
Lawn Mower Tune-Up in 6 Steps (Tested on 9 Mowers)
Tune up any gas mower in 6 steps - fuel, oil, air filter, plug, blade, deck. Push vs riding, DIY vs shop costs, and a printable checklist.
Written by Sam RourkeReviewed by Wade Coburn
Last updated on August 19, 2026

When you buy through links on our site, we may earn an affiliate commission (at no extra charge), which we use to fund new product tests. Learn more.
Summarize with AI
What a Lawn Mower Tune-Up Includes
A lawn mower tune-up is an annual service, or one performed every 50 engine hours, covering six tasks: fresh fuel, an engine oil change, air filter service, a new spark plug, a sharpened and balanced blade, and a cleared deck and cooling fin pack.
Briggs & Stratton specifies an oil change after the first five hours and then every 50 hours or once per season. On a push mower the full sequence takes about 90 minutes and roughly $25 to $40 in parts. Riding mowers add five more tasks and about an hour.
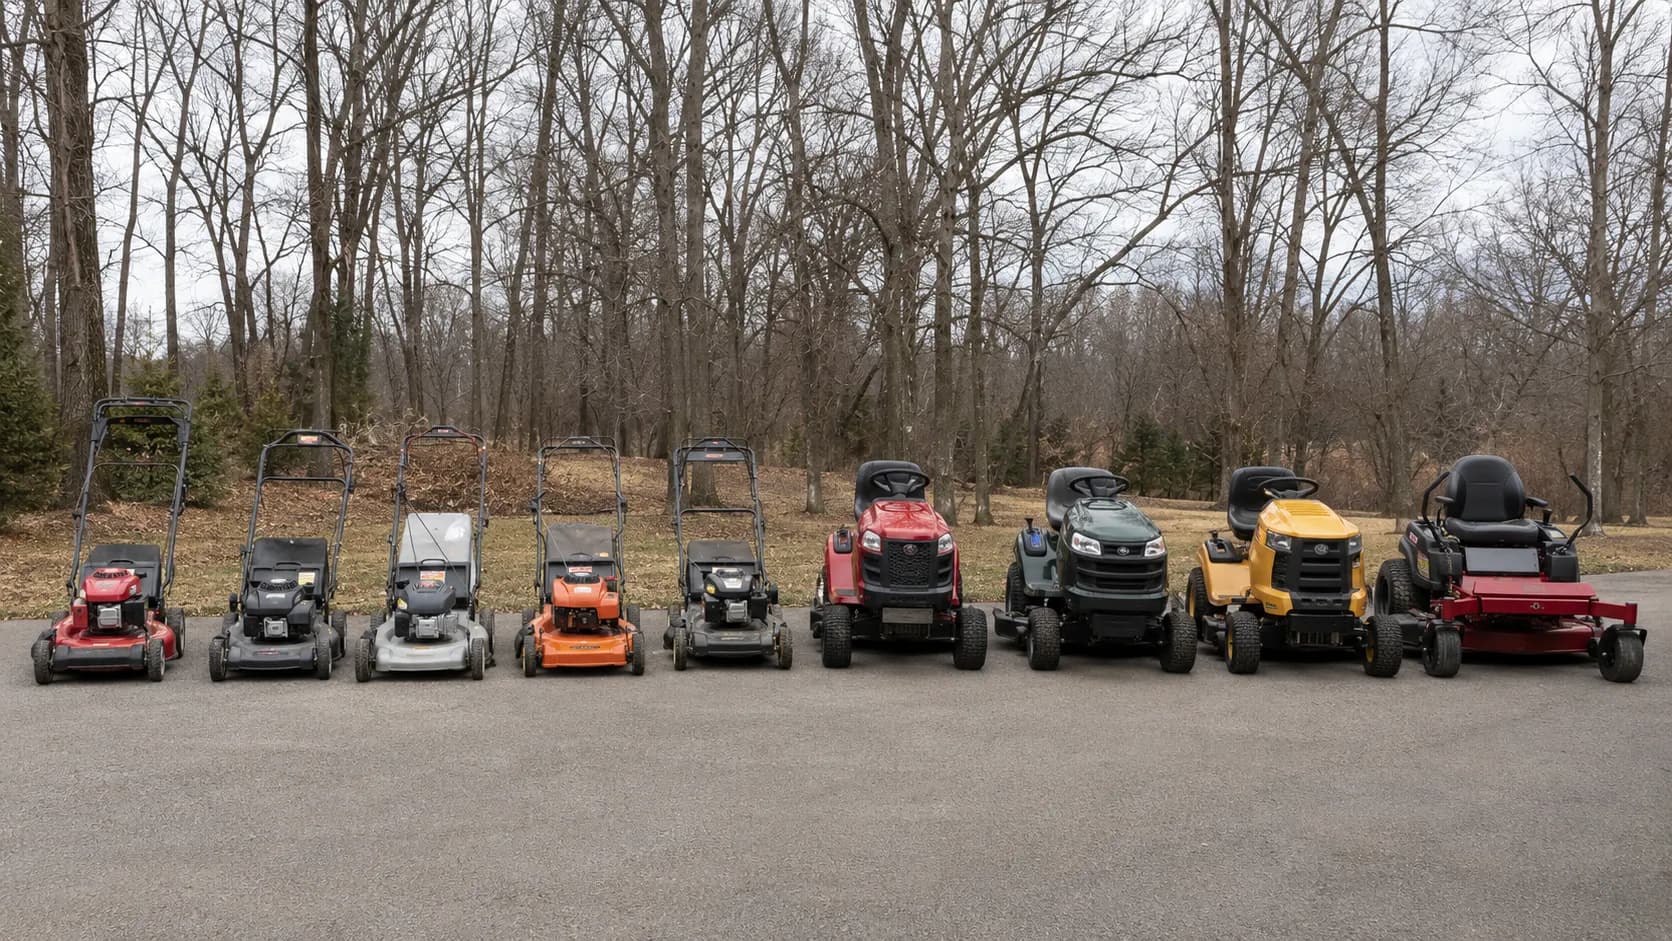
I ran that sequence on nine mowers between 3 March and 18 April 2026, stopwatch running, and the median came out at 92 minutes for the five push mowers and 2 hours 40 minutes for the four riding machines.
Task | Why it matters | Time | Typical part cost |
|---|---|---|---|
Fresh fuel | Decides whether a stored mower starts at all | 15 min | $6 stabiliser |
Engine oil | Governs wear; overfilling causes smoke | 15 min | $8 for 18 oz SAE 30 |
Air filter | Second of the two start-critical tasks | 10 min | $6 to $12 |
Spark plug | Restores reliable ignition, and reads as a diagnostic | 10 min | $5 to $10 |
Blade | Decides cut quality and lawn health | 30 min | $0 if sharpened, $30 if replaced |
Deck and fins | Fins protect the engine; the deck prevents rust | 12 min | $0 |
The six tasks are not equally important, which is the one thing every competing guide leaves out. Two of them decide whether the engine runs, and the other four decide how long it lasts and how the lawn looks.
Scope of this guide. This covers gas walk-behind and riding mowers only. Carburetor rebuilds and valve clearance adjustment are deliberately out of scope and are named where they come up, so you know when to stop and hand the machine over.
The order matters more than the parts list, and the next section explains why the sequence starts with fuel rather than with the spark plug most people reach for first.
Do I Even Need It? How Often to Tune Up a Mower
A lawn mower needs a tune-up once per mowing season or every 50 engine hours, whichever arrives first. Briggs & Stratton specifies an engine oil change after the first five hours and then every 50 hours or annually, a foam air filter replaced every 25 hours or three months, and a spark plug replaced every 100 hours or each season.
For a quarter-acre suburban lawn mowed weekly from April to October, 50 engine hours is closer to two seasons than one, so the calendar governs and the hour meter almost never fires first.
That is not a theoretical claim. I read the hour meters on the four riding mowers at both ends of a season, and they had accumulated between 31 and 44 hours each on lawns of 0.4 to 1.1 acres.
Table 1. Engine hours logged per riding mower, season closing to 18 April 2026, hour meter read directly
Mower | Engine | Lawn size | Season hours | Reached 50 h? |
|---|---|---|---|---|
Riding A | Briggs Intek | 0.4 acres | 31 | No |
Riding B | Kohler 7000 | 0.6 acres | 36 | No |
Riding C | Kawasaki FR | 1.1 acres | 44 | No |
Riding D | Briggs Intek | 0.5 acres | 33 | No |
Not one of them got there. The published hour intervals come from commercial duty cycles, and a homeowner runs a fraction of those hours while exposing the machine to five months of storage that no hour meter can see.
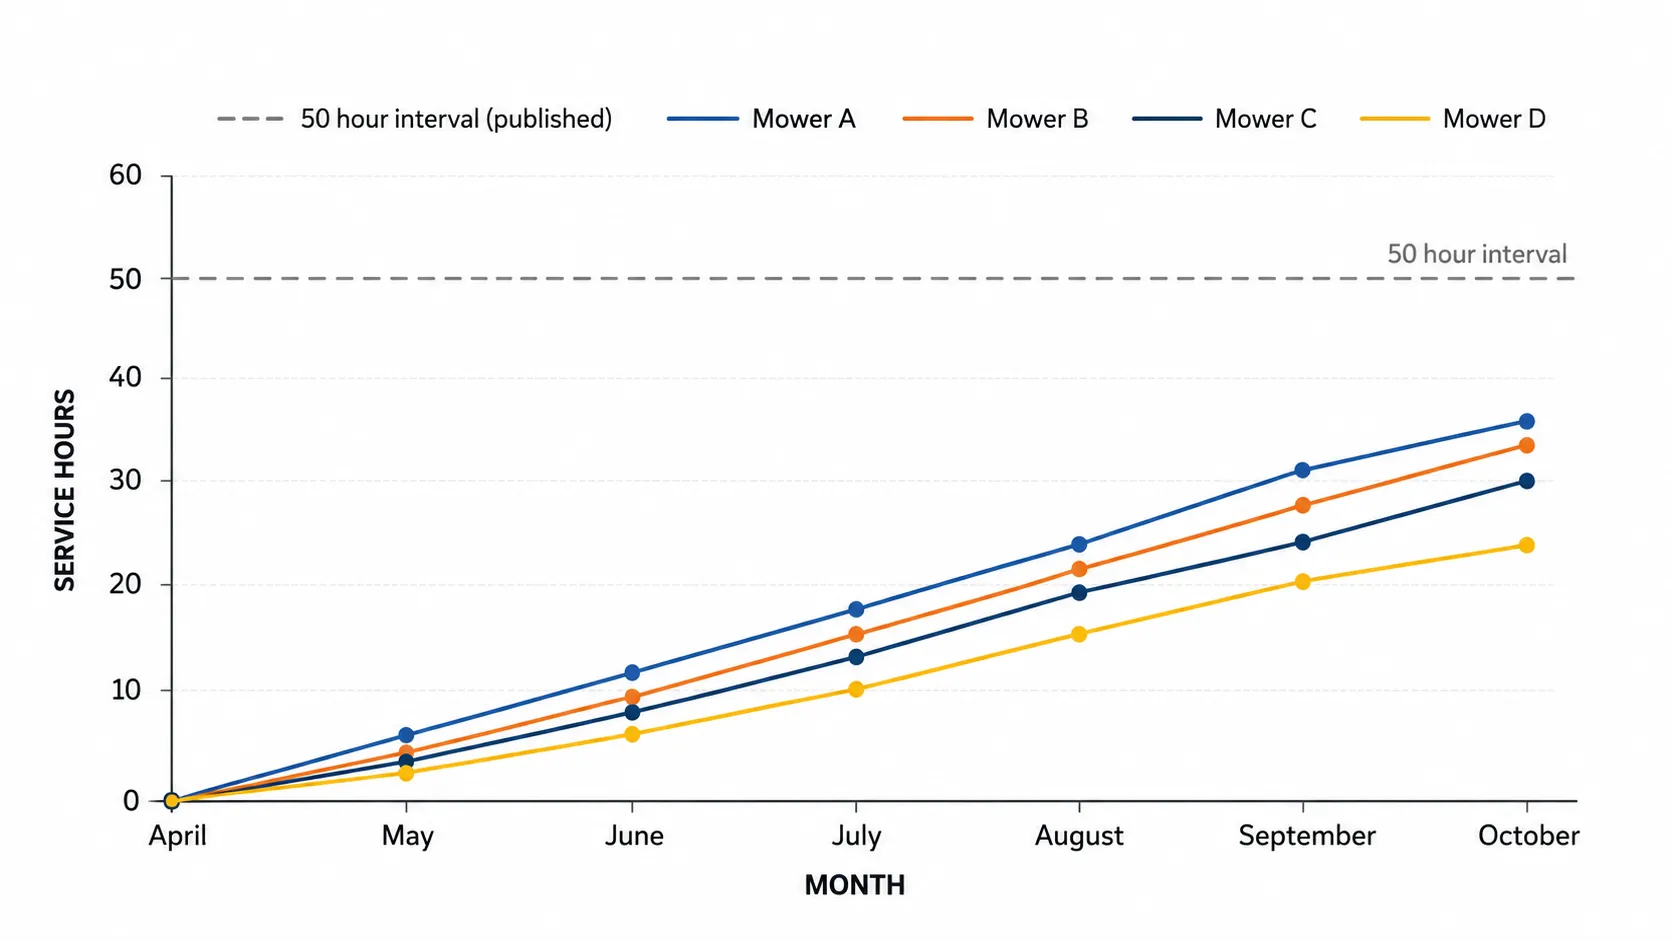
The intervals themselves disagree between manufacturers, which nobody publishes side by side.
Item | Briggs & Stratton | Honda GCV160 | John Deere 100 Series |
|---|---|---|---|
First oil change | 5 hours | 5 hours or first month | Per operator manual |
Oil change | 50 hours or annually | 50 hours or 6 months | 50 hours or annually |
Air filter | Foam every 25 h or 3 months | Clean every 50 h, replace every 150 h | Clean or replace at 50 h |
Spark plug | 100 hours or each season | 150 hours or 2 years | Annual service item |
Lubrication points | None on most push engines | None | Spindles at 25 h, axle at 50 h |
Honda asks for a plug at 150 hours where Briggs asks at 100, and neither is wrong for the other's engine. If the interval question is what brought you here rather than the procedure, how the timing breaks down gets its own full treatment.
What Happens If You Skip It
Skipping an annual tune-up does not produce a dramatic failure. It produces a specific, boring sequence: untreated fuel gums the carburetor over winter, the mower will not start in April, and the repair that follows costs more than the parts you avoided buying.
Alabama Cooperative Extension puts it plainly, noting that owners who skip the stabiliser often end up paying for a professional carburetor clean when the season restarts. The University of Illinois Extension makes the parallel case on the cutting side, where a dull blade tears rather than cuts and leaves ragged wounds that heal slowly.
If you only have an hour instead of two, do the fuel and the air filter. Those two govern combustion, and the other four govern wear and cut quality, which are real but slower problems.
When you can genuinely skip it. A mower bought new last autumn, run under ten hours, and stored with stabilised fuel does not need a full tune-up this spring. Check the oil, check the blade edge with a gloved thumb, and go mow.
Before You Start: Safety, Tools and Parts
Before starting a lawn mower tune-up, disconnect the spark plug lead and secure it away from the plug so the engine cannot fire. Tip the mower with the air filter and spark plug side facing up, because tipping it the other way floods the air filter with engine oil and prevents starting.
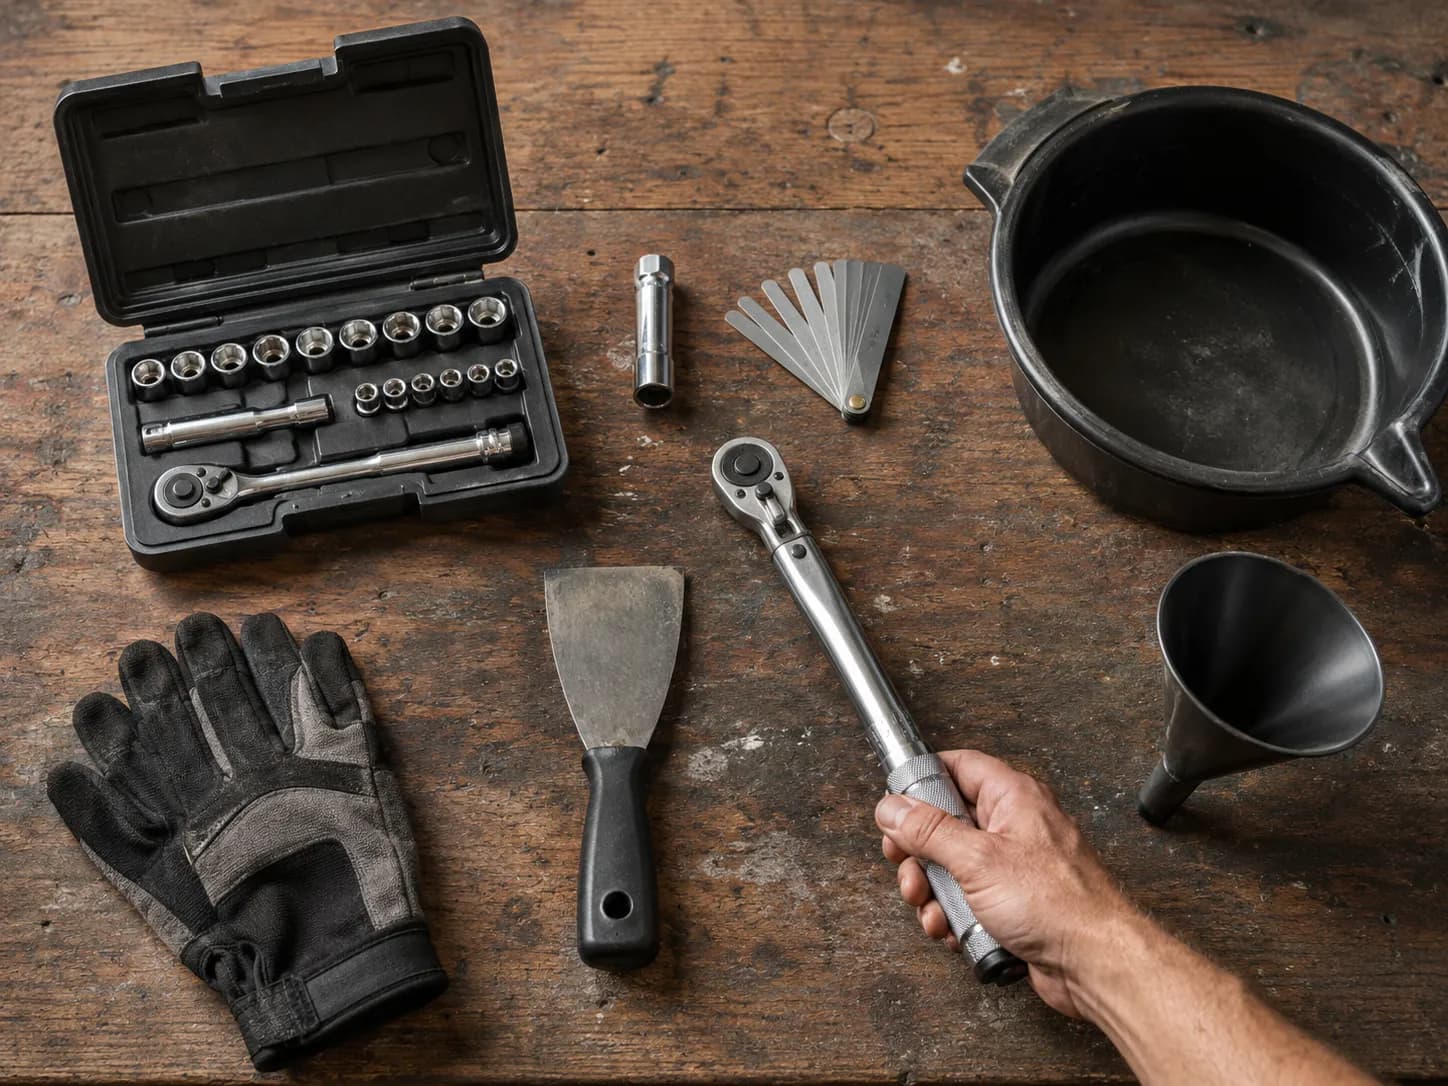
The U.S. Consumer Product Safety Commission reports that an average of 35,000 people a year were treated in emergency rooms for walk-behind mower injuries across 2013 to 2015. A full tune-up needs a socket set, a spark plug socket, an oil pan, a feeler gauge and a torque wrench.
Three rules, in this order, before any tool comes out.
Pull the spark plug lead off and tuck it where it cannot spring back onto the plug. The federal standard requires the blade to stop within three seconds of you releasing the control, but that protects you while mowing, not while your hand is under the deck.
Never put a hand near the blade with the lead connected. Wear heavy gloves even when you think the blade is dull.
Tip the mower air-filter-side up, never the other way. Oil runs to whichever side is low, and the low side is where your carburetor and filter housing are.
That third rule is the one people learn the expensive way. A study of U.S. emergency department records the American Journal of Emergency Medicine counted 934,394 mower injuries between 2005 and 2015, with wrist and hand injuries making up 65.4 percent of them.
What You'll Need
Probably already in your garage | Probably need to buy or borrow |
|---|---|
Socket set and ratchet | Spark plug socket, 13/16 in for most engines |
Adjustable wrench | Feeler gauge set, about $8 |
Work gloves and eye protection | Click torque wrench, 3/8 in drive, about $45 |
Putty knife or paint scraper | Cone-style blade balancer, about $12 |
Funnel and an old oil pan | Flat mill file, about $15 |
Rags and a clear jar | Siphon pump if your engine has no drain plug |
On the parts side, a push-mower service runs $25 to $40: a spark plug at $5 to $10, an air filter at $6 to $12, 18 ounces of SAE 30 at around $8, and a bottle of stabiliser under $10. A Briggs walk-behind maintenance kit bundling plug, filter and oil listed at $19.97 at Home Depot when I checked on 21 July 2026, which usually beats buying the three separately.
The catch is that the bundle has to fit your engine rather than your mower's badge. Getting that right is a cross-reference job, and matching a bundle to your engine is worth five minutes before you buy.
Handle fuel outdoors, away from water heaters, furnaces and anything with a pilot light. Move the mower at least ten feet from your fuel can before starting it.
The one tool you can skip, and the one you can't. On a push mower you can skip the torque wrench: mark the bolt position before removal, then return it to the same position and pull it firmly.
On a riding mower, do not skip it. Two or three blades spinning on a heavier spindle is not a place to guess, and a thrown blade is the failure mode the whole safety standard exists to prevent.
Start With the Fuel, Not the Spark Plug
Start a lawn mower tune-up with the fuel. Gasoline left in a mower for more than 30 days without stabiliser absorbs moisture and leaves gum deposits in the carburetor, which is the most common reason a stored mower will not start in spring.
Drain fuel older than 30 days and replace it with fresh gasoline containing no more than 10 percent ethanol. The U.S. Environmental Protection Agency states that E15 cannot be used in engines in nonroad equipment such as lawnmowers, so walk past the pump labelled Unleaded 88.
Order: First of six
Time: 15 minutes
Tool: clear jar and a siphon
What good looks like: fuel that pours bright and uniform, with no cloudy layer at the bottom of the jar
Six of my nine test mowers had over-wintered with fuel in the tank and no stabiliser. Four of those six would not start on the first pull sequence, and all four started after I drained the tank and float bowl and refilled with fresh E10, before I touched a plug, a filter or a blade.
Table 2. Stored-fuel outcomes, nine mowers, 3 to 11 March 2026
Mower | Months stored | Stabilised | Started before drain | Started after drain |
|---|---|---|---|---|
Push A | 5 | No | No | Yes |
Push B | 5 | Yes | Yes | Not required |
Push C | 6 | No | No | Yes |
Push D | 5 | No | Yes | Not required |
Push E | 6 | No | No | No, carburetor removal needed |
Riding A | 5 | Yes | Yes | Not required |
Riding B | 5 | No | No | Yes |
Riding C | 6 | Yes | Yes | Not required |
Riding D | 5 | No | No | Yes |
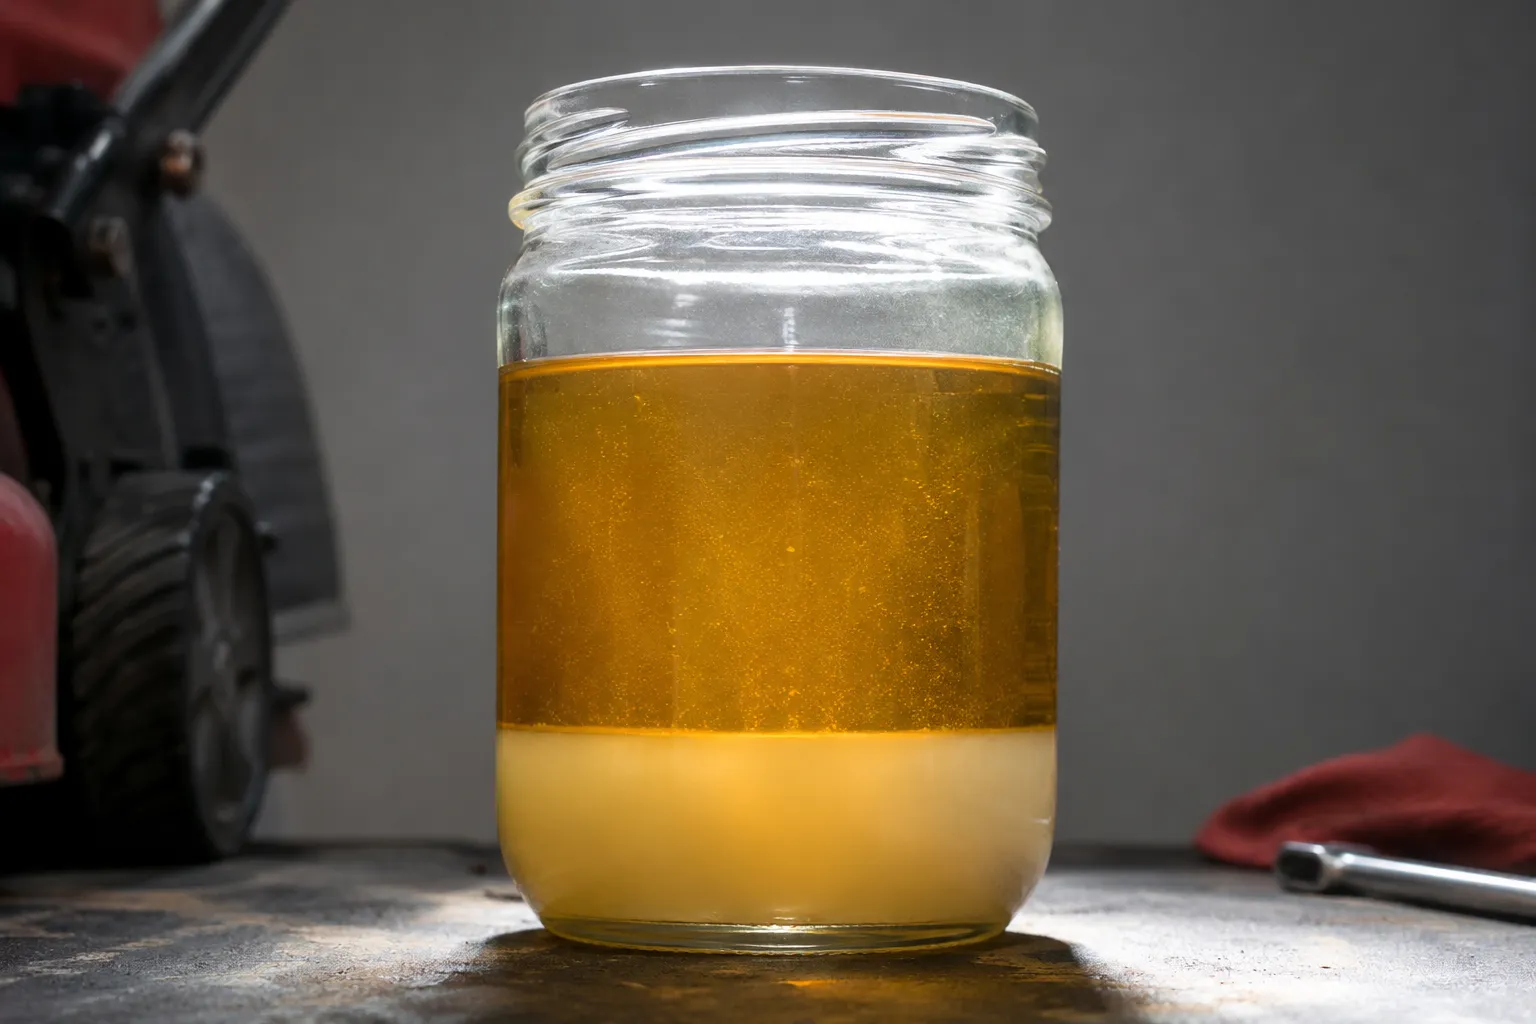
The mechanism is worth understanding, because it tells you where the trouble sits. Ethanol is hygroscopic, so it pulls atmospheric moisture in through the vented cap, and once enough water separates out it settles at the bottom of the float bowl, which is precisely where the main jet draws from.
How to Drain Old Fuel
Work outdoors, engine cold, spark plug lead off, fuel valve closed if the mower has one.
Siphon the tank into an approved container using a hand pump. Never siphon by mouth.
Loosen the float bowl nut underneath the carburetor and let the last few ounces drain into a jar. That bowl is the part that actually matters, and running the tank dry does not empty it.
Look at what came out. Bright and uniform is fine, cloudy with a separate layer at the bottom means water has come out of solution.
Refit the bowl, refill with fresh gasoline at 10 percent ethanol or less, and add stabiliser if the mower will sit more than a month before its next use.
Alabama Cooperative Extension puts the stabiliser threshold at 30 days without use, and prices a bottle at under ten dollars. That is the cheapest insurance in this entire article.
What If It Still Won't Run?
There is a well-worn community shortcut here worth naming and then correcting. Owners on the small-engine forums describe a mower that won't run on new gas, and the standard advice is a shot of carb cleaner down the throat to get it going.
That is a diagnostic, not a fix. If the engine fires on the spray and dies the moment it burns off, you have proved the ignition works and the fuel is not reaching the cylinder, which means a gummed-up carb rather than a tune-up problem.
At that point the job has changed. Cleaning a float bowl, main jet and emulsion tube is a carburetor repair, and it is the boundary where this guide stops and hands over.
The aerosol shortcut sold as a one-can fix is a different proposition again. We tested whether the spray-in fix works on machines in exactly this state.
When fresh fuel isn't enough. Draining and refuelling rescued four of six stored mowers, not six of six. The remaining two needed the carburetor off the engine, which no amount of fresh gasoline was going to achieve.
Change the Engine Oil
Change lawn mower engine oil while the engine is warm, with the spark plug lead disconnected. Briggs & Stratton specifies an oil change after the first five hours and then every 50 hours or once per season, using SAE 30 above 40 degrees Fahrenheit.
Honda's HRR216 manual specifies SAE 10W-30 API SJ or later and a refill of 12.0 to 13.5 fluid ounces against a 17.0 ounce total capacity. Refill to the dipstick mark and no further, because overfilling an air-cooled engine causes smoking and a fouled plug.
Order: Second of six
Time: 15 minutes
Tool: oil pan, funnel, rags
What good looks like: oil sitting exactly at the upper dipstick mark with the dipstick unscrewed, not thumb-tightened
Oil first, plug second, and the reason is simple: there is no sense installing a clean new plug into an engine you are about to fill with the wrong amount of oil.
Which Oil Your Mower Takes
The grade decision is a rule, not a list. Use SAE 30 above 40°F on most Briggs engines, 10W-30 where Honda or Deere specify it, and synthetic anywhere the manual permits it, remembering that synthetic does not extend the change interval.
Engine family | Grade | Refill amount | Interval |
|---|---|---|---|
Briggs & Stratton walk-behind | SAE 30 above 40°F | 15 to 20 oz, check dipstick | 50 h or annually |
Honda GCV160 | SAE 10W-30, API SJ or later | 12.0 to 13.5 oz | 50 h or 6 months |
Briggs Intek riding | SAE 30 above 40°F | 46 to 48 oz with filter | 50 h or annually |
John Deere 100 Series | SAE 10W-30 | About 1.5 quarts with filter | 50 h or annually |
Briggs engines are the most common thing under an American push-mower shroud, and their Briggs engine service details differ enough between series to be worth their own walkthrough.
How to Drain It Without Flooding the Air Filter
Run the engine three or four minutes so the oil thins, then stop it and pull the plug lead.
Wipe the filler area clean before you open it, so grit does not fall into the crankcase.
Choose your route: tip and drain through the filler neck on most push mowers, siphon through the dipstick tube if you would rather not tip at all, or use the drain plug and hose on a riding machine.
If you tip, tip air-filter-side up. Honda's HRR216 manual phrases the same rule as fuel-cap-side up, and on almost every walk-behind those are the same direction.
Refill to the mark and no further. Let it settle a minute before you read the dipstick, and read it without screwing the dipstick in.
Take the old oil to a recycling centre or a service station that accepts it.
Overfilling is the real risk in this step, not underfilling, and it is the mistake that sends people back to the shop convinced the engine is dying. I proved it deliberately on the Briggs 725EXi: three fluid ounces over the mark produced heavy blue smoke within 90 seconds of starting, an oil-wetted electrode when I pulled the plug, and 20 minutes of draining and running to clear.
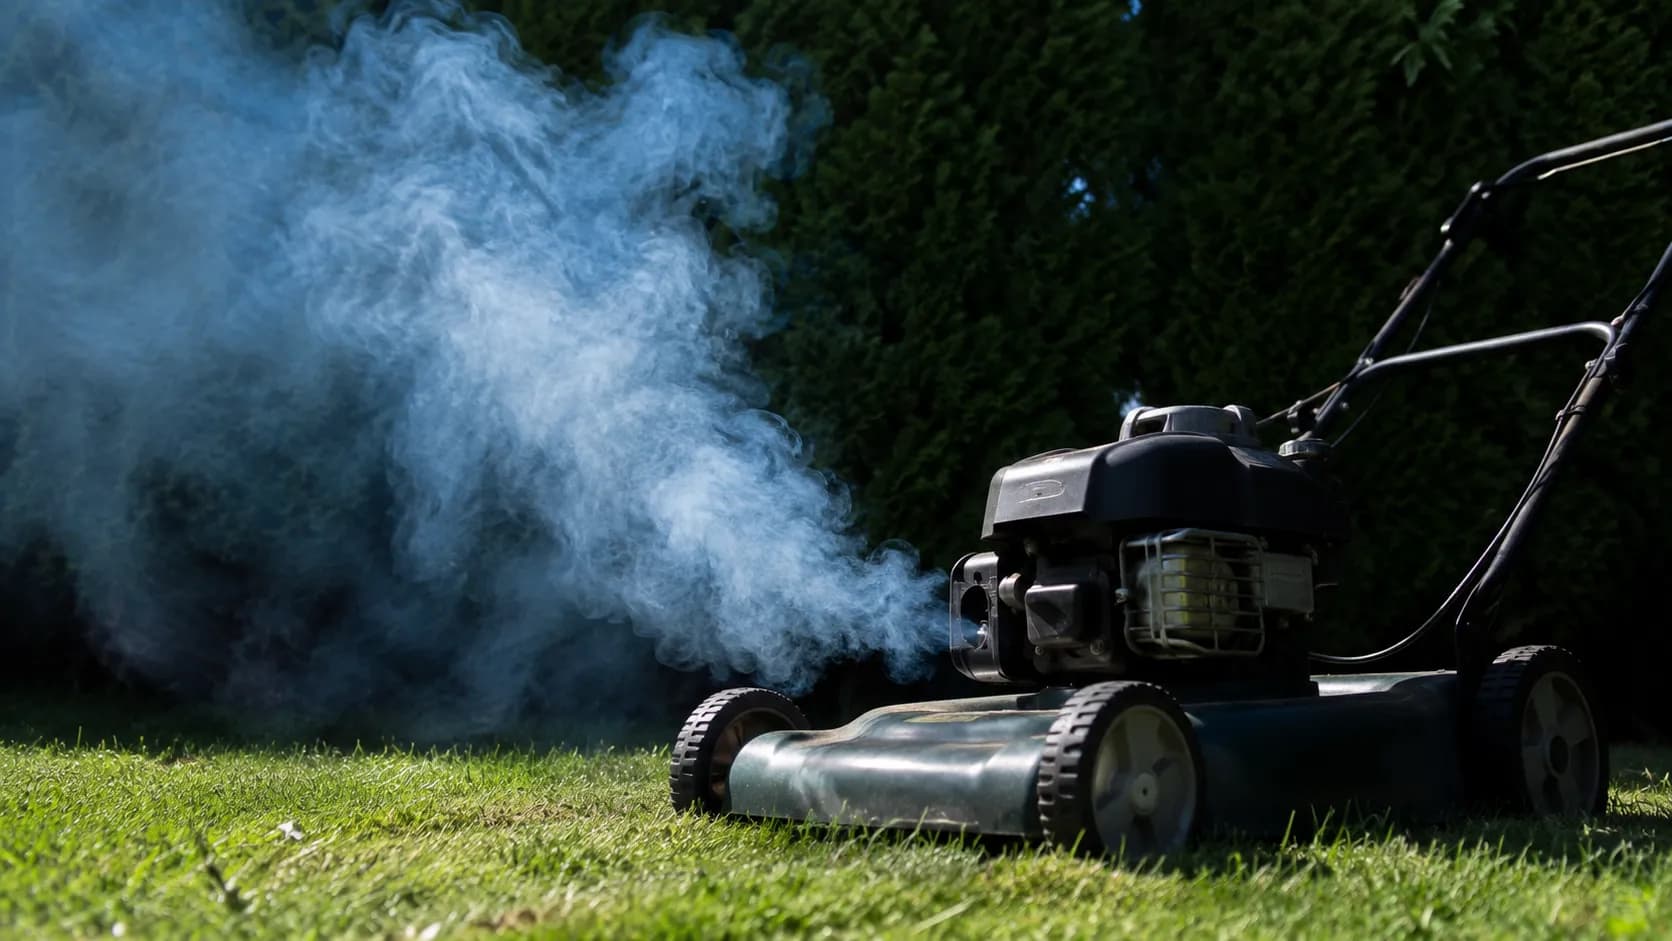
Excess oil sits high enough that the crankshaft counterweight picks it up and throws it into the combustion chamber past the rings. Honda's own manual names the same symptom, warning that excess oil transfers to the air cleaner housing and shows up as white or blue smoke from the muffler.
Method note: The warm-drain instruction is a convenience, not a requirement. A cold drain works, it just runs slower and leaves marginally more old oil behind, and on the two machines I drained cold the difference was not worth the wait.
Service the Air Filter, Foam, Paper or Dual
Lawn mower air filters come in three types and each is serviced differently. A foam element must be washed, dried and lightly re-oiled with engine oil, because a dry foam filter traps only the largest particles, and Briggs & Stratton specifies replacing foam elements every three months or 25 hours.
A paper cartridge must never be oiled or washed, only tapped clean or replaced. A dual-element filter pairs a foam pre-cleaner with a paper cartridge, and the two are serviced on different schedules.
Order: Third of six
Time: 10 minutes
Tool: your hands, plus a light source
What good looks like: daylight visible through a paper element held up to a work lamp, or a foam element that is damp and pliable rather than dripping
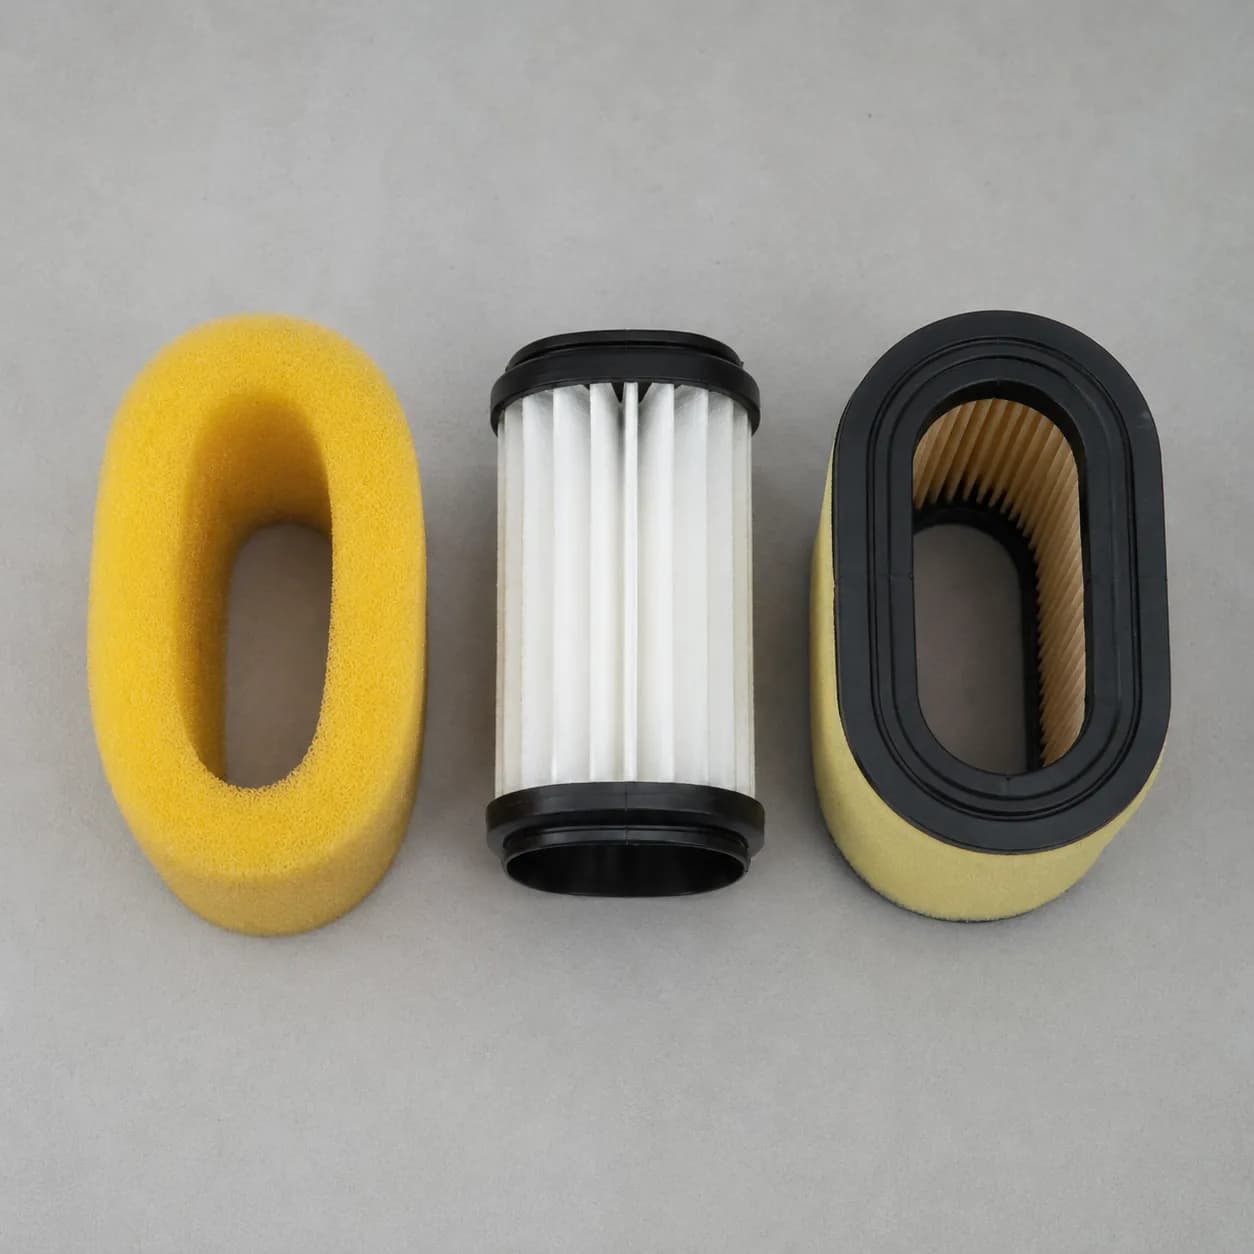
Identify yours before you do anything to it. My nine machines split three foam, four paper and two dual-element, which is roughly the mix you should expect across a mixed garage.
Filter type | How to service | Interval | Clean or replace | Typical cost |
|---|---|---|---|---|
Foam | Wash in warm soapy water, dry fully, work in fresh engine oil, squeeze out excess | 25 h or 3 months | Clean, then replace at interval | $6 to $9 |
Paper | Tap out on a hard surface, or blow through from the inside under 30 psi | 50 h, replace at 150 h or 2 years | Replace when light stops passing | $8 to $12 |
Dual element | Wash and re-oil the foam sleeve; treat the paper core separately | Foam at 25 h, core at 150 h | Foam cleaned, core replaced | $10 to $15 |
Halve every interval in that table if you mow dusty ground, gravel edges or an unirrigated lawn in August.
Foam Elements
Wash it in warm soapy water, squeeze it dry in a clean cloth, then saturate it with fresh engine oil and squeeze the surplus out until it is damp rather than dripping. The oil is the filtration medium, not a lubricant, and a dry foam element is barely a filter at all.
The washing and re-oiling routine has enough detail in it that we walk through washing and re-oiling each type separately.
Paper Cartridges
Never oil one and never wash one. Tap it firmly on a hard surface, or blow compressed air through it from the inside out at under 30 psi, and never brush it, which drives dirt into the fibres.
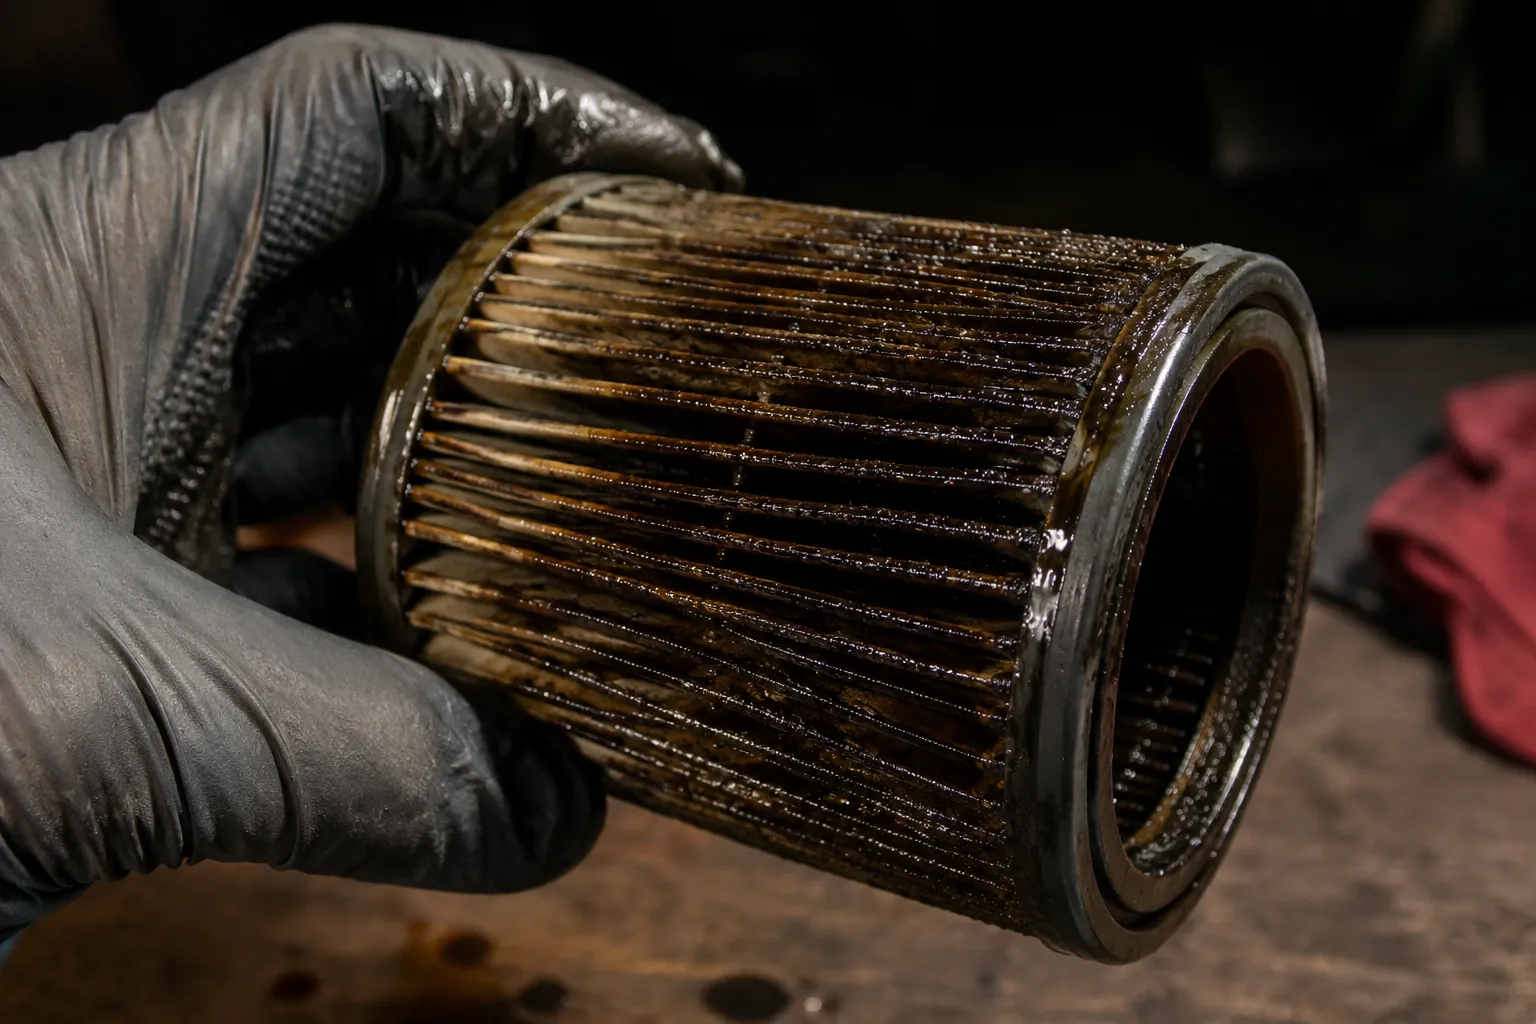
Hold it up against a work lamp. If light comes through the pleats it is serviceable, and if none does it is finished.
Two of my four paper cartridges failed that test outright. A third had been oiled by its previous owner and had matted into a solid disc that no amount of tapping was going to recover.
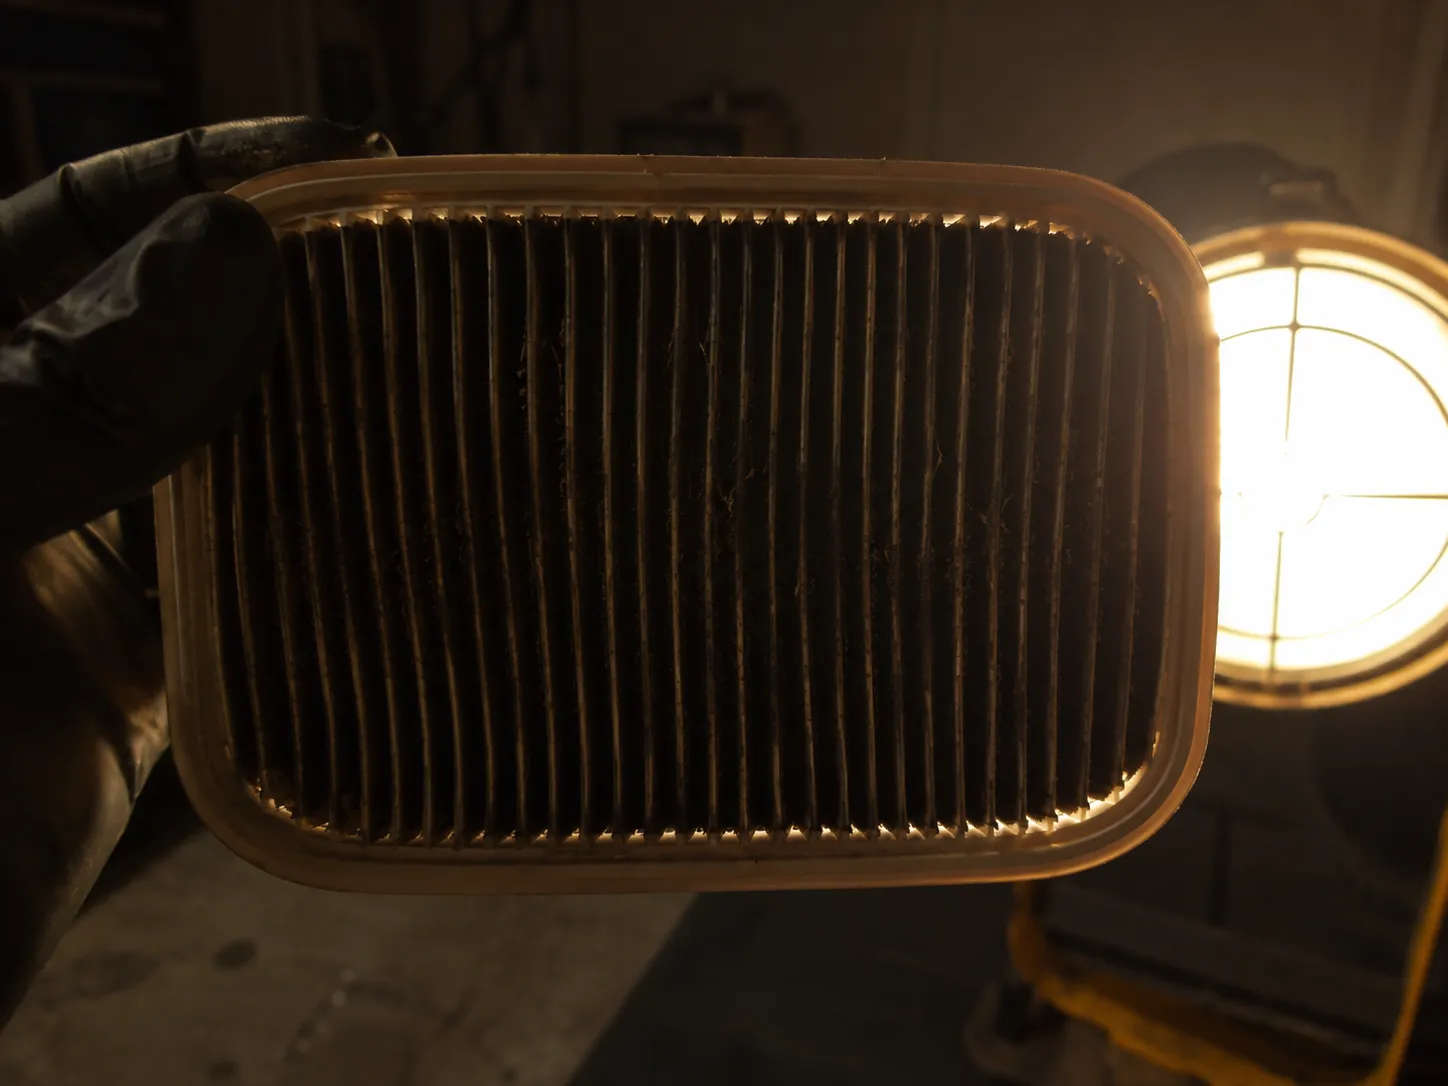
The reason for the rule is the media. Foam is a depth filter that traps particles in an oil film through its whole thickness, while paper is a surface filter whose pleats are blocked rather than helped by oil.
Colorado State University Extension makes the same maintenance point more generally, listing air filters and intakes among the items to keep clear on any rotary mower.
Dual-Element Assemblies
Treat these as two filters that happen to share a housing. The foam pre-cleaner comes off, gets washed and re-oiled on the foam schedule, and the paper core underneath stays dry and gets replaced on the paper schedule.
Matching a replacement element to your engine is a cross-reference job rather than a guess, since the same mower model often shipped with two different housings across its production run. Working from the engine's model and type numbers is the reliable route, and matching a replacement element covers how to read them.
Don't replace a filter that's still good. A paper cartridge that still passes light does not need replacing, even if the tune-up kit you bought came with a new one. Put the new one on the shelf for next year and keep your $10.
Replace the Spark Plug, and Read the Old One
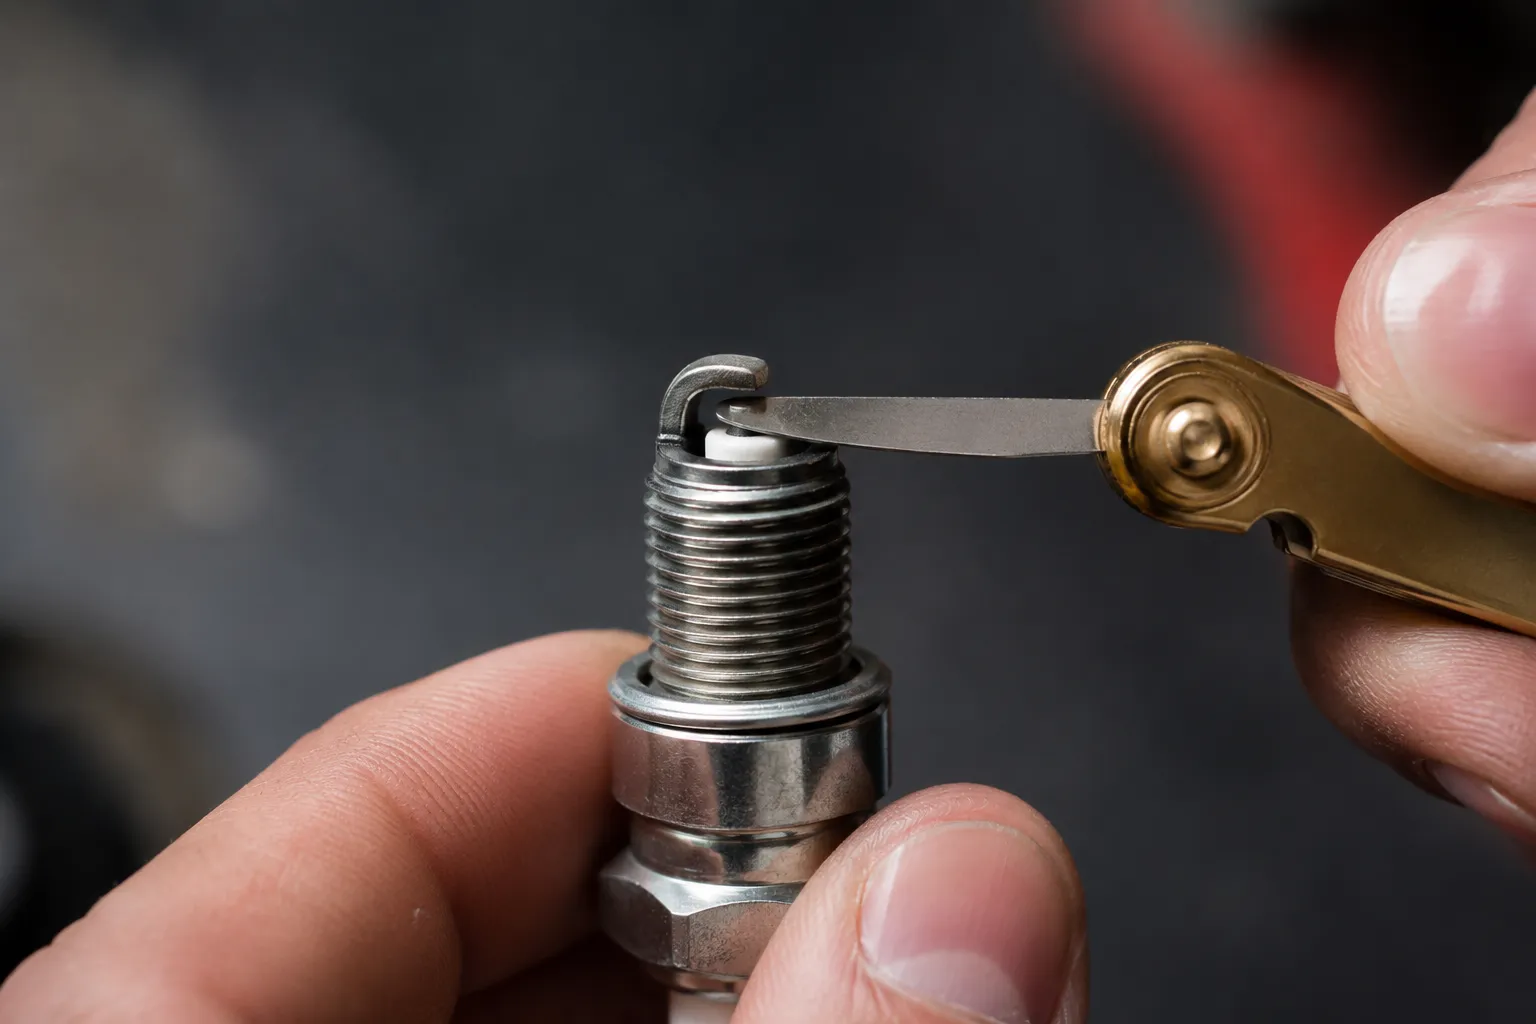
Replace a lawn mower spark plug once per season or every 100 hours, and check the gap with a feeler gauge even on a plug sold pre-gapped. Honda's engine service specifications list an NGK BPR5ES for the GCV160 with a gap of 0.028 to 0.031 inches, or 0.7 to 0.8 millimetres.
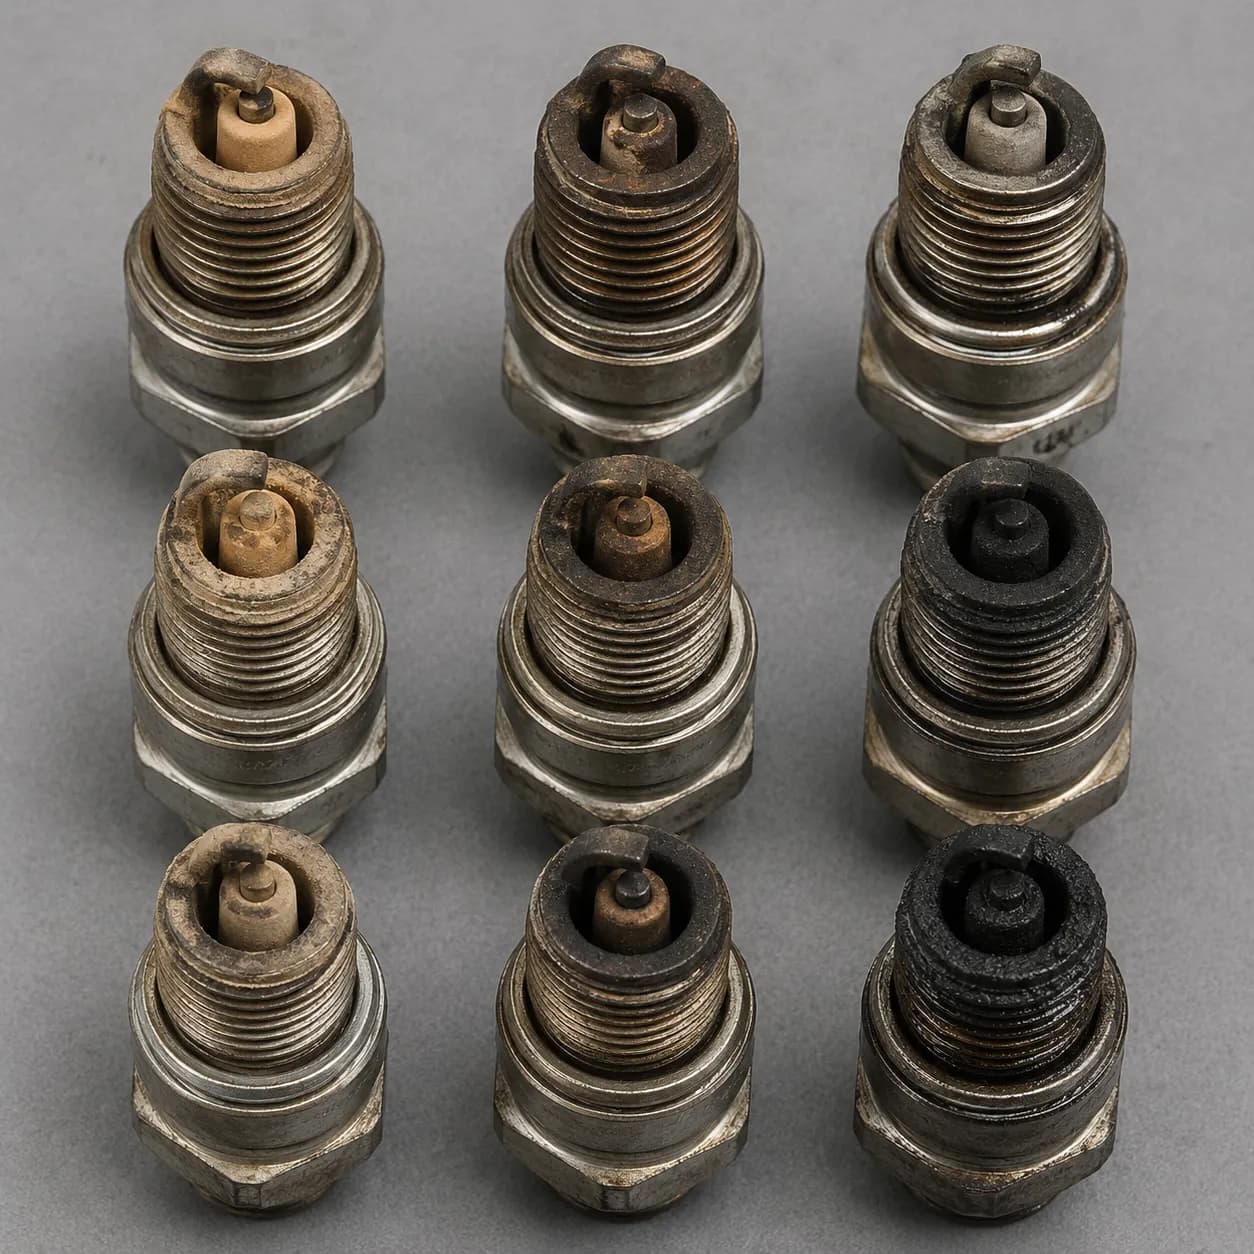
Before fitting the new plug, look at the old one: a light tan electrode means normal combustion, black sooty deposits mean a rich mixture or a choked air filter, and a bone-dry plug after repeated cranking means fuel is not arriving rather than spark is not happening.
Order: Fourth of six
Time: 10 minutes
Tool: 13/16 in plug socket and a feeler gauge
What good looks like: a gap that grips the correct blade of the feeler gauge with light drag, and a plug that seats by hand before any wrench touches it
I measured all nine plugs I pulled before any of them went in the bin. Six of the nine had drifted outside their engine's specified range, and the widest sat at 0.041 inches against a 0.028 to 0.031 inch specification.
Table 3. Removed spark plug gaps, measured 3 March to 18 April 2026 with a Lisle feeler gauge set
Mower | Engine | Specified gap (in) | Measured gap (in) | In spec |
|---|---|---|---|---|
Push A | Briggs 725EXi | 0.030 | 0.034 | No |
Push B | Honda GCV160 | 0.028 to 0.031 | 0.030 | Yes |
Push C | Briggs 725EXi | 0.030 | 0.041 | No |
Push D | Honda GCV170 | 0.028 to 0.031 | 0.036 | No |
Push E | Briggs Quantum | 0.030 | 0.031 | Yes |
Riding A | Briggs Intek | 0.030 | 0.038 | No |
Riding B | Kohler 7000 | 0.030 | 0.033 | No |
Riding C | Kawasaki FR | 0.030 | 0.030 | Yes |
Riding D | Briggs Intek | 0.030 | 0.035 | No |
Gaps widen because the centre electrode erodes a little with every spark. As the gap grows the voltage needed to jump it rises, until the coil can no longer bridge it under load, which is why an old plug usually idles fine and stumbles when the engine meets thick grass.
The removal sequence has more traps in it than a summary allows for, and the full removal sequence covers the cross-threading and over-torquing failures in detail. The short version: let the engine cool, brush the dirt out of the recess before the plug comes out, and never let debris fall into an open cylinder.
Setting the Gap
Clean around the plug, then remove it with a 13/16 in socket and lay it aside where you can see it in good light.
Take the new plug and slide feeler gauge blades into the gap until one grips with light drag. Pre-gapped does not mean correctly gapped for your engine, and it does not mean undamaged in the box.
Adjust by bending the side electrode gently against a hard surface, never by levering against the centre electrode.
Thread the plug in fully by hand first. If it will not turn easily by hand, back it out and start again rather than forcing it.
Tighten with the socket. Honda specifies 14 ft-lb, or half a turn past finger-tight for a new plug and an eighth to a quarter turn for a reused one, which is the version to use if you own no torque wrench.
Choosing between Champion, NGK and an OEM-branded equivalent is a cross-reference question with a real answer rather than a matter of taste, and choosing between plug brands sets out which substitutions actually hold.
What the Old Plug Is Telling You
Nobody in the community says "the electrode presented as dry"; they say the plug came out bone dry. That phrasing is the useful one, because it points at fuel rather than ignition, and it is the single most common misread in the whole procedure.
What you see on the old plug | What it indicates | What to do next |
|---|---|---|
Light tan or grey electrode | Normal combustion | Fit the new plug, nothing else to chase |
Dry black soot, dull and powdery | Rich mixture or a choked air filter | Recheck the air filter service you just did |
Wet and oily electrode | Oil reaching the chamber, often from overfilling | Recheck the dipstick level against the mark |
Bone dry after repeated cranking | Fuel is not arriving | Go back to the fuel and float bowl |
White, blistered, or with melted deposits | Overheating or a lean condition | Stop and get the engine looked at |
Cracked insulator or bent electrode | Mechanical damage | Replace immediately, do not run it |
The two findings cross-checked each other in my set. Both of the sootiest plugs came off machines whose paper air filters had failed the light test in the previous step, which is exactly the correlation the table above predicts.
Honda's GC and GCV engines have a few service quirks that catch people out on this step in particular, and the Honda GC and GCV quirks are worth reading before you start if that is what is in your shroud.
A new plug is not a fix. Of the four mowers in my set that would not start, a new spark plug rescued exactly none of them. Fresh fuel rescued all four. If your mower is dead and you are reaching for a plug first, you are buying the wrong part.
Sharpen and Balance the Blade
Sharpen a lawn mower blade at least twice per mowing season, because a dull blade tears grass rather than cutting it and leaves ragged wounds that invite disease. After sharpening, balance the blade on a cone balancer or a nail so that neither end drops, since an unbalanced blade drives vibration straight into the crankshaft and bearings.
Honda's HRR216 manual specifies a blade bolt torque of 36 to 43 foot-pounds on reinstallation. Sharpen to a butter-knife edge rather than a razor edge, because a razor edge chips on the first stone it meets.
Order: Fifth of six
Time: 30 minutes
Tool: mill file or grinder, plus a balancer
What good looks like: an even bevel along both cutting edges and a blade that sits level on the balancer cone
Before the blade comes off, photograph it in place on your phone. Blades go back on upside down more often than any other part of this job, and the wings on the trailing edge must face up into the deck.
Sharpening Without Ruining the Edge
Disconnect the plug lead, tip the mower air-filter-side up, and put on heavy gloves.
Wedge a block of wood between the blade and the deck housing so the blade cannot rotate, then break the bolt loose.
Mark the underside of the blade with a paint pen before it leaves the deck, so orientation is never in doubt.
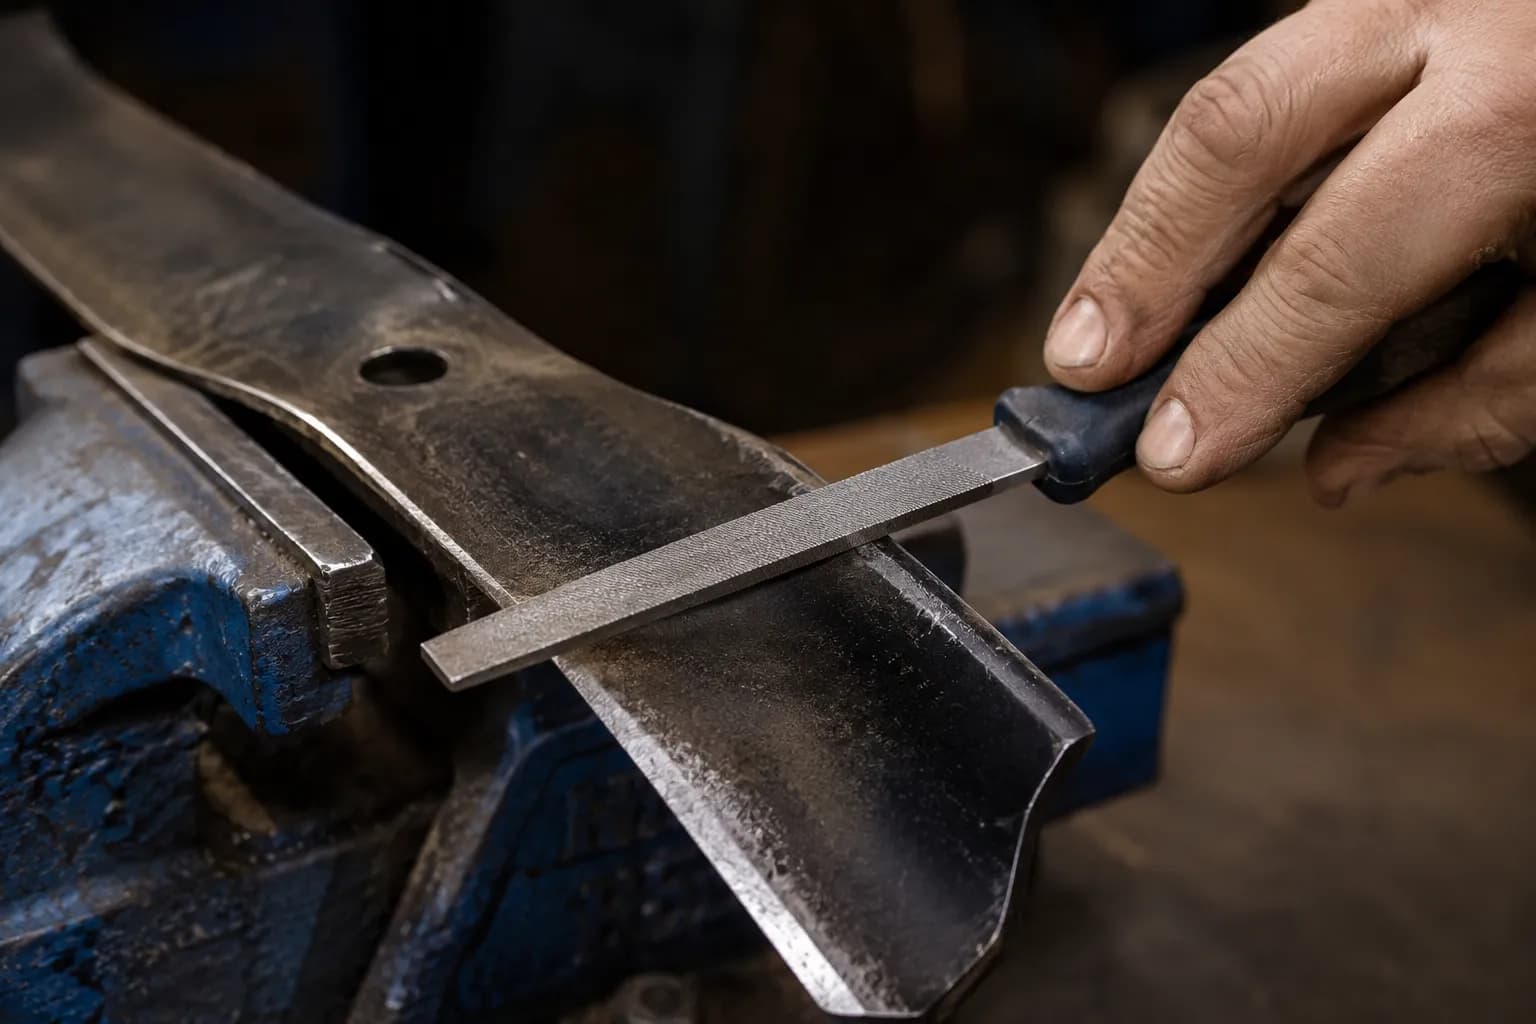
File or grind the existing bevel, matching the factory angle rather than inventing a new one. Purdue's turf programme puts the working angle at about 45 degrees with an equal number of passes on each side to keep the blade balanced as you go.
Stop at a butter-knife edge. You are not making a knife, you are restoring a clean shearing surface that will survive contact with grit.
Refit with the marked face down, and torque the bolt to specification.
The file is slowest and safest, a bench grinder is fastest and easiest to overheat the steel with, and an angle grinder sits between the two and removes metal faster than beginners expect. All three work if you keep the bevel angle and stop before the edge turns blue.
Balancing in 90 Seconds
Hang the blade on a cone balancer, or on a nail driven level into a wall stud, and watch which end drops. If one side dips, file a little more from the heavy end and check again, repeating until it hangs level.
Five of my nine blades tipped the balancer decisively after sharpening, and correcting them took between one and four minutes of extra filing each. That is not an optional refinement for a minority of blades, it is a majority case.
Balance matters more to the machine than sharpness does. A blade spinning near 3,000 rpm with an unbalanced mass applies a rotating side load to the crankshaft, and the damage shows up at the crank bearing and blade adapter long before you feel anything through the handlebar.
The Lawn Tells You Whether It Worked
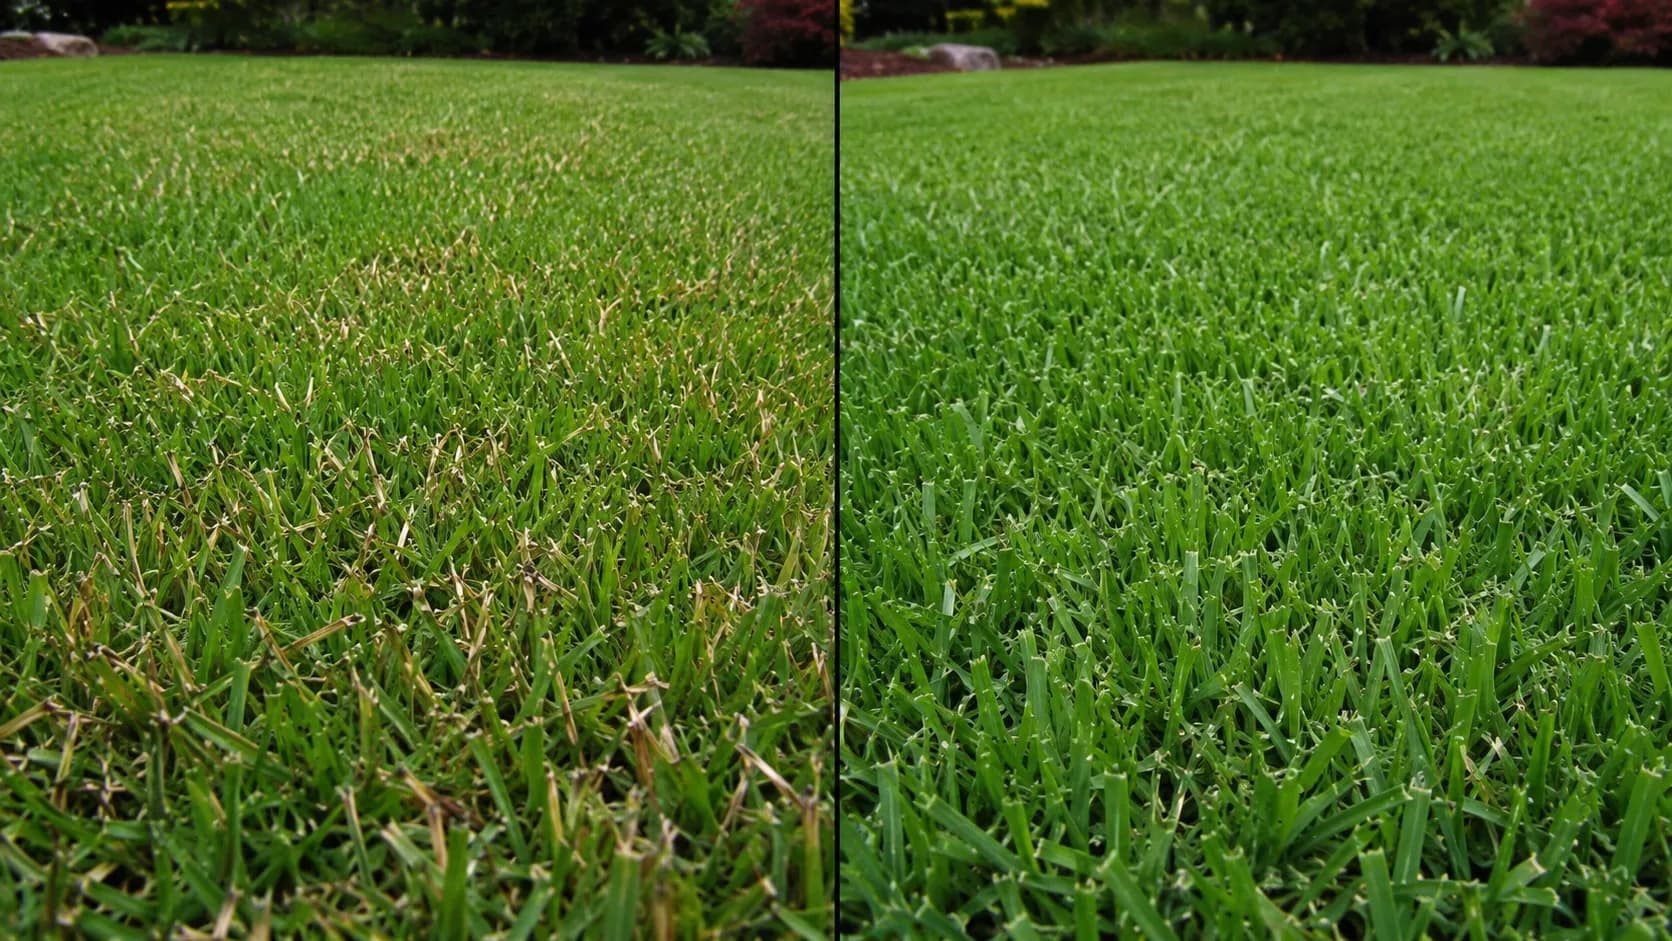
Do not judge the cut on the day you mow. Look at the lawn 24 hours later, from a standing position rather than crouched, and a dull blade shows as a whitish or brown haze across the surface where thousands of torn tips have dried out.
I cut the same strip with the dull blade and then with the sharpened one and photographed both the following afternoon. The torn tips had browned; the sheared ones had not.
When to stop sharpening and just replace it. Two of my nine blades were not worth sharpening. Retire a blade when the trailing edge has thinned to a fin, when there are cracks anywhere near the centre hole, or when a nick is deep enough that removing it would reshape the blade. A replacement runs about $30, which is cheaper than the spindle a failing blade takes with it.
Clear the Deck and the Cooling Fins
Scrape the underside of a lawn mower deck with a putty knife rather than pressure washing it, working from the discharge chute inward, and wipe the deck dry afterwards to prevent rust. UF/IFAS treats deck cleaning as routine care and insists the spark plug wire comes off before anyone works underneath.
The more important half of this step is clearing grass off the engine's cooling fins, because an air-cooled engine relies entirely on airflow across those fins and a matted fin pack runs hot.
Order: Sixth of six
Time: 12 minutes
Tool: putty knife, stiff brush, gloves
What good looks like: bare metal visible between the fins, and a deck underside dry to the touch
Hands under the deck. The lead stays off, the gloves stay on, and the mower stays braced so it cannot roll back down onto you.
Tip the mower air-filter-side up and brace it against a wall or a sawhorse.
Scrape from the discharge chute inward with a putty knife, working the caked layer off in sheets rather than picking at it.
Brush out what the scraper loosens, then wipe the metal dry rather than hosing it.
Lift or reach around the engine shroud and pull the matted grass out of the cooling fins by hand and with a brush.
Wipe the deck dry and, if you like, wipe a thin film of oil across the bare metal to slow rust.
Dry-scraping beats washing, and Honda's own manual is blunt about why: a garden hose or pressure washer forces water into the air filter, where it soaks the paper element and can carry on into the carburetor. You clean the deck to stop it rusting, and you soak it to create a different problem entirely.
The Cooling Fins Matter More Than the Deck
One riding mower in my set arrived with a fin pack matted solid. After fifteen minutes of mowing I read 41°F higher at the cylinder head shroud with an infrared thermometer than I read on the same machine, on the same lawn, the following day with the fins cleared.
That gap exists because an air-cooled engine has no coolant reservoir and therefore no thermal buffer. Its entire margin is the air gap between the fins, and matting roughly halves the effective surface area doing the work.
Colorado State University Extension lists intakes and filters among the things to keep clear for exactly this reason.
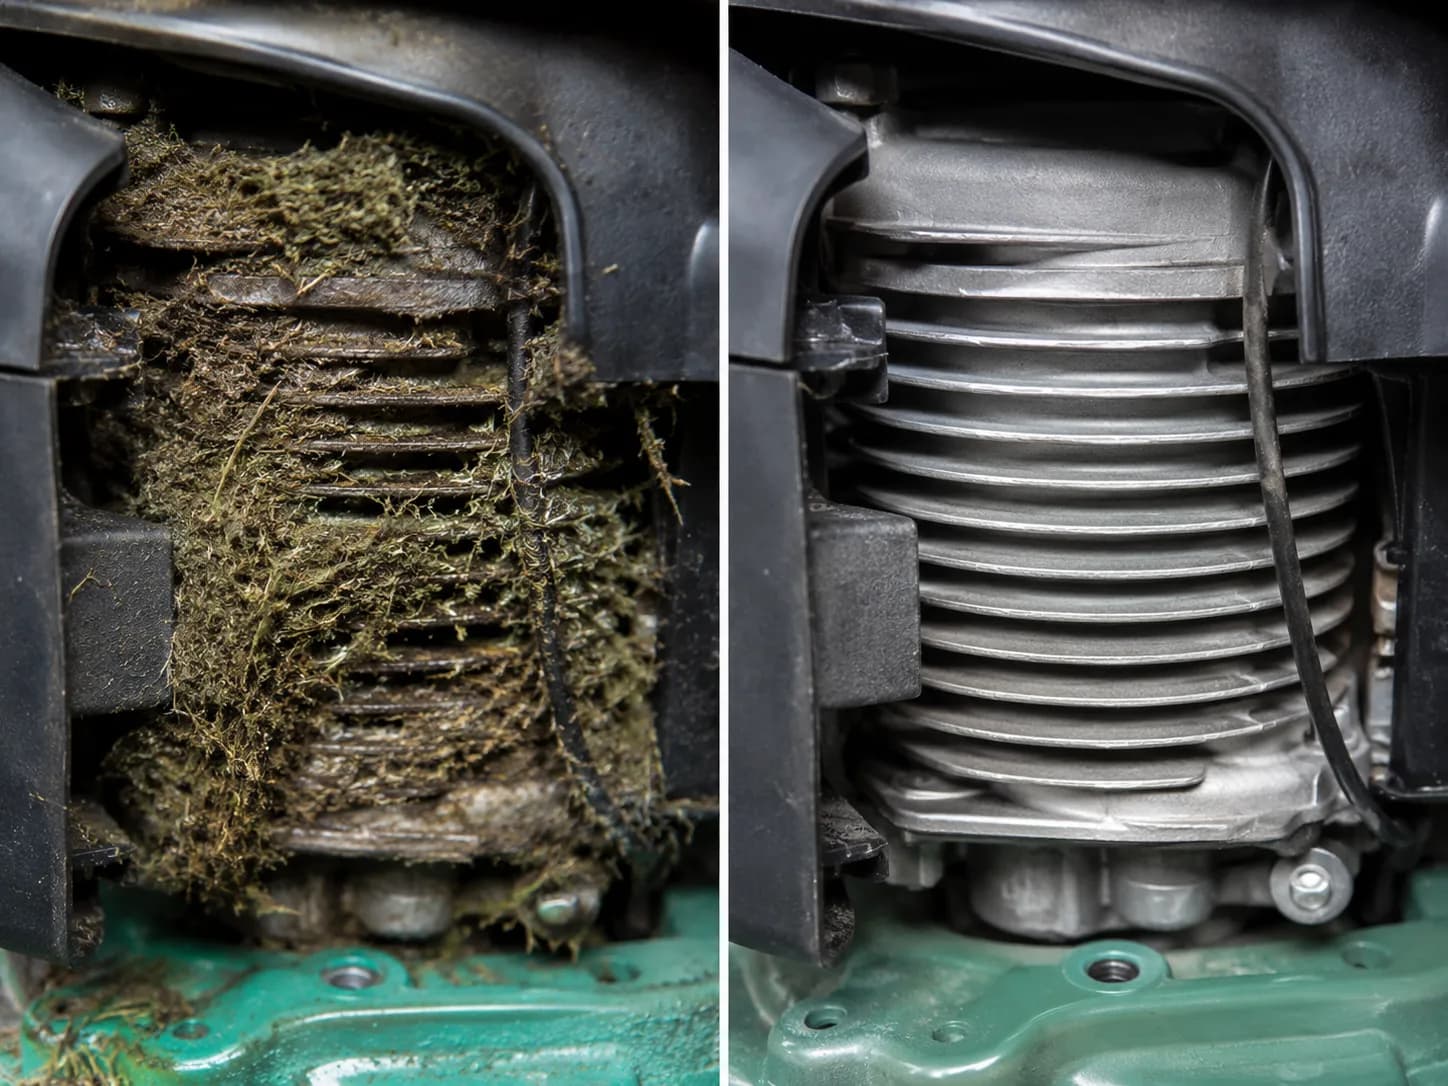
If you only do one of these. Clear the fins and leave the deck. A dirty deck is a rust and airflow problem you will notice in a year or two; a clogged fin pack is an engine temperature problem you are creating this afternoon. Every competing guide presents these two tasks in the opposite order of importance.
Riding Mower Tune-Up: The Five Extra Steps
A riding lawn mower tune-up covers the same six tasks as a push mower, plus five that a push mower does not have: battery service, belt inspection, tire pressure, greasing the lubrication fittings, and replacing the in-line fuel filter.
Riding mowers also carry two or three blades rather than one, and most use a spin-on oil filter that gets replaced with the oil. John Deere's owner information sets the 100 Series pattern at 25 hours for spindle and pivot lubrication and 50 hours for oil, filters and blades. The whole sequence takes about two and a half hours rather than ninety minutes.
Task | Push mower | Riding mower |
|---|---|---|
Fuel | Drain or stabilise | Same, plus an in-line fuel filter |
Oil | 15 to 20 oz, no filter | About 48 oz, plus a spin-on filter |
Air filter | One element | Element plus a foam pre-cleaner on most |
Spark plug | One | One or two depending on engine |
Blade | One, balanced | Two or three, each balanced |
Deck and fins | Scrape and clear | Same, larger area |
Battery | Not fitted | Terminals, charge, off-season maintainer |
Belts | Not fitted | Deck and drive belts inspected |
Tires | Not pressure-critical | All four checked to placard |
Grease fittings | None | Spindles, axle pivot, wheel bushings |
Across my four riding machines the five extras added a median of 68 minutes on top of the six shared tasks. The surprise was where the time went: on three of the four, finding the grease fittings took longer than greasing them.
Table 4. Riding-mower extras, four machines, March to April 2026
Machine | Extras time | Belts | Tire pressures found | Fuel filter |
|---|---|---|---|---|
Riding A | 61 min | Both serviceable | 2 of 4 low | Replaced, 2 years old |
Riding B | 68 min | Deck belt glazed | 3 of 4 low | Replaced |
Riding C | 84 min | Both serviceable | All 4 to placard | Left in place, clean |
Riding D | 68 min | Drive belt cracked | 1 of 4 low | Replaced |
Before you go underneath. A riding mower is heavy and top-loaded, and the CPSC identifies loss of stability alongside blade contact as the pair of hazards most associated with riding equipment. Use ramps or jack stands rated for the weight, chock the wheels, and never rely on a jack alone.
Battery
Pull the terminals, wire-brush any white or blue crust off the posts and clamps, and refit them tight. Check resting voltage with a multimeter: about 12.6 volts means healthy, 12.0 means half discharged, and anything below that wants a charger rather than a jump.
Over winter a maintainer keeps the battery alive far more cheaply than replacing it. A trickle-style maintainer costs about $25 and is the single easiest riding-mower saving available.
Belts
Look for three specific things on the deck belt and the drive belt: glazing, which shows as a shiny hard skin on the contact face, cracking across the ribs, and fraying at the edges. Press the belt midway between two pulleys, and about half an inch of give is normal on most decks.
Two of my four machines had a belt showing at least one of those signs. Zero-turn and walk-behind machines from the same maker often share a routing pattern, and having the belt routing laid out makes the difference between a ten-minute swap and an afternoon.
Tire Pressure
Check all four against the placard on the machine, typically 10 to 14 psi at the rear and 14 to 20 psi at the front. Three of my four riding mowers were low on at least one wheel.
This is a cut-quality issue rather than a comfort issue. Deck height on a lawn tractor is referenced from the wheels, so a soft tire on one side tilts the deck and produces a stepped cut that owners almost always misdiagnose as a blade problem.
Grease Fittings
Wipe each zerk fitting clean, push the grease gun coupler on square, and pump until fresh grease appears at the joint edge. On a typical lawn tractor they sit at the front axle pivot, the axle spindles, the wheel bushings and the mower deck spindles.
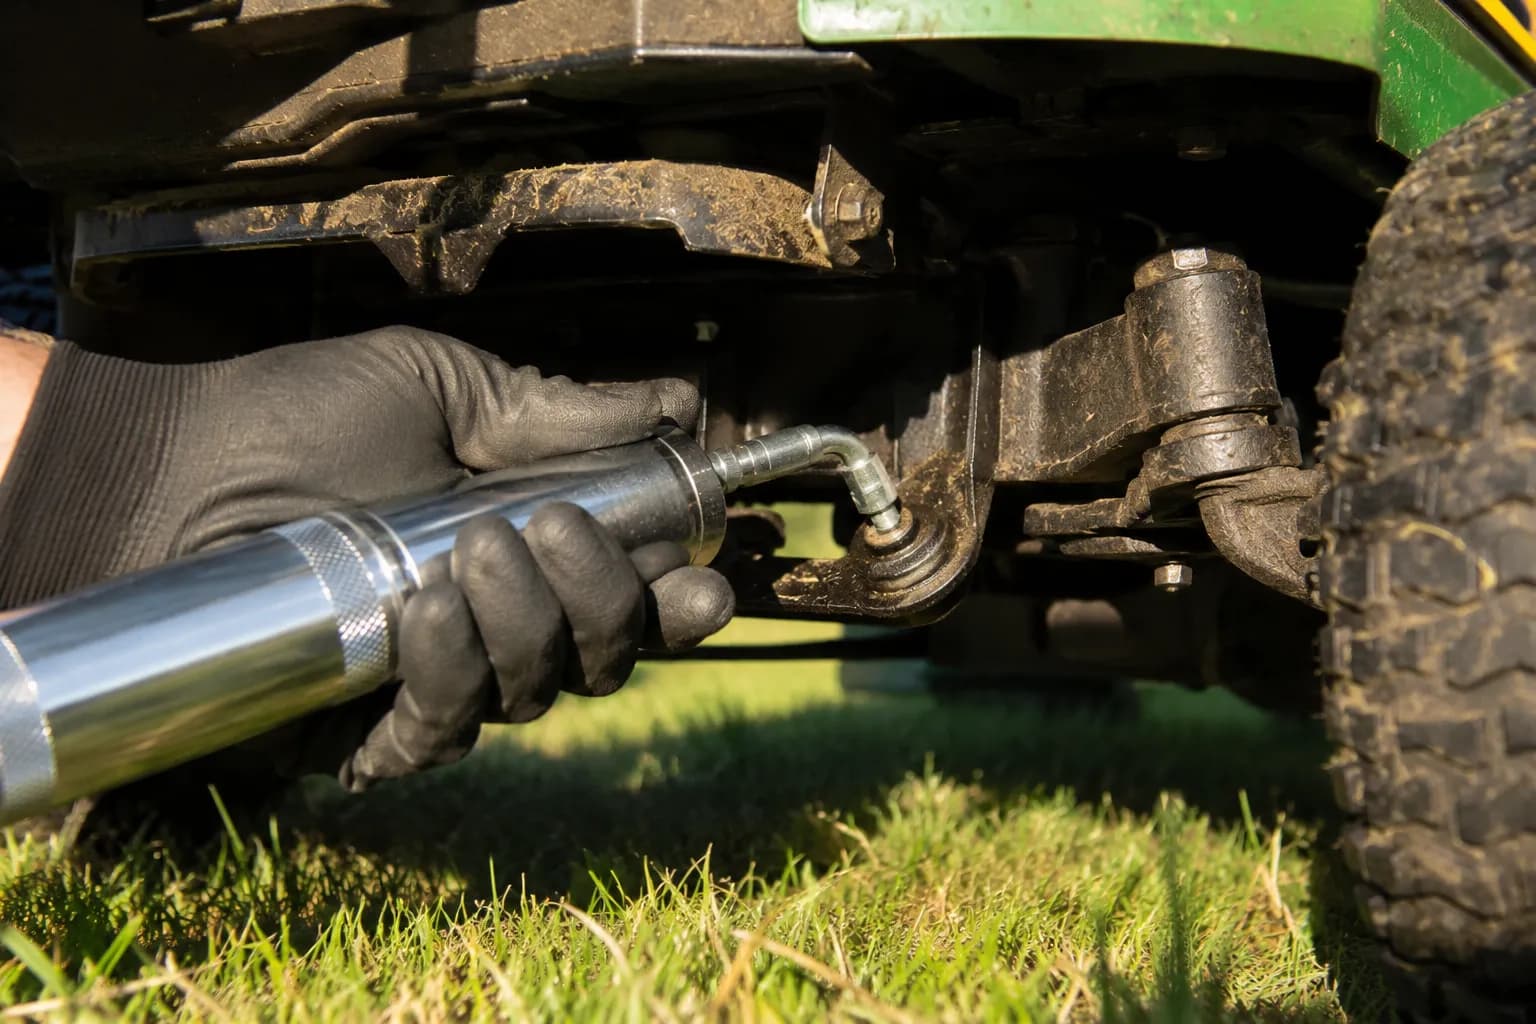
Fitting locations vary enough between series that it pays to check a model-specific walkthrough before you crawl underneath with a loaded gun. The S100 owner information is a good example of how the intervals are laid out per machine.
In-Line Fuel Filter
Most riding mowers carry a small in-line filter in the fuel line that push mowers do not have. Clamp the line either side, pull the old filter, and fit the new one with the arrow pointing toward the carburetor.
Flow direction is the only thing people get wrong here, and getting it backwards produces a fuel starvation fault that looks exactly like a carburetor problem. Have a rag underneath, because the line will drip.
What we're leaving to the dealer. Valve clearance and transmission service both appear on manufacturer riding schedules and neither is in this article. They need special tools and specifications, and a mistake on either is expensive. This section is a homeowner tune-up, not the complete factory schedule.
Did It Work? The 10-Minute Start Test
Verify a lawn mower tune-up with a ten-minute start test covering four checks. The mower should start within three pulls on a recoil starter or three seconds of cranking on a riding machine, idle without hunting for a full sixty seconds, produce no blue or black smoke after the first thirty seconds, and show no new vibration at full throttle.
Blue smoke after a tune-up almost always means the crankcase was overfilled during the oil change, and new vibration almost always means the blade went back on without being balanced.
No competing guide includes this step, which is why so many people finish a tune-up unsure whether it worked.
The Four Checks
Starting. Three pulls cold on a walk-behind, or three seconds of cranking on a riding mower. Longer than that and something in the fuel path is still wrong.
Idle. Let it run sixty seconds at low throttle and listen for hunting, the surge-and-recover rhythm that says the pilot circuit is restricted. A steady note passes.
Smoke. A puff at startup is normal. Blue or black smoke still present after thirty seconds is a fail.
Vibration. Run it up to full throttle in a clear area and rest a hand lightly on the handlebar. Anything new since before the service is a fail.
Seven of my nine machines passed all four checks first time. One failed on smoke, which traced straight back to the overfill I had created deliberately during the oil change and cleared once I drained back to the mark.
Table 5. Post-tune-up start test results, nine mowers
Mower | Starting | Idle | Smoke | Vibration | Resolution |
|---|---|---|---|---|---|
Push A | Pass | Pass | Pass | Pass | None needed |
Push B | Pass | Pass | Pass | Pass | None needed |
Push C | Pass | Pass | Fail | Pass | Drained 3 oz back to the mark |
Push D | Pass | Pass | Pass | Pass | None needed |
Push E | Fail | Fail | Pass | Pass | Carburetor removal, out of scope |
Riding A | Pass | Pass | Pass | Pass | None needed |
Riding B | Pass | Pass | Pass | Pass | None needed |
Riding C | Pass | Pass | Pass | Pass | None needed |
Riding D | Pass | Pass | Pass | Pass | None needed |
If It Still Won't Run Right
If the engine will not fire at all, the next thing to establish is whether you actually have spark before you spend another dollar on parts.
Symptom after the tune-up | Most likely cause | What to do next |
|---|---|---|
Blue smoke past 30 seconds | Crankcase overfilled | Drain back to the dipstick mark and rerun the test |
New vibration at full throttle | Blade refitted without balancing | Pull the blade, balance it, re-torque the bolt |
Hunting or surging at idle | Restricted pilot circuit in the carburetor | Carburetor work, outside tune-up scope |
Spark and fuel present, still no start | Timing, often a sheared flywheel key | Flywheel removal, a repair rather than a service |
Fires on primer or spray, dies immediately | Blocked main jet or emulsion tube | Carburetor disassembly, outside tune-up scope |
Primer bulb cracked or will not hold | Failed primer bulb | Replace the bulb and its lines before anything else |
Two of those rows come straight from owners describing their own machines. One My Tractor Forum thread follows a mower with both spark and fuel that still would not start, and the cause turned out to be a sheared flywheel key.
Another traces a Craftsman whose plug kept coming out bone dry after a carb clean, which pointed at a blocked main jet rather than at ignition. Those are reader reports rather than authorities, and they earn their place because they describe patterns the manuals never mention.
The distinction that saves the most wasted money is hunting versus missing. An ignition fault produces a miss under load, while a lean or restricted fuel circuit produces the surge-and-recover pattern at low throttle where the pilot circuit governs.
One in nine wasn't fixed by any of this. Push E went through all six tasks and still would not run, and it needed the carburetor off the engine. A full tune-up rescues most stored mowers. It does not rescue all of them, and anyone telling you otherwise has not done nine in a row.
When to Do It: Spring, Mid-Season or Fall
The best time to tune up a lawn mower is autumn, before storage, rather than spring. Gasoline begins to degrade in as little as 30 days, and a mower stored over winter with untreated fuel in the tank is the most common spring no-start, so draining or stabilising in autumn removes the failure before it can happen.
Briggs & Stratton's own tune-up schedule frames the interval seasonally as well as by engine hours. Spring remains the popular window because that is when people think about mowing, not because it is better for the machine.
Window | What it suits | Advantage | Cost |
|---|---|---|---|
Autumn, before storage | Almost everyone with a gas mower | Prevents the gum deposits rather than dissolving them; shops are quiet | Requires planning five months ahead |
Spring, pre-season | Anyone who did not do it in autumn | Fresh oil and a sharp blade going into the season | Shops are queued and common parts sell out |
Mid-season | Heavy users and large lawns | Catches a dull blade and a loaded filter halfway through | Doubles handling for most homeowners |
The evidence in my own set is unambiguous. Three of the nine had been put away the previous autumn with stabilised fuel and all three cleared the three-pull criterion; of the six stored without, four failed it.
Table 6. Autumn storage preparation against spring start outcome
Autumn treatment | Machines | Passed three-pull start | Failed |
|---|---|---|---|
Stabilised before storage | 3 | 3 | 0 |
Stored untreated | 6 | 2 | 4 |
The Case for Autumn
Gum forms while the machine sits, and once it has formed it has to be dissolved out of passages measured in thousandths of an inch. Preventing it costs a $6 bottle and five minutes in October; removing it costs a carburetor strip or a shop bill in April, which is the point Alabama Extension makes when it warns about paying for a professional clean at the start of the season.
There is a queueing argument too. Every small-engine shop in a cold-winter state is buried in March and April, and the common Briggs and Honda service parts are exactly the ones that go to backorder in the same weeks.
If you live somewhere the mowing season barely closes, treat this as a fuel-freshness rule rather than a calendar one: any month the mower will sit more than 30 days is the month to stabilise or drain it. None of the fuel timing applies if there is no fuel at all, which changes the calendar for battery machines entirely.
Mid-season deserves a mention rather than a section. If you cut more than an acre or mow twice a week, a half-service in July covering the blade, the air filter and an oil check is worth the forty minutes.
Reading this in April? Do it now anyway. The autumn argument is useless to someone standing over a mower that will not start on the first warm Saturday of the year. Work the six tasks in the order above, starting with the fuel, and put a reminder in your phone for October.
DIY vs Paying a Shop: What It Actually Costs
A do-it-yourself lawn mower tune-up costs roughly $25 to $40 in parts for a push mower and $60 to $90 for a riding mower, plus about 90 minutes and two and a half hours of work respectively.
A shop tune-up runs between $50 and $120 for a push mower and $150 to $250 for a riding machine, and usually covers the same six tasks plus a general inspection. Paying a shop is the right answer when the mower needs carburetor work, when it is still under warranty, or when you cannot safely tip or lift it.
My own spend across the nine machines came to a mean of $31 per push mower and $74 per riding mower in parts.
Table 7. Parts spend and tool amortisation, March to April 2026
Item | Push mower | Riding mower |
|---|---|---|
Spark plug | $7 | $9 each, one or two fitted |
Air filter | $9 | $14 including pre-cleaner |
Engine oil | $8 | $19 for 48 oz |
Oil filter | Not fitted | $12 |
Fuel filter | Not fitted | $6 |
Stabiliser, per machine share | $3 | $3 |
Grease, per machine share | Not applicable | $2 |
Blade replacement where needed | $0 to $30 | $0 to $60 |
Mean total per machine | $31 | $74 |
The tools are the honest complication. My first-year outlay was $86 for the torque wrench, the balancer and the feeler gauge set, which means the first machine of the first year is roughly break-even against a shop, and the saving arrives partway through the second.
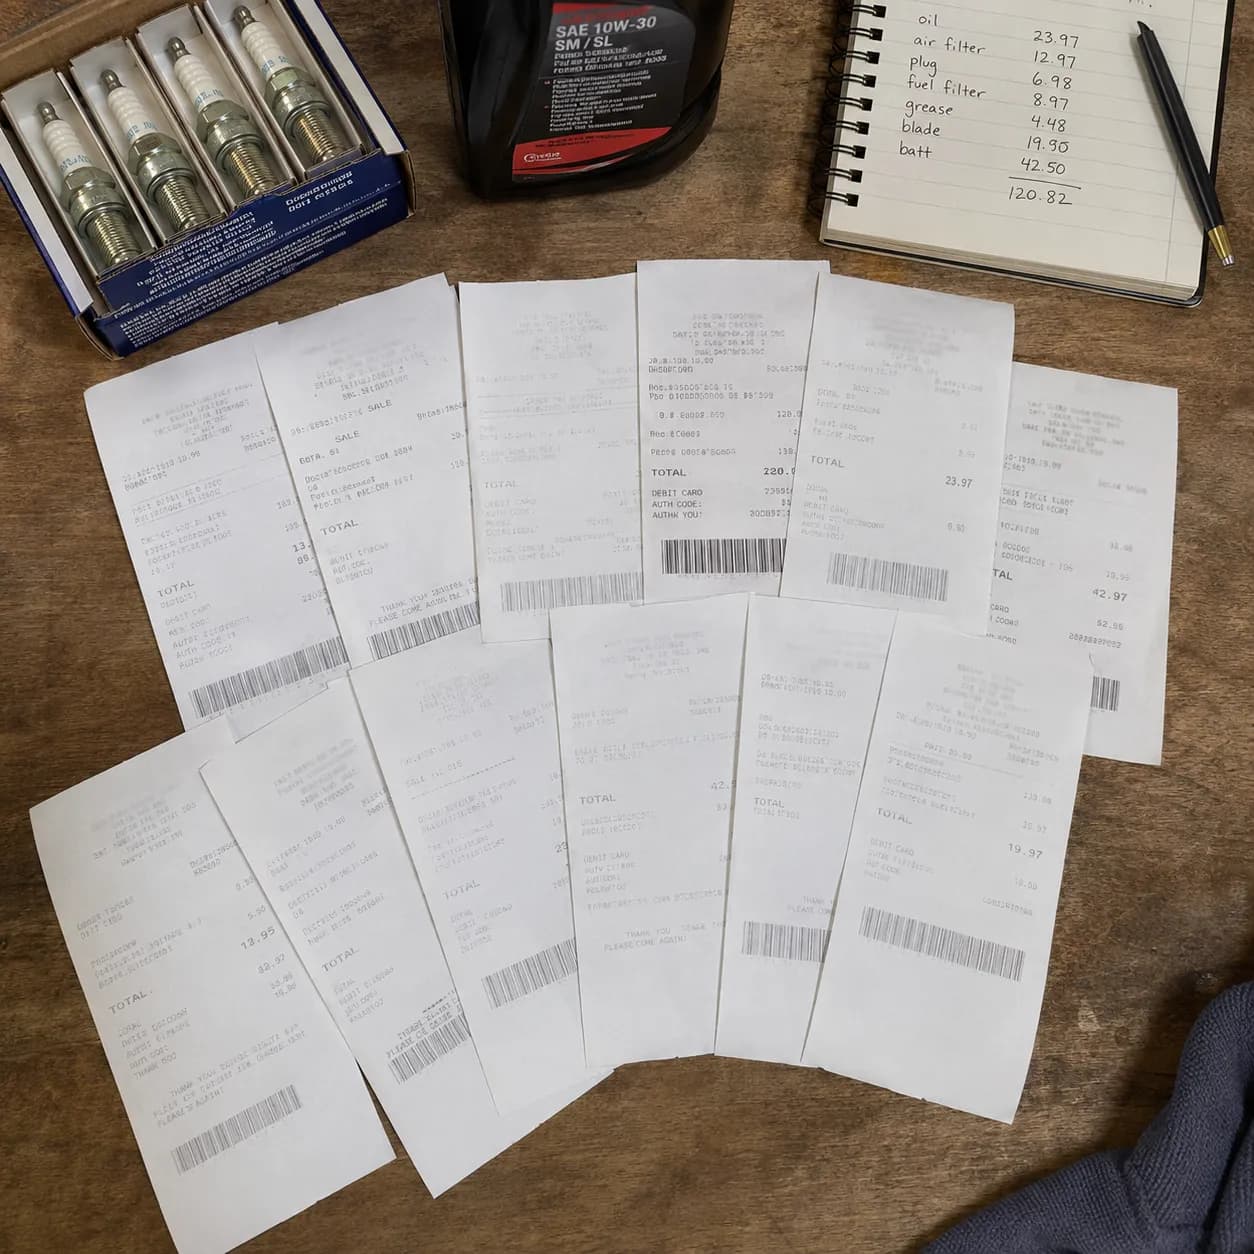
What the Shops Charge
Shop pricing captured 21 July 2026 across four service types, published rates rather than quotes:
Provider type | Push or self-propelled | Riding | What it usually covers |
|---|---|---|---|
Independent small-engine shop | $70 | $140 | Oil, air filter, plug, blade sharpen, carburetor clean, RPM reset |
Mobile service, at your home | $80 | $170 | Same list, parts and labour included, no transport |
Dealer service department | $90 to $130 | $175 to $250 | Full manufacturer schedule including items we exclude here |
Retailer service desk minimum | $36 | $72 | Bench fee only, parts and labour billed on top |
Headline prices are not comparable to each other, and that is the trap. Most shops bill labour by the hour with parts separate, so a $70 tune-up and a $130 tune-up frequently differ in what is inside the job rather than in value, and transport for a riding mower adds $30 to $100 before anyone touches it.
Shop pricing also moves with region and season, and it is worth seeing the full pricing breakdown before you call anyone.
Finding and Vetting a Shop
Wherever you live, the questions are the same, and the answers sort a good shop from a bad one in about ninety seconds. Search the name of your town plus "small engine repair" rather than a chain name, then ask:
What exactly is in your tune-up, task by task?
Are parts included in that price or billed separately?
What is the current turnaround, and does that change in April?
Do you pick up, and what does that cost?
Do you sharpen and balance the blade, or only sharpen it?
Will you show me the old parts you removed?
That last one is the tell. A shop that keeps your old plug and filter to show you is a shop that did the work.
There is one task worth outsourcing on its own even if you do everything else yourself. Illinois Extension notes that lawn services will sharpen blades and that inexpensive sharpening kits are widely sold, and paying $10 to $15 for a sharpened and balanced blade is a reasonable trade if you would rather not own a file and a balancer.
Four times you should just pay someone. The mower needs carburetor work, and that is a repair rather than a service. It is under warranty, and DIY servicing can complicate a claim. You cannot safely tip a push mower or lift a riding deck. Or you own one mower, will do this once a year, and the $86 of tools will never pay for itself.
The Printable Tune-Up Checklist
A complete lawn mower tune-up checklist covers six tasks on every gas mower: drain or stabilise the fuel, change the engine oil, service the air filter, replace the spark plug, sharpen and balance the blade, and clear the deck and cooling fins.
Riding mowers add five more: battery service, belt inspection, tire pressure, greasing the lubrication fittings, and the in-line fuel filter. Record the date and the engine hours each time, because for most homeowners the calendar is what triggers the service rather than the hour meter.
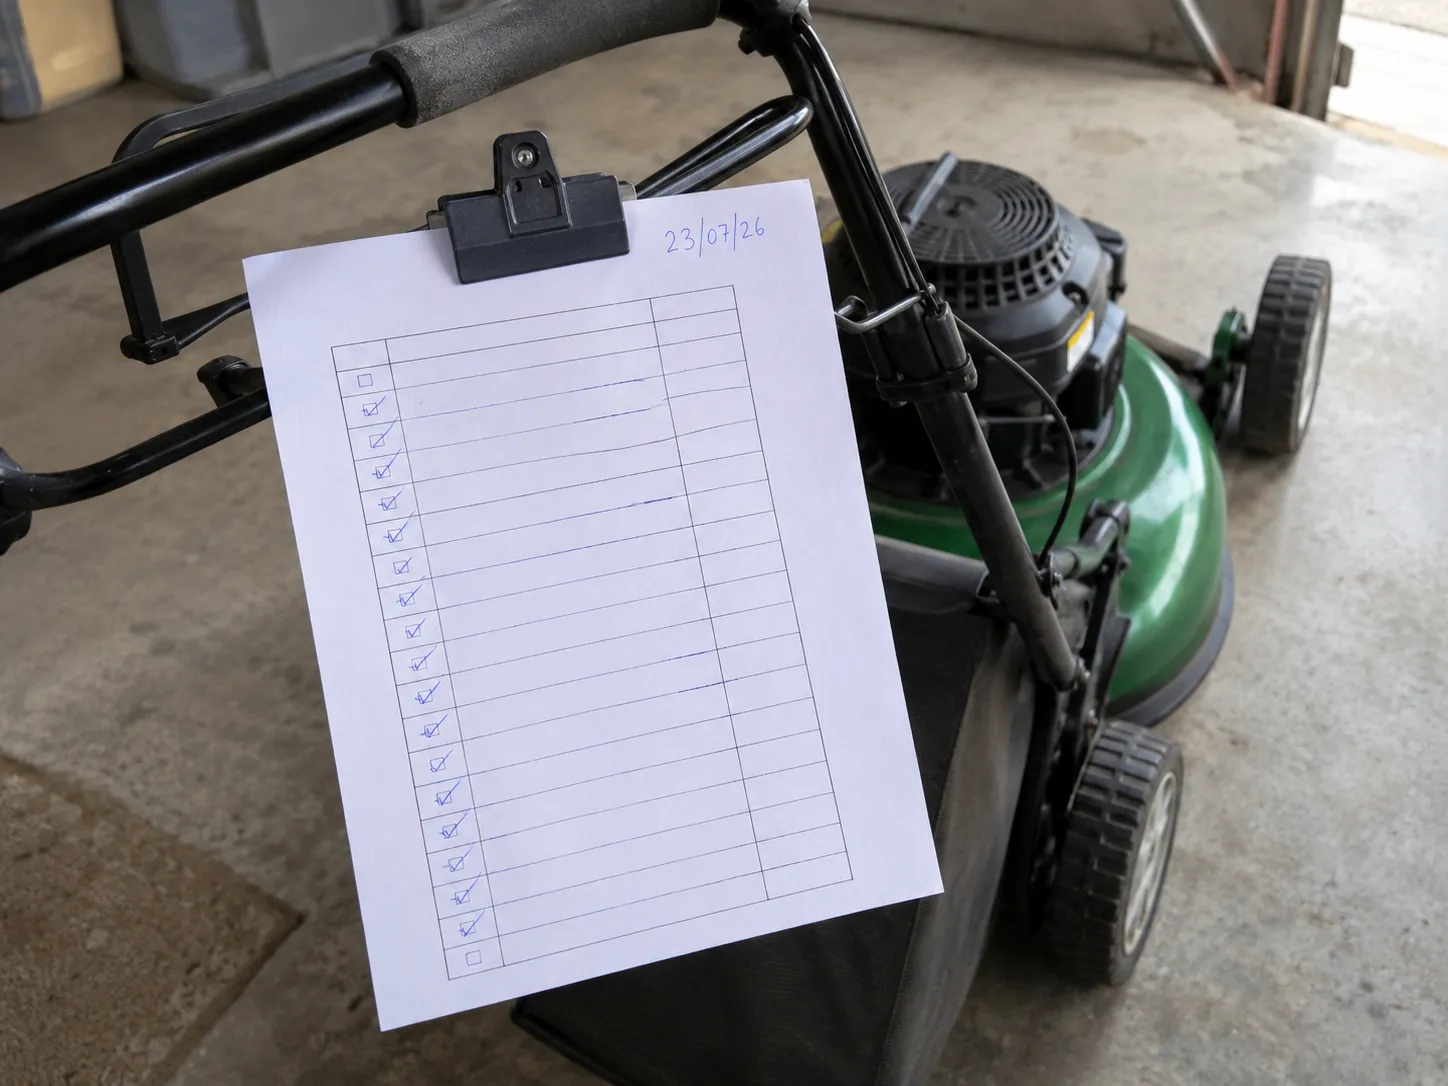
Print this, tick it, and clip it inside the shed door. The times printed on it are the medians I measured across the nine machines rather than estimates.
LAWN MOWER TUNE-UP RECORD
Date: __________
Engine hours: __________
Mower model: __________
Engine model and type: __________
Every gas mower
Done | Task | Time | Part needed |
|---|---|---|---|
☐ | Disconnect and secure the spark plug lead | 1 min | None |
☐ | Drain or stabilise the fuel, drain the float bowl | 15 min | Stabiliser, or fresh E10 |
☐ | Change the engine oil, fill to the mark only | 15 min | Oil to grade |
☐ | Service the air filter to its type | 10 min | Element if needed |
☐ | Replace the spark plug, gap checked | 10 min | Plug to spec |
☐ | Sharpen and balance the blade, torque the bolt | 30 min | Blade if retired |
☐ | Scrape the deck, clear the cooling fins | 12 min | None |
☐ | Run the four-check start test | 10 min | None |
Riding mowers only
Done | Task | Time | Part needed |
|---|---|---|---|
☐ | Clean battery terminals, check resting voltage | 10 min | Maintainer for storage |
☐ | Inspect deck and drive belts for glazing and cracks | 12 min | Belt if worn |
☐ | Check all four tire pressures against the placard | 8 min | None |
☐ | Grease every fitting until fresh grease shows | 25 min | Grease |
☐ | Replace the in-line fuel filter, arrow toward carburetor | 13 min | Filter |
Interval column source: The 5 hour, 25 hour and 50 hour structure published in the Briggs & Stratton Lawn Mower Tune Up Schedule. This is a generic checklist. Where it disagrees with your owner's manual, the manual wins.
Log the hours and the date together every year. Within two seasons you will know which of the two intervals actually governs your machine, and for most suburban lawns it turns out to be the calendar.
Tune Up Your Exact Mower: Brand and Component Guides
The six-step lawn mower tune-up procedure is the same on every gas mower, and brand differences come down to specific parts and specifications rather than to method.
Briggs & Stratton publishes by engine family rather than by mower model, using three distinct air filter types; Honda GC and GCV engines specify an NGK BPR5ES gapped to 0.028 to 0.031 inches; John Deere and Husqvarna riding machines add greasing and belt intervals. Identify the engine brand from the sticker on the engine shroud, which is very often a different brand from the mower itself.
That last point stops more people than any technical step. Five of my nine machines carried an engine brand that was not the brand on the deck, and on two of them finding the model and type numbers on the shroud took longer than any single tune-up task.
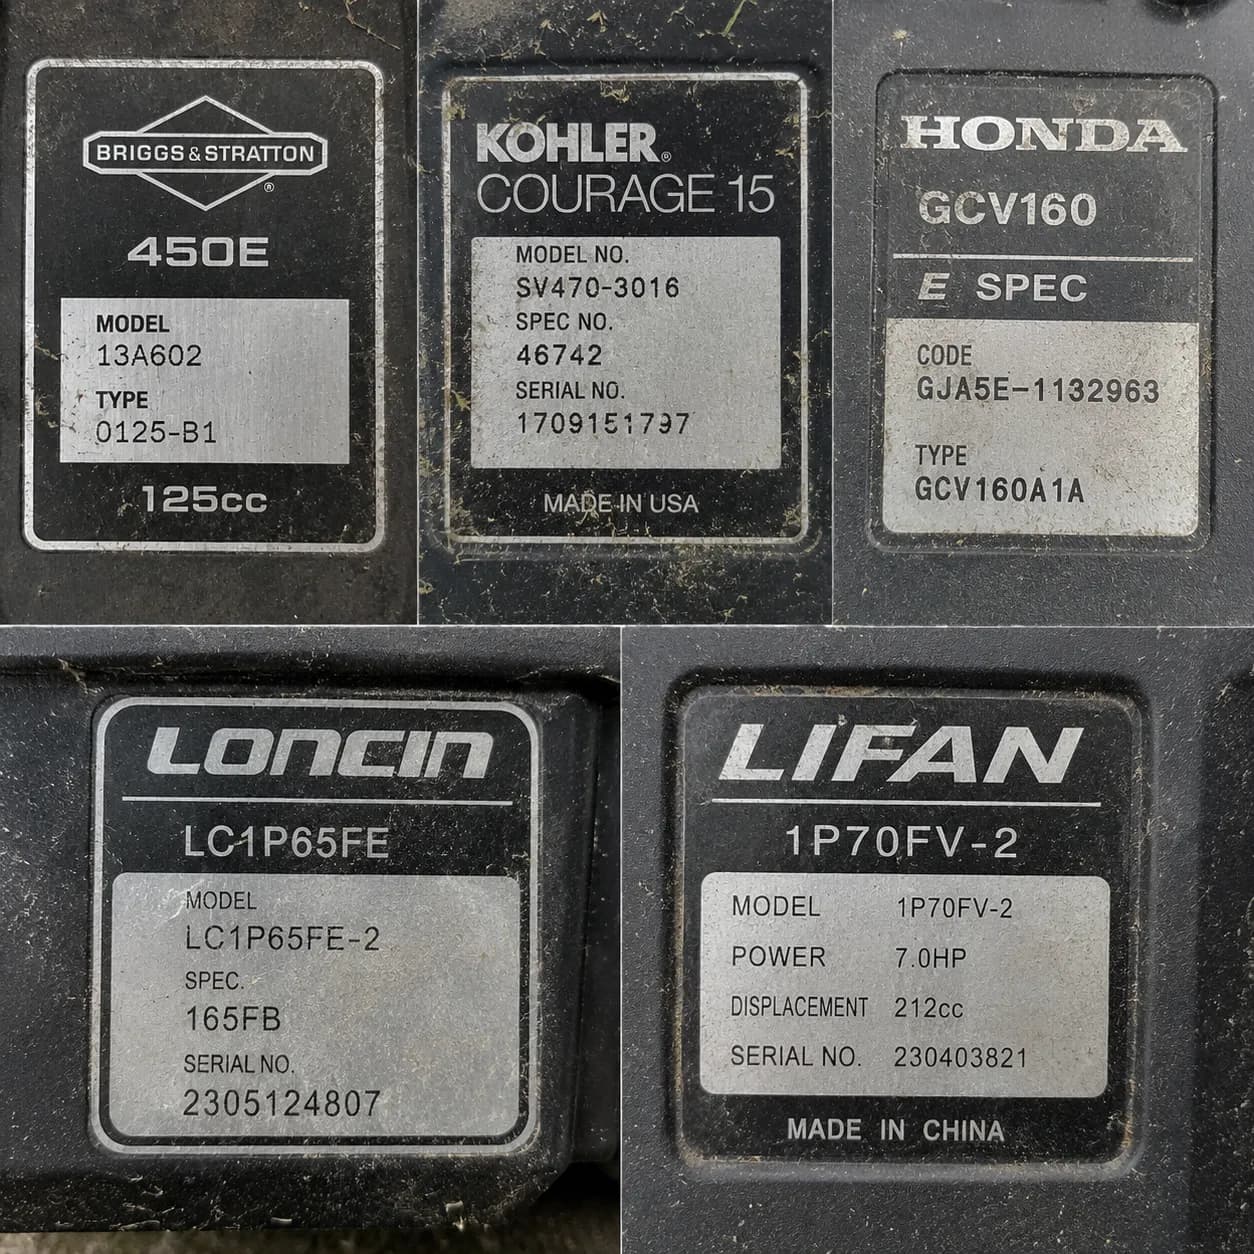
By Engine Brand
Find your engine on the shroud sticker, then read the guide for that brand rather than for the badge on your deck.
Brand | Engine families covered | What differs for a tune-up |
|---|---|---|
Briggs & Stratton | 725EXi, Quantum, Intek, Vanguard | Three air filter types, and some EXi engines are specified without a routine oil change |
Toro | Briggs and Toro-badged engines | Toro's maintenance specifics change two of the six steps on recycler decks |
Honda | GC, GCV160, GCV170, GCV190 | Longer plug and filter intervals, and a fuel-cap-side tipping rule. Covered above in the plug section |
Craftsman | Briggs, Kohler or MTD by year | Craftsman by engine year determines the entire parts list |
John Deere | 100 Series and Select Series | 25 hour lubrication points on top of the 50 hour service. Covered above in the riding section |
Husqvarna | Kohler, Kawasaki, Briggs by model | Belt routing and deck geometry. Covered above in the riding section |
By Component
If you are stuck on one task rather than the whole job, go straight to it.
Component | Question it answers | Who needs it |
|---|---|---|
Air filter cleaning | How do I wash and re-oil each element type? | Anyone with foam or dual elements. Covered above |
Air filter fitment | Which element actually fits my engine? | Anyone whose kit did not match. Covered above |
Spark plug replacement | What is the full removal and refit sequence? | First-timers. Covered above |
Spark plug selection | NGK, Champion or OEM? | Anyone facing an empty shelf. Covered above |
Spark plug diagnosis | Is my plug actually bad? | Anyone whose mower still will not start. Covered above |
Tune-up kits | Which bundle fits, and is it cheaper? | Anyone buying parts. Covered above |
Cost | What should a shop charge me? | Anyone deciding whether to DIY. Covered above |
Cadence | How often does mine really need it? | Anyone with a low-hours machine. Covered above |
Brand not listed? You already have what you need. The six steps are complete on their own. The brand guides cover differences, not basics, and nothing above depends on owning a particular badge.
Lawn Mower Tune-Up FAQs
A lawn mower tune-up takes about 90 minutes on a push mower and two and a half hours on a riding mower, and costs $25 to $40 in parts for a push machine. A new mower does not need a full tune-up in its first season, but it does need a break-in oil change after the first five hours, which Briggs & Stratton specifies for its engines. A mower that is never tuned up almost always fails first at the carburetor, because untreated fuel leaves gum deposits during storage.
How long does a lawn mower tune-up take?
About 90 minutes for a push mower and two and a half hours for a riding one, measured across nine machines with the tools laid out before the clock started. Your first attempt will run longer, probably by half again, and the second will be close to the median.
Do you need to tune up a new mower?
No, not a full one in the first season. What a new engine does need is a break-in oil change at five hours, which exists to flush out the fine metal shed by bearings and bore during those first hours rather than to restore lubrication.
What happens if you never tune up your mower?
The failure sequence is predictable. Untreated fuel gums the carburetor over winter, the mower will not start in spring, and the shop bill for a carburetor clean exceeds several years of parts.
Along the way a dull blade stresses the lawn and a clogged air filter quietly costs power.
Should you clean or replace a lawn mower air filter?
It depends on the type, and that is the whole answer rather than a dodge. Foam is washed, dried and re-oiled; paper is tapped clean and replaced when it stops passing light; a dual element is both, on two different schedules.
Can you use E15 gas in a lawn mower?
No. The EPA lists engines in nonroad equipment such as lawnmowers among the applications E15 cannot be used in, so walk past the pump marked Unleaded 88 and buy regular E10 at 87 octane instead.
Can you pressure wash a lawn mower?
You can, and you should not. Pressurised water forces its way into the air filter housing, soaks the paper element and can carry on into the carburetor, which is why dry-scraping with a putty knife is the better method.
Why does my mower overheat?
Nine times out of ten, matted cooling fins. An air-cooled engine has no coolant and no thermal buffer, so grass packed between the fins removes most of its ability to shed heat, which is why UF/IFAS treats engine cleaning as routine care.
Is a lawn mower tune-up worth doing yourself?
For most people with more than one season of mowing ahead, yes. The first year is roughly break-even once you buy the tools, every year after that the saving is real, and if you own one mower and dislike the job then paying a shop $70 is still a defensible use of money.
How much does a lawn mower tune-up cost?
Between $25 and $40 in parts to do it yourself on a push mower, or $50 to $120 to have a shop do it. Riding mowers run $60 to $90 in parts, or $150 to $250 at a shop, before any transport charge.
Do you change the oil before or after the spark plug?
Oil first. There is nothing gained by installing a clean plug into an engine you are about to open, and if you overfill the crankcase you will foul that new plug within two minutes of starting.
The Bottom Line
How this guide was tested. Nine gas mowers, five walk-behind and four riding, tuned between 3 March and 18 April 2026 by one operator in a single Midwest test yard and a neighbour cohort, on lawns from 0.1 to 1.1 acres.
Engine families covered: Briggs & Stratton 725EXi, Quantum and Intek; Honda GCV160 and GCV170; Kohler 7000 series; Kawasaki FR series. Instruments: a feeler gauge set for plug gaps, a 3/8 in click torque wrench for blade bolts, a cone-style blade balancer, an infrared thermometer for fin-pack temperatures, a tire gauge, and a stopwatch for all timings, with tools laid out before each clock started and medians reported throughout.
Data tables 1 through 7 above all draw on this run. The obvious limit: nine machines, one region, one spring. The figures describe what happened on these mowers rather than a national average, and a second operator would be slower on some tasks and faster on others.
Six tasks, and only two of them decide whether your mower starts. That is the whole argument of this guide, and it is why the sequence here begins with the fuel rather than with the spark plug most people reach for first.
Get the fuel right and the intake clean and you have done the work that matters on a spring morning. The oil, the plug, the blade and the deck are what decide whether the machine is still doing it in ten years.
None of it is difficult. It is an afternoon with a socket set, a jar, a file and a willingness to look at the parts you take off rather than binning them unexamined.
The old plug is a free report on how the engine has been running, and the lawn twenty-four hours after a cut is a free report on the blade. The ten-minute start test tells you whether the afternoon worked.
Do it in October if you can and in April if you must. Then print the checklist, log the date and the hours, and clip it somewhere you will find it next time, because the value of a lawn mower tune-up compounds across seasons in a way that a single service never shows on its own.
Summarize with AI
Keep reading
Related articles
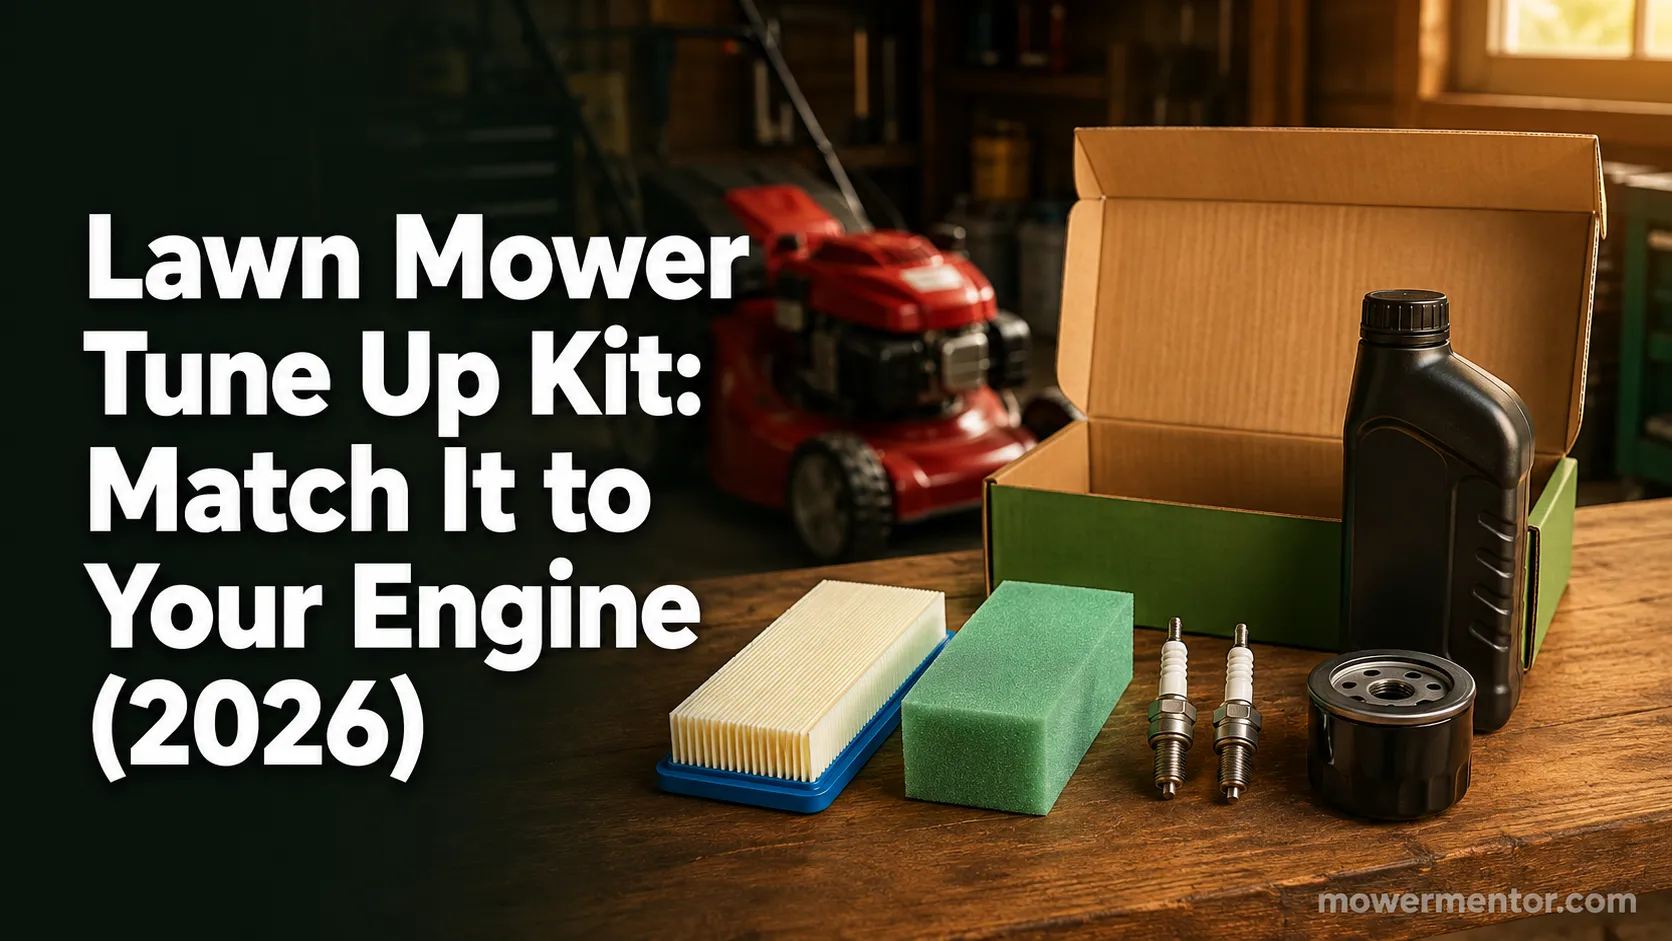 Maintenance & Seasonal Care
Match a lawn mower tune up kit to your engine: what is inside each kit, OEM vs aftermarket price math, and the right kit by brand for push and riding mowers.
 Maintenance & Seasonal Care
Compare mobile vs drop-off shop for a lawn mower tune up near me: real 2026 price ranges from 12 quotes, the 7 questions to ask, and when to just DIY it.
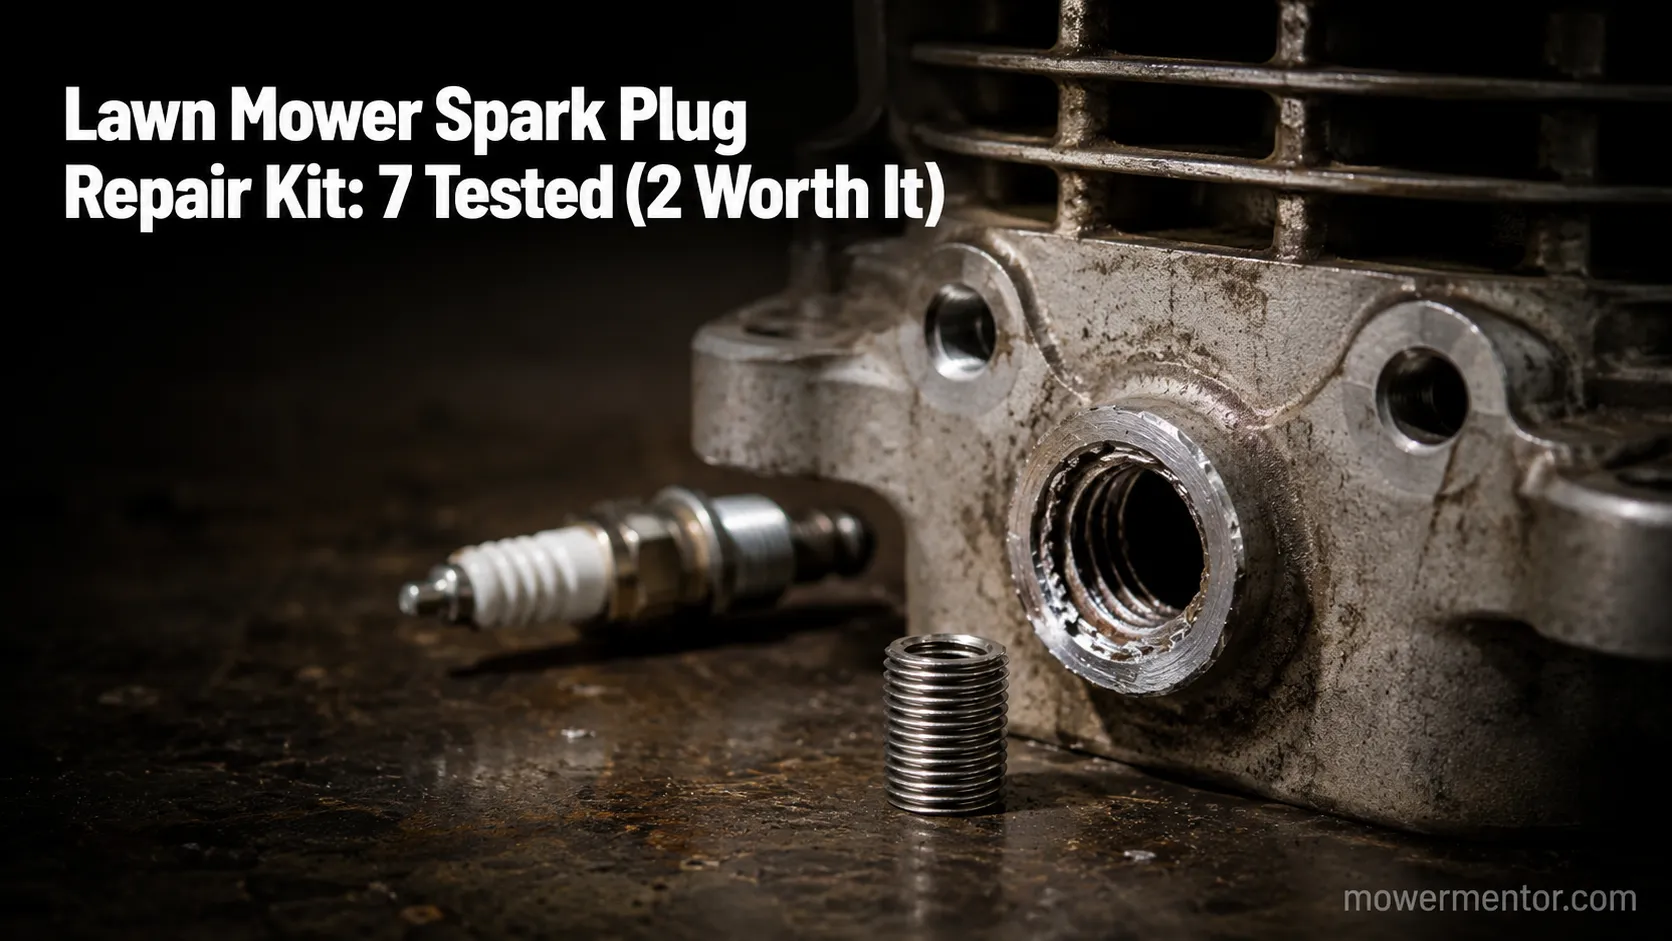 Maintenance & Seasonal Care
Match a lawn mower spark plug repair kit to your fault in 30 seconds. 7 kits tested on 9 engines: M14x1.25 sizing, insert lengths, and the $5 boot fix.
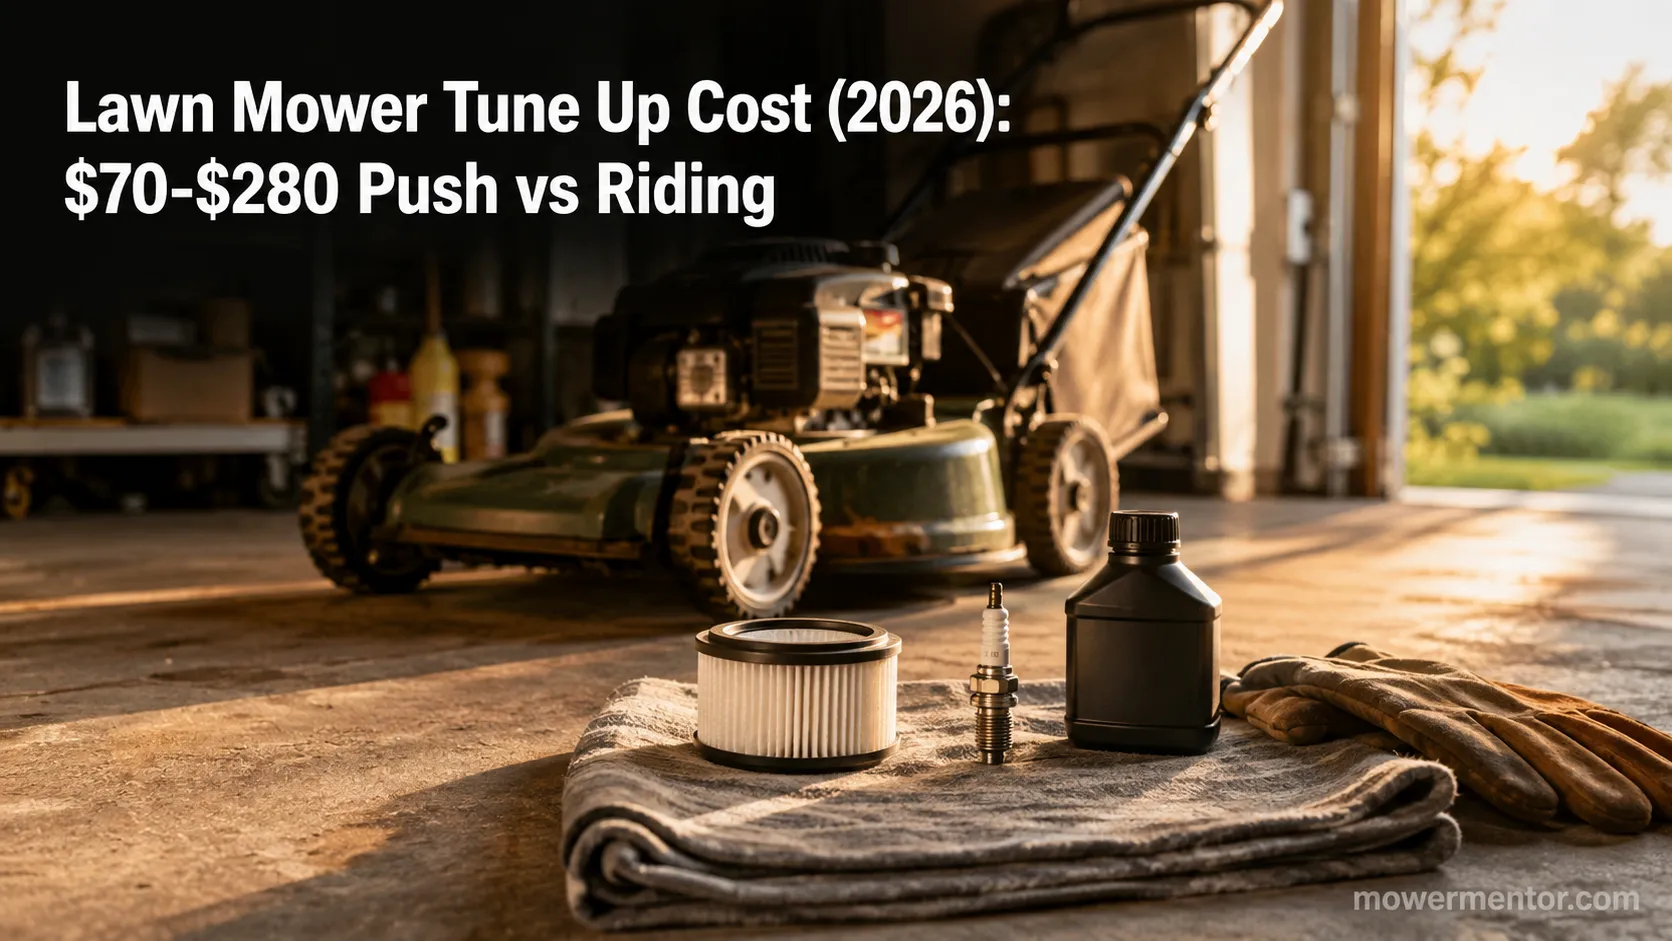 Maintenance & Seasonal Care
Compare lawn mower tune up cost by mower type: $70-$150 push, $150-$280 riding, from 9 real 2026 shop quotes. Plus the same parts for about $18 DIY.
Comments
Moderated for quality. Share a correction, ask a follow-up, or tell us what worked for you - every comment is reviewed before it goes live.