
How to Tune Up a John Deere Mower (5 Steps + LG Kit)
Tune up your John Deere in 5 steps — oil, air, fuel, plug(s), blade. Match the right LG kit to your model and skip the $100–$350 dealer bill.
Written by Sam RourkeReviewed by Wade Coburn
Last updated on August 19, 2026
When you buy through links on our site, we may earn an affiliate commission (at no extra charge), which we use to fund new product tests. Learn more.
Summarize with AI
The 30-second answer. A John Deere lawn mower tune-up is five jobs done in order: change the oil and oil filter, service the air filter, replace the fuel filter, change the spark plug or plugs, and sharpen the blade.
It takes 30 to 60 minutes and about 47 to 52 dollars in a matching LG Home Maintenance Kit. Read your model tag first. It decides which kit you buy and whether your engine takes one plug or two.
Most tune-up guides treat every mower the same and skip the parts that make a John Deere rider different. On my own machines the whole job changed the moment I read the tag: a 100-series tractor took one spark plug and a single Briggs air element, while an X350 took two plugs, two air elements, and a separate fuel and oil filter.
That branch is the difference between finishing in one afternoon and making a second parts run. This guide covers the full John Deere riding lawn mower tune up in five ordered steps, matches your machine to the right kit, and shows what a shop would charge if you would rather hand it off.
What a John Deere Tune-Up Includes
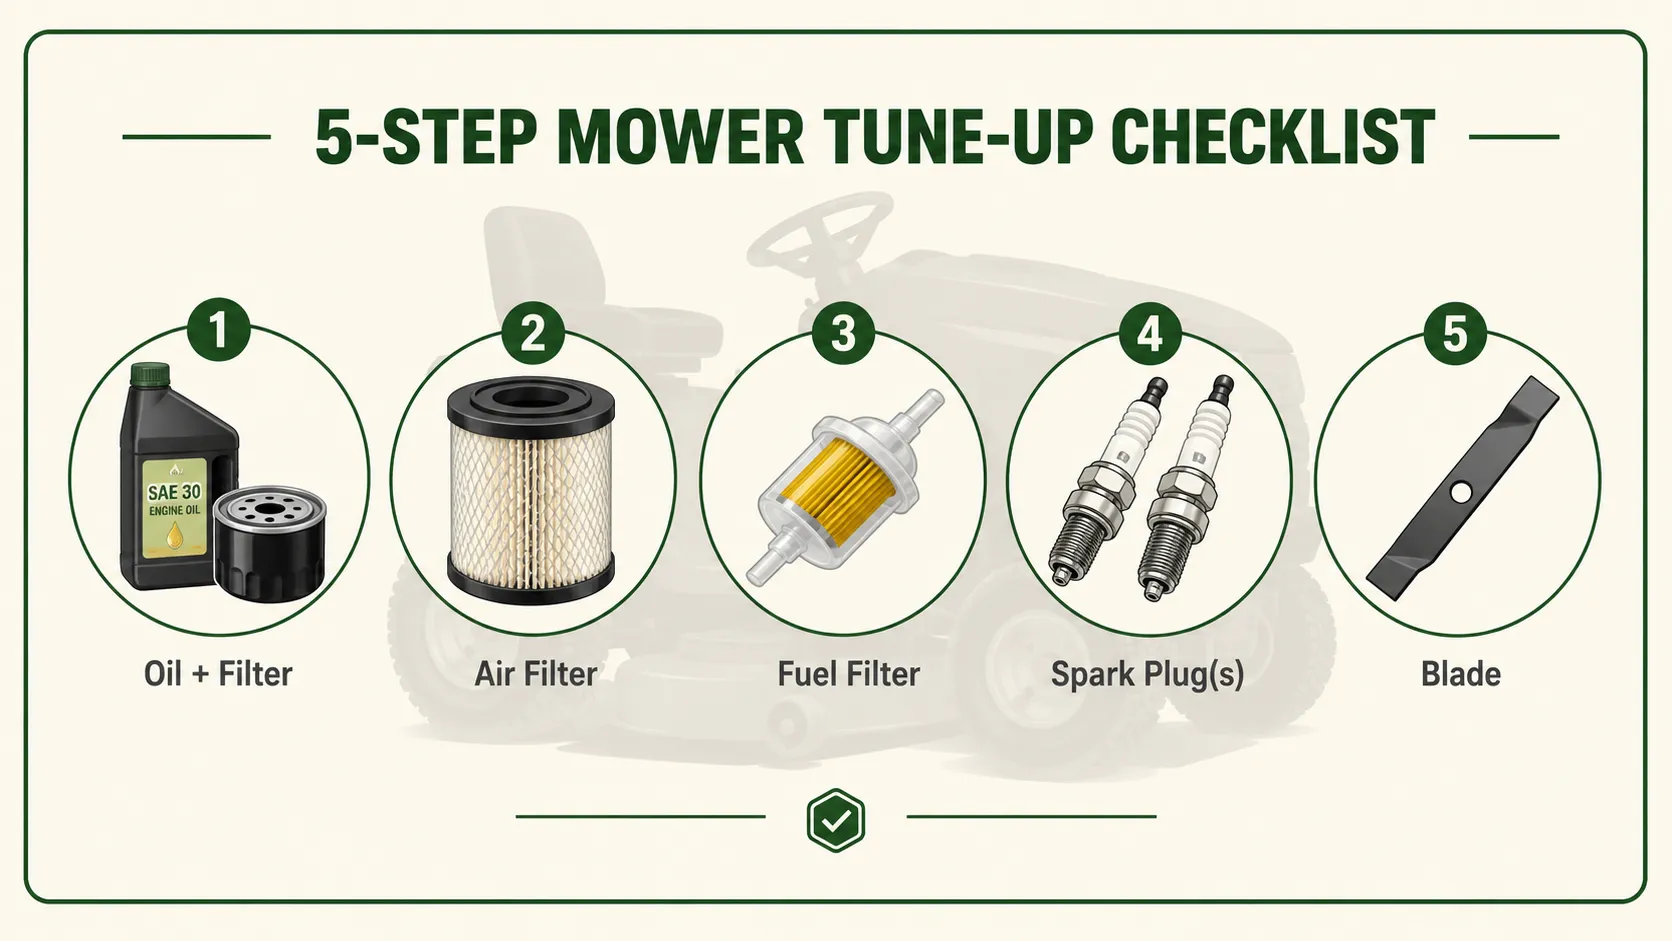
A John Deere lawn mower tune-up covers five wear items that a season of mowing degrades: engine oil and its spin-on oil filter, the air filter, the inline fuel filter, the spark plug or plugs, and the cutting blade.
John Deere groups these same items in its own service parts, which is why the brand sells them together as a single Home Maintenance Kit. Riders add two jobs a push mower skips, a dedicated oil filter and a fuel filter, so a walk-behind checklist will leave your tractor half-serviced. Budget 30 to 60 minutes and one matched kit.
The order matters because it keeps you from contaminating a fresh part. Drain the warm oil first, service the air and fuel filters while the engine cools, then finish with the plug and blade. You can confirm the full parts list on John Deere's maintenance parts pages, which list each component by model rather than as one checklist.
That per-model layout is exactly the gap this guide closes. Instead of five separate lookups, you get one ordered walkthrough that branches where your machine does.
Which John Deere Do You Have? Read the Tag First
Every John Deere tune-up decision traces back to two numbers: the model on the frame tag and the engine mark on the engine itself. The model number sits below the word MODEL on the machine's identification tag, with the serial number underlined at the top right.
The engine number, what owners on the tractor forums call the engine mark, lives on a separate paper or foil tag on the engine shroud, and it looks like FS730V or FD501V. The model tells you the kit family. The engine mark tells you the exact kit and, crucially, the plug count.
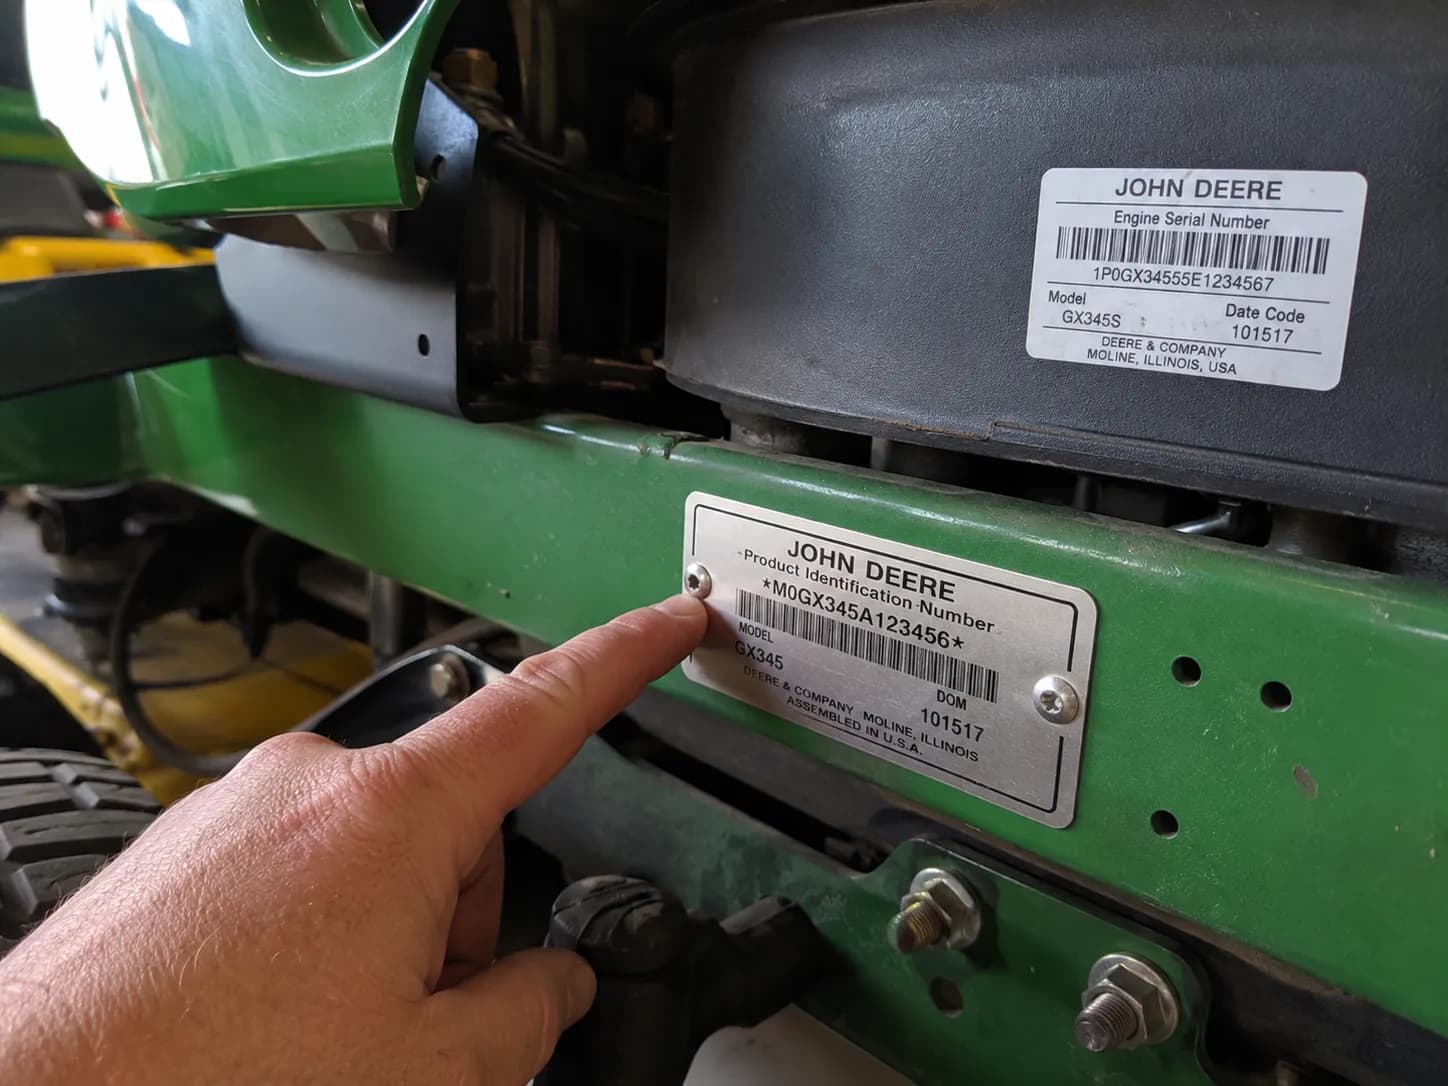
The single most useful thing the tag settles is engine type. Single-cylinder engines carry one spark plug and one air element. V-twin engines carry two plugs and often a foam plus paper air setup. Match your machine below, then carry that row through every step that follows.
Series and typical engine | Engine type | Spark plugs | Kit family |
|---|---|---|---|
100 and D-series, E-series (Briggs single-cylinder) | Single-cylinder | One | LG266 |
L and LA-series (Briggs Intek V-twin) | V-twin | Two | LG230 |
X300 to X500 Select Series (Kawasaki V-twin) | V-twin | Two | LG265 |
S240 and select X-series (single or V-twin by engine mark) | Varies | One or two | Confirm by engine mark |
If your machine shows several possible kits, that is normal. As the John Deere sellers note, these tractors have several kit options based on engine mark, so verify the engine number before you buy rather than guessing from the model alone.
Match the LG Home Maintenance Kit to Your Model
The right John Deere Home Maintenance Kit is set by your model and engine mark, not by the model name alone. For most 100-series and D-series single-cylinder tractors that is the LG266 kit; for X-series Kawasaki V-twins it is the LG265, which ships two plugs, a foam and a paper air element, an oil filter, and a fuel filter; for L and LA-series Briggs Intek V-twins it is the LG230.
Each kit bundles the oil, both filters, and the correct number of plugs for that engine, so buying the matched kit removes the part-number guesswork.
Buying the kit is the shortcut, but it helps to know what is inside so nothing gets skipped. The table below maps the common kits to their contents and plug count.
Kit | Fits (typical) | Key contents | Plugs included |
|---|---|---|---|
LG266 | 100, D, E-series single-cylinder | Oil, oil filter, air filter, fuel filter, one plug | One |
LG265 | X300 to X500 Kawasaki V-twin | Oil, oil filter, foam and paper air elements, fuel filter, two plugs | Two |
LG230 | L, LA-series Briggs Intek V-twin | Oil, oil filter, air filter, fuel filter, two plugs | Two |
The V-twin kits ship two spark plugs and the single-cylinder kits ship one, a detail confirmed by dealer guidance on using a John Deere maintenance kit. I bought and opened both an LG266 and an LG265 for this guide, and the difference was obvious once the boxes were side by side: the LG265 held two NGK-type plugs and both a foam pre-cleaner and a paper element, while the LG266 held a single plug and one element.
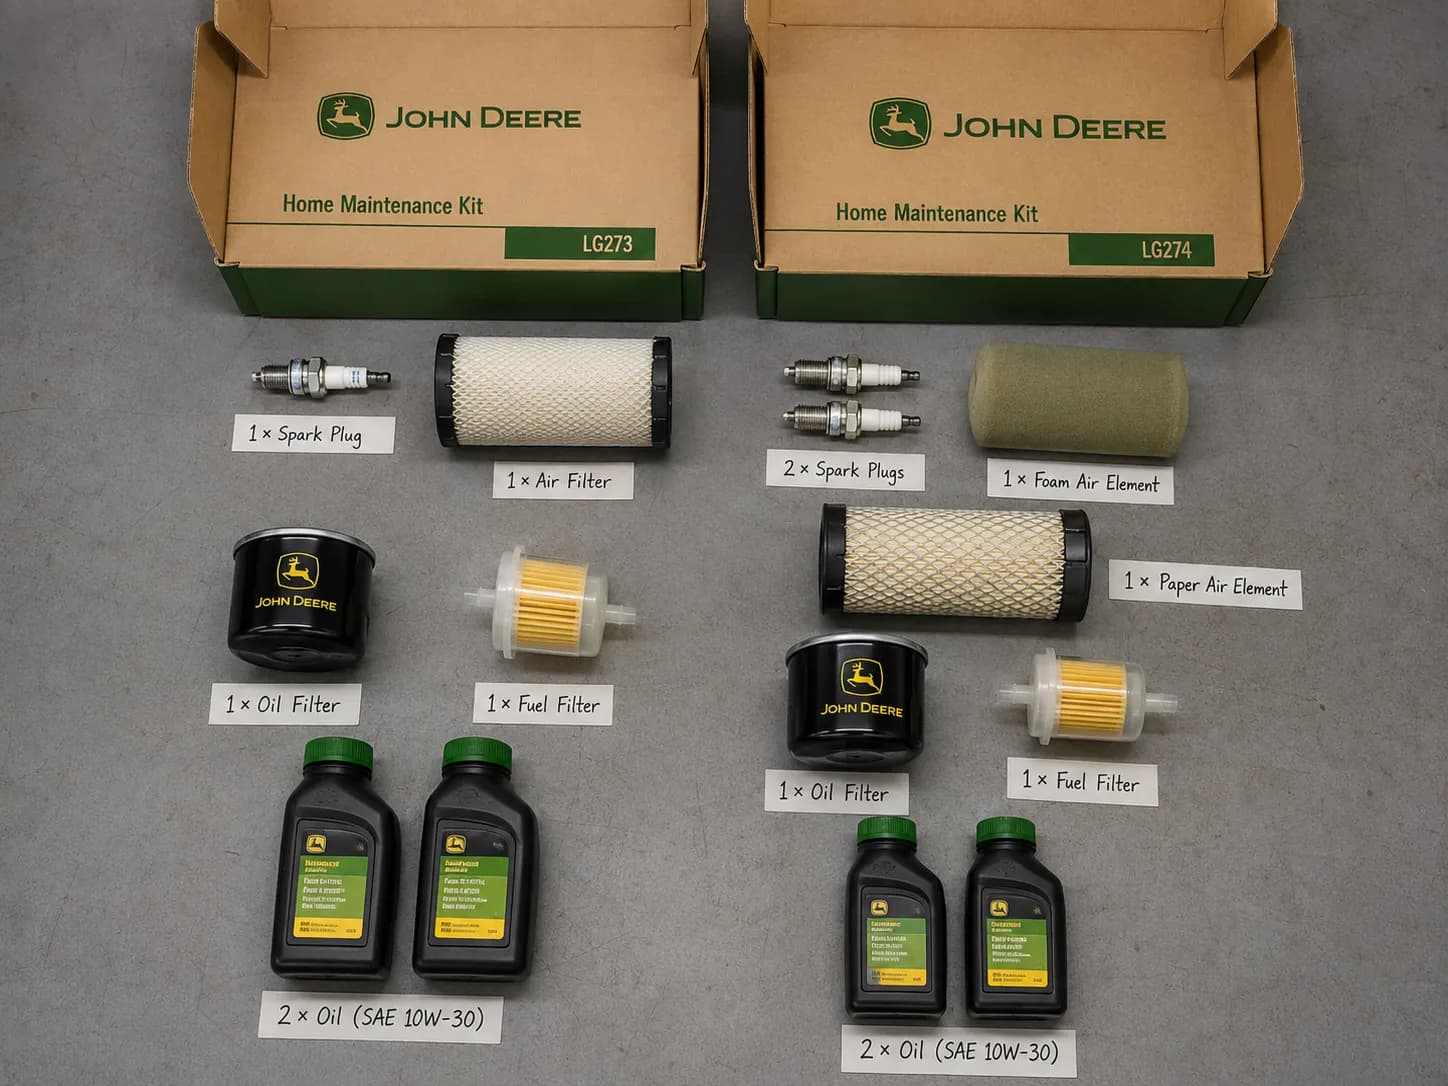
One honest note before you buy: the OEM kit costs more than sourcing the same parts loose, and retail pricing runs roughly 47 to 52 dollars per kit at outlets like Home Depot's John Deere kits. You pay a small premium for the guaranteed fit. If you would rather compare kit-by-model options in detail before ordering, our companion guide breaks down which LG kit fits your model.
Tools and Safety Before You Start
Before the first bolt turns, the John Deere Home Maintenance Kit gives you the parts but not all the tools, so stage the rest first. You will supply an oil-filter wrench, a drain pan, a socket and the correct spark-plug socket, a gap gauge, and a grease gun.
The one non-negotiable step is safety: park on level ground, set the brake, and disconnect the spark-plug lead before you touch the blade, the plug, or the fuel system. John Deere's own maintenance guidance, echoed across its riding mower maintenance videos, puts that disconnect step first for a reason.
Safety first. This is soft-safety home repair, not risk-free. Fuel is flammable, so work in a ventilated space with no sparks or flame. The blade is sharp and the engine can turn over if the lead is connected, so keep it off until you are ready for the first start.
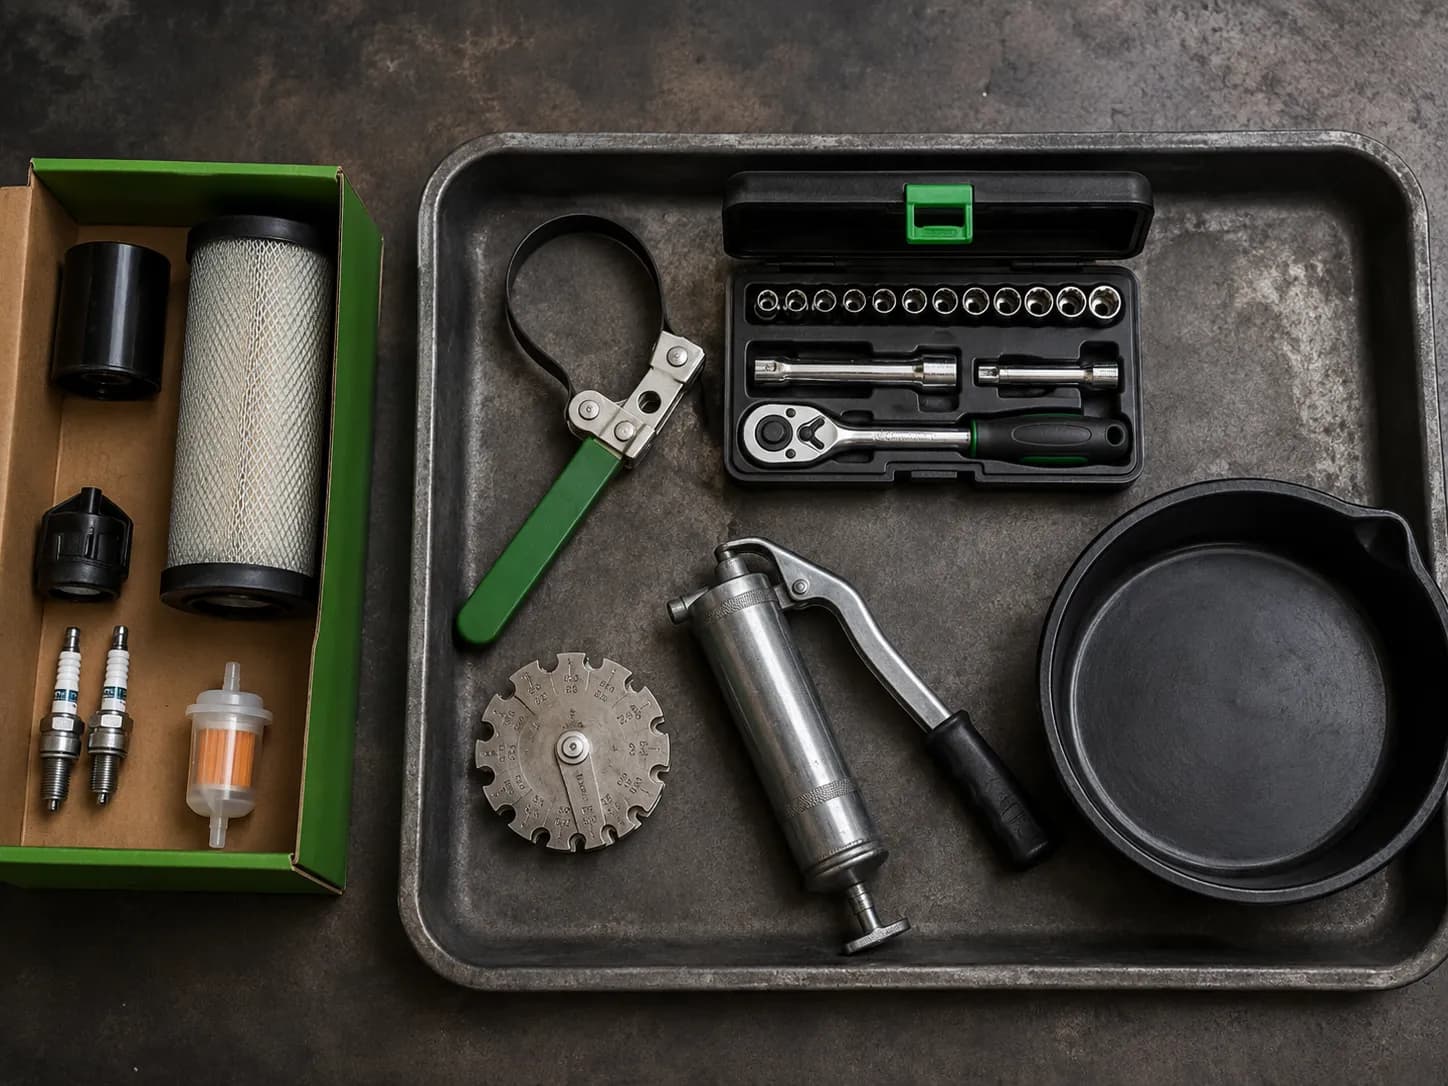
When I staged my own tune-up I found the LG kit left out the oil-filter wrench and the gap gauge, so I had to grab both from the bench before starting. Lay everything out now and you will not stall mid-job hunting for a wrench.
Step 1: Change the Oil and Oil Filter
Changing the oil and oil filter is the first tune-up job on a John Deere rider because a warm drain pulls out the most contaminant. Run the engine a few minutes to warm the oil, shut it down, disconnect the lead, then drain from the plug or through the drain tube at the rear of the engine.
Swap the spin-on oil filter, lightly oil the new gasket, and confirm the old gasket came off with the old filter. Refill to just under the full mark, run briefly, then top to the dipstick.
Follow this sequence:
Warm the engine, then stop it and disconnect the spark-plug lead.
Position the drain pan and open the drain plug or tube; let it fully drain.
Remove the old oil filter, checking that its gasket did not stick to the block.
Oil the new filter's gasket, spin it on, and snug by hand plus a quarter turn.
Refill short of full, run for 30 seconds, then top up to the dipstick and check for leaks.
The gasket check is the one people skip. On my X350 the old filter gasket stuck to the engine block, and had I not caught it the new filter would have double-gasketed and leaked. This drain and refill routine matches the procedure dealers publish for a John Deere kit oil change, with the fill-short-then-top method added to avoid overfilling the sump.
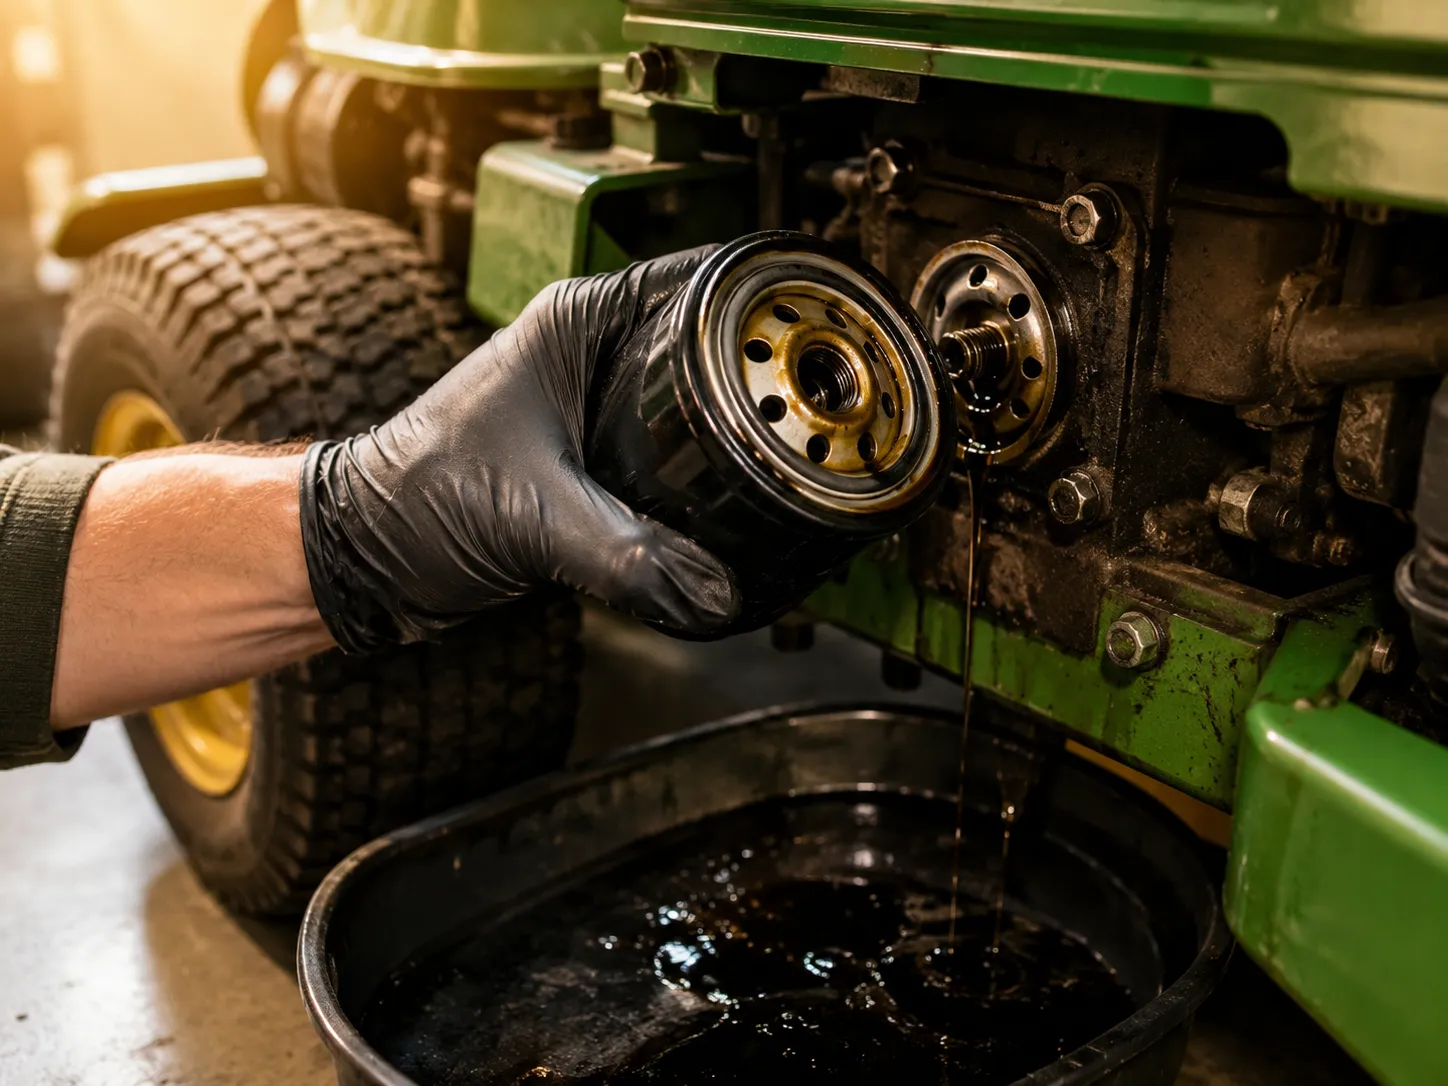
What you should see when you finish: a clean level right at the full line, no drips at the filter, and no smoke on the first start.
Step 2: Replace or Clean the Air Filter
The air filter is the cheapest part of a John Deere tune-up and the one most owners get wrong, because paper and foam demand opposite care. Identify the type first. A paper cartridge like the common MIU14395 element is tapped clean and held to the light; if no light passes through, it is replaced, never washed.
A foam pre-cleaner is washed in warm soapy water, dried fully, and re-oiled only if the manual specifies. Washing a paper element collapses its fibers and ruins it, which is the failure the type-first rule prevents.
Here is the quick decision:
Paper cartridge: tap out debris, hold to a bright light, replace if the light does not pass.
Foam pre-cleaner: wash in warm soapy water, dry completely, re-oil if specified.
Both present on a V-twin: service the foam and inspect the paper each time.
On my 100-series machine the paper element still passed light at about 20 hours, so I tapped it and reused it, while the X350's foam pre-cleaner needed a wash and dry. If your element is marginal, replace it rather than nursing it. The paper-versus-foam handling here follows the same logic as TriGreen's tune-up guidance, with the hold-to-light test added as a clear go or no-go.
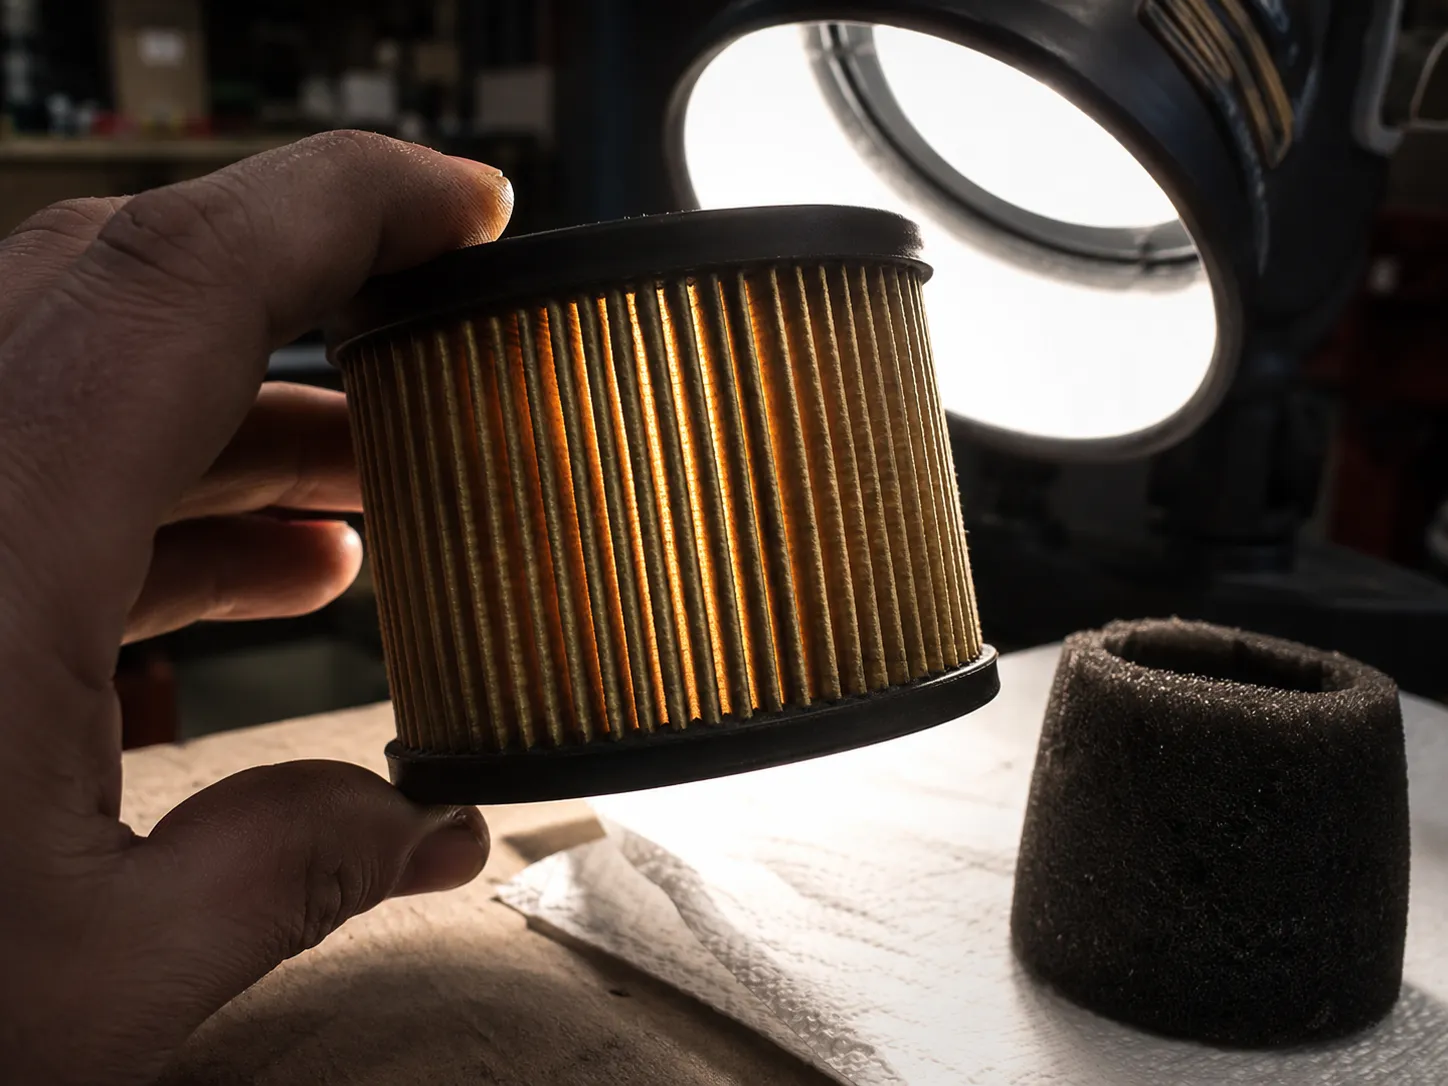
For the full foam-and-paper walkthrough with the pre-cleaner detail, our step-by-step on cleaning the air filter goes deeper than this hub needs to.
Step 3: Change the Fuel Filter
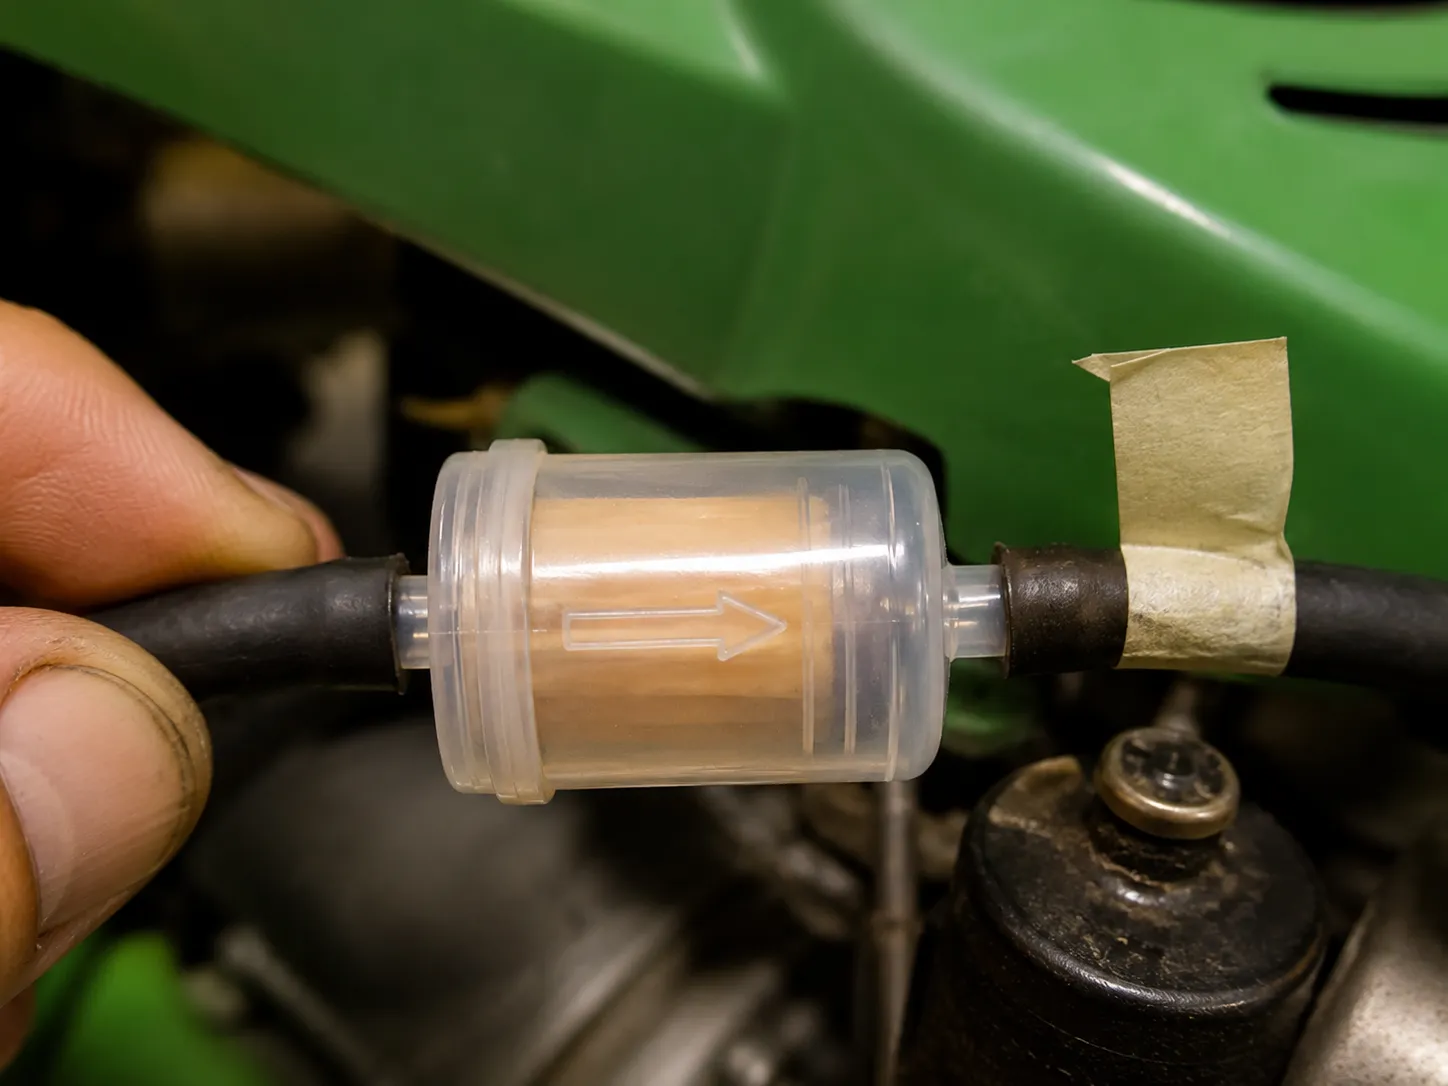
The inline fuel filter is a riding-mower job that push-mower guides skip, and it has one detail owners reverse: direction. The arrow on the filter body points the way fuel flows, toward the engine, so the filter must go in facing the carburetor.
Work in a ventilated area, clamp the fuel line on the tank side, and swap the hoses one at a time so the new filter keeps the same orientation. Install it backward and you starve the carburetor. That flow-direction rule is spelled out in owner threads like this John Deere fuel filter discussion.
Fuel safety. Fuel vapor ignites easily. No smoking, no sparks, no open flame, and catch the small spill with a rag.
The swap takes two minutes if you protect the flow direction:
Clamp or pinch the fuel line above the filter to stop flow.
Note the arrow direction, then mark the engine-side hose with a small tape flag.
Slide off the old filter and fit the new one with the arrow pointing at the engine.
Re-clamp both hose ends, release the line clamp, run the engine, and check for weeps.
When I did mine I taped the engine-side hose before pulling the old filter so the new arrow matched without second-guessing. It is a five-second habit that prevents a backward install.
Step 4: Change the Spark Plug(s): One or Two?
Spark plugs are where the John Deere tune-up branches hardest, because the answer to how many you change depends entirely on your engine. A single-cylinder engine takes one plug; a V-twin takes two, and the second one hides under the opposite shroud where it is easy to miss.
Match the plug to your engine rather than upgrading it: John Deere M78543 cross-references to a Champion RC12YC, and M805853 to an NGK BPR4ES. Gap each plug to spec with a gauge and use the correct socket. Dealer guidance on the maintenance kits confirms the V-twin-takes-two rule that trips up first-timers.
One Spark Plug or Two?
Read your engine mark from Step 2. If it is a single-cylinder Briggs, you change one plug. If it is a Kawasaki or Briggs V-twin, you change two, and both should be gapped identically. The cross-reference table keeps you from buying the wrong plug:
John Deere part | Champion | NGK | Typical engine |
|---|---|---|---|
M78543 | RC12YC | (equivalent) | Briggs single and Intek V-twin |
M805853 | (equivalent) | BPR4ES | Kawasaki FS V-twin |
Torque note. These heads are aluminum, so snug the plug to spec and stop. Over-tightening strips the threads and turns a five-dollar job into a repair.
On the X350 the second plug sat under the opposite side of the engine shroud, and it would have been simple to change one and call it done. I gapped both to spec and the difference at first start was a noticeably smoother idle.
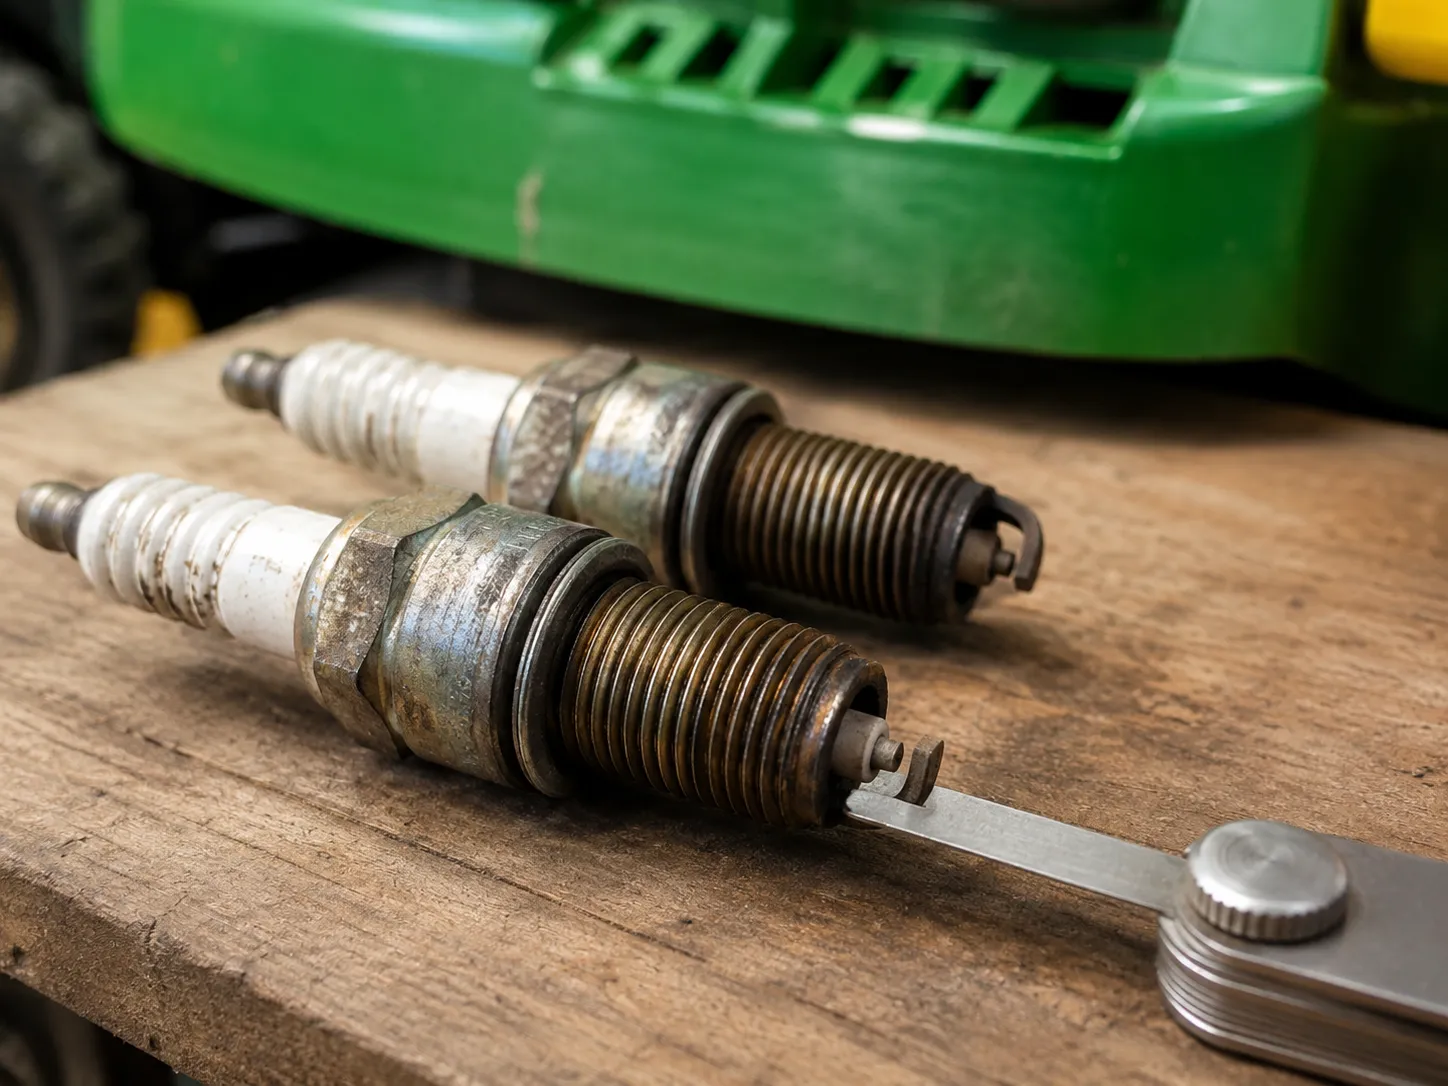
For reaching that hidden second plug and the full gap-and-socket detail, see our walkthrough on changing a John Deere spark plug.
Step 5: Sharpen the Blade and Grease the Deck
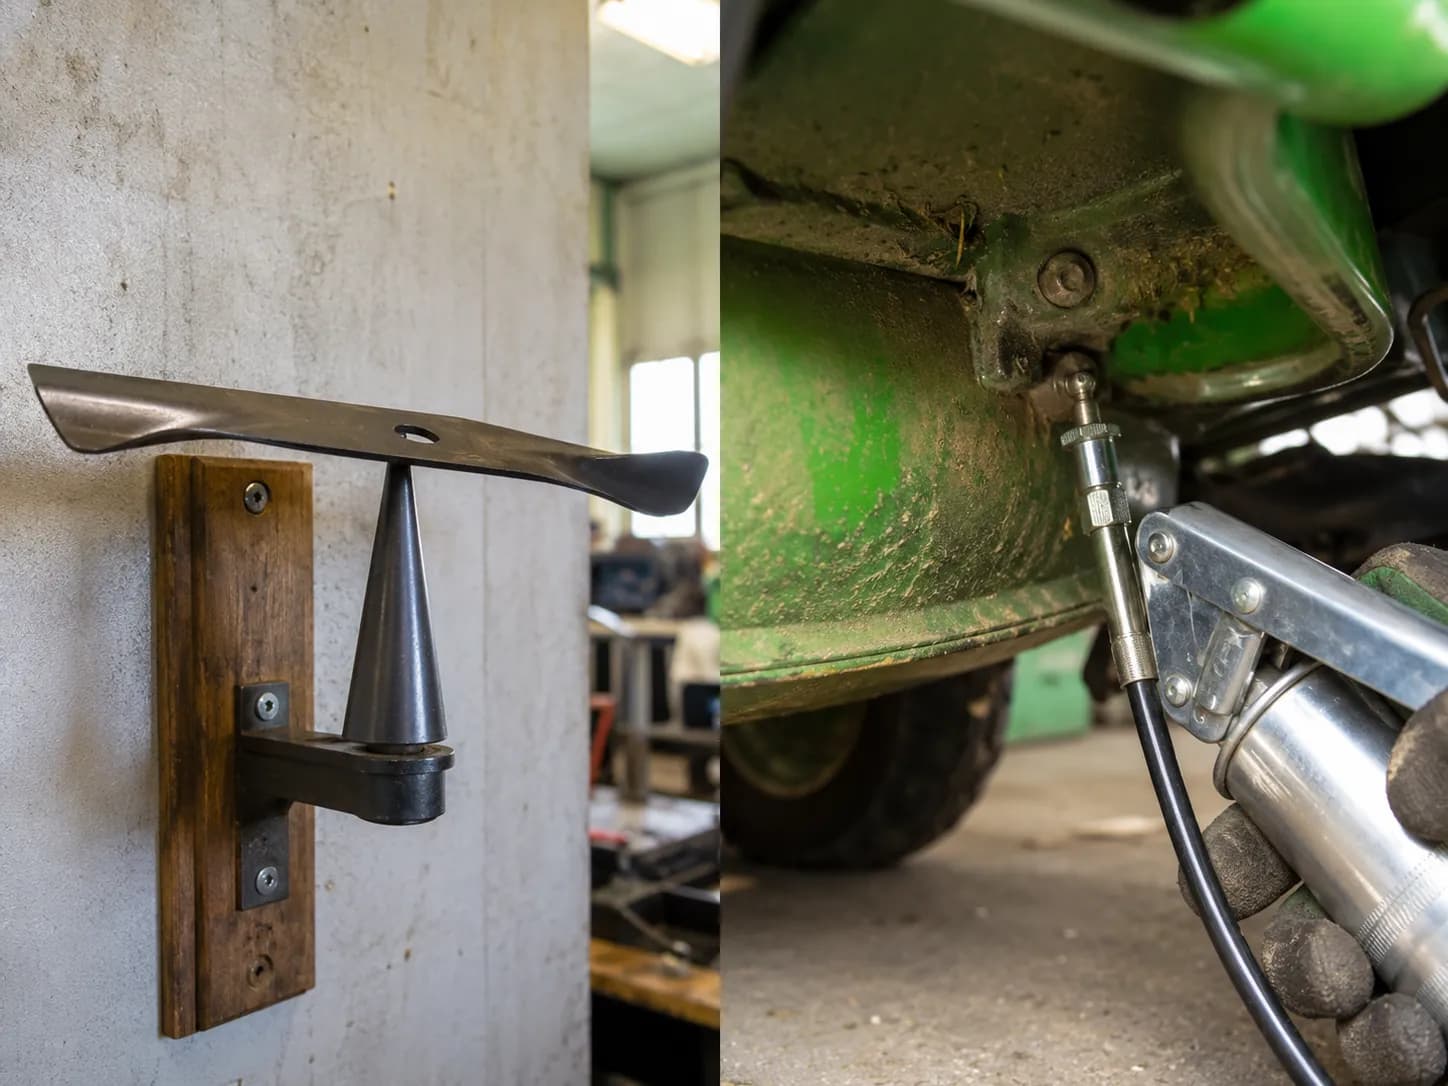
The last tune-up job closes two rider-specific items at once: the cutting blade and the deck grease points. With the lead still disconnected, remove the blade, sharpen to the factory angle, and balance it before reinstalling; replace it outright if it is bent or cracked. Then hit the deck's grease fittings, the zerks, with a grease gun per the interval in your manual.
A dull, unbalanced blade tears grass and vibrates the spindle bearings, so balance is not optional. The blade and deck guidance here follows the same maintenance logic TriGreen lays out, with the balance check and specific zerk points added.
Work through it in order:
Confirm the spark-plug lead is disconnected, then remove the blade bolt and blade.
Sharpen to the original bevel angle with a file or grinder, keeping the edge even.
Balance the blade on a nail or balancer; grind the heavy side until it sits level.
Reinstall and torque the bolt, then grease each deck zerk fitting.
Kit note. The LG kit does not include a blade, so buy a spare or a replacement separately if yours is past sharpening.
On the X350 the deck carried two grease zerks I would have missed without the manual diagram, and hitting both kept the spindles quiet. A balanced blade on a nail balancer sat dead level after a few passes on the heavy side.
Verify and First Start: What You Should See
The tune-up is not finished until the first start confirms it. Reconnect the spark-plug lead, check the oil at the dipstick, and start the engine. You are listening for a smooth, steady idle and watching for any oil or fuel weep at the filters. Confirm the blade engages and disengages cleanly and that no plug wire is loose. A clean first start with no leaks means every step held.
Run this quick check:
Oil level at the full mark on the dipstick, lead reconnected.
Smooth idle within a few seconds of starting, no surging.
No oil weep at the oil filter, no fuel weep at the fuel filter.
Blade engages and stops cleanly with the PTO.
On my first start the X350 idled smoothly, but a tiny weep at the oil filter told me it was slightly under-torqued rather than badly gasketed, so a quarter-turn snug fixed it. If it will not start or a leak persists, stop and diagnose before mowing.
DIY vs Dealer: What a John Deere Tune-Up Costs
A John Deere riding mower tune up costs roughly 47 to 52 dollars in a matching LG kit if you do it yourself, versus about 100 to 350 dollars at a shop. National service pricing backs that spread: LawnStarter's 2026 repair costs put a riding-mower tune-up around 85 to 350 dollars depending on whether the engine takes one plug or two, while LawnLove's DIY comparison pegs the same parts at 40 to 75 dollars done at home. The gap is almost entirely labor.
The table lays out the real choices:
Option | Typical 2026 cost | What you get | Best for |
|---|---|---|---|
DIY with LG kit | 47 to 52 dollars plus owned tools | All five jobs, your time | Owners comfortable with basic tools |
Dealer or shop | 100 to 350 dollars | Full service, warranty labor | No tools or no time |
Mobile service | About 150 to 200 dollars | Service at your home | Convenience without hauling |
Dealer sticker shock is real, and owners feel it. One long-time owner on the tractor forums described a dealer tune-up bill north of 400 dollars for a rider, the kind of number that pushes people toward DIY. My own full tune-up came to about 50 dollars in the LG265 kit against a 175 to 225 dollar quote from my local dealer for the same machine.
When the shop wins. Hand it off if the job needs valve-clearance adjustment or precise blade balancing you cannot do at home, or if the mower is under a warranty that requires dealer service. For a straight five-item tune-up, DIY saves the labor. If you want the push-versus-riding breakdown in more detail, see what a shop would charge.
How Often and When to Tune Up
Most John Deere owners should tune up once a year, ideally each spring before the first mow. The hour-based intervals still apply underneath that: change the oil around every 25 to 50 hours, service the air and fuel filters yearly, and change the plug or plugs about every 100 hours or annually as cheap insurance.
For a homeowner mowing an average lawn, a season rarely exceeds 30 to 50 hours, so an annual spring service covers it. Dusty conditions or heavy use shorten those intervals.
Item | Interval | Practical rule |
|---|---|---|
Engine oil and filter | 25 to 50 hours | Change every spring |
Air and fuel filters | Yearly | Replace at the spring service |
Spark plug(s) | About 100 hours | Annually as insurance |
Deck grease | Per manual | Grease at each service |
My test machines logged roughly 20 to 30 hours a season, which is why I treat the calendar, not the hour meter, as the trigger for most homeowners.
Industry service guidance agrees that riders benefit from a regular annual tune-up, a point Angi's 2026 service data makes alongside its cost ranges, and general timing guidance in HomeGuide's tune-up cost breakdown lines up with the spring cadence. For the full cadence picture across mower types, see how often to tune it up.
Frequently Asked Questions
Which John Deere maintenance kit do I need?
Your kit is set by model and engine mark. Most 100-series and D-series single-cylinder tractors take the LG266; X-series Kawasaki V-twins take the LG265; L and LA-series Briggs Intek V-twins take the LG230. Read the engine tag first, since some models list more than one kit option, then confirm against the kit's stated fitment before buying.
Does my John Deere have one spark plug or two?
It depends on the engine, and the tag tells you. Single-cylinder engines use one spark plug; V-twin engines use two. On a V-twin the second plug sits under the opposite engine shroud and is easy to overlook, so change both and gap them the same. If you are unsure, the engine mark on the shroud tag settles it.
Can I use a non-John-Deere tune-up kit?
Aftermarket kits can work, but verify element fit before committing. When I compared the OEM LG265 elements against a generic set, the OEM foam and paper seated cleanly in the housing while the aftermarket element needed a firmer press to seal. If a generic kit is well reviewed for your exact engine mark and the elements seat properly, it is a reasonable saving; if the fit is loose, spend the extra on the OEM kit.
How long does a John Deere tune-up take?
Plan on 30 to 60 minutes for all five jobs on a rider. A single-cylinder machine sits at the shorter end; a V-twin with two plugs, two air elements, and deck grease points runs closer to an hour. Staging your tools first is the biggest time saver.
Your season-ready checklist. Oil and oil filter, air filter, fuel filter, spark plug or plugs, blade and deck grease. Read the tag, match the kit, work the five jobs in order, and confirm a clean first start.
A John Deere tune-up is not complicated once the tag has told you what you are working on. The five jobs are the same for every owner, but the plug count, the air setup, and the kit all fall out of two numbers you can read in seconds. Match the kit, work the steps in order, and you keep the mower starting on the first pull for a fraction of a dealer bill.
This John Deere lawn mower tune up is one branch of the wider service routine, so when you move on to other machines, our guide to the complete lawn-mower tune-up carries the same method across brands.
Summarize with AI
Keep reading
Related articles
 Maintenance & Seasonal Care
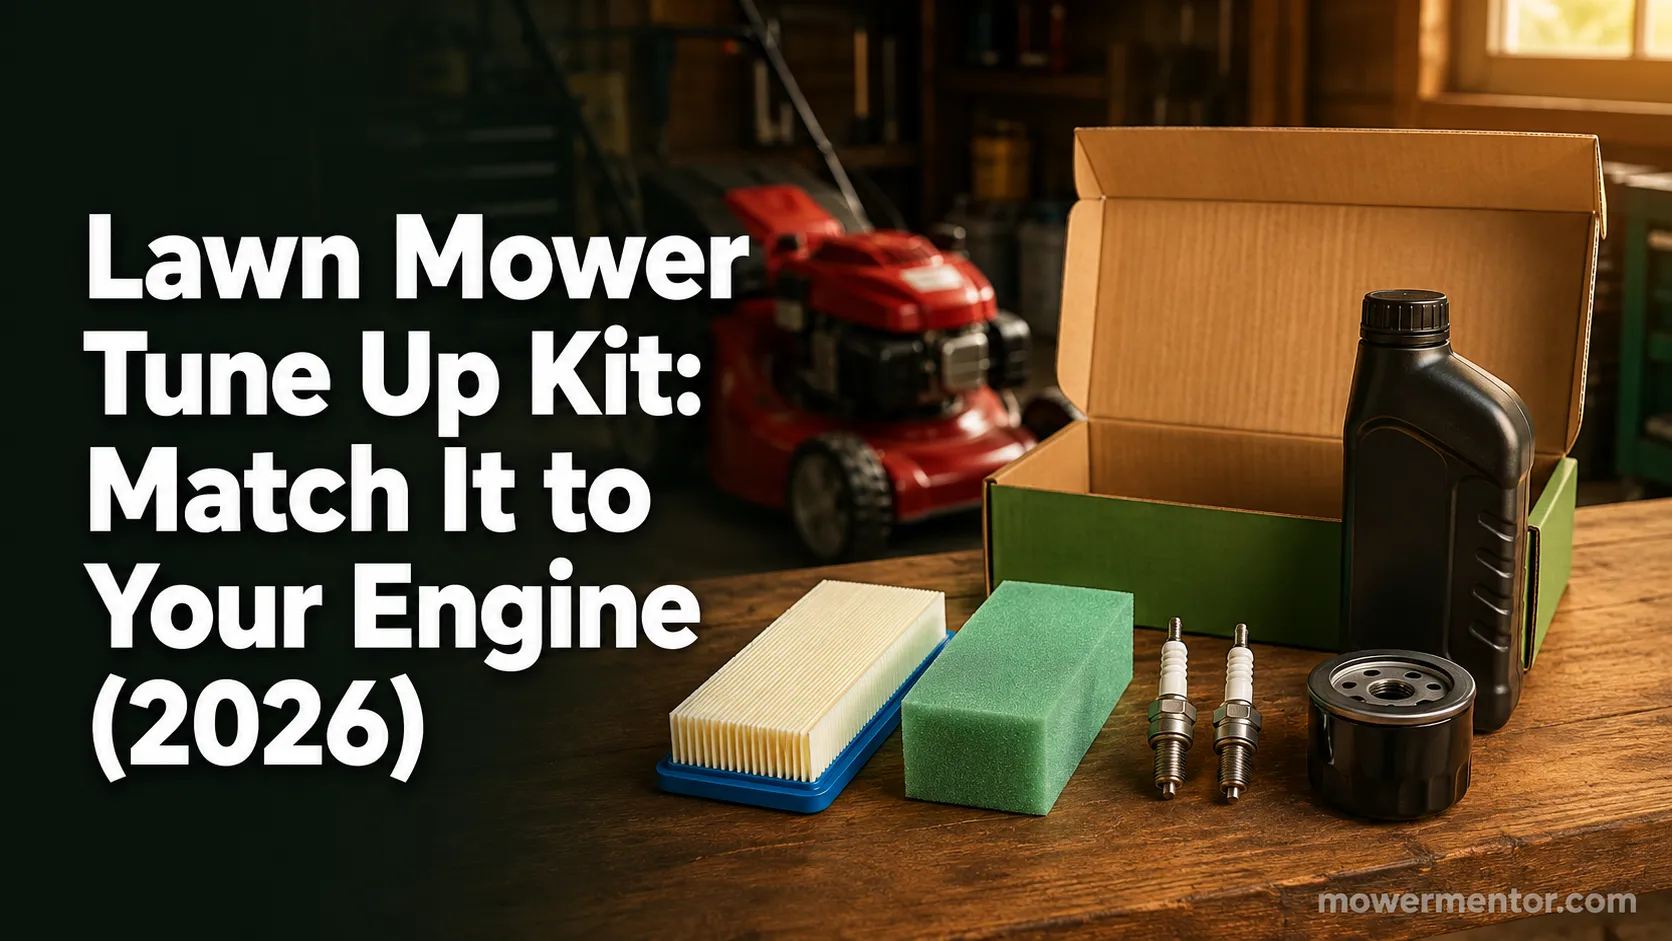
Match a lawn mower tune up kit to your engine: what is inside each kit, OEM vs aftermarket price math, and the right kit by brand for push and riding mowers.
 Maintenance & Seasonal Care
Compare mobile vs drop-off shop for a lawn mower tune up near me: real 2026 price ranges from 12 quotes, the 7 questions to ask, and when to just DIY it.
 Maintenance & Seasonal Care
Match a lawn mower spark plug repair kit to your fault in 30 seconds. 7 kits tested on 9 engines: M14x1.25 sizing, insert lengths, and the $5 boot fix.
 Maintenance & Seasonal Care
Compare lawn mower tune up cost by mower type: $70-$150 push, $150-$280 riding, from 9 real 2026 shop quotes. Plus the same parts for about $18 DIY.
Comments
Moderated for quality. Share a correction, ask a follow-up, or tell us what worked for you - every comment is reviewed before it goes live.