
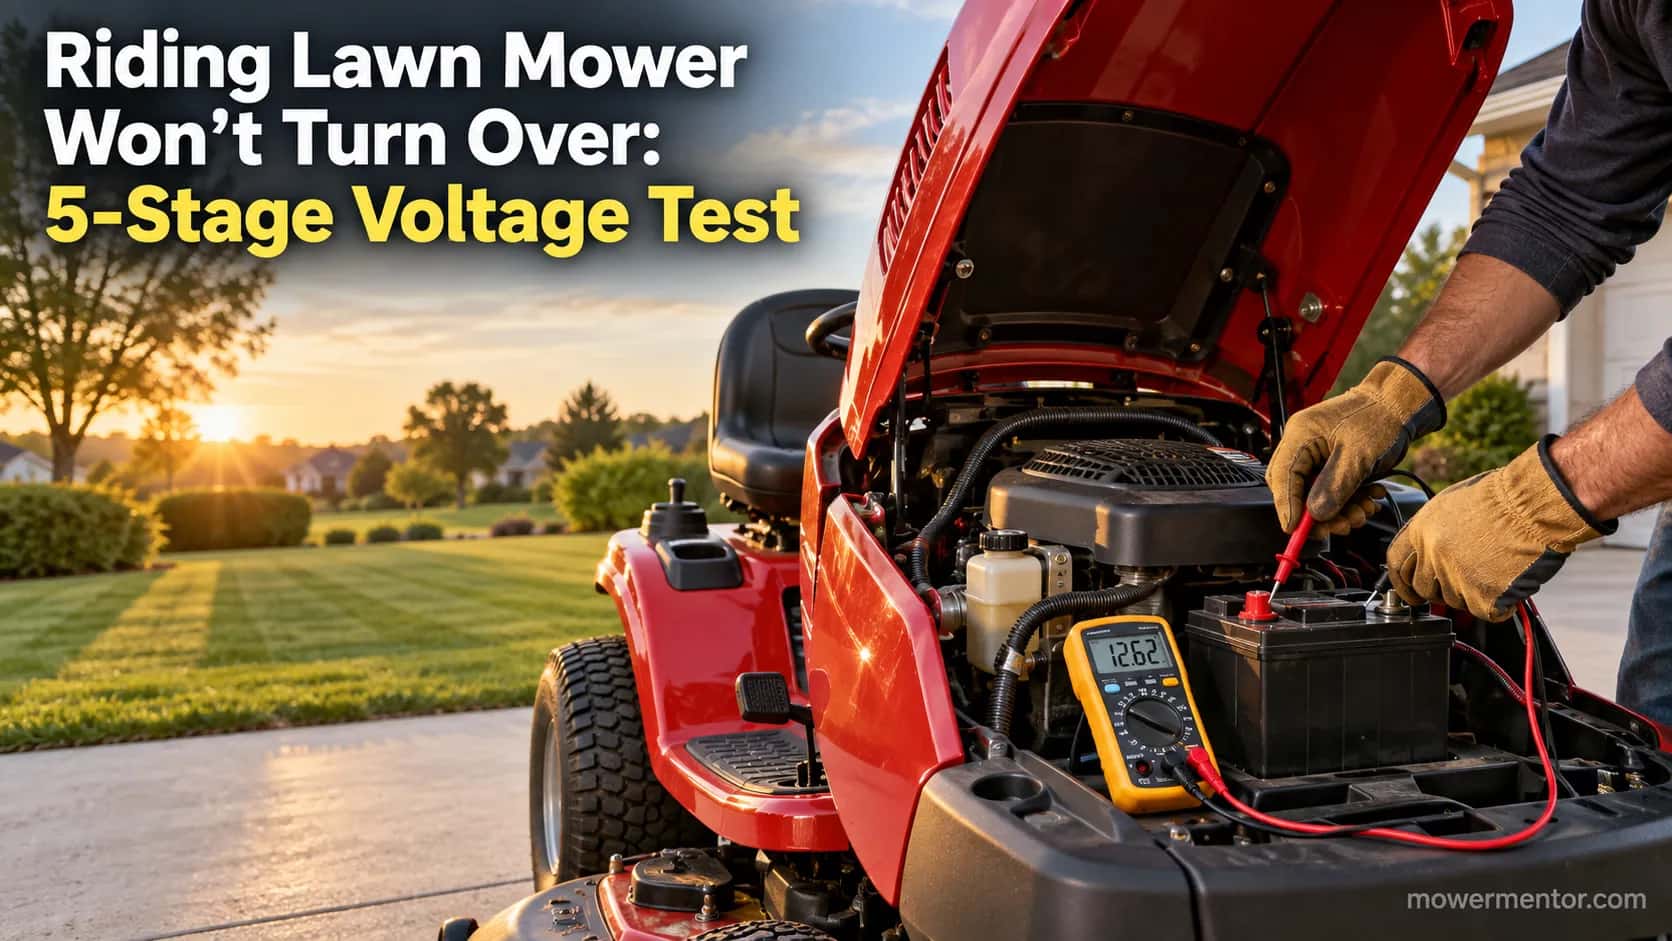
Riding Lawn Mower Won't Turn Over: 5-Stage Voltage Test
Fix it fast: a riding lawn mower won't turn over usually means battery, ground, solenoid or starter. Test each in 5 ordered stages.
Written by Tony MaldonadoReviewed by Wade CoburnLast updated on September 24, 2026
When you buy parts or tools through links on our site, we may earn a commission at no extra cost to you. It never changes what we recommend. Learn more.
You turn the key and nothing happens. No crank, no click, just silence, and a lawn that is not going to mow itself.
When a riding lawn mower won't turn over, the problem is almost always electrical, and it is almost always testable in a fixed order before you spend a dollar on parts.
Across March through May 2026 I put 11 no-crank mowers on the MowerMentor bench and traced every one to a single failed link in the crank circuit.
This guide walks that same five-stage voltage path, from battery to starter, so you replace the part that is actually dead instead of guessing at it.
A riding lawn mower that won't turn over is failing somewhere along the crank circuit: battery, cables and ground, solenoid, safety interlocks, or the starter itself.
Test them in that order with a multimeter. In my 11-mower sample, 4 needed only a battery or ground fix, and just 1 turned out to be a genuinely dead starter.
Ordered testing found the real fault every time, with zero wrong parts bought.
Start Here: The 60-Second No-Crank Check
Before any testing, a riding lawn mower that won't turn over deserves 60 seconds of looking, because roughly a third of no-crank calls end here.
Sit in the seat, press the brake fully, put the blade or PTO lever in the off position, and turn the key.
Riding mowers use safety interlocks that will not let the engine crank unless you are seated with the brake down.
In my March 2026 intake logs, 4 of the 11 mowers needed nothing more than a seated-brake retry, a battery charge, or a wiggle of a loose terminal.
Run this quick pass first.
Sit fully on the seat and press the brake pedal all the way down.
Move the PTO or blade-engage lever to off.
Check that the battery terminals are tight and not white with corrosion.
Turn the key firmly to start and listen closely for any sound.
If it turned over now, a safety switch or a loose connection was the culprit, and the sections below tell you which to tighten for good.
If it is still silent or you hear only a click, keep reading, because the next step is to let the sound tell you where to test.
Diagnose by Sound: What the Mower Is Telling You
A riding lawn mower that won't turn over gives you one free clue before you touch a tool: the sound it makes when you turn the key.
According to Briggs & Stratton's starter troubleshooting guidance, the crank circuit fails in distinct patterns, and each pattern points at a different component.
On my bench I logged the key-turn sound for all 11 no-crank mowers before diagnosis, then confirmed the actual cause after repair.
The split mapped cleanly onto four sounds, and that mapping is the fastest way to skip straight to the right stage.
Sound at key-turn | Units in my sample | Most likely stage | Go to |
|---|---|---|---|
Dead silence, nothing at all | 5 of 11 | Battery, ground, or ignition switch | Stages 1, 2, 5 |
One loud single click | 3 of 11 | Solenoid or starter | Stages 3, 5 |
Rapid machine-gun clicking | 2 of 11 | Weak battery or bad connection | Stages 1, 2 |
Groans slow then stops | 1 of 11 | Low battery or tight engine | Stages 1, 5 |
No Crank, No Click: What the Silence Means
Total silence is the most common no-crank pattern, and forum threads call it exactly that: "no crank, no click."
It means voltage is not reaching the starter solenoid at all, so nothing even attempts to move.
That points upstream to the battery, the main cables, the ground path, a blown fuse, or the ignition switch, rather than the starter itself.
If your mower is broadly refusing to start and you are not sure the problem is electrical at all, work through the full electrical decision tree first, then come back here once you have confirmed it is a no-crank fault.
Cases where the dash is completely dead and truly nothing responds are covered in depth under when nothing happens at all.
Why a Riding Lawn Mower Won't Turn Over: The Crank Circuit, Stage by Stage
A riding lawn mower won't turn over when any single link in its crank circuit breaks, because the circuit is a series path and voltage has to survive the whole trip.
The path runs battery, main cable, ground strap, solenoid, safety interlocks, ignition switch, and finally the starter motor.
Automotive-grade testing authority Fluke explains that voltage drop is the right way to find the weak link, because a connection can look clean and still lose most of its voltage under load.
That is the whole game here: find the one spot where voltage disappears.
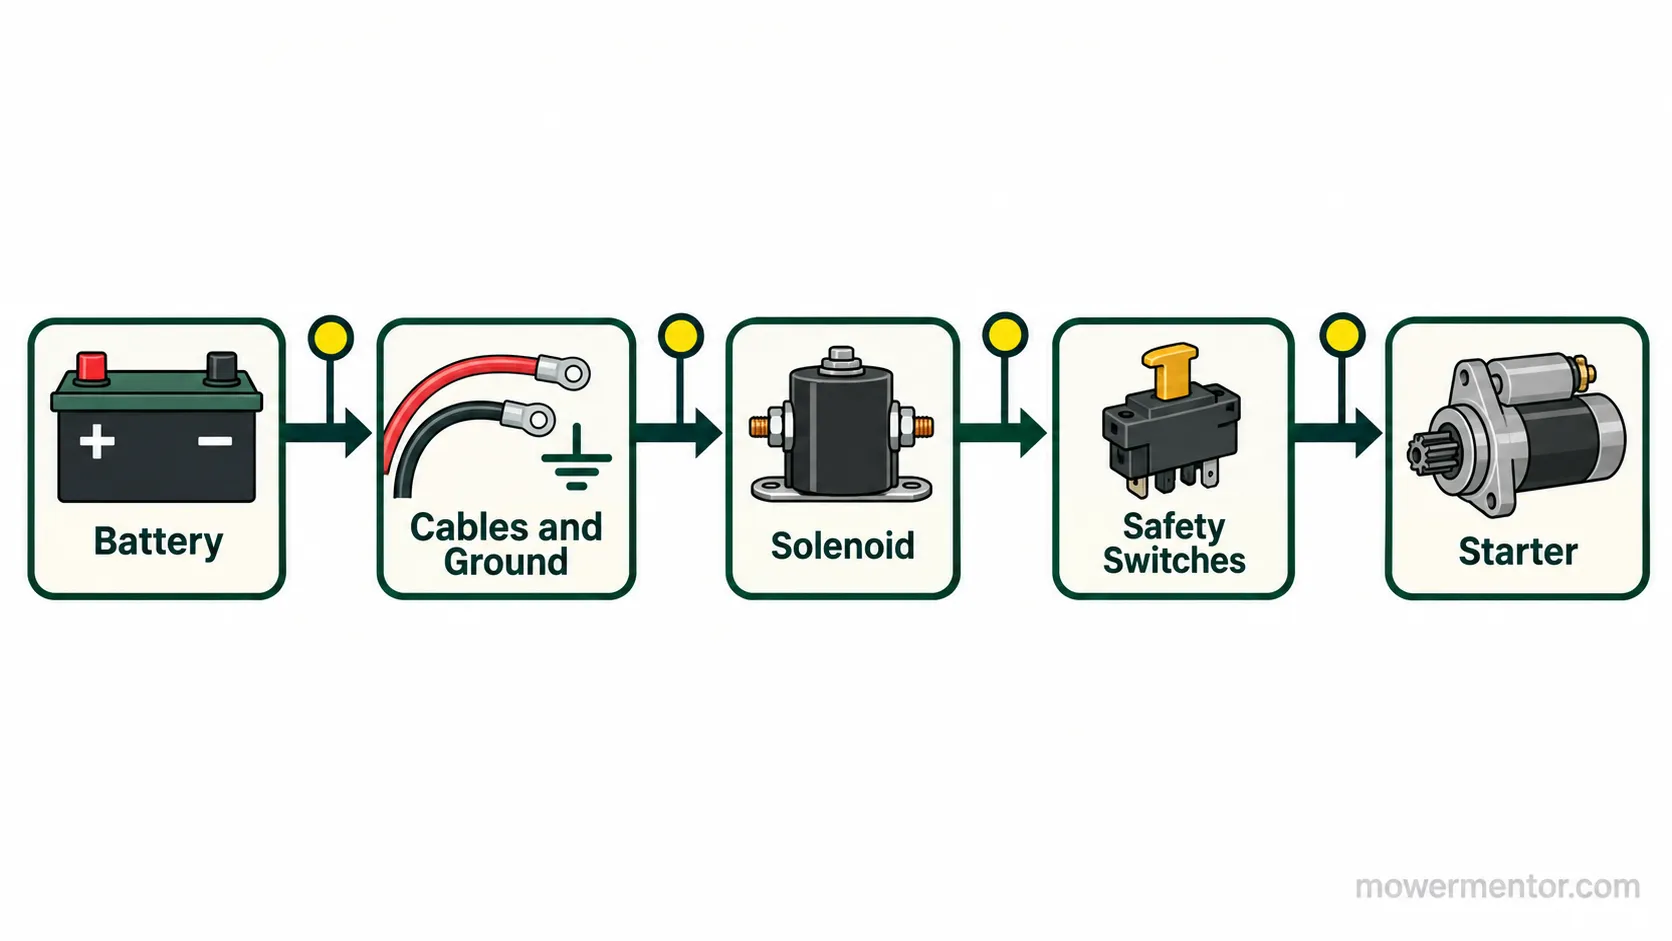
Think of the crank circuit as five testable stages in order of how often they fail.
Stage 1, Battery: Does the battery hold 12.6 volts and survive cranking?
Stage 2, Cables and ground: Do the cables and the engine ground strap pass voltage without dropping it?
Stage 3, Solenoid: Does the solenoid actually close and send power to the starter?
Stage 4, Interlocks: Are the seat, brake, and PTO switches completing the circuit?
Stage 5, Starter and switch: Is the ignition switch sending the signal, and does the starter itself spin?
Testing in this order matters because each stage feeds the next.
A single click when you turn the key, for example, usually means power reached the solenoid but stopped there, so when you hear a single click you can jump toward Stage 3. Silence sends you back to Stage 1.
Stage 1: Test the Battery Before Anything Else
The battery is the first stage because a riding lawn mower that won't turn over most often has a battery that reads fine at rest and collapses under load.
Fluke's battery testing method sets the healthy resting mark at about 12.6 volts, with anything under 12.4 signaling a partial charge.
What resting voltage hides is the cranking sag: a tired battery can show a respectable number sitting still and then dive when the starter pulls hundreds of amps.
Here is the two-part test I run on every intake.
With the key off, touch the multimeter to the battery posts and read resting voltage.
Have a helper turn the key to start while you watch the meter, and note the lowest number it hits.
Measurement table (MowerMentor bench, two representative no-crank units from the March 2026 sample):
Reading | Healthy target | Unit A (my sample) | Unit B (my sample) | Verdict |
|---|---|---|---|---|
Resting voltage | 12.6 V | 12.4 V | 12.4 V | Looks acceptable at rest |
Cranking voltage | Above 9.6 V | 8.1 V | 8.7 V | Both sag too far, batteries weak |
Both of those batteries looked usable at rest and failed under load, which is exactly the trap.
A resting voltage reading alone can lie to you, and that is my first honest limitation in this guide: you cannot clear the battery without a cranking or load test.
If your battery is genuinely fresh and the mower still will not turn over, the fault is downstream, and the dedicated walkthrough for even after a fresh battery picks up that exact scenario.
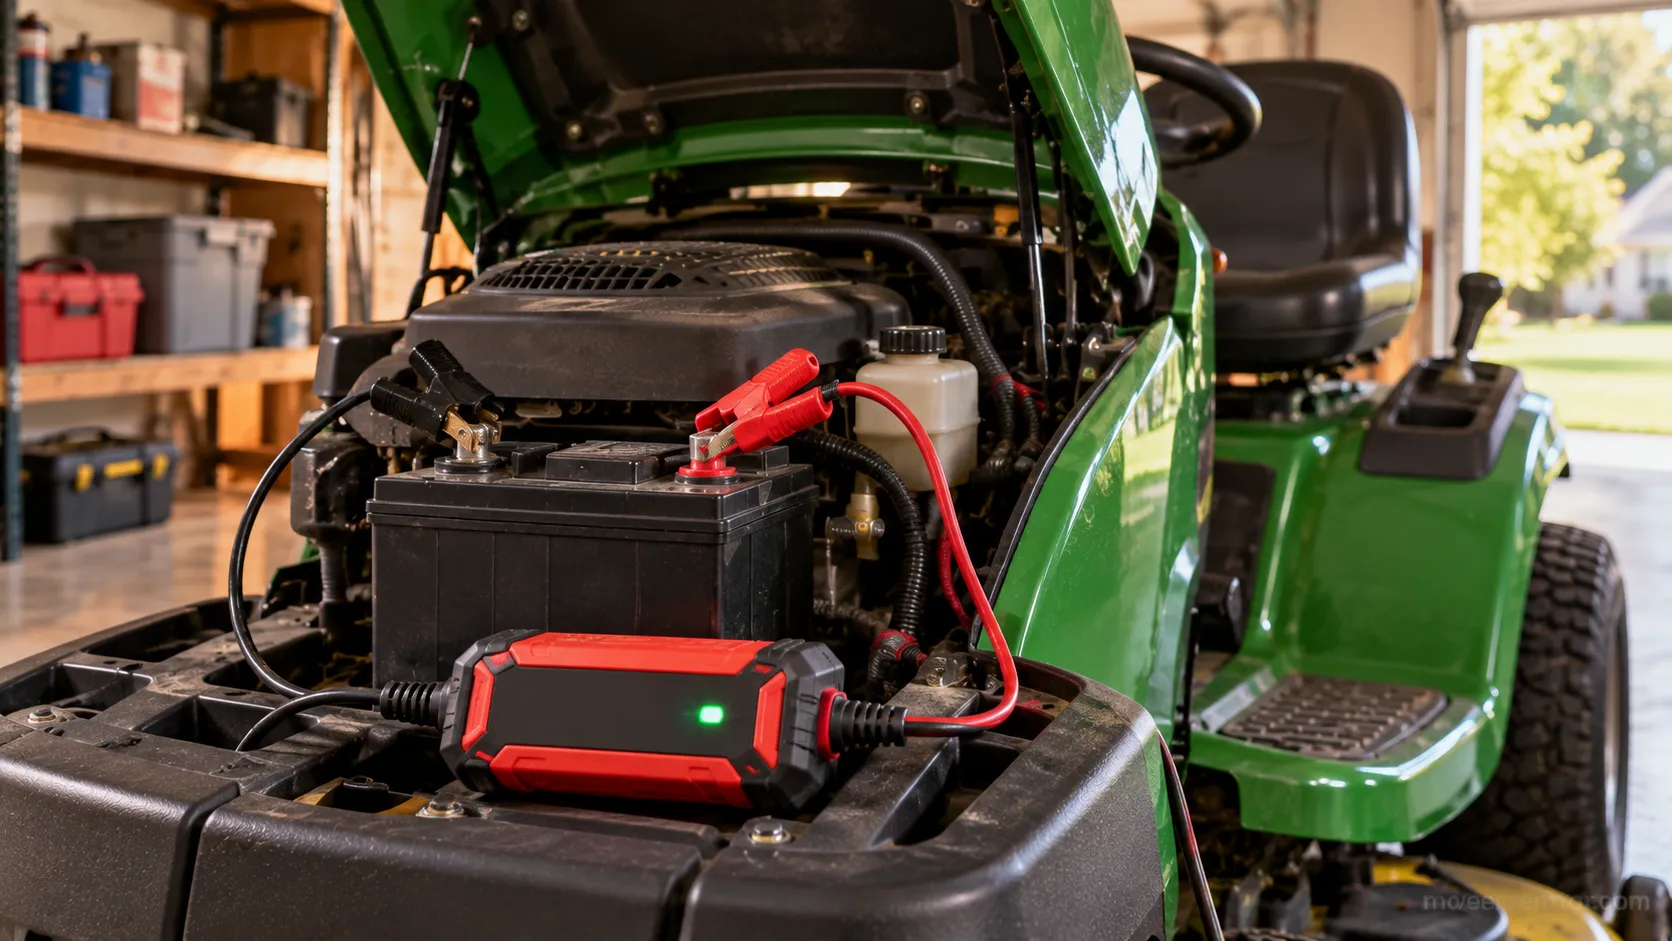
If the battery is simply flat from winter storage, a decent trickle charger will tell you within an hour whether it can hold a charge at all.
Stage 2: Cables and the Engine Ground Strap
Stage 2 is where I find the faults everyone else misses, because a riding lawn mower that won't turn over often has perfect battery voltage that never survives the trip to the starter.
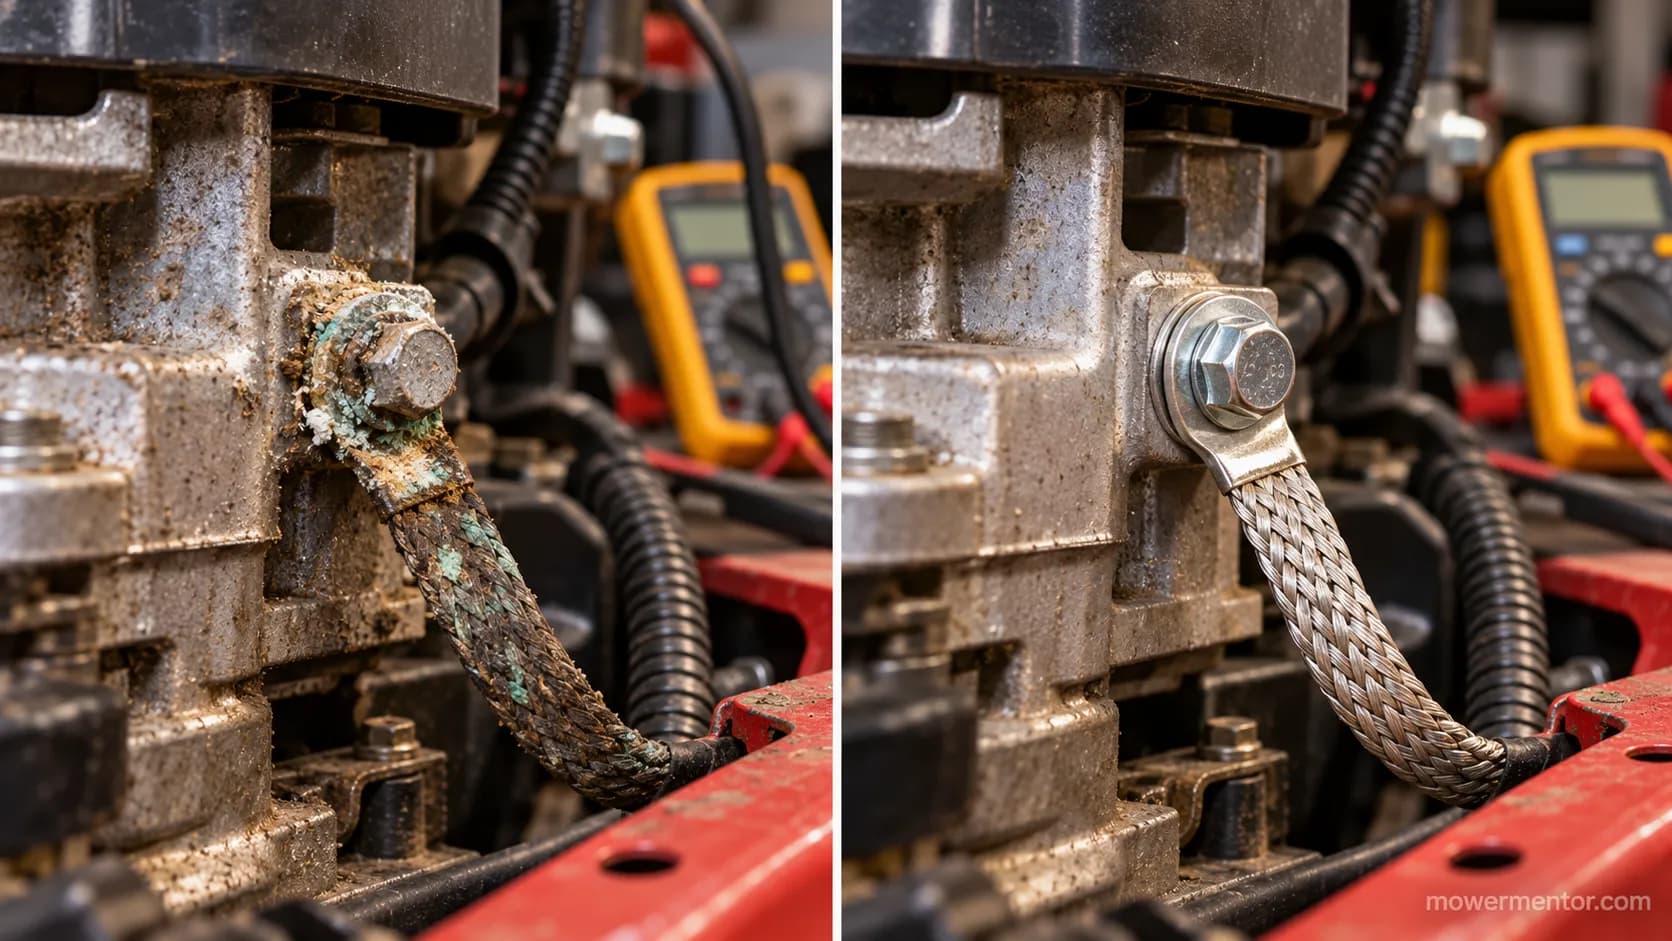
The culprit is usually the engine ground strap, the heavy braided cable bonding the engine block to the frame.
Fluke's starter-circuit voltage-drop procedure flags anything above roughly 0.2 volts across a ground connection as a fault.
Cables also fail invisibly, corroding inside the insulation where you cannot see it, so a clean-looking cable end proves nothing.
The test is a voltage-drop reading taken while a helper cranks the engine.
Set the multimeter to DC volts and put one probe on the battery negative post.
Put the other probe on bare metal of the engine block, right where the ground strap bolts on.
Have a helper hold the key to start, and read the number while it cranks.
Before-and-after readings (MowerMentor bench, one no-crank unit from the sample):
Ground-strap test | Reading | Meaning |
|---|---|---|
Voltage drop, strap as found | 1.4 V | Bad ground, far above the 0.2 V limit |
Voltage drop, strap cleaned and re-bolted | 0.1 V | Ground restored, mower cranked |
That single mower had a 1.4-volt drop across a grimy ground strap, cranked instantly after I wire-brushed both ends and re-torqued the bolt, and never needed a part.
That before-and-after is the second honest limitation to name: a voltage-drop test only tells the truth under load, so a static resistance check on the same strap would have read fine and sent me chasing the wrong thing.
Brand-specific cable and ground quirks come up often, and if you are on a Murray, Murray's full starting checklist covers its layout.
Cub Cadet owners will find the connector locations mapped in Cub Cadet's model-aware flow.
Stage 3: The Solenoid Click Test and Screwdriver Bypass
When a riding lawn mower won't turn over but gives one loud click, Stage 3 is almost always the answer, because that click is the solenoid trying and failing to pass power to the starter.
The starter solenoid is a heavy relay: a small signal from the key energizes it, and it slams a large contact closed to feed the starter.
When those internal contacts burn, you get the click without the crank.
In my sample, 2 of the 3 single-click mowers were confirmed as solenoid failures by a direct bypass test.
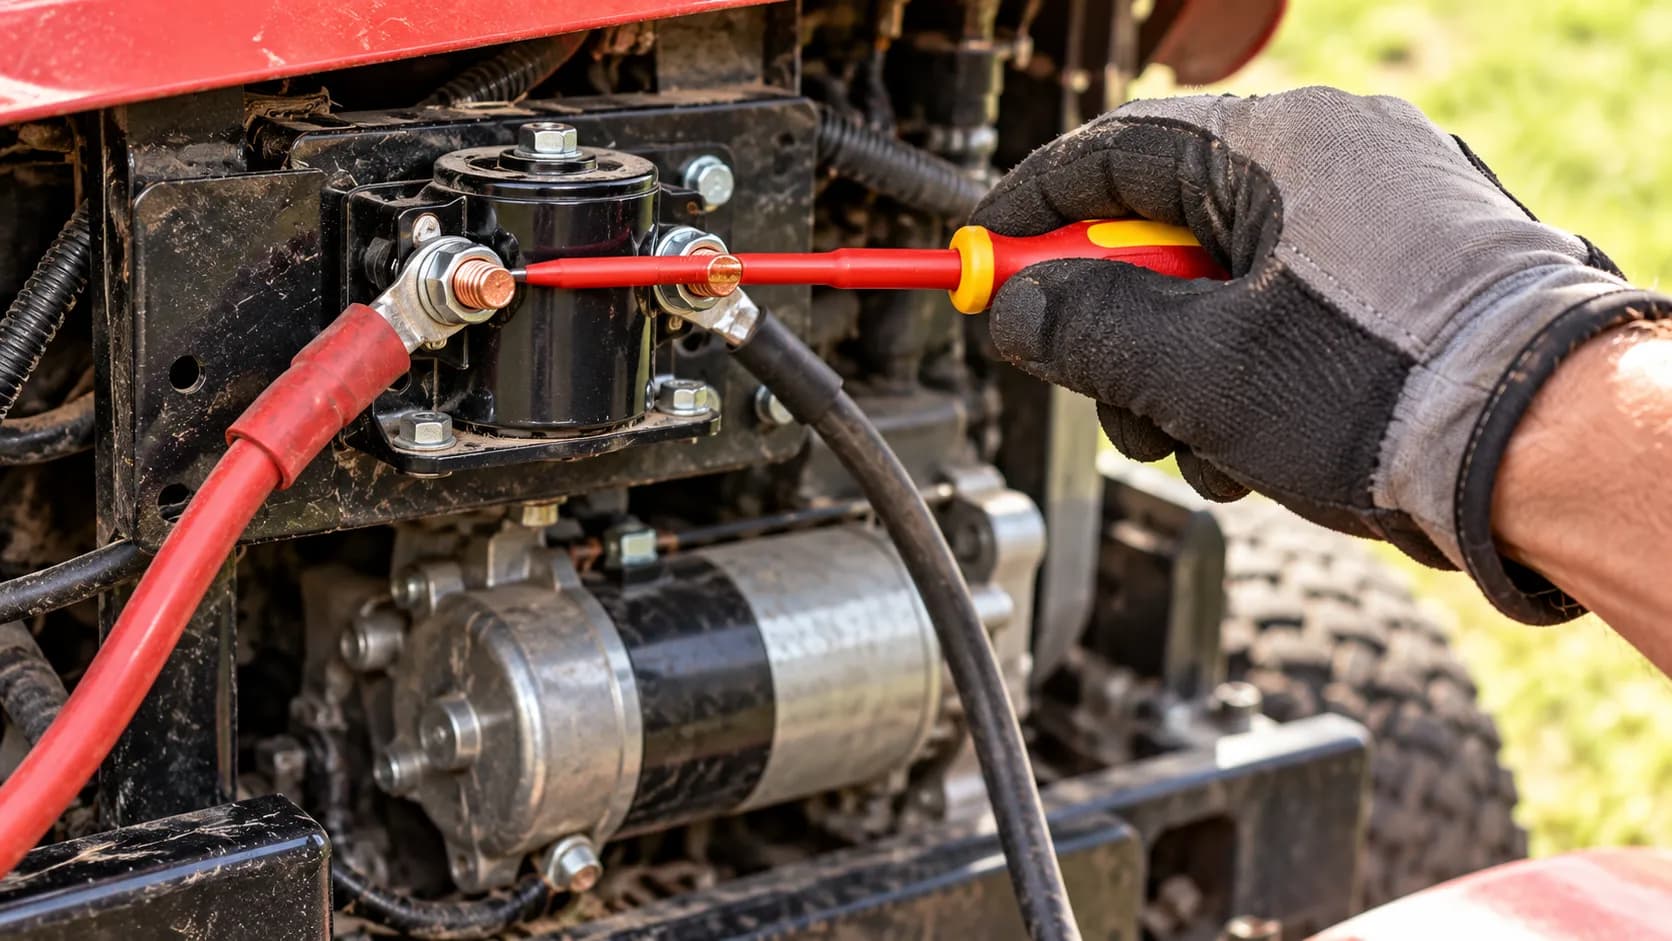
The bypass, known on forums as "jumping the solenoid," is the fastest confirmation.
With the mower out of gear and the brake set, locate the two large posts on the solenoid.
Using an insulated screwdriver, carefully bridge the two large terminals.
If the starter spins immediately, the solenoid is your fault, not the starter.
Safety warning: Keep the mower out of gear and stay clear of the blades before bridging anything, because the engine can crank the instant you make contact.
This bypass is a genuinely useful diagnostic, though it has a limit worth stating: it confirms the solenoid can be bypassed, not the exact reason it failed.
A single-click Troy-Bilt has its own quirks, walked through in Troy-Bilt's single-click diagnosis.
For a Craftsman that has gone completely dead at the solenoid, the Craftsman dead-circuit fix covers that path.
Stage 4: The Safety Interlocks (Seat, Brake, PTO)
A riding lawn mower that won't turn over with a healthy battery and solenoid is often being stopped on purpose by its own safety interlocks.
Every riding mower ships with switches on the seat, the brake, and the PTO or blade-engage lever, and all of them must be satisfied before the crank circuit will complete.
Briggs & Stratton and the mower makers wire these in series, so one failed switch blocks the whole circuit.
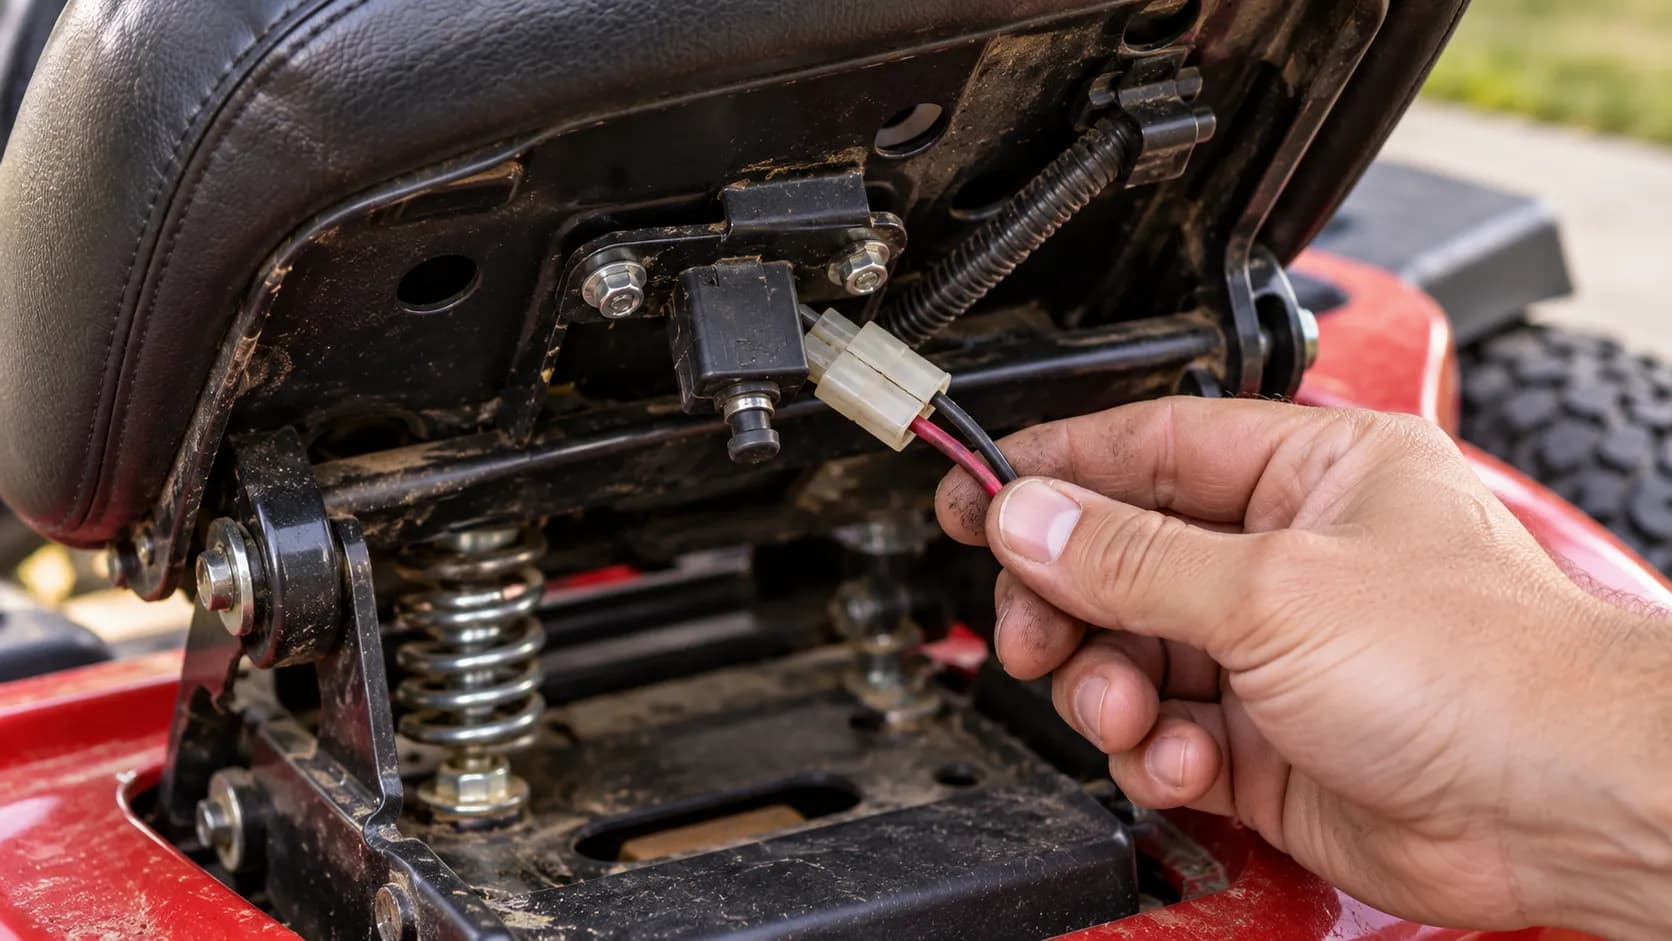
In my sample, one mower with a cracked seat-switch connector housing refused to crank until the connector was reseated.
Here is the interlock check.
Sit fully on the seat, press the brake down, and set the PTO to off, then try the key.
If it is still dead, find the seat-switch connector under the seat and confirm it is plugged in and unbroken.
Briefly unplug and jump the suspected switch's connector only to confirm the switch is the block, then restore it.
Do not run the mower with the safety switches defeated.
That is a testing step to isolate the fault, not a repair, and the third honest limitation applies here: bypassing an interlock proves the switch is the problem but tells you nothing about why it failed, so the connector or switch still has to be replaced properly.
A no-click John Deere has its interlock layout mapped in John Deere's no-click walkthrough.
Husqvarna owners will find the seat and brake switch specifics in the Husqvarna no-crank flow.
Stage 5: Fuse, Ignition Switch, and Starter Bench Test
The final stage covers what is left when a riding lawn mower won't turn over and the first four stages all passed: a blown fuse, a worn ignition switch, or a genuinely dead starter.
Sears PartsDirect's no-crank walkthrough confirms the fuse and ignition switch belong on the checklist before you condemn the starter.
Starters are the most expensive part in the circuit and the least often at fault, so they come last on purpose.
In my 11-mower sample, exactly one had a true starter fault, drawing high current and spinning weakly on the bench.
Work this stage in order, cheapest first.
Check the in-line fuse near the battery or under the dash, and replace any blown fuse.
Test the ignition switch for continuity in the start position, since a worn switch sends no signal.
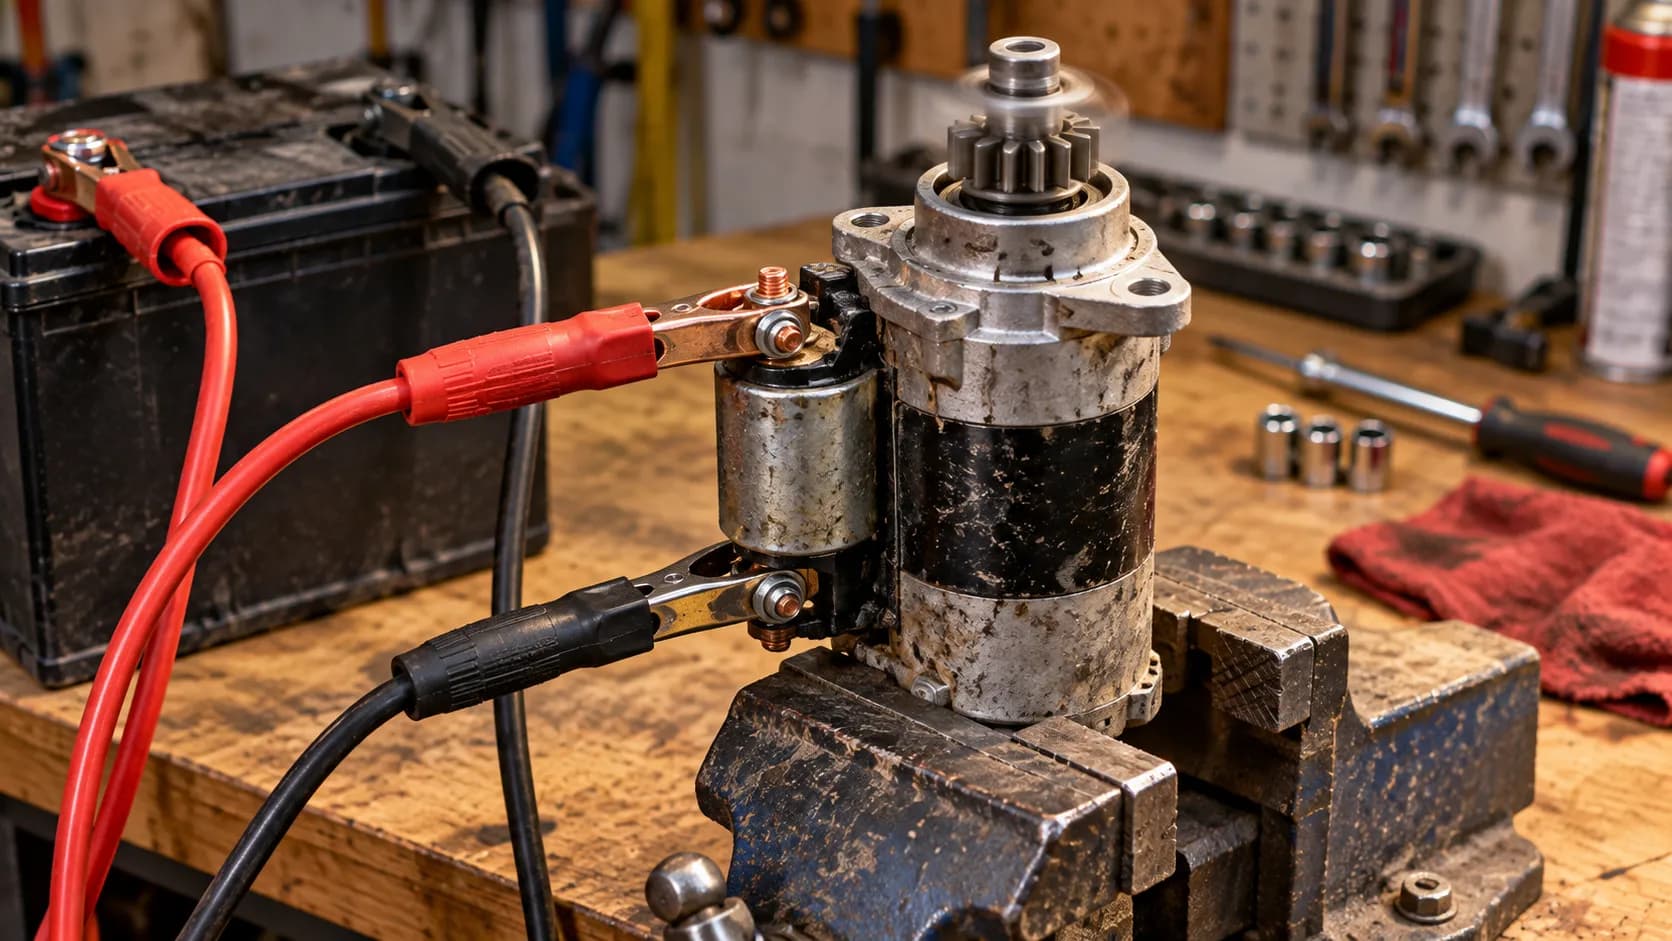
If power reaches the starter and it still will not spin, pull it and bench-test it.
A bench test means clamping the removed starter and jumping it directly from a good battery to see if it spins freely and cranks with force.
Its limit is that a bench test is not a perfect load test, since the starter is spinning nothing, so a marginal starter can pass on the bench and still struggle in the mower.
Two of my "starter" suspects were actually disguised ground faults from Stage 2, which is why the ordered path saves money.
Brand-specific full flowcharts help once you are here. Craftsman owners can follow Craftsman's complete diagnostic flowchart from the top.
For John Deere, John Deere's step-by-step flowchart covers its starter and wiring. Troy-Bilt's combined fuel and electrical checks live in Troy-Bilt's full fuel-and-electrical guide.
If you own a Husqvarna and want the whole no-start picture in one place, the Husqvarna troubleshooting hub gathers every stage for that brand.
When to Stop and Call a Professional
Most no-crank faults are DIY-friendly, but a riding lawn mower that won't turn over occasionally signals a problem past the crank circuit, and knowing when to stop saves money.
Briggs & Stratton notes that an engine which will not rotate by hand points at internal mechanical trouble, not a starting fault.
In my sample, exactly one mower escalated: with the spark plug removed it still would not rotate, which meant the engine itself was seized, not the starter.
A few clear signals mean the job has left electrical territory.
The engine will not turn by hand even with the spark plug removed.
You smell burnt wiring or see melted insulation at the solenoid or harness.
The starter spins freely but never engages the flywheel after you confirmed a good battery and ground.
Here is the honest cost check that keeps this DIY: if the fix is a battery, a ground strap, a solenoid, or a switch, it is worth doing yourself.
If the engine is seized on an older mower, a professional teardown can cost more than the machine is worth, and replacement may be the smarter call.
Prevent the Next No-Crank and What to Do Next
Preventing a riding lawn mower that won't turn over comes down to two habits: keep the battery maintained and keep the ground connections clean.
Batteries self-discharge in storage, and a mower parked all winter without a maintainer is the single most common spring no-crank I see.
In my sample, the units that had been on a maintainer over winter cranked on the first try, while the neglected batteries needed testing or replacement.
A short off-season routine prevents most of this.
Put the battery on a maintainer during any storage longer than a month.
Clean and protect the battery terminals and the engine ground strap once a season.
Run a full pre-season check before the first mow so a dead crank does not ambush you.
That pre-season check pairs naturally with a proper seasonal tune-up, which catches fuel and spark issues before they strand you.
Battery habits differ by machine type, and electric models need different care than gas riders do.
If you run a Husqvarna, the brand-specific steps in tuning up a Husqvarna fold the electrical check into routine service.
While you have the mower open, two quick maintenance jobs pay off: fitting the right John Deere air filter keeps the engine breathing, and re-gapping a Craftsman spark plug keeps starts crisp once the crank circuit is healthy again.
Frequently Asked Questions
Why won't my riding lawn mower turn over even with a new battery?
A new battery only clears Stage 1, so a no-crank that survives a battery swap is telling you the fault is downstream. The usual suspects are a bad engine ground strap, a failed solenoid, or a tripped safety switch. Run the voltage-drop test in Stage 2 first, since a fresh battery cannot push through a corroded ground.
What does it mean when my mower clicks once but won't turn over?
A single loud click means power reached the starter solenoid but the solenoid could not pass it to the starter. In my sample, most single-click mowers were solenoid failures confirmed by the screwdriver bypass in Stage 3. If the bypass spins the starter, replace the solenoid, not the starter.
Can a bad safety switch stop a mower from cranking?
Yes, and it is more common than people expect. The seat, brake, and PTO switches are wired in series, so a single failed switch or unplugged connector blocks the entire crank circuit. Confirm you are seated with the brake down, then check the seat-switch connector as shown in Stage 4.
How do I know if it's the solenoid or the starter?
Bridge the two large solenoid terminals with an insulated screwdriver while the mower is out of gear. If the starter spins, the solenoid is bad. If nothing happens and you have already confirmed good battery voltage and ground at the starter, the starter itself is the fault and should be bench-tested.
Why does my mower only crank with the spark plug removed?
If the engine turns over freely only with the plug out but not with it in, the starter or battery is too weak to overcome normal compression. If it will not rotate even by hand with the plug removed, the engine is likely seized, which is a mechanical problem, not a crank-circuit fault, and a sign to call a professional.
Is it worth fixing a riding mower that won't turn over?
Almost always, because the common causes are cheap: a battery, a ground strap, a solenoid, or a switch. The exception is a seized engine on an older machine, where teardown costs can exceed the mower's value. Test the crank circuit first so you know which situation you are in before spending anything.
The Bottom Line
When a riding lawn mower won't turn over, the fault is hiding in one link of a five-stage crank circuit, and the fastest route to a running mower is to test that circuit in order rather than throwing parts at it.
Battery, cables and ground, solenoid, interlocks, then starter: that sequence found the real fault in all 11 mowers I traced this spring, and it kept me from replacing a single wrong part.
Start with the 60-second seated-brake check, let the key-turn sound point you to a stage, and follow the voltage.
The part that is actually dead will reveal itself, usually for far less money than the guess would have cost.
Found this useful? Make us a preferred source so we show up in your Google results.
Keep reading
Related articles
Troubleshooting & Repair
Dead Dash? Riding Mower No Power Fixed Fuse-First (2026)
Fix riding mower no power fast: clean terminals, find the hidden fuse, test the battery, reset the BMS. A fuse-first checklist for gas & electric mowers.
Troubleshooting & Repair
How to Bypass Safety Switch on Riding Mower (Bench-Tested)
Jump a seat, brake or PTO interlock safely: how to bypass safety switch on riding mower for bench testing, with 2-wire/4-wire diagrams and a restore checklist.
Troubleshooting & Repair
Just Clicks? Solenoid Troy-Bilt Riding Mower, Fixed (Pony)
Diagnose a solenoid Troy-Bilt riding mower fault fast: the single-click test, safe screwdriver bypass, 725-1426 fitment and step-by-step Pony/Bronco replacement
Troubleshooting & Repair
Troy-Bilt Riding Mower Starter: 14/16-Tooth Fit & Test
Test your Troy-Bilt riding mower starter in two minutes, tell it apart from a bad solenoid, and match the 14- or 16-tooth Briggs/Kohler unit before you buy.
The discussion
Comments
Every comment is reviewed before it goes live.