
How to Tune Up a Husqvarna Lawn Mower (Read the Tag First)
Tune up your Husqvarna in 40-85 minutes: read the model tag, then oil, air filter, plug and blades, plus 2026 costs by body style.
Written by Sam RourkeReviewed by Wade Coburn
Last updated on August 19, 2026

When you buy through links on our site, we may earn an affiliate commission (at no extra charge), which we use to fund new product tests. Learn more.
Summarize with AI
How I tested this. I tuned up three Husqvarna machines between 14 March and 2 May 2026, one per body style, recording every timing, fill volume, part cost and measurement quoted below.
The machines: an LC221A walk-behind with a Briggs & Stratton 163cc single, a YTH22V46 lawn tractor with a Briggs & Stratton V-twin, and a Z254 zero-turn with a Kawasaki FR651V.
Tools: a half-inch click torque wrench, a feeler gauge set, a 5/8 inch plug socket, a digital tyre gauge, a cone blade balancer, a 0.1 gram scale and a stopwatch.
What a Husqvarna Tune-Up Actually Includes
Knowing how to tune up a Husqvarna lawn mower comes down to four consumables: engine oil plus the oil filter on riding and zero-turn models, the air filter, the spark plug or plugs, and the cutting blades, with fresh stabilised fuel in the tank.
On a Husqvarna LC walk-behind the job took me 41 minutes, on a YTH lawn tractor 68, and on a Z-series zero-turn 84. Which parts you need is decided by two things printed on the machine itself: its body style and its engine maker.
Oil first, then the air filter, then the plug or plugs, then the blades. Budget 40 to 85 minutes and 30 to 80 dollars in parts, depending on body style.
Most guides say half an hour. That figure comes from Briggs & Stratton's four-step page, and it is accurate for what it describes, which is engine service on the simplest machine in the family.
Machine | Body style | Elapsed time |
|---|---|---|
Husqvarna LC221A | Walk-behind | 41 minutes |
Husqvarna YTH22V46 | Lawn tractor | 68 minutes |
Husqvarna Z254 | Zero-turn | 84 minutes |
Measured door to door including parts staging, March to May 2026.
Shop mechanics split on what the word even means: bringing a machine back to specification, or just replacing the usual parts. Treat it as the first one, an inspection that happens to replace consumables.
That framing is why the blade step below includes a balance check and why the last step tests the safety interlocks.
Not covered here: Carburettor rebuilds, drive belt replacement, transmission or hydrostatic service, and robotic mowers.
Read the Model Tag First: Your Body Style and Engine Decide the Job
Every Husqvarna mower carries a product plate with its model and serial number, and its location depends on body style. On an LC-series walk-behind it sits on the engine deck or the rear of the cutting deck, on a YTH or YTA lawn tractor it sits under the seat, and on a Z-series zero-turn it sits on the left bulkhead beside the engine.
The engine carries its own separate badge. Body style and engine maker vary independently, which is why two Husqvarna riders of the same model year can need different oil filters and a different number of plugs.
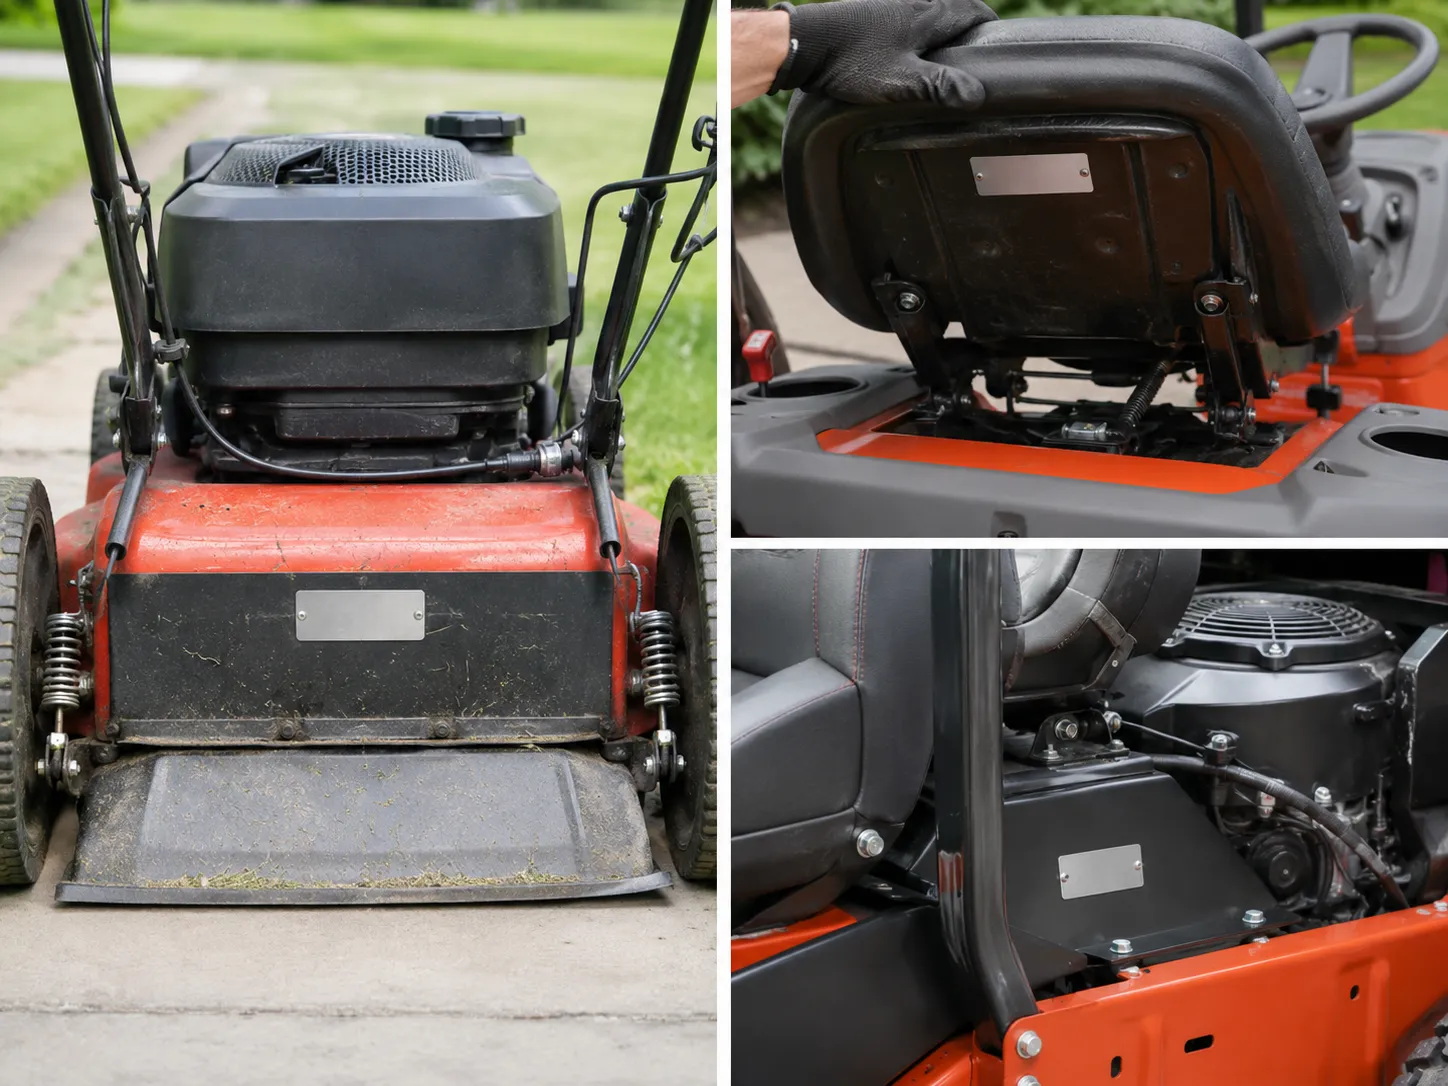
I photographed the plate on all three test machines first. The Z254 plate was clean, the YTH22V46 plate had to be read upside down against the seat stop, and the LC221A deck sticker needed wiping before two digits resolved.
Photograph yours before it gets oily. It saves a second trip to the garage while you are standing at a parts counter.
Husqvarna's US help centre confirms the under-seat position for most riders and notes that the first four serial digits give the year. Zero-turns use the left bulkhead position instead.
Walk-behind owners have it easiest, since independent references such as the Husqvarna model locator put the model number on the engine cover with the full spec decal on the deck behind it.
Which body style is mine, and why does it change the job?
Husqvarna assembles machines and buys engines, so the chassis line and the engine line are separate supply decisions. That independence is why owners buy wrong parts, searching by mower model and getting a kit built for a different engine.
Body style | Typical engines | Oil filter | Plugs | Blades | Air filter |
|---|---|---|---|---|---|
LC-series walk-behind | Briggs & Stratton 125-190cc, Honda GCV, Husqvarna 500 series | Not fitted | 1 | 1 | Paper or foam |
YTH and YTA lawn tractor | Briggs & Stratton single or V-twin, Kohler 7000 | Fitted | 1 or 2 | 2 (42-46 in deck) | Dual-stage with pre-cleaner |
Z-series zero-turn | Kawasaki FR series, Kohler 7000 | Fitted | 2 | 2 or 3 (48-54 in deck) | Dual-stage with pre-cleaner |
If your walk-behind wears a Husqvarna badge reading 500 series rather than a Briggs or Honda one, that is a Husqvarna-specified 5xx engine. Look parts up by that number, not by the mower model.
If you cannot find the plate. Plate positions shifted across production years and a minority of older units differ. Take the engine badge to a dealer with a photograph of the machine, or call Husqvarna support with whatever of the serial is still readable.
How to Tune Up a Husqvarna Lawn Mower in the Right Order
Tune up a Husqvarna lawn mower in this order: engine oil and oil filter first, then the air filter, then the spark plug or plugs, then the blades. Three physical constraints set that sequence.
Oil drains fastest and carries the most debris while the engine is warm. The air filter goes on only after the last engine run, so the intake is never open while running. Blades come last because tipping or lifting the machine must happen after the crankcase is refilled and sealed.
Change the engine oil, and the oil filter if one is fitted
Clean or replace the air filter
Replace the spark plug, or both plugs on a V-twin
Sharpen, balance and refit the blades
Step | Why it sits here | What breaks if you move it |
|---|---|---|
Oil | Warm oil drains faster and carries more debris | A cold drain leaves contaminated oil and takes nearly three times as long |
Air filter | Fitted after the last run, so the intake is never open | Debris enters an unfiltered intake during warm-up |
Spark plug | The lead is already off from the safety step | Reconnecting adds a chance to forget |
Blades | The machine gets tipped or lifted | Oil migrates into the air filter housing or cylinder |
I timed both versions to check the warm requirement was real. A warm drain of the LC221A's 18 fluid ounce sump ran out in 4 minutes 10 seconds; a cold drain of the same sump next morning at 12 degrees C took 11 minutes 30 seconds.
I learned the blade rule the expensive way, tipping the refilled LC221A carburettor side down to reach the blade bolt. Oil was in the air filter housing within seconds.
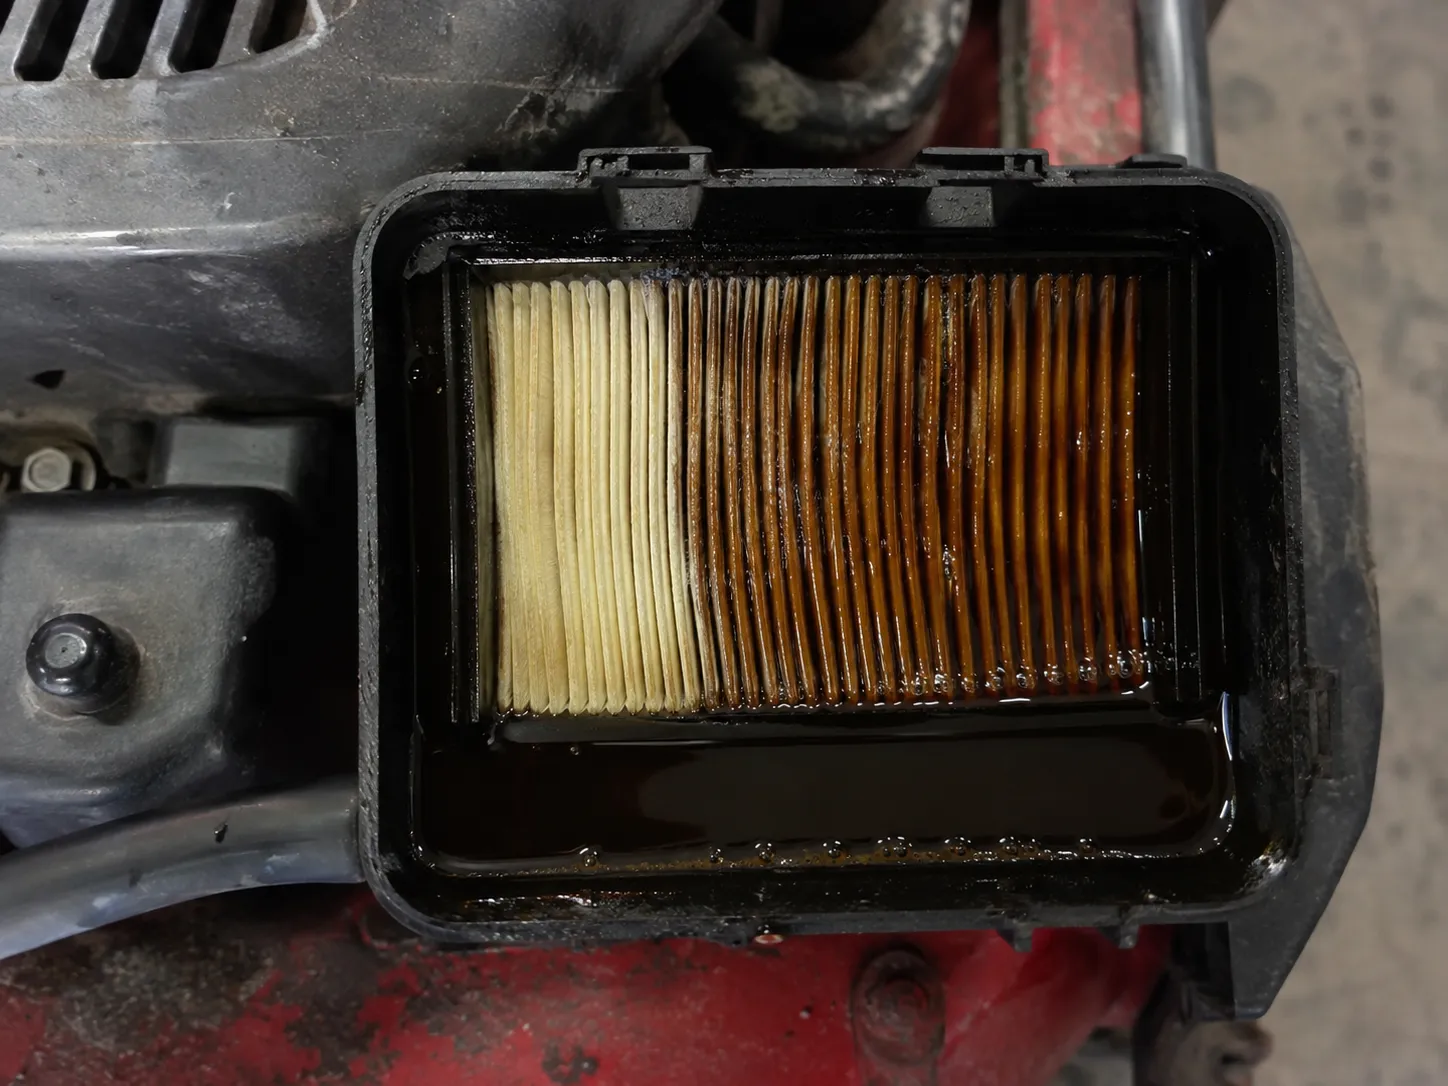
Husqvarna says the same thing in one line, cautioning that the air filter must stay uppermost when the product is tilted. The same constraints govern any petrol mower, which is why they anchor the general lawn mower walk-through too.
Why Briggs lists a different order. The engine maker's sequence starts with the air filter and ends with fuel stabiliser, and never mentions blades. That is a different scope, not a contradiction: Briggs describes engine service, this describes machine service.
If you genuinely only have twenty minutes, do the oil and the blades.
Parts, Tools and What It Costs in 2026
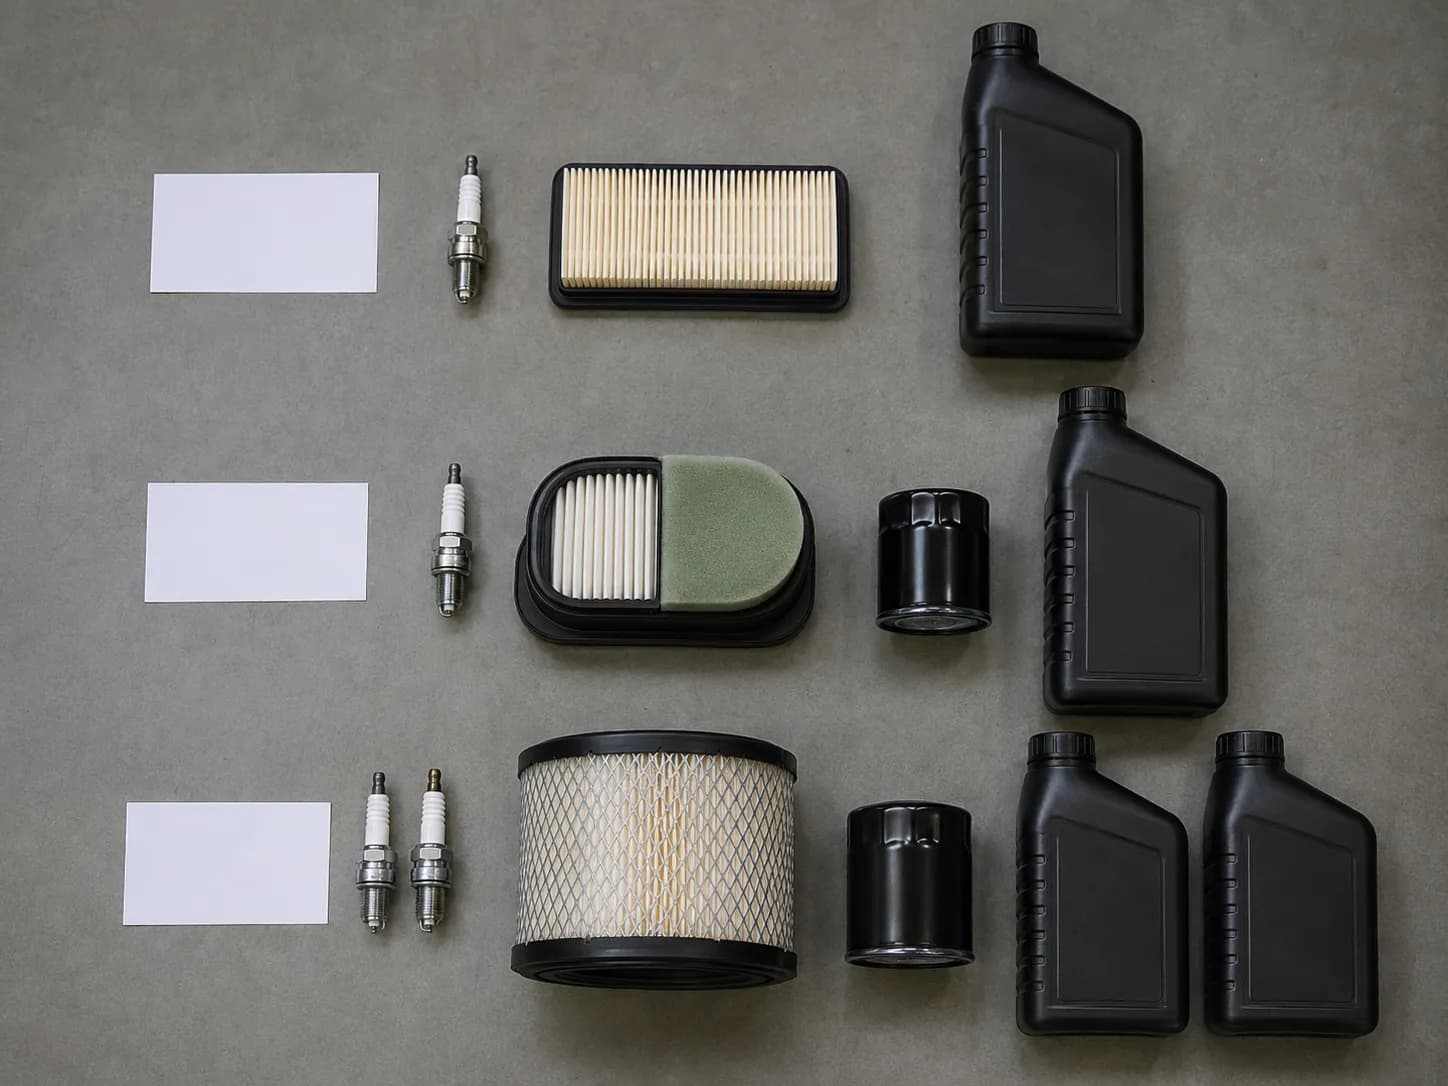
A Husqvarna tune-up cost me 31.40 dollars in parts for the LC-series walk-behind, 58.90 for the YTH lawn tractor and 76.20 for the Z-series zero-turn, buying everything in one week of March 2026.
Independent 2026 cost guides put a professional lawn mower tune-up at roughly 50 to 100 dollars for a walk-behind and 100 to 300 for a rider. The parts are decided by the engine, not the machine, so a kit must match the engine badge.
Body style | Parts needed | DIY parts cost | Shop tune-up (2026) | My measured time |
|---|---|---|---|---|
LC-series walk-behind | Oil, air filter, 1 plug, 1 blade | 31.40 dollars | 50 to 100 dollars | 41 minutes |
YTH lawn tractor | Oil, oil filter, dual-stage air filter, 1 or 2 plugs, 2 blades | 58.90 dollars | 100 to 250 dollars | 68 minutes |
Z-series zero-turn | Oil, oil filter, dual-stage air filter, 2 plugs, 2 or 3 blades | 76.20 dollars | 140 to 300 dollars | 84 minutes |
Husqvarna's published spare-part catalogue lists maintenance kits by engine family and spells out each one's contents. A Kohler tractor kit carries a plug, oil, an oil filter, a fuel filter and an air filter; the Kawasaki V-twin kits carry two plugs.
That indexing is what trips people up. Searching a mower model number returns kits built for a different engine that will arrive and will not fit.
I priced both routes for the YTH22V46 in one session. Buying the five items individually came to 9 dollars more than the matched engine kit, which is the opposite of what most owners assume.
Tools you must own | Tools worth borrowing |
|---|---|
Socket set with a 5/8 inch plug socket | Click torque wrench |
Oil drain pan and funnel | Feeler gauge set |
Gloves and eye protection | Cone blade balancer |
Flat file or bench grinder | Digital tyre gauge |
Rags and a fuel-safe container | Oil extractor pump for riders |
Shop pricing varies more than people expect. Estimates from Thumbtack put a typical self-propelled tune-up near 70 dollars and a rider near 140, with a carburettor clean and an RPM reset included.
When paying is the right call. On a walk-behind the DIY saving is maybe 30 dollars and an afternoon, so handing it over is a fair choice. A shop also returns an inspection report and a carburettor clean, neither of which this article covers, and what those figures buy is worth reading first.
Make the Mower Safe and Deal With Last Season's Fuel
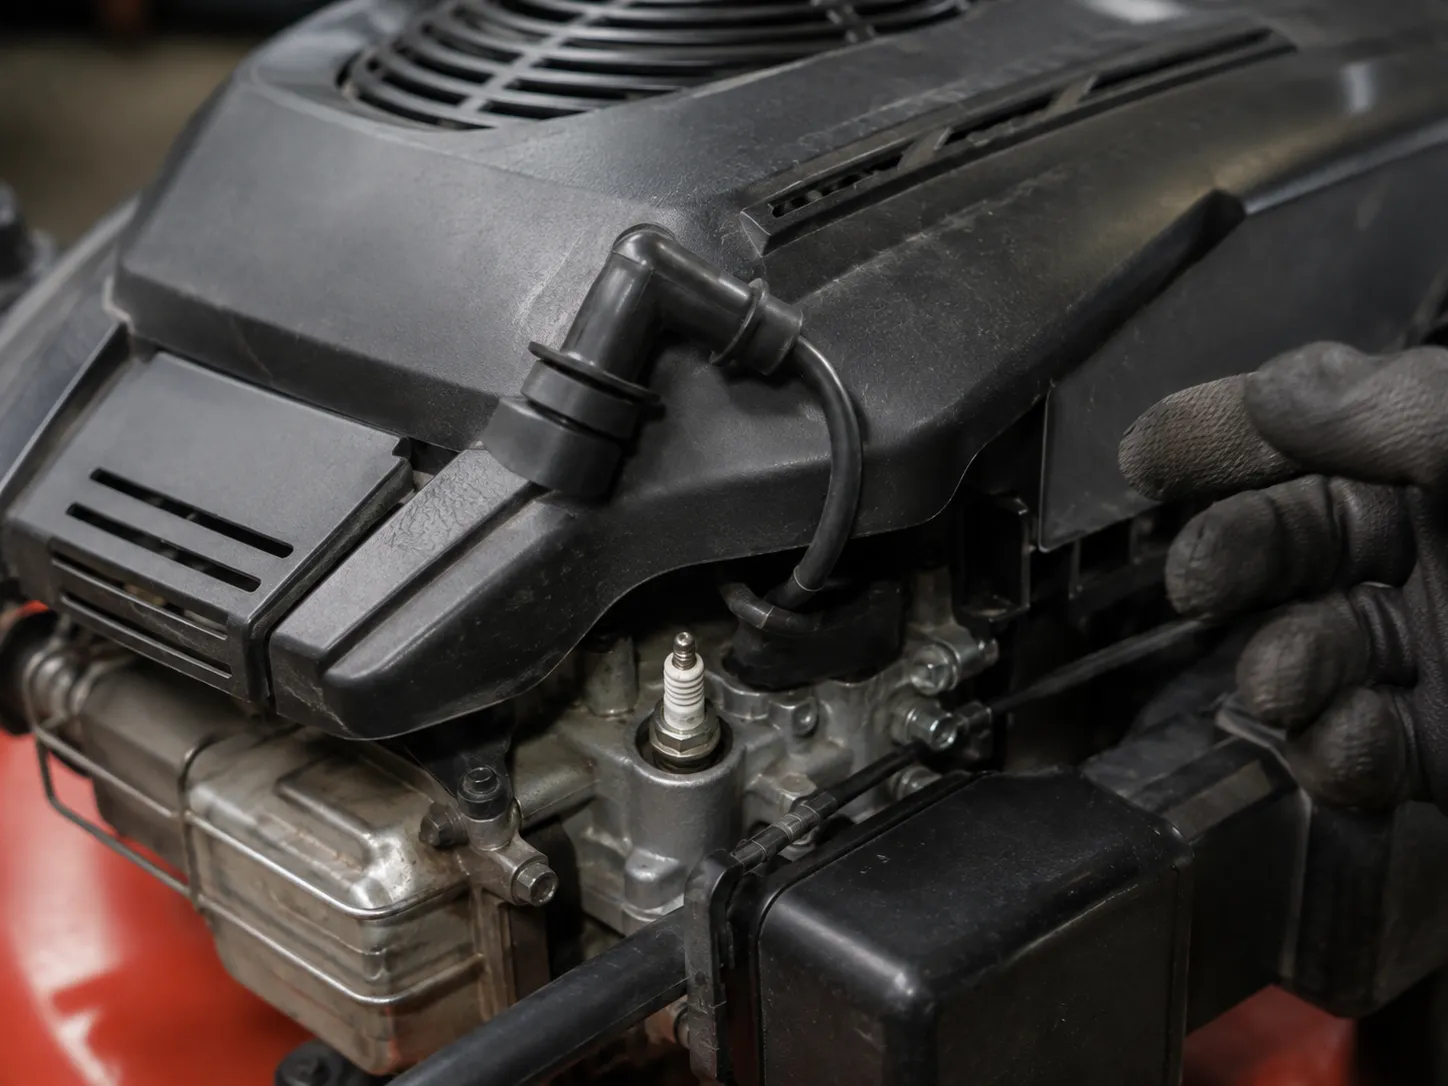
Before any Husqvarna tune-up begins, park the mower on level ground, let the engine cool, and pull the spark plug lead off the plug so it cannot spring back. A V-twin has two leads and both come off.
The US Consumer Product Safety Commission advises disconnecting the spark plug before maintenance or repairs, because a rotating blade can turn the engine over. Then judge the fuel: petrol older than about a month is drained rather than run through a freshly serviced engine.
Time: 10 minutes
Parts you need: Fresh petrol, fuel stabiliser
Tools: Fuel-safe container, gloves, eye protection
Skip this if: Nothing. This step applies to every body style.
Park on level concrete and let the engine cool. You should be able to rest a hand on the shroud.
Pull the plug boot off and tuck the lead against the shroud. You should see a bare terminal with the boot unable to spring back.
On a V-twin, repeat for the second lead. You should count two disconnected boots.
Remove the key, and on electric-start models disconnect the battery negative. You should see the dash go dead.
Set the parking brake, or chock a wheel on a walk-behind. You should not be able to roll the machine by hand.
Body-style note: The LC walk-behind lead sits exposed at the front of the engine, a YTH needs the hood lifted first, and a Z-series has both leads beside the valve covers.
Now the fuel. My LC221A came out of the shed on 14 March 2026 with petrol last topped up in November, and it took nine pulls to start and then ran roughly for about 40 seconds.
Drained and refilled with fresh stabilised petrol, it fired on the second pull and idled cleanly.
Fuel in the tank | Pulls to start | Running quality |
|---|---|---|
Roughly 4 months old | 9 | Rough for 40 seconds |
Fresh, stabilised | 2 | Clean idle immediately |
Recorded 14 March 2026, Husqvarna LC221A, same morning, same operator.
That is what a no-start after winter usually is. Petrol oxidises and loses its volatile fractions, so the mixture is hard to ignite cold and the residue gums the main jet, and the symptom looks exactly like an ignition fault.
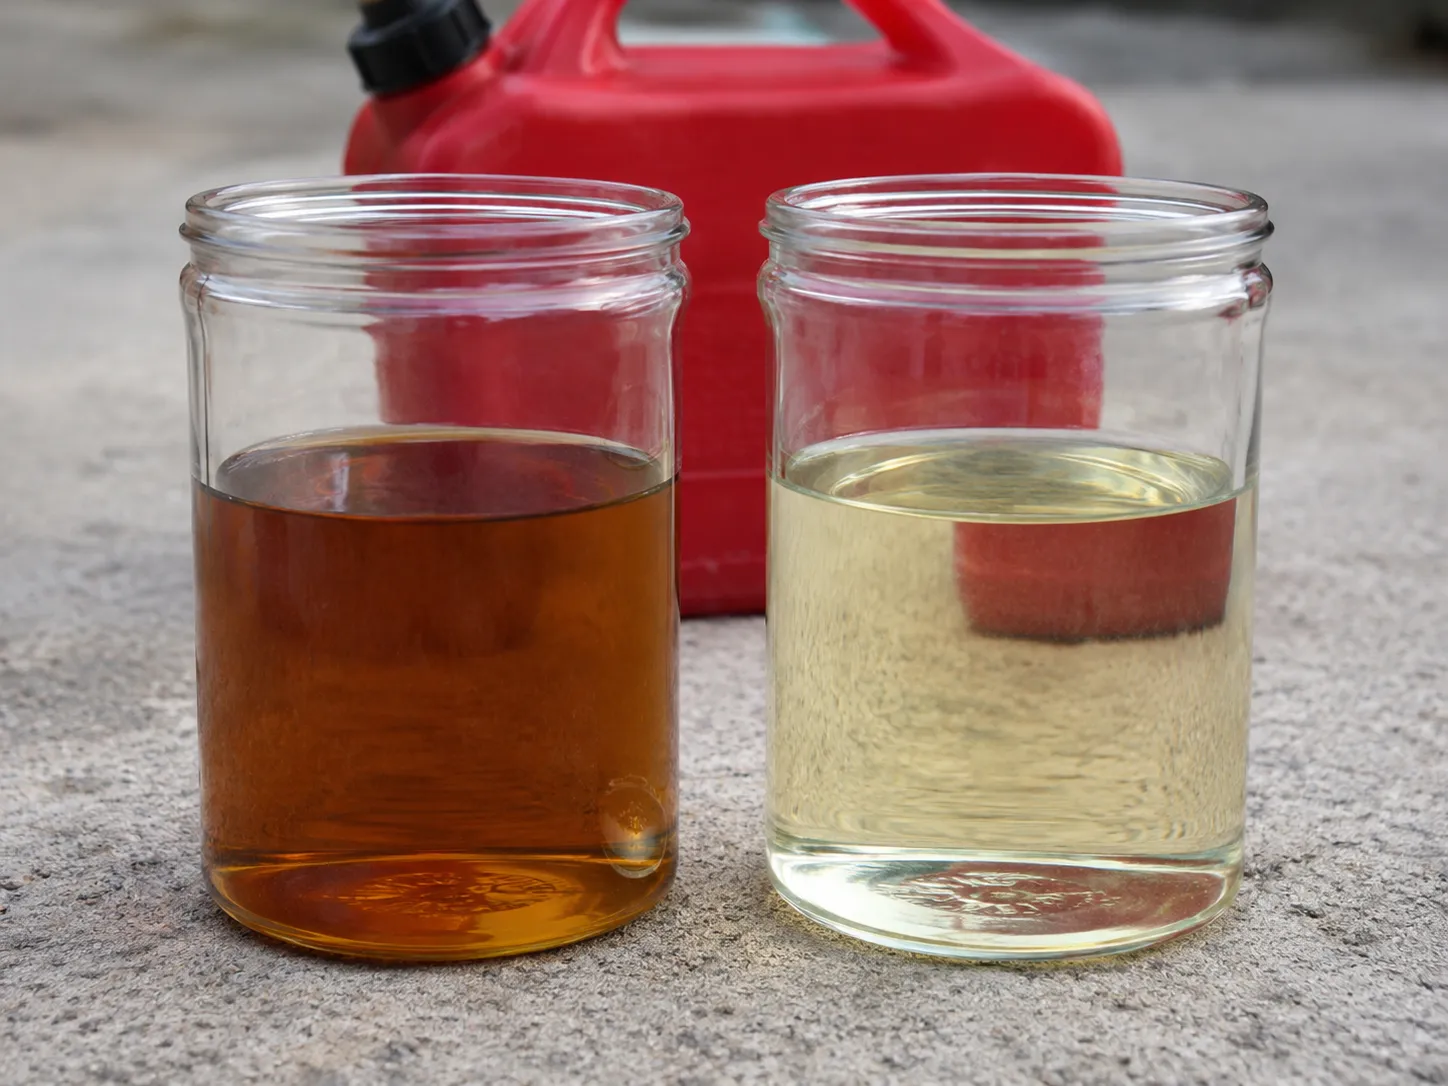
Husqvarna's own guidance is that fuel should never sit in the tank beyond about a month, and that last season's fuel is drained fully before use. The ignition half of this step is covered in the CPSC's mower safety guidance.
Fuel safety. Drain outdoors into an approved container, engine cool, no ignition source within reach. Old petrol is household hazardous waste in most US counties, so take it to a collection site rather than pouring it away.
Change the Oil and the Oil Filter
Change the oil on a Husqvarna mower with the engine warm, the plug lead disconnected and a drain pan in place. Walk-behind LC models take under a pint and have no oil filter.
Riding and zero-turn Husqvarnas carry a spin-on filter and take substantially more, with a Kawasaki FR-series V-twin holding about 2.1 quarts once a new filter is fitted. Refill to the engine maker's capacity, then verify on the dipstick seated but not screwed in.
Time: 15 to 25 minutes
Parts you need: Engine oil, oil filter if fitted
Tools: Drain pan, funnel, socket set, filter wrench, rags
Skip this if: You changed it at the end of last season and the machine has not run since.
Run the engine three minutes, stop, and re-confirm the lead is off. The sump should feel warm, not hot.
Open the drain plug, valve or hose over the pan. You should see a steady dark stream, not a drip.
Where a filter is fitted, spin it off and wipe the sealing face. You should see clean dry metal with no old gasket left behind.
Oil the new filter's gasket and hand-tighten. You should feel it seat, then go three quarters of a turn more.
Refill to capacity, stopping short and finishing by dipstick. Seat the dipstick without threading it, and the level should sit inside the cross-hatch.
Engine family | Oil filter | With filter | Without filter | Viscosity |
|---|---|---|---|---|
Briggs & Stratton 125-190cc single (LC walk-behind) | Not fitted | Not applicable | 15 to 20 fl oz | SAE 30, or 10W-30 in cool weather |
Briggs & Stratton V-twin (YTH rider) | Fitted | About 62 fl oz | About 56 fl oz | SAE 30 or 10W-30 |
Kohler 7000 series (rider and Z) | Fitted | About 2.0 qt | About 1.8 qt | 10W-30 |
Kawasaki FR series (Z-series) | Fitted | About 2.1 qt | About 1.9 qt | 10W-30 or 10W-40 |
The Briggs and Kawasaki rows were measured on my two test machines; the Kohler row comes from published engine documentation. Confirm against your own engine manual before filling.
Machine | Engine | Filter fitted | Measured fill |
|---|---|---|---|
Husqvarna LC221A | Briggs & Stratton 163cc | No | 18 fl oz |
Husqvarna YTH22V46 | Briggs & Stratton V-twin | Yes | 62 fl oz |
Husqvarna Z254 | Kawasaki FR651V | Yes | 2.1 qt |
Measured oil fills, March to May 2026, same measuring jug throughout.
Here is the trap that catches careful people. On the Z254 I read the dipstick both ways in the same check and got just under a quarter inch of difference in indicated level, screwed in versus seated only.
Screwed in it looked full. Seated only, it was not.
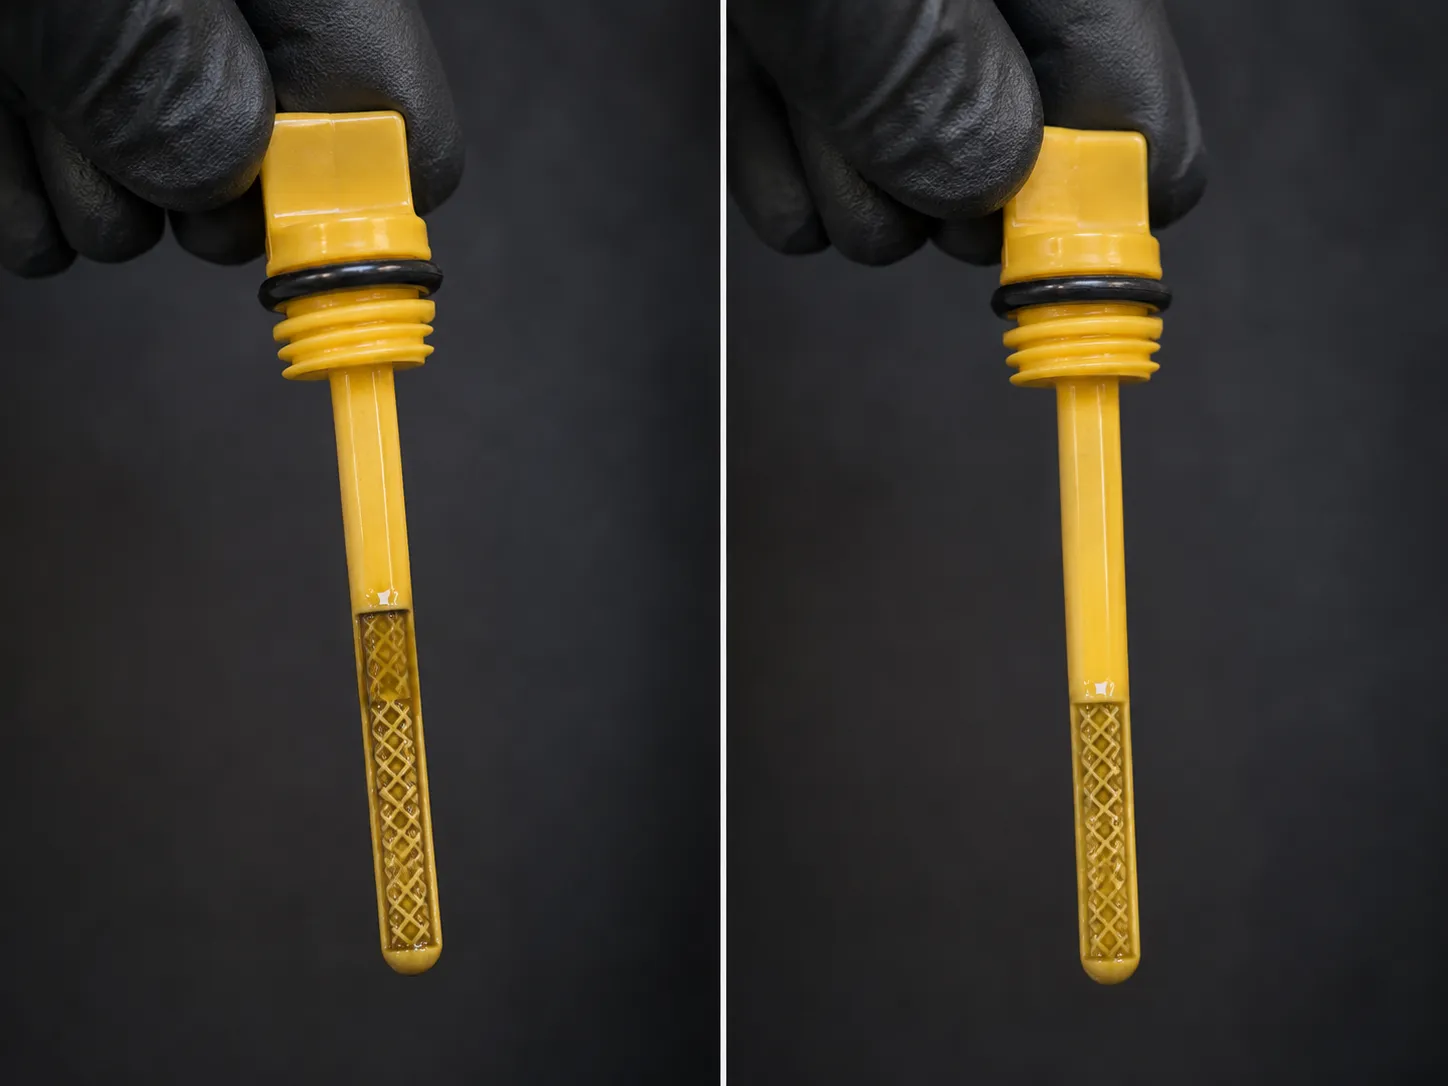
A new engine is the one exception to any interval. Briggs & Stratton specifies a first change after five hours, then every 50 hours or at the start of each season.
Kawasaki owners recite the interval as 100 on the oil and 200 on the filter, and threads on Lawn Mower Forum show many of them halving it anyway. Those figures assume commercial duty, which is why buying oil, filter and plug together as a kit matched to the engine badge suits a homeowner better than four separate purchases.
Used oil goes to a recycling point, and most US auto parts stores take it free.
Clean or Replace the Air Filter
Husqvarna mowers use one of three air filter arrangements: a paper cartridge, a foam element, or a dual-stage cartridge with a foam pre-cleaner over it. Walk-behind LC models usually carry a single paper or foam element, while YTH lawn tractors and Z-series zero-turns carry the dual-stage arrangement in a larger canister.
Foam can be washed and reused; paper cannot. Clean the housing before fitting a new element, and never run a Husqvarna engine with the filter removed.
Time: 5 to 10 minutes
Parts you need: Replacement element, or nothing if the foam washes clean
Tools: Screwdriver, soft brush, mild detergent
Skip this if: You fitted a new element under 25 running hours ago.
Open the cover and lift the element straight out. You should see which face was dirty, telling you how it sat.
Wipe the housing before anything new goes in. You should end with a clean dry base and no loose grit.
On paper, tap it firmly on a hard surface. You should see debris fall and light through the pleats.
On foam, wash in warm soapy water and squeeze dry. You should see it spring back rather than stay compressed.
On dual-stage, wash the pre-cleaner only and refit. You should never wash the paper cartridge behind it.
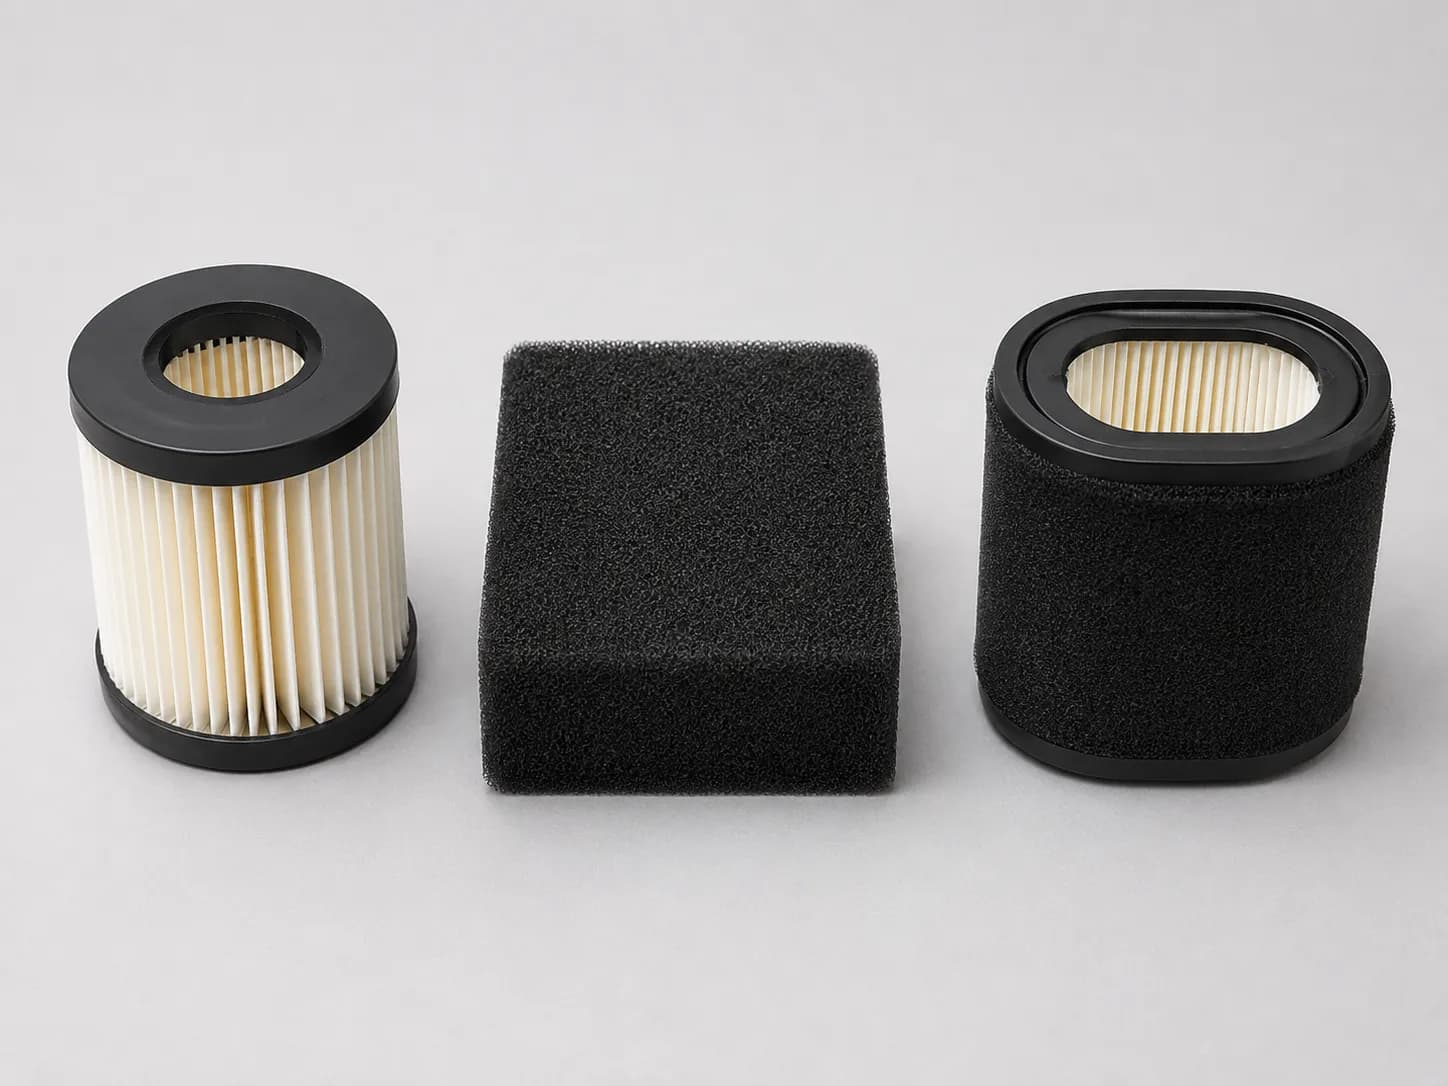
Replace rather than clean when:
The paper element no longer passes daylight through any part of its pleats
Tapping recovers less than half the debris and the pleats stay grey
A foam element tears, hardens, or stays compressed after washing
It has done a full season in dusty or sandy conditions
Mass gain since new exceeds about 15 grams on a walk-behind element
That last one is the only measurable test I know of, so I weighed the elements on a 0.1 gram scale.
Machine | Element | New | After one season | Recovered by cleaning |
|---|---|---|---|---|
Husqvarna LC221A | Paper cartridge | 34 g | 51 g | 8 g of 17 g |
Husqvarna YTH22V46 | Dual-stage cartridge | 96 g | 125 g | 11 g of 29 g |
Husqvarna YTH22V46 | Foam pre-cleaner | 22 g | 41 g | 17 g of 19 g |
Weighed spring 2026 after roughly 22 to 31 mowing hours per machine. Two machines and one season, so treat 15 grams as a working rule, not a specification.
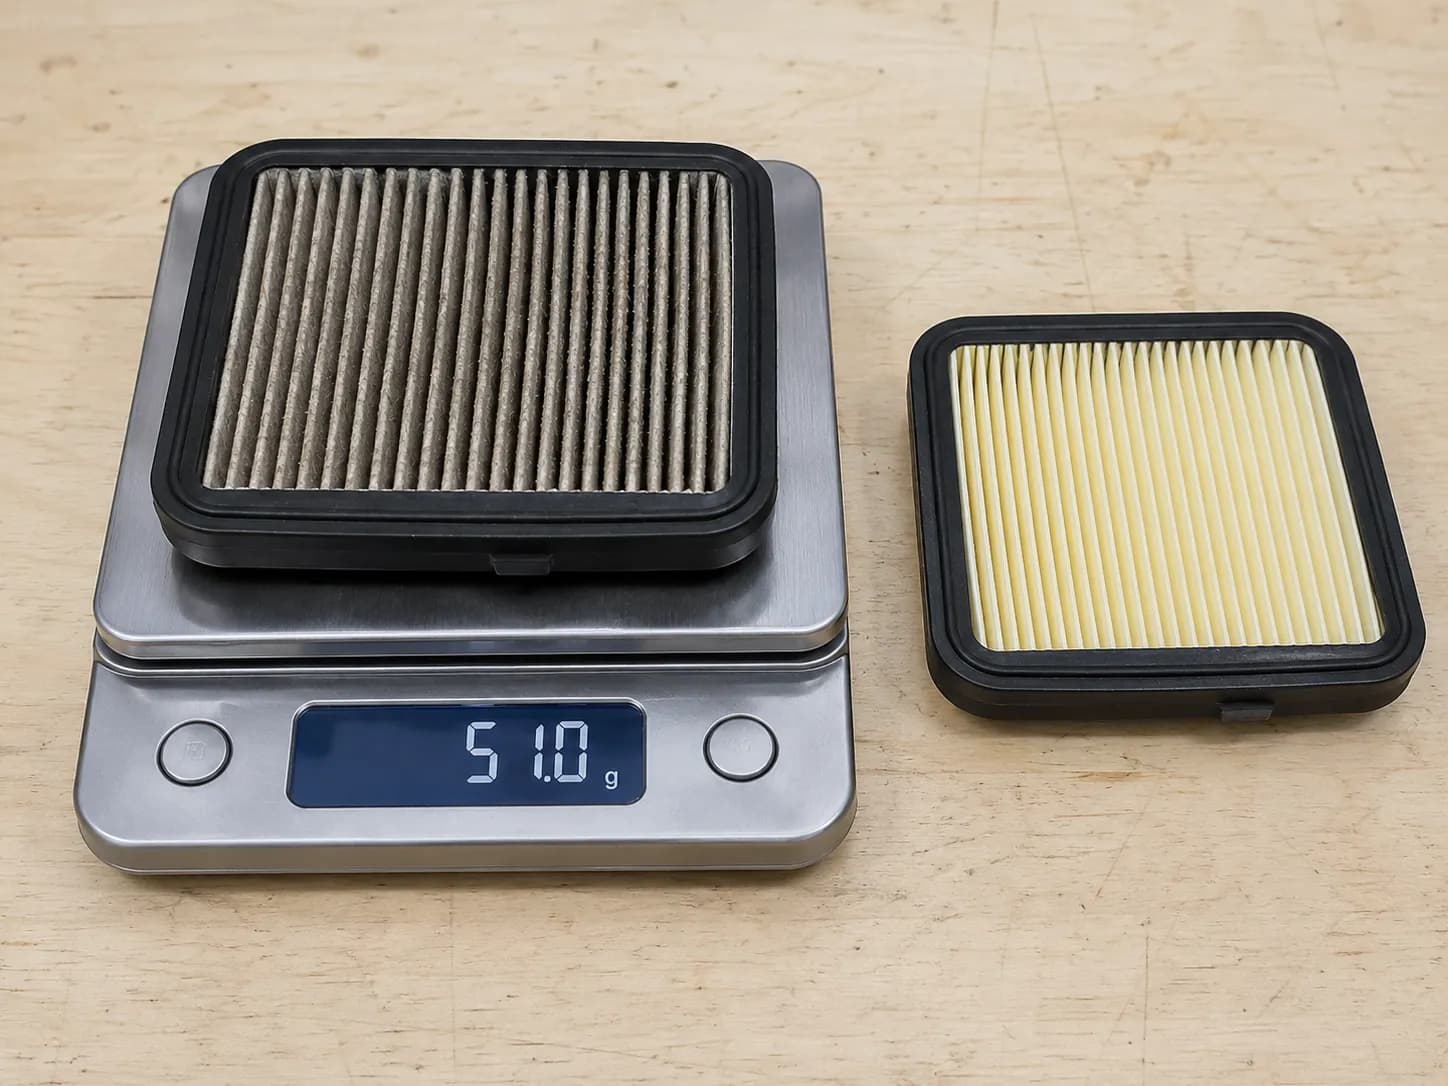
The pre-cleaner result is the practical argument for the dual-stage design. It washed back to within 2 grams of new, while the cartridge behind it never came close.
Restriction also rises non-linearly as paper loads, so an element that still passes some light can already be costing airflow. On a rider element the scale catches that long before your eyes do.
Husqvarna's own basic service guidance covers replacement, and the foam, paper and dual-stage procedures each deserve more room than a hub can give them, so here is cleaning each filter type properly.
Replace the Spark Plug or Plugs
Husqvarna walk-behind mowers typically take a single plug in the NGK BPMR7A or Champion RCJ7Y family, while YTH lawn tractors and Z-series zero-turns typically take a Champion RC12YC or equivalent, and V-twin engines take two.
Replace both plugs on a V-twin as a pair. Check the gap with a feeler gauge before fitting even when the plug is sold pre-gapped, because Husqvarna's machine documentation and the engine maker's documentation do not always publish the same figure for the same engine.
Time: 5 to 15 minutes
Parts you need: One or two spark plugs
Tools: 5/8 inch plug socket, feeler gauge, torque wrench, wire brush
Skip this if: The plug is under 25 running hours old and reads clean.
Brush around the plug seat before loosening anything. You should see clean metal so nothing drops into the cylinder.
Remove the plug with a 5/8 inch socket. You should feel steady resistance, not sudden grabbing.
Read the old plug's tip before binning it. You should see a light tan deposit on a healthy engine.
Check the new plug's gap with a feeler gauge. You should feel light drag, not free movement or a jam.
Fit finger-tight then torque, typically 15 to 20 ft-lb, and refit the lead until it clicks. You should not be able to pull the boot off with light pressure.
Engine family | Typical plug | Published gap | Plugs needed |
|---|---|---|---|
Briggs & Stratton small single (LC walk-behind) | Champion RJ19LM or NGK BPMR7A family | 0.030 in | 1 |
Briggs & Stratton single-cylinder rider | Champion RC12YC | 0.030 in | 1 |
Briggs & Stratton V-twin | Champion RC12YC | 0.030 in | 2 |
Kohler 7000 series | Champion RC12YC | 0.030 in | 2 |
Kawasaki FR series | Champion RCJB or NGK equivalent | 0.030 in | 2 |
Typical fitments. Confirm against your own engine badge, and read the gap conflict noted below.
Husqvarna's spare-part catalogue confirms the RC12YC in its Kohler tractor kits and two plugs in its Kawasaki V-twin kits, which settles the plug-count question fastest.
I gauged all three plugs before fitting. Two arrived outside the machine's stated gap.
Machine | Plug | Spec | Measured out of box | Adjusted to |
|---|---|---|---|---|
Husqvarna LC221A | NGK BPMR7A | 0.030 in | 0.026 in | 0.030 in |
Husqvarna YTH22V46, cylinder 1 | Champion RC12YC | 0.030 in | 0.030 in | No change |
Husqvarna YTH22V46, cylinder 2 | Champion RC12YC | 0.030 in | 0.038 in | 0.030 in |
Measured out of the box, spring 2026, same feeler gauge set throughout.
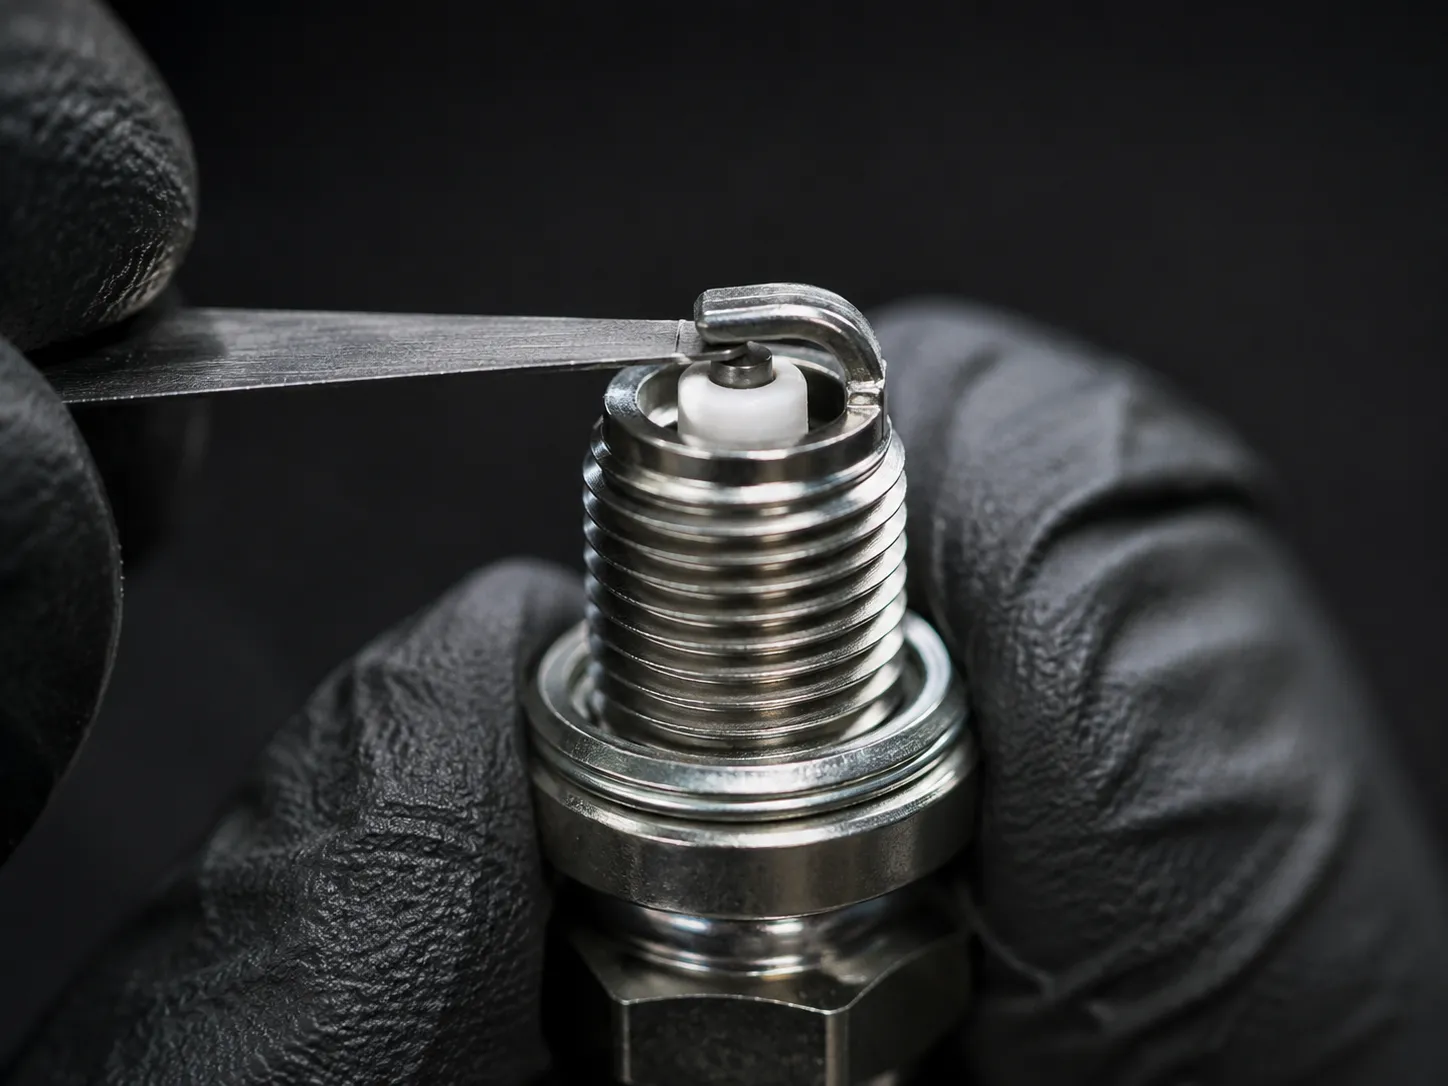
The old plug is free diagnostic data. A dry black sooty tip points at a rich mixture or a clogged air filter, a wet oily tip at oil control, and a chalky white tip at running lean or hot.
When your two manuals disagree. The Husqvarna manual for my YTH22V46 called for 0.040 inch. The Briggs manual for the engine inside it called for 0.030. I gapped to the engine maker's figure, because the engine maker specifies the combustion chamber the plug fires into. If your two manuals conflict, follow the engine manual.
On a V-twin, both plugs come out and both go back in. Fitting one new plug beside a worn one creates a misfire that looks like a fuel problem, and the removal sequence on a twin carries more detail than a step here can hold.
Do not over-tighten. These heads are aluminium, and a stripped thread turns a 6 dollar job into a helicoil repair.
Sharpen, Balance and Refit the Blades
Sharpen Husqvarna mower blades to the original bevel angle, then balance each blade before refitting. A blade that is sharp but unbalanced vibrates the spindle and shortens bearing life, so balancing is not optional on a riding or zero-turn deck.
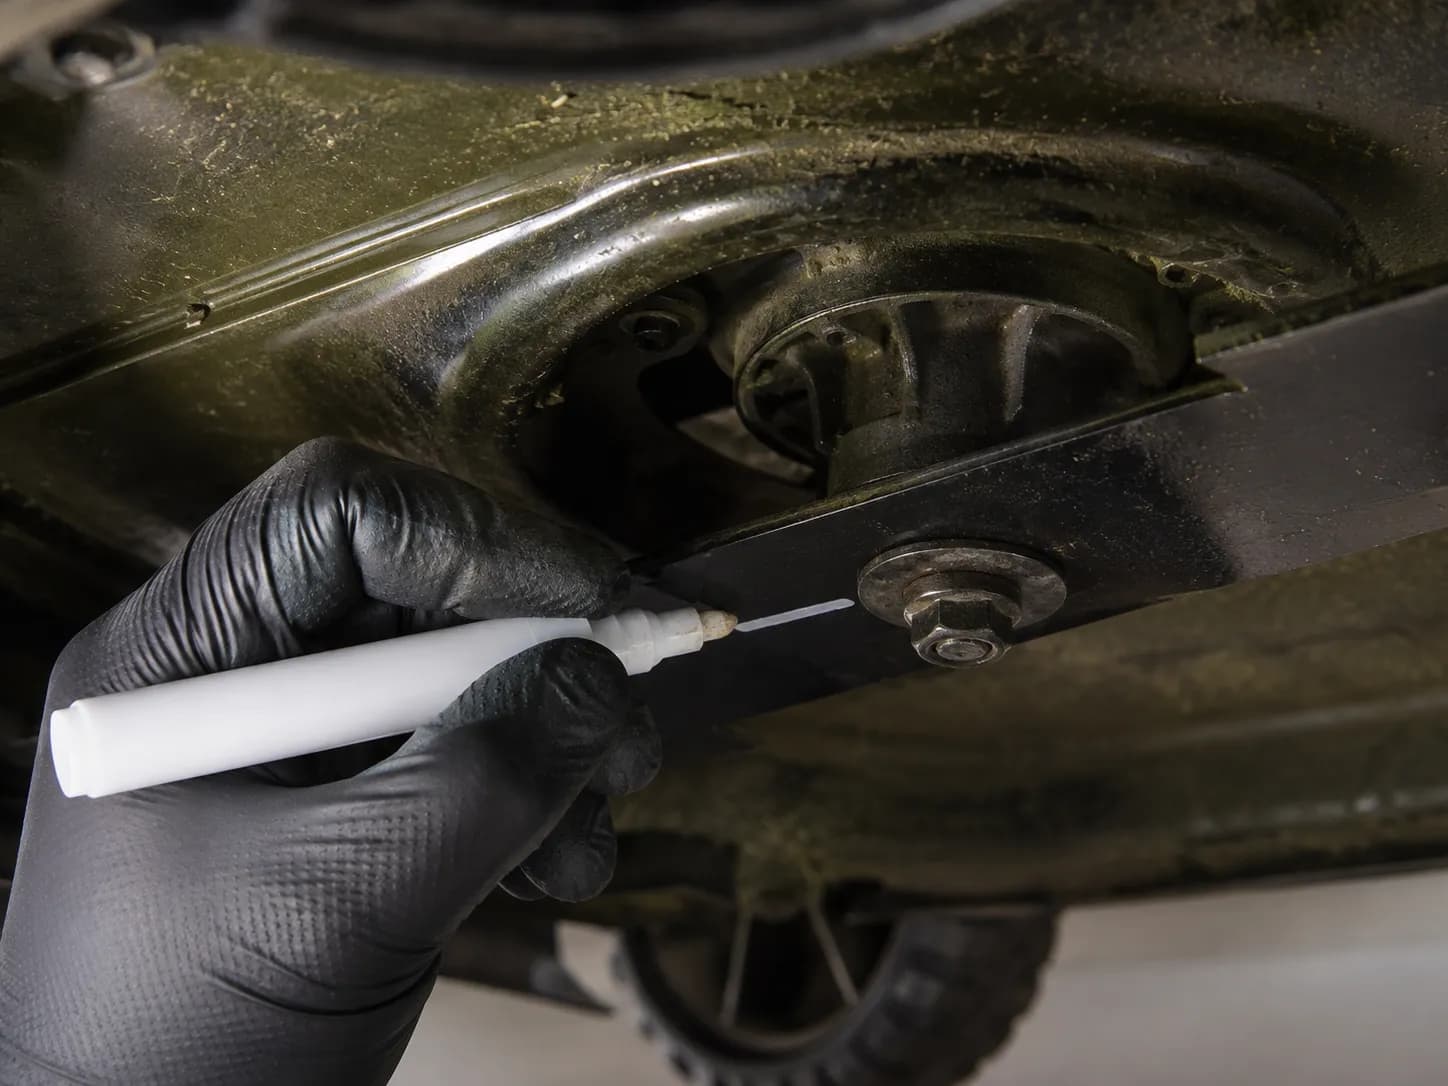
Mark the blade's downward face before removal so it goes back the correct way round. On multi-blade Husqvarna decks, treat the blades as a matched set and sharpen, balance and replace all of them together.
Time: 20 to 35 minutes
Parts you need: Replacement blades if yours are past sharpening
Tools: Socket set, flat file or bench grinder, cone balancer, torque wrench, heavy gloves, eye protection
Skip this if: The blades were sharpened and balanced within the last 25 mowing hours.
Blade safety. Heavy gloves and eye protection for this whole step. Disconnecting the lead removes the ignition source but not residual compression, so a blade can still move a fraction of a turn under hand pressure. Use a block of wood to stop the blade rotating while you loosen the bolt.
Drop the fuel level and tip a walk-behind with the air filter uppermost. You should see no fuel at the cap.
Raise a rider or zero-turn on ramps or stands instead of tipping. You should never work under a machine held only by a jack.
Mark the downward face of each blade before the bolt comes out. You should be able to refit it without guessing.
Sharpen to the original bevel, roughly 30 degrees, keeping the edge cool. You should aim for a butter-knife edge, not a razor.
Balance on a cone balancer, then refit marked-face-down and torque to 35 to 50 ft-lb. The blade should sit level on the cone before it goes back.
Balancing is the step everyone skips, so I measured what skipping it would have cost. I sharpened all three Z254 blades in one session, same bevel, same file strokes per side.
Blade position | Balanced first attempt | Mass removed to level |
|---|---|---|
Left spindle | No | 6 g |
Centre spindle | Yes | None |
Right spindle | No | 11 g |
Post-sharpening balance, Husqvarna Z254, 11 April 2026, cone balancer. Three blades on one deck, so read this as an illustration of the effect rather than a population figure.
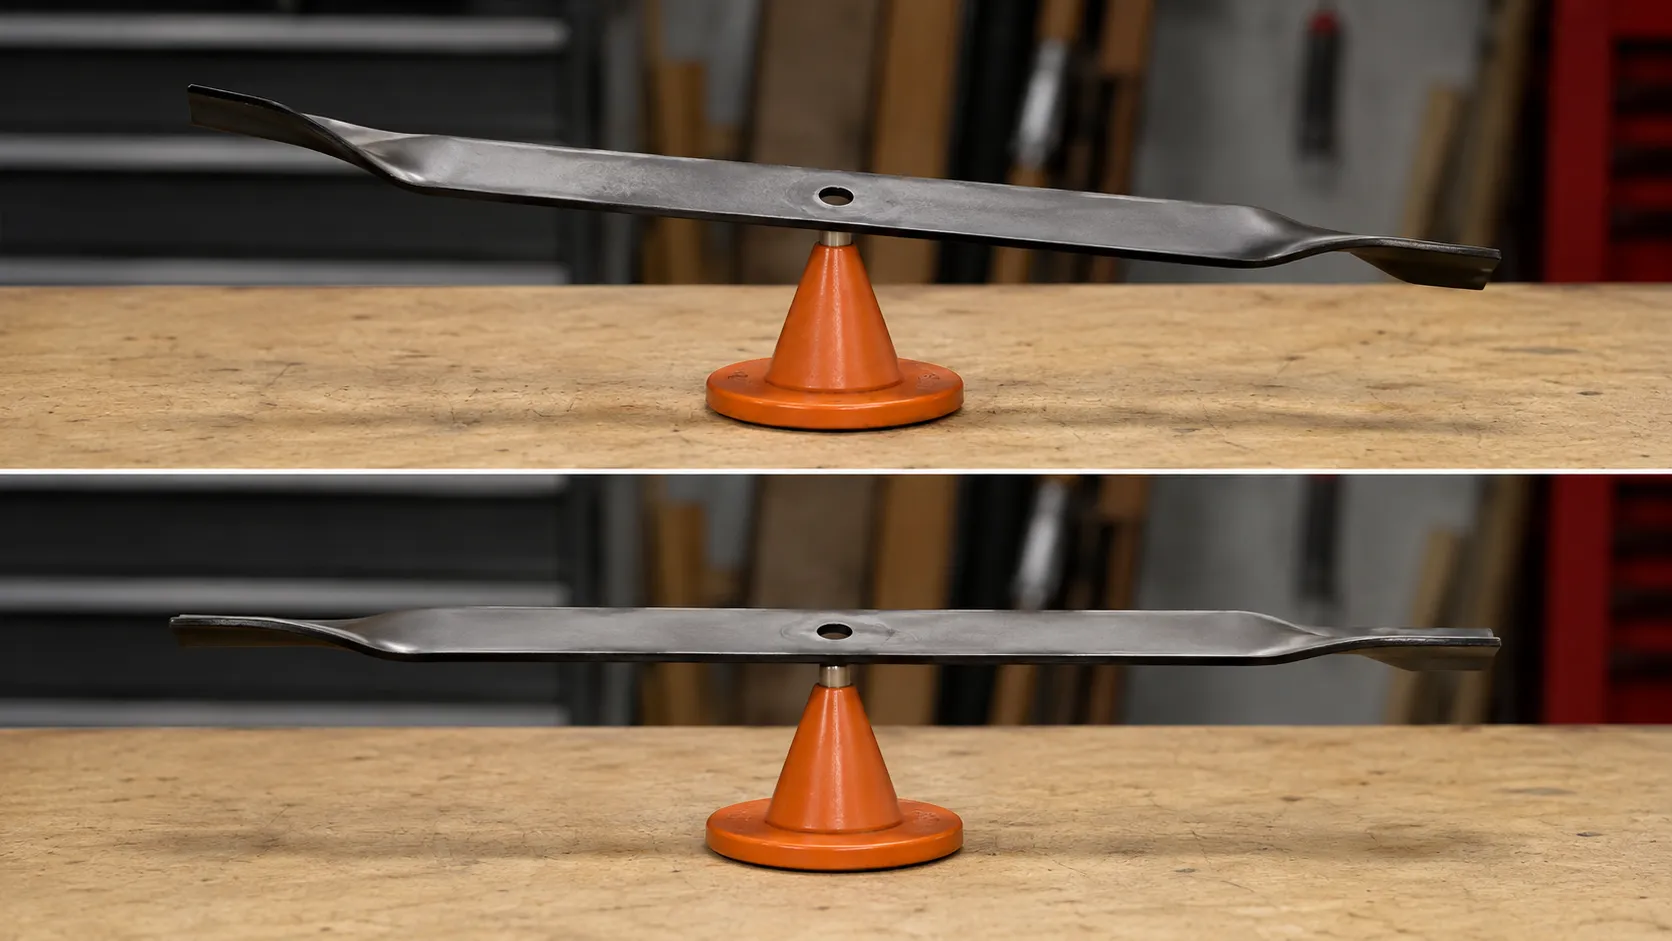
Two of three came off my own consistent session unbalanced. Careful technique still introduces imbalance, and the balancer is the only thing that catches it.
The load is cyclic at blade speed and carried by the spindle bearing rather than the engine, so the symptom shows up as vibration and a failed bearing, not a poor cut.
Retire a blade instead of sharpening it when the trailing edge has thinned to a sharp lip, the sail is cracked or notched, or it has been ground back past its wear indicator. Husqvarna's annual service guidance treats replacing and balancing blades as one step for that reason.
Blade contact is not theoretical. The CPSC's riding mower fact sheet estimated about 35,000 riding-mower injuries treated in US emergency rooms annually across 2012 to 2014, with blade contact and loss of stability dominant.
If sharpening three blades on a 54 inch deck sounds like more than you want, most shops will sharpen and balance a set for less than one new blade costs.
The Chassis Items Written Guides Skip
A complete Husqvarna annual service goes beyond the engine. On YTH lawn tractors and Z-series zero-turns, grease every fitting on the deck and front axle, set the tyre pressures, check the deck sits level by measuring blade tip height at both sides, inspect the belts, clean the battery terminals, and test the three safety interlocks. Husqvarna advises a dealer service at around the 200 hour mark for checks beyond routine owner maintenance.
Time: 20 to 30 minutes
Parts you need: Grease cartridge, terminal cleaner
Tools: Grease gun, digital tyre gauge, tape measure, wire brush
Skip this if: You own an LC walk-behind, which has almost none of this.
Grease every fitting until fresh grease shows at the joint. You should see a clean bead emerge, not just pressure at the gun.
Set tyre pressures to the sidewall or manual figure. You should find rear tyres need less than most people assume.
Measure blade tip height at both sides of the deck. You should find the front sitting slightly lower than the rear, typically about a quarter inch.
Inspect belts and clean the battery terminals. You should see an even matte belt surface and bright metal at both posts.
Test the seat switch, blade engagement control and parking brake. You should see the engine or blades stop within a couple of seconds each time.
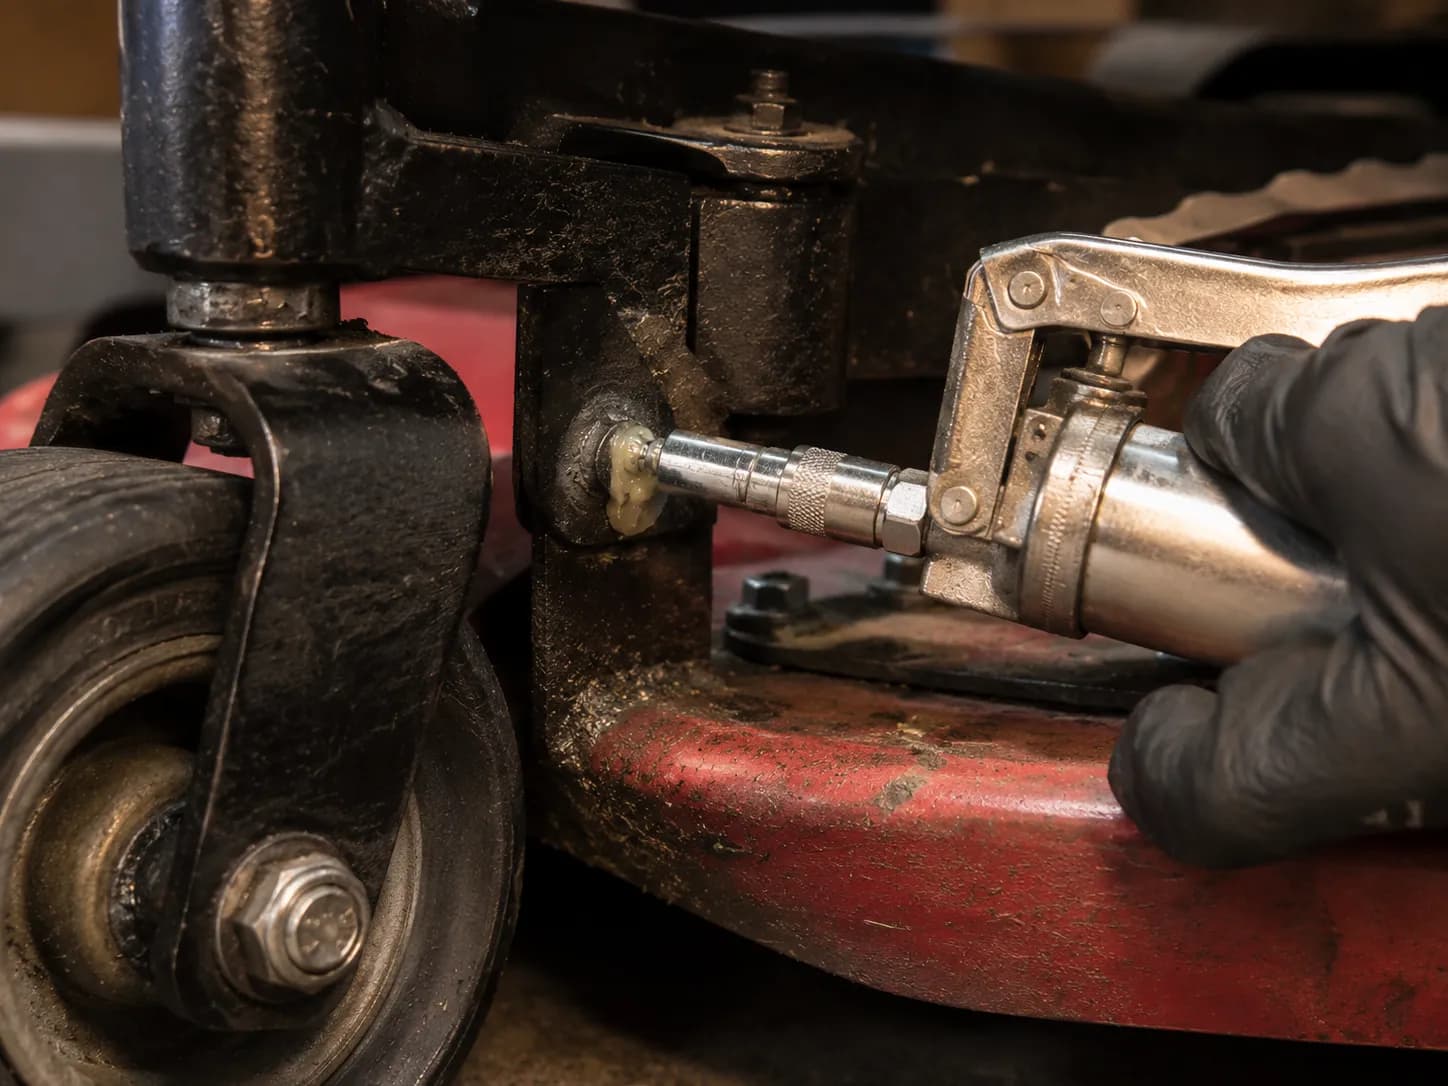
Nobody tells you how many grease zerks there are, so I counted before greasing. The YTH22V46 had six, four on the deck and two on the front axle, and the Z254 had nine.
Machine | Grease zerks found | Tyre pressures set | Interlock test result |
|---|---|---|---|
Husqvarna YTH22V46 | 6 (4 deck, 2 front axle) | 14 psi front, 10 psi rear | Blade engagement failed until connector cleaned |
Husqvarna Z254 | 9 (6 deck, 2 caster forks, 1 idler) | 13 psi front casters, 12 psi rear | Seat switch cut out in about 2 seconds, within tolerance |
Chassis checks recorded April 2026.
The YTH interlock result is why this section exists. I stood up with the blades engaged and nothing happened, and the cut-out only worked after I unplugged and cleaned a tarnished two-pin connector under the dash.
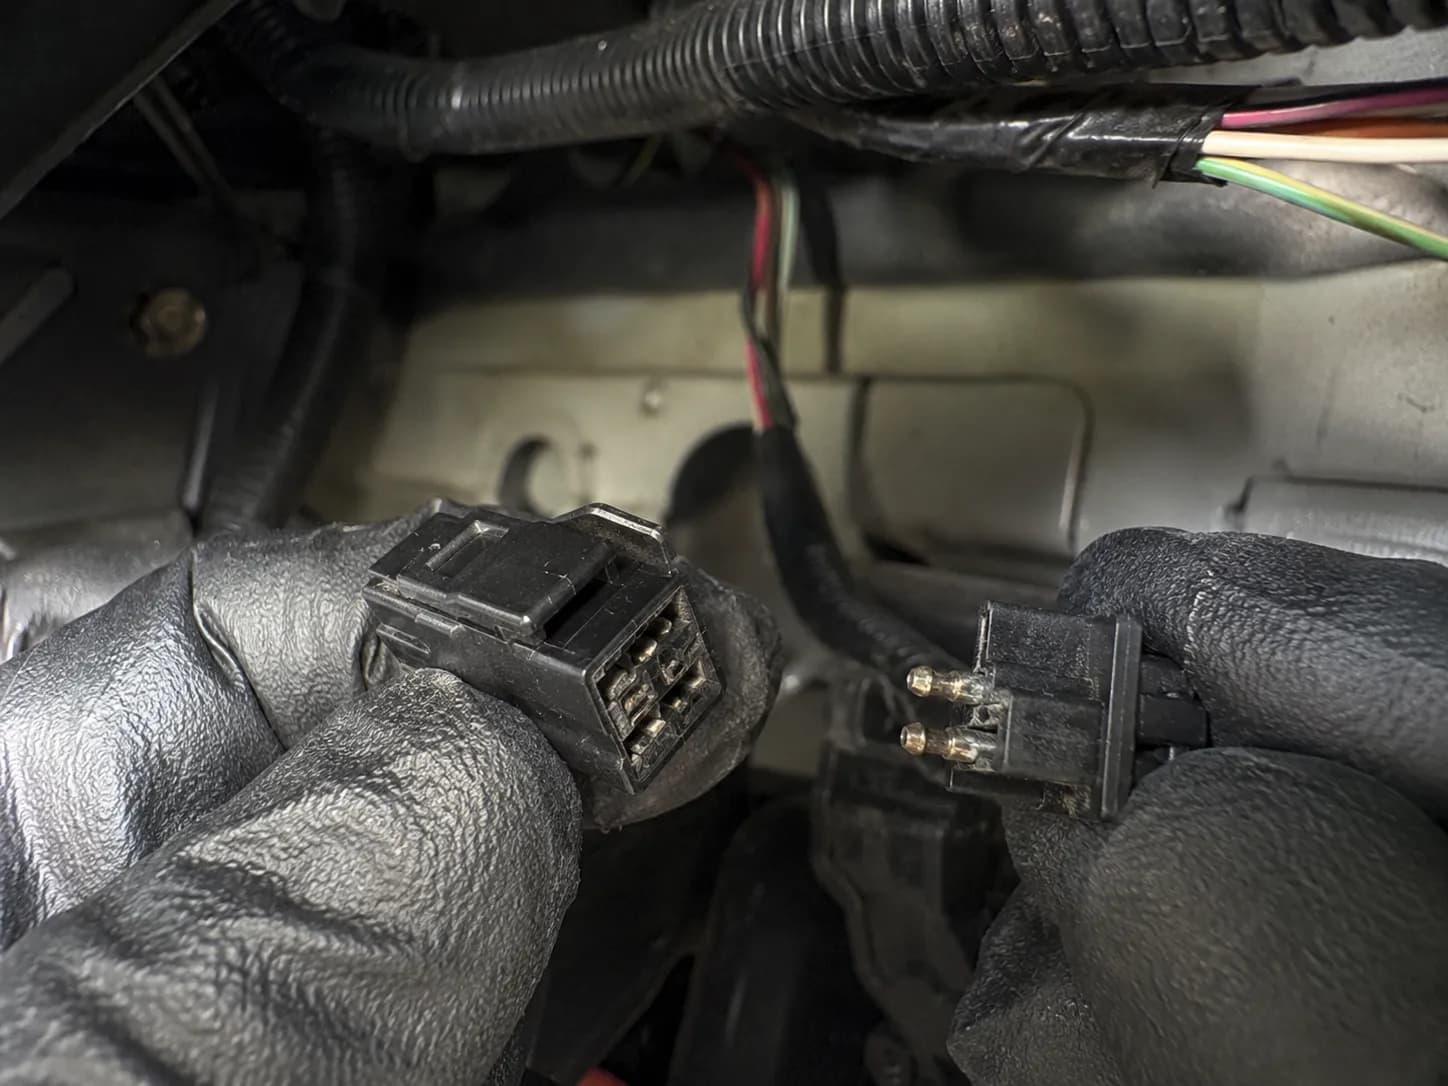
An owner would never find that without testing for it. It is also the most consequential thing in this article, and no written tune-up guide I could find includes the test.
Deck level earns the tape measure too. An unlevel deck produces a stepped cut with one clear ridge rather than a generally ragged one, and it gets blamed on dull blades almost every time.
Husqvarna's ride-on maintenance guidance covers tyre pressure, deck cleaning, cutting height and pitch, and the seat, lift, drive and brake tests, and points owners to a dealer at 200 hours.
If an interlock fails, stop here. A machine whose seat switch, blade engagement cut-out or parking brake does not work is not ready to mow, whatever else you have serviced. Fix it or take it to a dealer before the first cut.
Belt replacement, transmission service and carburettor work all sit deliberately outside this list, because each has a failure mode that punishes guesswork.
Verify the Tune-Up Worked
Verify a finished Husqvarna tune-up with a six-point check that takes about ten minutes. Cold-start the engine and expect it to fire within two or three attempts. Run it three minutes, stop, and re-check the oil level, because a newly fitted oil filter takes its share of the fill.
Check for leaks at the drain plug, the filter seal and the plug seat. Listen for new vibration at operating speed, which usually means an unbalanced blade, then cut a short strip and inspect the grass tips.
Cold start. Passes if the engine fires within three pulls or three seconds of cranking. Fails: recheck the lead and the fuel.
Three minute run, then re-check oil. Passes if the level sits inside the cross-hatch. Fails: top up in two ounce increments.
Leak check. Passes if the drain plug, filter seal and plug seat are dry. Fails: stop and re-seat the offending part.
Vibration at operating speed. Passes if the deck feels as it did before. Fails: pull the blades and re-balance.
Cut a short strip. Passes if the grass tips are cleanly severed. Fails: more edge on the blades, or level the deck.
Interlock re-test after reassembly. Passes if all three cut-outs still work. Fails: stop and fix before mowing.
The second check is the one that saves people. On the Z254 the level read at the full mark straight after refilling, then sat around the middle of the cross-hatch after a three minute run, roughly 4 fluid ounces down.
That is not a leak. A spin-on filter and the oil galleries hold oil that simply is not in the sump at fill time.
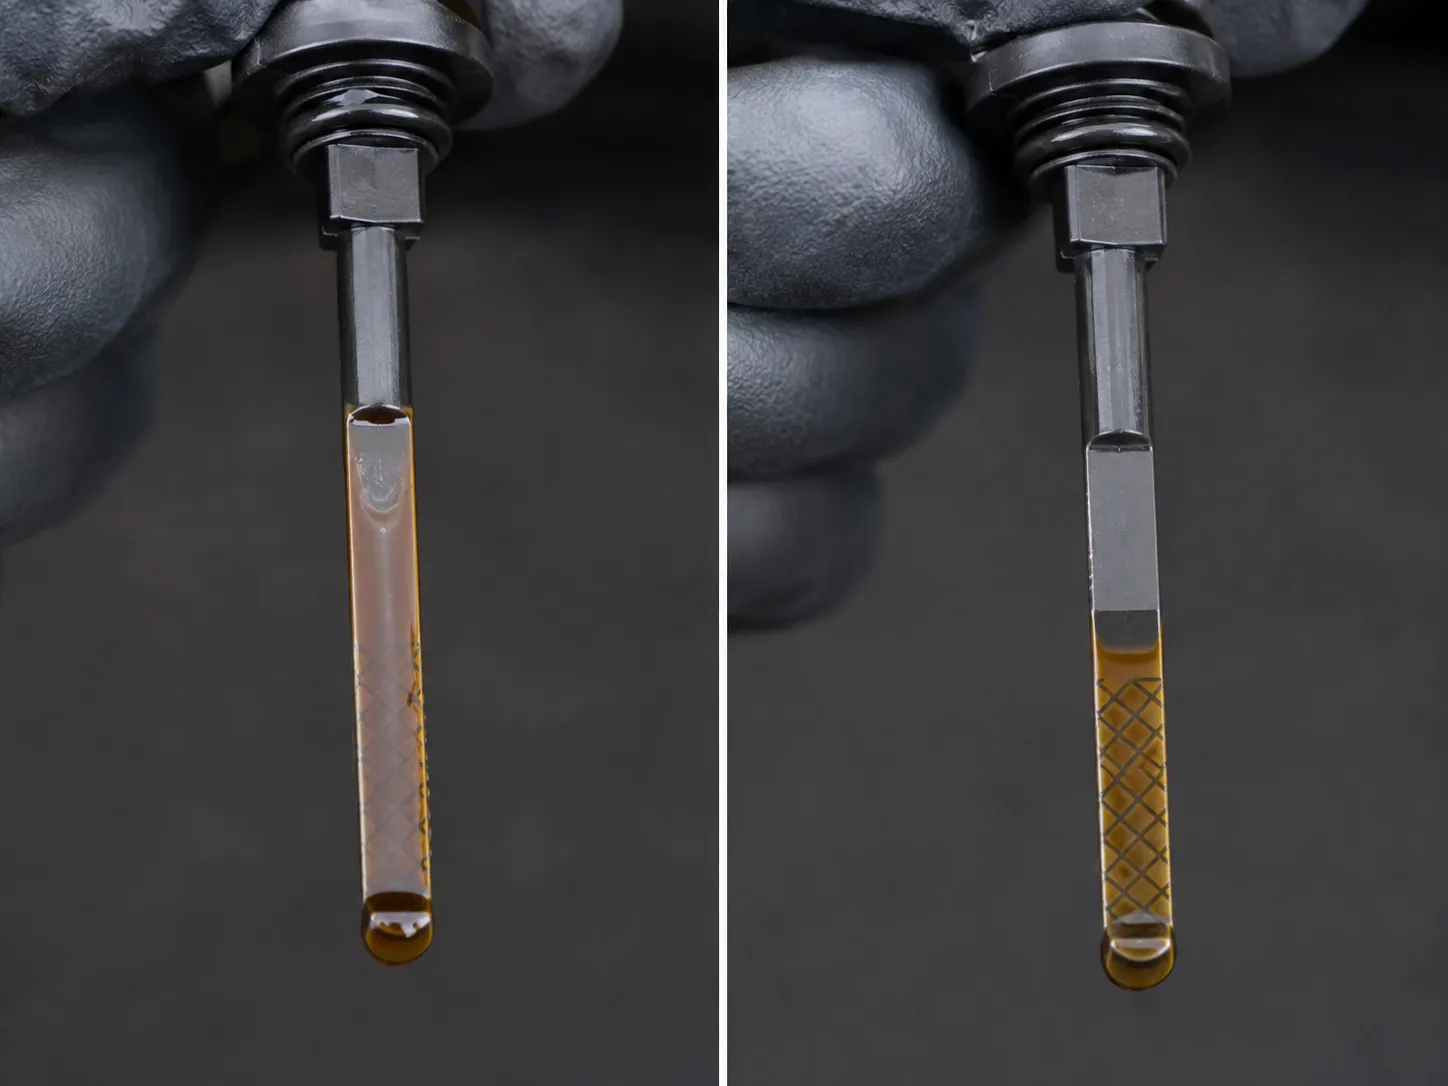
Running the engine, checking for leaks and re-checking the level is standard practice among owners who service their own machines, though the amount it drops is rarely stated. Four ounces is a useful number to carry.
If it still runs badly. This check finds the four errors a tune-up commonly introduces. It does not diagnose a machine that was already running badly beforehand, which usually means fuel delivery, ignition or valve clearance, none of which are covered here.
How Often Does a Husqvarna Need a Tune-Up?
Most homeowners should tune up a Husqvarna lawn mower once a year, in late winter or early spring before the first cut. Hour-based intervals such as oil every 50 or 100 hours are written for commercial duty cycles, and a homeowner mowing 20 to 25 hours a season reaches the annual calendar trigger several years before the hour trigger.
Between annual tune-ups, sharpen the blades mid-season, clean the air filter, and check the oil level before each mow.
Item | Calendar trigger | Hour trigger |
|---|---|---|
Engine oil | Every season, before the first cut | 50 h single-cylinder, 100 h V-twin |
Oil filter | Every season, with the oil | 100 to 200 h |
Air filter | Clean mid-season, replace yearly | Clean at 25 h, replace at 100 h |
Spark plug | Every season | 100 h |
Blades | Sharpen twice a season | 25 h |
Grease fittings | Season start and mid-season | 25 h |
Dealer service | Every 4 to 5 seasons for most homeowners | 200 h |
Here is why the calendar wins for most people. My three machines logged 22, 31 and 27 hours across the 2025 season, so the Kawasaki's 100 hour oil interval would fall due roughly once every three and a half seasons if hours were the only trigger.
Machine | Hours logged in 2025 | 100 h interval due in | Calendar interval due in |
|---|---|---|---|
Husqvarna LC221A | 22 h | 4.5 seasons | 1 season |
Husqvarna YTH22V46 | 31 h | 3.2 seasons | 1 season |
Husqvarna Z254 | 27 h | 3.7 seasons | 1 season |
Oil also degrades on a time axis, absorbing moisture and losing additive package over a winter in an unheated shed. That is why the calendar trigger survives even at very low hours.
Hour meters are not always trustworthy either. One Husqvarna zero-turn owner on LawnSite reported logging 26 hours across a four hour working day, and threads like that are also where the trade argues about whether a tune-up means restoring specification or replacing parts.
Briggs & Stratton sets its own interval at every 50 hours or the start of each season, whichever comes first. If you want the interval question worked through properly, it deserves its own read.
When once a year is not enough. Dusty or sandy conditions, more than 40 hours a season, outdoor storage, or ethanol-blended fuel left over winter all shorten the interval. Treat mid-season as a second checkpoint rather than a glance.
The Mistakes I Keep Seeing, and When to Call a Dealer
Four mistakes account for most disappointing Husqvarna tune-ups: fitting a pre-gapped plug without checking the gap, refilling only the volume of oil that drained out after changing a filter, sharpening blades without balancing them, and servicing the engine while never testing the safety interlocks.
Stop and take the mower to a Husqvarna dealer if it still misfires after a correctly gapped plug and fresh fuel, if it smokes after a correct oil fill, if it will not hold engine speed under load, or if any safety interlock fails.
Assuming a pre-gapped plug is gapped correctly. Two of my three arrived out of spec, and a wrong gap costs starting reliability all season.
Matching the refill to the drained volume. With a filter fitted the engine needs more than came out, and the shortfall runs it lean on oil until someone notices.
Sharpening without balancing. The cut looks fine and the spindle bearing pays for it over the next two seasons.
Treating the tune-up as engine-only. The interlocks are the part of the machine that stops it hurting you, and the part nobody checks.
I made two of those four during this test window, which is why they are on the list.
Machine | Error | Cost to correct |
|---|---|---|
Husqvarna LC221A | Tipped the refilled machine carburettor side down, pushing oil into the air filter housing | About 25 minutes of cleaning and a new element |
Husqvarna Z254 | Left the sump about 4 fl oz light after the filter change | Caught by the three minute run check, two minutes to correct |
Errors made, March to May 2026.
This is where the inspection framing pays off. A shop tune-up costs more than parts because what you are really buying is the report, the list of things a mechanic noticed with the machine on the bench.
Hand it over if you see any of these. A persistent misfire after a correctly gapped plug and fresh fuel. Smoke after a correct oil fill. An engine that will not hold speed under load. Any safety interlock that fails a test. Any hydrostatic or transmission symptom, including creeping in neutral or losing drive on a slope.
Expect a floor price for that visit. Estimates from Angi put shop labour around 45 to 100 dollars an hour, with many shops applying a minimum charge before parts.
What this article cannot tell you. My measurements come from three machines in one spring, enough to show an effect and not enough to be a population figure. The 2026 prices will move. Published specifications vary by production year, so your own engine manual outranks every table here.
Husqvarna Tune-Up FAQs
Can I use any spark plug in my Husqvarna?
No. The replacement must match the original's heat range, thread diameter and thread reach, which is what a cross-reference chart actually checks. A plug that threads in is not necessarily the right plug, and a reach that is too long can contact the piston.
Should I use synthetic oil in a Husqvarna mower?
Yes, on modern engines, once break-in is complete. Use the viscosity your engine maker specifies rather than the one your car takes, since air-cooled engines run hotter and 10W-30 or 10W-40 is the usual answer.
Do I really need the 8-hour break-in oil change?
Yes on a new engine, and it is the one interval I would not negotiate. Owners argue about it because printed and PDF manuals for the same engine family disagree on whether an early change is specified, but the metal shed during ring seating is real either way.
Do I need to change the oil filter every time I change the oil?
Not strictly. Engine documentation often allows a filter to run two oil changes, but a filter costs a few dollars and holds contaminated oil you just paid to remove, so doing both together is the better trade.
Is a Husqvarna riding lawn mower tune-up different from a walk-behind one?
Yes, in scope rather than in kind. The same four consumables apply, plus an oil filter, often a second plug, two or three blades instead of one, and the chassis list of greasing, tyre pressures, deck level and interlock testing.
Can I skip the tune-up if the mower still runs fine?
You can, and often nothing dramatic happens. My LC221A went two seasons untouched and still cut, but it needed nine pulls to start on stale fuel, its air filter had picked up 17 grams of debris, and its plug was 0.004 inch out of gap, so what you spend is starting reliability and engine life rather than one bad afternoon.
What two skipped seasons looked like. Husqvarna LC221A, measured 14 March 2026: nine pulls to start, 17 grams of debris in the air filter, spark plug 0.004 inch out of gap. Nothing broken.
What to Do Next With Your Husqvarna
The reason to learn how to tune up a Husqvarna lawn mower is not the 60 dollars a year it saves, though it does save that. It is that the machine stops being unpredictable.
Everything above traces back to the first sixty seconds. Read the product plate, resolve your body style and your engine maker, and the parts list, the oil capacity, the plug count and the blade count all stop being guesses.
Do it this week rather than in April. Late winter is when parts are on the shelf and shops are quiet, and you will not be standing over a mower that will not start with the grass already ankle deep.
Then work in order: oil while the engine is warm, air filter next, plug or plugs after that, blades last, chassis checks to finish. Ten minutes of verification at the end tells you whether it worked, which is ten minutes more than most guides give you.
And know where your line is. If the machine misfires after a correct plug and fresh fuel, smokes after a correct fill, will not hold speed under load, or fails an interlock test, that is a dealer's problem and not a failure on your part.
The job of an annual tune-up is to keep a good machine good, and to tell you early when it has stopped being one.
Summarize with AI
Keep reading
Related articles
 Maintenance & Seasonal Care
Match a lawn mower tune up kit to your engine: what is inside each kit, OEM vs aftermarket price math, and the right kit by brand for push and riding mowers.
 Maintenance & Seasonal Care
Compare mobile vs drop-off shop for a lawn mower tune up near me: real 2026 price ranges from 12 quotes, the 7 questions to ask, and when to just DIY it.
 Maintenance & Seasonal Care
Match a lawn mower spark plug repair kit to your fault in 30 seconds. 7 kits tested on 9 engines: M14x1.25 sizing, insert lengths, and the $5 boot fix.
 Maintenance & Seasonal Care
Compare lawn mower tune up cost by mower type: $70-$150 push, $150-$280 riding, from 9 real 2026 shop quotes. Plus the same parts for about $18 DIY.
Comments
Moderated for quality. Share a correction, ask a follow-up, or tell us what worked for you - every comment is reviewed before it goes live.