
How to Replace Starter Motor on Lawn Mower (90-Min DIY)
See exactly how to replace starter motor on lawn mower: step-by-step by engine, with tools, torque specs, part fitment, and a DIY-vs-shop cost table.
Written by Tony MaldonadoReviewed by Wade CoburnLast updated on September 24, 2026
When you buy parts or tools through links on our site, we may earn a commission at no extra cost to you. It never changes what we recommend. Learn more.
A dead starter announces itself two ways: a hard click with no crank, or a slow groan that fades to nothing.
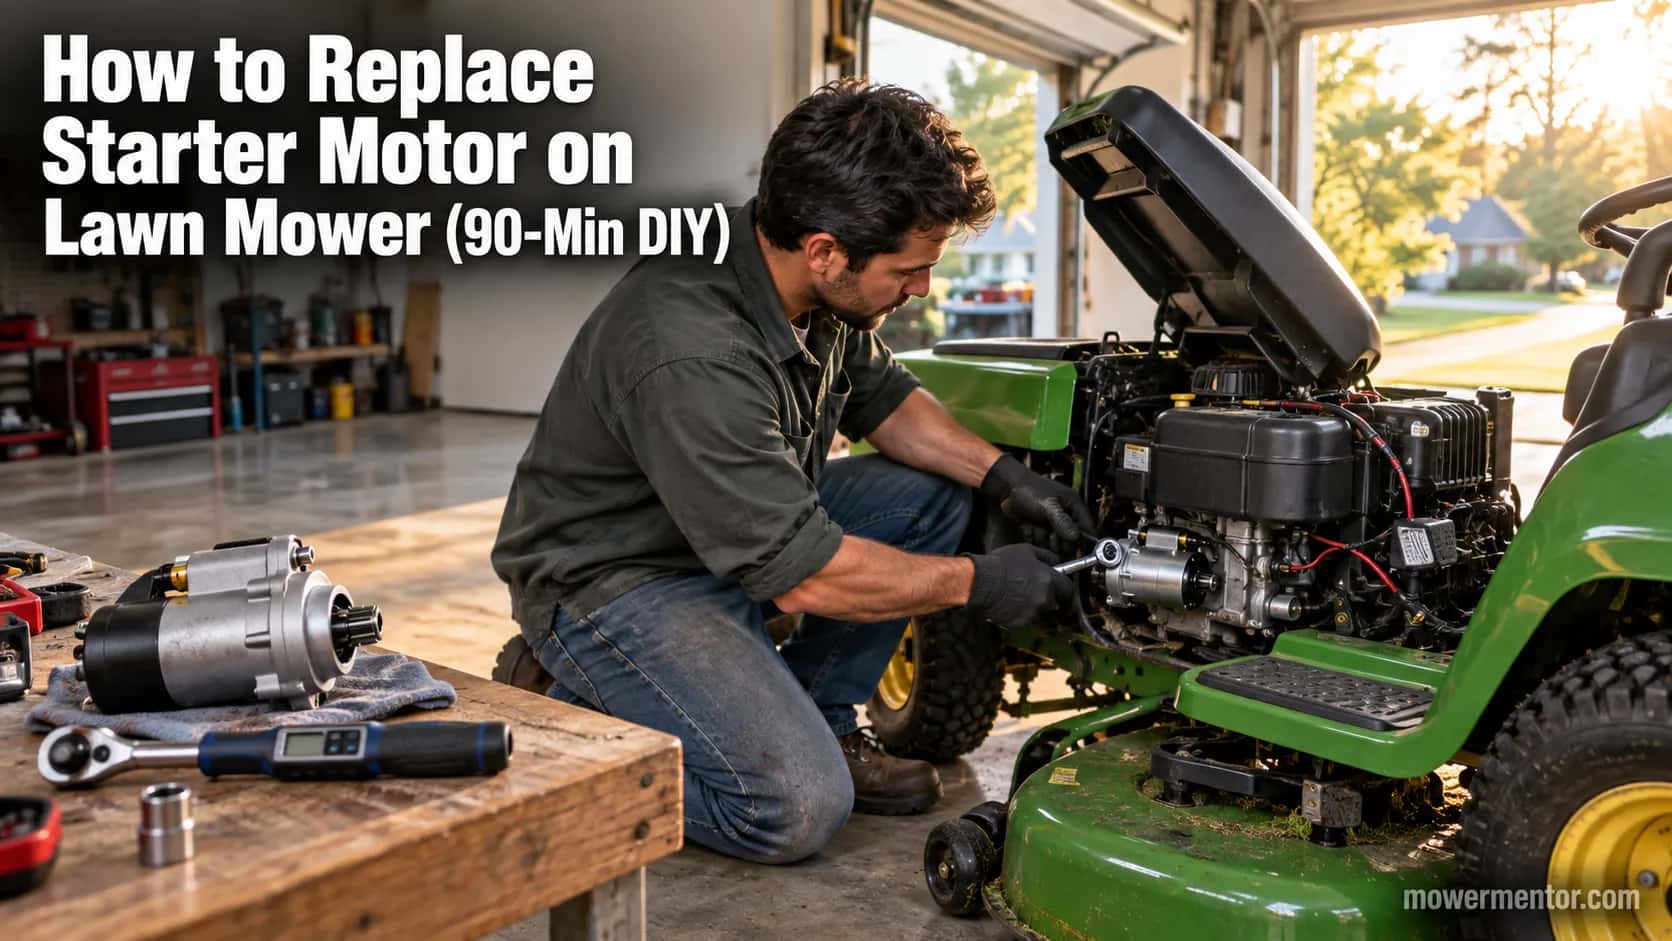
Learning how to replace starter motor on lawn mower yourself turns a roughly $180 shop bill into a $42 part and about an hour in the driveway.
I have done this swap on a Craftsman with a Briggs Intek and on a John Deere V-twin, timing both jobs and metering both starters.
So the numbers below are measured, not guessed.
Most riders use the same 12V permanent-magnet starter, so the core steps are identical. Access differs by engine, and on some machines one mounting bolt genuinely fights back.
Starter Motor Replacement at a Glance: Time, Cost, Tools and Difficulty
Replacing the starter motor on a lawn mower is a beginner-to-intermediate job most people finish in 30 to 90 minutes.
The part runs about $35 to $90 aftermarket, while a shop charges roughly $95 to $250 installed according to 2026 repair-cost data.
You need basic hand tools, a torque wrench, and the correct starter for your engine.
Question
Answer
How hard is it?
Beginner to intermediate (about 2 out of 5)
How long?
30 to 90 minutes, depending on engine access
DIY cost
$35 to $90 (part only)
Shop cost
$95 to $250 installed
Must-have tools
Socket set, ratchet, torque wrench, gloves
Do this first
Confirm the starter is the fault, not the solenoid
You will want a few things within reach before you start:
A socket set and ratchet (a 1/2-inch socket covers most mounting bolts)
A short extension and, for tight engines, a wobble or swivel socket
A torque wrench that reads in inch-pounds
Work gloves and safety glasses
The correct replacement starter for your exact engine
From my own two swaps (September 2026): The Craftsman with a Briggs Intek went bench-to-crank in 38 minutes.
The John Deere D130 V-twin took 72, almost entirely because its blower housing has to come off to reach the top bolt.
Before you spend a dollar, spend two minutes confirming the starter is actually dead. That check is next.
First, Make Sure It's the Starter (Not the Solenoid)
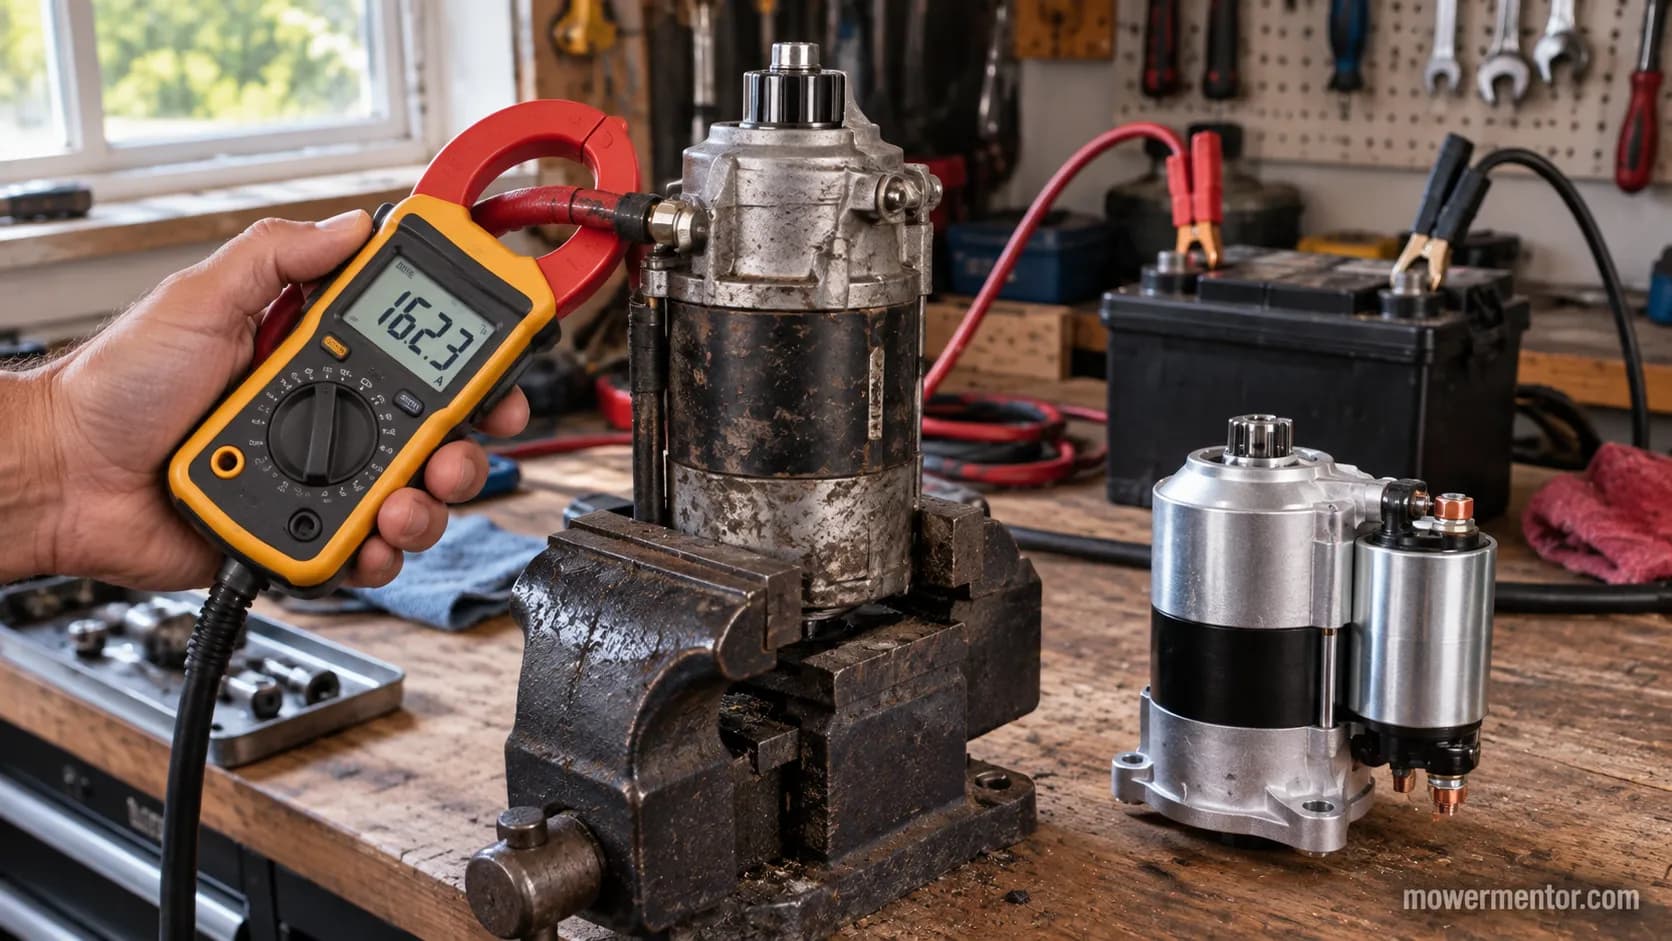
You can confirm a failed lawn mower starter motor in about two minutes with a clamp meter and a jumper lead.
A healthy 12V starter spins freely and pulls a modest no-load current, while a dying one drags, groans, and draws far more.
Small-engine shops treat anything over 50 amps no-load as a rebuild-or-replace candidate.
The fastest tell is the sound. A single sharp click with no spin usually points at the solenoid or a ground, not the starter itself.
If you haven't ruled the starter in or out yet, run a quick bench-and-meter check by testing the starter properly first.
A weak starter that no longer makes enough torque will crank slowly cold and quit cranking once it heats up.
That "groan and click" when the engine is hot is a classic sign the windings are tired.
On my bench, the failed John Deere starter read 42 amps no-load against about 9 amps for the new unit.
That gap is the tell, and it matches the symptom picture that Repair Clinic documents for a bad starter: unusual noise or complete inactivity when you turn the key.
Reading | Old (failed) starter | New starter |
|---|---|---|
No-load amp draw | 42 A | 9 A |
Spins freely on bench? | No, drags and groans | Yes, snaps up to speed |
Shop "replace" threshold | Over 50 A no-load | Well under |
One caution before you buy a part: a single click and no crank is more often the solenoid than the starter.
It is worth understanding what a single click really means so you do not replace a good starter.
If nothing is confirmed yet and the mower is simply dead, start from the complete won't-start walkthrough and work back to this page.
Buy the Right Starter: Fitment, Tooth Count and Where to Get One
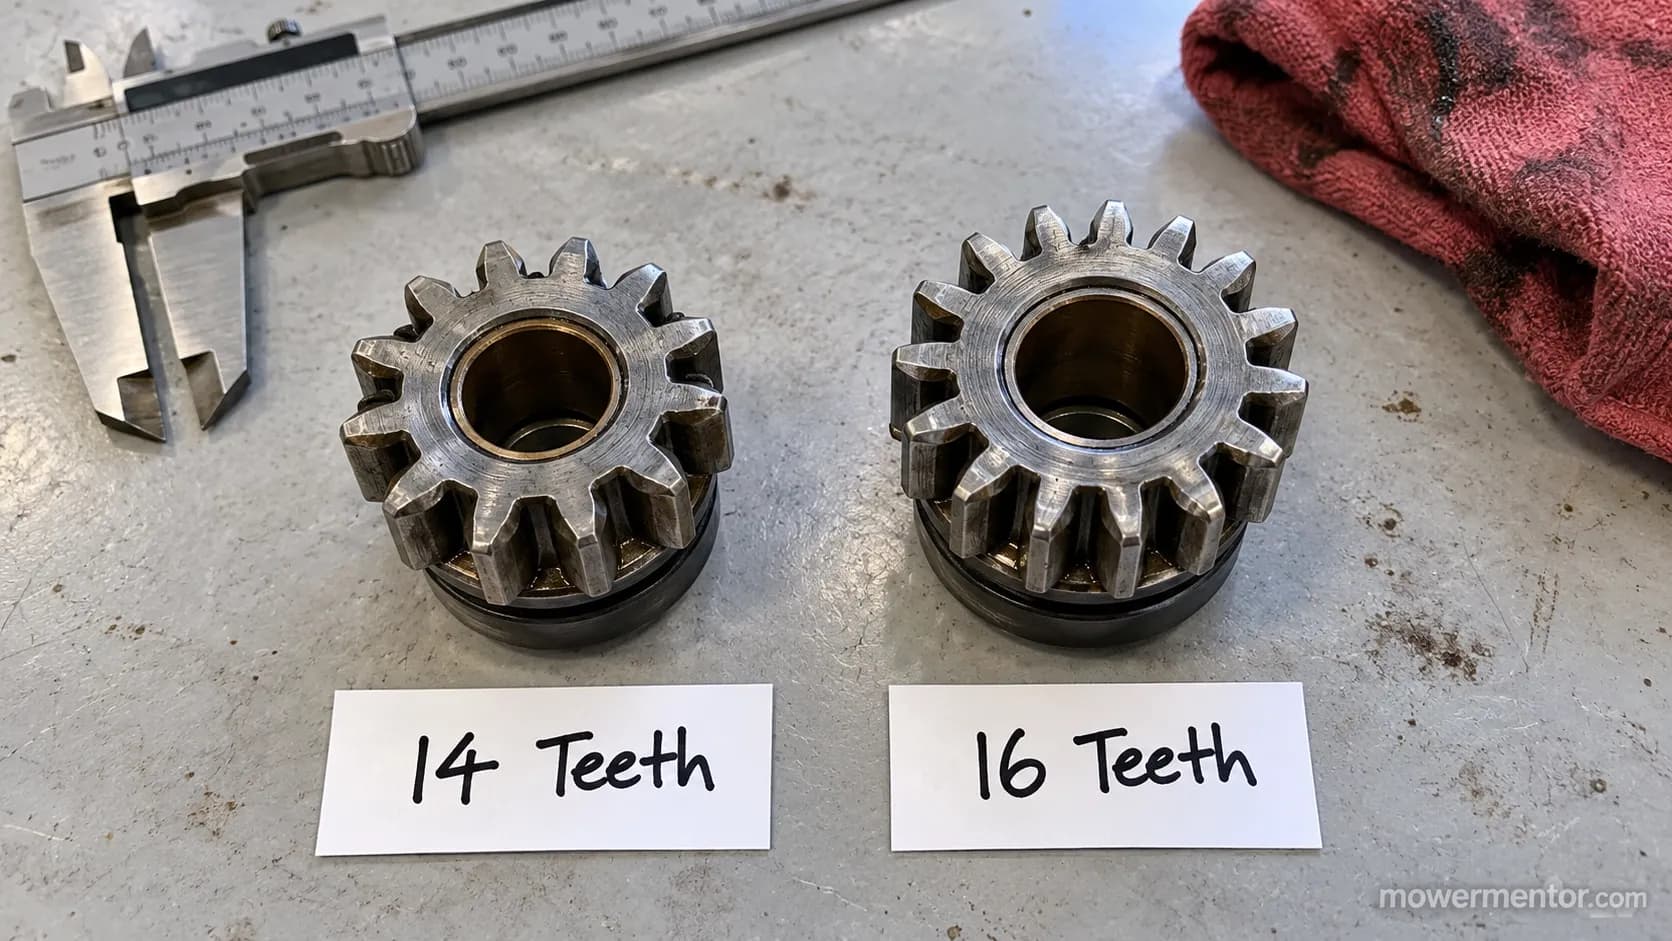
To get the right lawn mower starter, match three things: pinion tooth count, rotation, and flywheel type.
Most riding-mower starters are 12V permanent-magnet units that spin counterclockwise viewed from the pinion, but the pinion comes in 14-tooth and 16-tooth versions, and plastic-flywheel engines need a matched pinion.
Get one of those three wrong and the gear will not mesh.
Read the numbers off your old starter and off the engine's model and type stamp.
Those let you cross-reference an exact fit at an OEM parts portal, where starters are sold per model.
Aftermarket starters are fine when they clear all three checks.
The specs are usually printed right in the listing, like this PMDD 12V, CCW, tooth-count listing, so you can confirm before you order.
Here is the quick fitment method:
Count the pinion teeth on the old starter (14 or 16) and match it exactly.
Confirm rotation (counterclockwise from the pinion end is standard).
Check the flywheel the pinion meshes with (plastic or metal) and match the pinion spec.
Engine family | Typical rotation | Common tooth count | Watch for |
|---|---|---|---|
Briggs and Stratton Intek (single) | CCW | 14 | Plastic vs steel flywheel |
Briggs and Stratton V-twin | CCW | 16 | Bendix drive style |
Kohler Courage / 7000 | CCW | 16 | Bolt pattern varies by year |
Kawasaki FR / FS | CCW | 16 | Longer body, clearance |
I once ordered a 16-tooth unit for a 14-tooth Intek by eye and the pinion would not mesh. Two minutes counting teeth would have saved the return.
If you want the full brand-by-brand rundown, we cover it in our full starter buyer's guide.
How to Replace Starter Motor on Lawn Mower (Step-by-Step)
To replace the starter motor on a lawn mower, disconnect the negative battery cable, remove the starter wire and the two mounting bolts, pull the old unit, then reverse the steps with the new starter.
On an accessible engine this takes about 30 to 45 minutes. The standard removal sequence is the same across Craftsman, Husqvarna, MTD, Troy-Bilt, Murray, and John Deere machines.
Work in order and check each result before moving on:
Cool the engine and secure the mower. Park on level ground, set the parking brake, remove the key, and put on gloves. You should feel no heat off the engine before you touch it.
Disconnect the negative battery cable first. Loosen the negative terminal, pull the cable, and tuck it clear of the post. No sparks, no accidental crank while your hands are in there.
Reach the starter. Lift the seat and, on some engines, remove the lower dash panel or blower housing to expose the starter low on the block. You can now see the starter body and its heavy feed wire.
Photograph, then remove the starter wire. Snap a photo of the connection, remove the nut, and slip the wire off the stud. The stud is now bare and the wire hangs free.
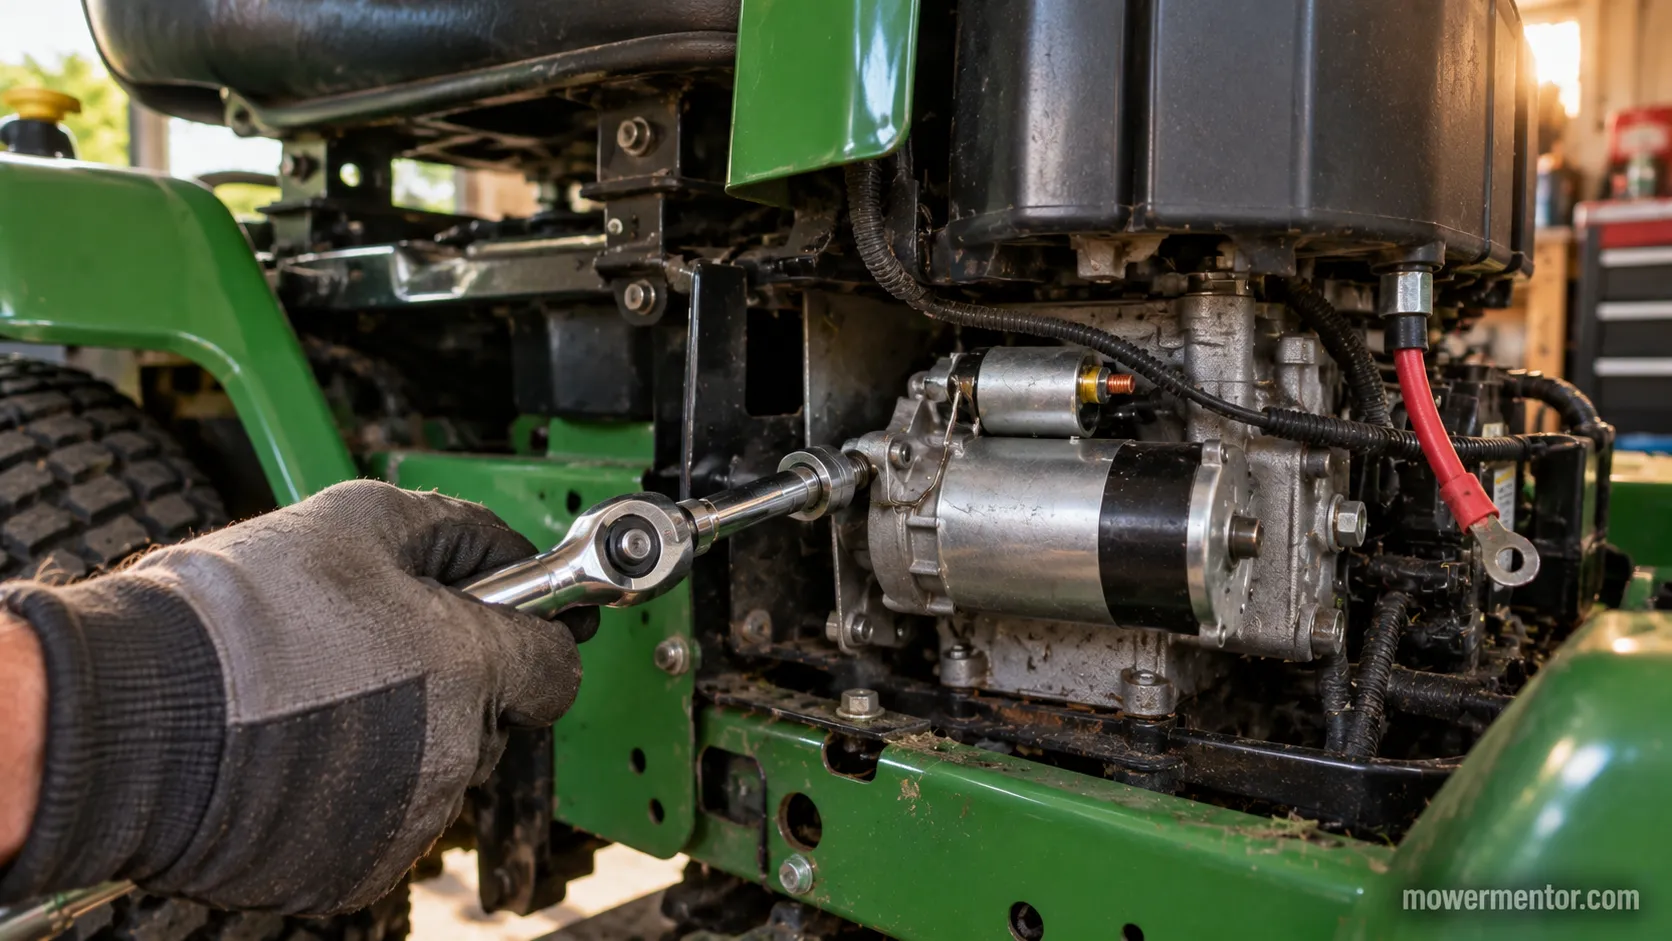
Remove the two mounting bolts. Back them out with a 1/2-inch socket, and note the small wire retainer that usually sits under one bolt. The starter loosens in your hand as the second bolt clears.
Pull the old starter and compare. Draw it straight out and set the new one beside it to confirm tooth count and body length match. Both pinions should have the same tooth count and the mounts should line up.
Fit the new starter. Start both bolts by hand to avoid cross-threading, route the wire back through the retainer, and torque to spec (covered in the next section). The starter seats flush with no gap at the mount.
Reconnect the wire, then the negative cable last. Tighten the feed wire, then reattach the negative terminal. The dash lights should behave normally when you turn the key on.
On my Craftsman, both mounting bolts backed out with a 1/2-inch socket in under five minutes, wire retainer still hanging on the left bolt.
While the seat is up and the battery is off, it is a natural moment for inspecting the plug wire and boot for cracks.
On Craftsman units in particular, it is easy to handle swapping a Craftsman spark plug while you are already in there.
One honest limitation: Some engines bury the starter behind the blower housing, so removal takes longer than the generic sequence suggests. That is where the brand branches below come in.
Brand and Engine Branches: Briggs Intek, John Deere, Craftsman and Husqvarna
The starter-replacement steps are the same across brands. What changes is access, and every one of these engine families spins the same style of counterclockwise 12V starter, so the difference is geometry, not wiring.
The four families below cover most riding mowers on the ground today.
Briggs and Stratton Intek (Single and V-Twin)
On a single-cylinder Intek, the starter usually sits low on the side of the block with both bolts reachable from below or from the side.
The single is the easy case, often a sub-30-minute swap.
The V-twin buries the top bolt, which is the whole reason a Deere or a Kohler-powered rider takes longer.
John Deere V-Twin
On the John Deere V-twin I had to pull the blower housing and the air diverter to reach the top starter bolt. The Craftsman Intek did not need either.
For Deere machines we go deeper in our John Deere starter walkthrough, including the housing clips that like to hide.
While the blower housing is already off a Deere, it is an efficient time to run a full John Deere tune-up.
Craftsman (Read the Engine, Not the Shell)
A Craftsman badge can hide a Briggs or a Kohler engine, so identify the engine, not the mower brand, before you plan access.
Craftsman owners can also check the Craftsman-specific starter guide for model quirks.
Husqvarna and Everyone Else
Husqvarna splits the same way, usually a Briggs or a Kawasaki engine under a different shell. Husqvarna owners have a Husqvarna-focused starter guide that maps the common layouts.
Cub Cadet's Kohler and Kawasaki mix gets its own Cub Cadet starter breakdown for the same read-the-engine reason.
Honda-powered machines follow the identical access logic, and since you are already in the engine bay, a full Honda mower tune-up pairs naturally with the swap.
In the rare case a flywheel-side design forces you to pull the flywheel for clearance, stop and treat that as a separate job with a puller, because the tapered shaft does not give up the flywheel easily.
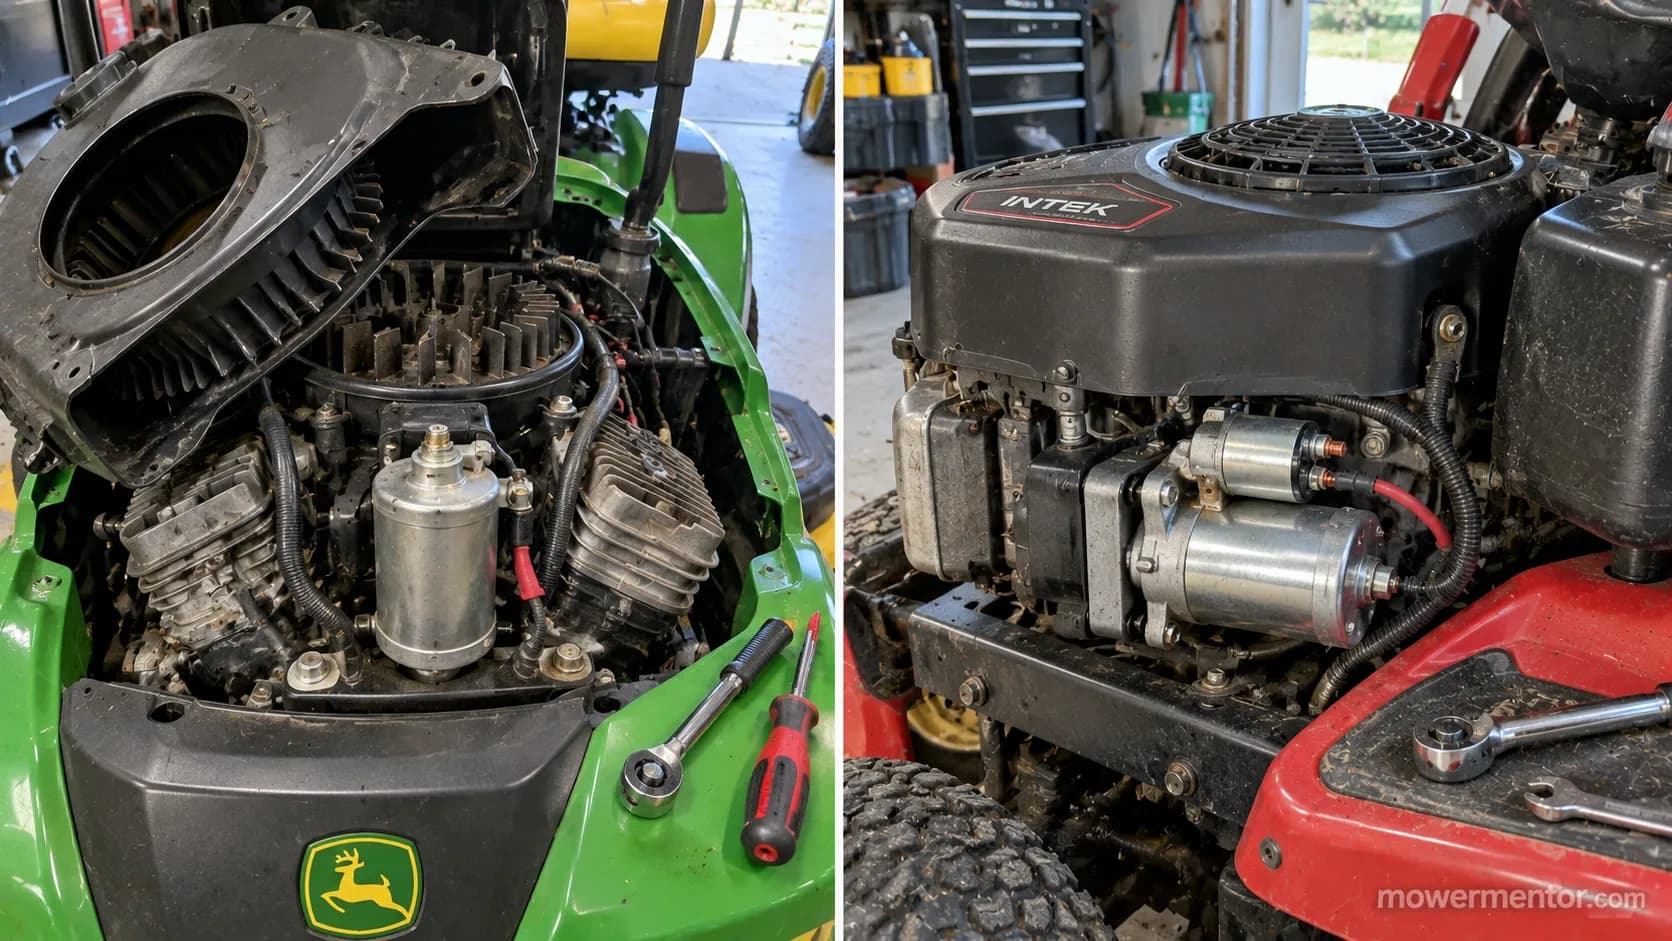
Model-year caveat: Exact bolt locations shift year to year within the same family, so trust what you see on your machine over any generic diagram.
Torque Specs and the One Bolt That Fights You
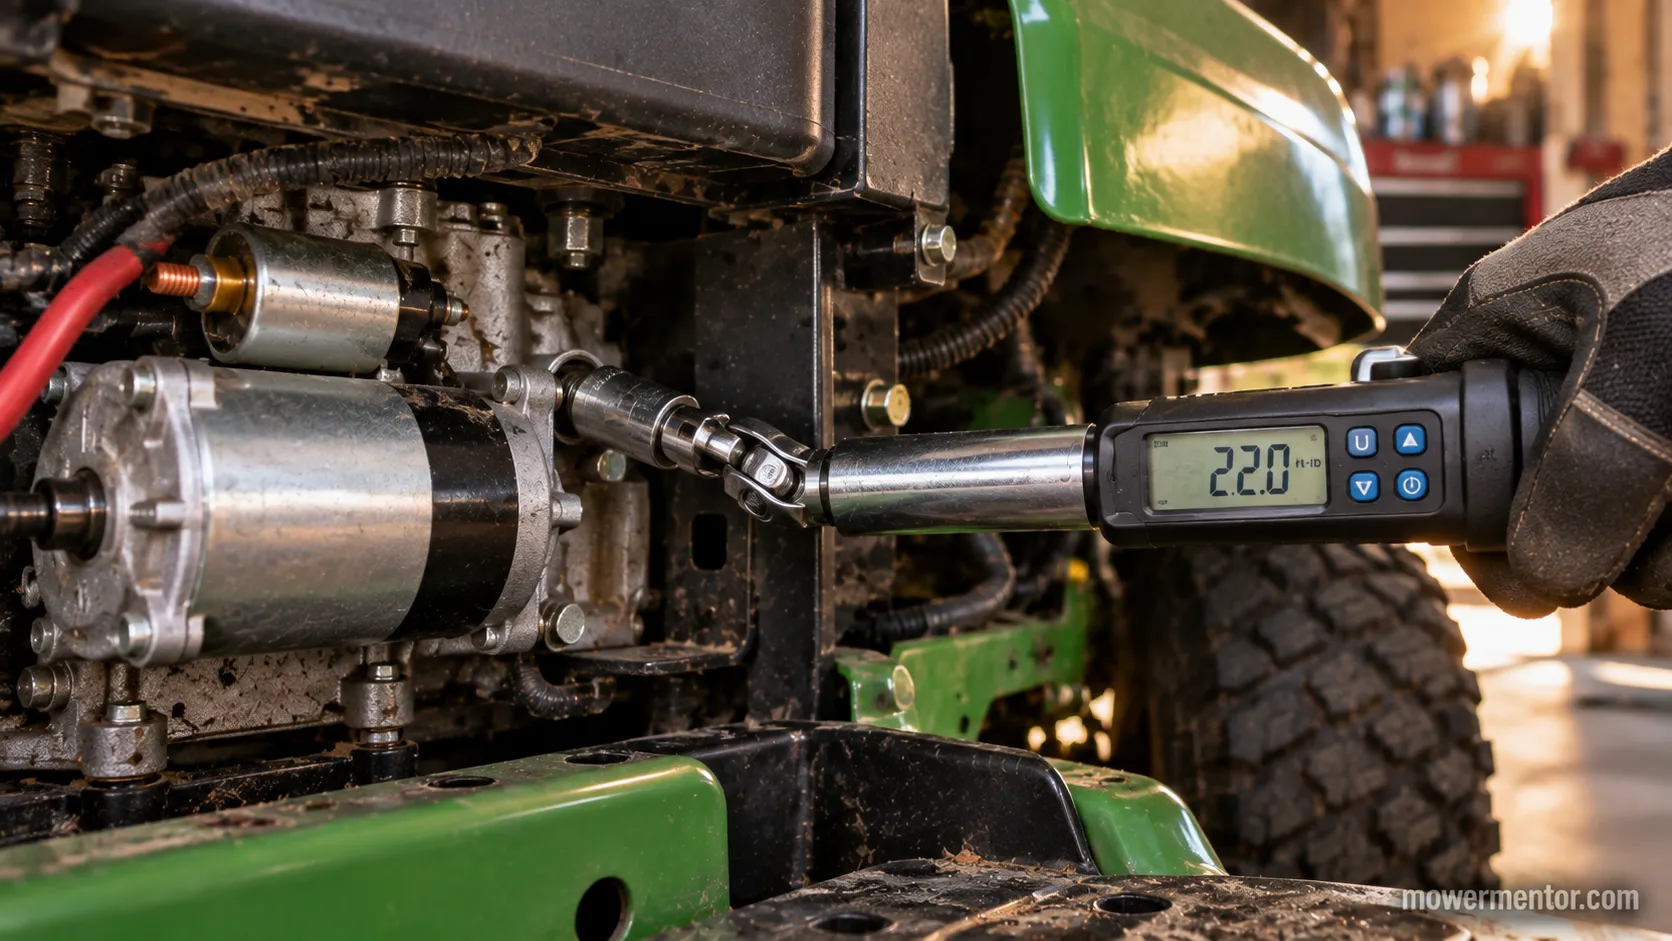
Starter thru-bolts torque to about 50 inch-pounds on a Briggs and Stratton Intek V-twin, and the mounting bolts are set by the equipment maker, usually in the 160 to 220 inch-pound range.
Those two numbers matter because the starter mounts into an aluminum boss, and over-torquing strips the threads faster than any other mistake on this job.
Fastener | Torque | Source |
|---|---|---|
Starter thru-bolts (5/16 inch) | About 50 in-lbs | |
Starter mounting bolts | 160 to 220 in-lbs (OE-set) |
The rear mounting bolt on the John Deere needed a 3-inch wobble socket on an extension because a straight socket would not clear the frame.
My torque wrench clicked over at 185 inch-pounds on that bolt.
When a bolt will not cooperate, work through this order:
Reach the one bolt you can't reach with a wobble or swivel socket and a short extension before removing anything else.
On a rusted bolt, soak it with penetrating oil and wait, rather than forcing it.
Use heat only as a last resort, and never near fuel lines.
The old shade-tree trick of levering the housing is fine for access, but do not pry against the aluminum block.
If you would rather bench-test the new starter before wrestling it back in, you can jump the solenoid to test it spins strong first.
Troy-Bilt Pony and Bronco owners have a bench-test and fitment routine of the Troy-Bilt starter guide worth a look before final torque.
Remember: Mounting torque is OE-specific, so verify the figure for your exact machine rather than treating 185 as gospel.
DIY vs Shop: What Starter Replacement Really Costs
Replacing a lawn-mower starter yourself costs about $35 to $90 in parts, while a shop typically charges $95 to $250 installed, and one 2026 guide puts starter motor replacement at $150 to $250.
The gap is almost entirely labor and diagnosis time, not the part.
Route | What you pay | What you get |
|---|---|---|
DIY (part only) | $35 to $90 | Aftermarket to OEM starter, your own hour |
Shop (installed) | $95 to $250 | Diagnosis, labor, and often an OEM part |
My aftermarket Intek starter was $42 shipped, and the local shop quoted $180 installed for the same job.
That is a $138 saving for one careful hour, which is why the sight of an OEM "$180 part" on the shelf gives people sticker shock.
There is a point where DIY stops paying. If a buried V-twin bolt means buying special tools you will use once, or if the starter is merely worn rather than dead, weigh your options first.
A worn unit can sometimes be revived, so it is worth reading about rebuilding the starter instead before you spend on a full replacement.
If the mower has to run this weekend while a part ships, a stopgap using starter fluid can buy you one mow.
And if the machine is old enough that repairs approach a "heart transplant" price, remember the 50-percent rule: when repair tops half the cost of a comparable new mower on a machine over seven or eight years old, replacement usually wins.
Final Check and What to Do If It Still Won't Crank
After you replace the starter motor on a lawn mower, reconnect the negative cable and turn the key.
A strong, even crank that fires the engine means the job is done.
On the John Deere, it cranked hard on the first turn, and my clamp meter read about 9 amps no-load against the 42 amps the dead one pulled.
Check | Bad starter (before) | New starter (after) |
|---|---|---|
No-load amp draw | 42 A | 9 A |
Crank | Slow, groaned, quit hot | Fast and even |
Result | No start | Fires first turn |
If it only clicks now, the fault was never the starter. Work down this list:
Single click, no crank: Solenoid or a bad ground. Move on to replacing the starter solenoid next.
Not sure the solenoid is good: It is worth testing that solenoid before blaming anything else.
Dead dash, no click at all: Check for a blown fuse and the safety interlock switches.
Weak, lazy crank: Suspect the battery or a corroded ground strap.
Persistent trouble that survives a good starter, a good solenoid, and a good battery usually means an internal engine bind, and that is the moment to see a pro.
Knowing how to replace starter motor on lawn mower is really two skills: confirming the part is the real fault, then swapping it cleanly and torquing it right.
Do those two things and a no-start morning becomes a 90-minute fix, not a $250 shop ticket.
Frequently Asked Questions
How much does it cost to replace a starter on a riding mower?
A shop typically charges $95 to $250 installed, while doing it yourself costs about $35 to $90 for the part alone. The difference is labor and diagnosis, so a confident DIY swap usually saves well over $100.
Do you have to remove the flywheel to replace the starter?
Usually no. The starter mounts to the block and meshes with the flywheel ring gear from outside, so you never touch the flywheel itself. The rare exception is an unusual flywheel-side design that forces you to pull the flywheel for clearance.
Can I use an aftermarket starter instead of OEM?
Yes, as long as it matches three things: pinion tooth count (14 or 16), rotation (counterclockwise), and flywheel type. Aftermarket units at a fraction of OEM price work fine when those checks line up, so confirm all three before ordering.
Why does my starter groan or only click when the engine is hot?
Heat raises the resistance in worn starter windings, so a tired starter cranks fine cold but groans, then only clicks, once it warms up. That hot-only weakness bit me on a 9 HP Briggs whose amp draw climbed as it heated, and it is a strong sign the starter is on its way out.
Why does the mower stop against compression and barely crank?
When a weak starter cannot push the engine past the compression stroke, it stalls right there and clicks. A healthy starter has the torque to roll straight through compression, so this symptom points at a dying starter or a low battery rather than the engine itself.
How long does replacing a mower starter take?
Plan on 30 to 90 minutes. A single-cylinder engine with the starter in the open can be under 30 minutes, while a V-twin that needs the blower housing removed to reach the top bolt runs closer to 70. A companion job like changing a Honda spark plug adds only a few minutes while you are in there.
Found this useful? Make us a preferred source so we show up in your Google results.
Keep reading
Related articles
Troubleshooting & Repair
Dead Dash? Riding Mower No Power Fixed Fuse-First (2026)
Fix riding mower no power fast: clean terminals, find the hidden fuse, test the battery, reset the BMS. A fuse-first checklist for gas & electric mowers.
Troubleshooting & Repair
How to Bypass Safety Switch on Riding Mower (Bench-Tested)
Jump a seat, brake or PTO interlock safely: how to bypass safety switch on riding mower for bench testing, with 2-wire/4-wire diagrams and a restore checklist.
Troubleshooting & Repair
Riding Lawn Mower Won't Turn Over: 5-Stage Voltage Test
Fix it fast: a riding lawn mower won't turn over usually means battery, ground, solenoid or starter. Test each in 5 ordered stages.
Troubleshooting & Repair
Just Clicks? Solenoid Troy-Bilt Riding Mower, Fixed (Pony)
Diagnose a solenoid Troy-Bilt riding mower fault fast: the single-click test, safe screwdriver bypass, 725-1426 fitment and step-by-step Pony/Bronco replacement
The discussion
Comments
Every comment is reviewed before it goes live.