
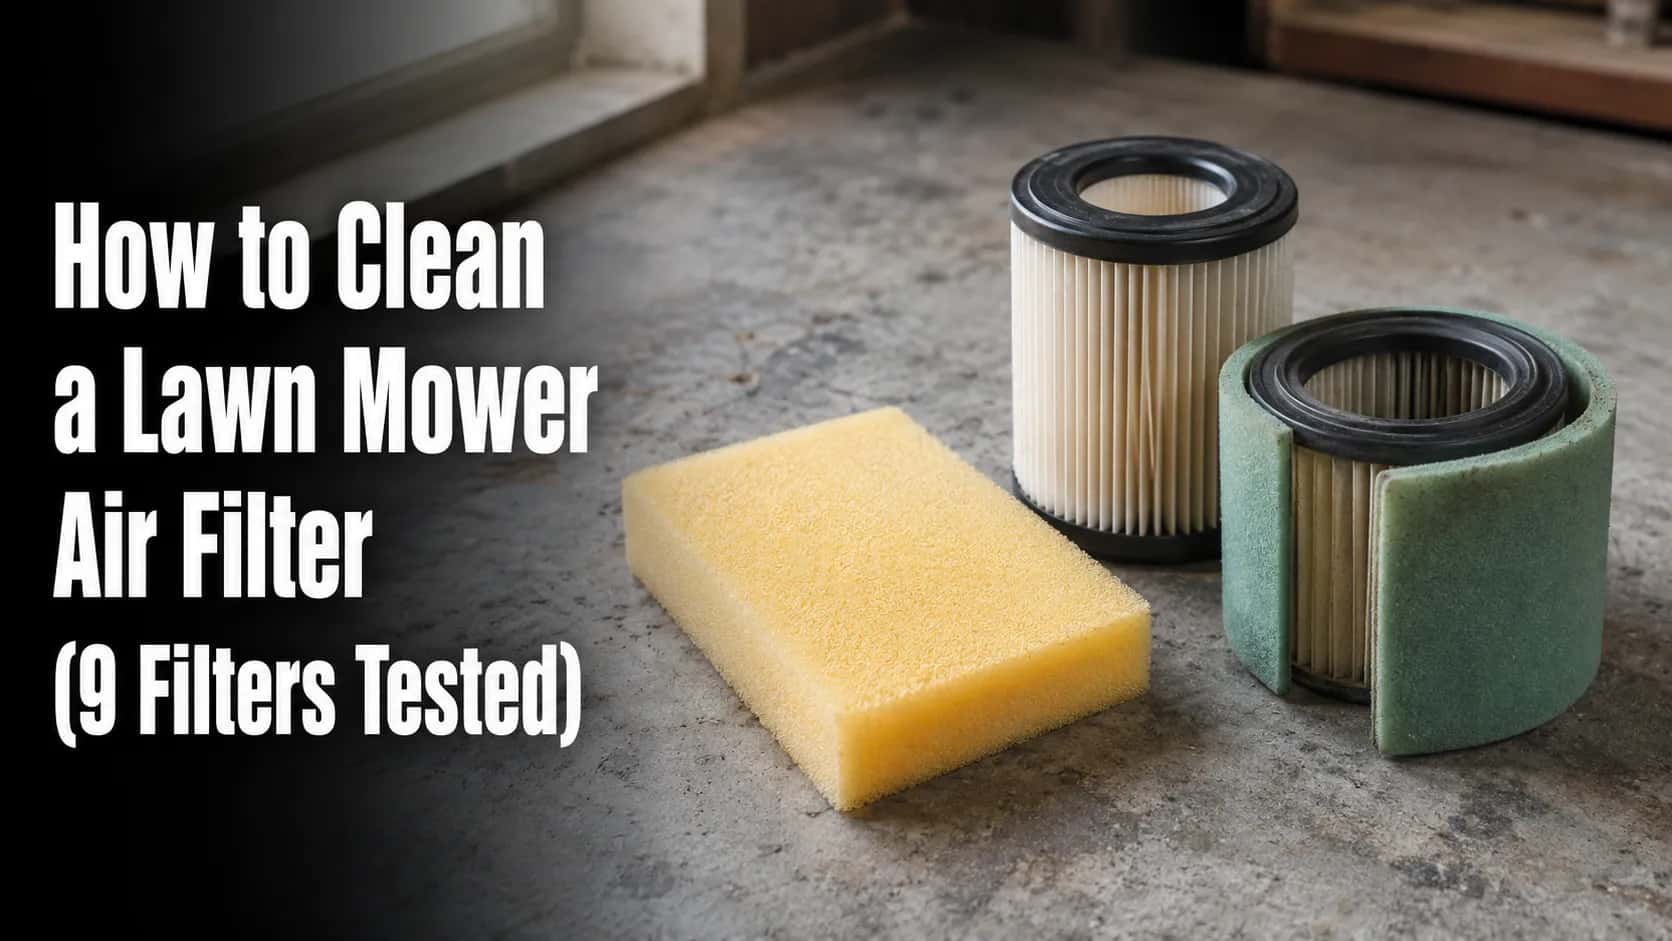
How to Clean a Lawn Mower Air Filter (9 Filters Tested)
Wash foam filters in warm soapy water, dry fully, then re-oil. Never wash paper. Includes a safe-vs-unsafe cleaner table and the light-box replace test.
Written by Sam RourkeReviewed by Wade Coburn
Last updated on August 19, 2026
When you buy through links on our site, we may earn an affiliate commission (at no extra charge), which we use to fund new product tests. Learn more.
Summarize with AI
Can You Clean a Lawn Mower Air Filter? The 60-Second Answer
I pulled nine air filters out of nine different mowers between 14 March and 22 May 2026. Four could be safely washed and reused, three had to go in the bin, and two needed two completely different treatments inside a single housing.
That split is the whole problem with this job. Whether your filter can be cleaned depends entirely on which of three types you are holding.
A lawn mower air filter can be cleaned only if it is foam. Foam filters wash in warm soapy water, dry completely, then get re-oiled. Paper filters are never washed. Tap them out and replace them if light no longer passes through the pleats.
Dual-element assemblies need both treatments: wash the foam pre-cleaner, tap or replace the paper cartridge underneath.
Filter type | Can it be cleaned? | Where to go next |
|---|---|---|
Foam (open cell, springy) | Yes, wash and re-oil | The foam procedure below |
Paper (pleated, stiff) | No, tap only | The paper procedure below |
Dual-element (foam over paper) | Partly, two separate methods | The dual-element procedure below |
Dust that slips past a badly serviced filter scores the cylinder wall permanently, and that damage accumulates silently until compression drops. According to Briggs & Stratton's service documentation, small engines use one of exactly three filter types: paper, foam, or dual element.
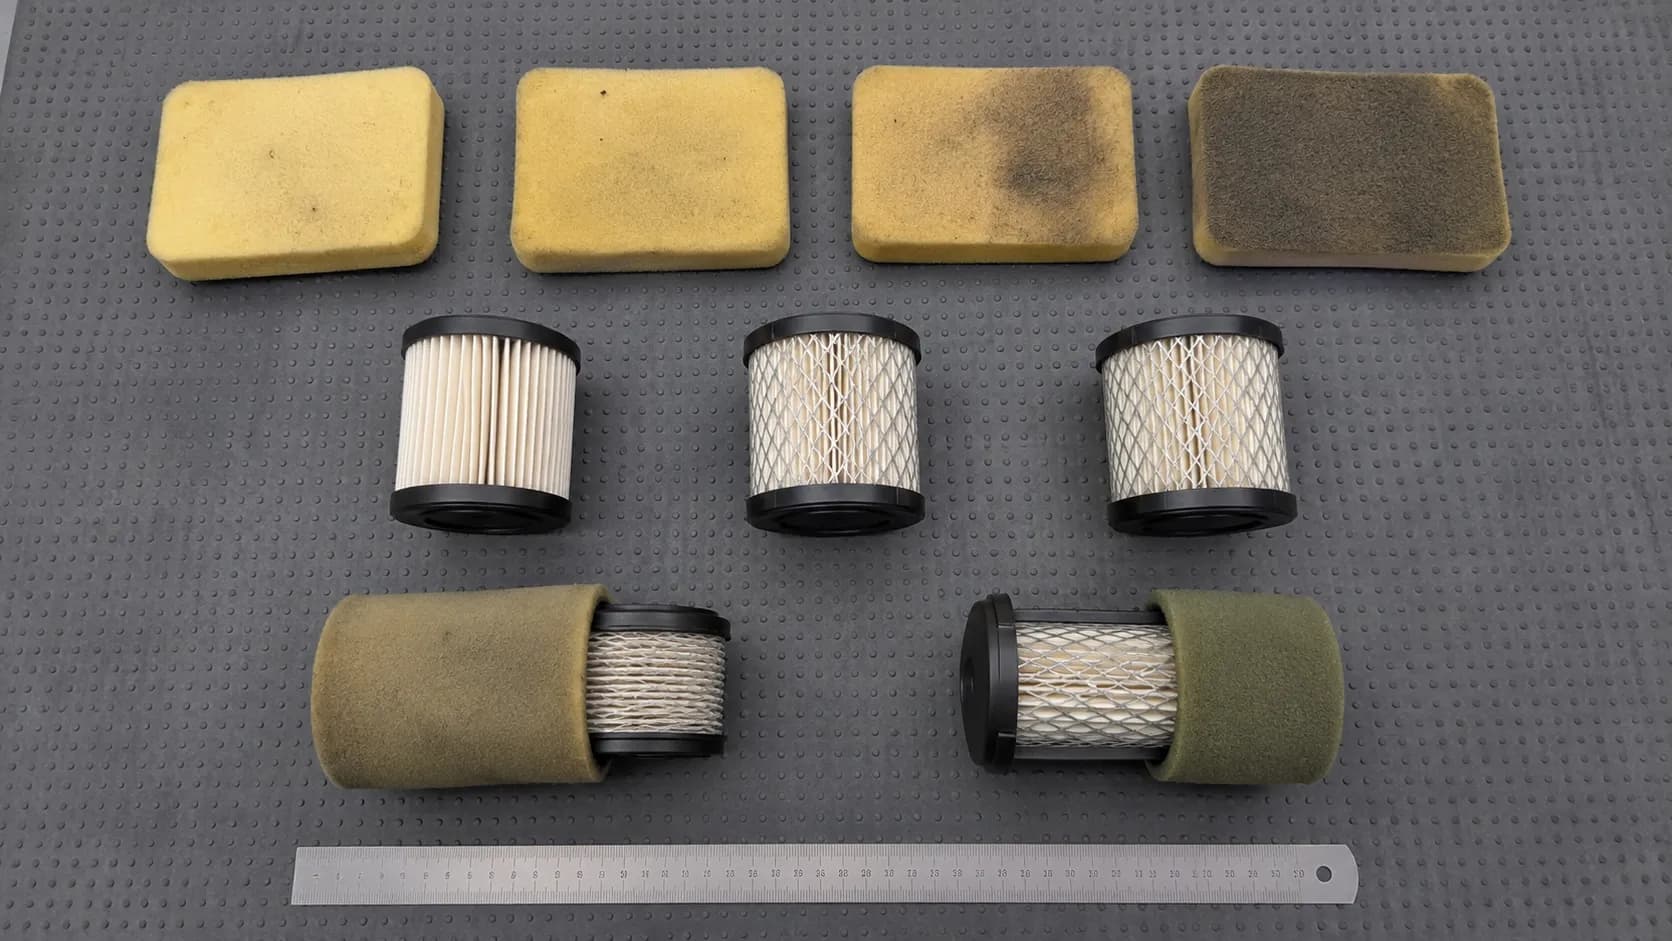
Filter | Type | Verdict |
|---|---|---|
1 | Foam | Washed and reused |
2 | Foam | Washed and reused |
3 | Foam | Washed and reused |
4 | Foam | Replaced, seam split |
5 | Paper | Tapped and reused |
6 | Paper | Replaced, media dark through |
7 | Paper | Replaced, torn pleat |
8 | Dual-element | Foam washed, cartridge reused |
9 | Dual-element | Foam washed, cartridge replaced |
First, Work Out What You're Holding: Foam, Paper or Dual-Element
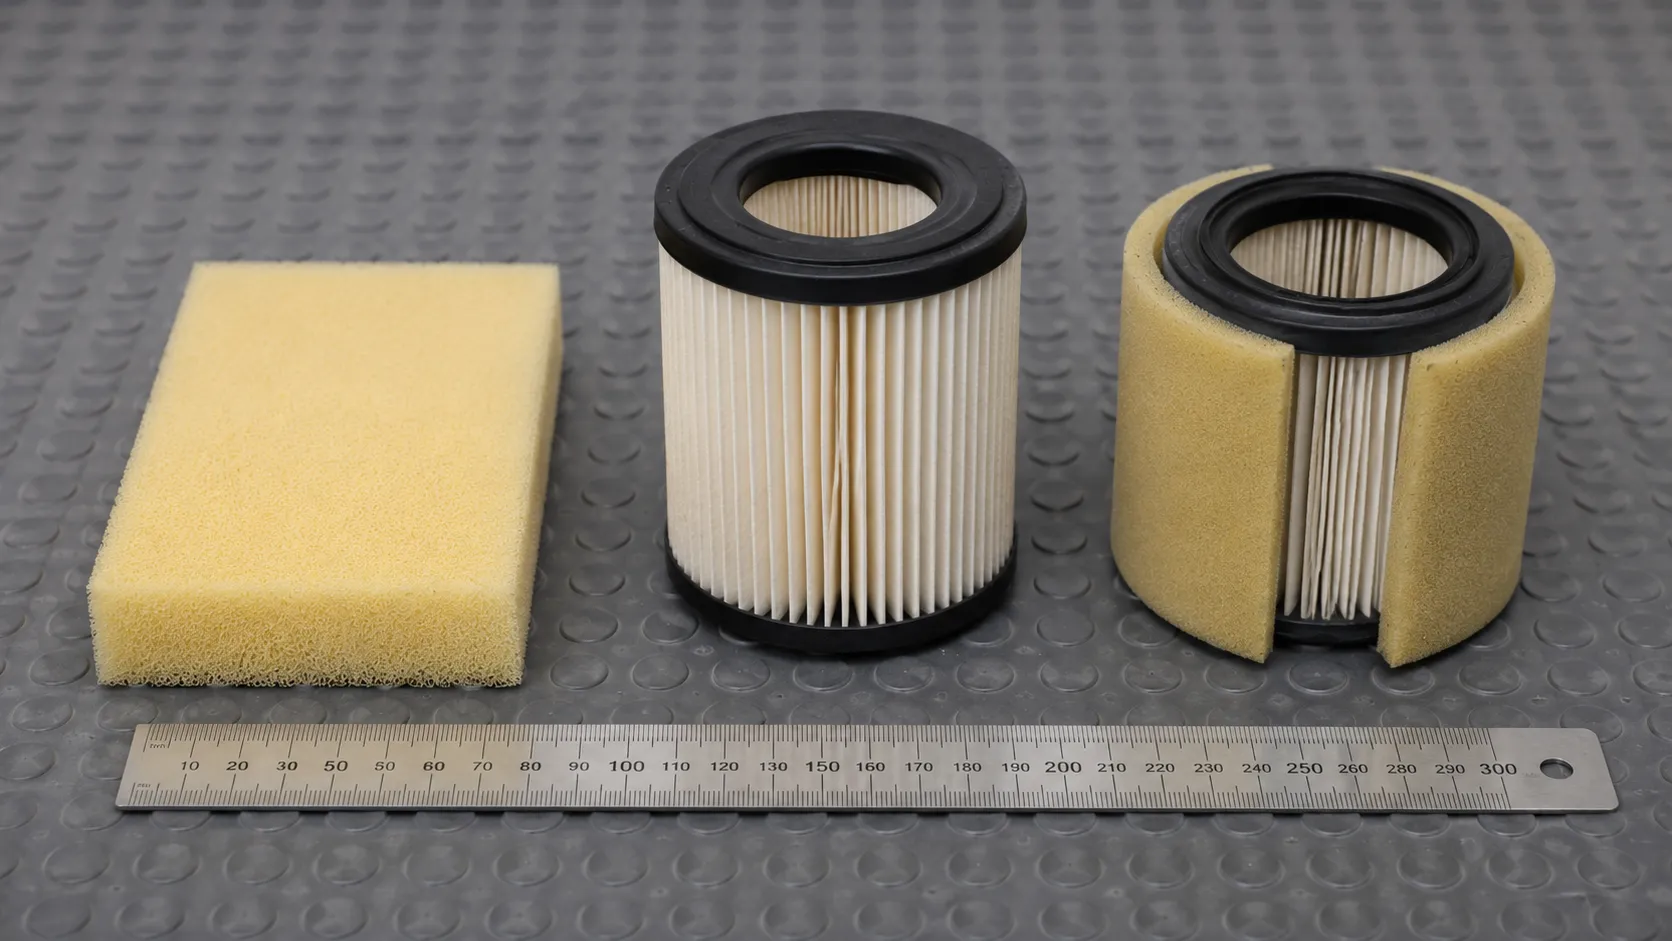
A lawn mower air filter is one of three media types, and you can identify yours in about ten seconds without opening a manual. Squeeze it: foam compresses and springs straight back, while paper takes a crease and keeps it.
A dual-element assembly is two parts in one housing, a foam sleeve or wrap sitting over a pleated cartridge. According to Honda's GCV owner's manual, that arrangement pairs a foam pre-cleaner with a paper element specifically to extend the cartridge's life.
The squeeze test told me the type faster than the label did on every filter in the spring run. Several of the foam elements had no printing left on them at all.
Foam: open cell, spongy, usually yellow, grey or black, rebounds under thumb pressure
Paper: pleated concertina media, off white to dark brown, stiff, holds a crease
Dual-element: a foam sleeve or flat wrap covering a pleated cartridge, two parts, one housing
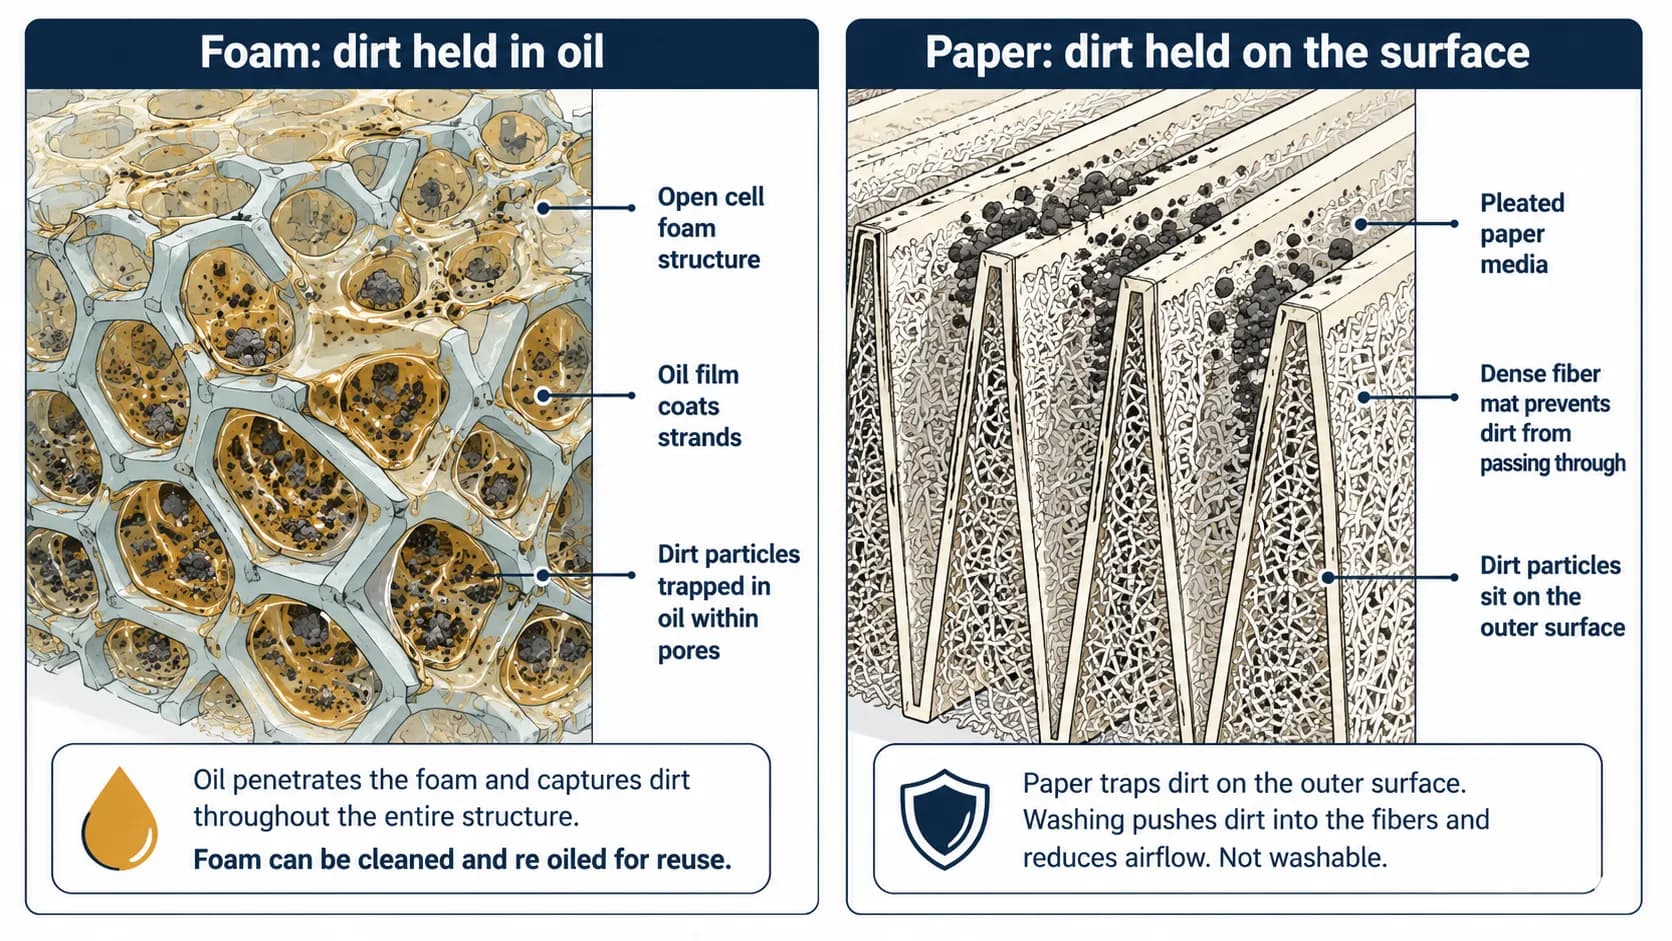
The reason the media type dictates the method comes down to where the dirt is held. Foam traps particles in a film of oil spread across an open cell structure, so washing the oil out and putting fresh oil back restores the filter to new condition.
Paper does the opposite, trapping particles on a fixed pore surface that water swells and distorts permanently. Washing restores one medium and destroys the other.
One detail that trips people up more than any other: the engine brand decides your filter type, not the mower brand. A Craftsman deck might carry a Briggs, a Honda or a Kohler engine, and each one has different filter rules.
Briggs & Stratton engines are the most common by a wide margin on US walk-behinds. If that is the badge on your engine shroud, the Briggs-specific walkthrough covers the housing variations you will run into.
If your mower is corded or battery powered, it has no combustion air filter at all. The vented panel you are looking at is a motor cooling intake, and it needs a brush, not a wash.
Before You Touch It: The 3-Minute Safety Setup
Servicing a lawn mower air filter takes three minutes of preparation that almost every guide skips. The engine must be cold, the spark plug lead disconnected and tucked clear, and the fuel cap tight before anything opens.
Honda's owner's manual for the GCV160 and GCV190 is blunt on the surrounding point: never run the engine without the air cleaner, because dirty air causes rapid engine wear. Husqvarna prints the same caution on its self-service page.
I pull the plug lead before the housing now. In March I caught the blade turning while I was rocking a mower onto its side to reach the airbox, and the habit changed that afternoon.
Let the engine cool completely
Disconnect the spark plug lead and tuck it well clear of the plug
Check the fuel cap is tight, and keep the mower level if you can
If you must tip it, tip with the air filter side facing up
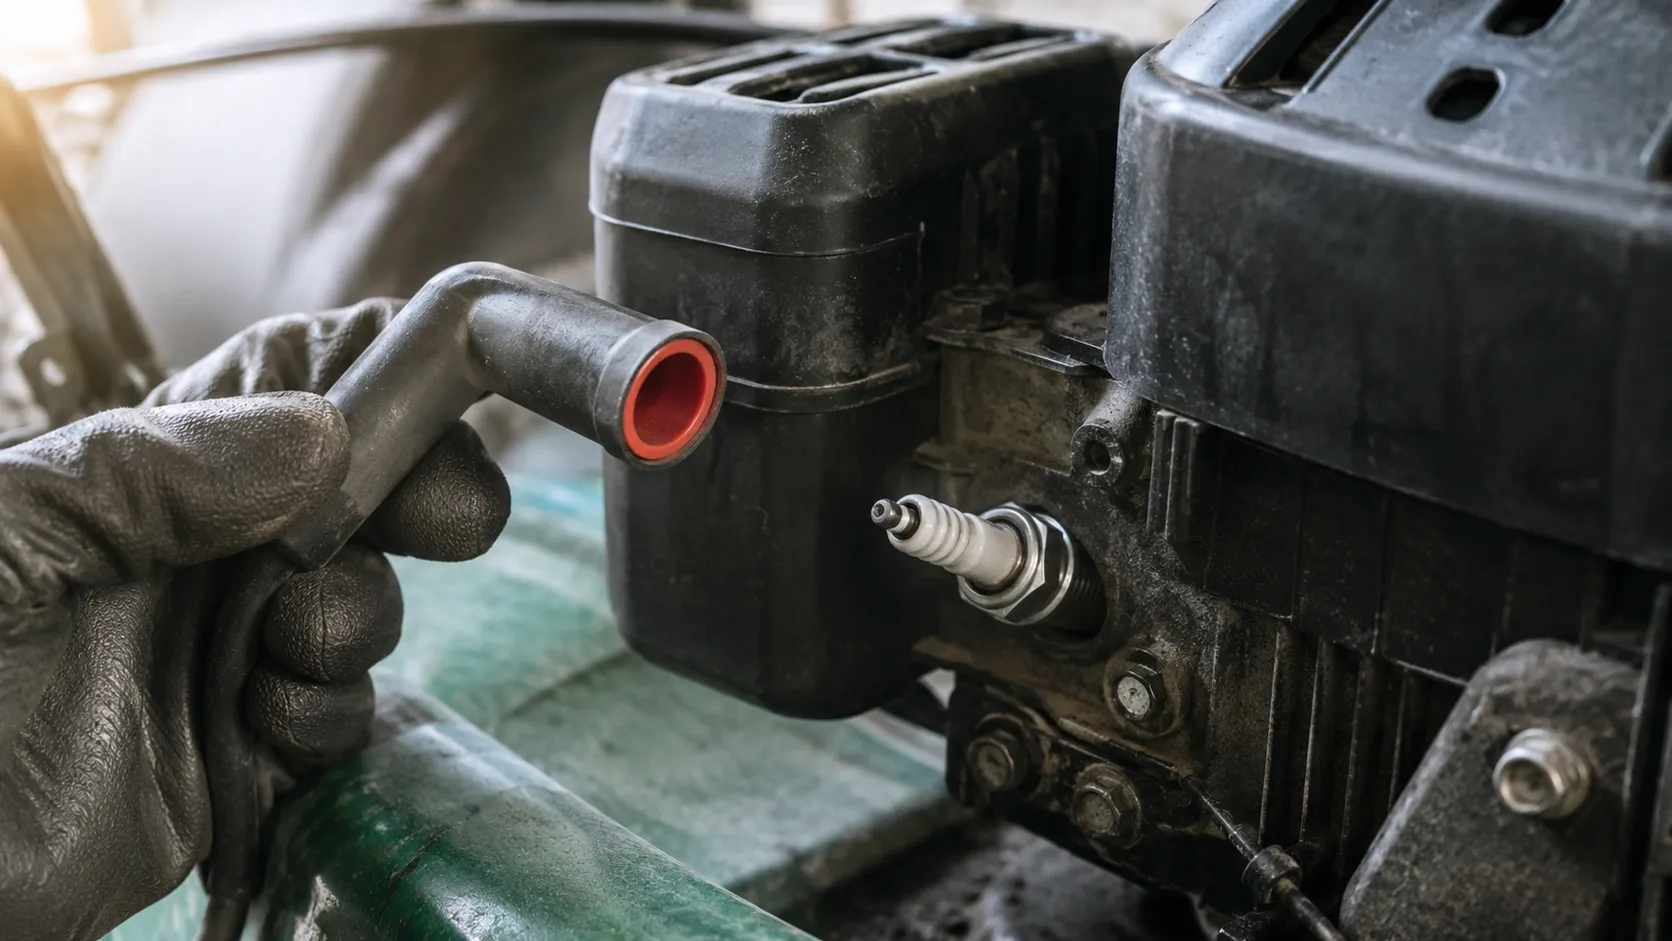
Warning. Tipping a mower carburettor side down floods the airbox with fuel and oil, which turns a five minute filter job into a carburettor strip. If you are not certain which way yours goes, drain the tank first. I do not always do this myself, and I should.
Now the step nobody mentions. Brush or blow the debris off the outside of the housing before you open it, then stuff a clean rag into the open intake while the filter is out.
Grit falling into an open intake goes straight to the cylinder, which makes a badly sequenced service worse than no service at all. An engine ingesting dirt does not complain immediately, which is exactly why running it bare is worse than running it dirty.
Have warm water, dish detergent, two clean rags, fresh engine oil, a shallow tray and gloves within reach before you start.
How to Clean a Foam Air Filter (7 Steps)
Cleaning a foam lawn mower air filter takes seven steps and about twenty minutes of hands-on work, plus overnight drying. According to Husqvarna's self-service guide, the sequence is wash with soap and water, rinse clean, squeeze the water out and let the element dry, then lubricate with engine oil and press a cloth against it to remove the excess.
The step that decides whether the job worked is the drying, and it takes far longer than most people allow.
The dirtiest foam element in the spring run weighed 41.2 grams coming out of the housing and 18.6 grams once washed and bone dry. More than half its mass was dirt.
Step 1. Clean the housing, then lift the element out.
Wipe or blow the loose debris off the outside of the airbox first, then lift the foam straight out without dragging it against the housing lip. Photograph or note which way round it sat.
What you should see: The element clear of the housing with no crumbs of dirt falling inward.
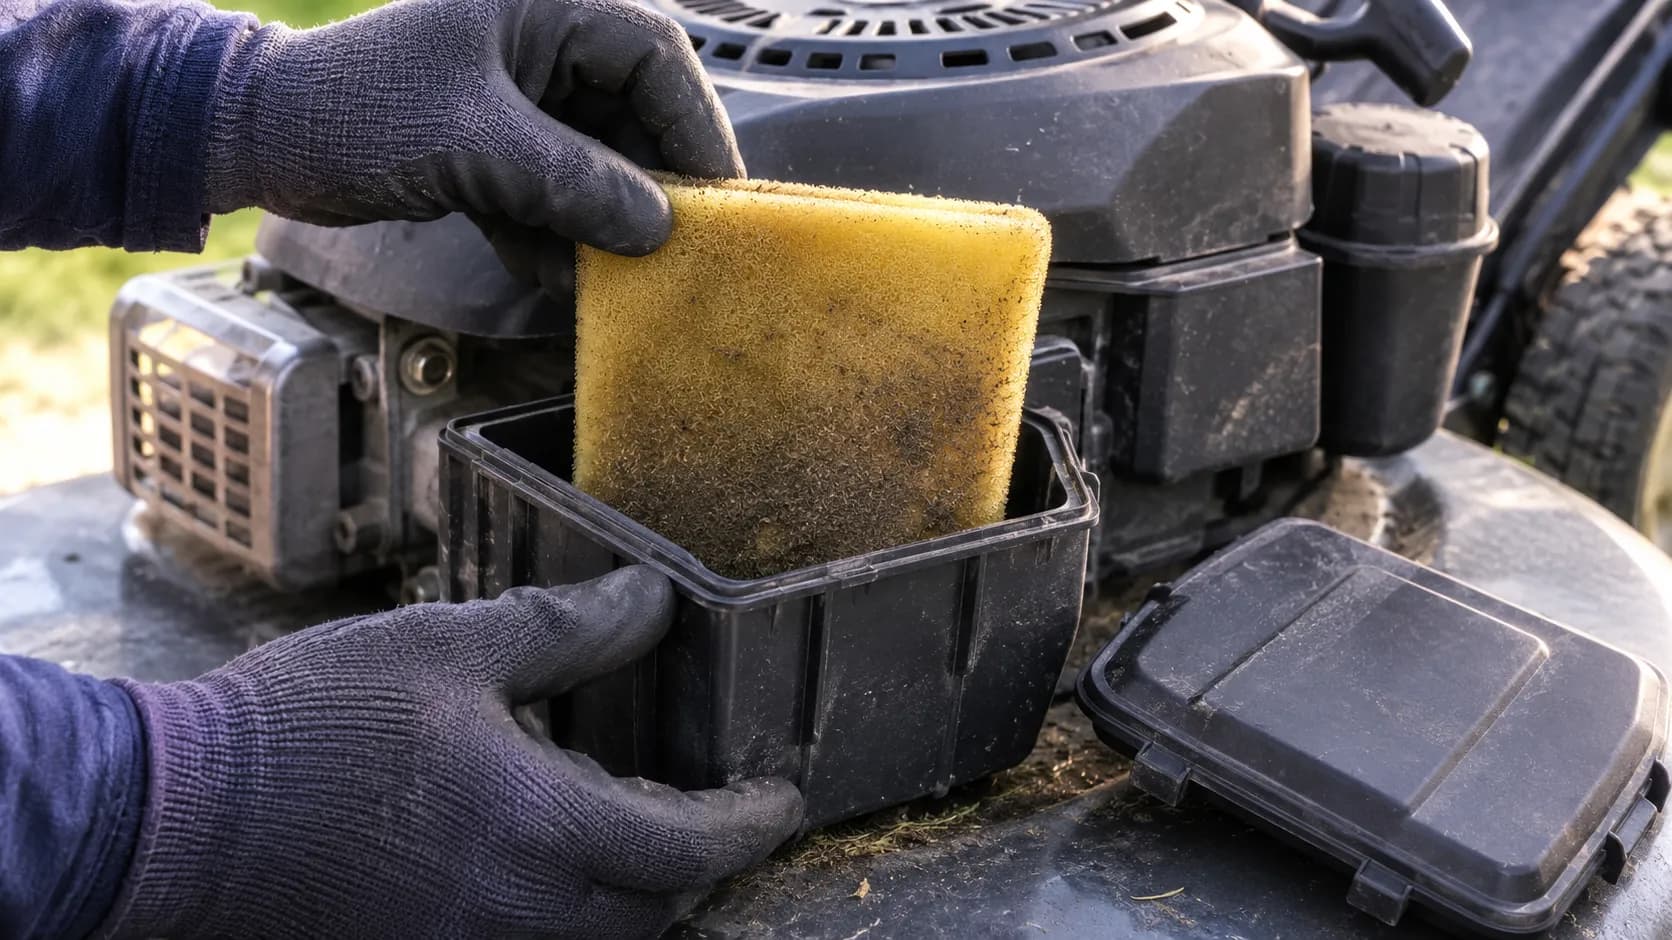
Step 2. Knock the loose dirt out dry.
Tap the element against your palm or a bench edge a few times before it goes anywhere near water. Loose grass chaff turns into a paste if you wet it first.
What you should see: A small pile of dry dust and clippings on the bench.
Step 3. Wash it in warm water and dish detergent.
Use a teaspoon of dish detergent in a bowl of warm water and work the foam open and closed under the surface. Keep it submerged so the dirt floats away rather than being pushed deeper.
What you should see: The water clouding grey or green within about thirty seconds.
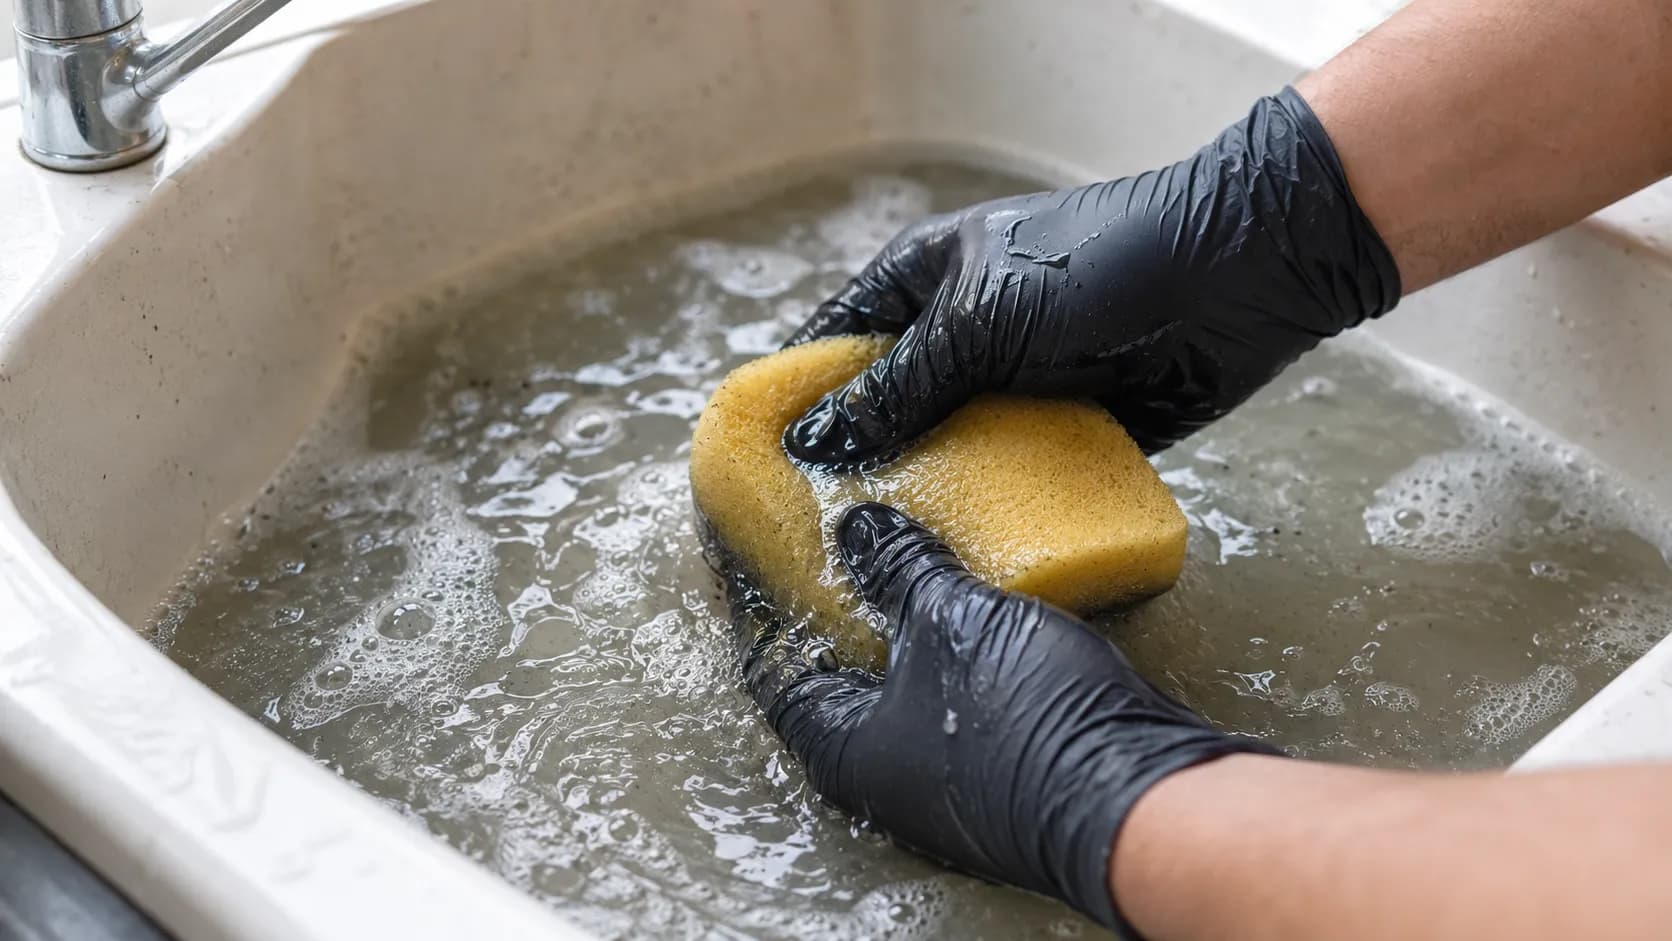
Step 4. Rinse until the water runs clear.
Rinse under a low-pressure tap, running the water from the clean side outward. Repeat until nothing grey comes out.
What you should see: Clear water leaving the foam with no grey tint.
Step 5. Squeeze the water out, never wring it.
Press the element flat between your palms, or roll it in a towel and press. Twisting is what tears foam.
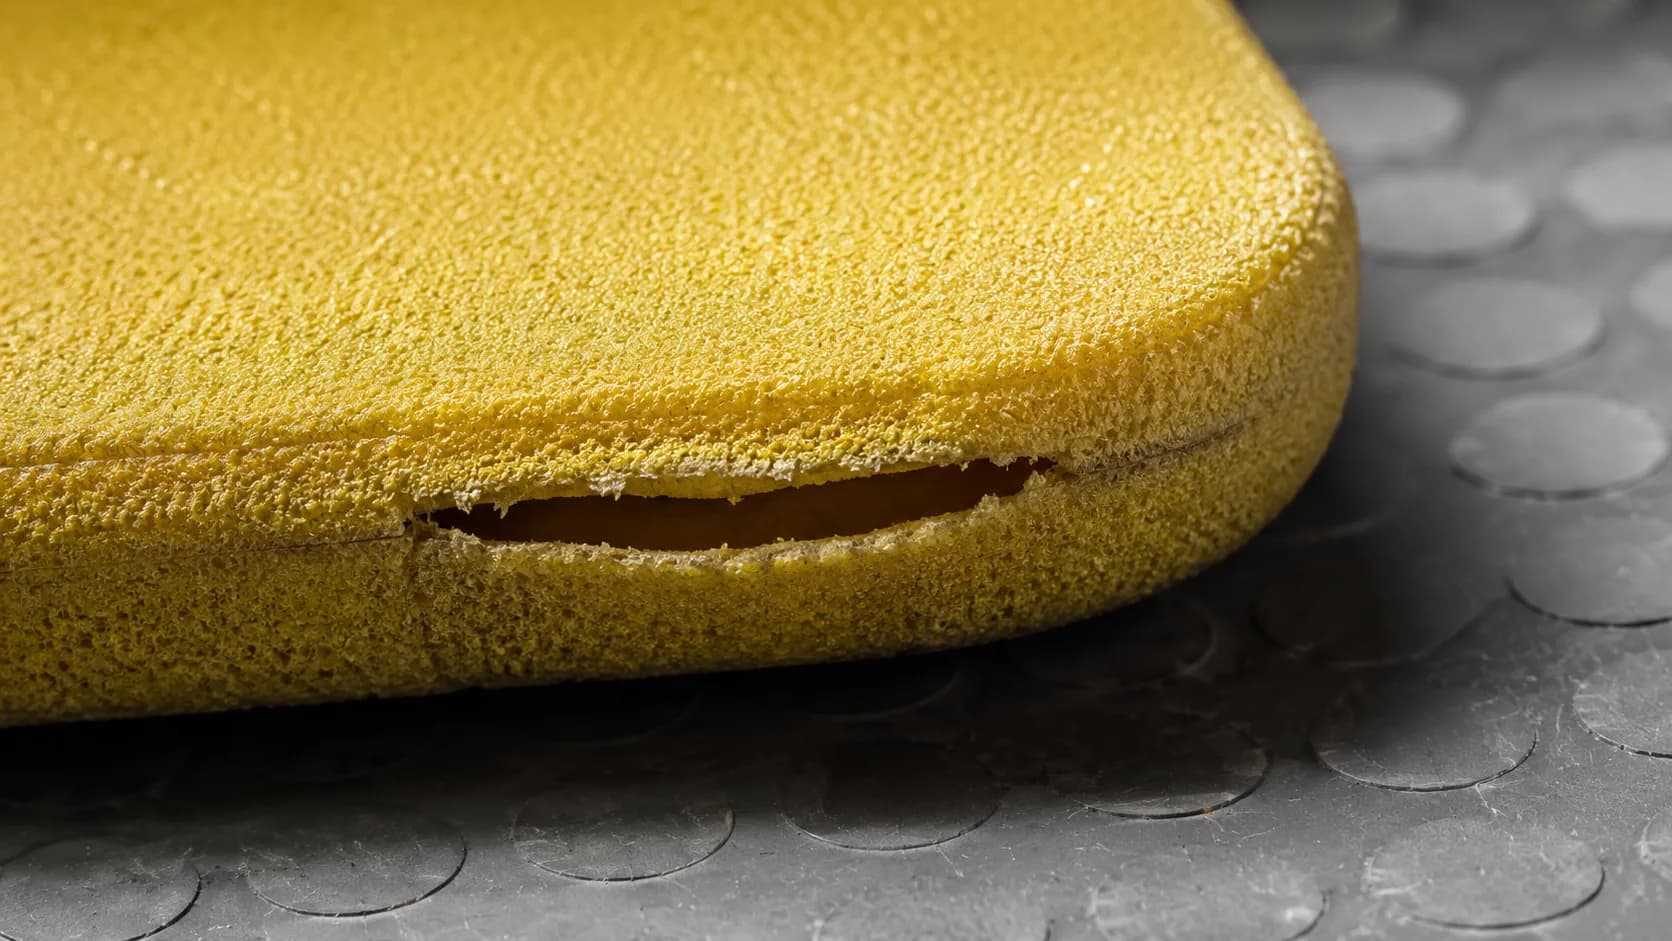
What you should see: The element damp and limp but structurally intact, with no split along the bonded edge.
Briggs & Stratton demonstrates the same press-and-squeeze handling in its foam air filter video. Foam cell walls fail in torsion long before they fail in compression, which is why a wrung filter can look fine and still leak dirt around its edge.
One of the four foam elements this spring split exactly that way and went in the bin.
Step 6. Dry it completely, and test that it is dry. Set it somewhere warm with air moving around it and leave it overnight. It is dry when it returns to its dry weight on a kitchen scale, or when a paper towel pressed hard against it comes away with no darkening at all.
What you should see: a paper towel that stays uniformly white after ten seconds of firm pressure.
At 68 degrees Fahrenheit and 45 percent humidity, that dirtiest element took 19 hours to come back to 18.6 grams. With a fan on it, six.
Step 7. Inspect it before you oil it. Hold it up and stretch it gently, looking for thin patches, tears and seam separation. Anything you find now is cheaper than what you find later.
What you should see: even thickness across the whole element and an unbroken bonded edge.
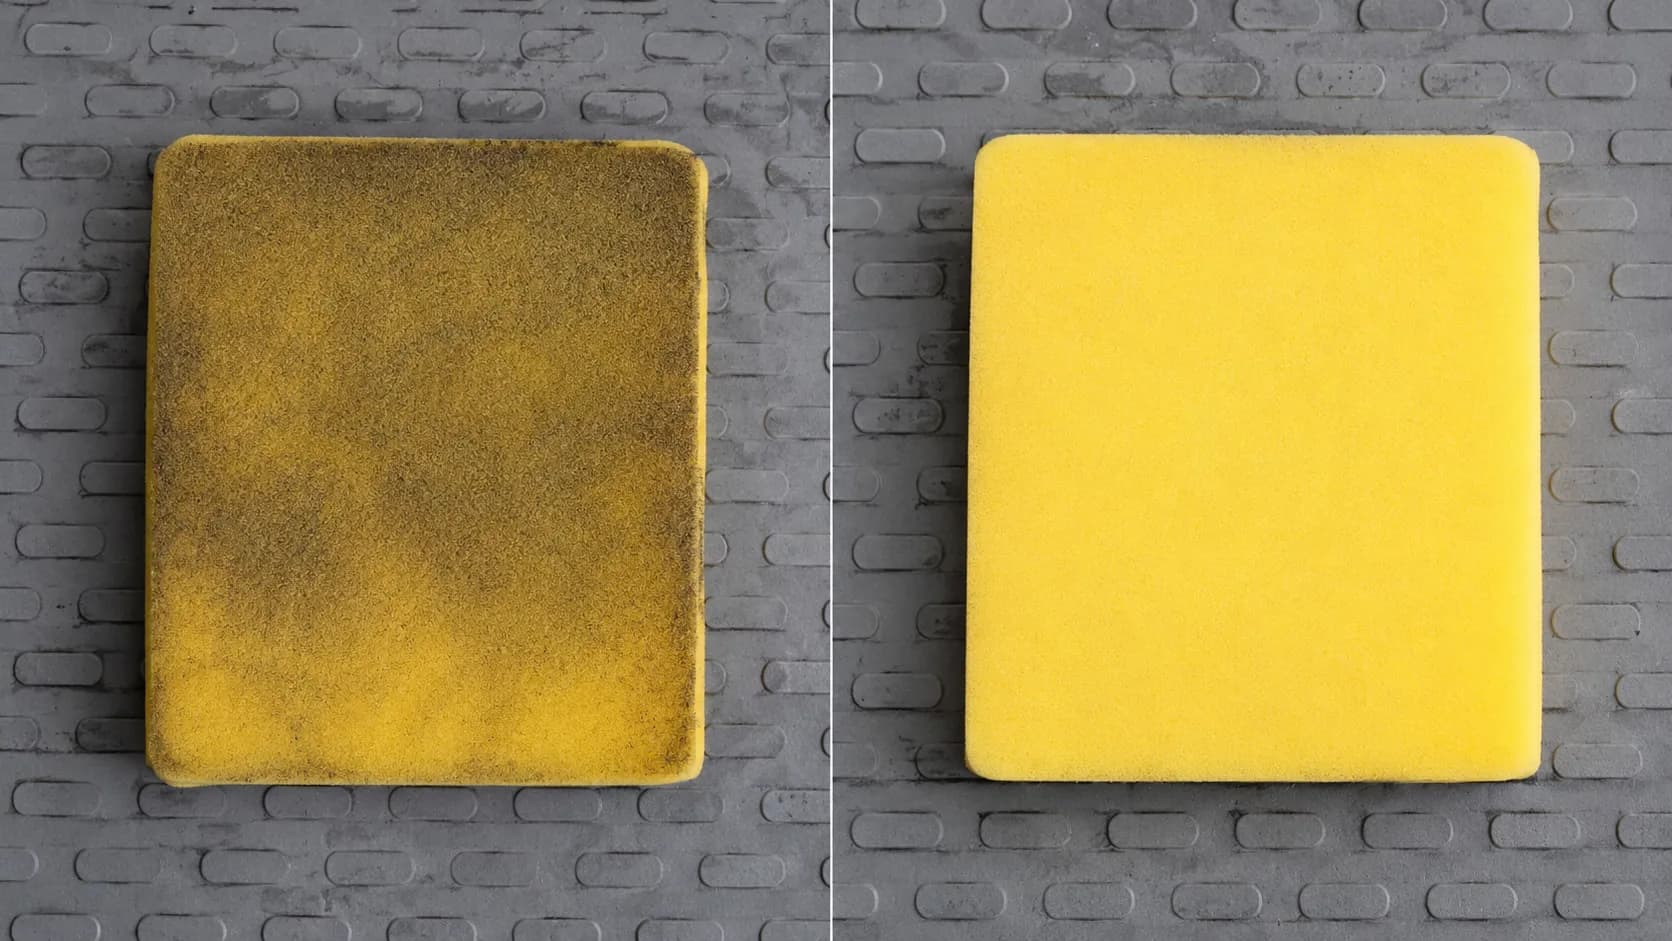
Foam element | Out of housing | Washed, still wet | Bone dry |
|---|---|---|---|
Filter 1 | 32.7 g | 41.9 g | 17.9 g |
Filter 2 | 28.4 g | 36.8 g | 18.1 g |
Filter 3 | 41.2 g | 52.6 g | 18.6 g |
Filter 4 | 35.9 g | 44.1 g | 18.3 g |
How we tested, and what this does not prove. Nine filters, one operator, one region of Ohio, one spring. Weights on a 0.1 gram digital scale, integrity checked in a 60 watt LED light box, drying logged at 68 degrees Fahrenheit and 45 percent relative humidity.
This is a bench log, not a laboratory study. It measures mass, drying behaviour and visible media integrity. It does not measure filtration efficiency, which would need a dust-feed rig we do not have.
Airbox geometry varies more than the filters do. Honda's clips are shallower than most and reseat in a particular order, so the Honda-specific procedure is worth a look before you force anything.
The job is not finished yet: a clean, dry foam element that goes back in unoiled filters worse than the dirty one you took out.
Re-Oiling the Foam: The Step Most Guides Skip
A foam-only lawn mower air filter must be oiled every time it is cleaned. Briggs & Stratton states the reason plainly: the foam-only system traps dirt using motor oil spread through the foam medium, and a dry element will trap only the largest particles.
The LSU AgCenter puts a number on it: one to three teaspoons of clean engine oil, massaged in until uniform, and if oil runs off into the housing you have used too much.
The mental model worth keeping, borrowed from the foam filter community: the oil stops the dirt, and the foam just holds the oil.
Pour the oil directly onto the dry foam, spread across the whole surface rather than in one spot
Work it through by opening and closing the element in your hands until the colour is even
Wrap it in a clean cloth and squeeze firmly to pull the excess back out
That third step is the one people skip, and Husqvarna's instruction is the same: press a clean cloth against the filter to remove any surface oil.
Three teaspoons brought that 18.6 gram element to 24.1 grams with no drip on the housing. A fourth pooled at the base of the airbox within a minute of refitting.
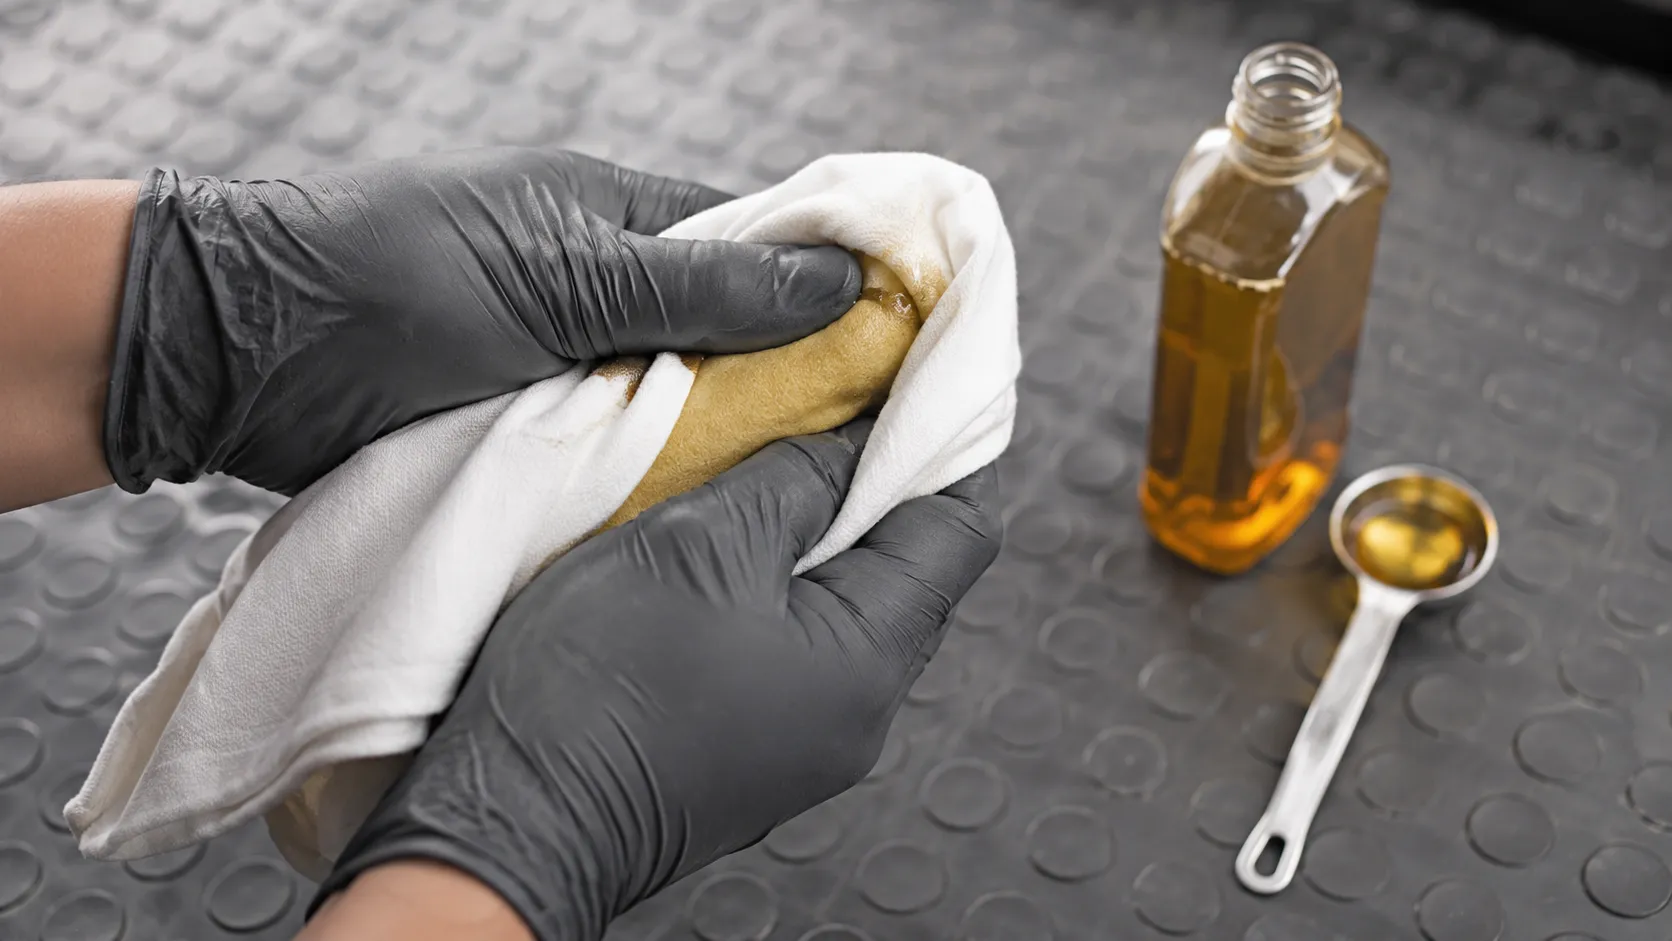
Engine oil added | Element mass | Drip in housing after refit |
|---|---|---|
1 teaspoon | 20.4 g | None, but coverage patchy |
2 teaspoons | 22.2 g | None |
3 teaspoons | 24.1 g | None |
4 teaspoons | 26.0 g | Pooling at base of airbox within one minute |
On oil type, fresh engine oil is what the manufacturers specify and it works. Dedicated foam filter oil is tackier and stays put through months of storage, where plain motor oil gradually drains off the element and leaves dry patches for dirt to walk through, a distinction set out well in this foam filter oiling guide.
Never use WD-40 as a filter oil. It is far too thin to hold dirt, and it evaporates off rather than staying in the foam.
Where practitioners and the manual part ways. A long-running BobIsTheOilGuy thread records the old Briggs service-school method, in which the oil goes into foam that is still damp from washing rather than fully dried. Experienced technicians still work that way and report no problems.
Our default is a fully dried element, because it is what the current manufacturer pages describe and because a damp element that is not oiled properly fails in an obvious and expensive way. We have not tested which produces better filtration, and we are calling this a default rather than a proof.
One hard exception before you reach for the oil bottle. If your foam is a sleeve or wrap sitting over a paper cartridge, do not oil it, and skip ahead to the dual-element section.
How to Clean a Paper Air Filter (and When You Shouldn't)
A paper lawn mower air filter is never washed, in water, in solvent, or in a dishwasher. According to Honda's GCV owner's manual, the permitted method is to tap the element lightly against a hard surface, or blow compressed air through it from the inside out, and never to brush it, because brushing forces dirt into the fibres.
Husqvarna's guidance is to knock it against a flat surface, and it explicitly rules out compressed air. Both agree on the ceiling: a filter in service a long time cannot be fully cleaned.
Tapping it out works, up to a point, and the point arrives sooner than you would hope.
I put each paper element under the light box before and after tapping. It restored light transmission across roughly a third of the pleat area, then stopped improving no matter how long I worked at it.
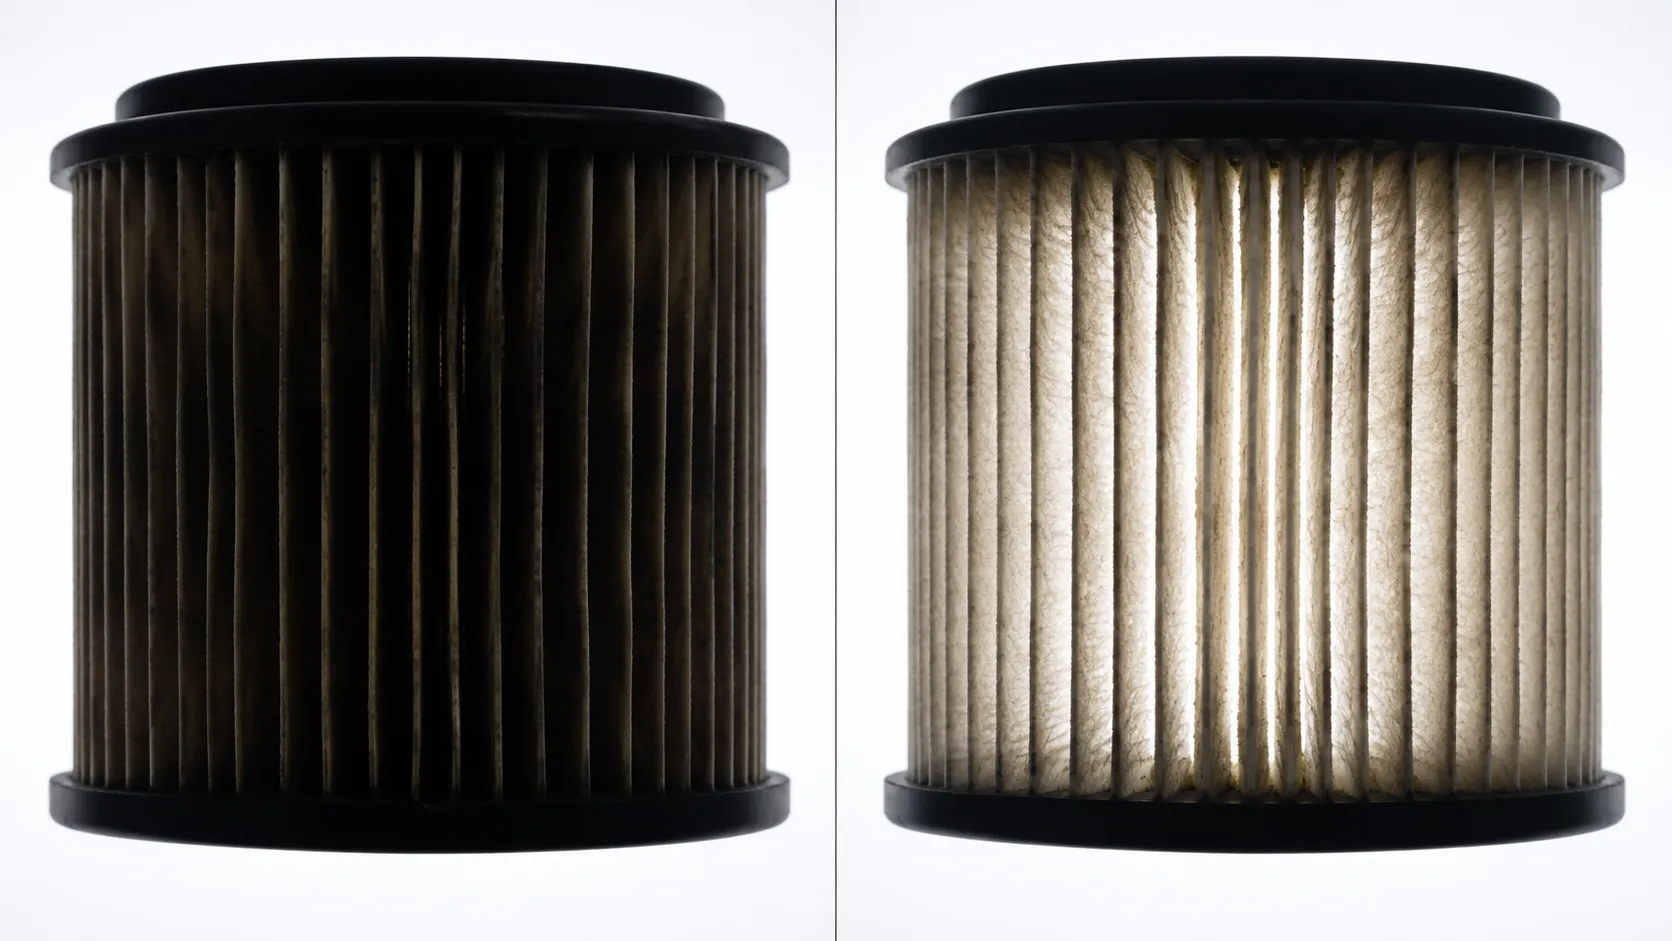
The reason the curve flattens is physical: tapping dislodges surface load only, and the particles that actually restrict airflow sit embedded inside the pore matrix where percussion cannot reach them.
Action on a paper element | Verdict |
|---|---|
Tap against a flat surface, pleats down | Do |
Blow compressed air from the inside out | Conditional, see the manufacturer section below |
Brush the pleats | Never, it drives dirt into the fibres |
Wash in water | Never |
Soak in any solvent | Never |
Run it through a dishwasher | Never |
On compressed air, the manufacturers genuinely contradict each other, which is a big enough problem to have its own section further down. The short version is to tap by default, and if you must blow, use low pressure from a distance and work from the inside out.
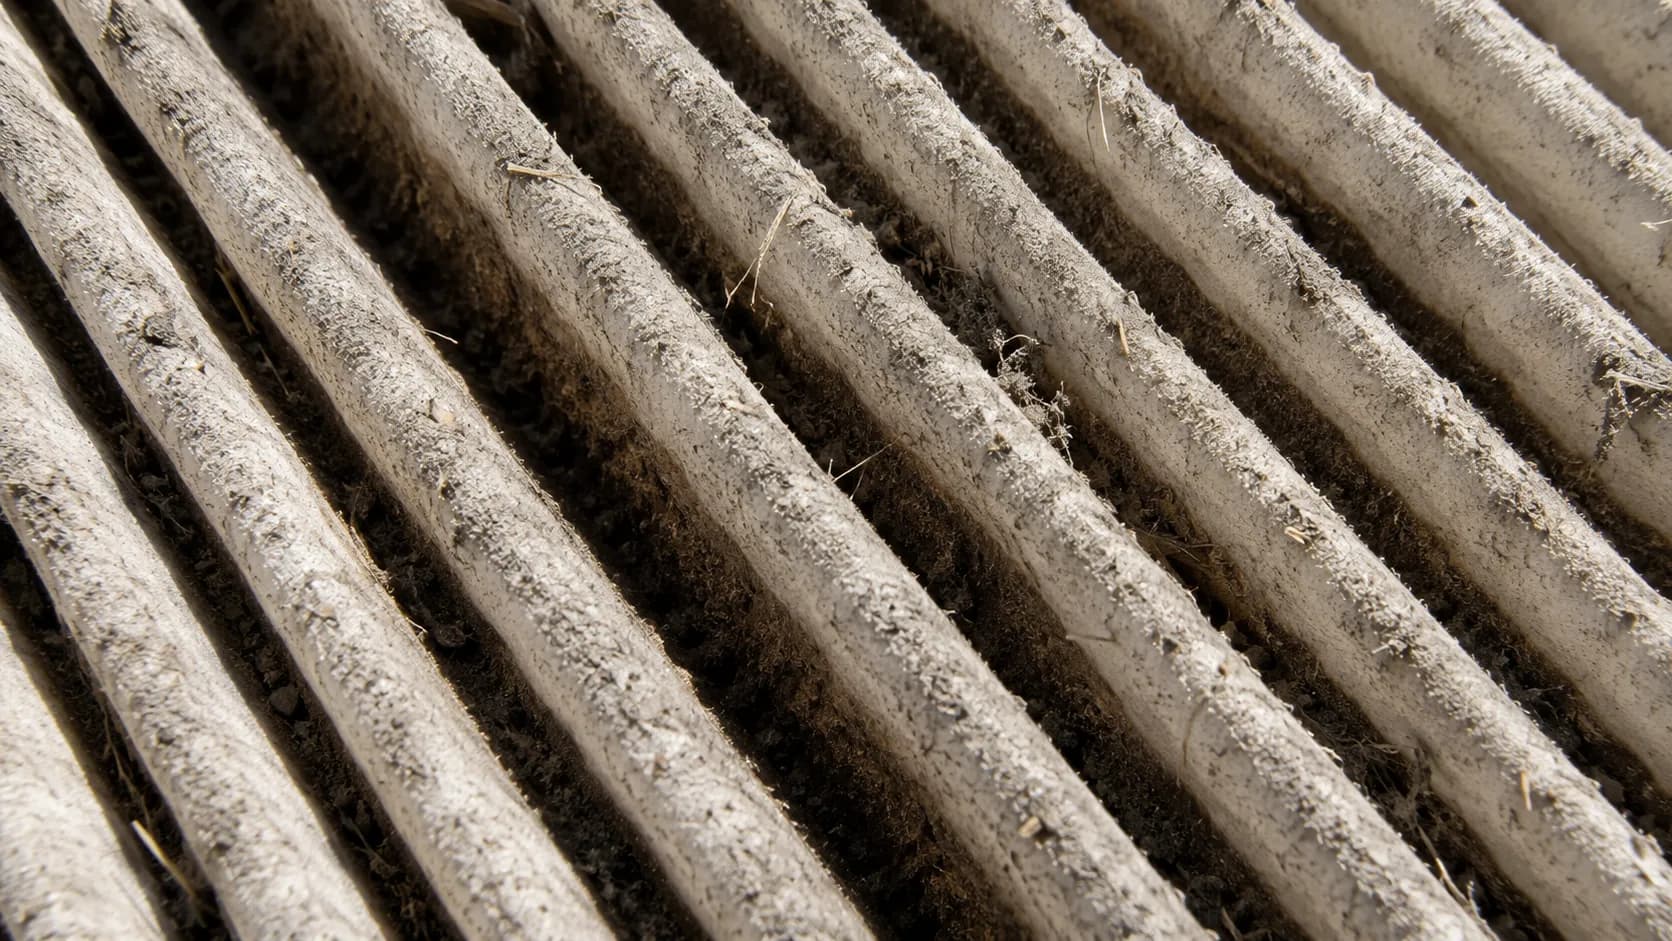
Once the pleats are dark through their depth rather than dusty on their surface, tapping is finished as a strategy and swapping in a new element is the only honest answer.
Where we differ from the manual. Briggs & Stratton does not publish a cleaning procedure for its filters at all. Its official foam procedure reads "remove air filter assembly and discard foam, then saturate a new foam filter with fresh engine oil," and its paper procedure is "remove and discard paper cartridge, install new cartridge."
The company treats these elements as scheduled consumables, not as washable parts. What we describe here is common practice, it works, and it diverges from what the manufacturer tells you to do.
A paper element is a consumable by design and priced accordingly. Getting the right one is less obvious than it looks, because matching a filter to your engine depends on the engine code rather than the mower model.
Dual-Element Filters: Foam Pre-Cleaner Over a Paper Cartridge
A dual-element lawn mower air filter is two filters in one housing, and it needs two different procedures. Briggs & Stratton describes the arrangement precisely: the foam portion works as a pre-cleaner for the paper element, and pre-cleaning the air extends the life of the more expensive cartridge underneath.
Wash the foam pre-cleaner in warm soapy water, then tap or replace the paper cartridge. Never treat them as one part.
Then comes the part that contradicts almost everything else written about foam.
Separate the two before cleaning either. Slide the foam sleeve off the cartridge and set them apart on the bench.
Wash the foam pre-cleaner in warm soapy water, squeeze it out and dry it completely, exactly as in the foam procedure above.
Tap the paper cartridge pleats down, and inspect it for holes and dark zones.
Leave the pre-cleaner dry. Do not oil it unless your engine manual specifically tells you to.
Reassemble in order, cartridge first, then the foam sleeve over it, then the cover, and check the element seats square before the cover goes on.
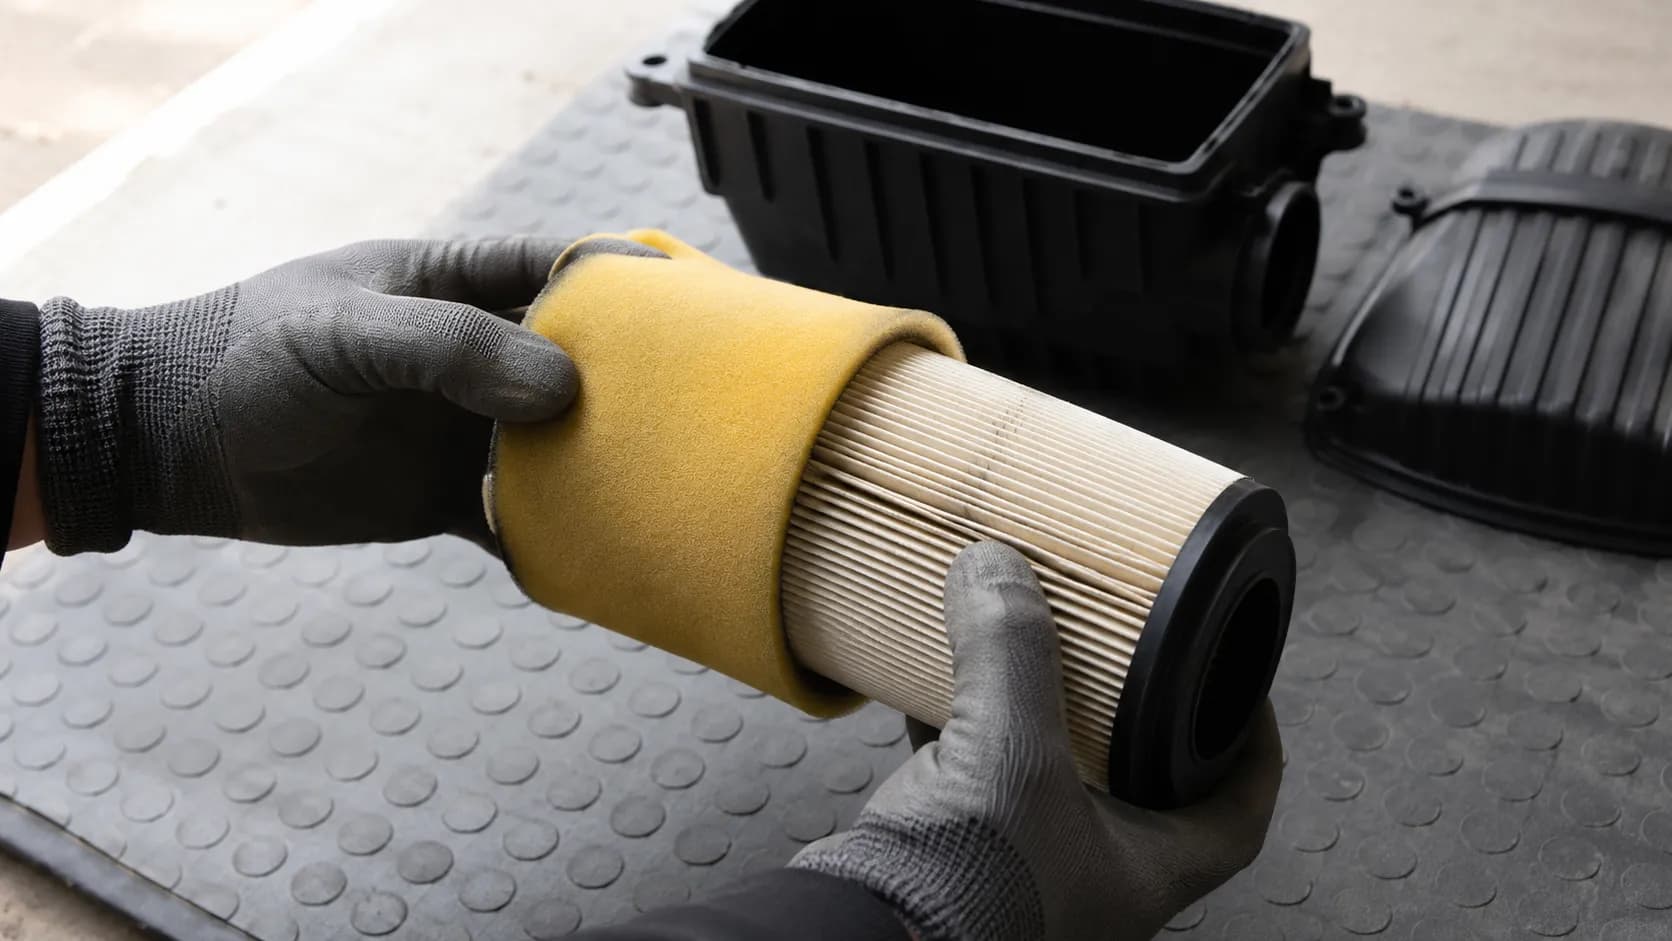
The reversal. On a foam-only filter, the oil is the filtration medium and the element must be oiled. On a foam wrap sitting over a paper cartridge, the paper is the filtration medium, and oil arriving in the paper is contamination rather than maintenance.
Briggs & Stratton's own procedures make this distinction without commenting on it: its foam-only instructions say to saturate the element with fresh engine oil, while its dual-element instructions contain no oiling step at all.
Practitioners have been flagging the consequence for years. One TractorByNet discussion records the current advice not to oil the foam wrap on paper cartridge filters, because people over-oil it and the excess transfers into the paper and clogs the pores.
On one of the two dual-element assemblies this spring I deliberately over-oiled the wrap to see how fast it would show. Within two hours of run time, amber staining had wicked through onto the paper pleats underneath.
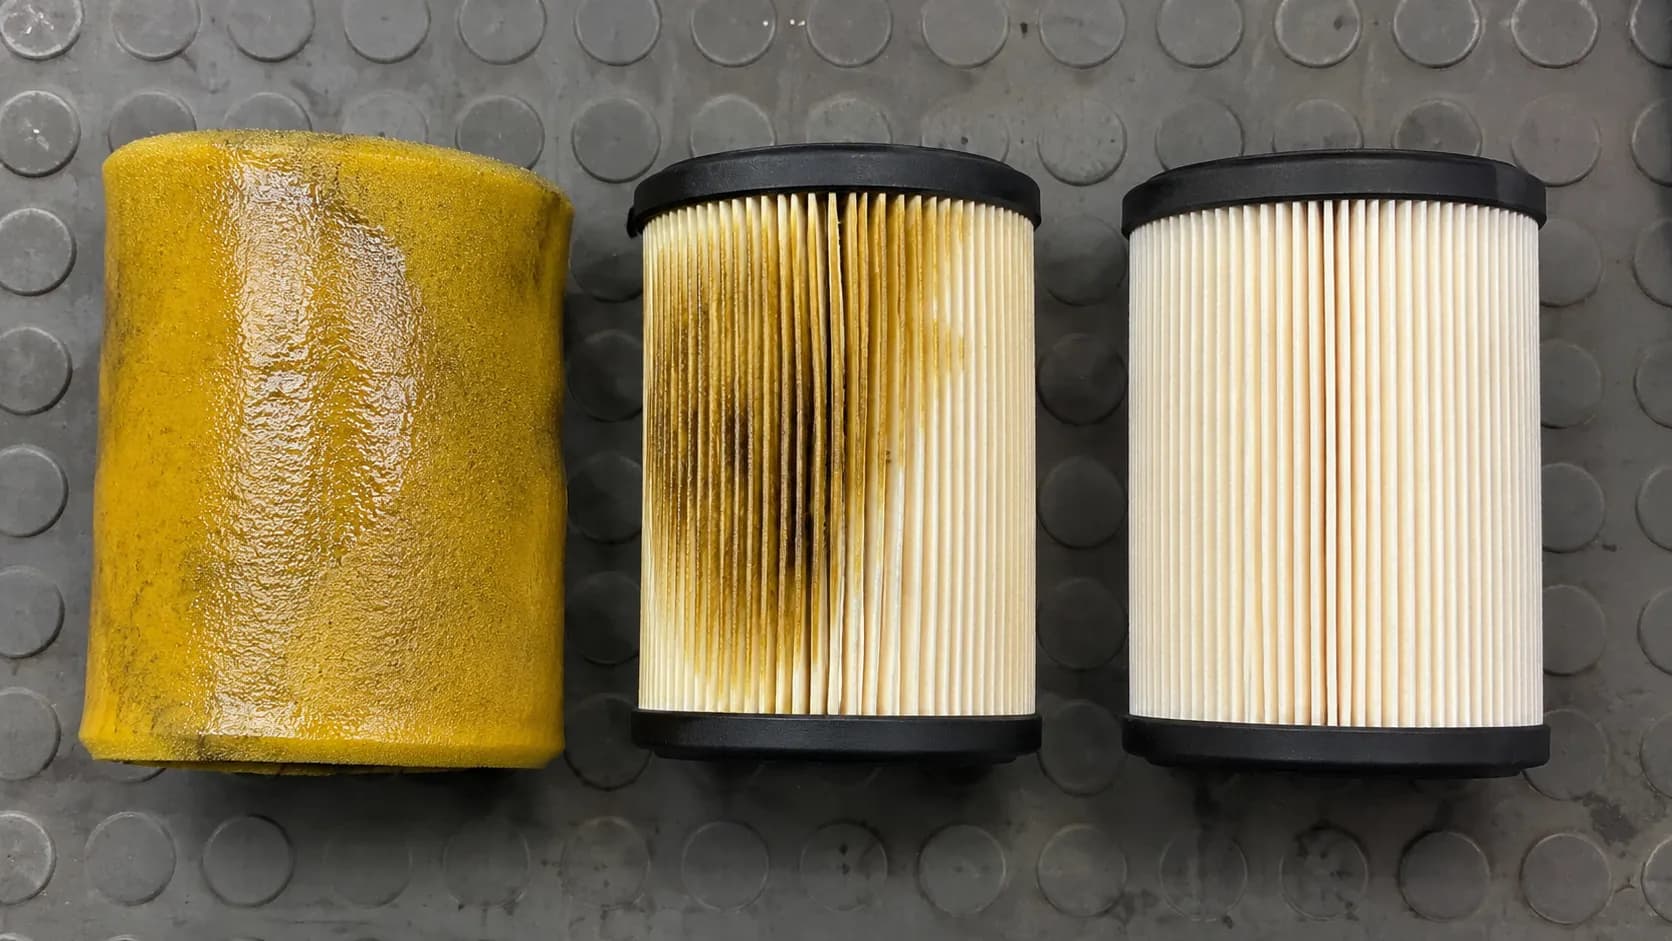
Check your manual before you follow this one. The reversal is not universal. Some engine manuals do specify lightly oiling the pre-cleaner, and where yours does, the manual wins over this article. It was written for your exact media.
Briggs & Stratton recommends servicing a paper element with a foam pre-filter annually, and demonstrates the sequence in its paper and pre-filter video.
These assemblies show up most often on riding decks and on walk-behinds with a wrapped cartridge. Toro's Recycler and TimeMaster setups are the ones readers ask about most.
Reassembly order matters as much as the cleaning. If the cartridge goes in crooked, unfiltered air takes the shortest route around it and everything you just did was decorative.
Riding decks complicate this further, and John Deere's pre-cleaner guidance diverges enough from the walk-behind case to be worth reading separately.
Housing clips also vary more than the filters themselves, and the Craftsman version of this job has a seating quirk worth knowing before you press the cover down.
What You Can and Can't Clean an Air Filter With
The safe list for a lawn mower air filter is very short: warm water with dish detergent, or a dedicated foam filter cleaner, and both only on foam. Husqvarna's service guidance rules out solvents containing petroleum, kerosene and compressed air outright, and nothing wet touches paper.
The reason most substances fail is not that they clean badly. It is that they attack the adhesive holding the element together while leaving the media looking perfect.
Substance | Safe on foam? | Safe on paper? | How it fails | Verdict |
|---|---|---|---|---|
Warm water + dish detergent | Yes | No | Water swells and distorts paper pores permanently | Use on foam |
Dedicated foam filter cleaner | Yes | No | Formulated for foam only, strips paper coatings | Use on foam |
Gasoline | No | No | Dissolves the edge adhesive and is a fire risk near an engine | Never |
WD-40 | No | No | Too thin to hold dirt, leaves residue, flammable | Never |
Kerosene or mineral spirits | No | No | Petroleum solvent, attacks foam bonding, explicitly ruled out by Husqvarna | Never |
Brake cleaner | No | No | Aggressive solvent, destroys foam structure in seconds | Never |
Compressed air | Not needed | Conditional | High pressure blows holes through paper media | See the next section |
Dishwasher | No | No | Heat sets a permanent distortion in the foam | Never |
Automotive filter charger kits | Caution | No | Formulated for cotton gauze, not small-engine foam | Check the label |
A note on the compressed air row. That verdict comes from testing one brand of paper media at two pressure settings. Media density varies between manufacturers, and the safe pressure for your filter may well be lower than ours.
Gasoline is the one worth showing rather than asserting. I left a scrap foam element in fresh gasoline outdoors and watched the clock: edge-glue adhesion failed at 12 minutes, and the seam separated completely at 22.
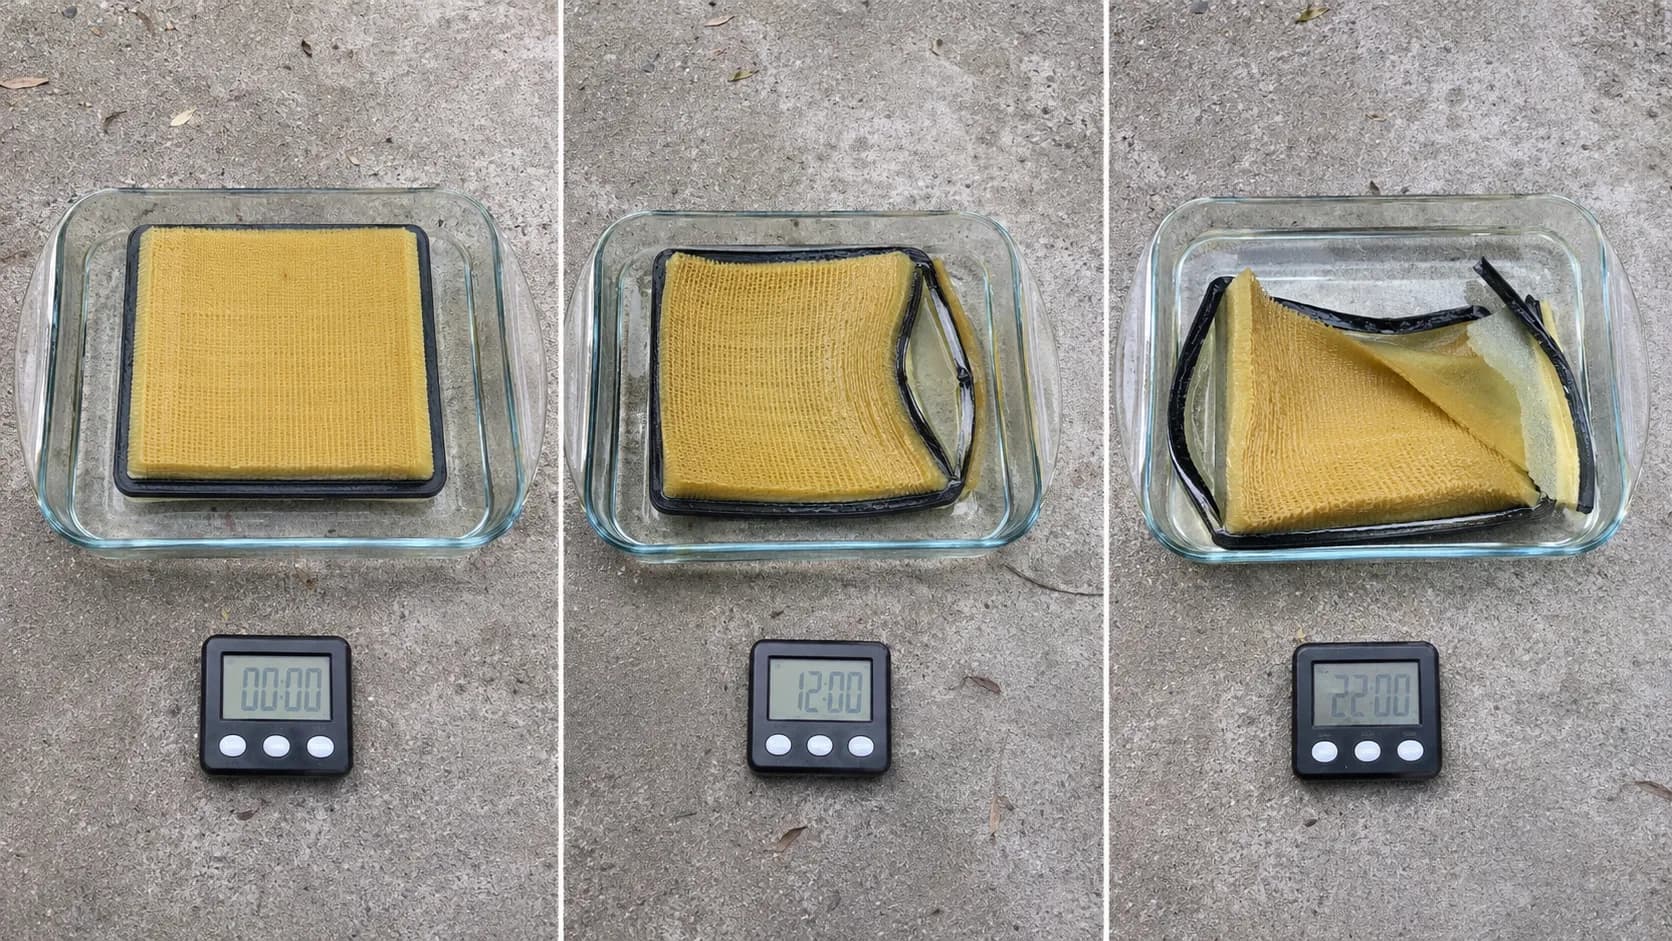
That is the important part: the foam media survived the soak looking fine, and the joint holding it to its frame did not. A gasoline-cleaned filter can look immaculate and pass dirt straight around its edge, which is why the failure is worse than an obviously dirty element.
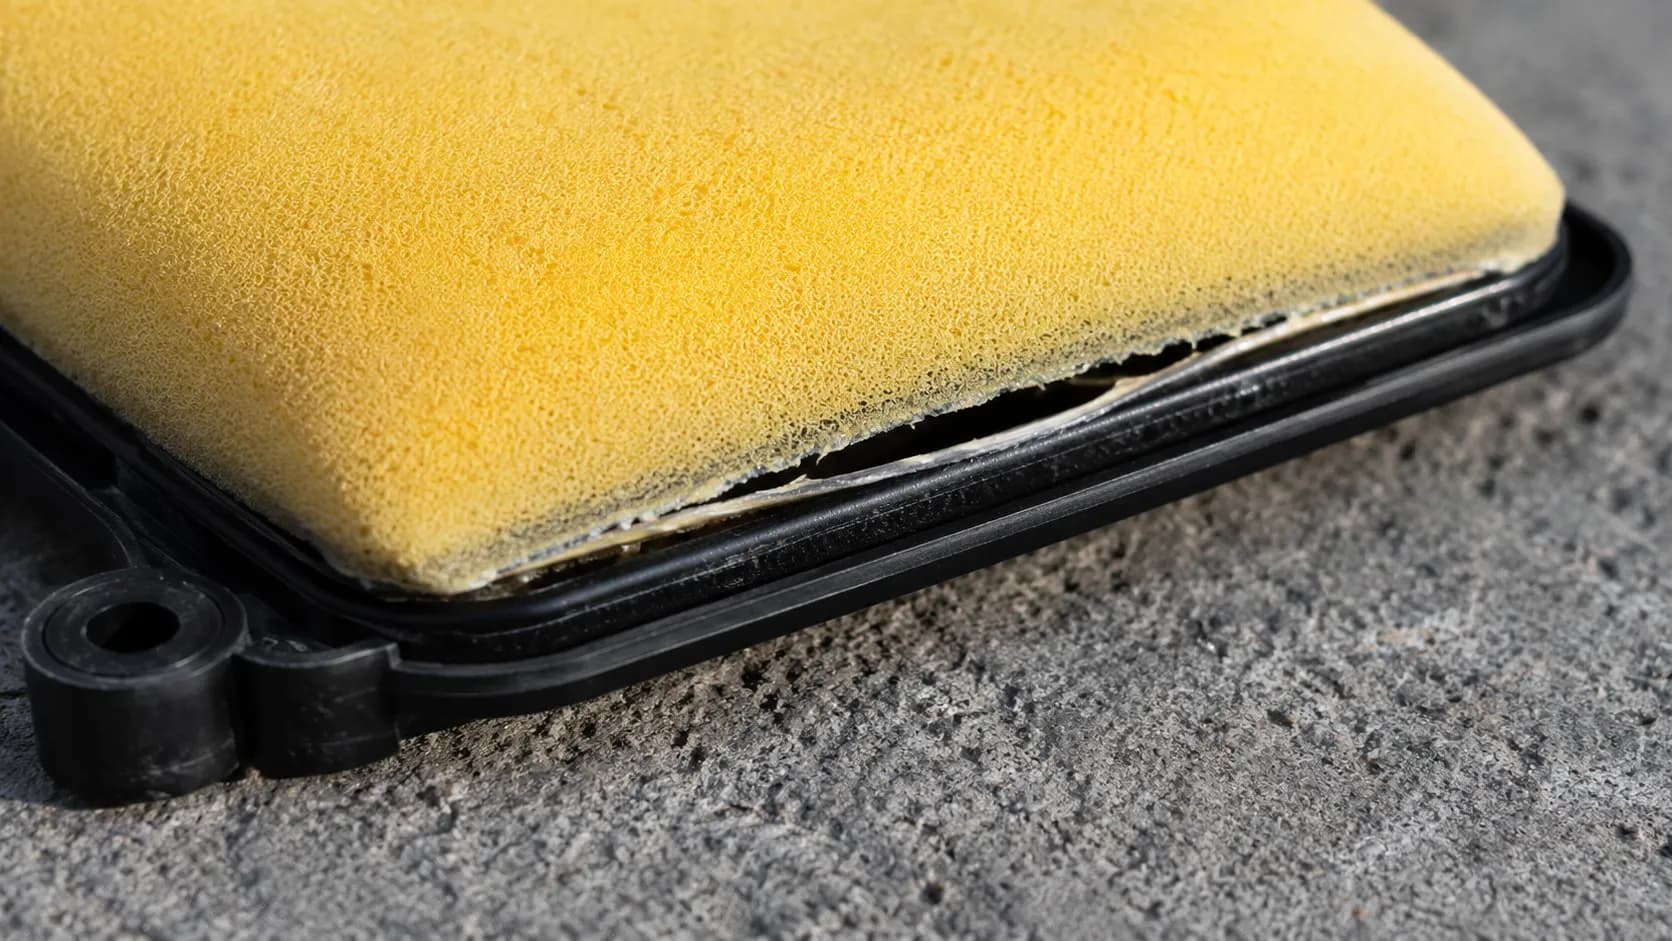
WD-40 comes up constantly and deserves a direct answer: it is a light penetrating oil, not a filter oil, and it neither cleans foam properly nor stays in it afterwards.
If you opened the housing and found the element already soaked with fuel, none of this table applies. A filter soaked in fuel is a symptom of a carburettor fault, not a cleaning problem.
Where the Manufacturers Disagree (and What to Do About It)
The manufacturers do not agree on how to clean a lawn mower air filter, and the disagreement sits on the two decisions that matter most. Honda's GCV owner's manual permits blowing compressed air through a paper element from the inside out, while Husqvarna's service page instructs owners not to use compressed air at all.
Both are correct for their own media. If your manual is silent, tap rather than blow, and if you do blow, stay at low pressure and work from the inside out.
No single source will tell you that, because each one is writing about its own products and none is writing about the others.
Manufacturer | Compressed air on paper | Oiling a foam pre-cleaner | Foam service position |
|---|---|---|---|
Honda | Permitted, inside out only, never brush | Not specified for GCV dual-element | Clean or replace a dirty element, always replace a damaged one |
Husqvarna | Explicitly not permitted | Oiling appears in its replacement flow, not its cleaning steps | Wash, rinse, squeeze, dry |
Briggs & Stratton | No cleaning procedure published | No oiling step in its dual-element procedure, oil mandatory on foam-only | Replace foam every 3 months or 25 hours |
Toro | Defers to the engine manual | Defers to the engine manual | Defers to the engine manual |
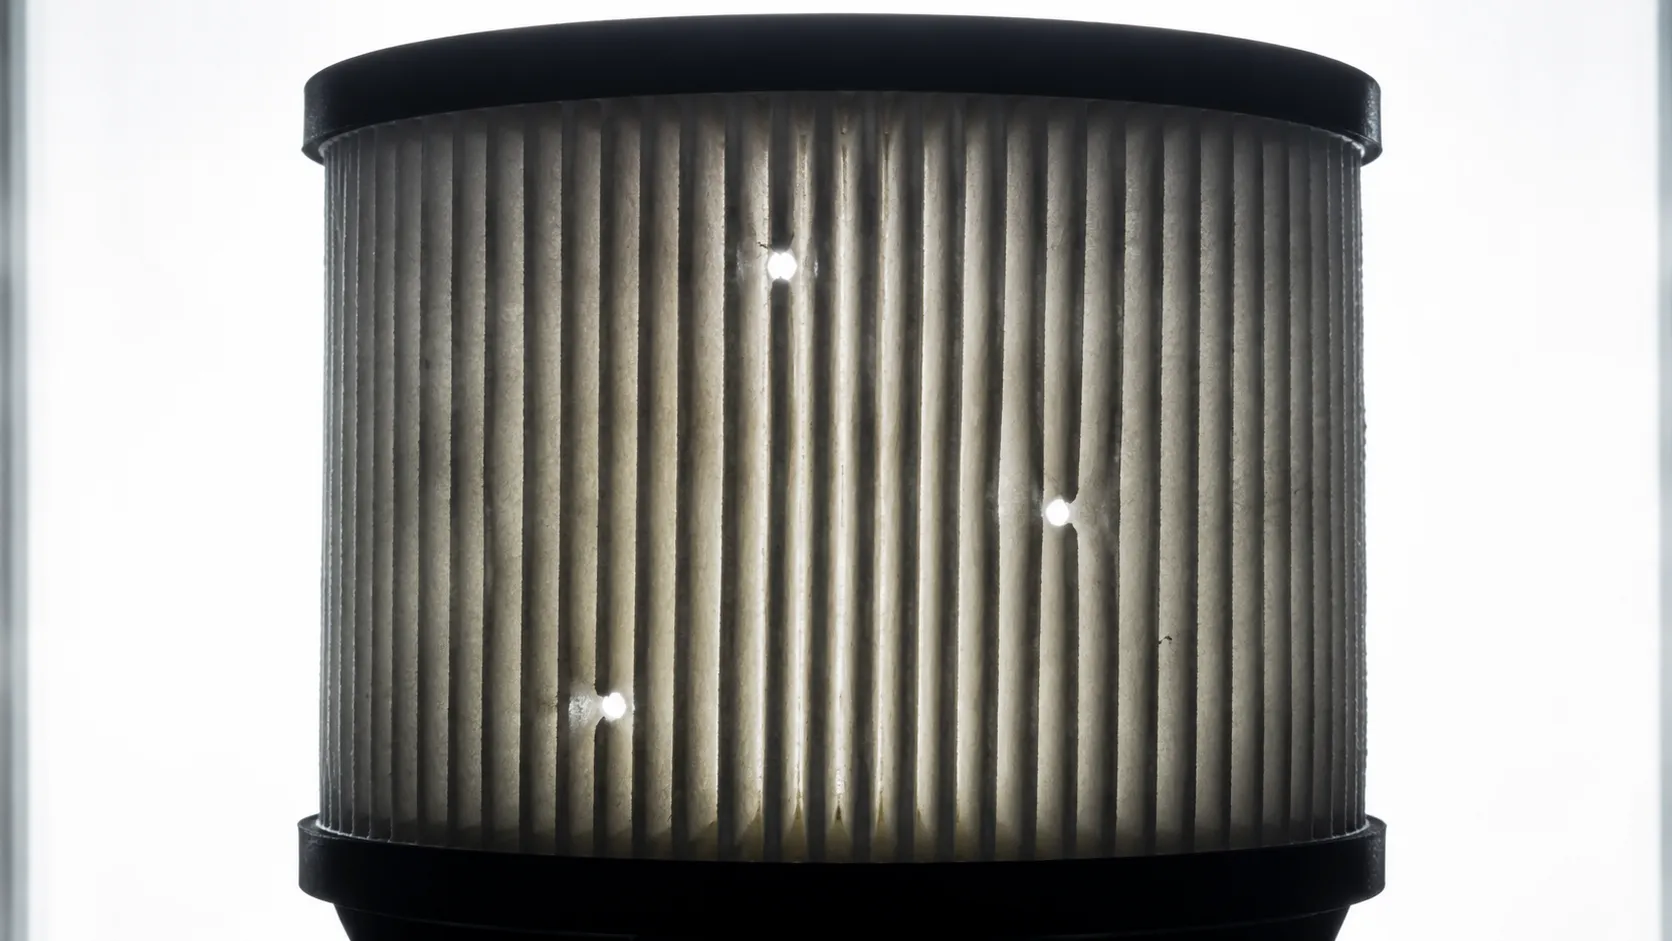
I ran the same paper element specification at two settings to find where the positions stop conflicting.
Setting | Distance | Result under the light box |
|---|---|---|
90 psi | 4 inches | Three clear blowouts, element scrapped |
30 psi | 12 inches | No visible damage, surface dust removed |
So both manufacturers are right, and neither is writing for the same reader. A permission written for a dealer bench with a regulated line is not the same instruction as a prohibition written for a homeowner holding an unregulated 120 psi gun four inches from the media.
The conflict is an artefact of documentation scope, not an engineering dispute.
When to ignore us. We are adjudicating between manufacturers here, not overruling them. If your engine manual contradicts this section, follow the manual. It was written for your specific filter media and this article was not.
The governing rule is worth stating plainly: your engine manual outranks your mower manual, and both outrank this article. Toro's rider support makes the same point, telling owners to review the engine manual alongside the operator manual before servicing.
That matters because a Toro deck might carry a Briggs, a Honda or a Kawasaki engine, which means one mower brand can route you to three different rule sets. Husqvarna's prohibition is unusually blunt, and Husqvarna's own service rules are worth reading in full if that badge is on your deck.
Did It Work? How to Tell a Clean Filter From a Finished One
A cleaned lawn mower air filter passes or fails on one test you can run in thirty seconds with a phone torch. Hold the element between the light and your eye and look through the media rather than at it.
Light should pass evenly across the whole element, and dark patches that do not clear, pinholes of bright light, or no light at all mean the filter is finished. The LSU AgCenter's guidance points the same way, advising replacement once an element is oily or once tapping no longer cleans it.
The light box is what changed how I called verdicts this spring. Two elements that looked identical sitting on the bench, same colour, same apparent load, came out as a clear pass and a clear fail the moment they were backlit.
Can You Just Shine a Light Through It?
Yes, and it is the most reliable check available to a homeowner. One TractorByNet discussion describes the method exactly as it is worth doing: shine a light on the inside, look for light coming through, and if you find a hole, the filter is done.
Pass: Light passes evenly across every part of the element
Fail: Dark zones that stay dark, or bright pinholes where the media has been punctured
Also fail: The element is caked through its depth rather than dusty on its surface
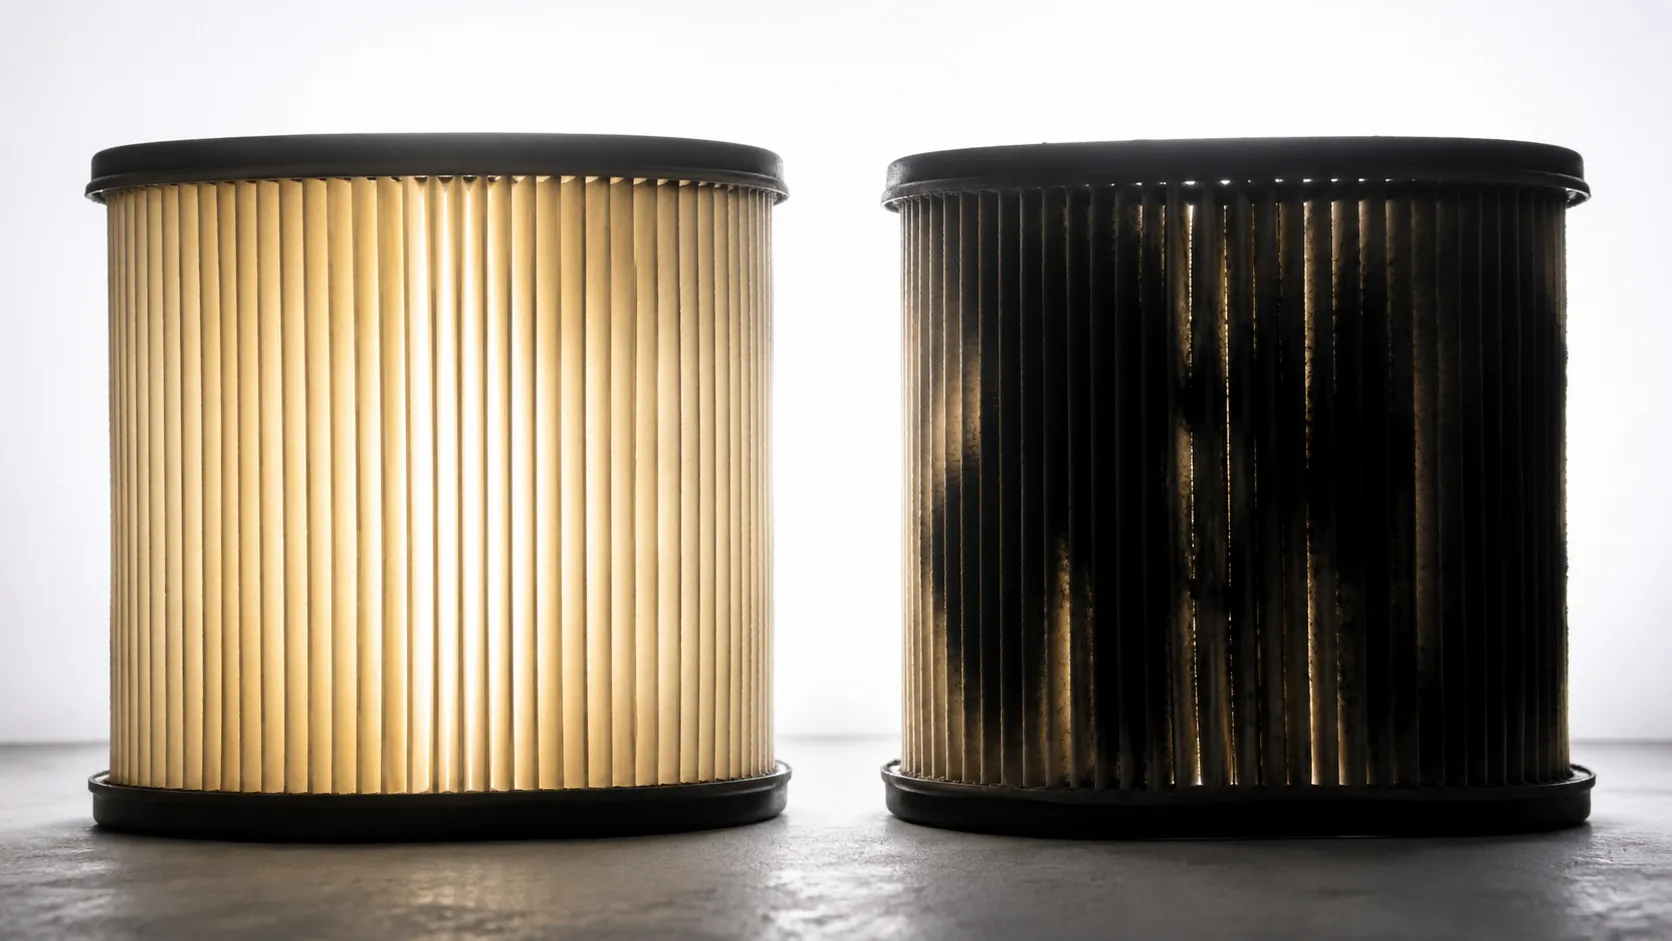
Looking at a filter tells you what landed on it most recently. Looking through it tells you how loaded the media is all the way down, the only thing that actually affects airflow.
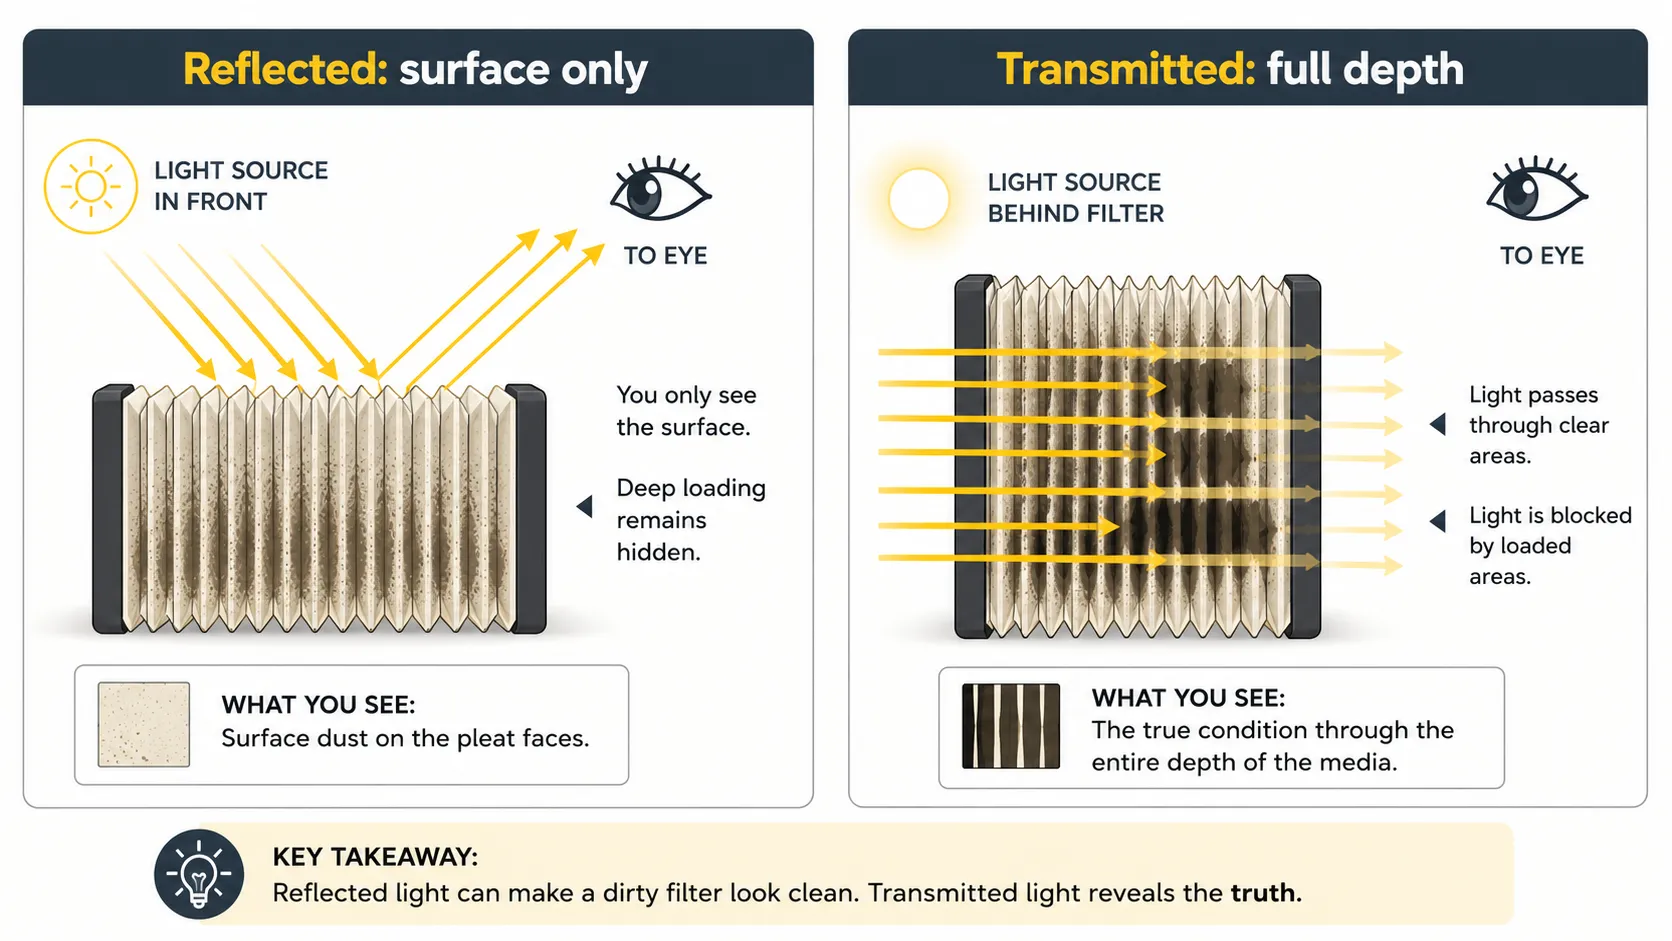
Run these four checks in order before anything goes back in the housing:
Light test, as above
Seam and edge integrity, no splits or lifted adhesive
Sealing face condition, still square and springy rather than compressed flat
Seating, the element drops in without forcing and the cover closes without strain
Husqvarna's instruction on that last one is worth repeating: when you reassemble, make sure the filter seals fully against the filter holder.
What this test does not catch. The light test measures load and media integrity, and it says nothing about sealing performance. A filter can pass the light test perfectly and still leak dirt around a compressed or distorted gasket face, which is why the seating check is a separate step rather than an afterthought.
If everything passes and the mower still runs badly, the filter may not have been your problem. It is worth checking the symptoms of a choked filter to confirm you were chasing the right part.
7 Mistakes That Turn a Cleaning Into an Engine Repair
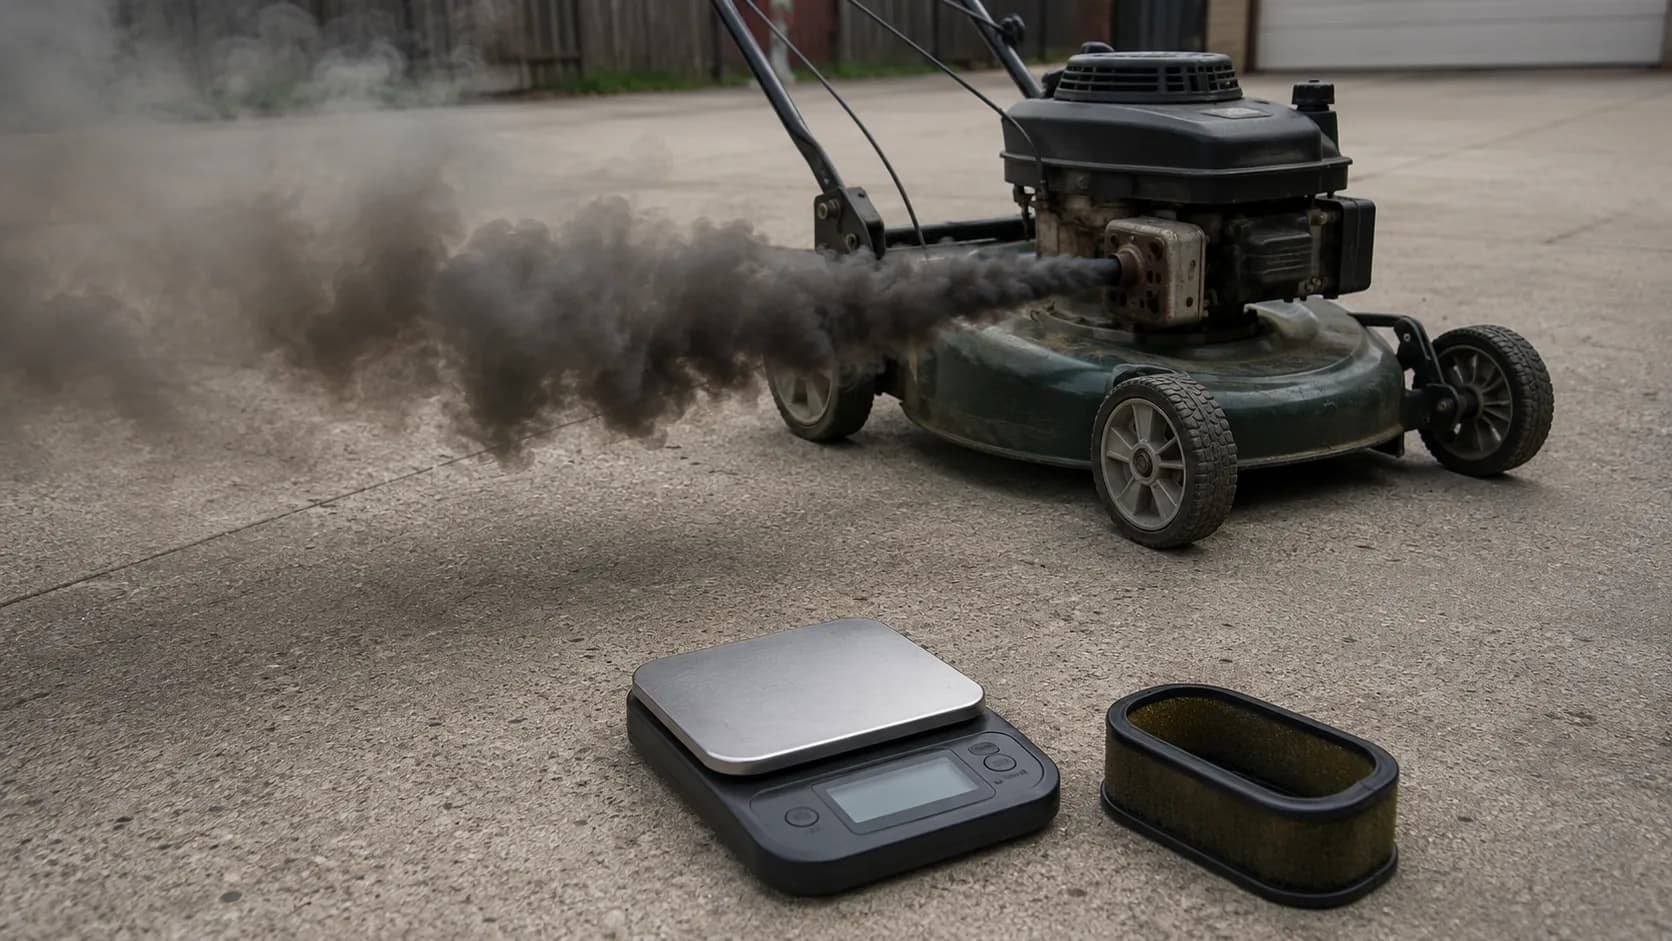
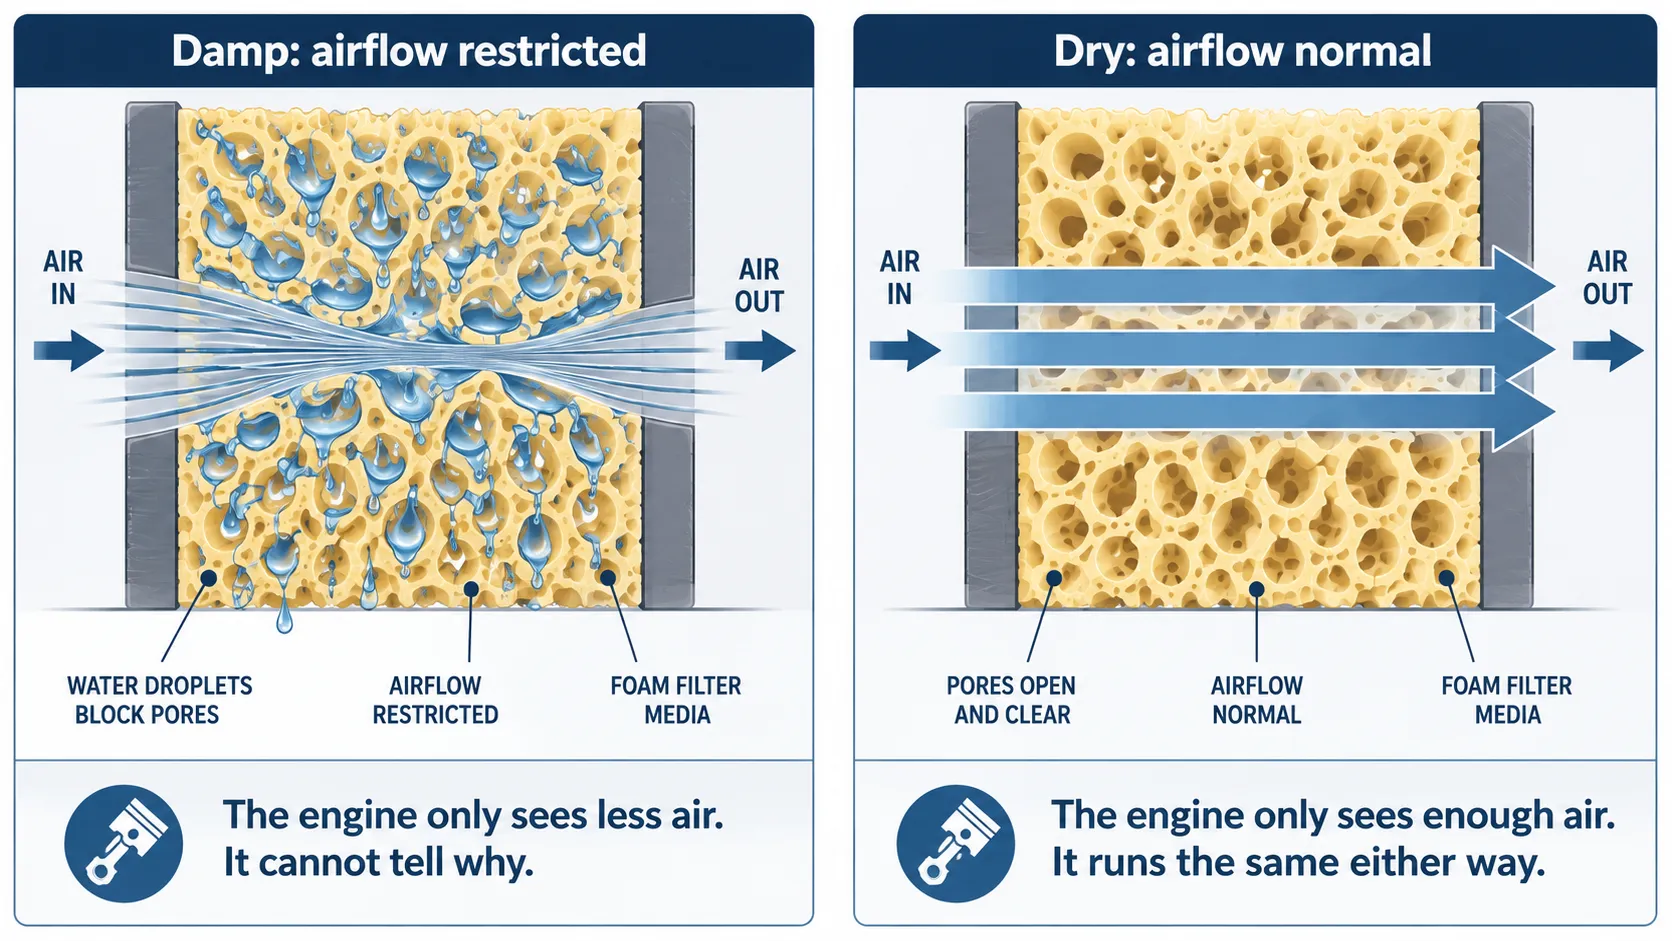
The most common lawn mower air filter mistake is reinstalling a foam element before it is fully dry. A damp element restricts airflow exactly like a clogged one, so the engine runs rich and blows black smoke within seconds of starting.
One TractorByNet thread records precisely that outcome after a wash: the tractor ran smoothly for about five seconds, then started smoking, and the filter turned out to still be damp.
Three of these we caused on purpose. One we did not. The damp reinstall, the high-pressure blowout and the gasoline soak were all deliberate tests. The dirty-housing mistake was an accident on the second mower of the run.
Reinstalling before it is dry: I put a foam element back at four hours of drying, still 3.1 grams above its dry weight, to see how forgiving the mower would be. It was blowing black smoke inside a minute, so wait for the dry weight or the clean paper towel.
Wringing the foam instead of squeezing it: Twisting splits the bonded seam, and the split sits at the edge where you will not see it once the cover is on. Press flat between your palms or roll it in a towel.
Oiling a foam pre-cleaner that wraps a paper cartridge: The oil wicks into the paper and chokes it, and the mower runs worse after the service than before. Leave a wrap dry unless your manual says otherwise.
Using compressed air at shop pressure, close in: At 90 psi from four inches I blew three holes clean through a paper element. Low pressure, from a distance, from the inside out, or just tap it.
Cleaning with gasoline, WD-40 or any petroleum product: The media survives and the adhesive does not, so the filter looks fine and leaks around its edge. Warm water and dish detergent only.
Opening a dirty housing: Grit sitting on the outside of the airbox falls straight into the open intake the moment the cover comes off. Brush the housing first and plug the intake with a rag.
Improvising a homemade element: Upholstery foam, filter offcuts and cut-down household filters all flow air happily, which is the problem. They are not rated to trap the particle sizes that score a cylinder, and they usually seem to work perfectly right up until compression drops.
Clean or Replace? Making the Call and Making It Last
Cleaning a lawn mower air filter saves money up to a measurable point, and after that it stops. Briggs & Stratton puts foam-only elements on a replacement interval of every 3 months or 25 hours of use, whichever comes first, and more often in dusty conditions.
For a combination filter with a pre-cleaner, it specifies replacing the pre-cleaner every 25 hours or every season and the cartridge every 100 hours. The practical rule that falls out of that: clean mid-season, replace at the start of each season.
The returns diminish for a physical reason: each wash relaxes the foam's cell structure and takes a little more compression set out of the sealing face.
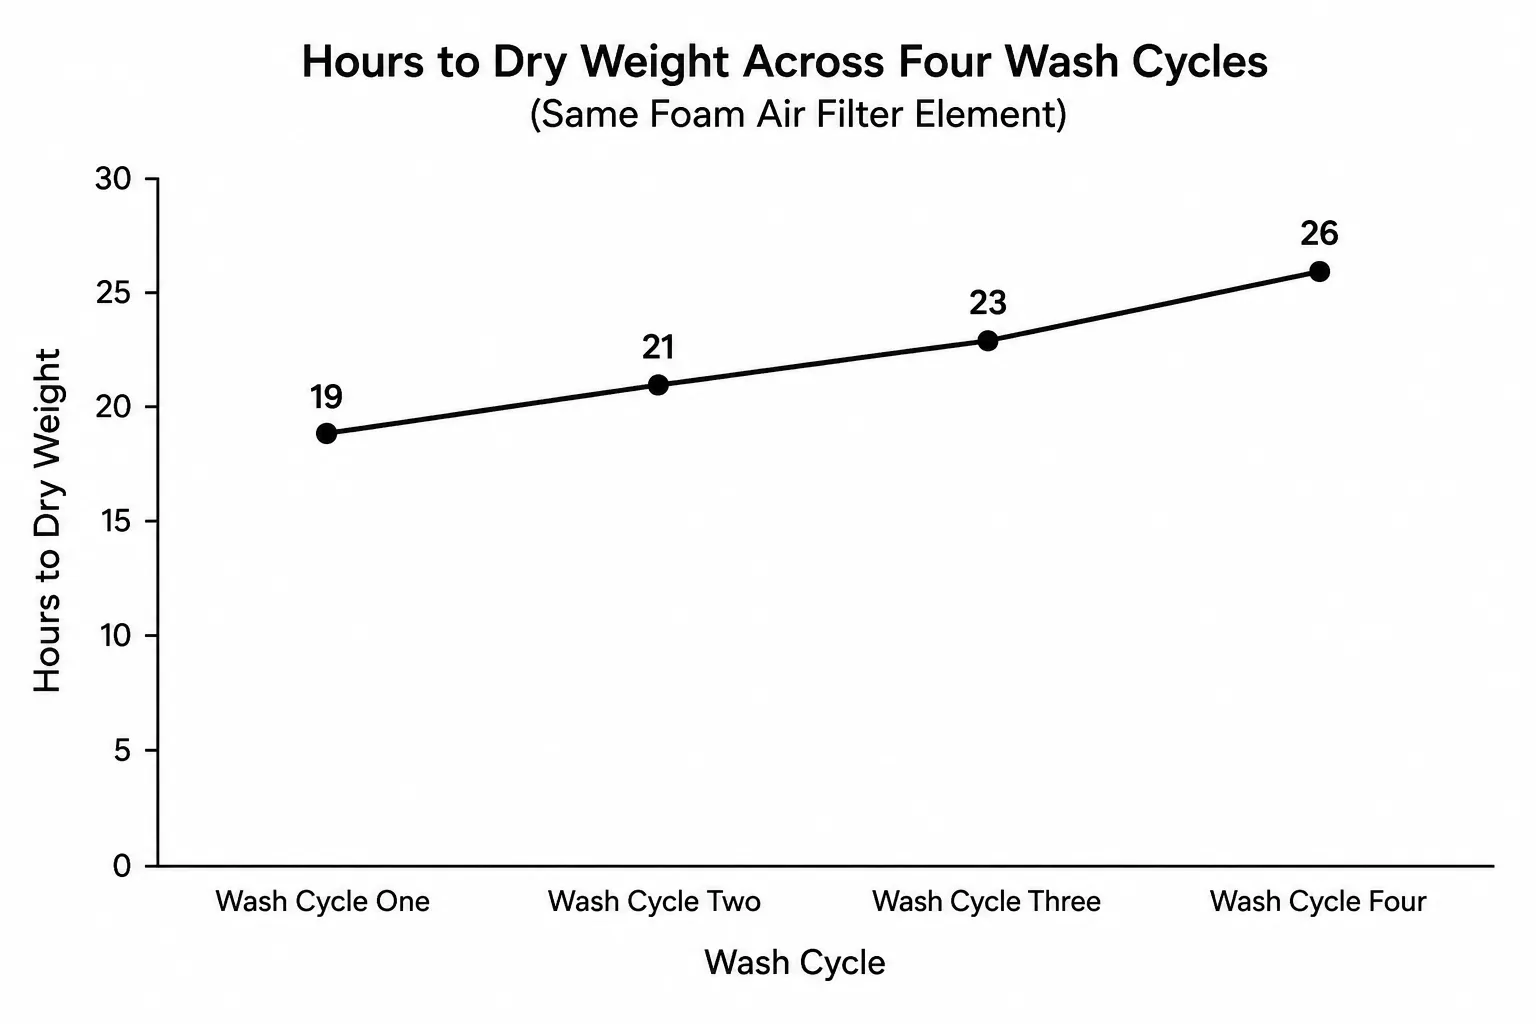
I tracked one foam element through four full wash cycles this spring. It took 19 hours to return to its dry weight after the first wash and 26 hours after the fourth, holding water longer every time.
Element type | Typical price | Realistic clean cycles | Manufacturer interval | When replacing wins |
|---|---|---|---|---|
Foam only | $6 to $12 | 3 to 4 before drying time drifts | 3 months or 25 hours | Any time the seam is soft or the sealing face stays flat |
Paper cartridge | $9 to $18 | 1 to 2 taps, no washing | 25 hours or every season | As soon as the light test fails |
Foam pre-cleaner | $5 to $10 | 4 or more, it does the coarse work | 25 hours or every season | When it tears or stops springing back |
Paper cartridge behind a pre-cleaner | $12 to $22 | 1 to 2 taps | 100 hours | When the light test fails or oil has stained it |
The case against cleaning. Washing a nine dollar filter four times to avoid buying one costs you most of a working day in drying time across a season, plus the oil. For most people, most of the time, buying the part is a better use of a Saturday than cleaning it.
Briggs & Stratton's own foam procedure is a replacement procedure, and it is worth understanding that its official instruction is to discard the old foam and saturate a new element with fresh oil rather than to wash anything.
The rule of thumb is mid-season clean, start-of-season replace, though how often this needs doing shifts a long way if you mow dry, dusty ground.
Whichever way you go, the filter is one item on a longer list, and doing it alongside the full seasonal tune-up takes less total time than doing any of it piecemeal.
Set a reminder for February and it stops being an emergency.
Lawn Mower Air Filter Cleaning: FAQs
Can you put a lawn mower air filter in the dishwasher?
No. A dishwasher cycle runs hot enough to set a permanent distortion in foam, so the element comes out clean but no longer the right shape.
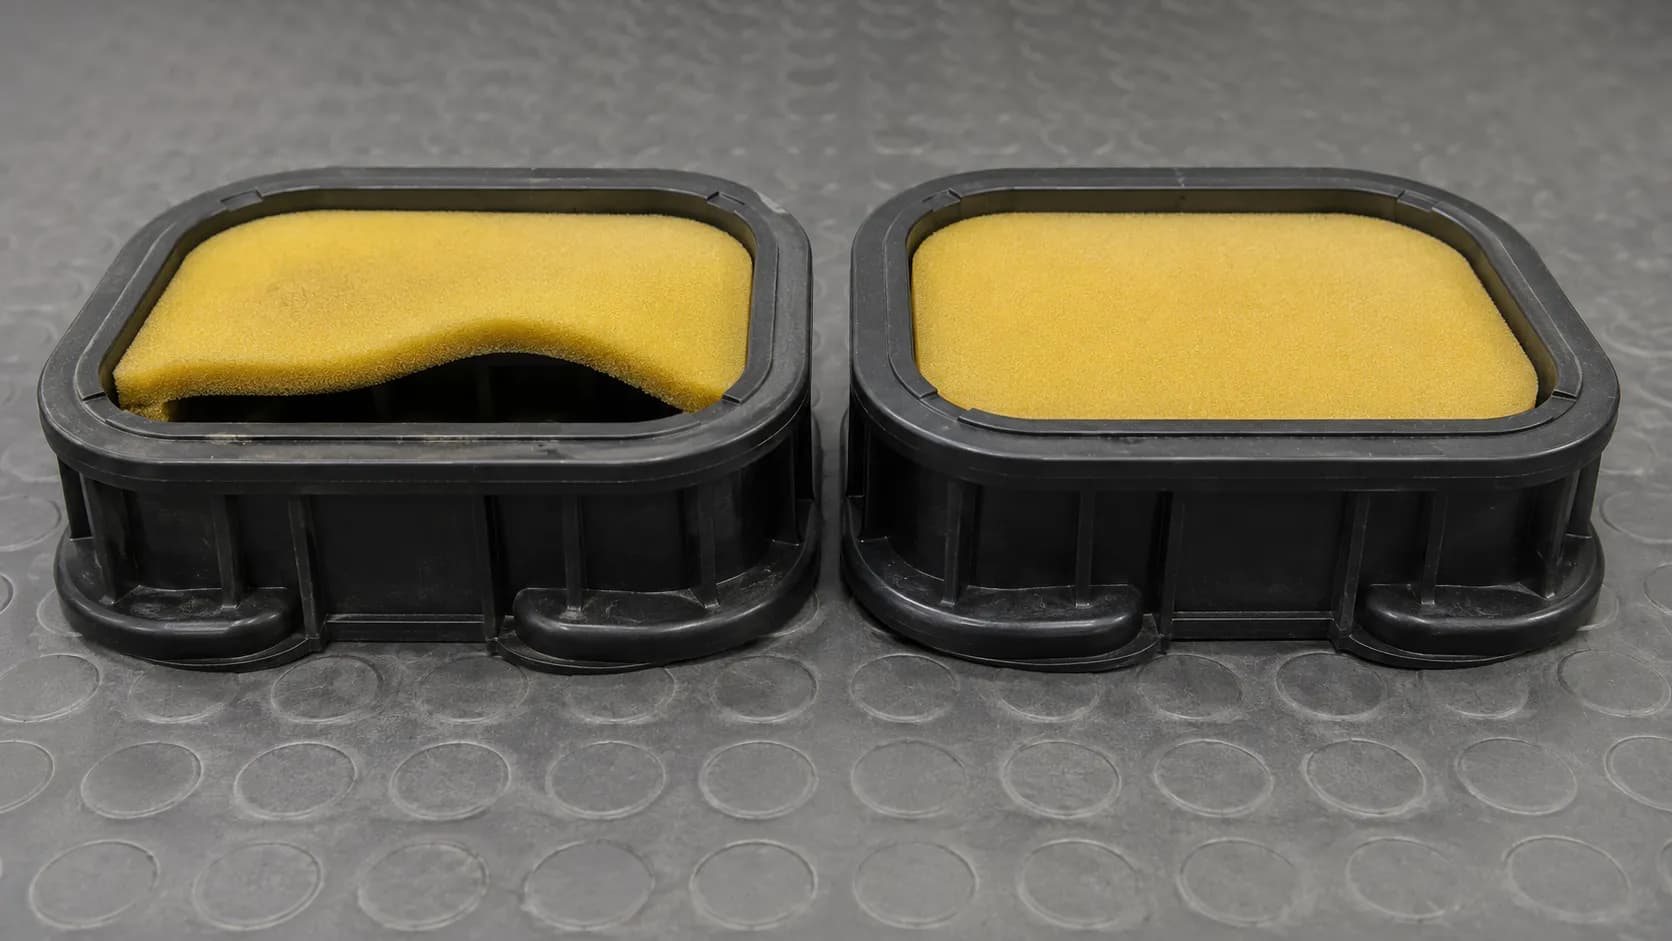
I ran one scrap foam filter through a normal cycle this spring, and afterwards it would not seat square in its housing, leaving a visible gap at the sealing edge.
Can you use Dawn dish soap on an air filter?
Yes, on foam. Dish detergent in warm water is the one cleaning agent every manufacturer and every experienced technician agrees on, and Husqvarna's own instruction is simply soap and water.
Use about a teaspoon in a bowl, and keep it away from paper elements entirely.
How long does a lawn mower air filter take to dry?
Longer than most people allow. At 68 degrees Fahrenheit and 45 percent humidity, the foam elements in this spring's run took 19 hours to return to their dry weight, dropping to about six with a fan on them.
Ambient conditions change that figure a lot, so test with a scale or a paper towel rather than trusting the clock.
Can you make a homemade lawn mower air filter?
No, and the reason is counterintuitive. Improvised foam and cut-down household filters flow air perfectly well and usually seem to work fine, which is exactly the danger.
They are not rated to trap the fine abrasive particles that score a cylinder wall, so the damage happens silently over months.
Do electric and battery mowers have air filters?
No. Corded and battery mowers have no combustion engine and therefore no intake air filter at all.
The vented panel that looks like one is a motor cooling intake, and it needs brushing or blowing out rather than washing.
Can you run the mower while the filter dries?
No. Honda's owner's manual states it directly: never run the engine without the air cleaner, because doing so causes rapid engine wear.
If you need the mower today and the filter is still wet, fit a spare or buy a new element rather than running it bare for one lawn.
The Bottom Line
Cleaning a lawn mower air filter is not one procedure. It is three procedures wearing the same name, and the whole job comes down to correctly identifying which of them applies to the part in your hand before you touch it with anything.
Foam washes and gets re-oiled, while paper gets tapped and nothing else. A dual-element assembly needs both treatments and, counterintuitively, no oil on the wrap.
The manufacturers themselves do not fully agree on the edges of this, which is why so much of the advice you find contradicts itself. When your engine manual has an answer, follow it, because it was written for your exact media.
When it does not, default to the gentler option and verify the result with a light rather than a guess.
Nine filters this spring produced four clean reuses, three replacements and two split decisions. That ratio is worth remembering, because the honest outcome of this job is often that you should buy the part.
Get the identification right, dry the foam properly, and check the seal before the cover goes back on.
Summarize with AI
Keep reading
Related articles
 Maintenance & Seasonal Care
Match a lawn mower tune up kit to your engine: what is inside each kit, OEM vs aftermarket price math, and the right kit by brand for push and riding mowers.
 Maintenance & Seasonal Care
Compare mobile vs drop-off shop for a lawn mower tune up near me: real 2026 price ranges from 12 quotes, the 7 questions to ask, and when to just DIY it.
 Maintenance & Seasonal Care
Match a lawn mower spark plug repair kit to your fault in 30 seconds. 7 kits tested on 9 engines: M14x1.25 sizing, insert lengths, and the $5 boot fix.
 Maintenance & Seasonal Care
Compare lawn mower tune up cost by mower type: $70-$150 push, $150-$280 riding, from 9 real 2026 shop quotes. Plus the same parts for about $18 DIY.
Comments
Moderated for quality. Share a correction, ask a follow-up, or tell us what worked for you - every comment is reviewed before it goes live.