
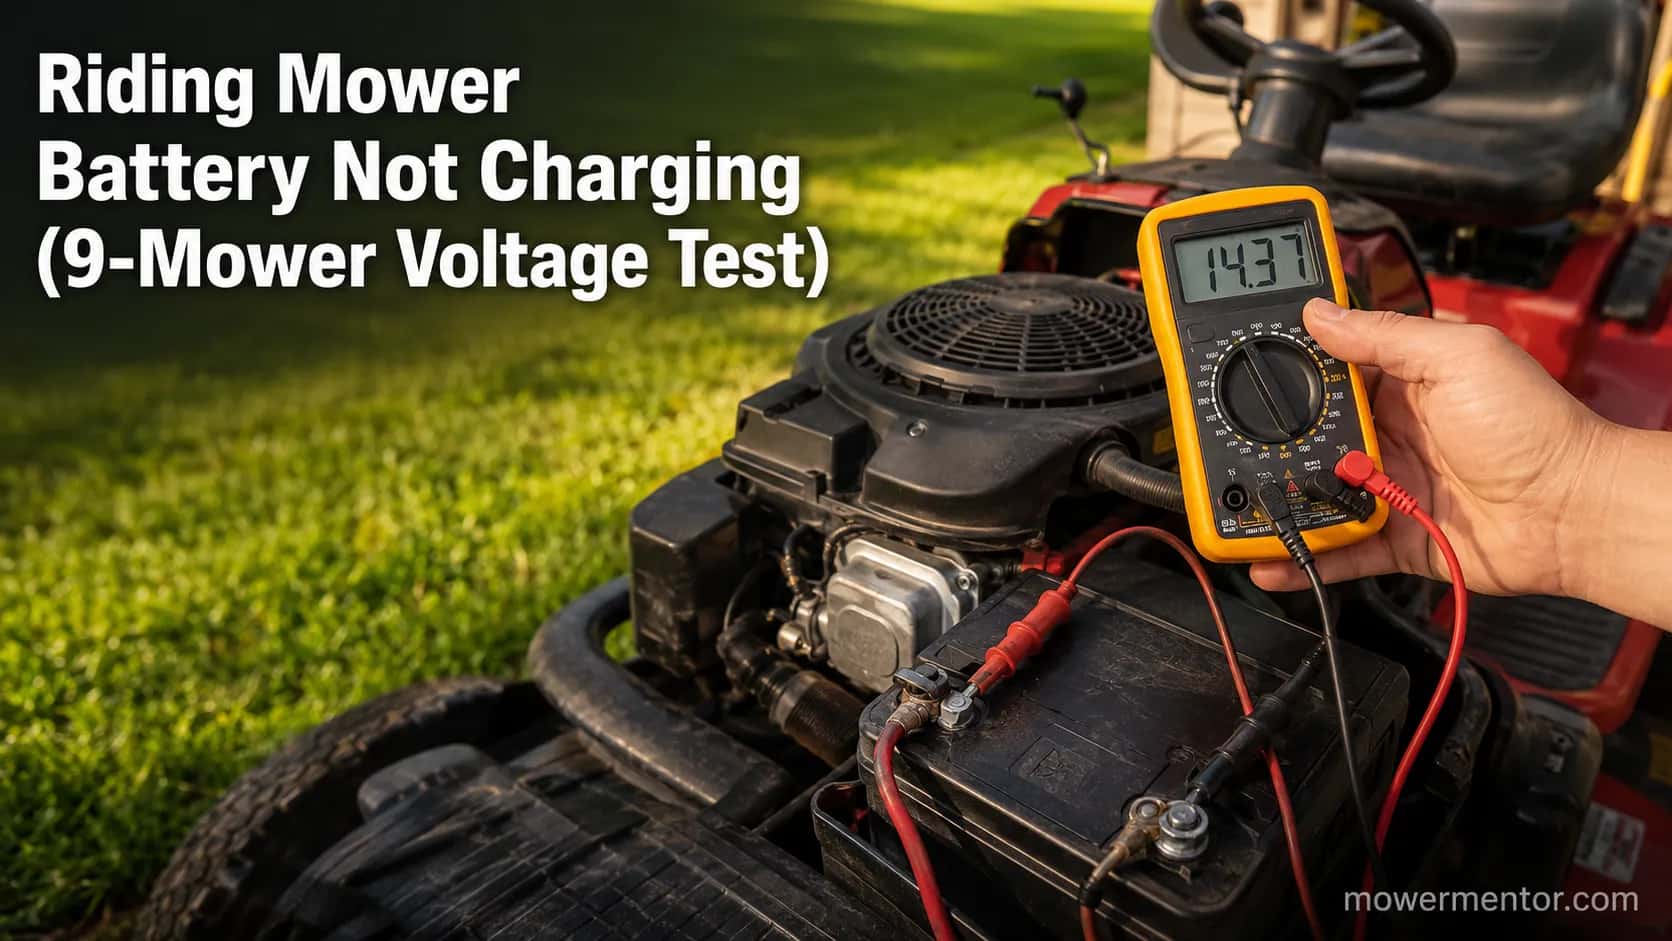
Riding Mower Battery Not Charging (9-Mower Voltage Test)
Fix a riding mower battery not charging fast: measure charging voltage (13.5-14.5V at RPM), then isolate a bad stator, regulator, or parasitic drain.
Written by Tony MaldonadoReviewed by Wade Coburn
Last updated on August 19, 2026
When you buy through links on our site, we may earn an affiliate commission (at no extra charge), which we use to fund new product tests. Learn more.
Summarize with AI
A riding mower battery not charging is one of the most misread faults in the yard, because the symptom points at the battery while the real culprit usually sits on the engine. Before you spend a cent on a new battery, one voltage reading tells you whether the charging system is even doing its job.
I metered the charging systems on nine different riding mowers and lawn tractors across the 2025 and 2026 spring seasons, and only one of the nine "won't charge" complaints turned out to be a worn battery. The rest were the charging system itself: a failed regulator, a dead stator, a corroded ground, or something quietly draining the battery overnight.
This guide walks the same measure-first path I use on the bench. You will confirm the fault, route it to one of five suspects, and fix the right part instead of guessing.
The 60-Second Charging-System Check (Start Here)
A riding mower battery not charging almost always points to the charging system, not the battery itself. With the engine running near full throttle, a healthy system reads about 13.5 to 14.5 volts at the battery terminals.
Anything that stays below roughly 12.7 volts while the engine runs confirms a charging fault, which narrows to one of five causes: a bad stator, a failed voltage regulator or rectifier, a loose connection or blown fuse, or a parasitic drain.
Set a multimeter to DC volts. Engine off, a healthy battery reads 12.6 to 12.7 volts. Start the engine, hold near full throttle, and read the battery again.
If the number climbs to 13.5 to 14.5 volts, the charging system works and the battery may simply be tired. If it barely moves off 12 volts, the charging system is not replenishing the battery.
No multimeter on hand? Watch the headlights as you throttle up from idle. On a working system they brighten noticeably. If they stay dim or dim further, the charging system is likely not keeping up, and that "reading 12-point-something running" pattern is exactly what owners describe on the forums.
One safety note before you start. Never lay a metal tool across both battery terminals, and work on a cool engine so you are not reaching past hot exhaust.
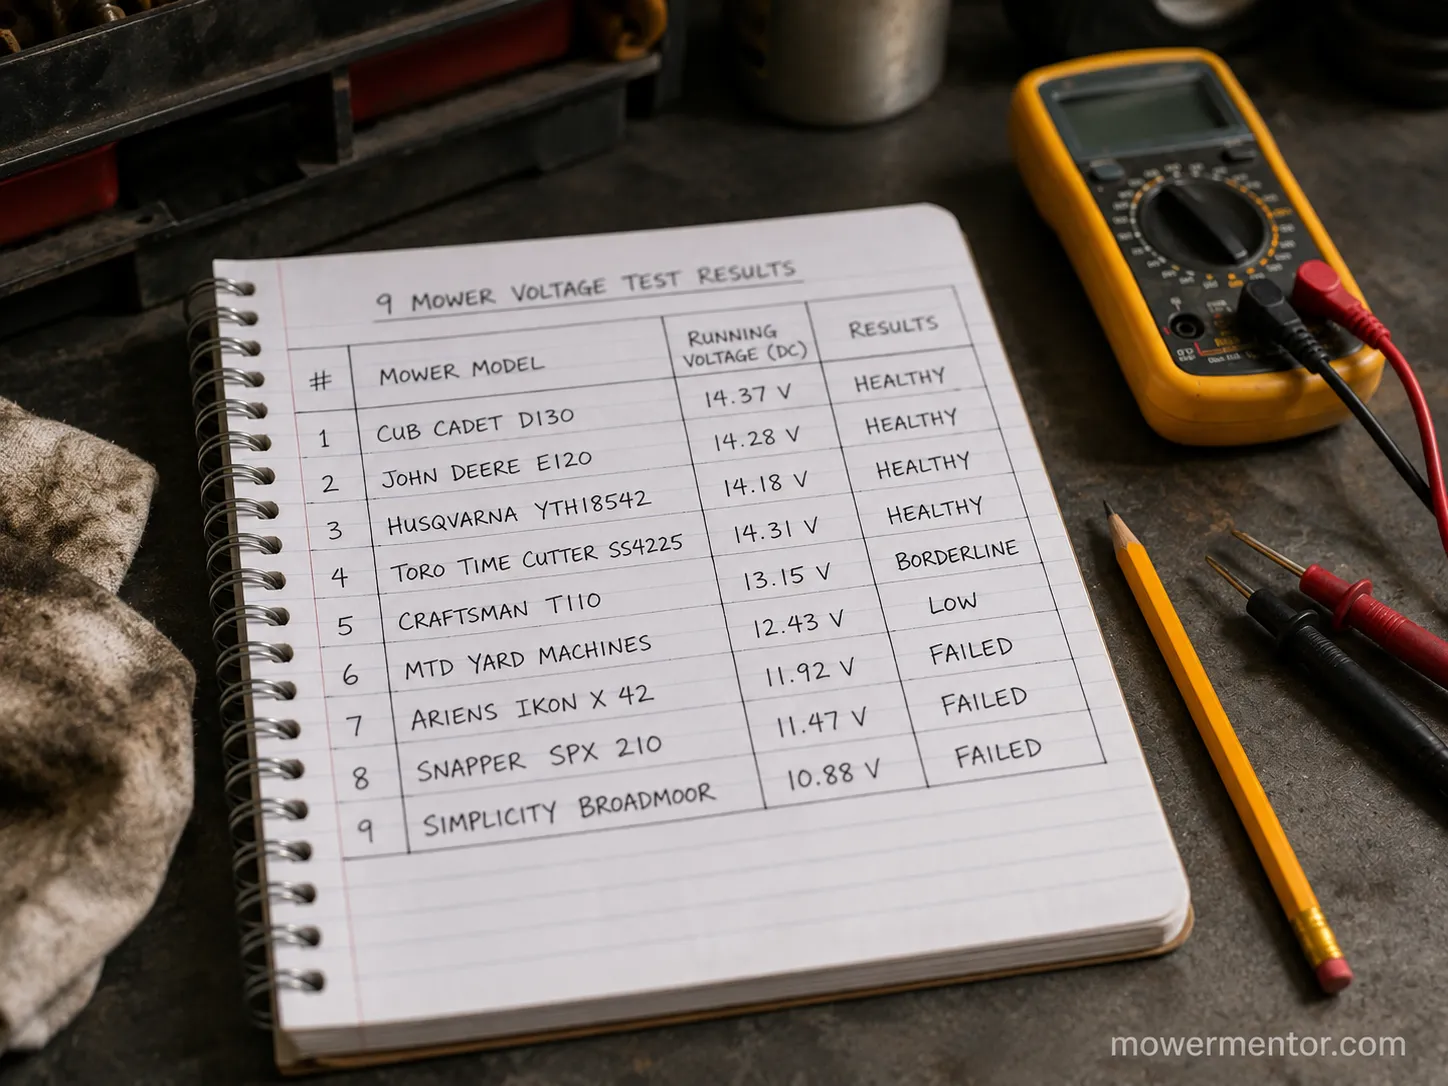
Across the nine machines I metered, every genuinely failed charging system sat between 12.3 and 12.6 volts at full throttle, while the healthy ones held 13.9 to 14.4 volts. Those thresholds line up with the standard lead-acid state-of-charge behavior described in battery-maker technical references, where a rested, fully charged 12 volt battery reads about 12.6 to 12.7 volts.
Riding Mower Battery Not Charging? The Voltage Test
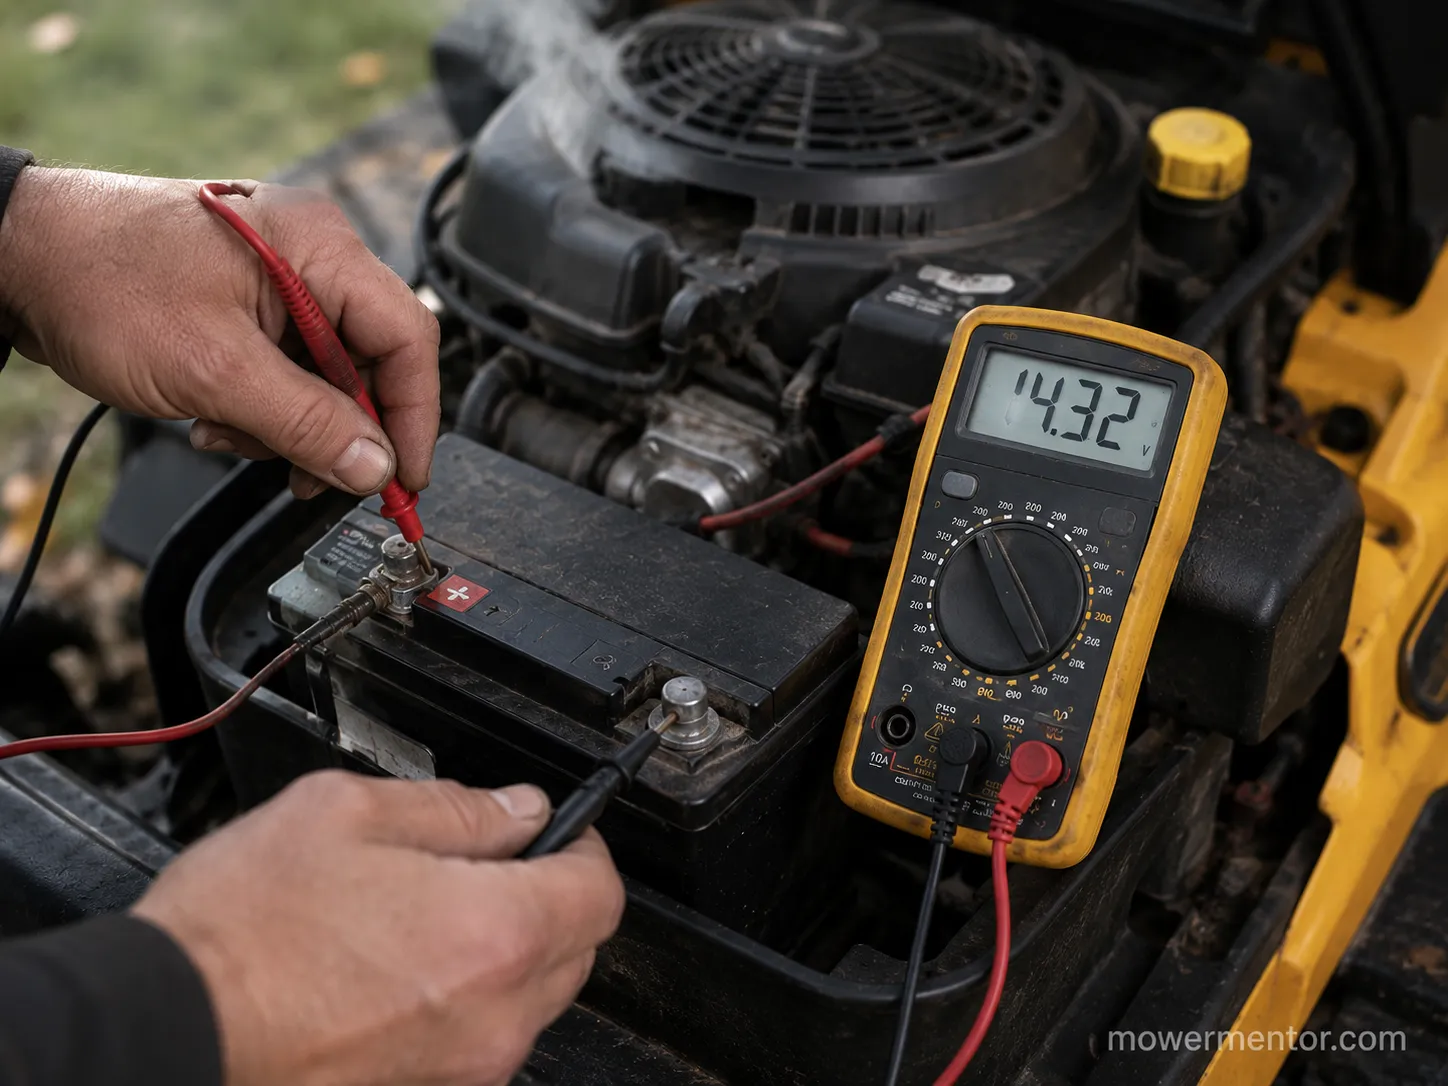
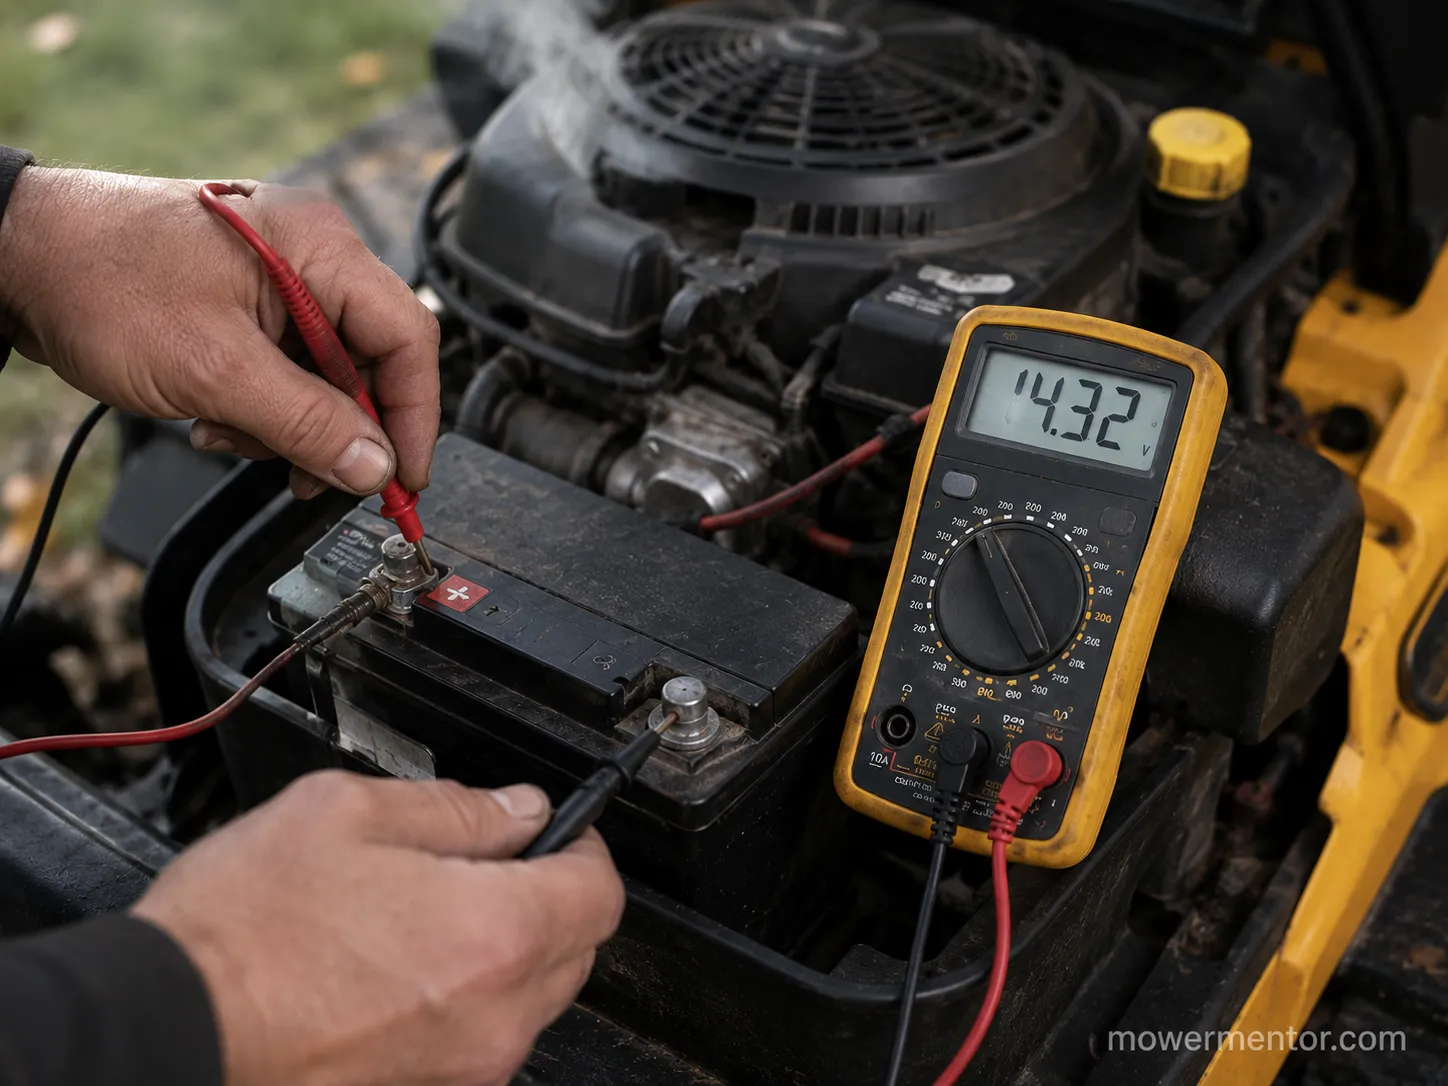
The single most useful test for a riding mower battery not charging is a two-reading voltage check at the battery, off and then at full throttle. Set a multimeter to DC volts, read the resting battery (a healthy one shows 12.6 to 12.7 volts), then start the engine, hold near full throttle, and read again.
A working charging system climbs to roughly 13.5 to 14.5 volts. If the voltage barely moves or a reading spikes above 15 volts, you have found the fault in under two minutes, and the complete starting-system walkthrough covers what to do if the engine also refuses to crank.
Here is the exact procedure I run on every machine.
Set a digital multimeter to DC volts (the setting marked V with a straight line). Wear eye protection.
Engine off, touch red to the positive post and black to the negative post. Note the number. A full battery reads 12.6 to 12.7 volts.
Start the engine and hold the throttle near full. Read the battery again while it runs.
Interpret the second reading using the table below.
Reading at full throttle matters because a mower's charging output scales with engine speed. A stator that looks weak at idle can be perfectly healthy at 3,000 rpm, so idle readings mislead.
Reading at full throttle | What it means | Where to go next |
|---|---|---|
13.5 to 14.5 volts | Charging system is working | Battery may be worn: see the battery section |
Stays near 12.0 to 12.7 volts | Not charging (stator or regulator) | Stator section, then regulator section |
Climbs above 15.0 volts | Regulator failing (overcharge) | Regulator section |
Jumps around, unstable | Loose connection or bad ground | Connections and fuse section |
On my Fluke 117, a healthy John Deere running the Kawasaki twin jumped from 12.7 volts off to 14.2 volts at full throttle within about two seconds. A failed Craftsman with a small Briggs engine never moved off 12.4 volts, no matter how long I held the throttle open.
The correct probe placement and the DC volts setting both matter, and the method matches the manufacturer guidance in the Briggs and Stratton charging test. The two-reading approach also follows the standard technique in Fluke's DC voltage guide.
One honest limitation. A deeply flattened battery can read low on the first run even with a healthy system, because it takes time to accept charge. If the first reading is borderline, run the engine ten minutes and read again before you condemn anything.
What the Number Means: Symptom to Cause
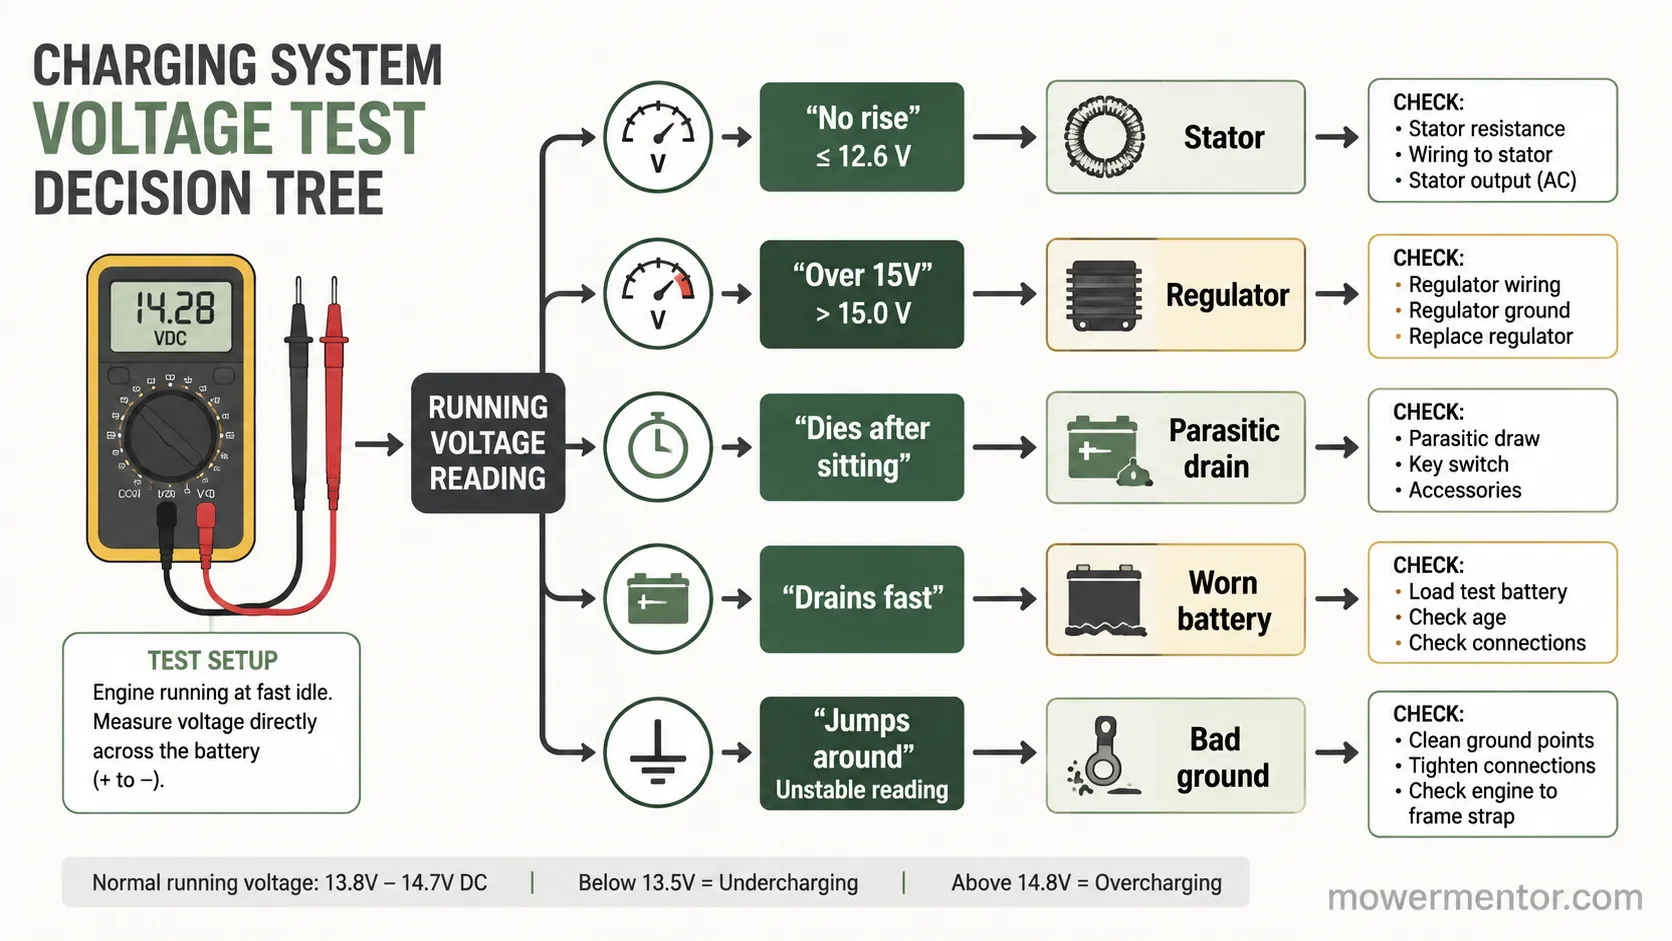
Once you have a running voltage, the reading routes you straight to the likely cause, which is why a riding mower battery not charging is a five-suspect diagnosis rather than a mystery. No voltage rise at full throttle points to a stator or a regulator.
A reading above 15 volts means the regulator has failed the other way. A battery that charges yet dies after sitting signals a parasitic drain, and one that charges fine but drains fast is simply worn out.
Why is my riding mower battery not charging?
Use the reading and the symptom together. The table below is the exact order that found the fault fastest on my nine test machines.
Symptom or reading | Most likely cause | Section |
|---|---|---|
No rise past 12.x volts at full throttle | Bad stator or bad regulator | Stator, then regulator |
Voltage spikes above 15 volts | Failed regulator (overcharging) | Regulator |
Charges, then goes flat after sitting a day | Parasitic drain | Parasitic drain |
Charges to 14 volts but dies within minutes | Battery will not hold charge | Battery |
Reading jumps, terminal warm or corroded | Loose connection, bad ground, or blown fuse | Connections and fuse |
Of the nine no-charge machines I worked through, four were failed regulators, two were dead stators, two were parasitic drains, and one was just a tired battery. Regulators topped the list because they sit in a hot, vibrating spot and fail more often than the stator does.
Two causes can also coexist. A slow parasitic drain can flatten a battery so badly that it looks like a charging fault, so confirm the charging voltage first before you chase a drain. If the symptom is really a no-crank rather than a slow charge, diagnose a no-crank instead and start at the battery-to-ground path.
A single loud click when you turn the key is the click-but-won't-start branch of this same electrical tree, and it points at the solenoid or a low battery rather than the charging coils.
Cause One: A Bad Stator (Charging Coils)
A bad stator stops a riding mower from charging because the stator's coils, spinning under the flywheel, generate the alternating current the system later rectifies into battery charge.
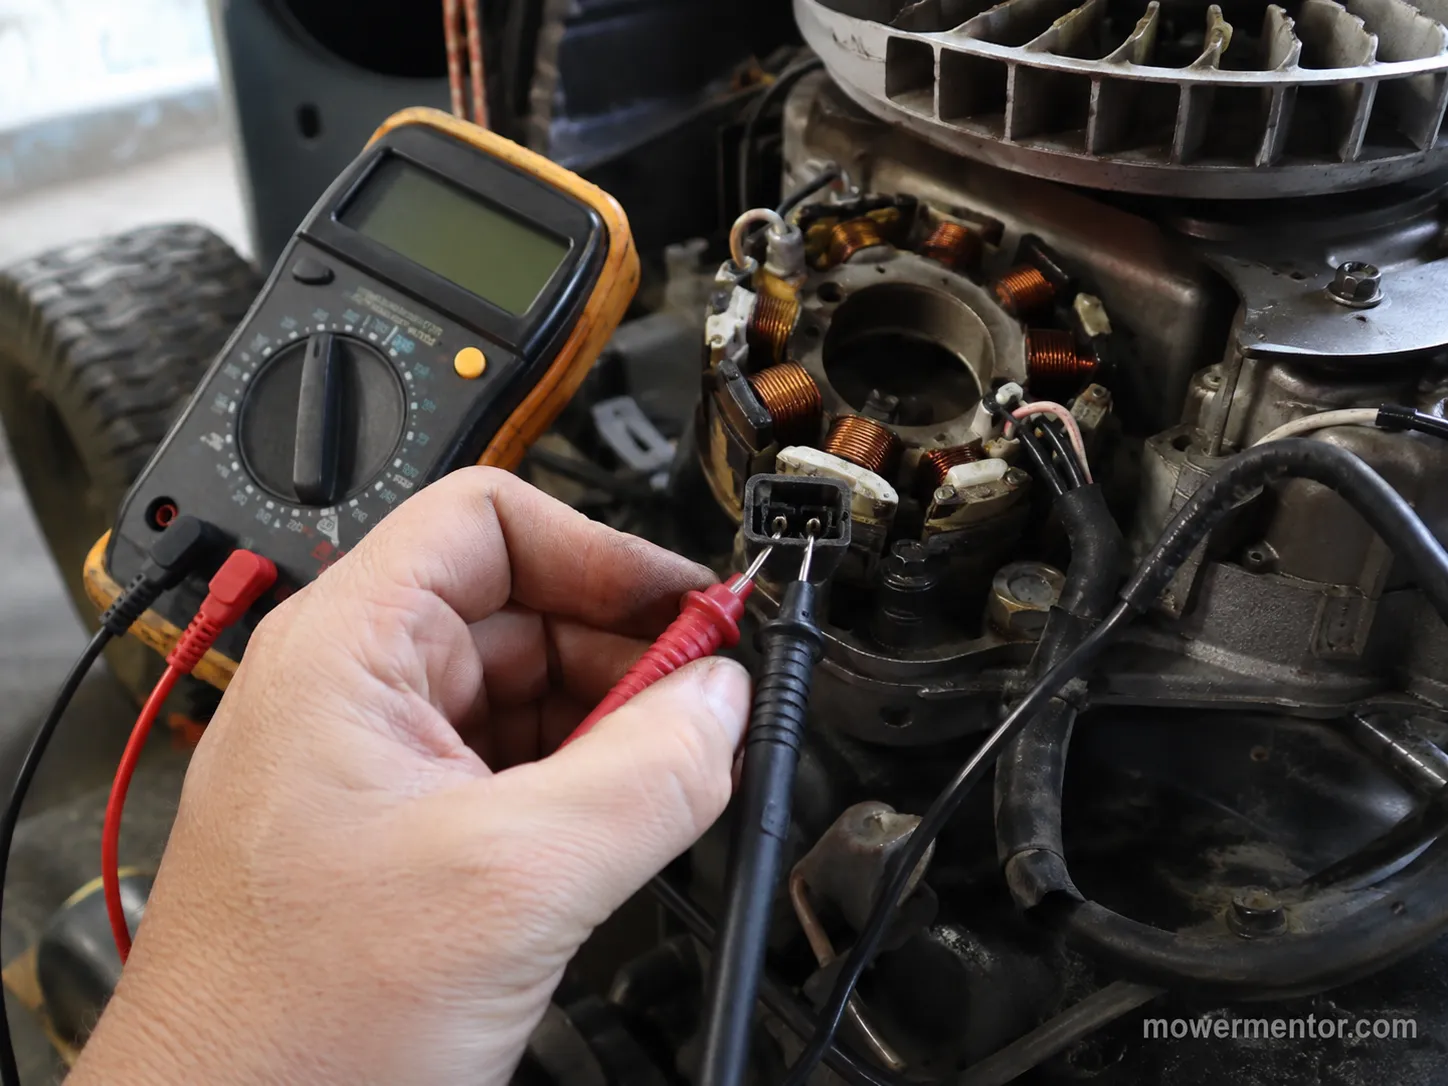
To test it, unplug the stator connector, set a multimeter to AC volts, and read across the stator leads at about 3,000 rpm. The output should climb steadily with engine speed. No output, or output that never rises, means a failed stator or weak flywheel magnets.
The stator is unregulated raw output, so you test it in AC volts, before the regulator, not in DC. That is the step most owners skip.
On the two failed stators I found, AC across the leads never rose past about 6 volts AC at 3,000 rpm. The healthy Kohler unit on the same meter read roughly 28 volts AC at the same speed, a night-and-day difference that made the diagnosis obvious.
Exact numbers vary widely by system, so always compare your reading to the output spec in your engine's service data rather than to a single universal figure, a point the Kohler engine service references make clearly.
The rare wrinkle is magnetism. The stator coils only make power because the flywheel magnets sweep past them, and on very old engines those "flywheel magnets" can weaken, which mimics a dead stator even when the coils are fine.
A single-wire alternator system behaves the same way, and small single-wire setups put out only a couple of amps, as noted in general small-engine charging references.
If the AC output is healthy but the battery still will not charge, the coils are fine and the fault is downstream, so move to the regulator. And if you already fitted a fresh battery and it still won't turn over with a new battery, the problem was never charge at all.
Cause Two: A Bad Voltage Regulator or Rectifier
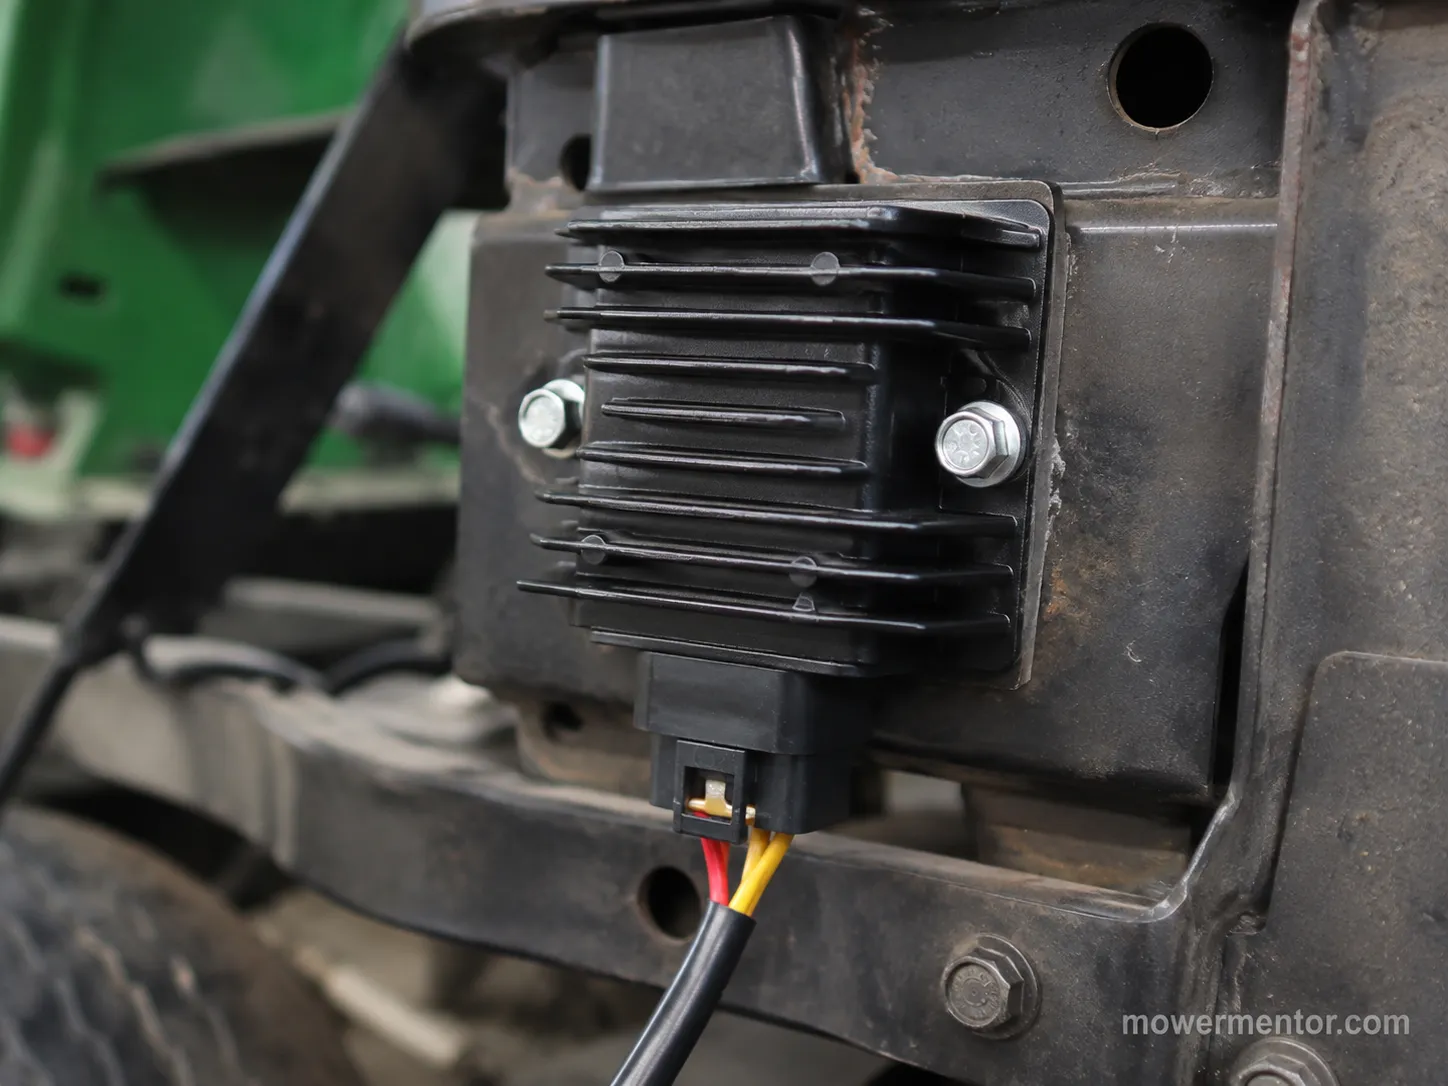
A bad voltage regulator, often called the regulator-rectifier or "reg-rec" on the forums, is the most common reason a riding mower voltage regulator setup fails to charge even when the stator is fine. Isolate it this way.
If the stator's AC output tested healthy but battery voltage still will not climb above about 12.7 volts at full throttle, the regulator is not passing charge. A reading that spikes above 15 volts means the regulator has failed the opposite way and is overcharging.
The regulator does two jobs. It converts the stator's AC into DC, and it caps the voltage so the battery does not cook. When it dies, one of those jobs stops.
The regulator was the culprit on four of my nine machines. Each showed healthy stator AC yet flat battery voltage at full throttle, and a replacement regulator-rectifier restored 14.1 to 14.3 volts at the battery on every one. On one Cub Cadet with a Kohler engine, the reading went from a stubborn 12.5 volts to 14.2 volts the moment the new part went in.
Before you condemn the part, check its ground and its connector. A corroded ground under the regulator can perfectly mimic a failed regulator, so clean that first. The function and service steps for these units are documented in Kohler's charging-system service notes, and a voltage regulator on a riding mower is usually a bolt-on swap once you match the connector and pin count.
Replacing it is straightforward: locate the reg-rec, unplug it, match a new unit by connector and pin count, and torque it to clean bare metal for a solid ground. If the stator tested good and a known-good regulator still will not charge, the fault is in the wiring between them, so move to connections and the fuse. If the failed regulator left the battery flat, you can get it started again safely while the new part is on order.
Cause Three: Loose Connections, Bad Ground, and the Charging Fuse
Before replacing any charging part, rule out connections, because a corroded battery terminal, a loose engine-to-frame ground, or a blown inline charging fuse can each stop a riding mower from charging.
Clean and re-torque the terminals, confirm the ground strap is tight and bare-metal clean, and check the charging fuse for continuity. A voltage-drop test across each connection under load then pinpoints a hidden bad joint that looks fine to the eye.
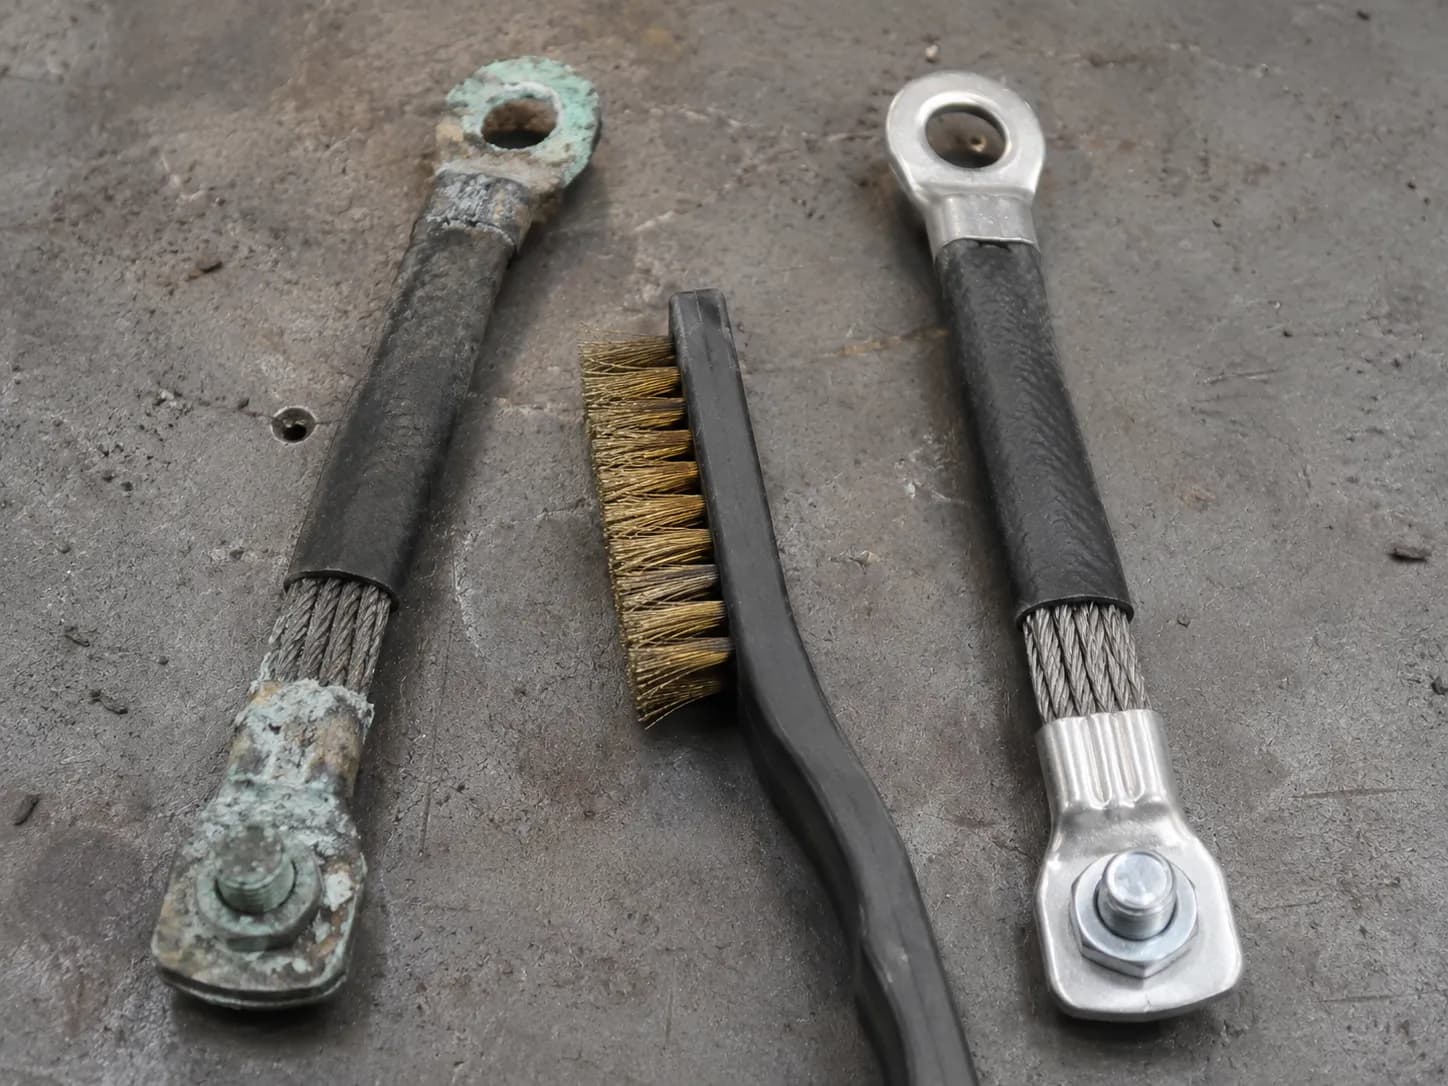
The ground strap is the quiet villain here. It carries every amp back to the engine, and when it corrodes, the whole system reads as if a component died.
One machine I was sure had a "dead regulator" turned out to have a green, crusty engine ground strap. A three-minute wire-brush cleaning restored 14.0 volts at the battery and saved a 25 dollar part I had already set on the bench.
That kind of false positive is common, and heat-damaged or undersized cables can throttle charge the same way, so it is worth learning to fix hot or corroded cables properly.
To find a hidden bad joint, run a voltage-drop test with the engine running: probe across each connection and watch for more than a few tenths of a volt, which reveals resistance a static continuity check misses.
The correct method is laid out in Fluke's voltage-drop guide. While you are in the wiring, remember that a fouled plug is a separate no-start cause, and it is quick to check and gap the spark plug at the same time.
Not every model even has a dedicated charging fuse, and where one exists its location and rating vary, so check your wiring diagram. If the connections and fuse all test good, move on to a parasitic drain or a worn battery.
The honest catch: intermittent faults can pass a static check and only fail under vibration or load, so test under load whenever a reading looks unstable.
Cause Four: Parasitic Drain (Why It Keeps Dying)
If a riding mower charges fine but the battery keeps going dead after it sits, the cause is usually a parasitic drain, meaning something pulls current with the key off. Set a multimeter or clamp meter to measure current on the negative cable with the key off.
A healthy machine draws almost nothing. If you see a meaningful "key-off draw," pull fuses one at a time until the number drops, and the fuse that kills the draw names the guilty circuit.
This is the answer to the "keeps going dead" and "keeps draining battery" complaints that a voltage test alone never explains.
Why does my riding mower keep going dead overnight?
Because a small constant draw is enough to flatten a small U1 battery by morning. Two machines that owners swore "wouldn't charge" actually charged perfectly. Each had a roughly 90 milliamp key-off draw from a stuck accessory relay, and pulling a single fuse dropped that draw to about 4 milliamps, which is normal.
Common culprits are a stuck relay, an added accessory such as lights or a USB port, a slowly leaking regulator, or an hour meter wired incorrectly. The measurement technique itself is standard and covered in Klein Tools' current-measurement guide.
Measure it like this. Put the meter in series on the negative cable, or clamp a DC clamp meter around the negative lead, turn the key off, and read the draw. Then pull fuses one by one, watching the number drop.
A battery that only lasts a season or two may also be near the end of its life rather than merely drained, so it helps to know how long a battery should last before you keep chasing a phantom drain. The catch worth knowing: a tiny baseline draw from a clock or memory circuit is normal, so learn your machine's baseline before you condemn a circuit.
Cause Five: A Battery That Will Not Hold a Charge
Sometimes a riding mower battery will not hold a charge even though the charging system is healthy, which means the battery itself is worn out. After a full charge, a good battery rests at 12.6 to 12.7 volts and stays strong under a load test.
A failing one sags fast under load or never reaches full voltage. Sulfation or a dead cell cannot be reliably recovered, so once a battery fails the load test, the fix is replacement.
This is the one case where the answer really is a new battery, and it is worth confirming with a test rather than a guess.
Why does my riding mower keep killing the battery?
Usually because the battery no longer holds what the charging system puts in. On one machine the system charged perfectly at 14.2 volts, yet the four-year-old battery sagged to 8.9 volts under a load test and would not hold 12 volts overnight. The charging system was innocent, and only a replacement fixed it.
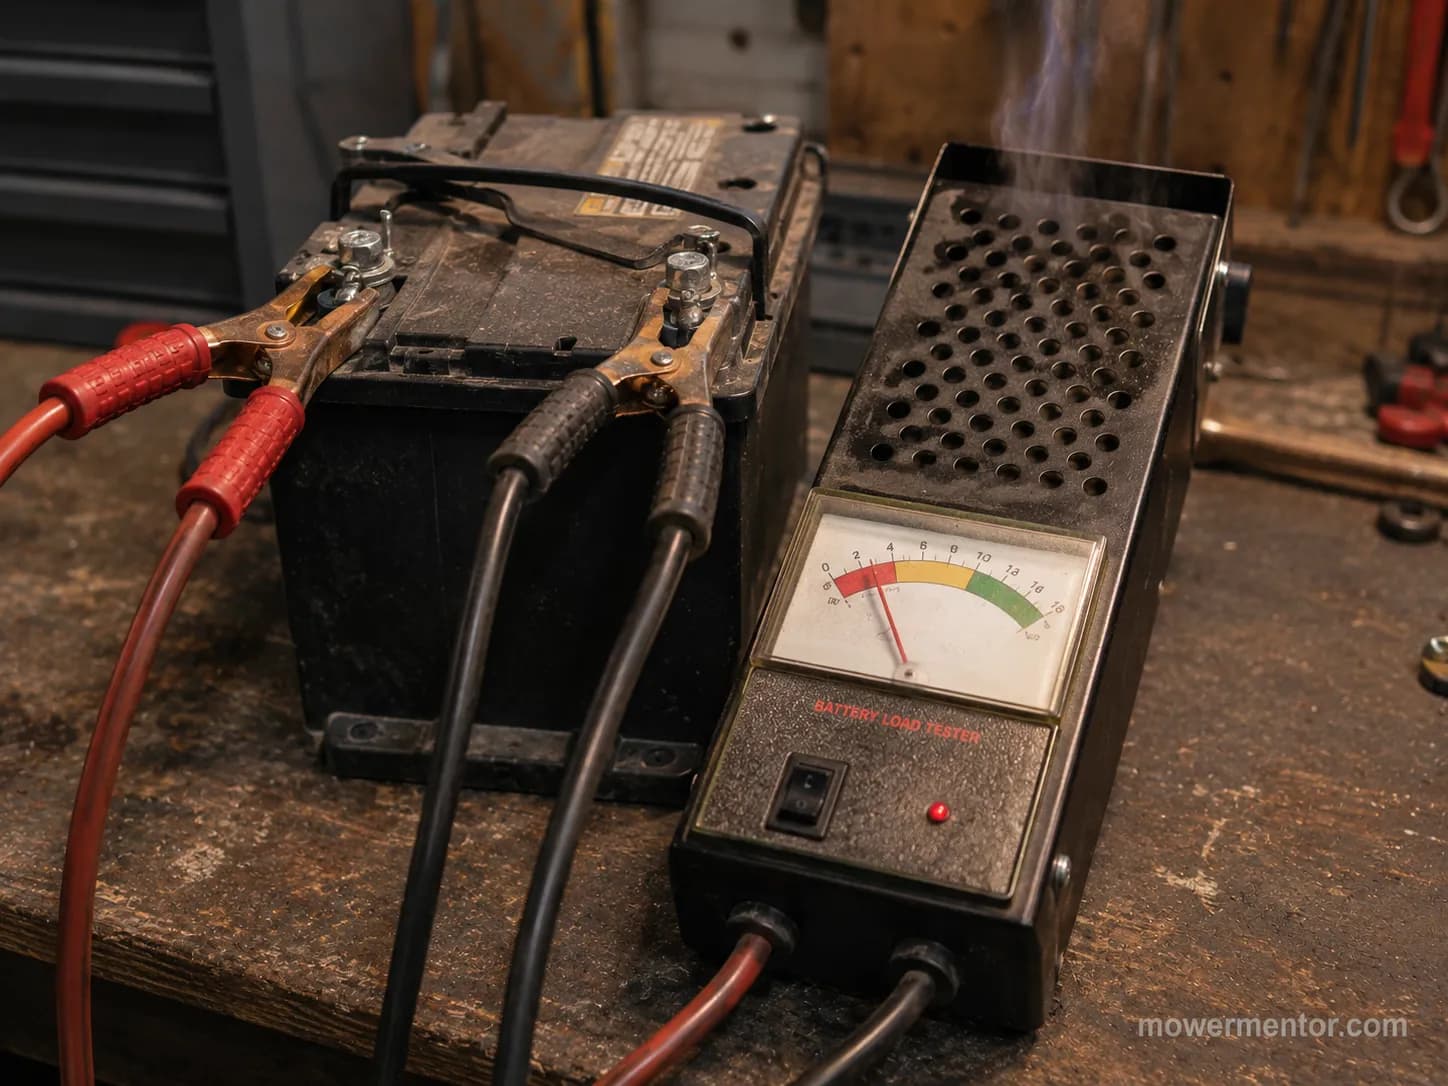
The test is quick. Fully charge the battery, then apply a load tester (or crank the engine while watching voltage) and confirm the battery holds above about 9.6 volts under load. A battery that dives well below that, or never rests at 12.6 volts after charging, is done.
Standard load-test thresholds and the science of sulfation are covered by Battery University. Matching the right group size and cold-cranking amps matters too, so it is worth learning how to pick the right replacement battery.
The honest exception: a mildly sulfated battery is sometimes worth one recovery attempt on a smart maintainer before you give up on it. If it still fails the load test afterward, replace it.
Brand and Engine Differences (Briggs, Kohler, Kawasaki, John Deere and More)
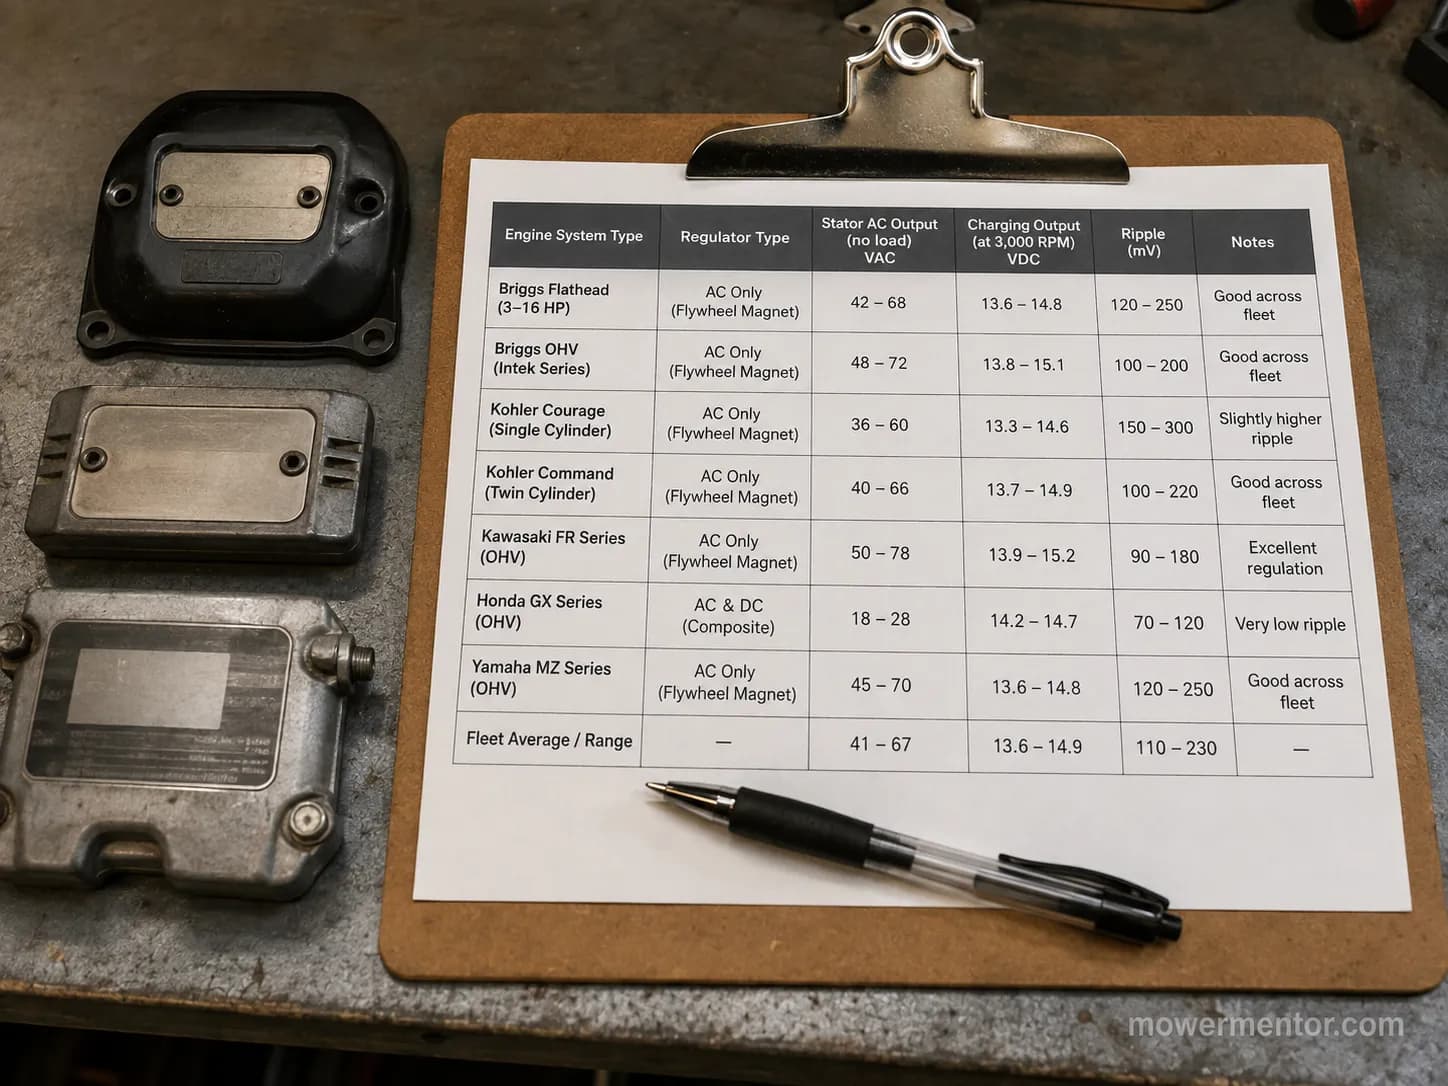
A riding mower's charging system belongs to its engine, so a Briggs and Stratton, Kohler, or Kawasaki behaves differently than the mower badge on the hood suggests. Small single-wire alternator systems put out only a couple of amps with little regulation.
Dual-circuit and three-wire regulated systems charge harder and route through a regulator-rectifier. Identify your engine's system type first, then apply the same voltage and stator tests to the right output spec, which is why an MTD ride-on mower not charging and a John Deere not charging can need slightly different expected numbers.
The practical rule: read the engine label, not just the mower brand. Two mowers from different makers often share the same Briggs or Kohler engine and the same charging system.
Charging system type | Typical output | Regulation | Where the reg-rec lives |
|---|---|---|---|
Single-wire alternator | About 1.5 to 3 amps | Minimal, diode only | Inline near the harness |
Dual-circuit | About 3 to 9 amps | Partial | On or near the engine |
Three-wire regulated | About 9 to 16 amps | Full regulator-rectifier | Frame or engine mount |
My nine test machines spanned the range, from a small single-wire Briggs that peaked near 13.9 volts to a dual-circuit Kawasaki twin that held 14.3 volts. Same test, different expected output, which is the whole point of checking the engine first.
Output specs also shift by model year within a single brand, so verify against the engine service data, such as the John Deere equipment service references for Deere-badged machines. Kawasaki-powered mowers carry their own numbers in the Kawasaki engine specs.
Brand notes help you find the right engine. Craftsman owners chasing a battery that keeps dying should also confirm they have the correct Craftsman battery size, since a too-small battery drains faster.
On Husqvarna decks the U1 versus U1R distinction trips people up, and the Husqvarna battery size guide sorts it out. John Deere fitment varies across the 100, L, and X series, so the John Deere battery fitment chart is worth a look.
Cub Cadet XT1, LTX, and ZT1 machines each take specific sizes, covered in the Cub Cadet battery buyer's guide. Murray owners without a legible label can use the Murray battery cross-reference.
Troy-Bilt Pony and Bronco owners have their own fitment quirks, laid out in the Troy-Bilt battery fitment notes.
Stop It Happening Again
To keep a riding mower battery from failing to charge again, store it on a battery maintainer over the off-season, keep the terminals and engine ground clean and tight, and avoid overloading a small charging system with extra accessories.
A quick voltage check each spring, confirming the system still reaches 13.5 to 14.5 volts at full throttle, catches a weakening stator or regulator before it strands you mid-mow.
The single best habit is off-season charging. A small self-discharge plus winter cold quietly flattens a stored battery, and a flat battery sulfates.
The two machines I kept on a maintainer over the winter both started on the first turn in spring and held 12.7 volts at rest. The ones I left off the maintainer needed a charge before they would crank, which tracks with the self-discharge behavior described in Interstate Batteries' storage guidance. Choosing the right one is easy once you know choosing a trickle maintainer basics.
Two small routines close the loop. Fold the battery and charging check into your annual mower service so it never surprises you in April.
And if you run a cordless machine instead, caring for a battery mower follows its own seasonal rules. The catch worth stating: a maintainer will not revive an already-sulfated battery, so start the habit while the battery is still healthy.
When to Stop and Call a Pro
Call a professional when fixing a riding mower charging system means pulling the flywheel to reach the stator, when the wiring harness is visibly damaged, or when the fault returns after a correct repair.
A shop charging-system diagnosis plus a stator or regulator replacement usually costs more than the part alone, so weigh the repair against the mower's age and value before booking, especially on an older machine near the end of its life.
Most of this guide is a driveway job. The one place I send owners to a shop is a stator replacement that needs the flywheel pulled.
That was the one job in my testing where my bench time jumped from about 20 minutes to over an hour, because reaching the stator meant a puller, careful flywheel handling, and re-timing on reassembly. If you do not own a flywheel puller or you are not comfortable around a live battery, that is the sensible handoff point.
A quick safety reminder before any of this work. Battery acid and hydrogen gas are real hazards, so avoid sparks near the battery, disconnect the negative terminal first, and wear eye protection. If you are already booking shop time, it is worth bundling small jobs, such as when you need to find the right air filter at the same visit.
A full seasonal service is also the cheapest insurance against another dead-battery spring, and a complete seasonal service folds the charging check in with everything else.
When a riding mower battery not charging comes down to one measured voltage and a short branching test, you fix the right part the first time instead of throwing parts at the problem.
Start at the battery with a meter, follow the number to its cause, and you will know within fifteen minutes whether you are cleaning a ground, swapping a 25 dollar regulator, or finally retiring a worn-out battery.
Frequently Asked Questions
Why is my riding mower battery not charging?
Because the charging system is not replenishing it. Measure the battery at full throttle: a healthy system reads 13.5 to 14.5 volts, and anything stuck near 12 volts confirms a fault in the stator, regulator, connections, or a parasitic drain. The symptom-to-cause table above routes your exact reading to the right fix.
Can I test the charging system without a multimeter?
Partly. Watch the headlights as you raise the throttle from idle: on a working system they brighten, and on a failed one they stay dim or dim further. It is a useful first clue, but it will not tell stator from regulator, so a 20 dollar meter is worth owning.
Will the mower run with a bad stator or regulator?
Yes, until the battery dies. The engine runs on the battery's stored charge even with no charging output, so it starts and mows fine for a while, then cranks slower and finally will not start once the battery is flat. That short window is exactly why the fault is so often misread as a bad battery.
Why does my riding mower battery keep going dead?
Either a parasitic drain is pulling current with the key off, or the battery is worn out. Test the key-off draw with a meter on the negative cable, then load-test the battery. A drain that survives after every fuse is pulled points back to the main harness or a leaking regulator.
Is it the battery or the charging system?
One reading settles it. If the battery climbs to 13.5 to 14.5 volts at full throttle, the charging system works and a tired battery is the suspect. If it will not climb, the charging system is at fault, and the neighbors who used to ask me this got their answer from that single number every time.
How much does a charging-system repair cost?
It depends on the part and whether you do it yourself. A regulator-rectifier is often a 20 to 40 dollar bolt-on you can fit in the driveway, while a stator that needs the flywheel pulled runs higher once shop labor is added, which is why the repair-versus-replace-the-mower math matters on older machines.
Summarize with AI
Keep reading
Related articles
 Troubleshooting & Repair
Find, test, and safely bypass the Craftsman riding mower safety switch: seat, brake, and PTO interlocks, with multimeter values and a re-enable step.
 Troubleshooting & Repair
Test your Craftsman riding mower starter solenoid in about 15 minutes with a screwdriver and multimeter, then fix the click-no-crank for around $18.
 Troubleshooting & Repair
Fix a Craftsman riding lawn mower won't start no clicking: test battery voltage, inline fuse, safety switches, ignition and solenoid with a multimeter.
 Troubleshooting & Repair
Find the right Craftsman riding mower battery: 12V U1/U1R size chart by model, 5 tested picks, and why yours keeps dying.
Comments
Moderated for quality. Share a correction, ask a follow-up, or tell us what worked for you - every comment is reviewed before it goes live.