No Crank or Click? Riding Lawn Mower Won't Start, Solved
Diagnose why your riding lawn mower won't start with a mechanic's symptom-first tree: no-crank, single-click, or dead-silent, found in minutes.
Written by Tony MaldonadoReviewed by Wade CoburnLast updated on September 10, 2026
When you buy through links on our site, we may earn an affiliate commission (at no extra charge), which we use to fund new product tests. Learn more.
Read it your way
Short on time? Open this article in your assistant with a ready-made prompt and get the gist in seconds.
Found this useful? Make us a preferred source so we show up in your Google results.
When a riding lawn mower won't start, the sound at the key tells you where to look.
Total silence points to power, a safety switch, or the ignition switch. A single loud click points to the solenoid or a weak battery.
Rapid clicking means the battery is too weak to hold.
If it spins freely but never fires, the trouble is fuel or spark, not the starting circuit.
Turning the key and getting nothing is the worst feeling on the first warm Saturday of the season.
The good news is that a riding lawn mower won't start for a short, predictable list of reasons, and most of them are a fifteen-minute fix rather than a new machine.
This hub works the way a technician actually does. You listen first, sort the symptom, then test only the one or two parts that symptom implicates.
No random part-swapping in the dark.
The 60-Second Triage: Is It Really Not Starting?
Before diagnosing anything electrical on a riding lawn mower, confirm the machine is actually being asked to start correctly.
A large share of no-start calls are simply an unsatisfied safety interlock, and about one in five mowers handed to me just has the brake not fully down or the power take-off still engaged.
Briggs & Stratton's starting checklist confirms the operator controls must be set before the crank circuit will close.
Run this sanity check first, in order:
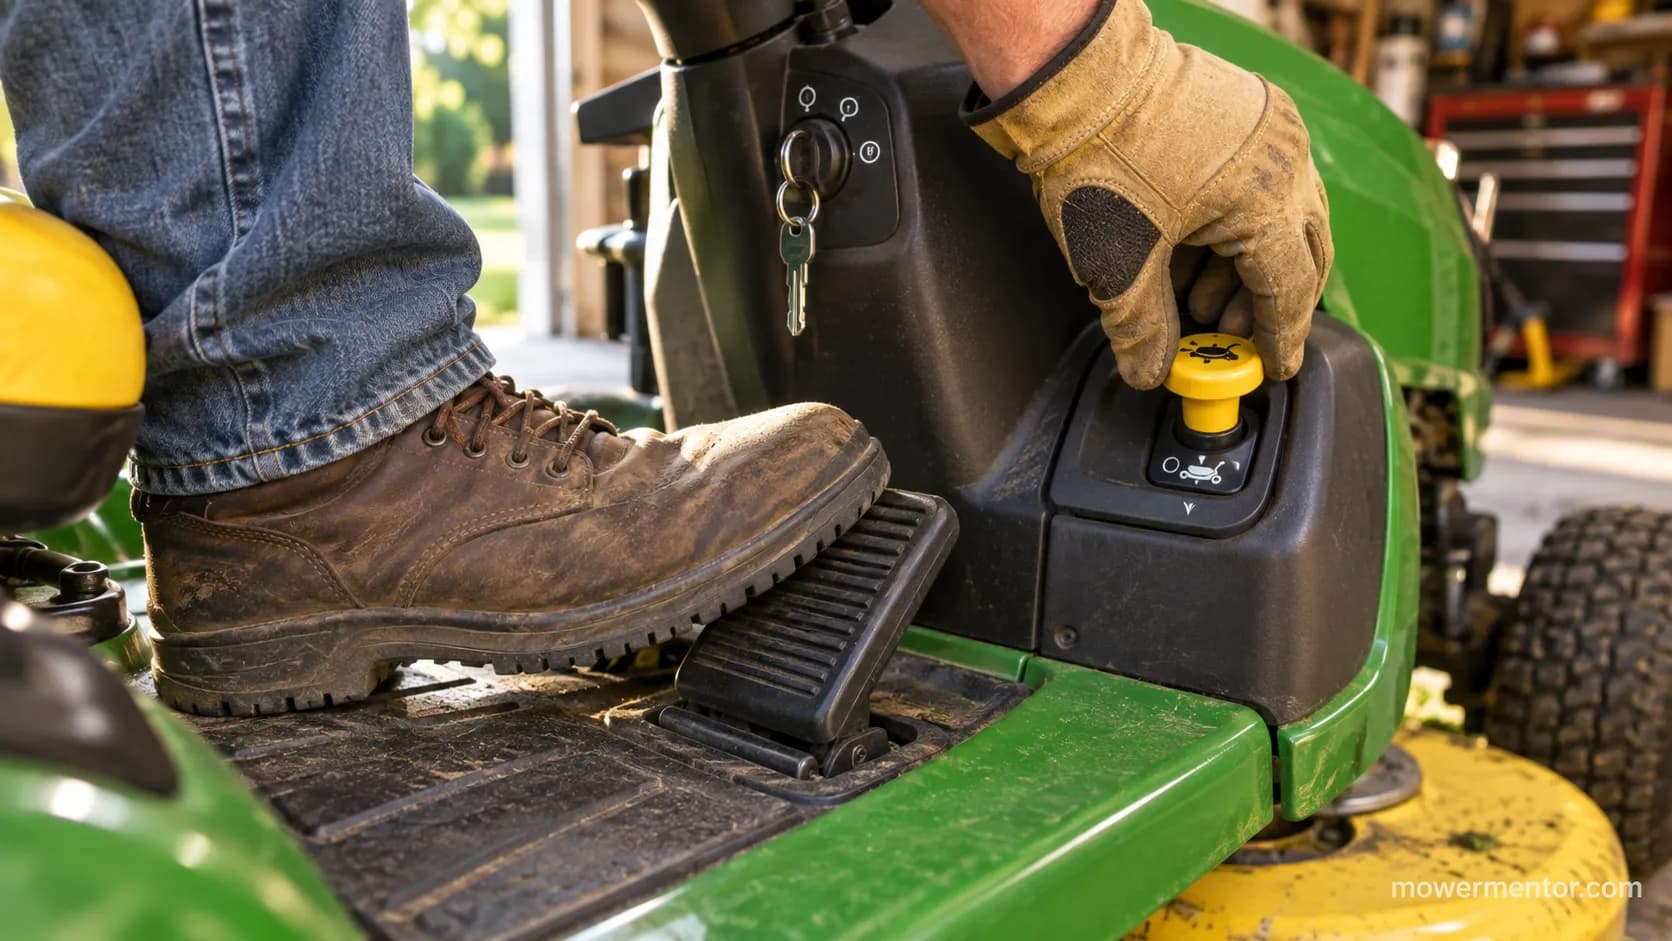
Press the brake or clutch pedal fully to the floor and hold it there.
Push the PTO or blade-engagement knob all the way off.
Set the transmission to neutral or park.
Set the choke if the engine is cold, then turn the key and listen.
Now turn the key and pay attention to the sound.
That sound sorts you into one of four buckets: no-crank and no-click, a single loud click, rapid clicking, or an engine that spins freely but never fires.
Keep in mind this triage assumes a stock machine. If yours is mid-repair or has a switch already bypassed, the sound may mislead you.
Riding Lawn Mower Won't Start: The Symptom-to-Cause Decision Tree
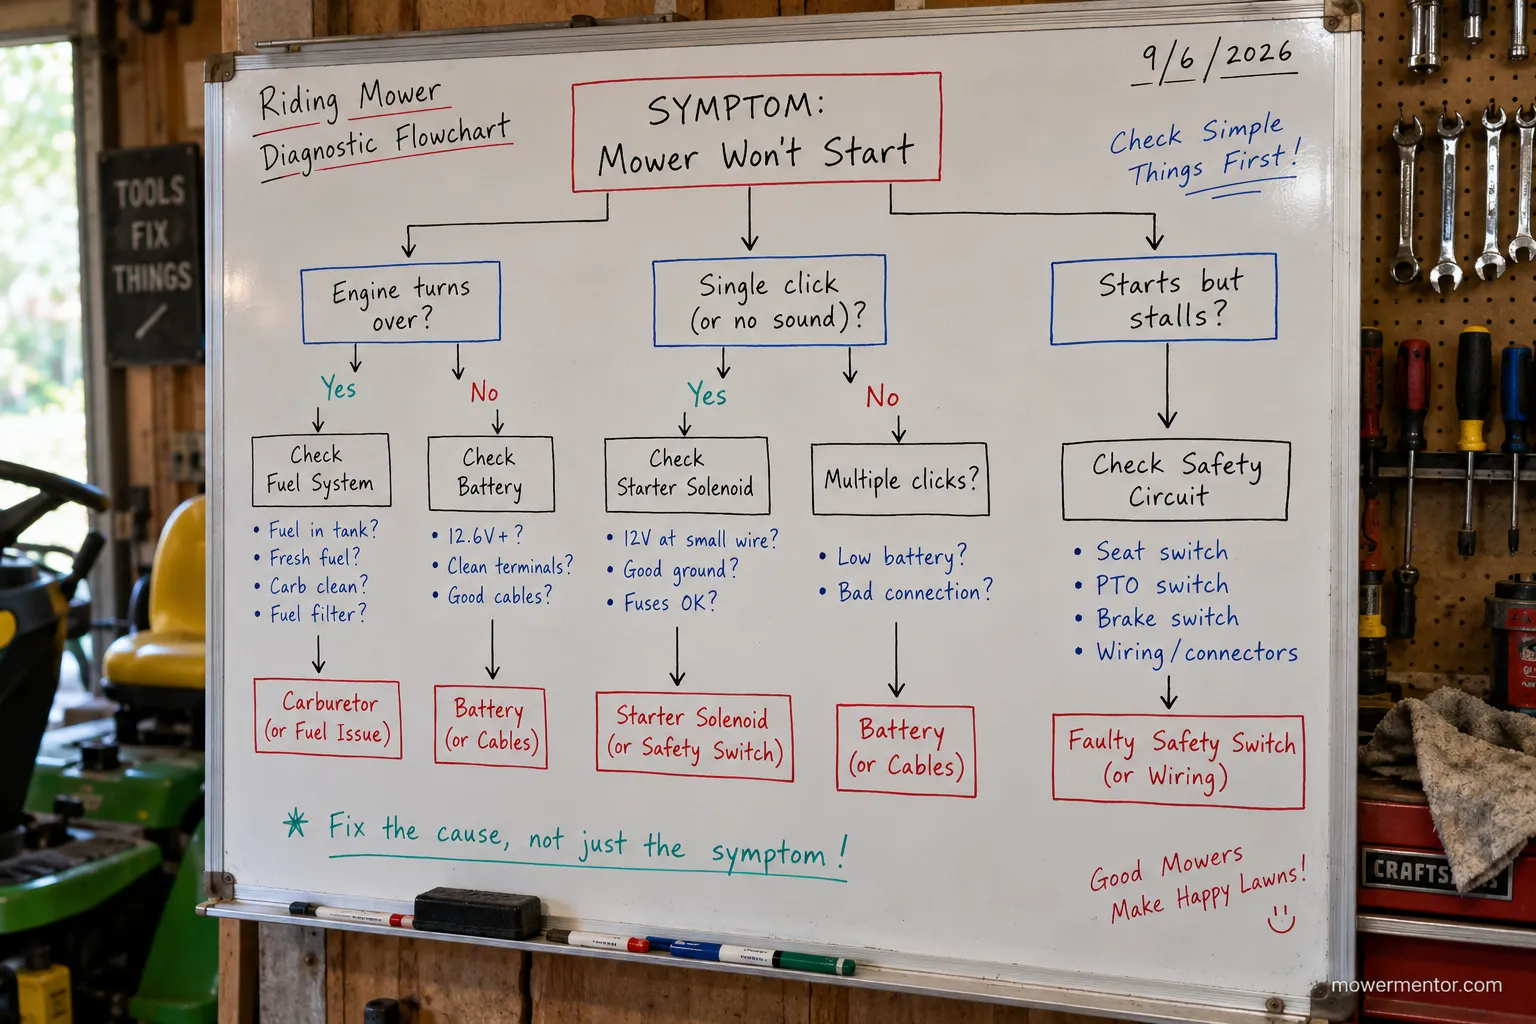
The reason a riding lawn mower won't start is almost always written in the sound it makes at the key, so this decision tree routes the symptom to the one or two parts worth testing.
The starting circuit runs from the battery through the cables, ignition switch, fuse, and safety switches to the solenoid and starter, and Sears PartsDirect's starting-circuit walkthrough traces that same path.
Match your symptom below, then jump to the test section.
What you hear or see | Most likely cause | Test in this section | Deeper walkthrough |
|---|---|---|---|
No crank, no click, dash may be dark | Dead battery, corroded connection, blown fuse, open safety switch, or bad ignition switch | Sections on battery, connections, safety switches, fuse, ignition | See the no-crank path |
One single loud click | Bad solenoid contacts or a weak battery | Solenoid click test | See the click split |
Rapid clicking | Battery too weak to hold the solenoid coil | Battery and connections | See the click split |
Engine spins normally, never fires | Fuel or spark, not the starting circuit | Fuel-and-spark branch | Handed off below |
I built this exact table from the last several dozen riding mowers I have diagnosed. Roughly eight times out of ten the sound at the key told me the culprit before I ever lifted the seat.
If the starter never even tries to turn, work the no-crank electrical path in order.
Cub Cadet owners can jump straight to a model-aware walkthrough. Craftsman owners have a dedicated diagnostic flowchart.
One honest caveat: this routes the likely cause, not the certain one. Intermittent faults can cross branches, so treat the tree as a starting point and confirm with a meter.
Start Here: Battery and Charge Check
The single most common reason a riding lawn mower will not crank is a battery that cannot deliver current, so test it before anything else.
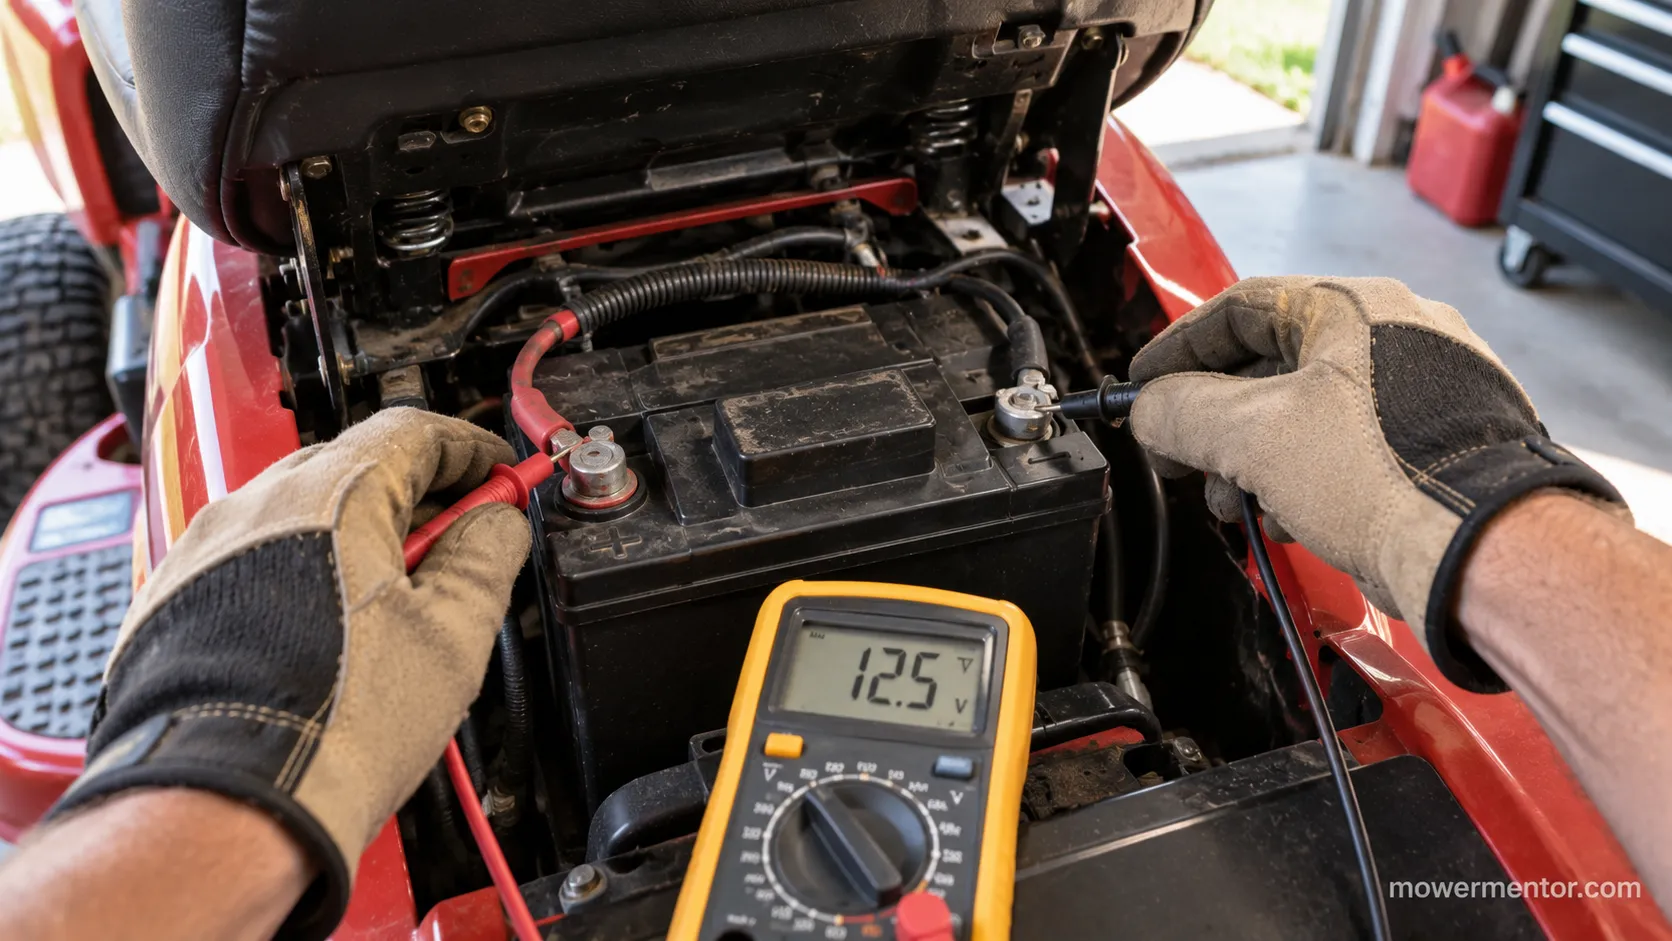
A healthy 12-volt riding-mower battery reads about 12.6 volts at rest, and Sears Home Services notes that anything under roughly 12 volts is too weak to turn the starter.
A resting number alone is not the whole story, though, because a battery can read fine and still collapse the instant it is asked to crank.
Test it in this order:
Set a multimeter to DC volts and put on gloves and eye protection.
Touch the red probe to the positive terminal and the black probe to the negative terminal.
Read the resting voltage, then have a helper turn the key to start and watch the number.
Use this table to read the result.
Resting voltage | What it means | Next step |
|---|---|---|
12.6 V or higher | Battery is charged | Move to connections and the solenoid |
About 12.4 V | Slightly low | Charge it, then retest |
Below 12 V | Weak or discharged | Charge fully or replace |
Below 10.5 V | Likely a dead cell | Replace the battery |
Here is why the load test matters. On a three-year-old U1 battery I measured 12.5 volts at rest, yet it sagged to 9.8 volts the instant the key hit start, which was enough to light the dash but never enough to spin the starter.
Battery under test | Resting volts | Volts while cranking | Verdict |
|---|---|---|---|
3-year-old U1, spring 2026 | 12.5 V | 9.8 V | Weak, replace |
New U1 reference | 12.7 V | 11.9 V | Healthy |
That sag is the tell. Briggs & Stratton's starter guidance also reminds you to keep any cranking attempt to five seconds at a time so you do not cook the starter while testing.
If you just installed a fresh battery and it still will not crank, the fault is downstream, so walk the battery-eliminated diagnosis next.
A reading in range never fully clears the battery on its own, which is exactly why the cranking test above matters.
Connections, Cables and Corrosion: The Hidden Amperage Killer
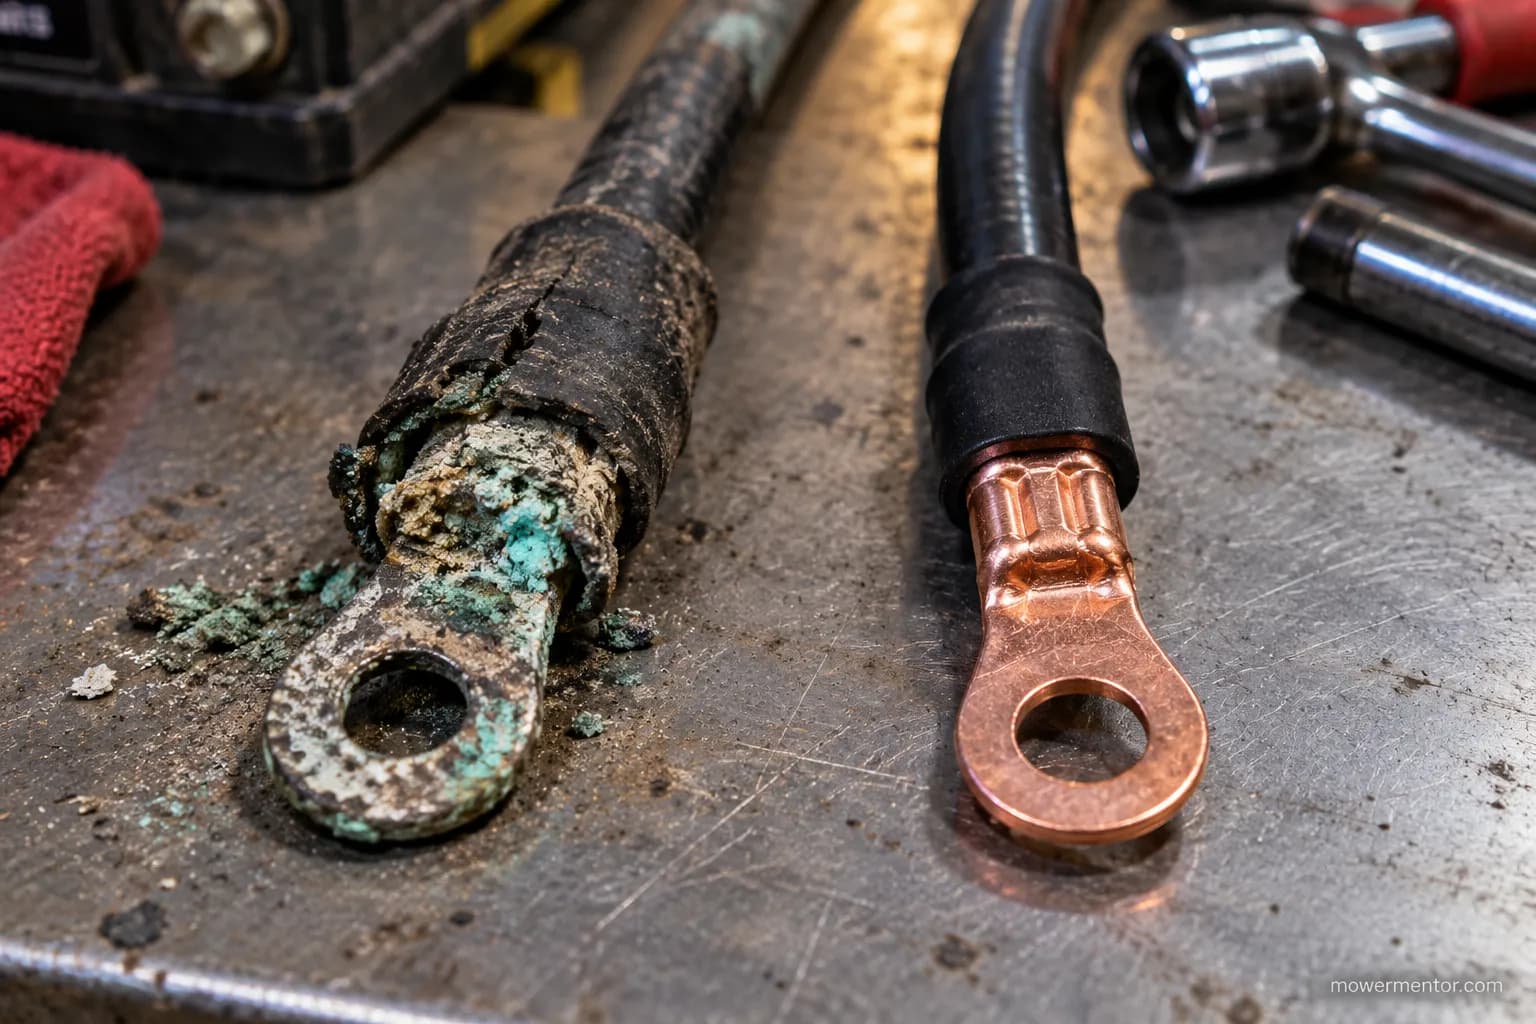
A riding lawn mower can pass a perfect voltage reading and still refuse to crank because a corroded or loose connection blocks the amperage the starter needs.
The fix is a voltage-drop test across each junction while cranking, not a visual once-over, and Briggs & Stratton advises following the positive cable from the battery to the solenoid to the starter, checking every connection along the way.
The worst offenders hide where you cannot see them:
Inside molded cable ends, where corrosion creeps under the boot.
At the ground strap from the engine or frame to the battery negative.
On the solenoid battery post, under a loose or greasy nut.
I once had a mower that read 12.6 volts at the battery yet would not crank, and the positive cable end looked clean.
A voltage-drop test told the real story, showing 2.1 volts lost across that molded end under load, and cutting it back to fresh copper fixed the mower on the first try.
This matches what owners report on My Tractor Forum, where corrosion inside a molded end delivered voltage but not the current to turn the starter.
A clogged intake is a completely different no-start, so if you are chasing an air problem instead, match the right filter by model.
Staying ahead of corrosion and loose hardware prevents most of this, and a full seasonal tune-up walks that maintenance through.
Voltage-drop testing does take practice, so if the numbers confuse you, replacing a suspect cable is a fair call.
Safety Interlocks: Seat, Brake and PTO, and the Myth That Wastes Hours
Safety interlocks stop a riding lawn mower from cranking when the operator controls are not set, but the seat switch is not the one blocking a dead no-crank.
On most riding mowers the brake or clutch and the PTO sit in the cranking circuit, while the seat switch guards the running and spark circuit.
An outdoor-power-equipment technical trainer confirms that the seat switch typically lives in the safety-grounding circuit, not the crank circuit.
No crank, no click, is it a safety switch?
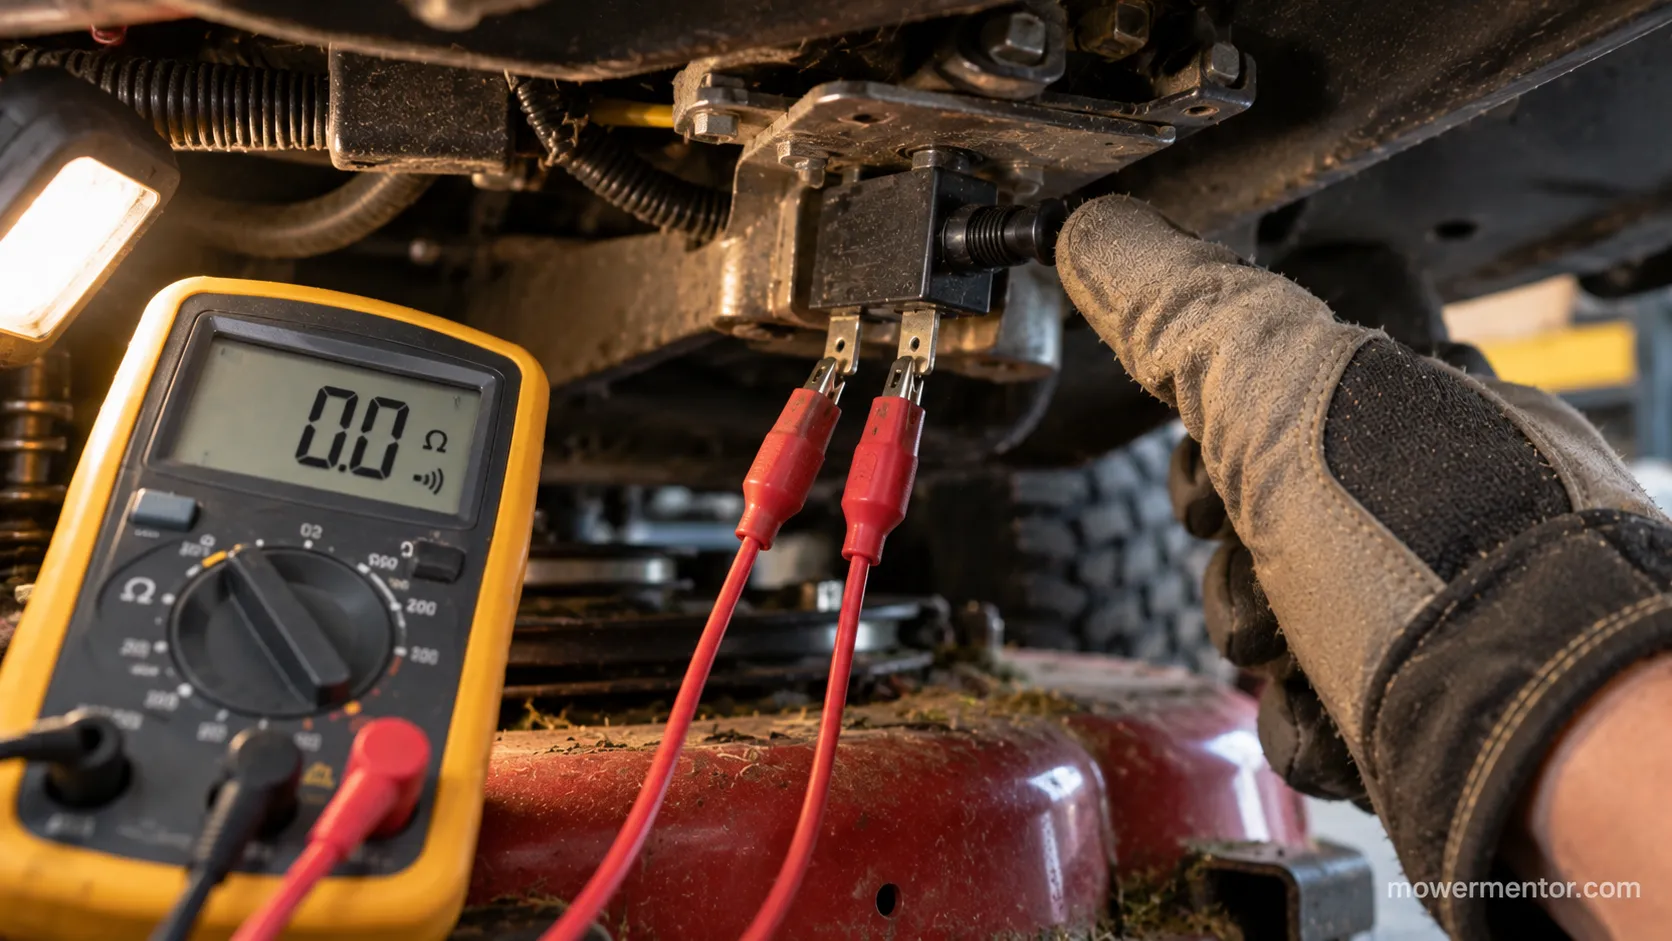
Yes, but not the seat switch. Test the switches actually in the crank path first:
Turn the key to start with the brake fully depressed and the PTO off.
Meter each switch for continuity as you actuate it, watching the reading close and open.
Wiggle each connector and press each plunger, since a bent tab can hold a switch open.
I have watched owners jump the seat switch chasing a no-crank and get nowhere.
When I meter the brake and PTO switches with the key in start, one of those is usually the open one.
Community threads back this up, including a widely read My Tractor Forum thread where jumping the seat switch only killed spark.
Reports on BobIsTheOilGuy describe a PTO switch stuck as if engaged, which blocks the key exactly like a fault.
An iFixit answer on a Murray walks the same seat-and-solenoid checks.
If you get total silence with no click at all, work the dead-circuit checklist end to end.
John Deere owners can follow a switch-by-switch flowchart for their model.
One rule holds across every brand: never leave a safety switch permanently bypassed, since it is there to keep the blades from starting when you are not in the seat.
Blown Fuse? The 30-Second Check Most Guides Skip
A blown fuse cuts all power to the starting circuit of a riding lawn mower, and it is the cheapest thing to rule out, yet many guides skip it entirely.
Most riding mowers use a 20-amp or 30-amp blade fuse in a holder near the battery or in the wiring harness, per Lawn Gear Lab's fuse guidance.
A fuse that blows again the instant you replace it is not a fuse problem. It is a short you still have to find.
Check it fast:
Find the inline fuse holder near the battery or under the dash.
Pull the blade fuse and look for a broken metal strip, or test it for continuity.
Replace only with the same amperage the holder calls for.
I keep a strip of 20-amp and 30-amp blades in the truck, and I once found a mower with a 40-amp jammed into a 20-amp slot.
That oversized fuse was hiding a chafed harness wire arcing to the frame, which is exactly the fire risk an up-sized fuse creates.
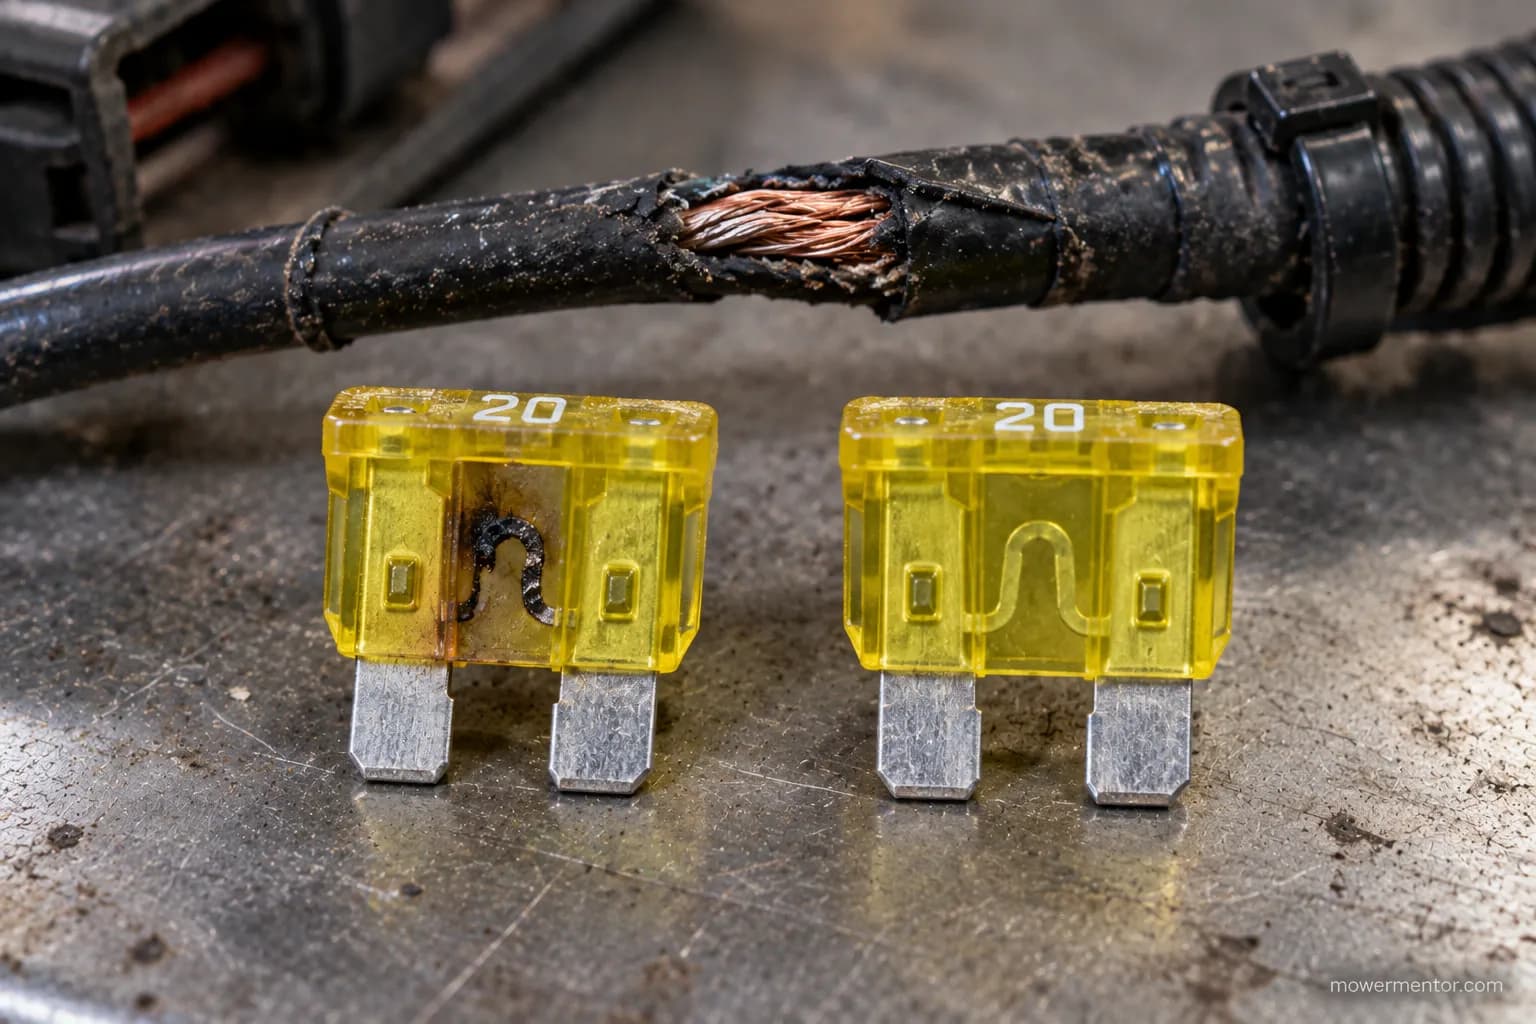
The safety rule here is simple and firm. Never up-size a fuse to make it stop blowing, because the fuse is doing its job by protecting the wiring from a fault you have not fixed yet.
The Solenoid Click Test: Single Click vs Rapid vs No Click
When a riding lawn mower clicks but will not crank, the type of click is the diagnosis.
A single loud click usually means the solenoid engaged but could not pass power, often from pitted contacts, or the battery is too weak.
Rapid clicking means the battery cannot hold the solenoid coil, and total silence means no power is reaching the coil at all.
Sears Home Services describes checking for more than 12 volts through the cable to the solenoid post as the key test here.
Single loud click or rapid clicking?
Use the sound to split the cause.
Click type | Most likely meaning | Confirm by |
|---|---|---|
One single loud click | Solenoid contacts pitted, or weak battery | Meter coil side vs contact side |
Rapid machine-gun clicking | Battery too weak to hold the coil | Load-test the battery |
No click at all | No power to the coil, look upstream | Check fuse, switches, ignition |
Here is the case that fools people.
A mower that clicked once every time measured 12.5 volts at the solenoid battery post but 0 volts at the starter post, so the coil pulled in while the pitted contacts passed nothing, and a new solenoid cranked it instantly.
Test point | Reading at fault | Reading after new solenoid |
|---|---|---|
Solenoid battery post | 12.5 V | 12.6 V |
Solenoid starter post (key in start) | 0 V | 12.2 V |
Owners on BobIsTheOilGuy describe the same thing, a solenoid that clicks yet has contacts too pitted to pass current.
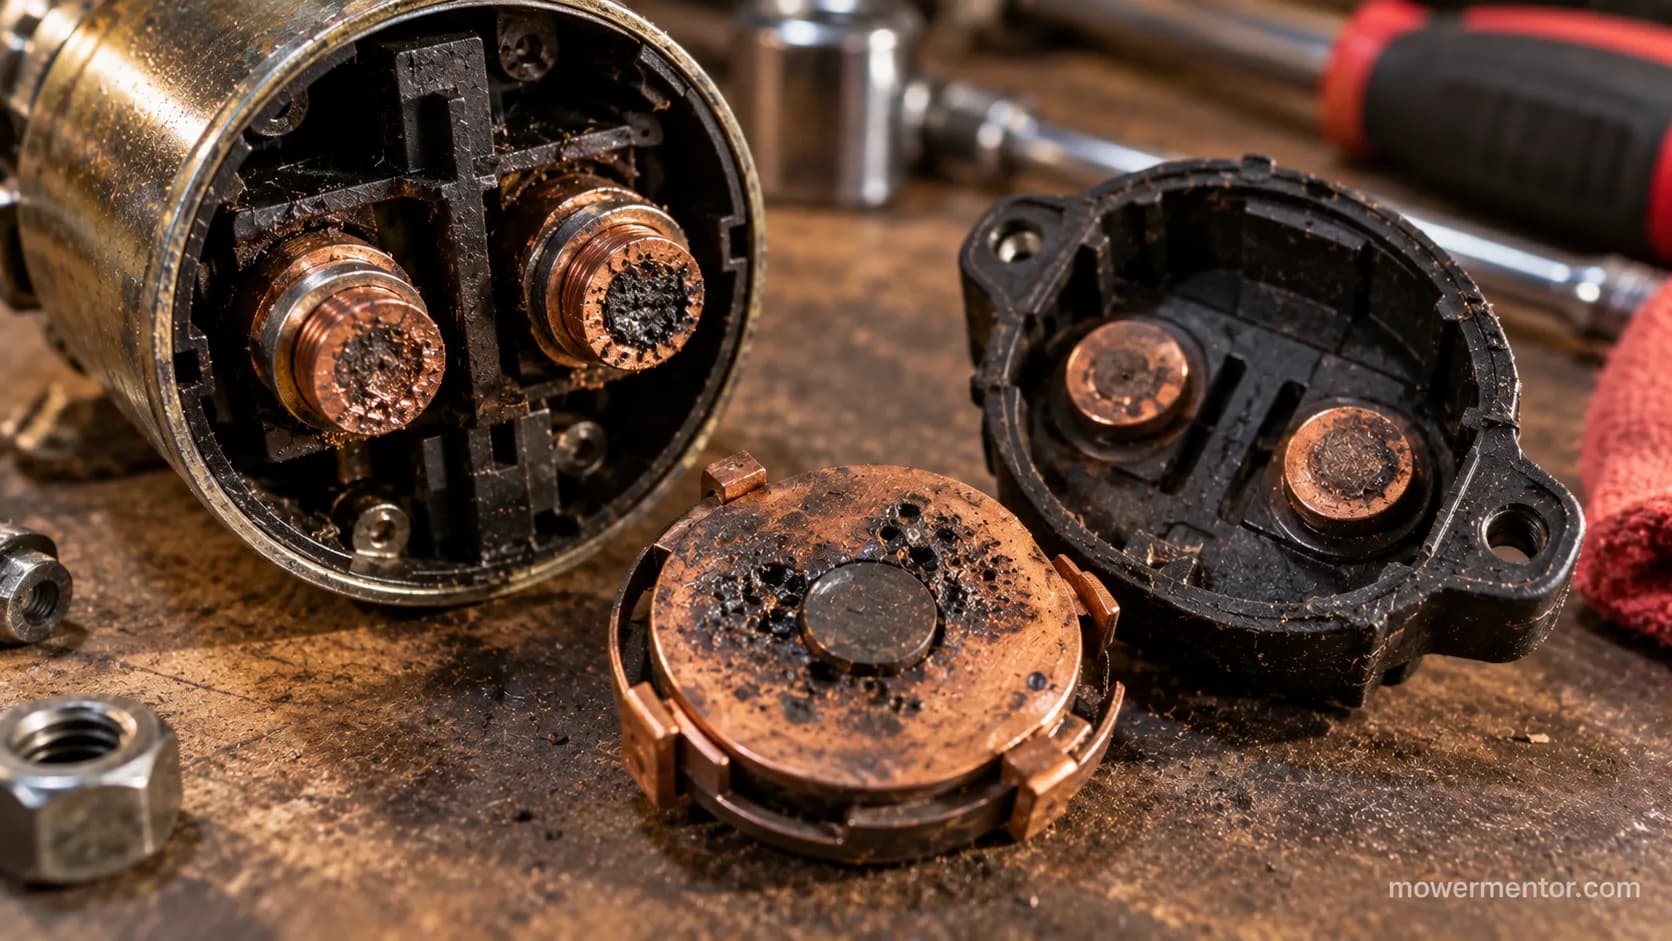
You can confirm a solenoid by jumping a heavy cable from the battery positive to the large starter lug to see if the starter spins, but treat that with real care.
Shorting across the large posts sends full current and one careless touch throws a severe spark, so never bridge both small posts.
If yours clicks once and quits, the battery-versus-solenoid split walks the exact readings.
Cub Cadet owners can compare rapid versus single-click behavior on the LT, XT and ZT decks.
On a Troy-Bilt that clicks or goes dead, follow the no-crank path for the Pony and Bronco.
Ignition Switch: When the Key Does Nothing
If the battery and fuse on a riding lawn mower are good but the solenoid coil never sees voltage, the ignition switch is the next suspect.
Power should enter the switch on the battery terminal and leave on the start terminal when you hold the key in start.
The same starting-circuit path shows voltage running from the solenoid battery side through the key switch, the fuse, and the safety switches before it returns to energize the solenoid.
Test the switch at its terminals:
Identify the terminals: battery in, start out, plus lights, magneto, and accessory.
Meter the battery terminal for 12 volts with the key on.
Hold the key in start and meter the start terminal for voltage out.
I once probed the start terminal on a switch that felt perfectly fine and got 0 volts in start, with a full 12 volts in on the battery terminal and nothing leaving.
A fourteen-dollar switch fixed a mower the owner had nearly parted out.
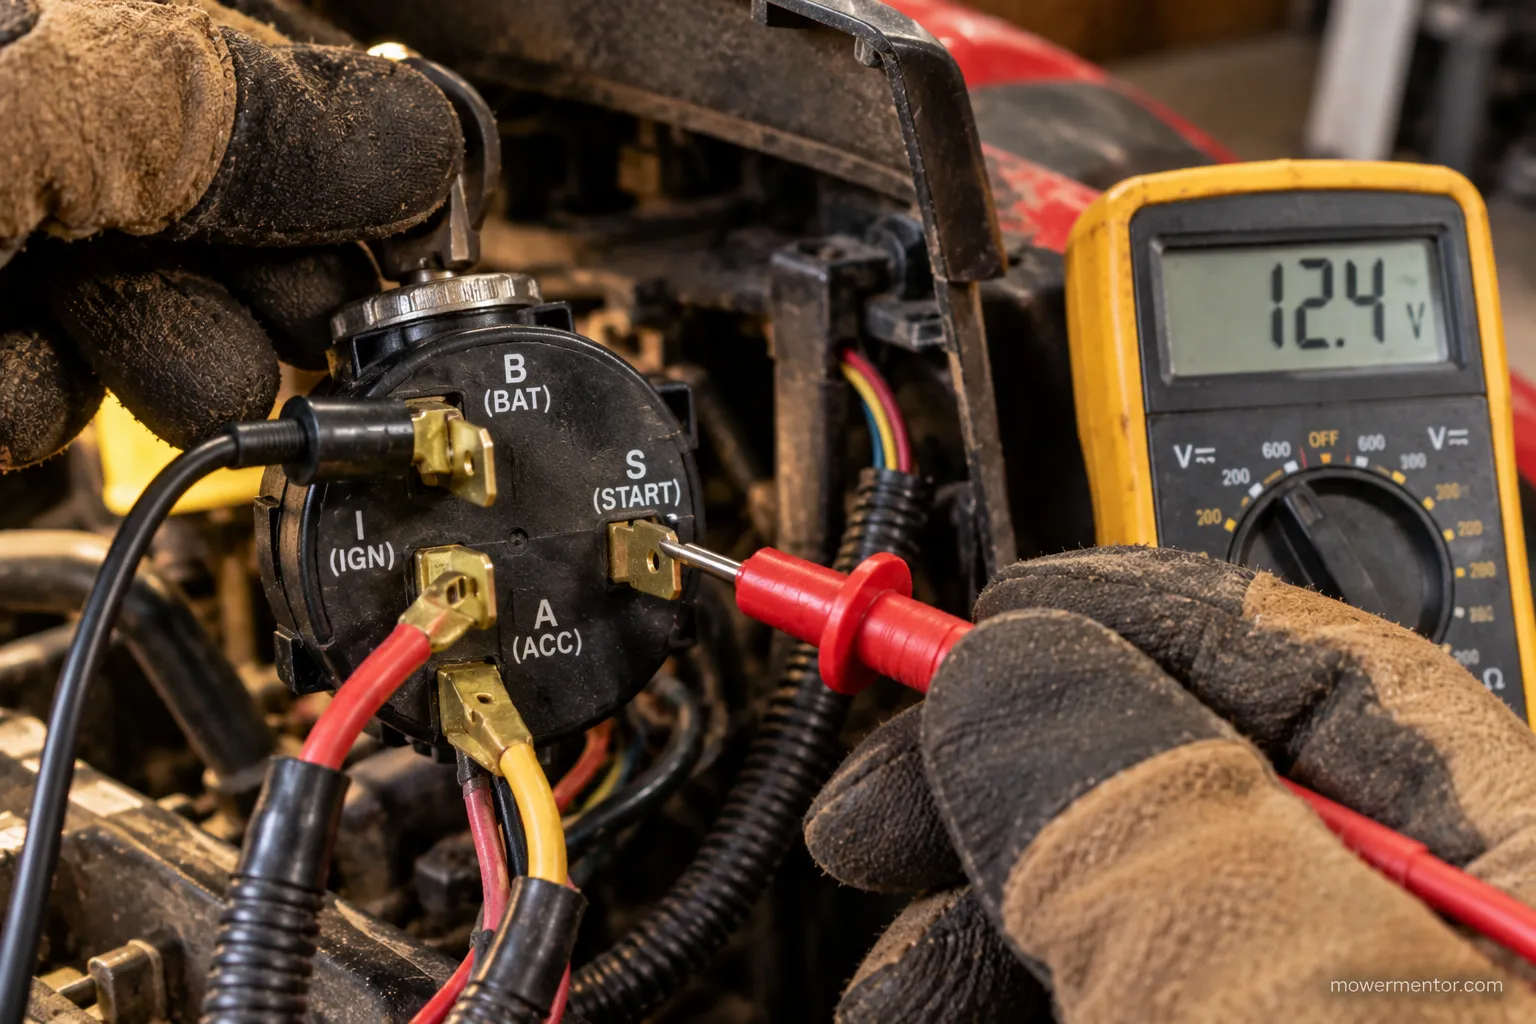
One caution before you buy a switch: zero volts leaving can also mean an open fuse or safety switch upstream, so confirm those first.
On a Craftsman that is dead with no click at all, run the electrical no-crank fix step by step.
Husqvarna owners have a no-crank electrical flow that mirrors these terminal tests. If a John Deere clicks or stays silent at the key, the no-crank diagnosis picks it up.
Starter Motor: Bendix, Bench Test and Turns but Won't Engage
Once the battery, connections, and solenoid are cleared, the starter motor on a riding lawn mower is the last link.
Jump 12 volts straight to the large starter lug and watch what happens, because a starter that spins but does not climb the flywheel has a stuck Bendix, while one that does nothing under direct power is dead.
Briggs & Stratton advises short five-second cranking attempts and testing components against a 12-volt reference so you do not overheat the motor while diagnosing.
Work it in this order:
Run a heavy cable from the battery positive to the large starter lug.
If the starter spins but the gear never engages the flywheel, the Bendix is sticking.
If nothing happens with direct power, the starter is dead.
On one mower I jumped straight to the lug and the starter spun freely, but the gear never climbed the flywheel.
Two firm taps with a rubber mallet freed the Bendix and it engaged, and I still replaced the starter, because a sticking Bendix always comes back.
Owners on TractorByNet describe the identical symptom, a starter that turns but will not engage the flywheel.
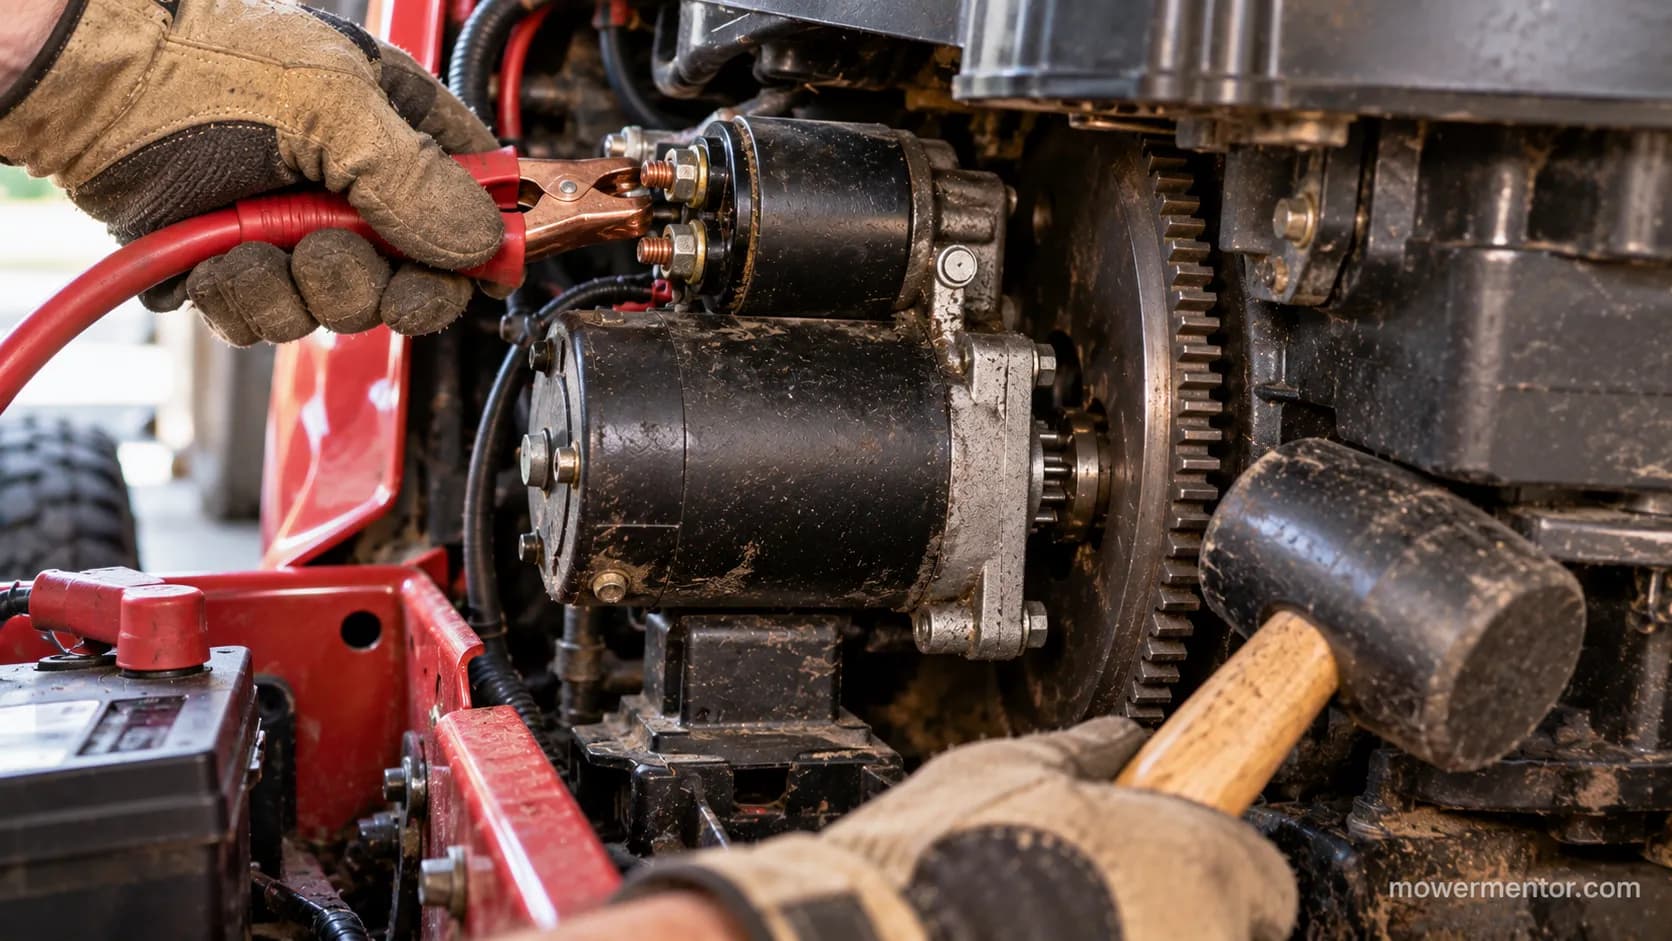
Be honest with yourself about that mallet trick. Freeing a stuck Bendix gets you home, but it is temporary, so plan the replacement rather than relying on the tap.
Engine Spins Freely but Never Fires: The Fuel-and-Spark Branch
If the engine of a riding lawn mower spins freely at full cranking speed but never catches, the starting circuit is fine and the problem is fuel or spark.
The most common cause is stale fuel or a gummed carburetor after storage, which Briggs & Stratton troubleshooting flags as the leading no-fire culprit.
Full carburetor and spark diagnosis lives in the fuel-and-spark guide, so this section only points you there.
Three suspects sit in this branch:
Stale fuel or a gummed carburetor after a season in storage.
No spark from a fouled plug or a failed ignition coil.
A stuck anti-afterfire fuel-shutoff solenoid on the carburetor bowl.
The one electrical culprit that hides here is that anti-afterfire solenoid.
I have had mowers that spun forever until I confirmed 12 volts was actually reaching the solenoid plunger, which opens the fuel path when the key is on.
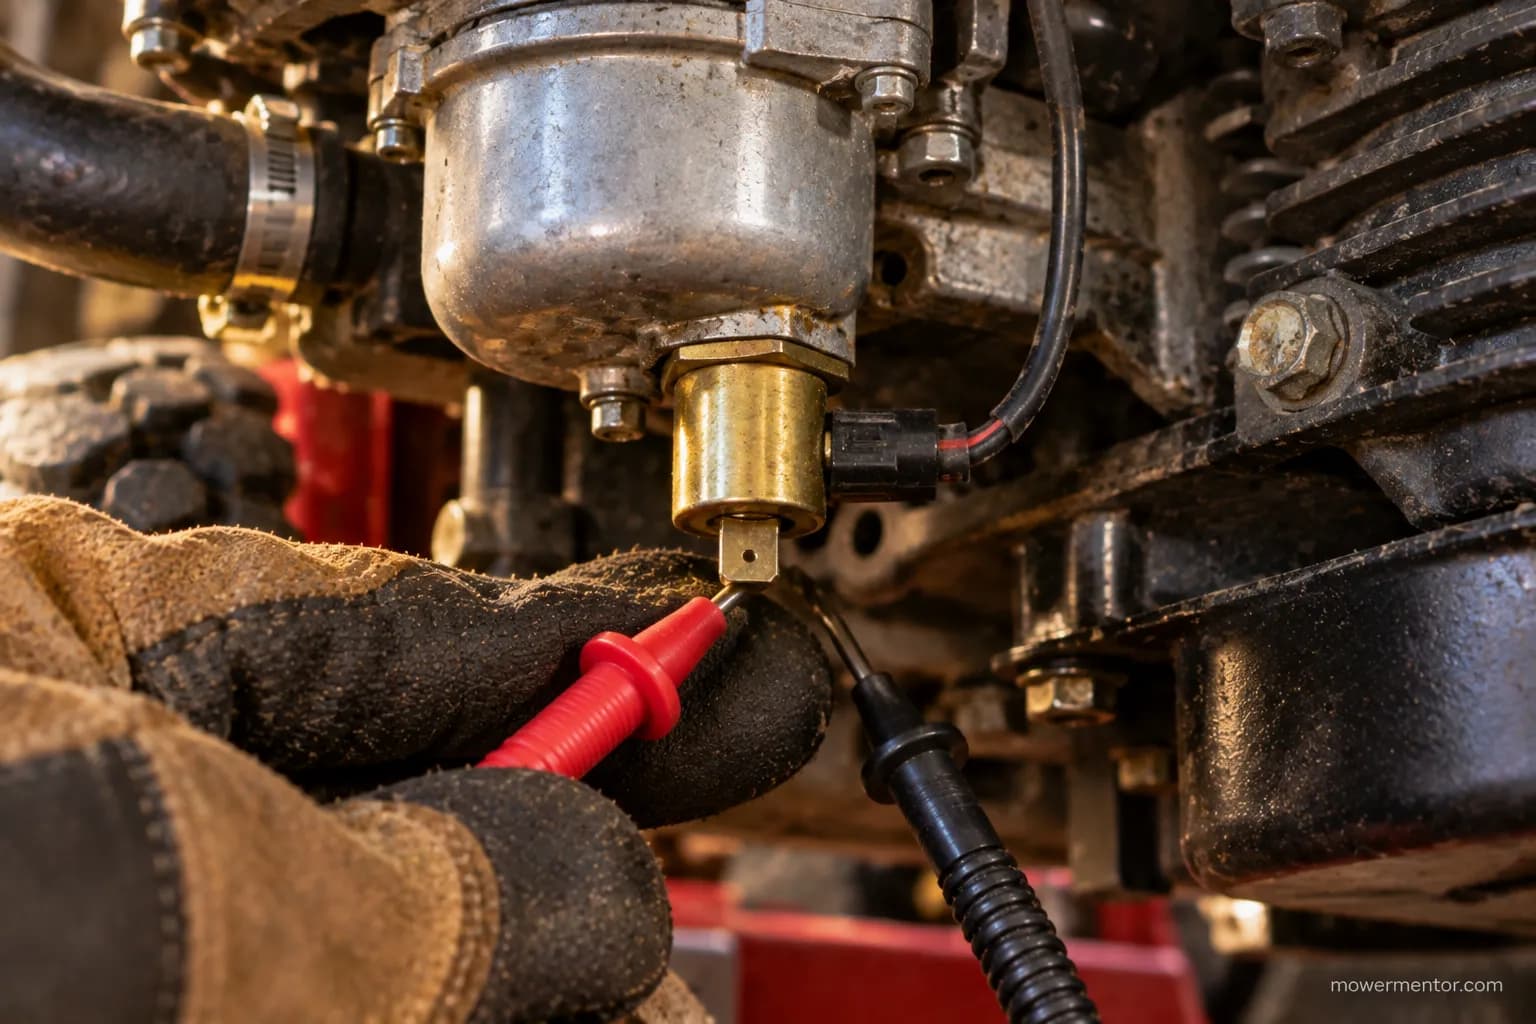
Most spins-no-fire cases trace to stale fuel or a gummed carburetor, and a full tune-up clears the usual suspects.
On a Honda-engined deck, the GC/GCV tune-up steps cover the fuel side. John Deere owners can follow the 100/L/X-series service walkthrough.
Brand-Specific Quirks: Where Your Model Differs
The diagnosis is the same across brands, but the details of where a riding lawn mower hides its interlocks and relays differ by maker.
Zero-turn Toros add lap-bar and parking-brake interlocks, some Cub Cadet models are fuel-injected with a starter relay, and Craftsman 917-series wiring routes the crank circuit its own way.
Cub Cadet's own knowledge base covers Cub Cadet alone. Troy-Bilt's no-start guide does the same for its own models, which is exactly the gap this cross-brand table fills.
Brand or type | Notable starting quirk | Where to go next |
|---|---|---|
Toro and Exmark zero-turn | Lap bars must be out and parking brake set, or it will not crank | Seat the bars, then work the tree above |
Cub Cadet EFI models | Fuel injection adds a starter relay to check | Compare click behavior in the click split |
Craftsman 917 series | Crank circuit wiring differs from newer decks | Use the Craftsman flowchart |
Husqvarna and Poulan | Shared platform, common fuse and relay layout | Combined brand hub below |
Troy-Bilt and Murray | Briggs engines, cross-reference the solenoid and starter | Brand checklists below |
Working across brands, the one that catches people most is the zero-turn.
Both lap bars have to be out and the parking brake set, or the interlocks never let it crank, and I have fixed more than one Toro just by seating the bars.
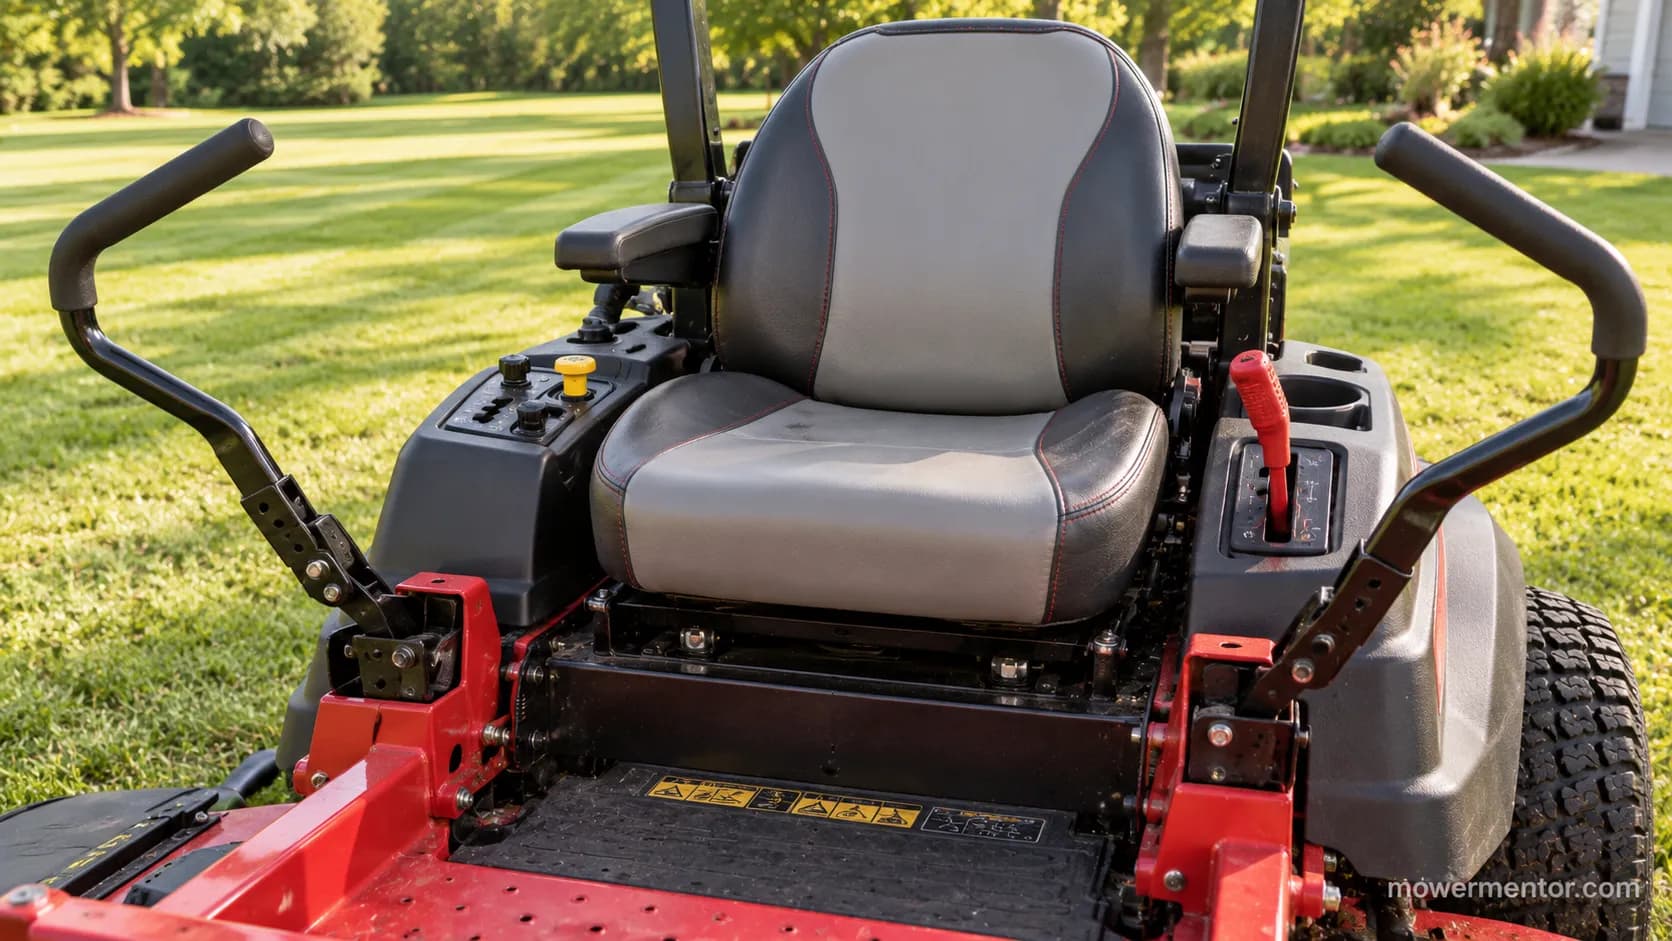
Murray owners get a full electrical and starting checklist for the riding and lawn-tractor decks.
Troy-Bilt's fuel-plus-electrical diagnosis includes a walkthrough video. Husqvarna has its own combined fuel and electrical troubleshooting hub.
Quirks vary by model year, so confirm any wiring detail against your own manual.
When to Stop and Call a Pro
Most riding lawn mower no-starts are a battery, connection, switch, solenoid, or starter, all of which a careful DIYer can handle.
Stop when the engine will not rotate by hand, when a fuse blows the instant you replace it, or when you smell fuel or see arcing, because those point to internal or wiring damage.
When a repair outgrows your tools, Briggs & Stratton recommends handing the machine to a service dealer.
The mowers I tell people to walk away from are the ones where the engine will not turn over by hand.
I have pulled a plug to find a seized cylinder more than once, and no amount of starter testing fixes that.
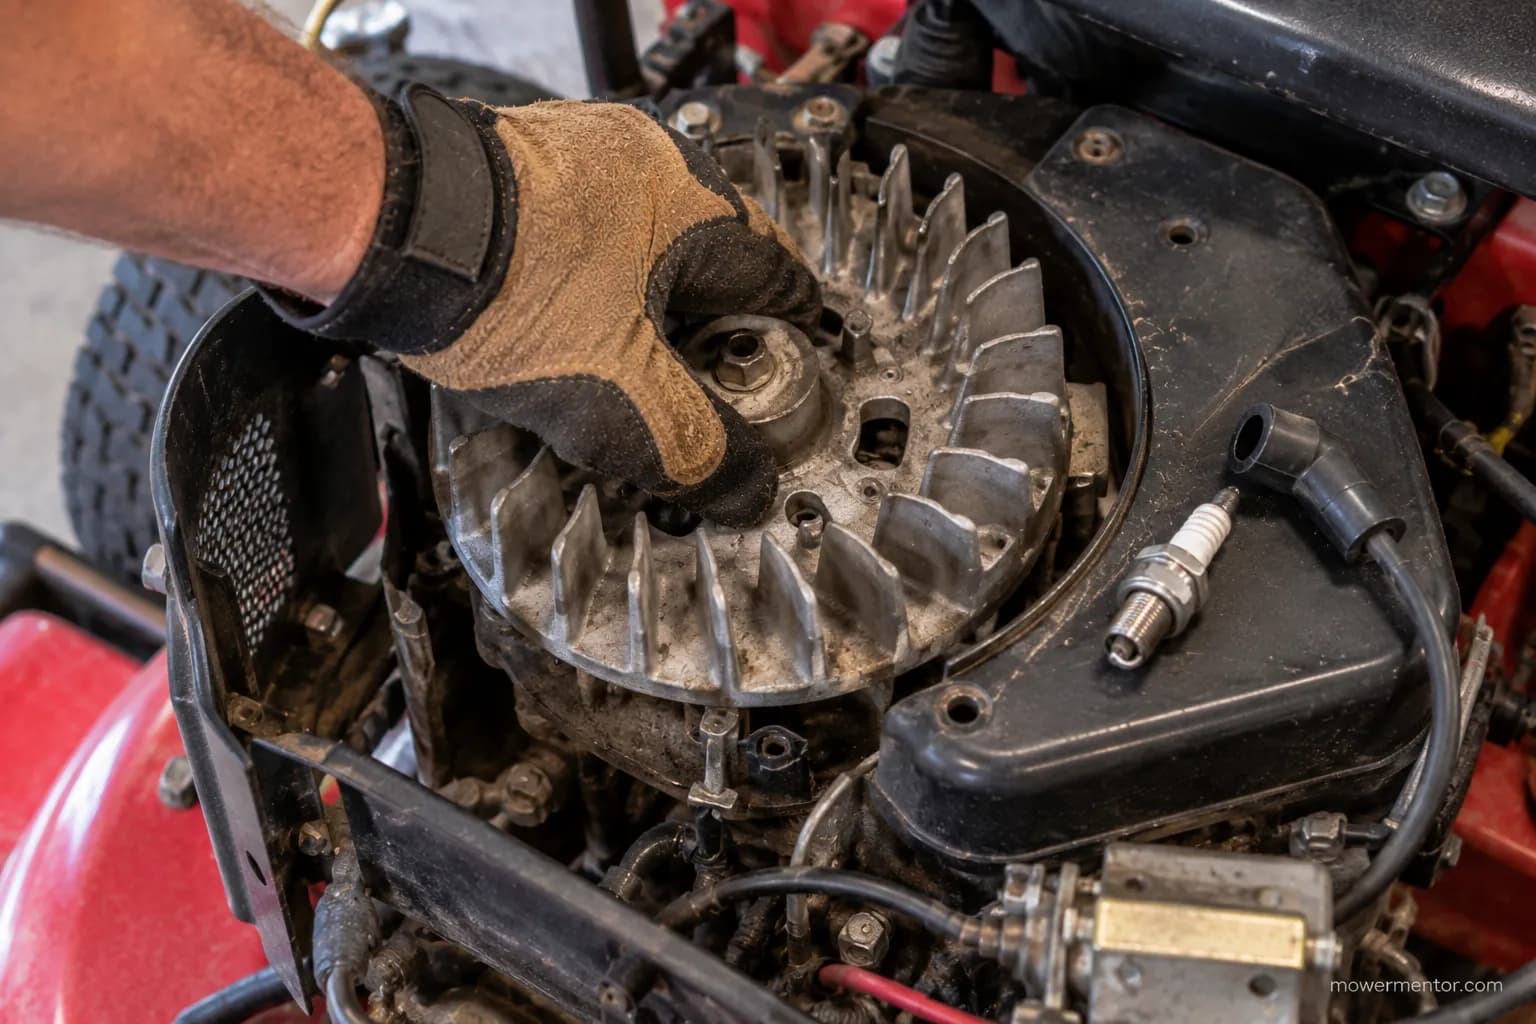
When you do hand it off, save the shop time and yourself money.
Tell them your symptom bucket and the tests you already ran, since a mechanic who knows it is a no-crank with a good battery and a clicking solenoid starts halfway to the fix.
That is the fastest way to get a stubborn riding lawn mower won't start problem off your bench and back on the lawn.
Frequently Asked Questions
What is the most common reason a riding mower won't start?
A weak or discharged battery is the most common cause, especially after winter storage. Because a healthy riding-mower battery reads about 12.6 volts at rest, test and charge the battery before you suspect any other component.
Is it the battery or the solenoid?
A weak battery causes rapid clicking or a slow, dying crank, while a bad solenoid usually gives one loud click with no crank. Confirm by reading voltage at both large solenoid posts, since a solenoid that shows power in but none out has failed contacts.
Why does my mower click once but not crank?
A single click means the solenoid engaged but did not pass power to the starter, most often from pitted internal contacts or a battery too weak to complete the job. Read voltage on both large solenoid posts with the key in start, because power in but zero out points to a failed solenoid.
Can a bad safety switch stop it from starting?
Usually the brake or PTO switch, not the seat switch, on a no-crank, because those interlocks sit in the cranking circuit while the seat switch guards the running and spark circuit. Test the brake and PTO switches for continuity before you suspect the seat.
What fuse does a riding mower use?
Most riding mowers use a 20-amp or 30-amp blade fuse in a holder near the battery or in the harness, and a blown one cuts all power to the starting circuit. Never fit a larger fuse to stop repeat blowing, because that hides a short and risks a wiring fire.
How do I test the starter?
Jump a heavy cable from the battery positive to the large starter lug: if it spins but the gear never engages the flywheel the Bendix is sticking, and if it does nothing under direct power the starter is dead. Keep every cranking attempt to five seconds at a time.
Why won't it start after winter?
Winter usually drains the battery and leaves stale fuel in the carburetor, so charge and load-test the battery first, since a season on the shelf is the single most common spring no-start I see. Sears Home Services also recommends fuel stabilizer and off-season battery care to avoid it next year.
Read it your way
Short on time? Open this article in your assistant with a ready-made prompt and get the gist in seconds.
Found this useful? Make us a preferred source so we show up in your Google results.
Keep reading
Related articles
Troubleshooting & Repair
Lawn Mower Ignition Switch Replacement (Steps + Cost)
Do your own lawn mower ignition switch replacement: photo steps, wire-by-terminal transfer, fitment help, and a DIY-vs-shop cost table to save $100+.
Troubleshooting & Repair
Which Lawn Mower Ignition Switch Fits? (Prong Guide)
hoose the right lawn mower ignition switch by prong count (4/5/6/7), universal vs OEM fit, and key compatibility, plus which one fits your mower.
Troubleshooting & Repair
How to Start a Lawn Mower With a Bad Ignition Switch
Confirm it's the switch, then learn how to start a lawn mower with a bad ignition switch: a safe solenoid bypass to get moving, plus how to fix it for good.
Troubleshooting & Repair
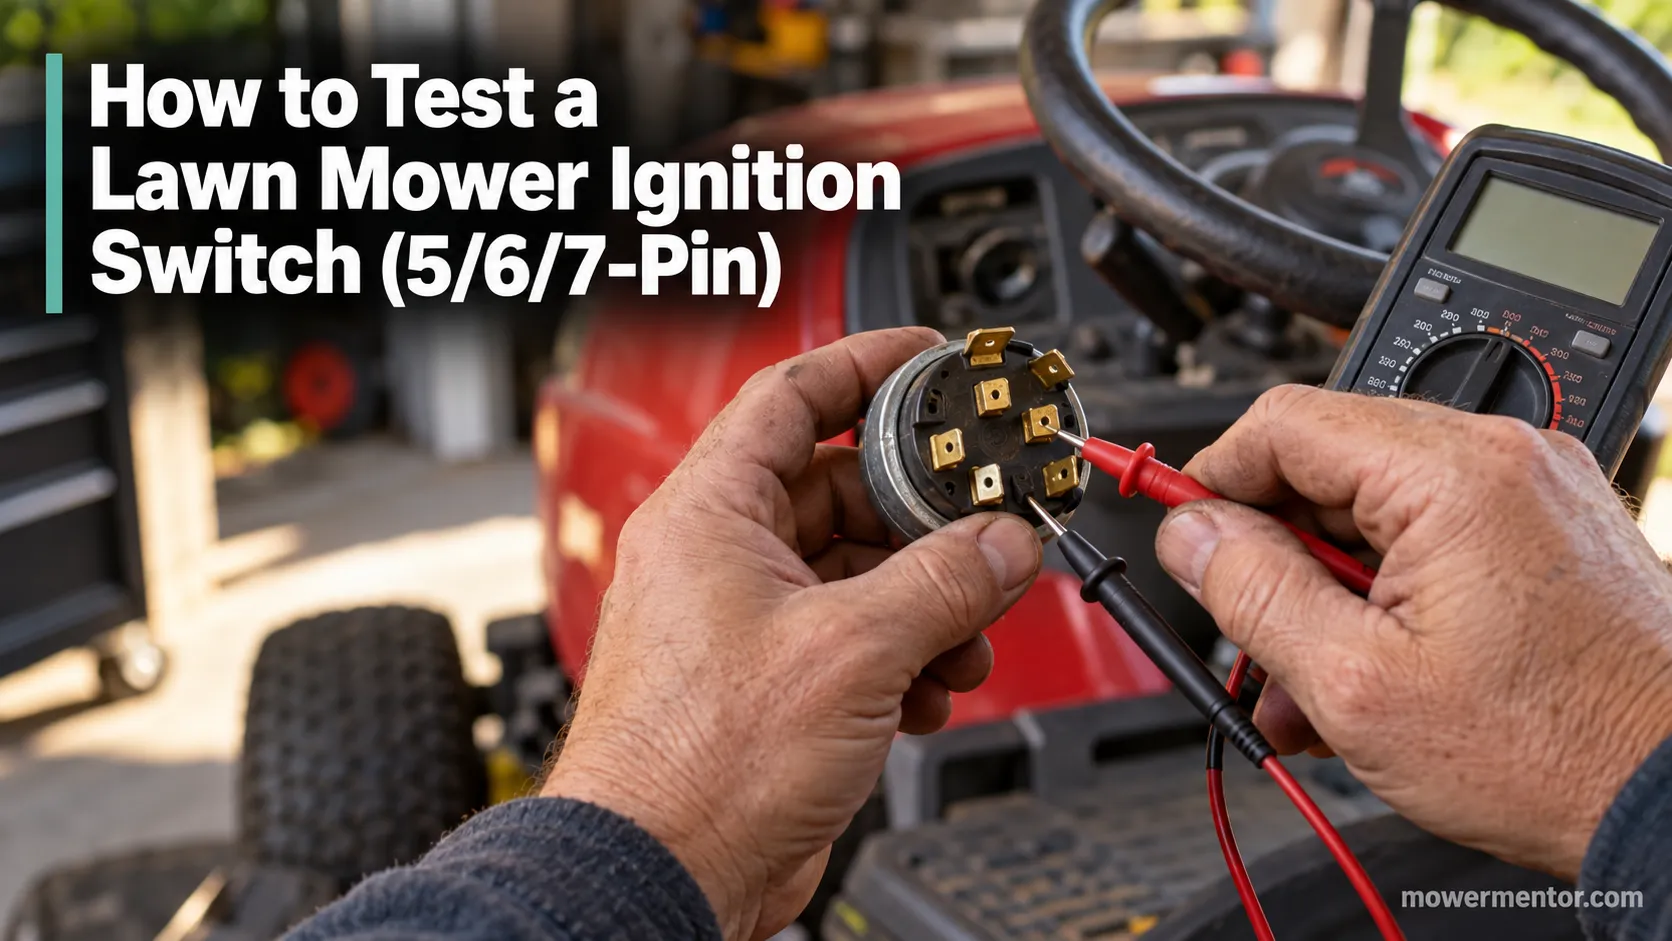
How to Test a Lawn Mower Ignition Switch (5/6/7-Pin)
Learn how to test a lawn mower ignition switch with a multimeter: get continuity tables for 5, 6 & 7-pin switches plus a no-multimeter test-light method.
The discussion
Comments
Every comment is reviewed before it goes live.