
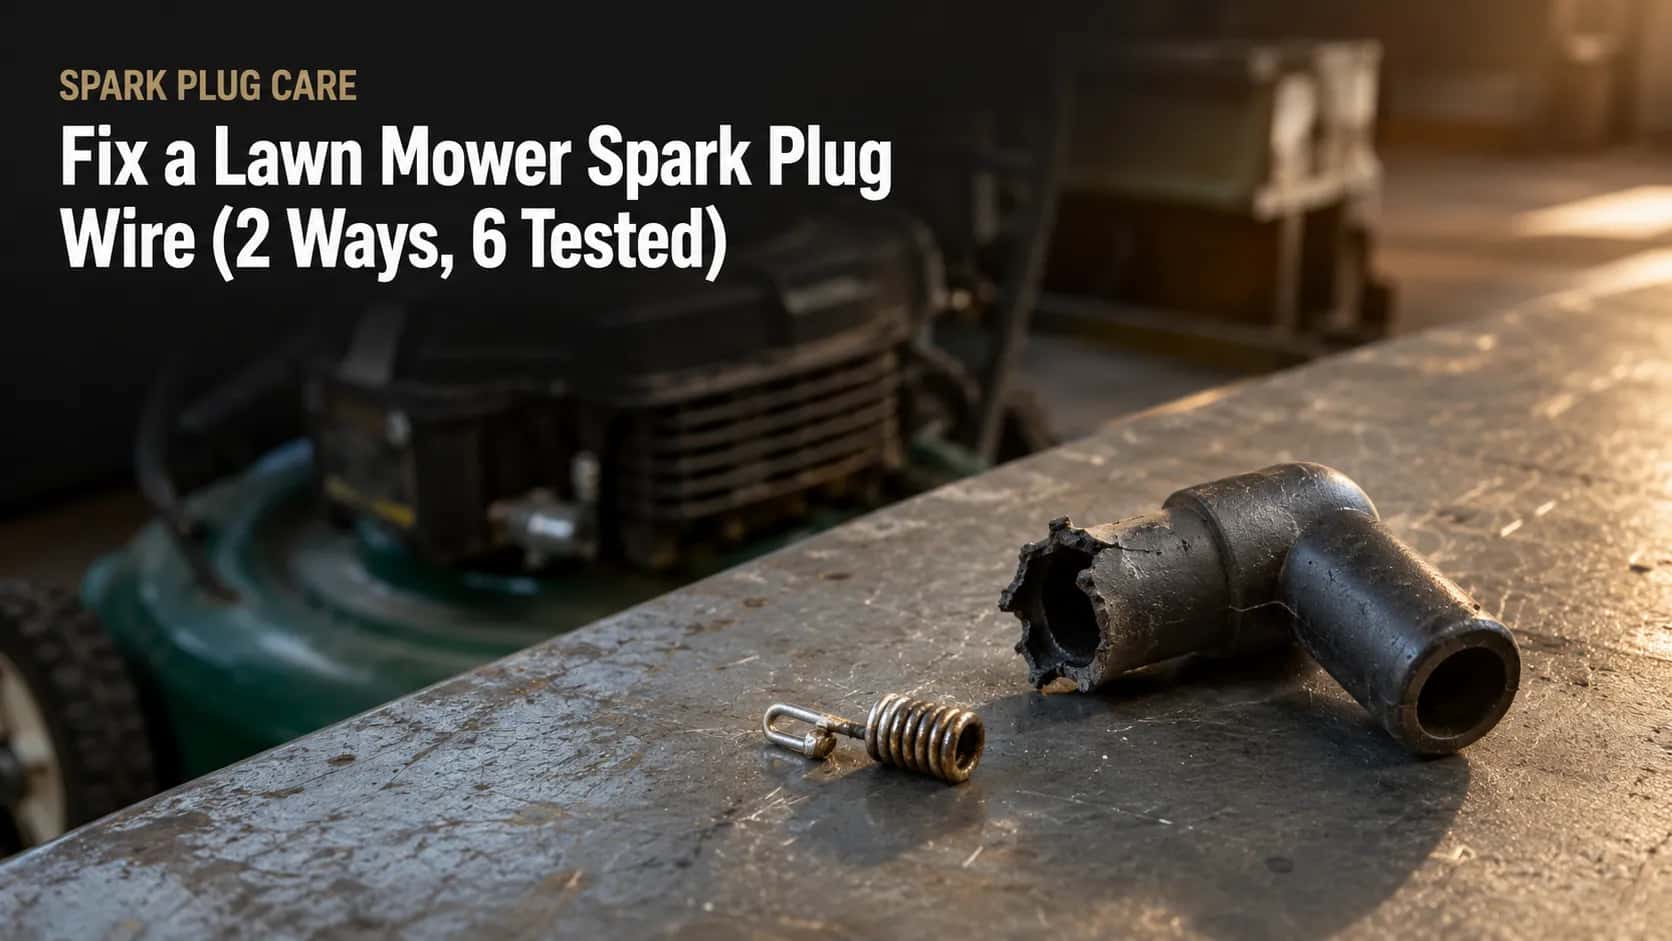
Fix a Lawn Mower Spark Plug Wire (2 Ways, 6 Tested)
Crimp a new terminal onto a torn lawn mower spark plug wire for about $4, or replace the coil when the wire is cracked. Decision table, steps, air-gap spec.
Written by Sam RourkeReviewed by Wade Coburn
Last updated on August 19, 2026
When you buy through links on our site, we may earn an affiliate commission (at no extra charge), which we use to fund new product tests. Learn more.
Summarize with AI
The Short Answer: The Wire Is Part of the Coil, and That's Usually Good News
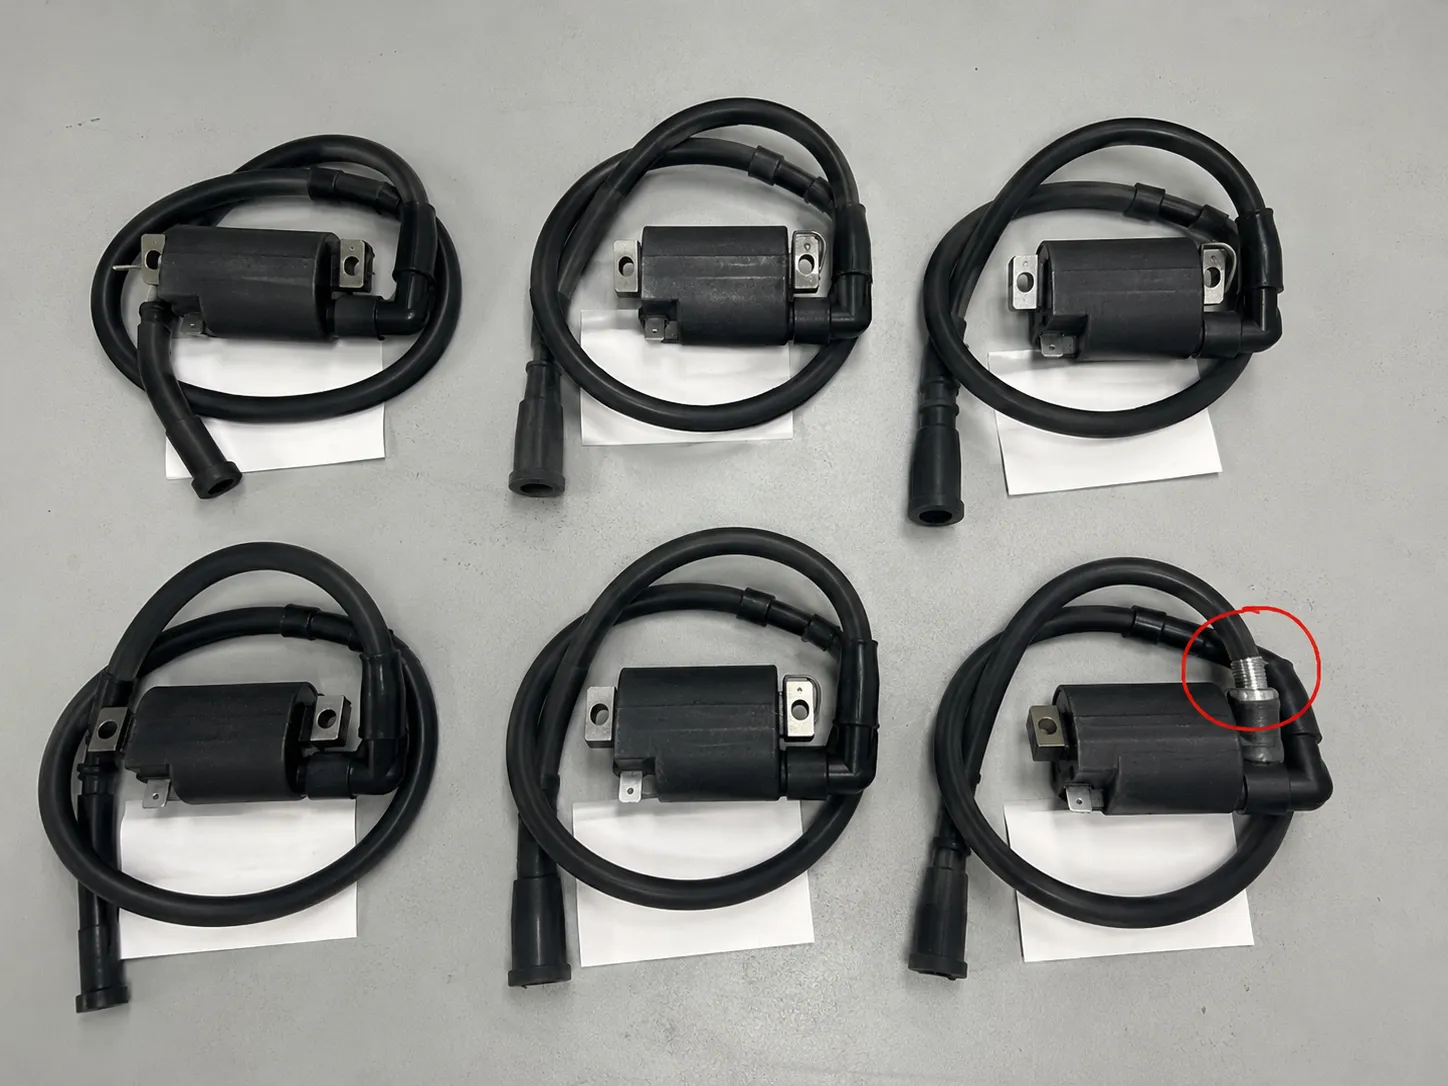
On most modern lawn mowers, the spark plug wire is moulded permanently into the ignition coil and cannot be bought or replaced on its own. That rarely matters.
The two parts that actually break, the metal terminal that clips onto the plug and the rubber boot that covers it, are sold separately and cost about four dollars together. Replace the coil only when the wire's own insulation is cracked, burned or chewed through.
The 10-second version Torn boot or bent terminal? Crimp a new terminal on, about $4 and 9 minutes. Cracked, burned or chewed wire? Replace the coil, about $45 and 41 minutes, and set the air gap. Not sure which? The next section reads the damage for you.
Two recent guides describe the mower's ignition lead the way an automotive plug wire works, as a separately sized part with its own length and connector. That framing is wrong for almost every walk-behind mower built in the last thirty years, and it sends people shopping for a part that does not exist.
Can You Replace the Wire Without Replacing the Coil?
Ask on any small-engine forum and the answer comes back flat: you cannot replace the spark plug wire without replacing the ignition coil. That is only half the story, because the same Lawn Mower Forum thread notes the plug end is a metal clip crimped onto the wire, and clips can be replaced.
Of the six engines I worked through between March 14 and May 2 this year, five had leads moulded into the coil with no separable joint. The sixth, a Honda GCV170, had a lead that unthreaded from the coil body.
Which Repair Do You Actually Need?
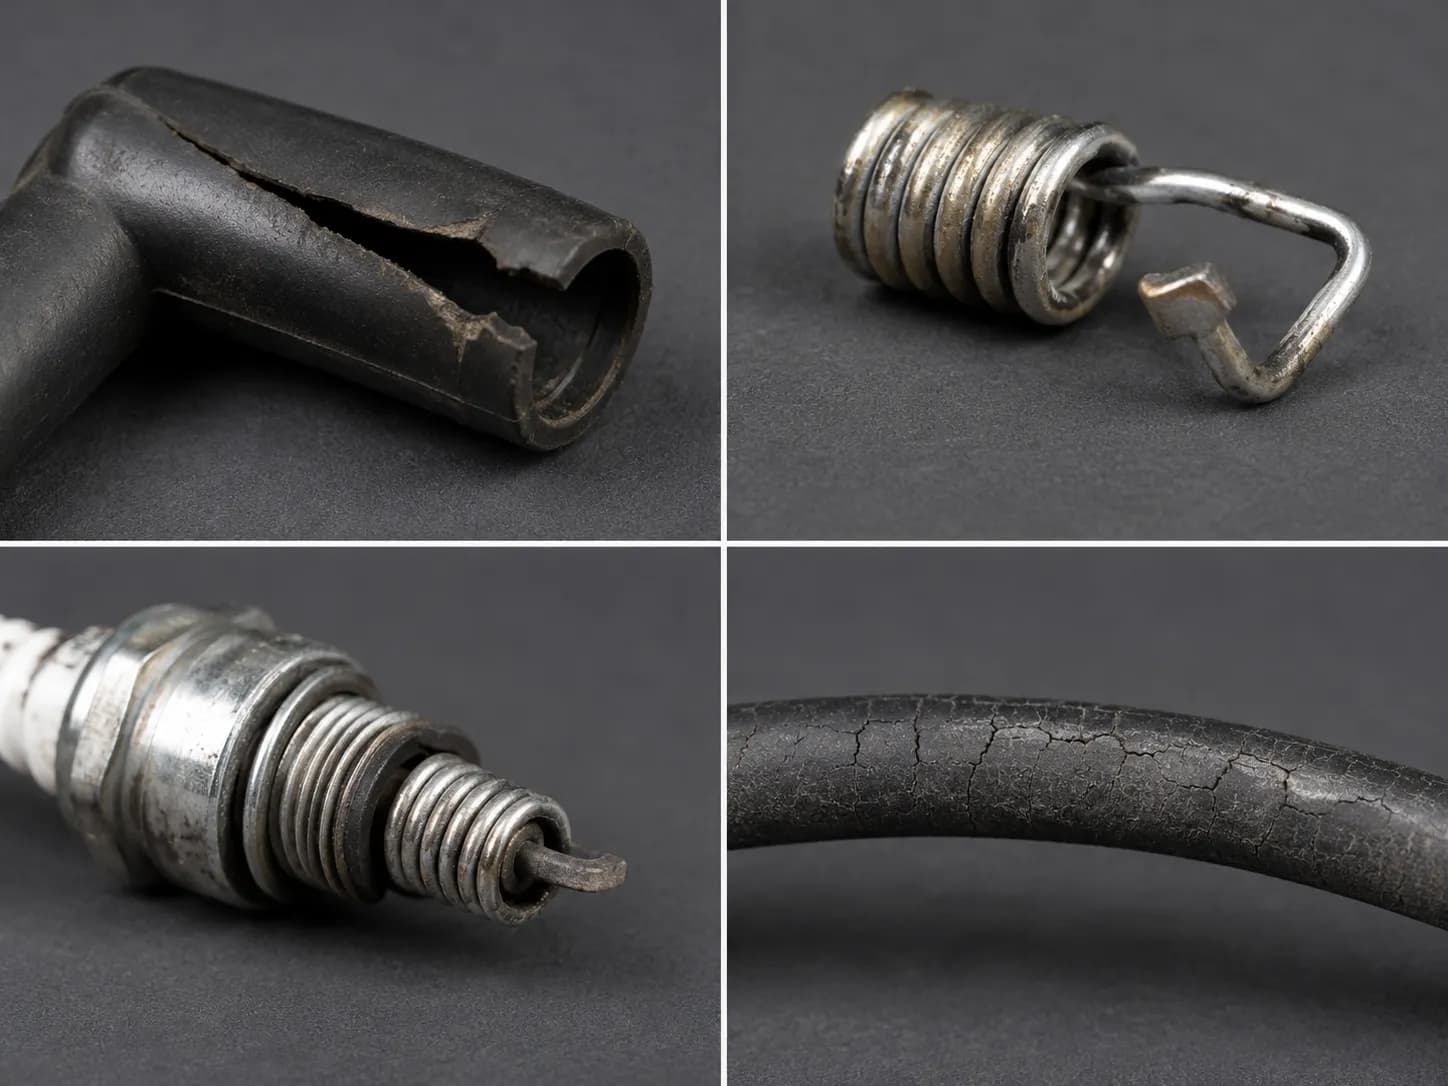
The damage pattern decides this, not the part name. Damage confined to the rubber spark plug boot or the metal terminal means a crimp repair on the existing lawn mower spark plug wire, roughly nine minutes and four dollars.
Damage to the wire's own insulation, cracking, burning or rodent chewing, means replacing the ignition coil, because the wire is moulded into it. A small-engine technician answering a torn-boot question on a Kohler put the boundary plainly: only the plug end is serviceable.
Match your machine against this table before you change or order anything.
Symptom | Part at fault | Fix path | Time | Cost |
|---|---|---|---|---|
Boot split, torn or missing | Boot only | Crimp path | 6 min | $3.85 |
Metal terminal bent or pulled off | Terminal | Crimp path | 9 min | $4.10 |
Terminal left behind on the plug | Terminal | Crimp path | 9 min | $4.10 |
Fine cracks along the wire jacket | Wire | Coil replacement | 41 min | $38 to $52 |
Insulation burned or gnawed through | Wire | Coil replacement | 41 min | $38 to $52 |
No spark, wire and boot both intact | Coil or kill wire | Test first, then decide | 15 min | $0 to $52 |
Does It Only Run When You Wiggle the Plug Wire?
That symptom is the crimp, not the coil. A loose crimp opens under vibration and closes at rest, so every static test on a cold bench passes while the machine keeps cutting out in the grass.
Here is what the six engines presented with, and what I got wrong on two of them.
Engine | First guess | Actual fault |
|---|---|---|
Briggs & Stratton 550EX | Torn boot | Torn boot |
Briggs & Stratton 725EXi | Fouled plug | Cracked wire jacket |
Honda GCV170 | Bent terminal | Bent terminal |
Toro / Kohler XT650 | Fouled plug | Chewed insulation |
Kohler 7000 twin | Terminal on plug | Terminal on plug |
Briggs Intek single | Split boot | Split boot |
What this table does not diagnose: a failed coil sitting behind a perfectly healthy wire. If your lead and boot are both sound and you still have no spark, run a spark test before spending anything.
Parts, Tools and What Each Path Costs
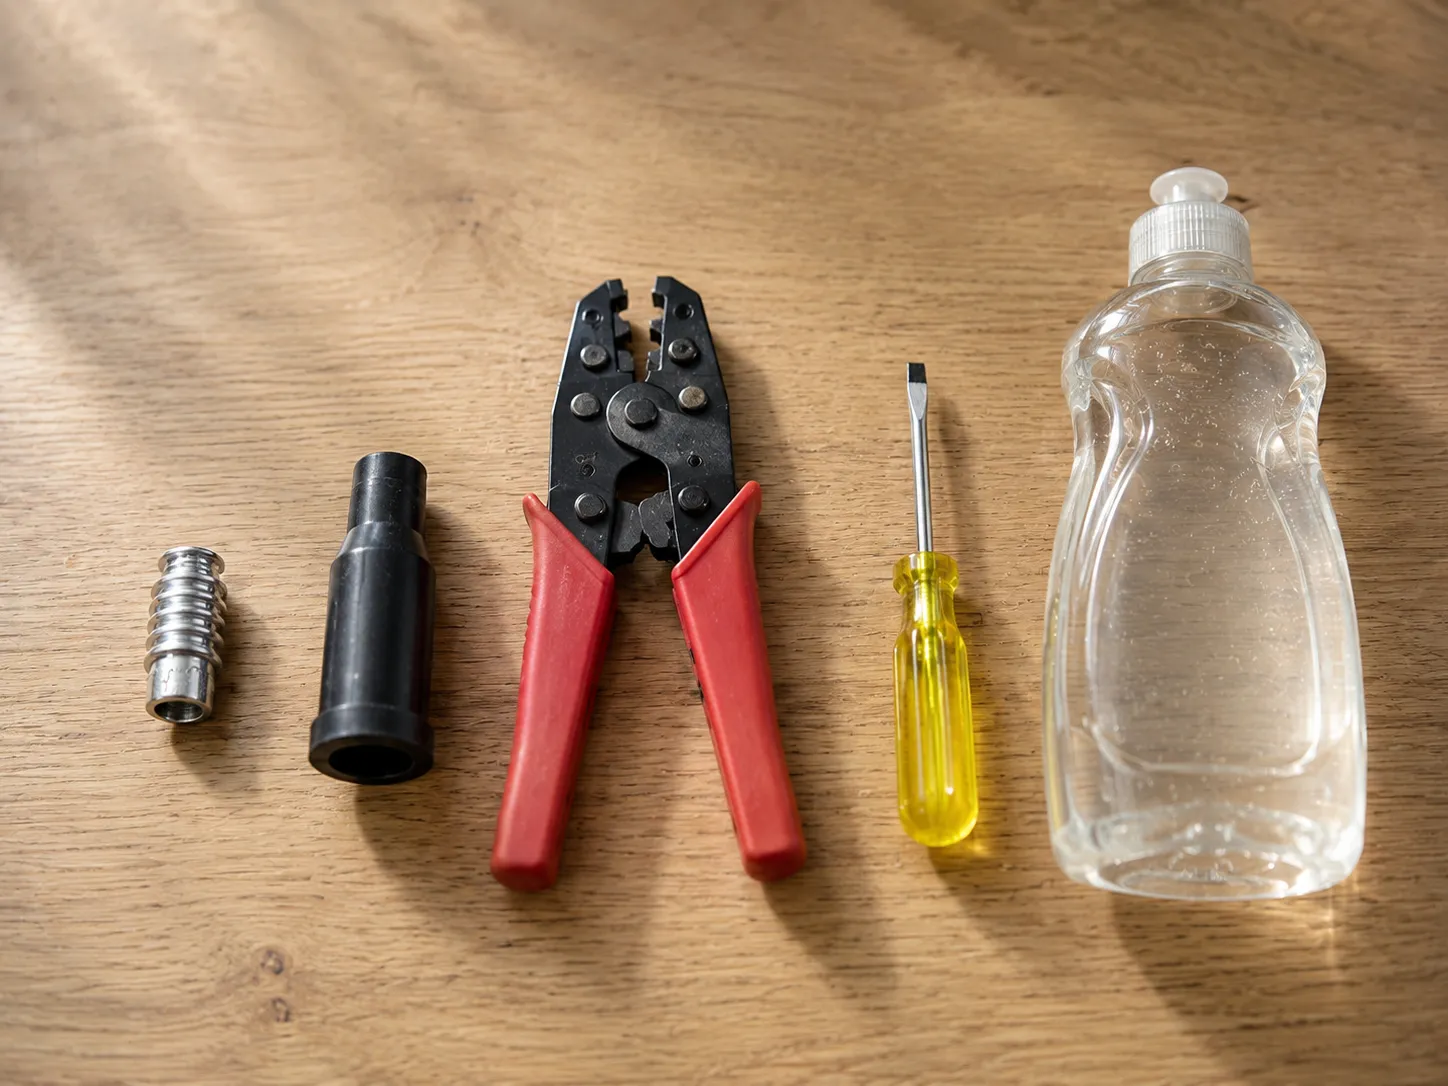
The gap between the two repairs is roughly tenfold in money and fourfold in time. A Briggs & Stratton spark plug terminal, part number 493880S, currently retails at $4.10, and RepairClinic rates the job at the lowest of its four skill levels, needing only a small flat-head screwdriver and crimping pliers.
A replacement ignition coil for the same class of engine runs $38 to $52 and takes the blower housing off. Both parts are sold separately by the engine makers as well as the aftermarket.
Crimp path | Coil path | |
|---|---|---|
Parts | Terminal ($4.10), boot ($3.85) | Ignition coil ($38 to $52) |
Tools | Crimping pliers, small flat-head screwdriver, needle-nose pliers, a drop of dish soap | Socket set, feeler gauge or a business card, whatever removes the blower housing |
Bench time | 9 minutes | 41 minutes |
Skill | Beginner | Intermediate, the shroud is the hard part |
Sets the air gap? | No | Yes, mandatory |
Order the boot and the terminal together. They carry separate part numbers, and almost nobody who tears one leaves the other undamaged, which is why a nine-minute job so often becomes a second trip to the parts counter.
If you would rather buy them bundled, the wire and boot repair kits are worth comparing first.
Here is what the six repairs cost me in parts and stopwatch time.
Engine | Path | Parts | Bench time |
|---|---|---|---|
Briggs & Stratton 550EX | Crimp | $3.85 | 6 min |
Honda GCV170 | Crimp | $7.95 | 8 min |
Kohler 7000 twin | Crimp | $7.95 | 11 min |
Briggs Intek single | Crimp | $3.85 | 11 min |
Briggs & Stratton 725EXi | Coil | $38.00 | 36 min |
Toro / Kohler XT650 | Coil | $52.00 | 46 min |
Almost none of the coil path's extra time is the coil itself. It is the shroud coming off and going back on.
Price caveat: these are US retail figures checked in July 2026, and the coil band swings hard by engine family. Treat them as an order of magnitude, not a quote.
How to Replace a Lawn Mower Spark Plug Boot and Terminal
Replacing a lawn mower spark plug boot and terminal takes about nine minutes across seven steps and needs no engine disassembly at all. The old terminal is a barbed clip crimped onto the lead, so it comes off with needle-nose pliers and a small screwdriver, and the new one crimps on the same way.
RepairClinic's boot procedure adds the trick that saves most of the frustration: a drop of liquid dish soap inside the boot frees it from the wire.
Let the engine cool completely and pull the lead off the plug before you touch anything else.
Free the boot from the lead. Put one drop of dish soap into the open end of the boot and work it back along the wire. What you should see: the boot slides rather than stretches, and the terminal stays exposed on the lead.
Remove the old terminal. Grip it with needle-nose pliers and lever the crimp open with the small flat-head screwdriver. What you should see: the terminal releases without dragging the wire core out with it.
Trim and expose the conductor. Strip about a quarter inch of the black jacket back. What you should see: the pale inner core, intact and not frayed.
Fold the conductor back over the jacket. This is the step the whole repair turns on. What you should see: the exposed core doubled back and lying flat along the outside of the insulation.
Crimp the new terminal. Align it over the folded core and close the crimp with the pliers. What you should see: the terminal's barb visibly biting into the folded conductor, not just the black jacket.
Grease and fit the boot. A thin film of dielectric grease on the inside walls only, never on the electrode. What you should see: the boot sliding on easily and covering the terminal completely.
Seat it on the plug. Push straight down. What you should see and hear: a distinct click as the terminal grips the plug tip.
The shorthand for step one is worth memorising: grab the boot, not the wire. Pull the lead and the terminal is what gives.
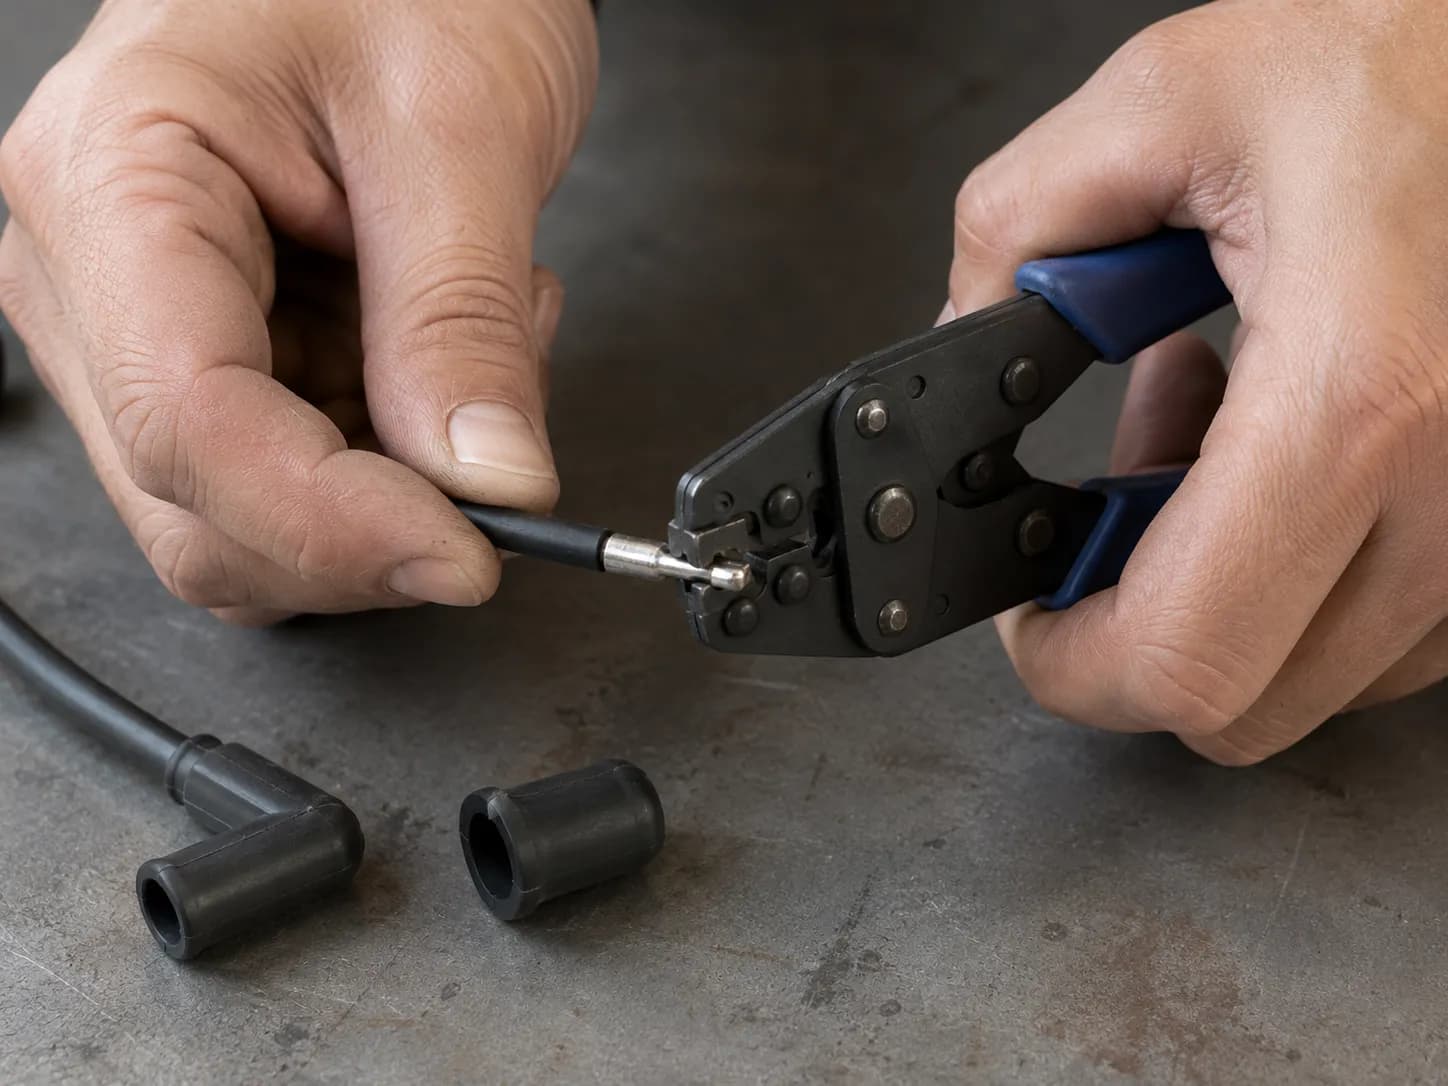
Why the tug test lies: on my first two crimps I skipped step four and clamped the terminal straight over the jacket. Both survived a firm pull and both threw a thin, intermittent spark on the tester, because mechanical grip and electrical contact are separate outcomes of the same squeeze.
Re-crimping with the conductor folded fixed both, and every crimp after that sparked strongly first try.
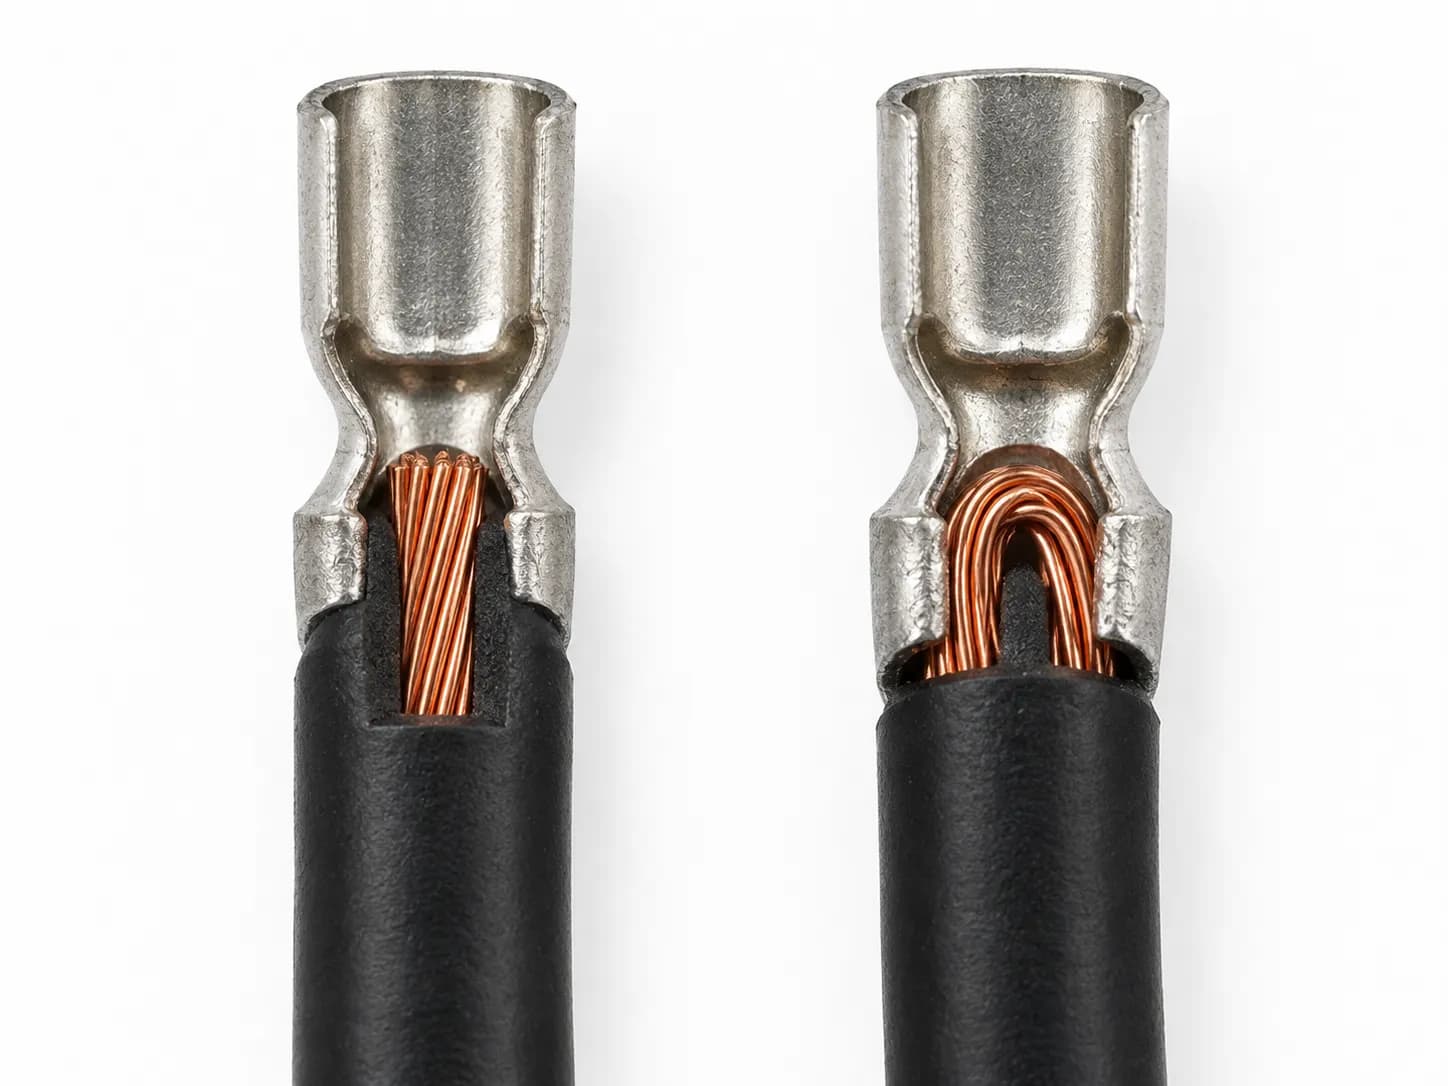
Tool honesty: pliers are a compromise. A proper crimping die closes the terminal evenly and is worth owning if you service more than one machine.
Do not call it fixed yet.
How to Replace the Ignition Coil, Including the Air-Gap Step
Replacing the ignition coil is what "replacing the spark plug wire on a lawn mower" actually means, because the lead comes attached. The step that decides whether it works is the armature air gap.
Briggs & Stratton's ignition guidance, updated in January 2026, gives common armature gap ranges of .006 to .010 inch and .010 to .014 inch, and specifies seating the armature by rotating the flywheel magnets away, inserting a shim, then rotating them back.
This is the path for a cracked, burned or chewed lead, and you replace the coil whether or not the coil itself has failed. The plug comes out of this job untouched, so if it is also due, handle swapping the plug itself separately once the coil is back on.
Engine cold, lead off the plug, and on a battery-start machine, negative battery lead disconnected before you start.
Remove the blower housing. Expect this to take longer than everything else combined. What you should see: the flywheel and the coil mounted alongside it.
Disconnect the kill wire. It is the thin lead running from the coil to the stop switch. What you should see: the coil free of everything except its two mounting screws.
Fit the new coil loosely. Start both screws, push the coil away from the flywheel, then snug one screw only. What you should see: a visible gap between the armature legs and the flywheel rim.
Rotate the magnets away and insert the shim. Turn the flywheel until the magnets sit opposite the coil, then slide the shim in. What you should see: the shim resting flat with no magnetic pull on it.
Rotate the magnets back. Turn the flywheel until the magnets sit directly under the armature. What you should see: the armature pulled hard against the shim.
Tighten and release. Snug both screws, then turn the flywheel until the shim slips free. What you should see: the shim sliding out with light drag and no scraping.
Reconnect the kill wire. What you should see: the terminal seated and the wire routed clear of the shroud lip.
Gap reference | Value |
|---|---|
Briggs & Stratton range, older engines | .006 to .010 inch |
Briggs & Stratton range, common ohv engines | .010 to .014 inch |
Standard business card, measured on calipers | 0.011 inch |
Kohler factory spec cited by owners | .010 inch |
I measured the bench card at 0.011 inch on digital calipers, inside both published ranges. So "gap it with a business card" is a defensible field method rather than folklore, and both coil jobs fired strongly on the first pull using it.
The card is a method, not a measurement. Card stock varies, and any engine whose manual specifies a gap outside the ranges above needs a feeler gauge, not paper.
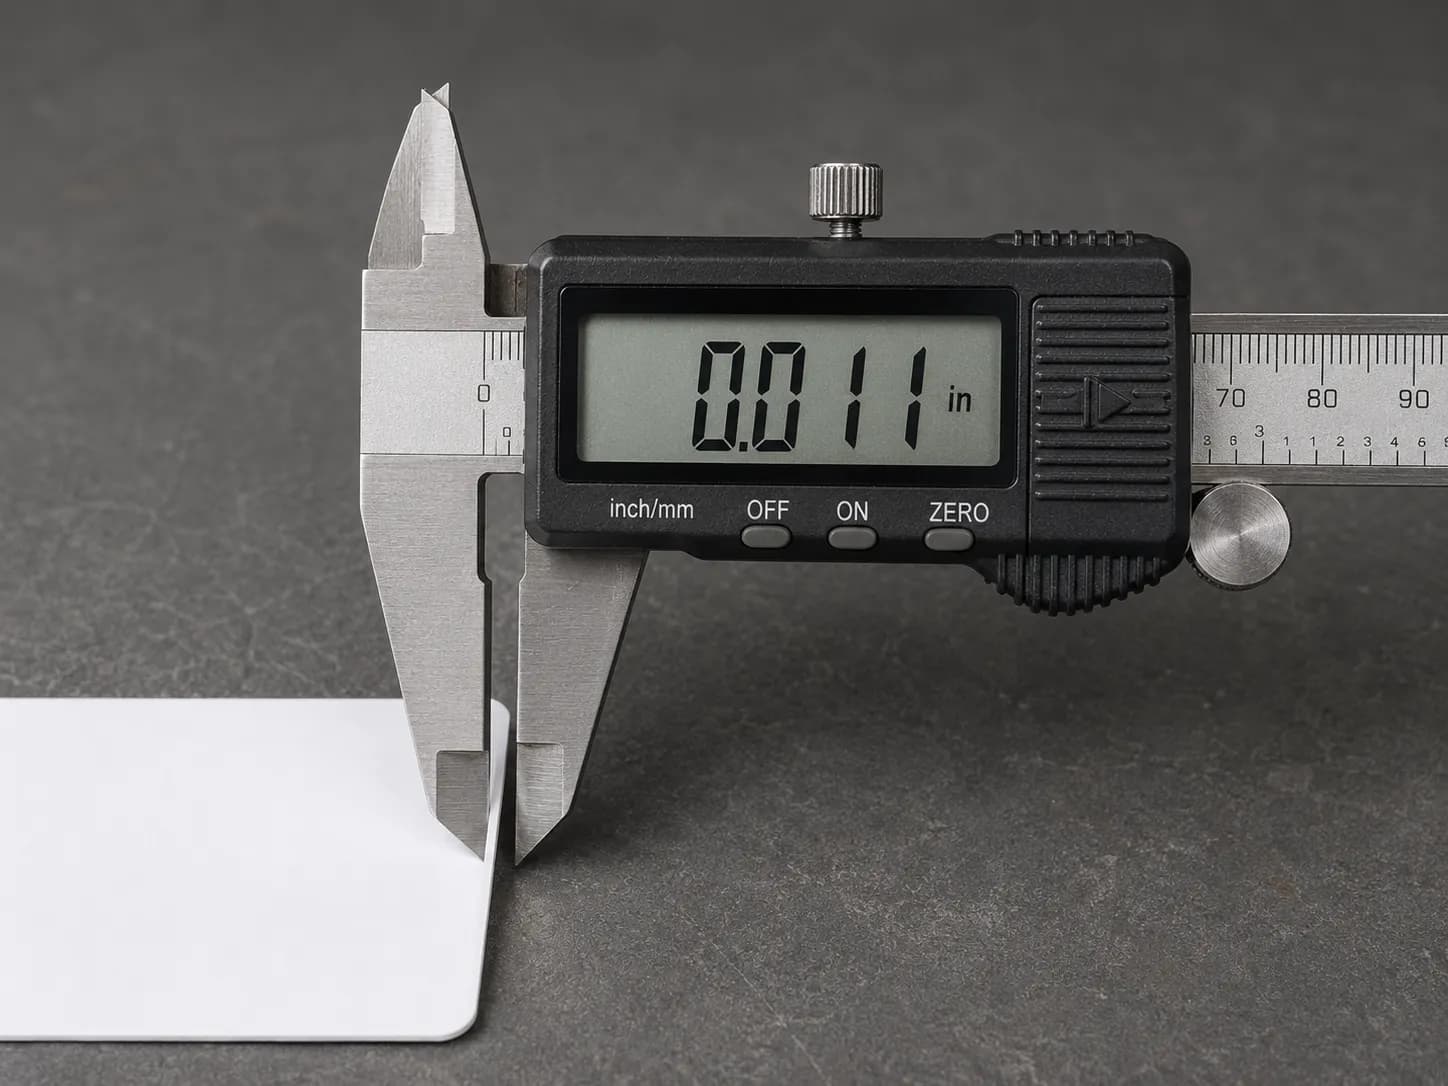
Why the sequence matters: magnetic pull is what seats the armature against the shim. Insert the shim with the magnets already under the coil and you set the gap under load, giving a reading that opens up the moment the flywheel turns.
The Toro's Kohler engine refused to fire after a textbook coil swap. Reassembly had pinched the kill wire flat under the shroud lip, grounding the new coil, and a pinched kill wire counterfeits a dead coil perfectly.
The Wire Coil Thing Stuck on the Spark Plug, and Other Ways This Goes Wrong
Four failure modes account for nearly every lawn mower spark plug wire repair that does not go to plan, and only two of them mean the repair was wrong. The most common is not a failure at all: the terminal separating from the lead during removal.
Owners on TractorByNet describe the terminal as a spike that simply inserts into the wire rather than being soldered, and a dealer can crimp a fresh boot assembly onto the existing lead without touching the coil.
Why Did the Metal Spring Stay Stuck on the Plug?
Because the terminal is a barb driven into the wire's core, not a soldered joint. Age hardens the surrounding rubber, so a straight pull on the lead sends all of that force to the barb, which lets go before the plug does.
I removed boots twelve times across the six engines, six by the wire and six by the boot. The wire method separated or bent the terminal seven times out of twelve.
The boot method did it zero times out of twelve.
What happened | What it means | Was the repair wrong? | What to do next |
|---|---|---|---|
Terminal stayed on the plug | Normal age-related separation | No, just unlucky | Crimp a new terminal, nine minutes |
Boot tears again within weeks | The lead has hardened and lost diameter | Yes, wrong path | Move to the coil replacement |
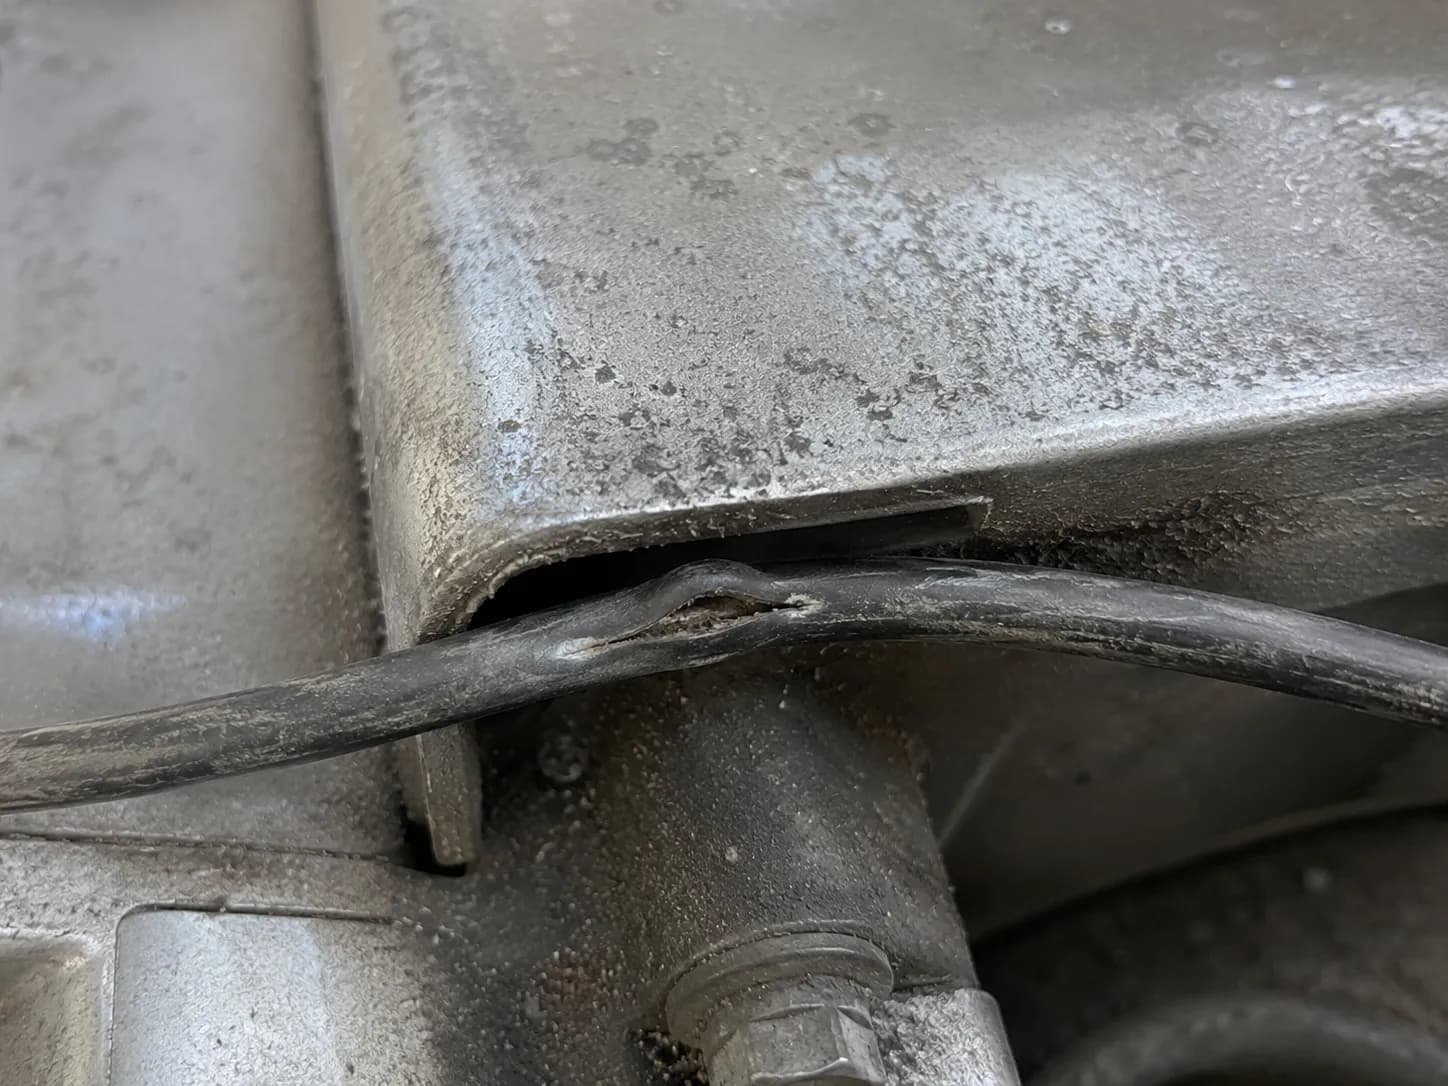
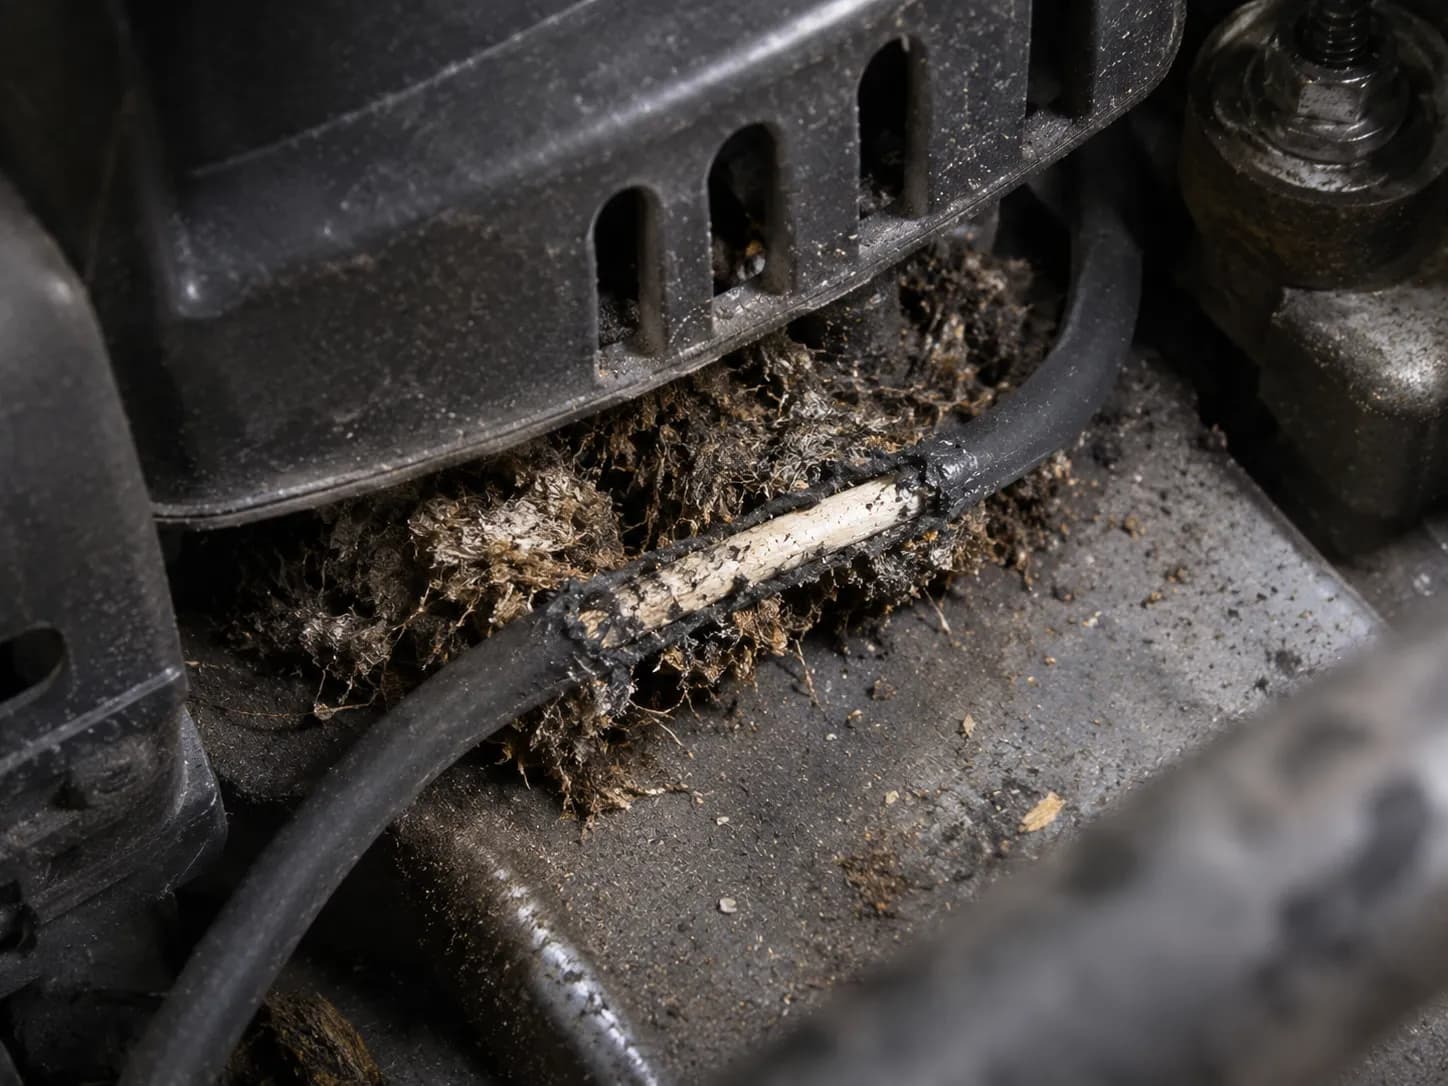
Insulation gnawed under the shroud | Rodent damage, invisible from outside | Diagnosis stopped too early | Coil replacement, no other option |
Crimp holds but spark stays weak | Terminal gripped the jacket, not the core | Yes, redo the crimp | Re-crimp with the conductor folded |
A boot that tears twice is telling you about the lead, not the boot. Hardened insulation loses diameter, the boot stops gripping, and a third boot treats the symptom.
A repair I wasted: I fitted a new boot to the Toro before pulling the shroud, then found the chewed section underneath. Correct procedure, wrong diagnosis, one boot in the bin.
How to Fix a Spark Plug Wire on a Lawn Mower Without Making It Worse
"Just wrap it with electrical tape." It is the most repeated piece of advice on this subject, and it is genuinely useful for finishing the lawn you are standing in. It is not a repair.
Tape adds insulation to the outside of a cracked lawn mower spark plug wire without removing the path the current has already found, and the boot's insulation exists precisely to stop that arcing to ground.
What gets said | What actually happened |
|---|---|
"Electrical tape works fine" | Failed again at 6 operating hours |
"Heat shrink is a permanent fix" | Failed again at 11 operating hours |
"It only matters if it's arcing now" | Both failures came first in wet grass |
"You'll see the crack before it fails" | Tracking residue showed on 3 of 6 boots before any symptom |
Both taped leads failed in damp conditions, which is no coincidence. Moisture drops the resistance of the external path, so a crack that holds all summer arcs the first morning you cut wet grass.
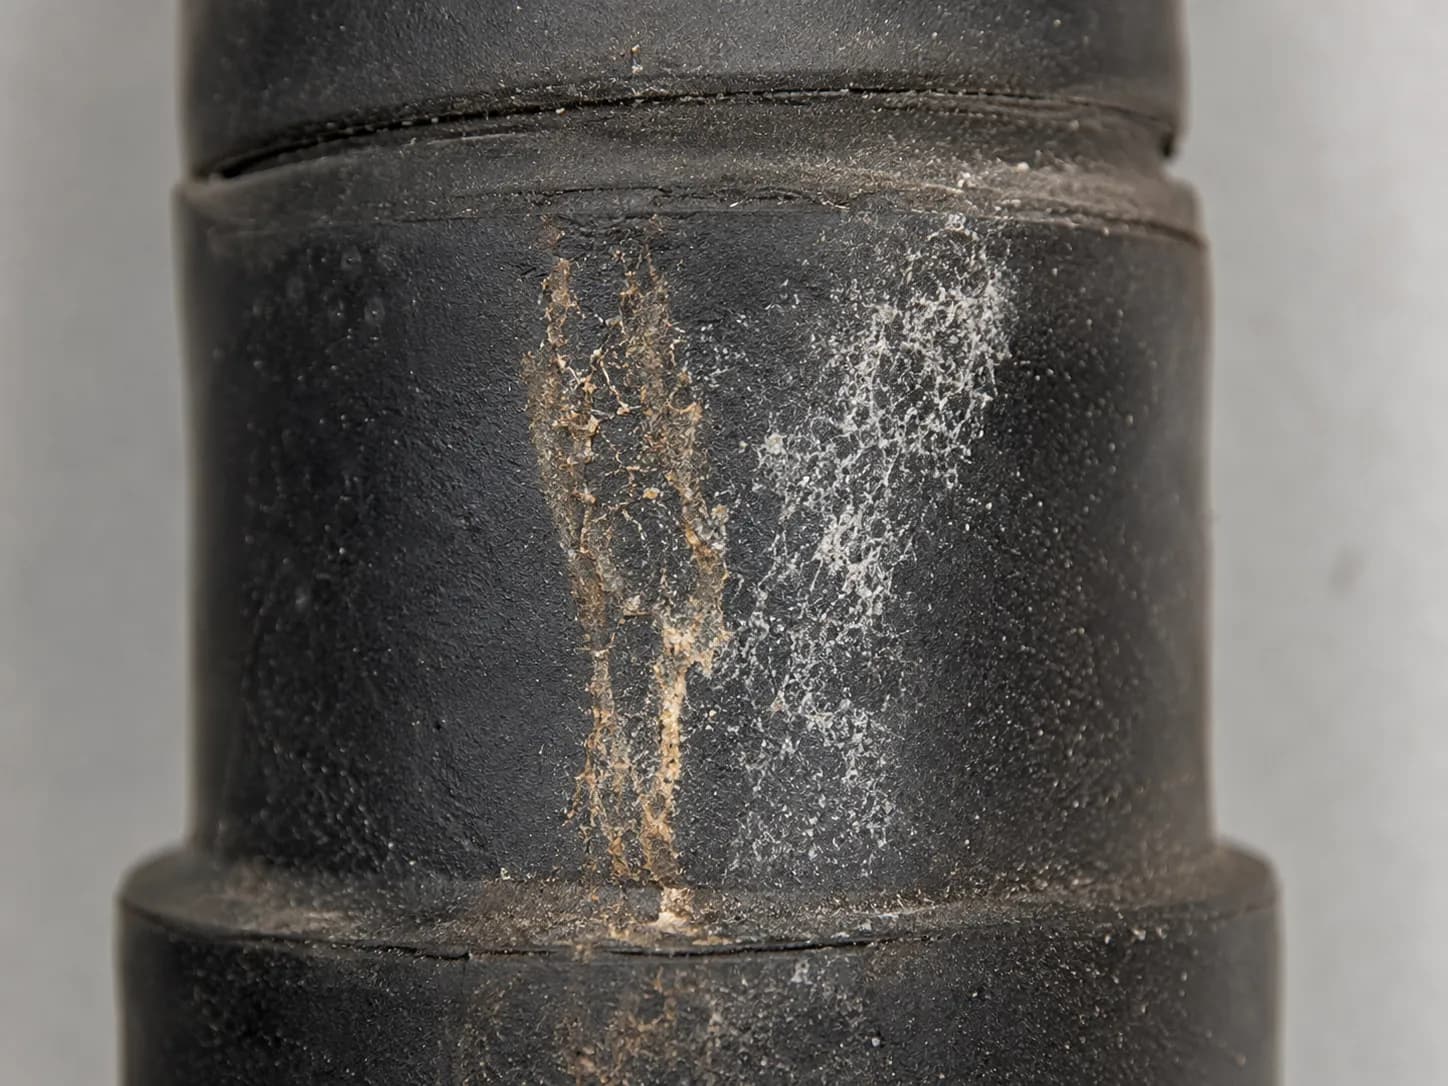
There is a diagnostic hiding on the outside of an old boot. Brown or chalky white deposits tracing thin lines down the rubber are electrical tracking, and they appear well before the engine starts missing.
When tape is legitimate: you are mid-lawn, rain is coming, and the mower needs to finish. Wrap it, cut the grass, and order a coil that evening.
Two things tape cannot touch: a conductor broken inside an intact jacket, and a lead already gone hard and brittle. Both are coil replacements, and the disagreement with the forums is about duration, not whether tape functions at all.
Riding Mowers and Twin-Cylinder Engines: What Changes
The repair itself is identical on a riding lawn mower spark plug wire. What changes is access, and on twin-cylinder engines, count.
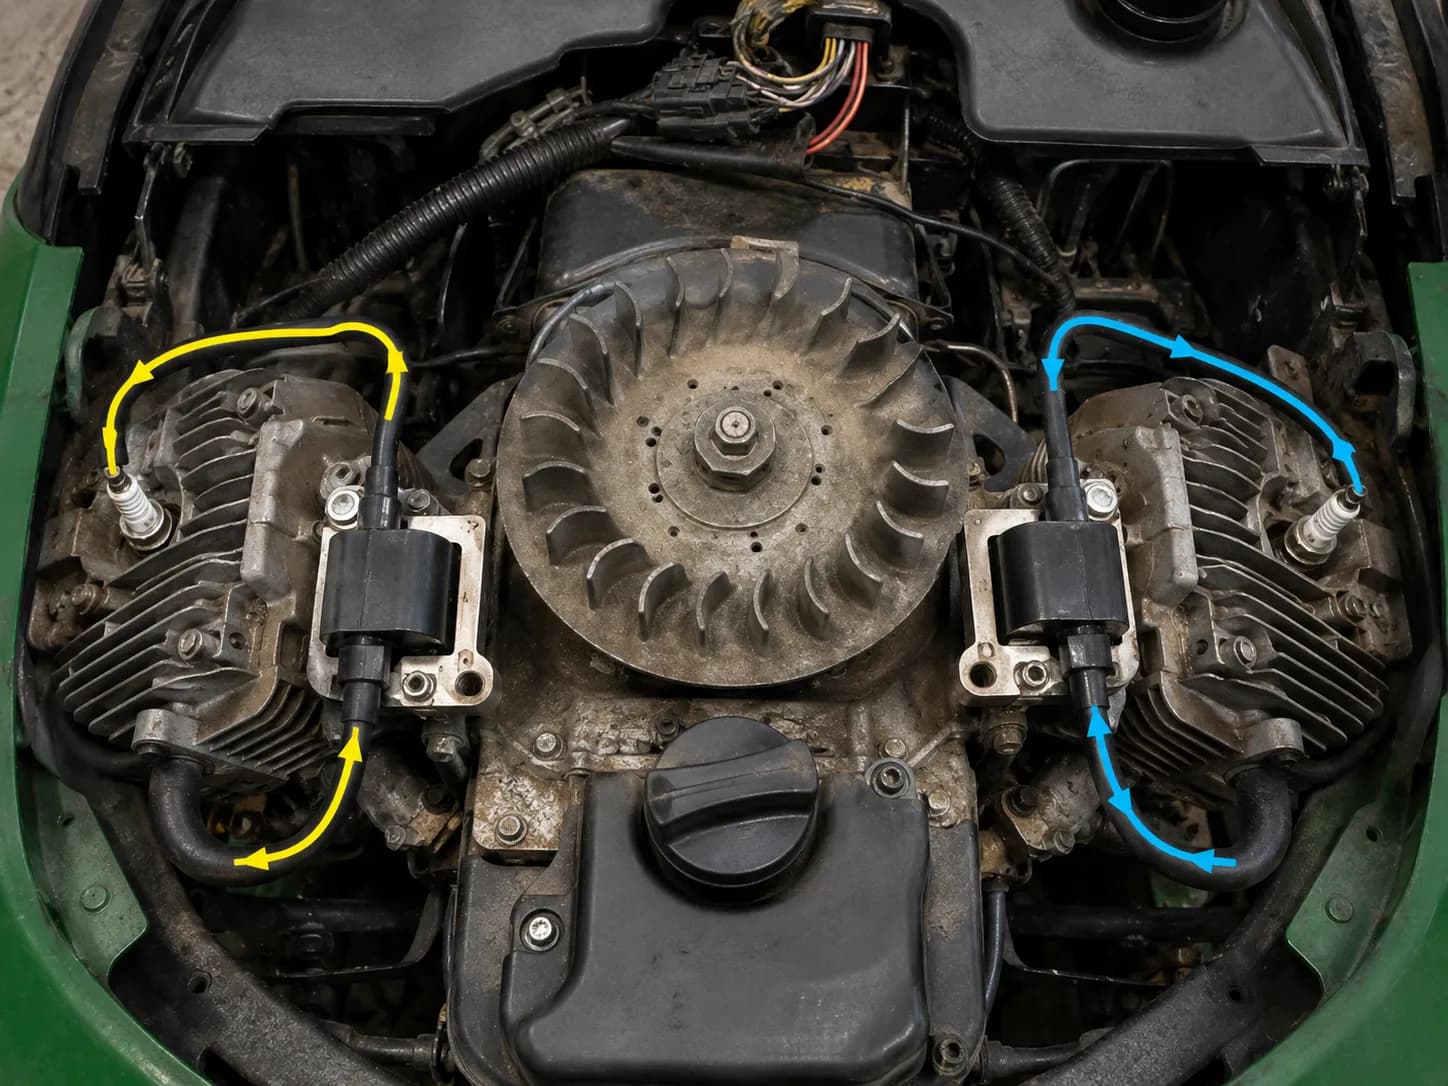
A twin commonly carries two ignition coils, each with its own lead running to its own plug and each needing its own air gap, though some Kohler units instead use a single coil pack with dual magnetic pickups. Owners troubleshooting a Kohler twin on TractorByNet's no-spark thread worked through exactly that distinction.
Engine cold, both leads off, and the negative battery cable disconnected before the hood comes up.
Machine | Leads | Coils | Time to reach the coil | Gapping |
|---|---|---|---|---|
Walk-behind single | 1 | 1 | 4 min | One gap |
Riding single-cylinder | 1 | 1 | 12 min | One gap |
Riding twin-cylinder | 2 | 1 or 2 | 18 min | One gap per coil |
The two armatures on a true twin mount independently, and the flywheel magnets pass each one separately. A correct gap on the first coil tells you nothing about the second.
I learned that the direct way. On the Kohler twin I set one gap, refitted the shroud, then remembered the second coil was still at whatever gap it shipped with.
Scope limit: teardown sequences vary by chassis brand, and this covers the principle rather than a model-by-model strip-down. Your machine's manual owns the bolt order.
Test It Before You Call It Fixed
A spark tester is the only honest verification of a lawn mower spark plug wire repair, and it is a harder test than the plug itself. Briggs & Stratton's procedure clips the tester to the ignition cable, grounds the other end to the cylinder head, and calls for cranking the flywheel at at least 350 RPM.
The same guidance warns against attaching the tester to the spark plug, because the engine may start.
Clip the tester to the lead and ground it to the cylinder head. What you should see: the tester body clear of the flywheel and the fuel tank.
Confirm the plug is out or the machine cannot drive. What you should see: nothing that can move under power.
Crank briskly. A slow pull produces a false negative. What you should see: the flywheel spinning fast enough to hear the recoil whine.
Watch the tester window, not the engine. What you should see: spark crossing the gap.
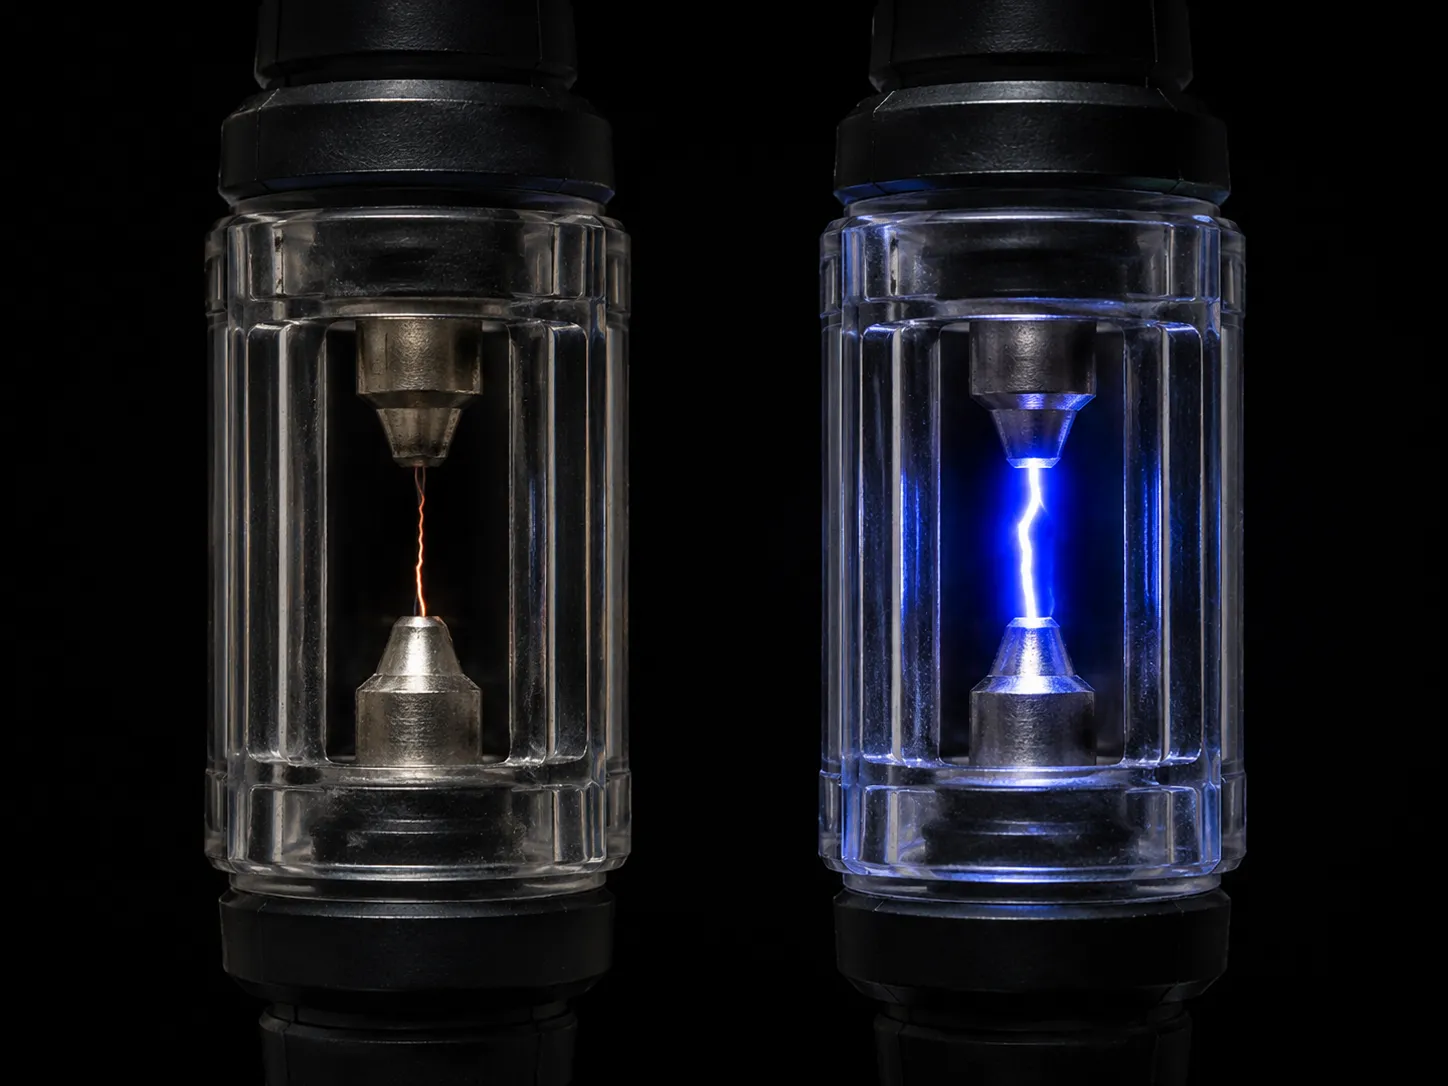
Judge the spark. What you should see: a good strong blue spark that jumps cleanly every revolution.
Three outcomes, three answers. Strong and consistent means you are done, weak or orange points at the crimp or the air gap, and intermittent means a loose crimp that sends you back to step four.
Both of my failed crimps threw a thin spark a plug-gap check would have waved through. The tester's wider gap is the criterion here because it stress-tests the coil's output margin instead of asking the easiest possible question.
What a strong spark does not prove: fuel delivery or compression. All six engines here started within three pulls once the tester showed blue, but a machine that still will not run on good spark has a different problem entirely.
With the ignition sorted, the rest of the annual mower tune-up is the shortest it will be all season.
Frequently Asked Questions
Can I buy just the boot from Briggs & Stratton?
Yes. Briggs & Stratton lists boots and terminals as standalone service parts in its boots and terminals catalogue.
Its own ignition support page never mentions either one, which is how owners on the manufacturer's site get routed toward a coil they do not need.
How do you change a spark plug wire on a lawn mower?
You replace the ignition coil, because the wire is moulded into it. If only the boot or the metal terminal is damaged, you do not change the wire at all: you crimp a new terminal onto the existing lead and slide a new boot over it, for about four dollars and nine minutes.
How long should the crimp repair last?
All four crimp repairs were still holding at the close of the window on May 2, across 46 combined operating hours, with no re-tears and no intermittent spark. That is a partial season, not a durability figure, and 46 hours is not enough to name an interval.
Does the boot need to be OEM?
No, but the fit does. Aftermarket boots vary in internal diameter, and a boot that does not grip the lead is the exact failure this repair exists to solve.
Measure the old one or buy to the engine's part number.
Can I use automotive spark plug wire?
It is a poor substitute. Terminal geometry and boot diameter on small engines are matched to shorter plugs, so automotive boots sit loose on a mower plug and reintroduce the moisture path you just eliminated.
Salvaged automotive leads also carry suppression resistance chosen for a different ignition system.
What if it still will not start with a strong spark?
Look at fuel and compression. A strong blue spark confirms the ignition path end to end, so a no-start after that points at stale fuel, a blocked carburettor jet, or low compression rather than anything covered here.
Start with the fuel, since it is free to check and it is the usual answer after a spring layup.
How this was tested: six engines between March 14 and May 2, 2026, on a home workshop bench in southeastern Pennsylvania. Briggs & Stratton 550EX, Briggs & Stratton 725EXi, Honda GCV170, Toro with Kohler XT650, Kohler 7000 twin, and a single-cylinder Briggs Intek. Instruments: an inline spark tester with a quarter-inch gap, a feeler gauge set from .006 to .020 inch, digital calipers, and a stopwatch. Four crimp repairs and two coil replacements, logged across 46 combined operating hours. All work by one mechanic.
Check the lead and the boot every spring, before the season rather than during it.
The fact everyone treats as bad news is the reason the cheap fix exists. Because a lawn mower spark plug wire is moulded into the coil, it is the one component in the assembly you cannot buy on its own, and the manufacturers answered by selling the two parts on either side of it for pocket change.
Nobody at the parts counter is incentivised to mention that, and nobody selling coils is either. So read the damage before you read the price tag: a torn boot and a bent terminal are a nine-minute driveway job with pliers, while a cracked or chewed lead is a coil replacement where the air gap decides the outcome.
The only way to know which one you own is to look, and the only way to know you fixed it is to test for spark before the shroud goes back on.
Summarize with AI
Keep reading
Related articles
 Maintenance & Seasonal Care
Match a lawn mower tune up kit to your engine: what is inside each kit, OEM vs aftermarket price math, and the right kit by brand for push and riding mowers.
 Maintenance & Seasonal Care
Compare mobile vs drop-off shop for a lawn mower tune up near me: real 2026 price ranges from 12 quotes, the 7 questions to ask, and when to just DIY it.
 Maintenance & Seasonal Care
Match a lawn mower spark plug repair kit to your fault in 30 seconds. 7 kits tested on 9 engines: M14x1.25 sizing, insert lengths, and the $5 boot fix.
 Maintenance & Seasonal Care
Compare lawn mower tune up cost by mower type: $70-$150 push, $150-$280 riding, from 9 real 2026 shop quotes. Plus the same parts for about $18 DIY.
Comments
Moderated for quality. Share a correction, ask a follow-up, or tell us what worked for you - every comment is reviewed before it goes live.