
Lawn Mower Seat Safety Switch: Tested on 3 Mowers (2026)
Test your lawn mower seat safety switch in 5 minutes: spot bad-switch symptoms, tell a 2-wire from a 4-wire, and replace it with the right part.
Written by Tony MaldonadoReviewed by Wade CoburnLast updated on September 24, 2026
When you buy parts or tools through links on our site, we may earn a commission at no extra cost to you. It never changes what we recommend. Learn more.
A lawn mower seat safety switch is an operator-presence sensor under the seat that kills the engine when your weight leaves the cushion.
The most common failure sign is an engine that dies the instant you shift or stand in the seat.
A two-minute multimeter continuity test, not a new part, is the first move: a good switch reads near-zero ohms in one state and OL in the other.
This guide tests three mowers, two wiring types, and shows you how to replace the switch with the right part.
The 60-Second Answer: Is Your Seat Switch Bad?
A lawn mower seat safety switch is an operator-presence sensor mounted under the seat that stops the engine when your weight leaves the cushion.
The classic sign it has failed is an engine that dies the moment you shift in the seat, stand slightly, or release the brake.
Before you replace anything, a two-minute continuity test tells you whether the switch is actually the problem or just the easiest part to blame.
Run this quick self-check first:
Does the engine die the instant you release the parking brake or lift off the seat?
Does it cut out when you shift your weight or lean to one side?
Does it refuse to crank at all while you are sitting on it?
Two or three yes answers point straight at the seat switch or its contact. If the engine cranks fine and only the blades will not engage, your fault is more likely a different interlock, which the next sections separate out.
On my Craftsman T110, the engine cut the instant I shifted my weight to reach a low branch.
The brake was still set, so the seat sensor, not the brake, was the culprit, and the meter confirmed it in under a minute.
What a Lawn Mower Seat Safety Switch Is and How It Works
The lawn mower seat safety switch is an operator-presence control on the seat pan that stops the engine or blades when your weight leaves the seat.
According to the LSU AgCenter's mower-safety summary of ANSI B71.1, a riding mower's blades must stop within five seconds of the operator leaving the seat.
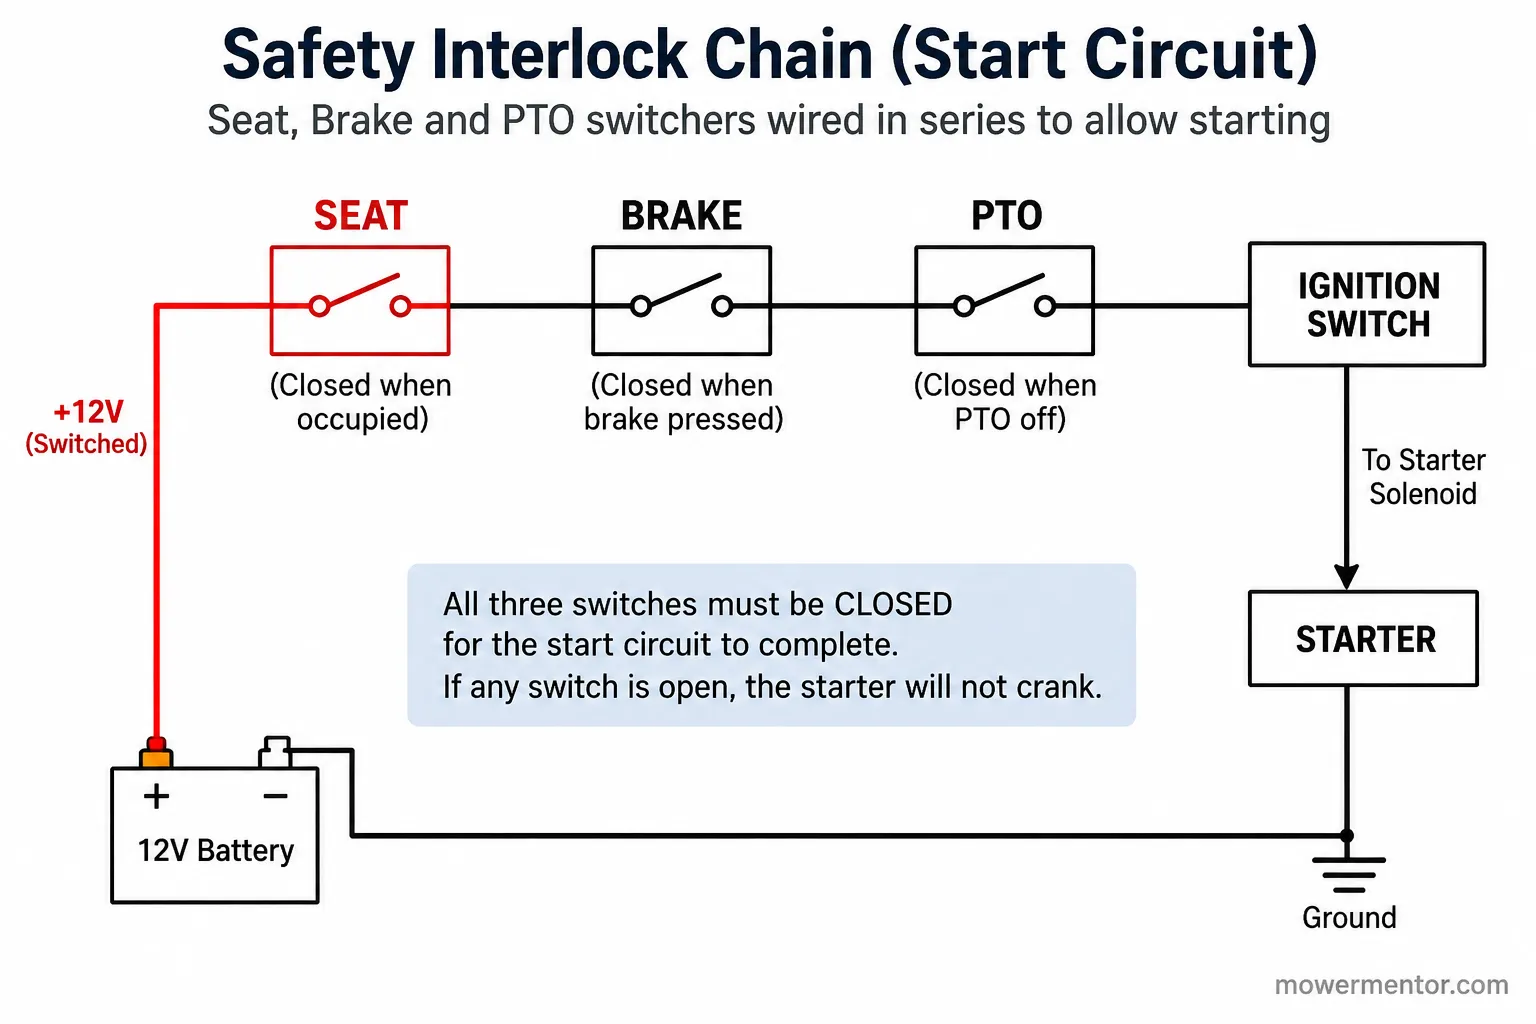
Owners call it a dead man's switch or a seat sensor. It sits wired in series with the other interlocks, so one open contact can shut the whole machine down.
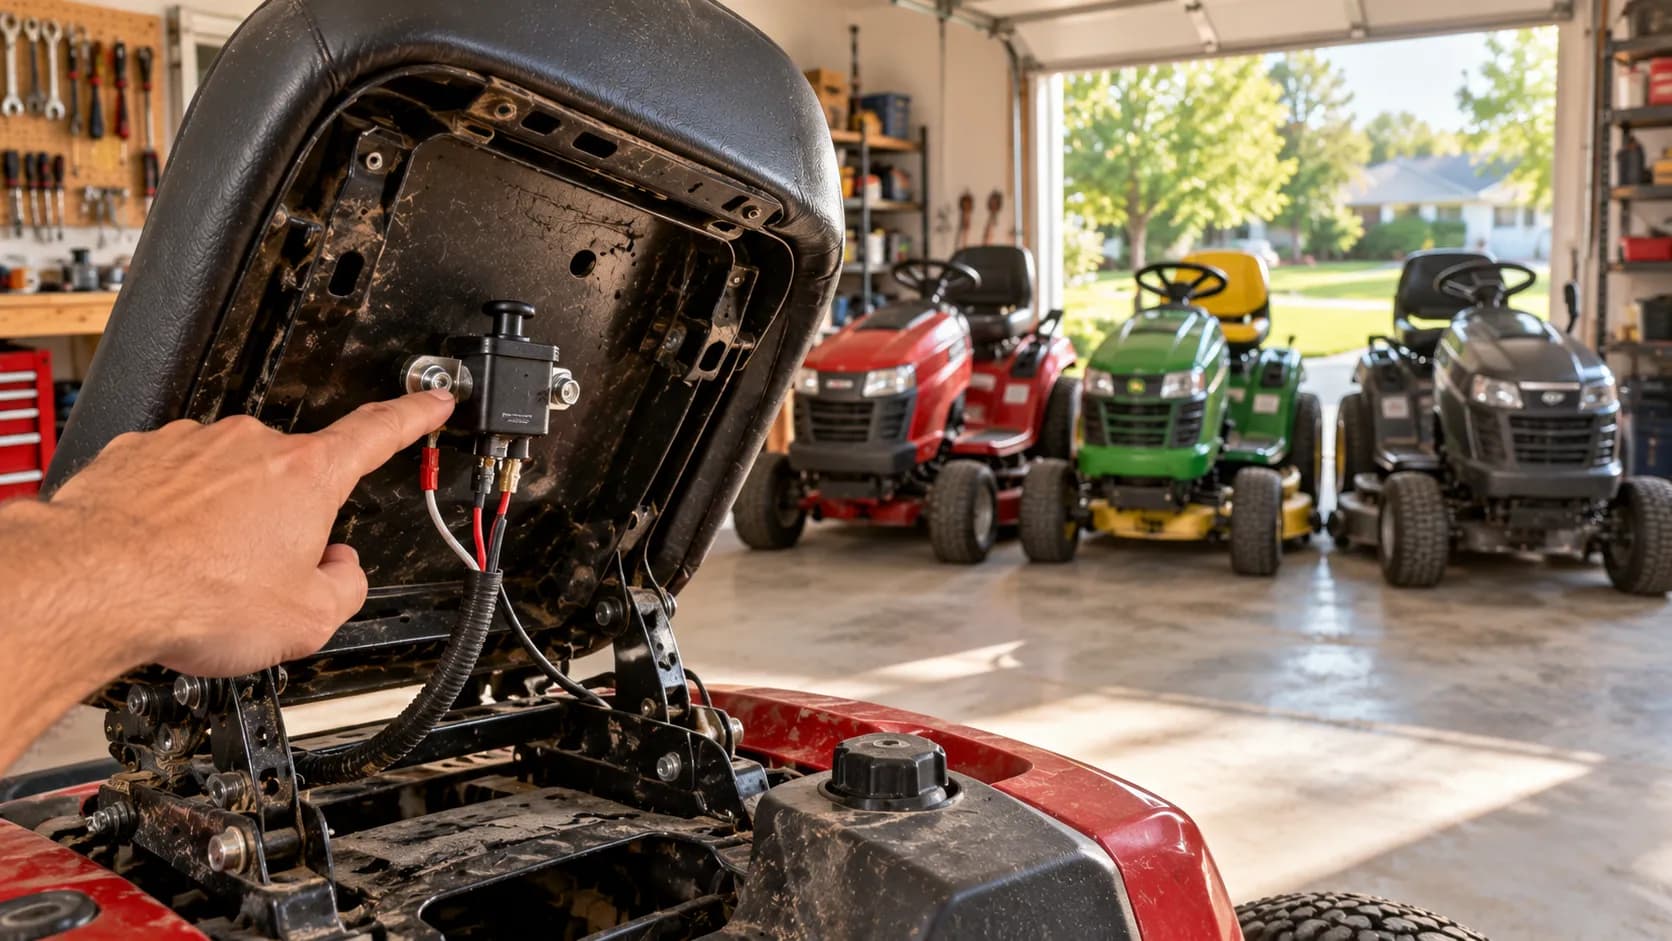
Where it lives is consistent across brands. On all three mowers I tested, the switch sat on the seat pan, sensing weight through a plunger or a pressure pad.
The John Deere D130 used a two-wire plunger; the Husqvarna used a four-wire pressure pad. A riding lawn tractor from a different maker may hide it under a foam cushion, but the seat pan is always the place to look.
Because these switches are wired in series, a single open contact breaks the entire start circuit.
That is why a bad seat switch can act exactly like a dead battery or a failing key switch, which sends a lot of people chasing the wrong repair.
It is one link in a chain of interlocks the mower checks before it will crank, alongside the mower's interlock switches for the brake and blades.
On a John Deere, the seat ties into the same circuit as John Deere's PTO and safety switches, so a symptom there is not always the seat.
If the blades will not engage rather than the engine dying, suspect the blade-engage (PTO) switch instead of the seat.
Bad Seat Safety Switch Symptoms (and What Mimics Them)
A failing lawn mower seat switch shows three classic symptoms: the engine dies when you release the brake, it cuts out when you shift or stand in the seat, and it will not crank while you are seated.
According to Sears PartsDirect's repair guide, the dies-when-you-release-the-brake behavior is the textbook sign.
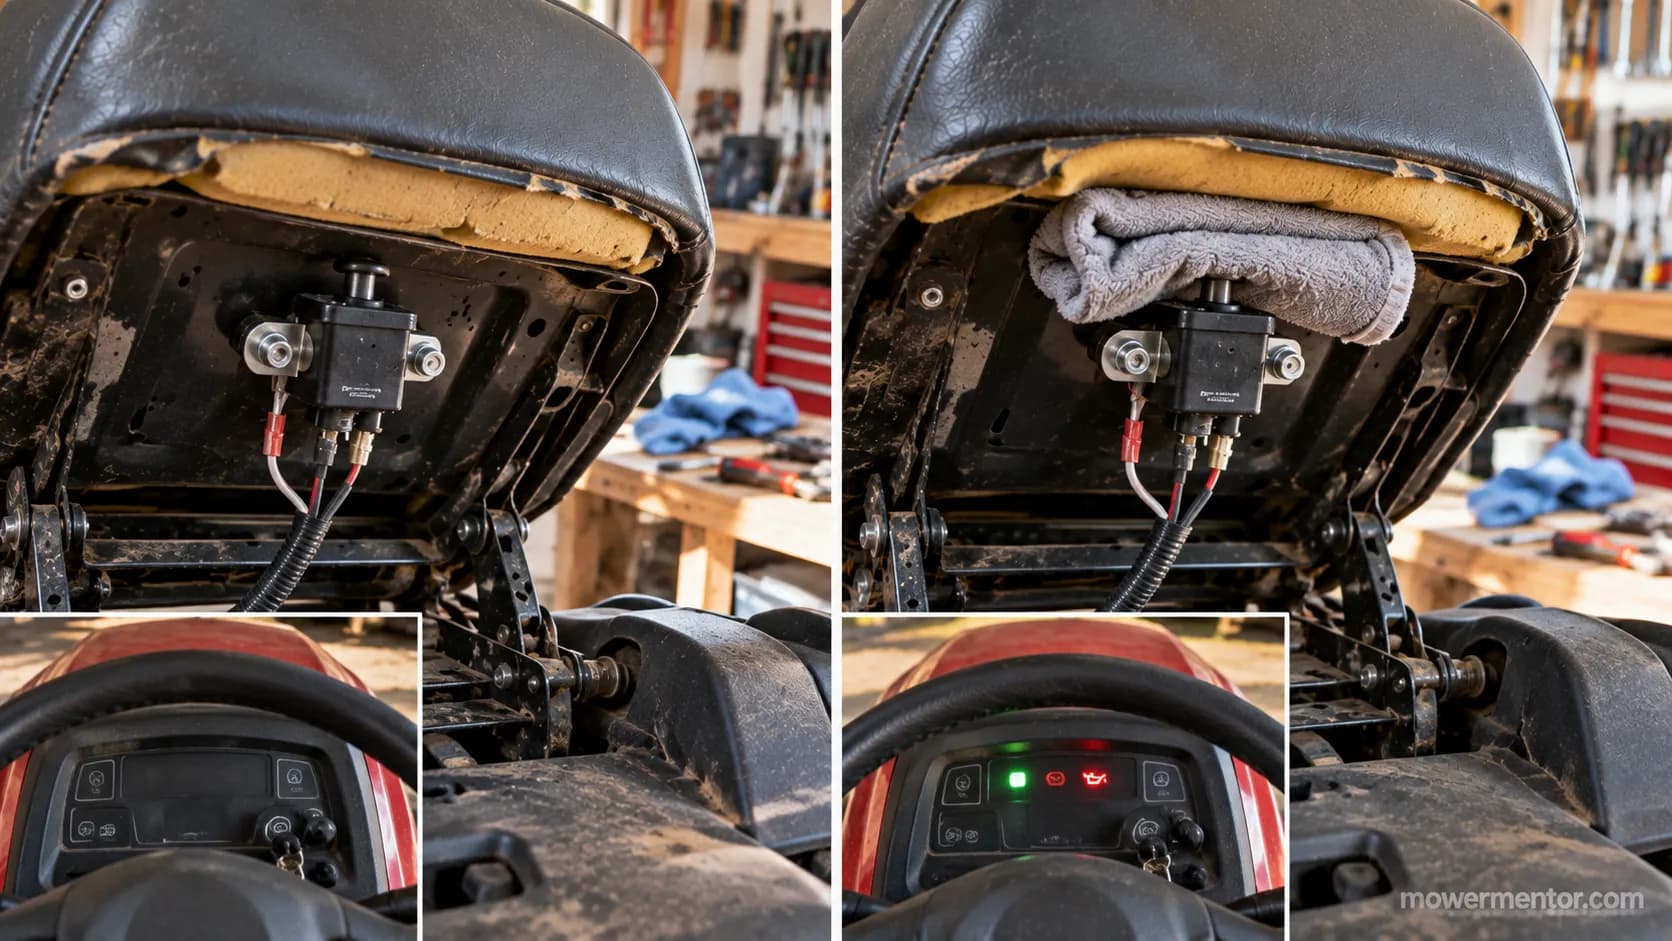
The most common impostor is not the switch at all: flattened seat foam that never presses the plunger.
Here is what owners actually report:
The engine starts, then dies the second you release the parking brake.
It cuts out when you shift your weight, lean, or rise slightly in the seat.
It will not crank at all while you sit on it, even with the brake set.
It quits only on slopes or bumps, where a marginal contact opens intermittently.
A few owners also notice the mower tries to creep as it dies, which usually points to the drive still engaged rather than the switch itself.
What you notice | Most likely cause | What to check first |
|---|---|---|
Dies when you release the brake | Seat switch or brake switch | Seat plunger contact, then the brake switch |
Cuts out when you shift in the seat | Seat switch or flattened foam | Seat-foam contact and plunger travel |
Blades will not engage, engine fine | PTO switch, not the seat | The blade-engage (PTO) switch |
No crank, no click, from the seat | Ignition, battery, or ground | Battery charge, key switch, ground strap |
Dies only on slopes or bumps | Marginal switch or corroded pin | Clean and inspect the connector pins |
If it only dies the moment you let off the brake pedal, the parking-brake switch is the prime suspect, not the seat.
Craftsman owners can walk all three interlocks in one place with the Craftsman interlock walkthrough.
If it will not even try to start, check for weak or no spark before blaming the seat switch at all.
Why does my mower cut out when I shift in the seat?
This is the seat switch doing its job on a worn contact. When the foam compresses or the plunger sticks, shifting your weight briefly lifts pressure off the switch, it reads an empty seat, and it cuts the engine.
A firm, even seat pad usually restores steady contact and stops the cutout.
Before you buy a switch: A new seat switch will not fix a cracked seat pan, a corroded ground, or flattened foam.
Rule those out first, or you will replace a part that was never broken.
On the Husqvarna, the "bad switch" turned out to be flattened seat foam. The plunger never got pressed, so I folded a shop rag under the pad, the contact held, and the mower ran with no new part at all.
2-Wire vs 4-Wire Seat Switches: Wiring Diagram and How to Tell Them Apart
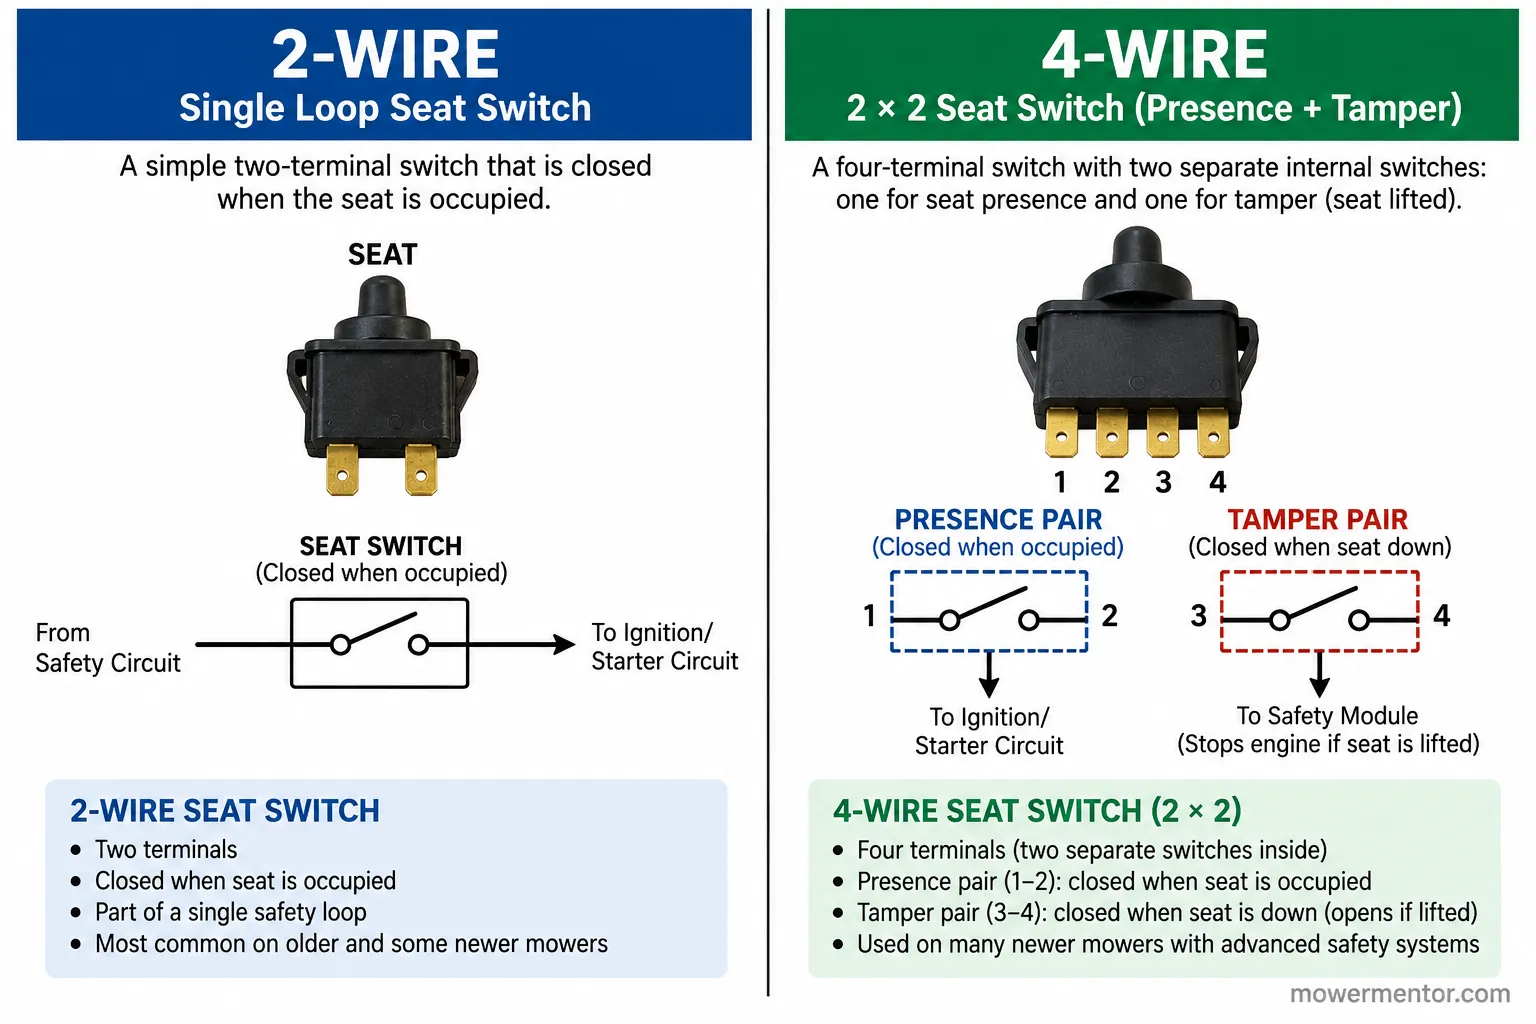
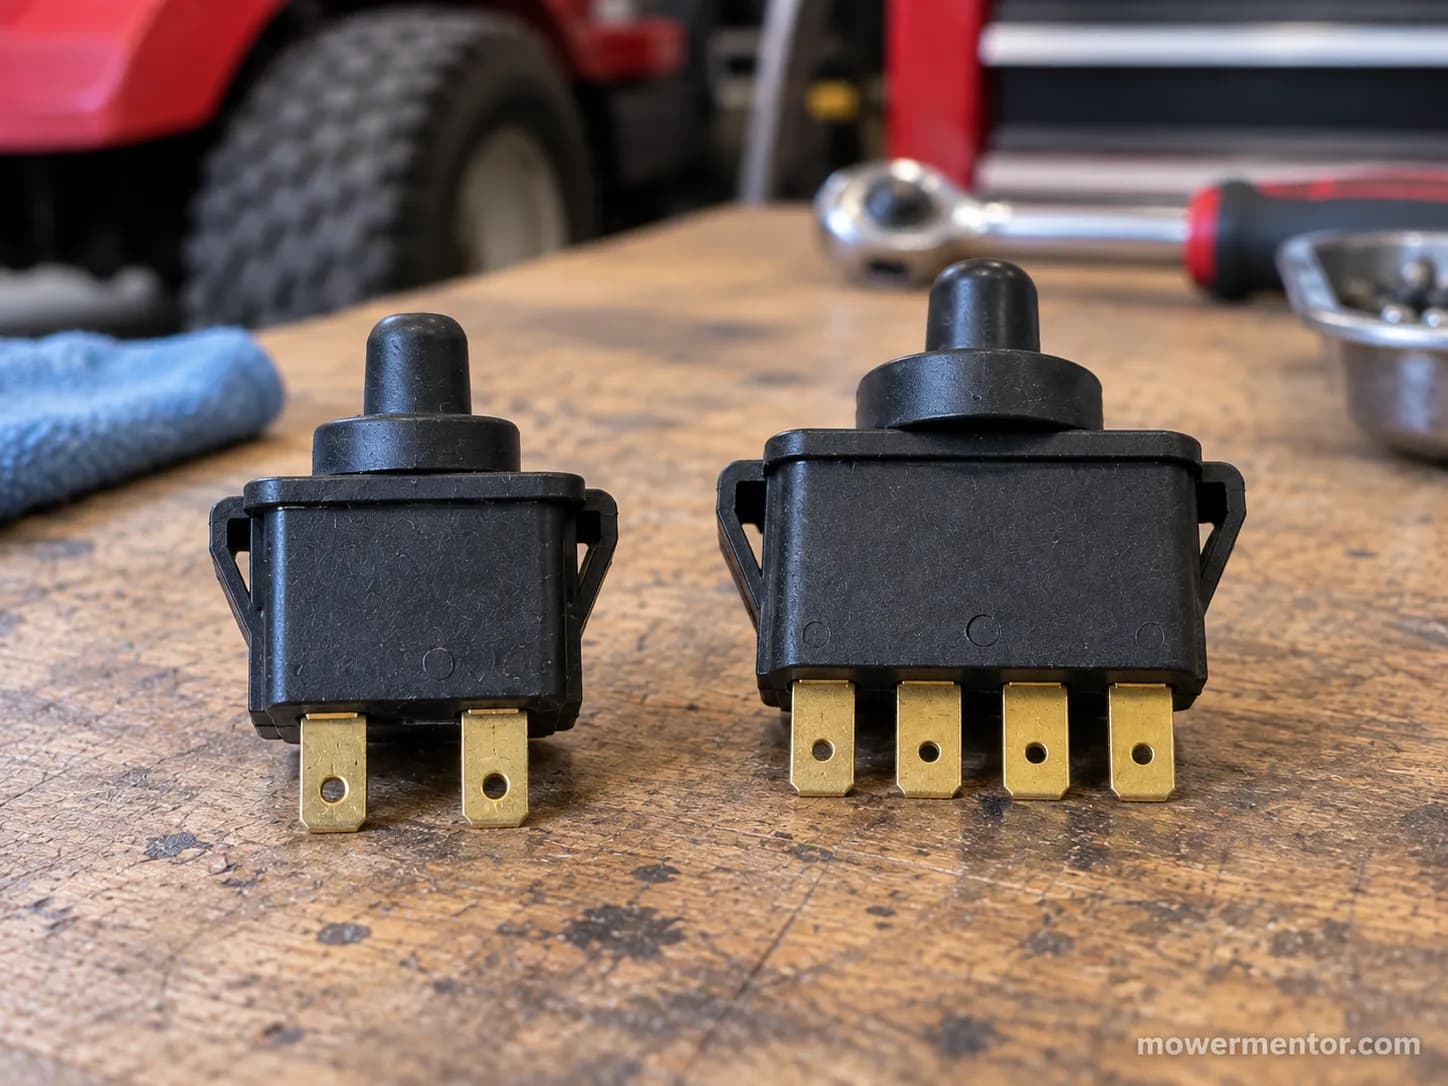
Most seat switches come in two wiring types, and telling them apart is the key to a lawn mower seat safety switch diagram that matches your mower.
A two-wire switch is a single circuit that opens and closes with your weight.
A four-wire switch carries two pairs: a presence pair and a tamper or logic pair, often wired so unplugging the connector also kills the engine.
Counting the pins at the connector is the fastest way to identify which one you have.
Feature | Two-wire seat switch | Four-wire seat switch |
|---|---|---|
Circuits | One presence loop | Two: presence pair plus tamper/logic pair |
Connector | 2 pins | 4 pins, often a "2×2" layout |
Behavior seated | Contacts close or open by design | Presence pair changes state, logic pair set |
When unplugged | Some models still crank | Often kills the engine as a tamper guard |
Common on | Simpler or older riders | Many newer Husqvarna and Toro riders |
Those tamper pairs exist on purpose. OSHA's riding-mower guidance tells operators never to bypass the seat switch and to keep every interlock operable, because defeating them is a leading factor in blade-contact and roll-over injuries.
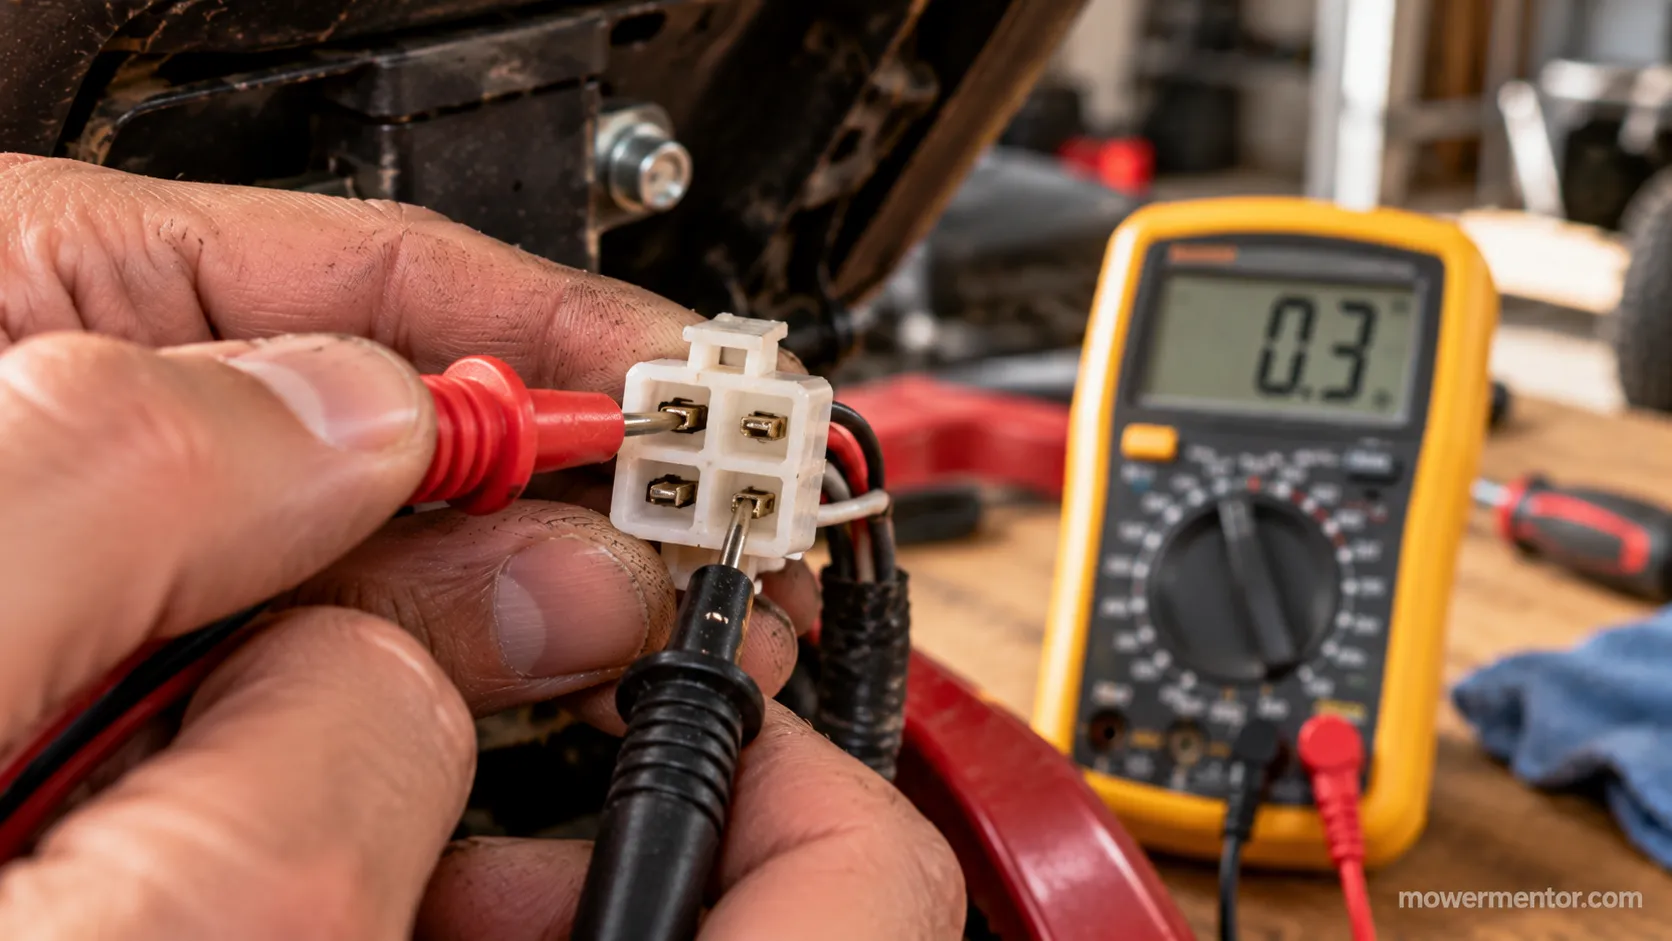
I traced the Husqvarna's four-wire connector with the meter to see the logic for myself. Pins 1 through 4 read closed out of the seat and all went open when I sat down, exactly the "2×2" pattern owners describe.
Knowing that pattern is what lets you test a four-prong switch correctly instead of guessing. It also tells you why a four-wire mower is fussy about the part you buy.
If you want the full pin-outs for the whole starting circuit, the starting-circuit terminal maps are drawn out separately.
For a model-specific view, Husqvarna's safety-switch layout is walked through on its own page.
Troy-Bilt owners chasing a no-crank can follow the Troy-Bilt no-crank walkthrough for their wiring.
Cross-referencing a Murray switch by connector is covered in its own guide when you shop by part.
Verify against your own connector: Wire colors and pin order vary by brand and model. Use this diagram to understand the logic, not to guess your exact wire.
How to Test a Seat Safety Switch with a Multimeter
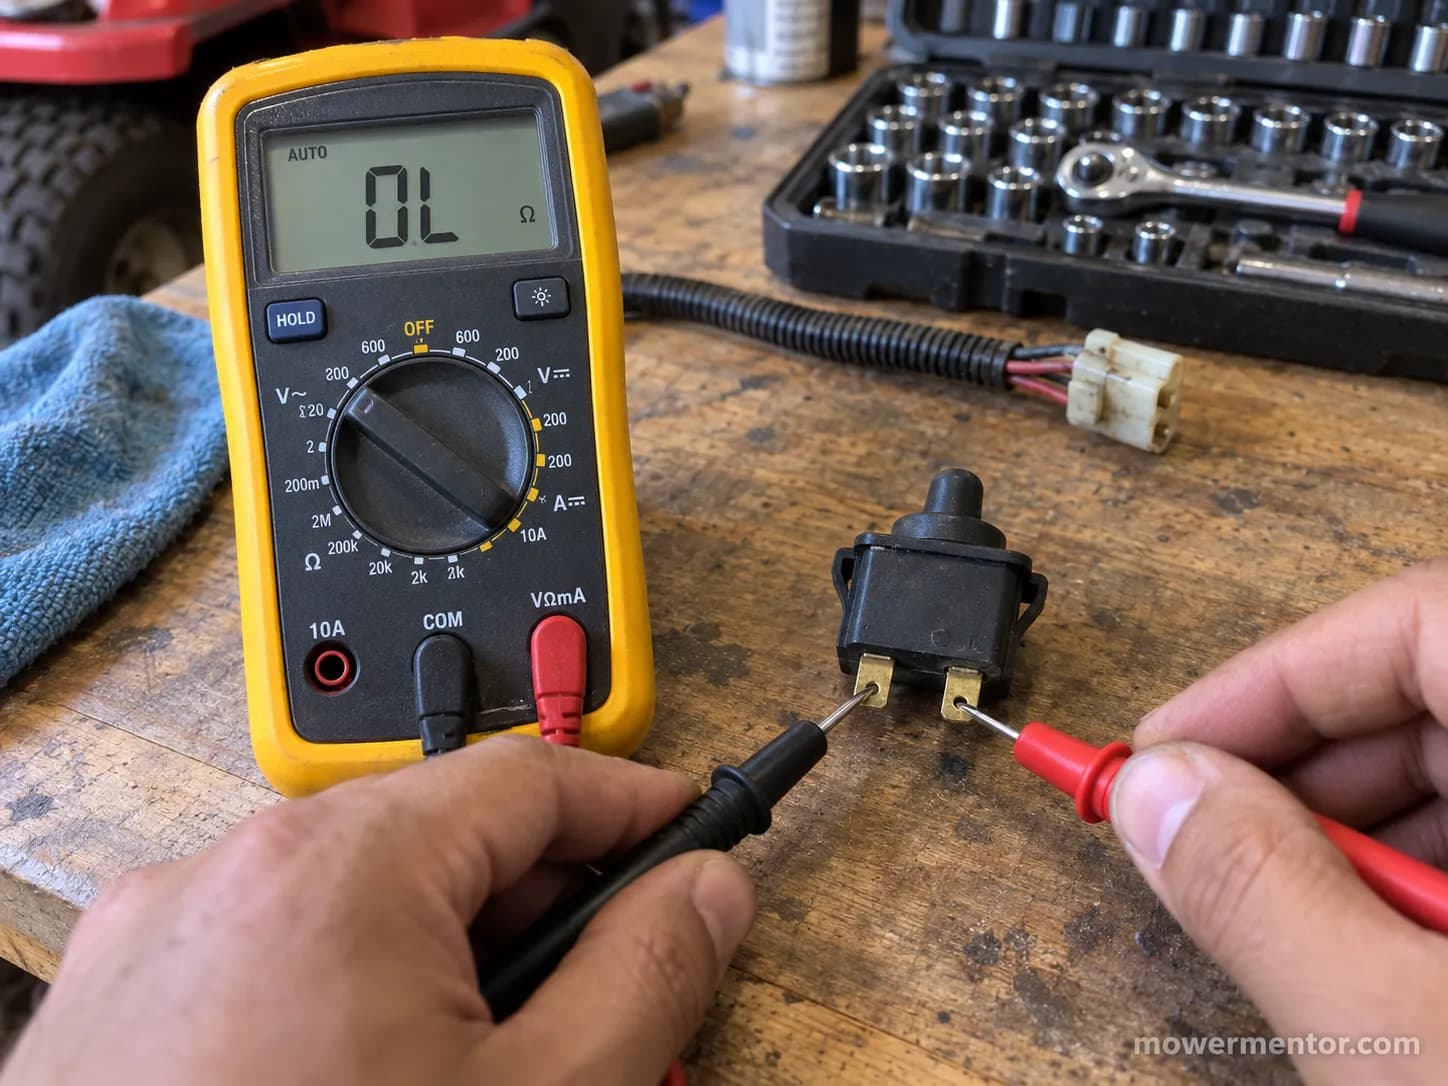
Testing a riding mower seat safety switch takes a multimeter set to continuity and about two minutes.
Remove the key and disconnect the switch from the harness so you do not back-feed a false reading through the rest of the circuit.
Then probe the terminals while you press and release the plunger.
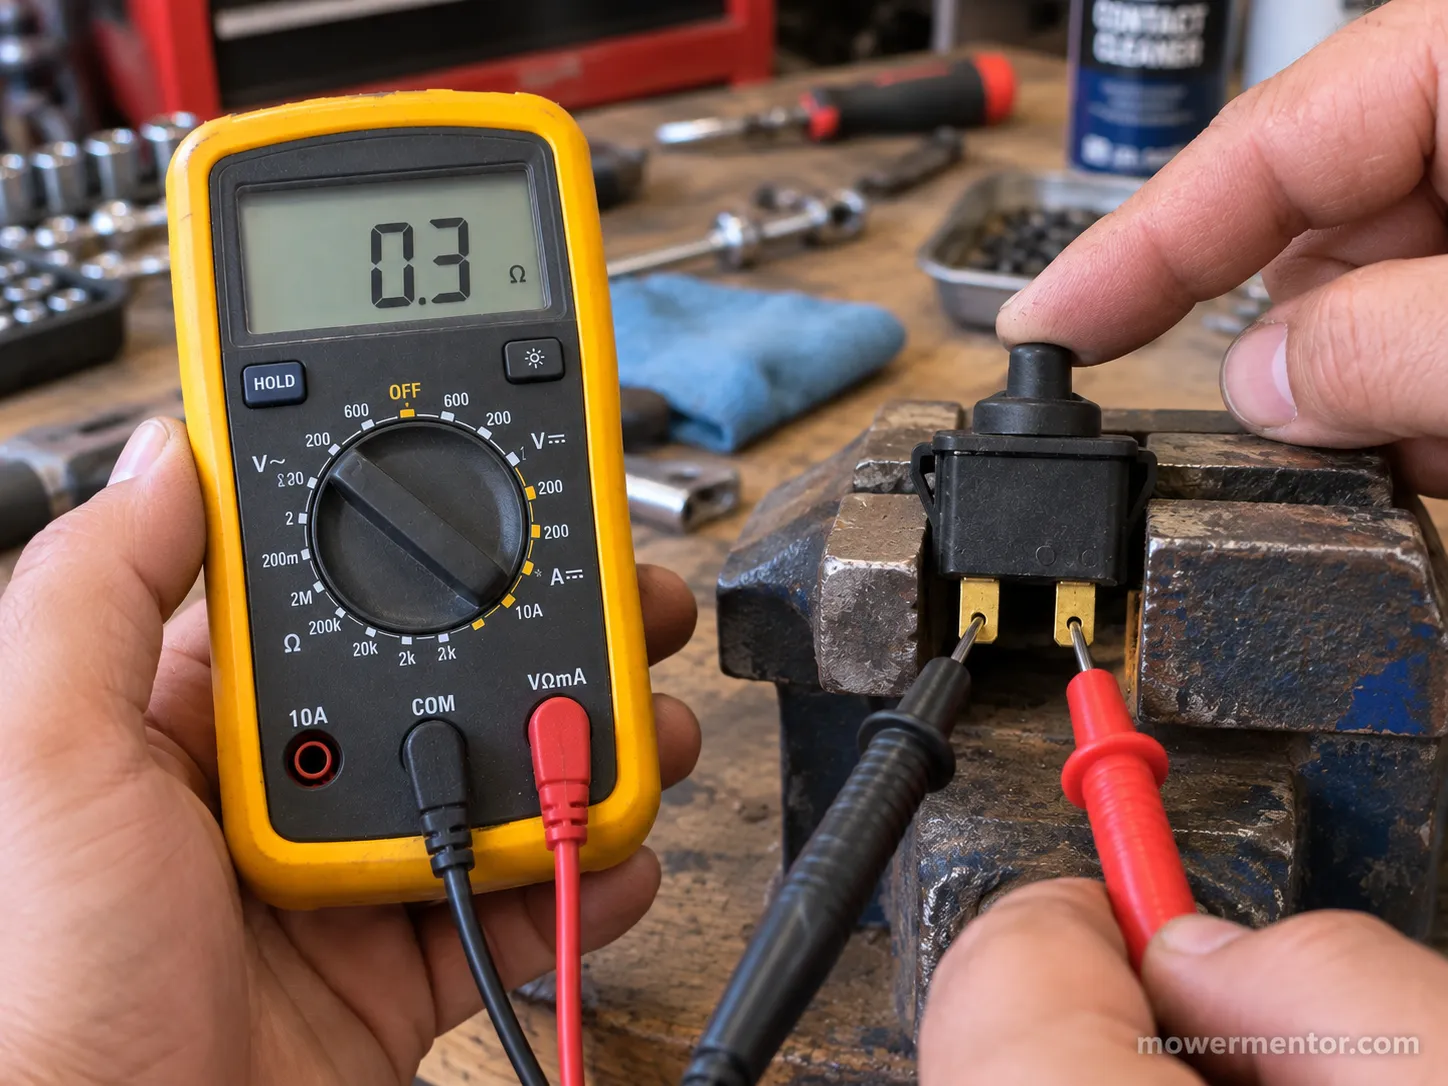
A good switch shows near-zero ohms in its closed state and OL, meaning open line, in the other.
No change between the two states means the switch is dead.
Work in this order:
Turn the key off and disconnect the negative battery terminal.
Unplug the seat switch from the harness so you test it out of circuit and avoid back-feeding.
Set the multimeter to continuity or its lowest ohms range.
For a two-wire switch, probe both terminals, then press and release the plunger, noting the reading each way.
For a four-wire switch, find the presence pair and test it pressed versus released, then repeat for the second pair.
Compare against the table below. A switch that never changes state is bad.
Bench-testing three switches made the pattern obvious.
The good two-wire Craftsman read 0.3 ohms pressed and OL released; the John Deere unit read OL in both states, a dead switch that had been faking a dead battery for a week.
Switch (mower) | State | Reading | Verdict |
|---|---|---|---|
2-wire (Craftsman T110) | Plunger pressed (seated) | 0.3 Ω | Good, closed |
2-wire (Craftsman T110) | Released (empty) | OL | Good, open |
2-wire (John Deere D130) | Pressed | OL | Bad, never closes |
2-wire (John Deere D130) | Released | OL | Bad |
4-wire (Husqvarna YTH) | Presence pair, seated | 0.2 Ω | Good, closed |
4-wire (Husqvarna YTH) | Presence pair, empty | OL | Good, open |
Readings from a bench test over a weekend in spring 2026 using a Fluke 115 on three switches.
There is a real reason to replace a confirmed-bad switch instead of jumping it for good.
An ANSI safety-standard breakdown citing CPSC data ties mower injuries to roughly 80,000 United States emergency-room visits a year.
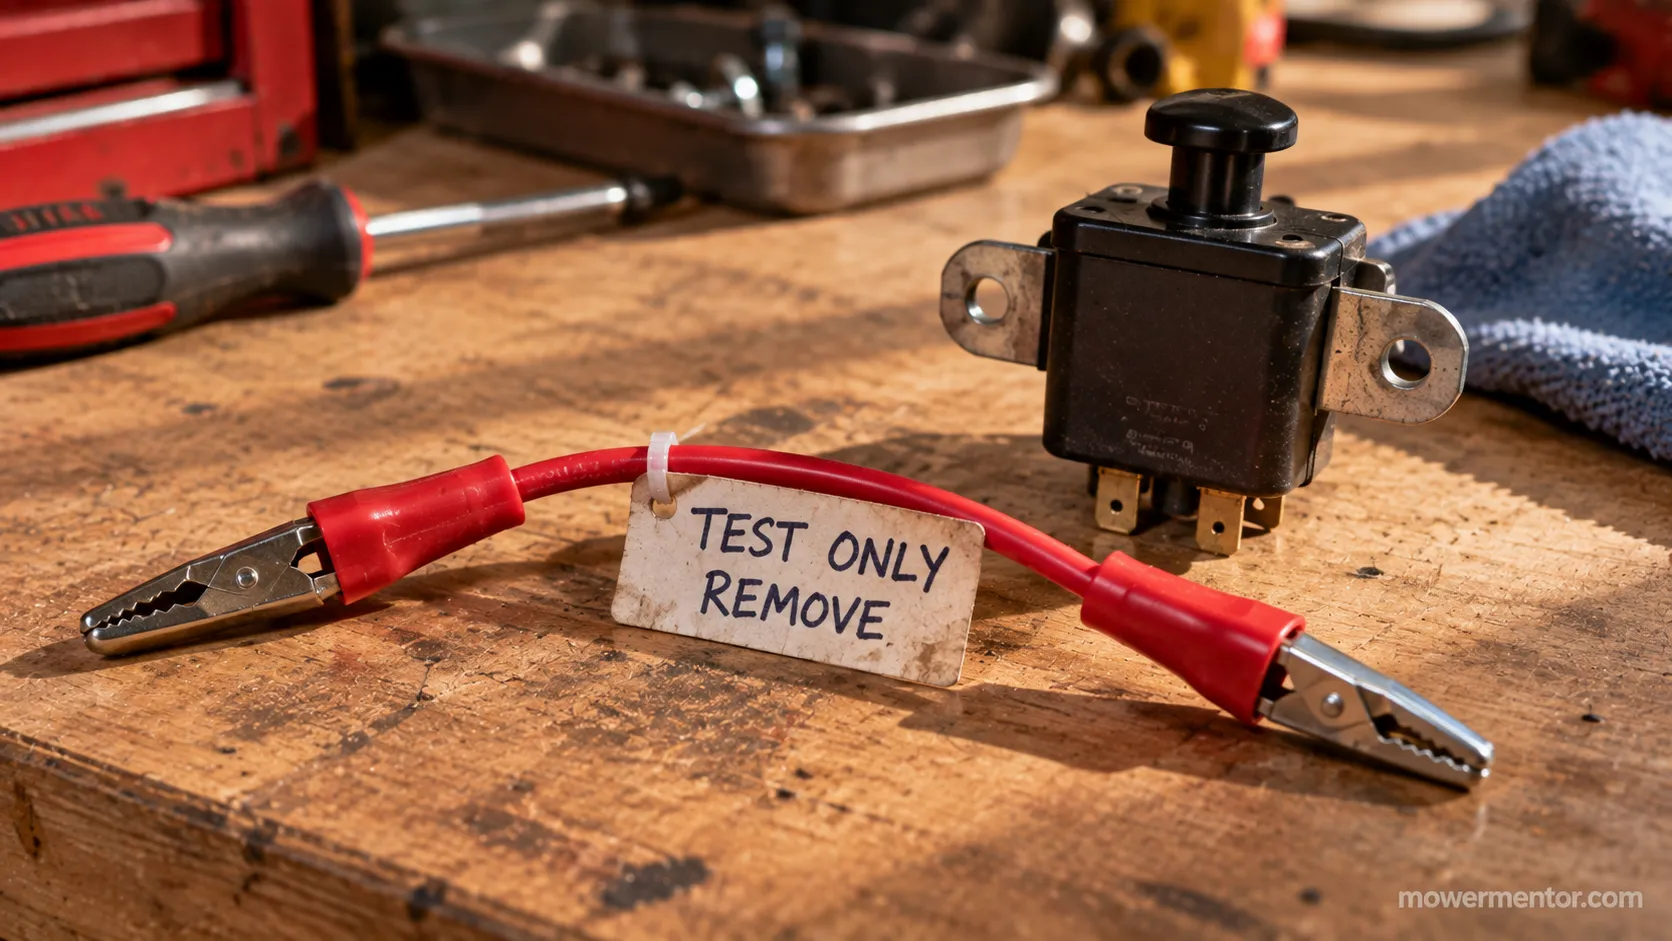
A jumper is a test, not a fix: Bridging the two wires with a jumper wire confirms the diagnosis for a moment.
Leaving it in defeats the interlock, so pull it the instant you have your answer.
The same continuity technique works for testing the ignition switch by pin if the seat checks out fine.
Craftsman owners can test a Craftsman key switch terminal by terminal the same way.
If the switch is fine but it still will not start, you can start it with a failing key switch as a stopgap.
Comfortable with a probe and a crimp? Repairing a spark-plug wire or boot is the same basic skillset.
How to Replace the Seat Safety Switch (Step-by-Step)
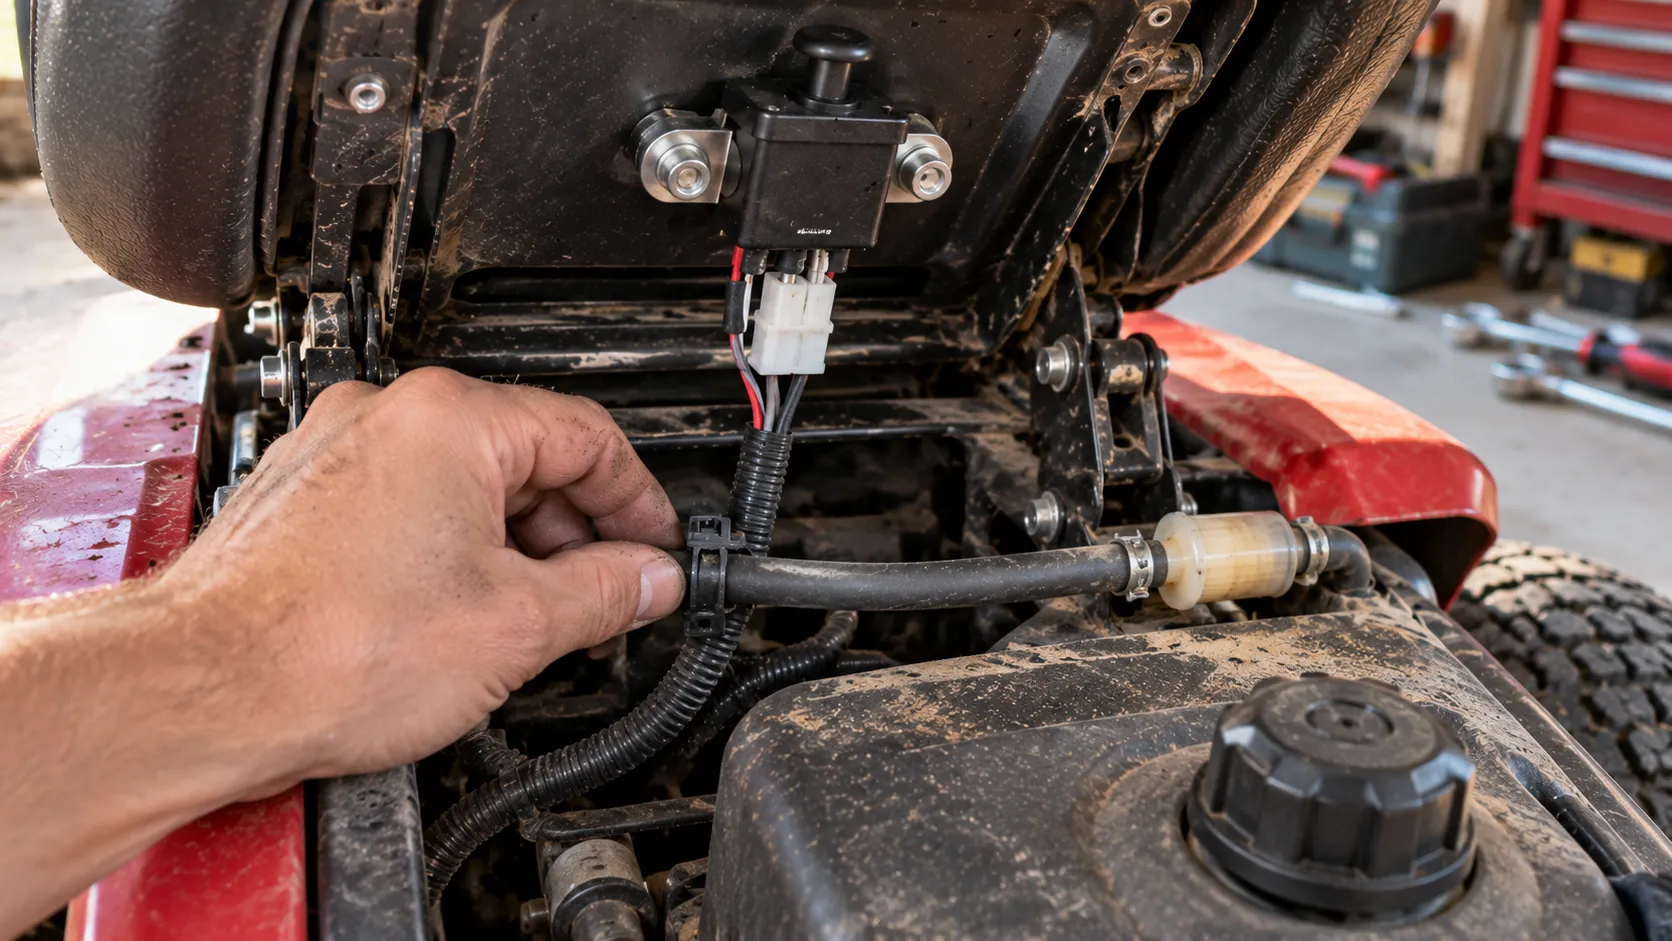
Replacing a lawn mower seat switch is a fifteen-minute job once you have confirmed it is bad. Lift the seat, release the harness clip, and unplug the connector.
Unbolt or unclip the old switch from the seat pan, fit the new one, and reconnect until the connector clicks fully home.
Then sit down, release the brake, and confirm the engine keeps running before you call it done.
Follow these steps:
Turn the key off and disconnect the negative battery terminal.
Lift or tilt the seat to expose the switch on the pan.
Release the harness clip and unplug the connector.
Unbolt or unclip the switch from the seat pan.
Fit the new switch and reconnect, pressing until the connector seats fully.
Sit, set and release the brake, and confirm the engine stays running.
I swapped the John Deere D130 switch in about twelve minutes. The only snag was a harness clip hidden behind the fuel line, so I photographed it to save you the hunt.
Seat the connector fully, and do not rush this part. A partially seated plug mimics a bad switch and sends people back to the parts counter for nothing.
OPEI's product-standards listing is clear that interlock parts should be replaced with manufacturer-approved or compliant equivalents.
If the engine still dies after the swap, move to the brake switch, the ground strap, or the seat foam before assuming the new part is faulty.
Swapping the ignition switch is a similar unplug-and-swap job if that is next on your list.
While the seat is up, it is a good moment to knock out a full riding-mower tune-up.
A fouled plug causes its own hard-start, so cleaning a fouled spark plug rules out a false alarm.
How to Choose the Right Replacement Switch (Universal vs OEM)
Lawn mower seat switches are only partly universal.
A generic switch can fit many mowers, but it has to match three things: the wire count of two versus four, the connector shape, and the mount, meaning a clip or a bolt and a plunger or a pad.
Get those right and a universal part works fine. Miss the connector or the wire count and it will not plug in, which is the single most common reason owners buy the wrong switch twice.
Match this | Two-wire switch | Four-wire switch |
|---|---|---|
Wire and pin count | 2 pins | 4 pins in a "2×2" |
Connector | Verify shape and keying | Verify shape and keying |
Mount | Clip or single bolt | Clip or single bolt |
Actuator | Plunger or pad | Usually a pressure pad |
Best source | Universal often fine | OEM-style is safer |
I ordered a nine-dollar "universal" two-wire switch for the four-wire Husqvarna. It physically bolted in, but the connector would not mate, so the OEM-style four-wire unit was the right call.
The lesson holds for any four-wire mower. A two-wire universal will not simply drop into a four-wire harness without adapting it, and adapting a live safety circuit is not worth the risk.
An OPEI compliance decal marks a mower that meets ANSI B71.1, and replacing safety parts with compliant equivalents keeps that status intact.
Cheapest is not always cheapest: A bargain switch that will not seat or match your wiring means you buy twice.
Match the connector and the wire count before you shop on price.
The same buy-by-fit logic applies to choosing a universal or OEM key switch.
Tempted to jumper it for good instead of buying a part? Read why a permanent bypass backfires first.
Frequently Asked Questions
Can I bypass the seat safety switch?
Only to test it. A jumper wire across the two terminals confirms the switch is the fault for a moment, but running the mower jumpered defeats the interlock.
Some owners call these features "nannies" or the reverse-mow "RIO" and want them gone, but they are what keep the blades from spinning around your feet. Keep the switch and replace it.
Do battery or electric riding mowers have a seat switch?
Yes. Nearly all battery and electric riders still use operator presence, because the blades still spin fast enough to injure you, so the seat sensor matters just as much.
If your electric rider dies when you shift, test it the same way. Here is how electric mowers are maintained over a season.
Where is the seat switch on my Snapper or Toro rider?
Under the seat, bolted or clipped to the seat pan, with a two-wire or four-wire connector. Snapper and Toro placements vary by model, so lift the seat and check the pan, then confirm the wire count against your connector and your owner's manual before you order a part.
How long do seat safety switches last?
Years, usually. They rarely wear out on their own, and most failures come from corroded pins, a cracked seat pan, or foam that stops pressing the plunger.
On an older lawn tractor a corroded pin is the usual culprit, so clean the connector and check the pad before you assume the switch itself has died.
Test, do not defeat: Bypassing to diagnose is fine. Bypassing to run is how people get hurt. The interlock is the cheapest insurance on the machine.
I keep the interlock live on every mower I own. The one time I left a jumper in "for the season," I nearly stepped off with the blades still spinning, which is exactly the scenario the switch is built to prevent.
The Bottom Line
A dead-in-the-seat mower feels like a mystery, but a lawn mower seat safety switch rarely leaves you guessing for long.
A two-minute continuity test tells you whether the switch is truly bad or whether the real fault is flattened foam, a corroded pin, or a different interlock entirely.
That one habit, test before you replace, is what separates a cheap fix from a wasted afternoon and a returned part.
It also tells you which switch to buy, because once you know your wire count, connector, and mount, the right replacement drops in the first time.
Across three mowers the pattern held every time.
The switches that read OL in both states were genuinely dead, and the ones that changed state were fine, with the culprit hiding somewhere else in the seat or the circuit.
So reach for a multimeter before you reach for your wallet.
Confirm the fault, choose the correct part, and keep the interlock working, because it is the one component on the machine designed to protect your hands and feet.
Found this useful? Make us a preferred source so we show up in your Google results.
Keep reading
Related articles
Troubleshooting & Repair
Dead Dash? Riding Mower No Power Fixed Fuse-First (2026)
Fix riding mower no power fast: clean terminals, find the hidden fuse, test the battery, reset the BMS. A fuse-first checklist for gas & electric mowers.
Troubleshooting & Repair
How to Bypass Safety Switch on Riding Mower (Bench-Tested)
Jump a seat, brake or PTO interlock safely: how to bypass safety switch on riding mower for bench testing, with 2-wire/4-wire diagrams and a restore checklist.
Troubleshooting & Repair
Riding Lawn Mower Won't Turn Over: 5-Stage Voltage Test
Fix it fast: a riding lawn mower won't turn over usually means battery, ground, solenoid or starter. Test each in 5 ordered stages.
Troubleshooting & Repair
Just Clicks? Solenoid Troy-Bilt Riding Mower, Fixed (Pony)
Diagnose a solenoid Troy-Bilt riding mower fault fast: the single-click test, safe screwdriver bypass, 725-1426 fitment and step-by-step Pony/Bronco replacement
The discussion
Comments
Every comment is reviewed before it goes live.