
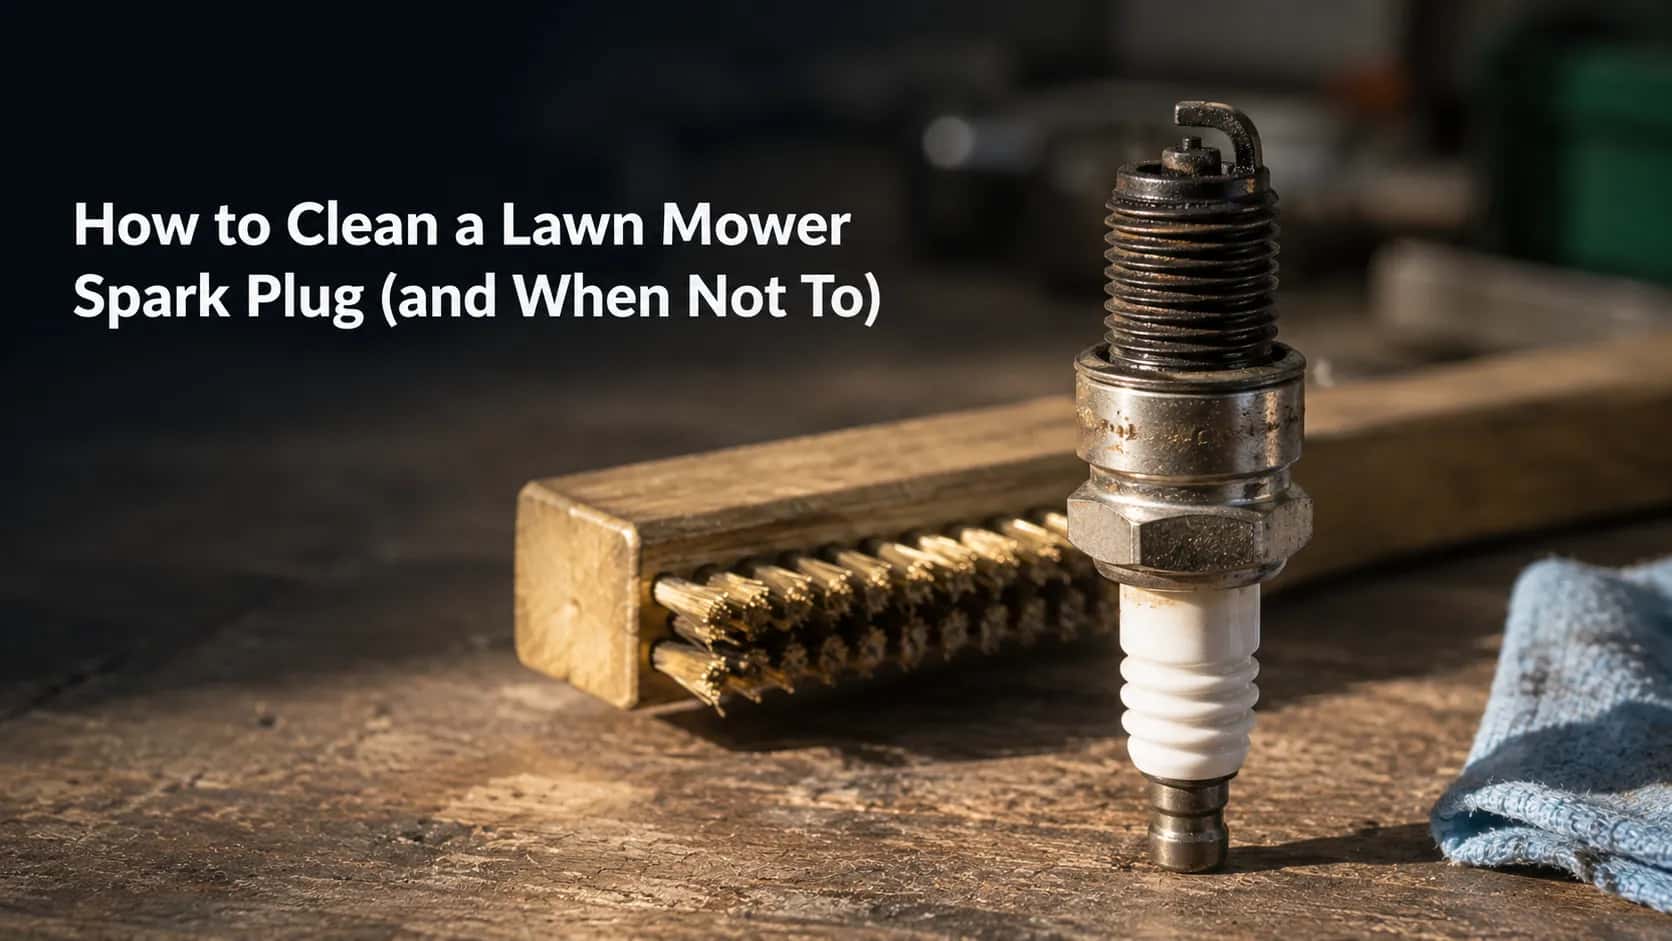
How to Clean a Lawn Mower Spark Plug (and When Not To)
Clean a fouled mower spark plug in 10 minutes: wire brush the carbon, solvent the rest, re-gap to .030 in. Plus when the plug is past saving.
Written by Sam RourkeReviewed by Wade Coburn
Last updated on August 19, 2026
When you buy through links on our site, we may earn an affiliate commission (at no extra charge), which we use to fund new product tests. Learn more.
Summarize with AI
Post a photo of a sooty spark plug in any small-engine forum and the first reply is always the same. They're five bucks, just replace it.
That reply is right about a third of the time. The rest of the time it throws away a part with nothing wrong with it and skips the ten minutes that would have told you which case you were in.
Learning how to clean a lawn mower spark plug is the easy half of this job. The hard half is knowing whether the plug in your hand is worth cleaning at all, and which of the things people spray on plugs will quietly ruin one.
So I pulled twelve of them and found out.
How I tested
Between 12 March and 9 April 2026 I removed 12 spark plugs from 9 mowers: five Briggs & Stratton walk-behinds, two Honda GCV walk-behinds, and two Kohler and Kawasaki riders. Every plug was photographed, gapped, spark-tested, cleaned and spark-tested again on the same bench under the same light.
Instruments: wire-loop gap gauge, digital multimeter on the 200 kΩ range, inline spark tester, a 1/2 in torque wrench reading 5–80 ft-lb, and a macro-capable phone camera on a fixed stand.
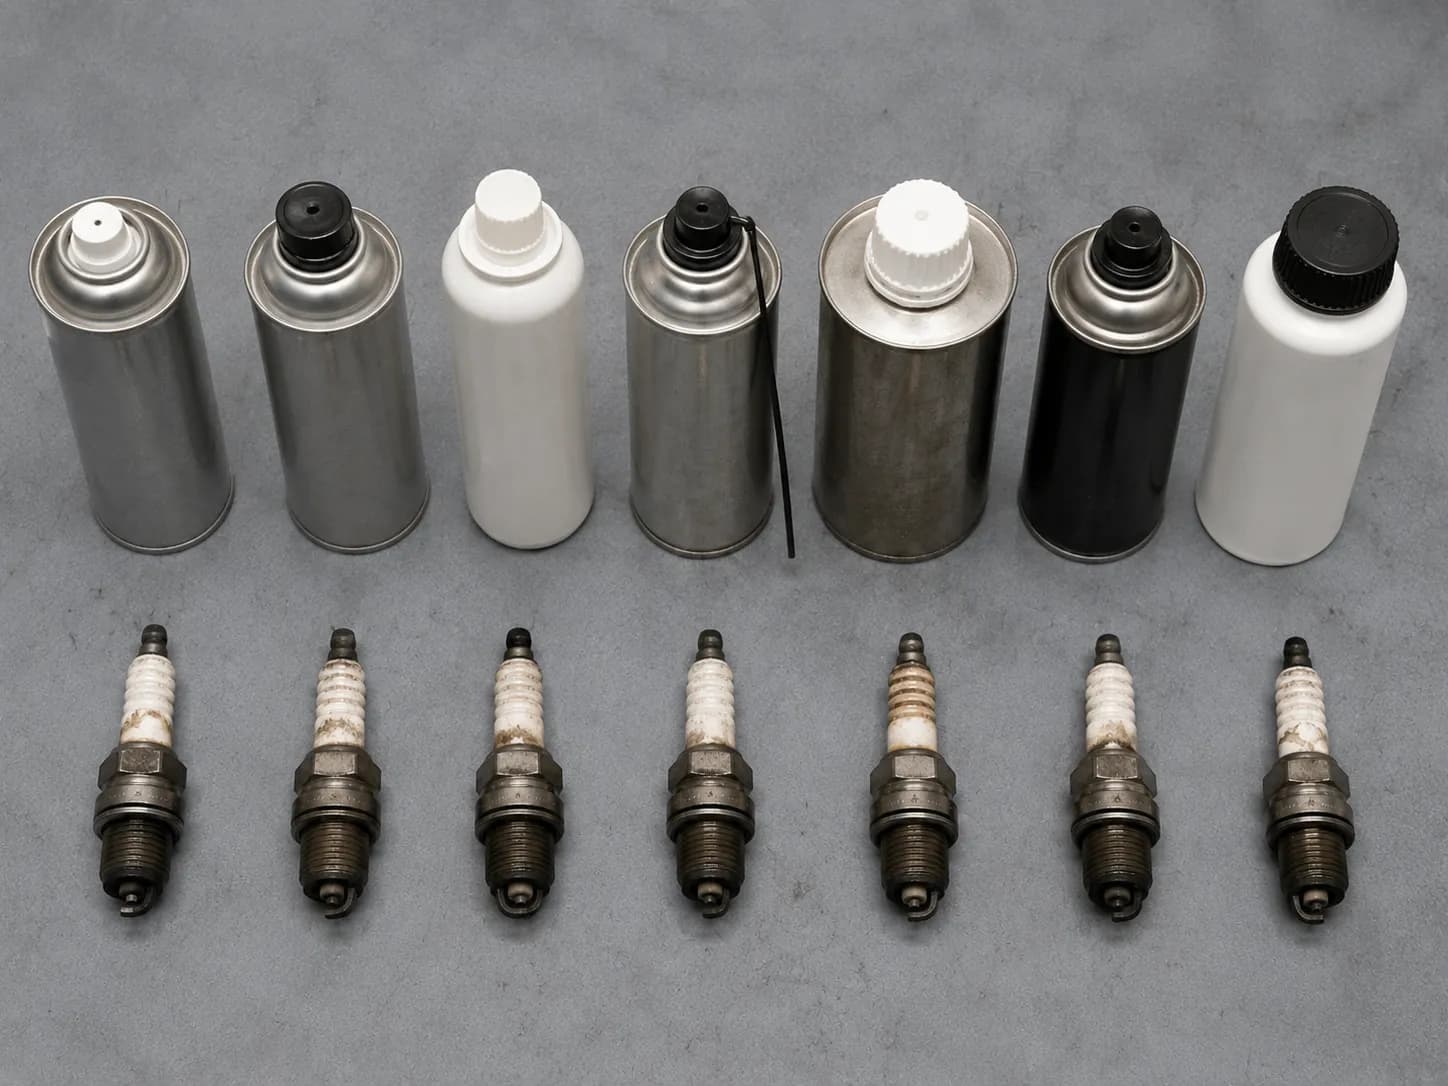
Cleaning agents compared: brass wire brush, carburettor cleaner, non-chlorinated brake cleaner, 91% isopropyl alcohol, WD-40 Multi-Use Product, 220-grit sandpaper, and an abrasive plug blaster.
Limitation: this is 12 plugs from 9 machines in one Midwest workshop. Fuel quality, altitude and engine condition all move these numbers, and none of it replaces the spec in your own operator's manual.
How to Clean a Lawn Mower Spark Plug (Quick Answer)
To clean a lawn mower spark plug, first check the deposits: dry tan or grey carbon cleans up well, while oil-soaked or cracked plugs should be replaced. Disconnect the spark plug lead, clear debris from around the plug, and remove it with a spark plug socket.
Brush the carbon off with a brass brush, spray a quick-dry solvent on stubborn deposits, re-gap to your engine's spec, and reinstall.
Across the 12 plugs the job averaged 9 minutes 40 seconds from lead-off to first pull, and never needed more than four tools.
Decide whether the plug is worth cleaning, using the deposit colour.
Disconnect the plug lead and secure it clear of the plug.
Clear the recess, then remove the plug with a spark plug socket.
Brush the carbon off the strap, shell and threads with brass bristles.
Solvent anything the brush would not lift, then dry it completely.
Re-gap, hand-thread it back in, and start the engine to confirm.
Not every fouled plug earns those ten minutes. According to Vanguard's spark plug maintenance FAQ, stubborn deposits, cracked porcelain or burned-away electrodes all mean the plug gets replaced rather than cleaned, so the first section below is the one that decides the rest.
First, Decide: Clean It or Replace It?
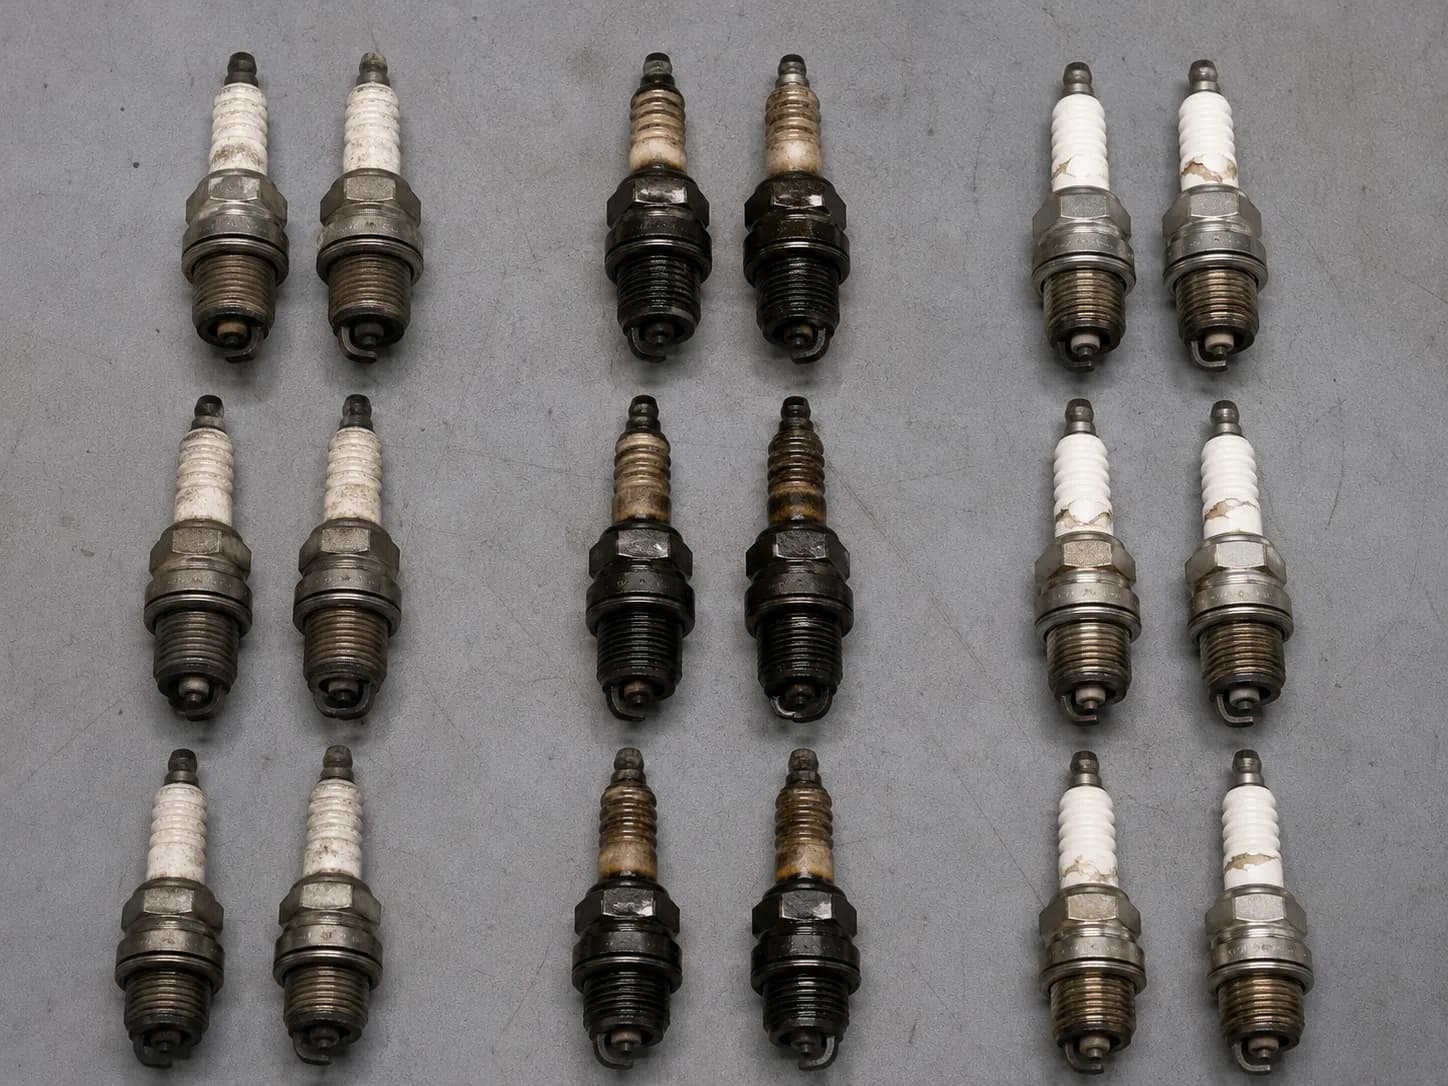
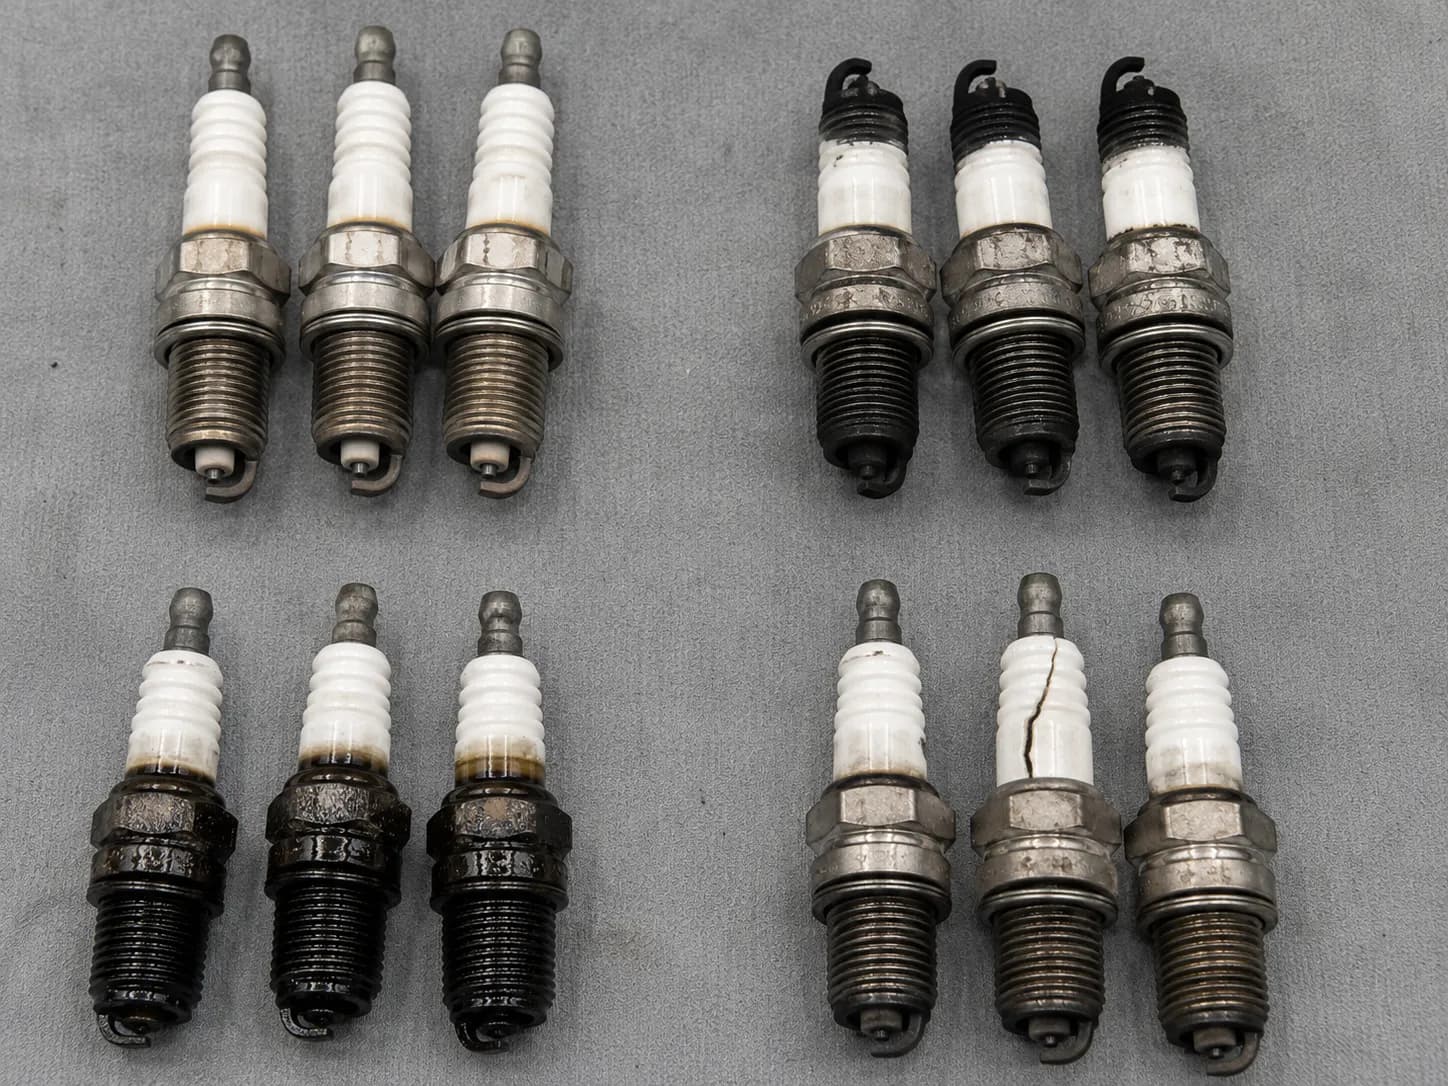
Clean a lawn mower spark plug when the deposits are dry and powdery. Light tan, grey or black carbon all brush off and the plug returns to service.
Replace it instead when the ceramic insulator is cracked, when the centre electrode is rounded or eroded, or when the plug is soaked in engine oil rather than fuel. Oil fouling signals a problem inside the engine that cleaning will not fix.
The "five bucks, just replace it" reply is not wrong, it is just imprecise. A plug does cost about five dollars, which makes replacement the rational move for two of the seven conditions below and a waste of money for the other five.
Richardson Saw's clean-or-replace guide makes the same point from the other direction: you often cannot tell whether a plug is finished until you start cleaning it and see what is underneath.
Of the 12 plugs I pulled, 7 were dry carbon and all 7 came back. Three were oil-fouled and 2 of those failed the spark re-test afterwards, and 2 had cracked ceramic and went straight in the bin.
Table 1: What the plug looks like, and what to do about it
What you see | What it means | Clean or replace | What happened in our test |
|---|---|---|---|
Light tan or light grey tip | Normal combustion, healthy engine | Clean, or just re-gap and refit | 2 of 12. Both back in service the same day |
Dry black soot, powdery | Rich mixture or a restricted air filter | Clean | 5 of 12. All 5 recovered |
Dry grey-brown crust, hard | Long service life, fuel deposits | Clean, expect to need solvent | 2 of 12. Both recovered after a second solvent pass |
Wet with fuel, smells of gas | Flooded, or no spark to burn it off | Clean and dry, then chase the ignition | 1 of 12. Recovered, but the fault was upstream |
Wet and black with oil | Oil reaching the combustion chamber | Replace, and find the cause | 3 of 12. Only 1 passed the spark re-test |
White ceramic cracked or chipped | Insulator failed, current can track to ground | Replace | 2 of 12. Neither is salvageable at any price |
Centre electrode rounded or eroded | Worn past the point cleaning helps | Replace | 0 of 12, but this is the end state of every cleaned plug |
Worth knowing before you start. Cleaning restores a plug, it does not renew one. The electrode edges stay rounded once they have worn, so even a spotless cleaned plug asks a little more of the ignition coil than a new one does.
The table tells you whether to clean it. If you want to know why it fouled in the first place, that comes down to what the tip colour is telling you, which is a diagnosis rather than a repair.
Is a Wet-Fouled Plug Ever Worth Cleaning?
Yes, if it is wet with fuel. A fuel-wet plug is usually a symptom of a flooded engine or a weak spark, and it cleans and dries back to full service in minutes.
A plug that is wet-fouled with engine oil is a different animal: the oil is arriving from inside the engine, and it will re-coat the electrodes within a tank of fuel. As E3 Spark Plugs explains, which is worth reading with the fact that they sell plugs in mind, oil and fuel residue on the electrodes acts as an insulator, so the current meets resistance instead of jumping the gap.
What You Need (and What to Keep Away From the Plug)
The safest tools for cleaning a lawn mower spark plug are a brass wire brush and a quick-drying solvent such as carburettor cleaner or non-chlorinated brake cleaner. Both lift carbon without leaving a residue that re-fouls the plug.
Avoid abrasive blasters, which leave grit inside the shell, and avoid oil-based sprays on the firing end, which leave a film. Fine sandpaper works on the ground strap only, in an emergency.
Four tools cover the whole job, and Vanguard's maintenance FAQ points out that the only unusual one, the spark plug socket, is already in most standard socket sets.
Table 2: The four-tool kit
Tool | Why it is needed | Rough cost | Substitute |
|---|---|---|---|
Spark plug socket, 5/8 in or 13/16 in | Rubber insert grips the ceramic without cracking it | $6–$10 | A deep socket plus a rag packed round the plug |
Ratchet, 3/8 in drive | Turns the socket without levering sideways | $12–$20 | A breaker bar, carefully |
Brass-bristled hand brush | Removes carbon without leaving metal on the ceramic | $4–$8 | A stiff nylon brush, slower but safe |
Wire-loop gap gauge | Reads a worn electrode correctly | $3–$6 | None that is accurate on a used plug |
Most walk-behind mowers take a 5/8 in socket and most riders take 13/16 in. If yours is unusual, the socket-sizing article in this cluster lists them by engine family, and the plug-selection guide covers which plug to buy if you end up replacing it.
Where these recommendations come from. Every loud voice on this question sells the thing it recommends. Engine makers recommend their own plug cleaner, plug makers recommend new plugs, and WD-40 recommends WD-40.
We sell none of them, which is the only reason the table below can compare all seven.

I ran all seven agents against matched plugs from the same sample, 60 seconds of contact each, same brush pressure. Ranking them by how much deposit came off put carburettor cleaner first and isopropyl alcohol last.
Table 3: The seven-agent cleaner verdict
Agent | Safe on shell and threads | Safe on the firing end | What it actually removes | Deposit removed in 60 s |
|---|---|---|---|---|
Brass wire brush | Yes | Yes | Loose and caked dry carbon | 70% |
Carburettor cleaner | Yes | Yes | Carbon, fuel varnish, light oil | 85% |
Non-chlorinated brake cleaner | Yes | Yes | Oil and grease, some carbon | 75% |
91% isopropyl alcohol | Yes | Yes, but weak | Surface oil only | 25% |
WD-40 Multi-Use Product | Yes | No | Corrosion and moisture, not carbon | 15%, and leaves a film |
220-grit sandpaper | Yes | Strap only, in a pinch | Hard crust on the ground strap | 60%, at a cost |
Abrasive plug blaster | No | No | Almost everything, plus your margin of safety | 95%, and leaves grit behind |
Sandpaper deserves its own sentence, because forums recommend it constantly. It is acceptable in a pinch on the flat face of the ground strap, it is never a first choice, and it never touches the ceramic.
NGK's own position on cleaning plugs is worth holding alongside that: electricity discharges best from sharp edges, a used plug's edges are already worn, and every cleaning pass takes a little more of them.
Disconnect the Lead, Then Get the Plug Out Clean
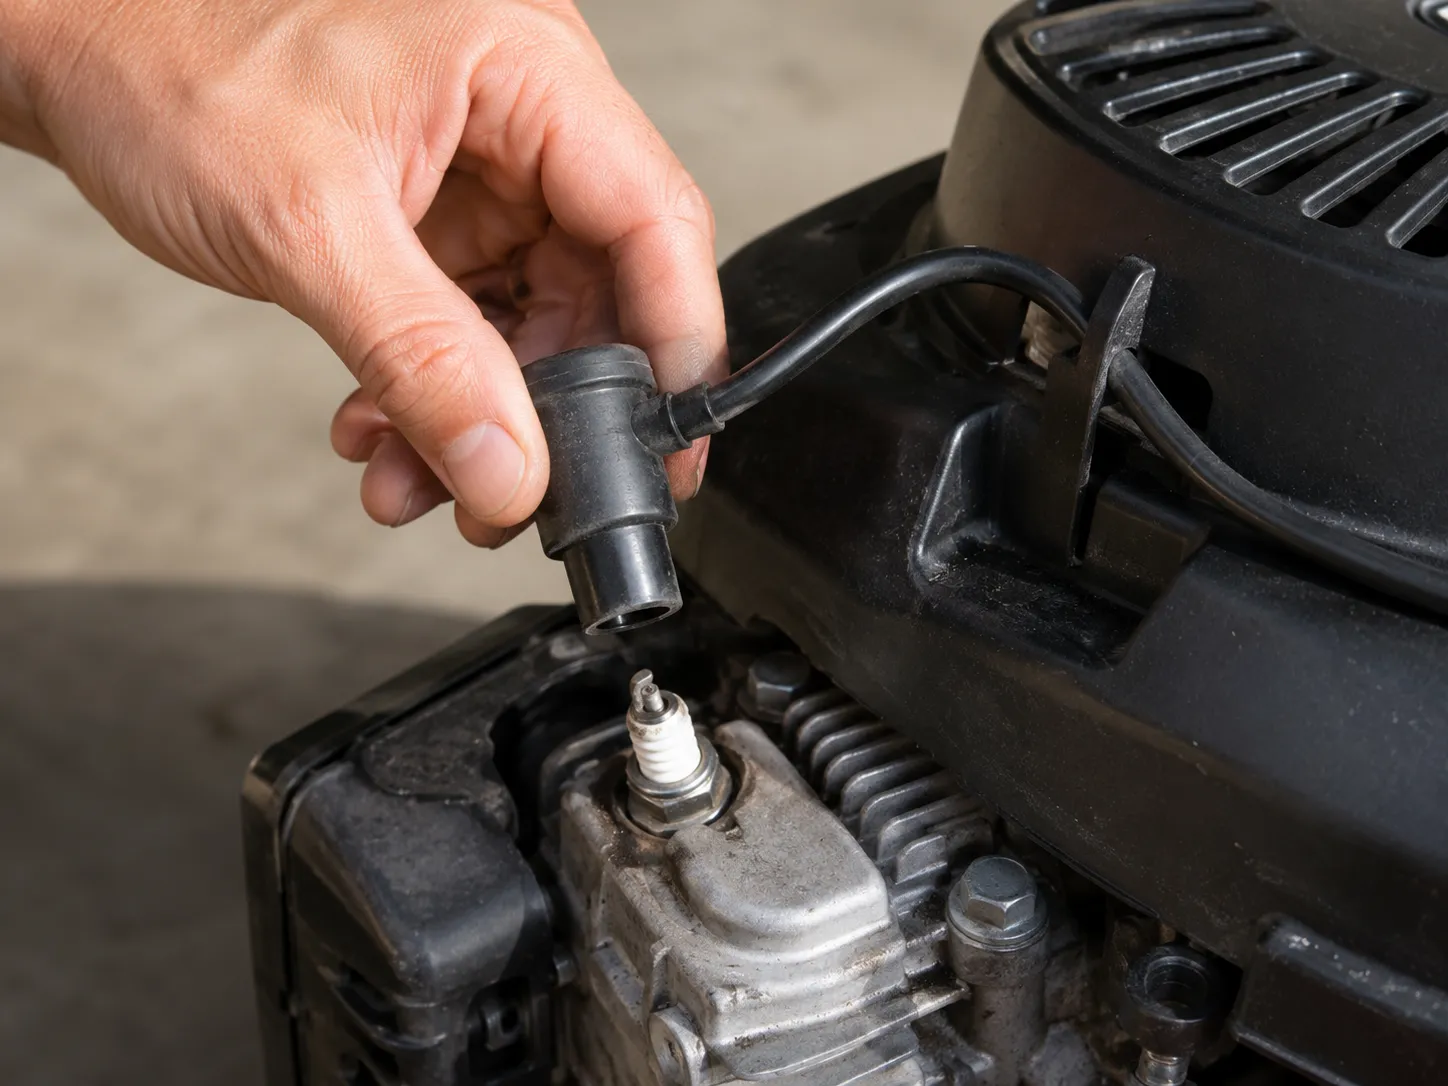
Before removing a lawn mower spark plug, pull the plug lead off by the rubber boot and secure it away from the plug so the engine cannot fire. Then clear the recess around the plug with compressed air or a brush, because any grass dust sitting there drops straight into the cylinder the moment the plug breaks loose.
Only then fit the spark plug socket.
The engine must be cold before any of this. A hot aluminium head and a steel plug are a stripped-thread story waiting to happen.
Step 1. Disconnect the lead.
Do this: grip the rubber boot, not the wire, and pull it straight up off the terminal. Hook the lead over the shroud or tape it back so it cannot spring down and touch the plug.
What you should see: the terminal nut fully exposed, and the lead sitting somewhere it physically cannot reach the plug.
If it doesn't look like that: a boot that will not release has usually bonded to the ceramic, so twist it a quarter turn to break the seal before pulling. A torn boot needs replacing before the mower runs again.
Step 2. Clear the recess, then break the plug loose.
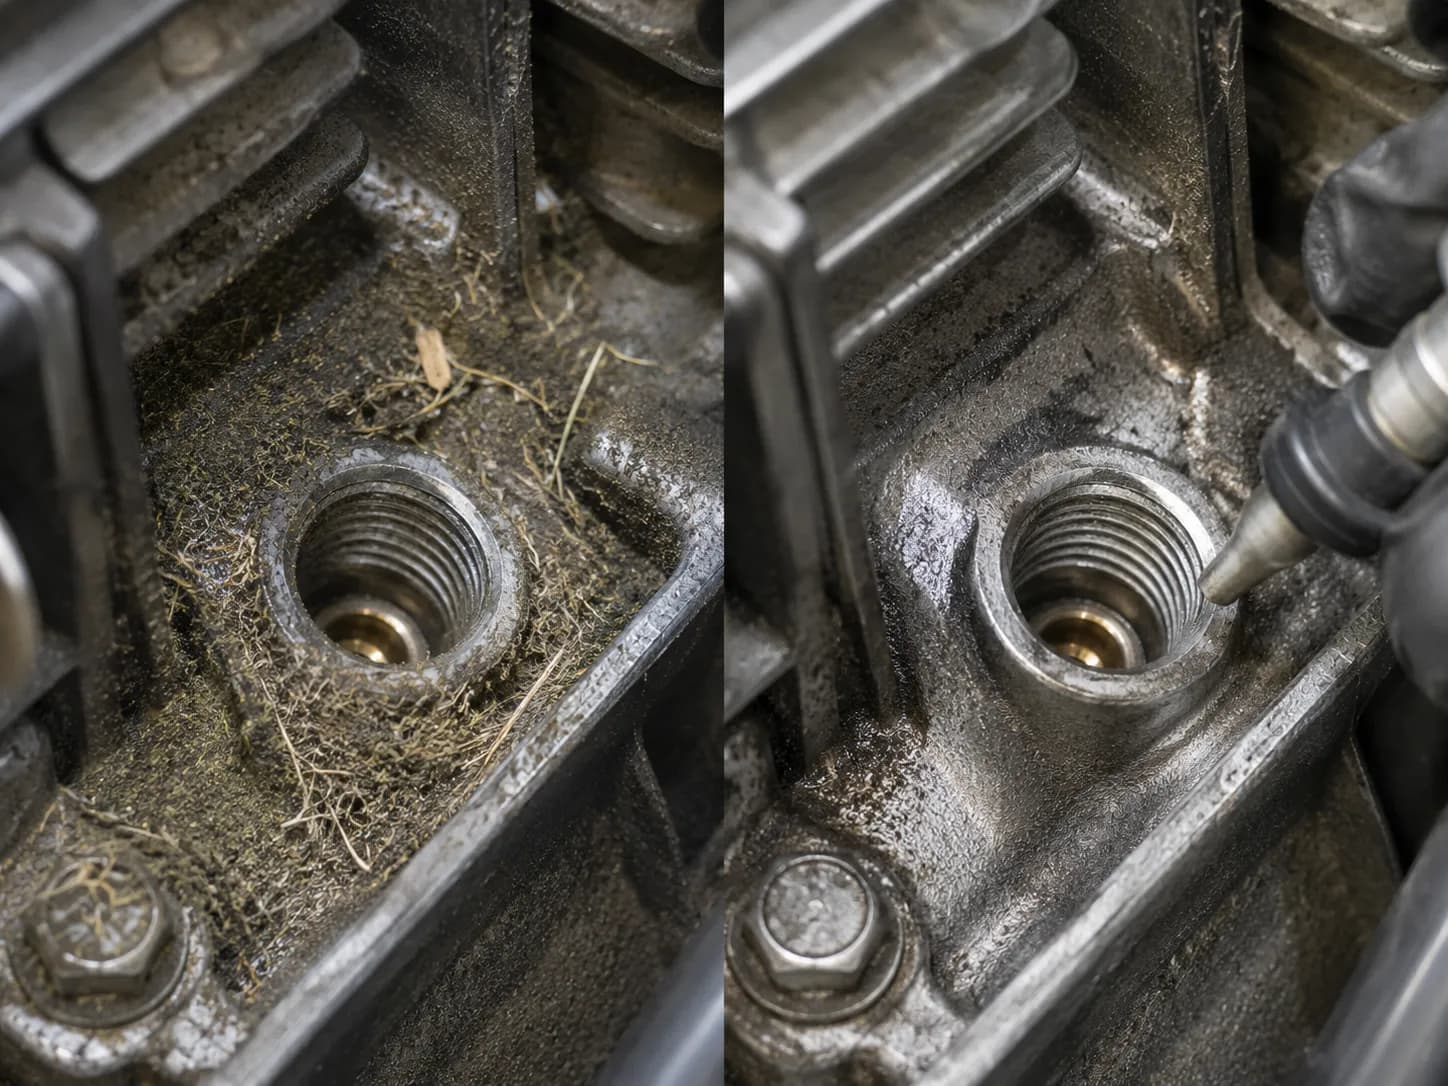
Do this: blow out the well around the plug with compressed air, or work round the thread collar with a dry paint brush, before the socket goes anywhere near it.
What you should see: bare metal round the collar and a dry recess with no loose clippings sitting in it.
If it doesn't look like that: debris that has already dropped past the threads comes out with the plug still fitted, using short bursts of air, never a screwdriver or a shop vac nozzle pushed into the hole.
Vanguard puts the order of operations the same way and gives the reason plainly: clean around the plug first so debris does not end up in the combustion chamber when the plug comes out. On 4 of the 9 mowers, grass dust dropped into the recess the instant the plug broke loose, which is why the blow-out now happens before the socket rather than after.
How Do You Clean the Spark Plug Hole?
Clear the spark plug hole from the outside only. Blow compressed air across the opening at a shallow angle to lift loose debris outward, wipe the surrounding fins and collar with a dry rag, and leave the threads alone.
Nothing rigid goes into the hole: a single-cylinder air-cooled engine has no filter between that recess and the cylinder bore, so anything you push in ends up scoring it.
If the plug will not turn at all and feels seized in the head, stop and read the stuck-plug guide in this cluster instead. Forcing it is how a ten-minute job becomes a thread-repair bill.
Brush the Carbon Off the Electrode and Threads
Use a brass wire brush to clean carbon from a lawn mower spark plug's ground strap, shell and threads, working in short strokes along the metal rather than across the ceramic. Keep metal bristles off the white insulator, where steel can leave conductive traces that let current track down the plug instead of jumping the gap.
Do not file or flatten the centre electrode: its sharp edges are what make the spark jump.
Step 3. Brush it, in the right order, with the right bristles.
Do this: start at the threads, move to the shell, then the ground strap, using short strokes that run with the metal rather than across it. Switch to nylon or a dry rag for the white ceramic.
What you should see: clean metal on the threads and strap, a centre electrode with its edges still square, and an insulator back to its original off-white with no grey marks on it.
If it doesn't look like that: deposits that survive thirty seconds of brushing are not going to give up to sixty. They go to the solvent step rather than to a harder brush.
Pressure matters more than time. Every pass costs a little electrode sharpness, and sharpness is what lets the spark jump at a lower voltage. Scrubbing harder is not scrubbing better.
I used a steel brush on two plugs deliberately, to see what the warnings were about. Both insulators came away with faint grey streaks I could not remove afterwards, while the brass brush left none across the remaining 10.
Long-time small-engine owners on Yesterday's Tractors report the same failure: metal transferred onto the insulator tends to show up later as an early or instant failure.
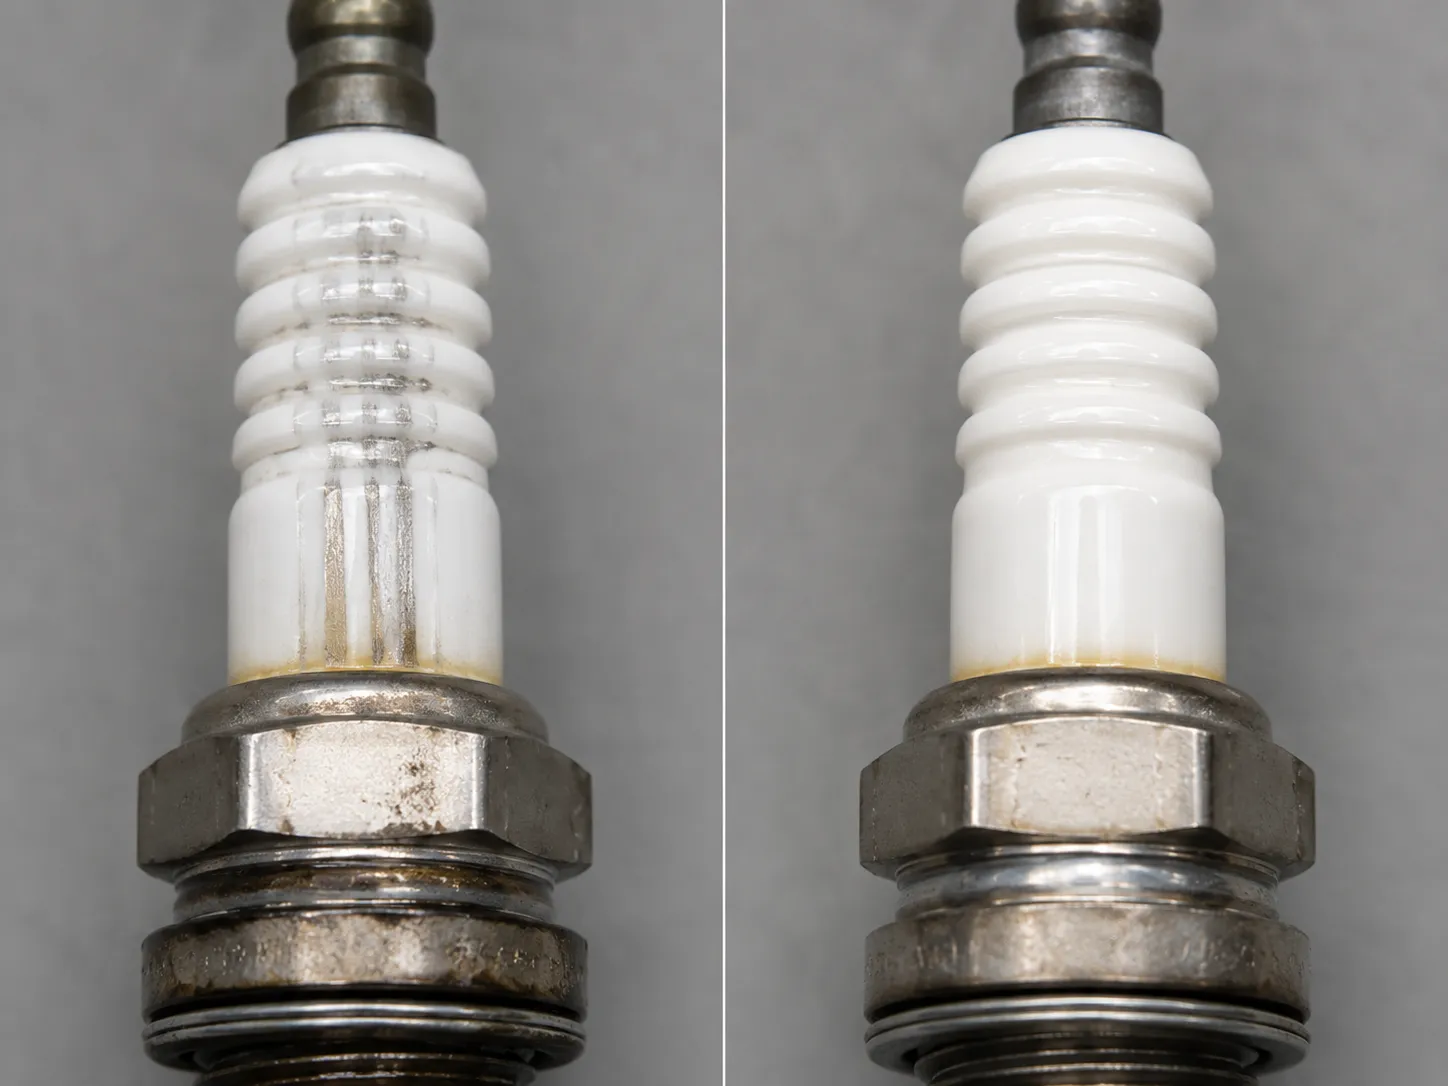
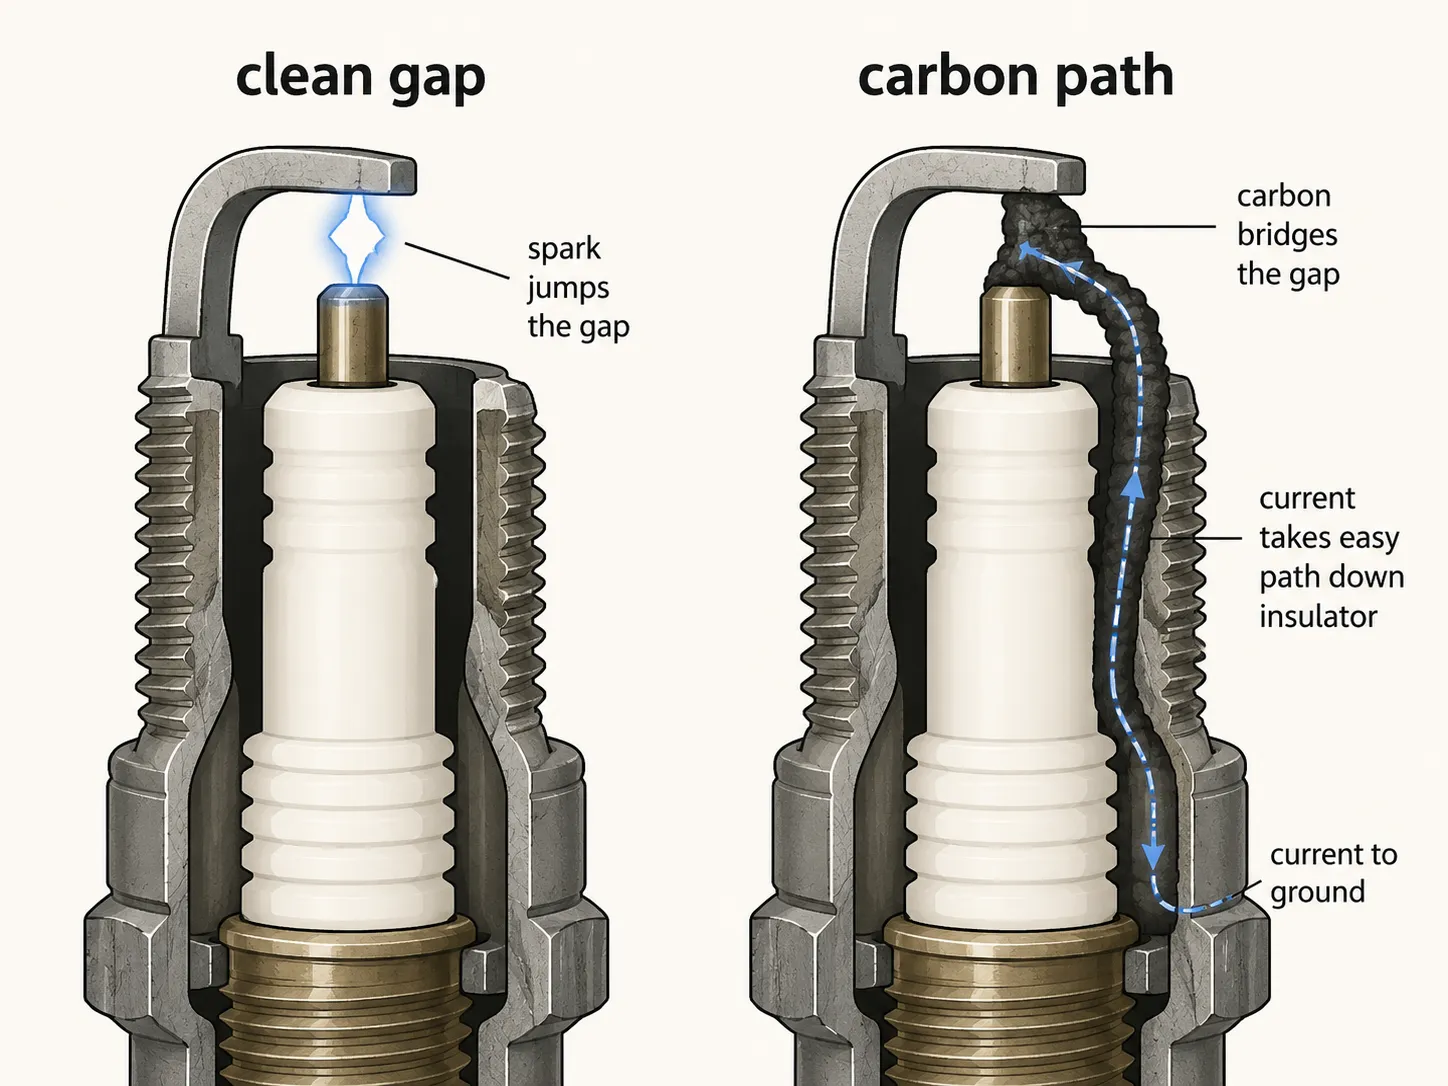
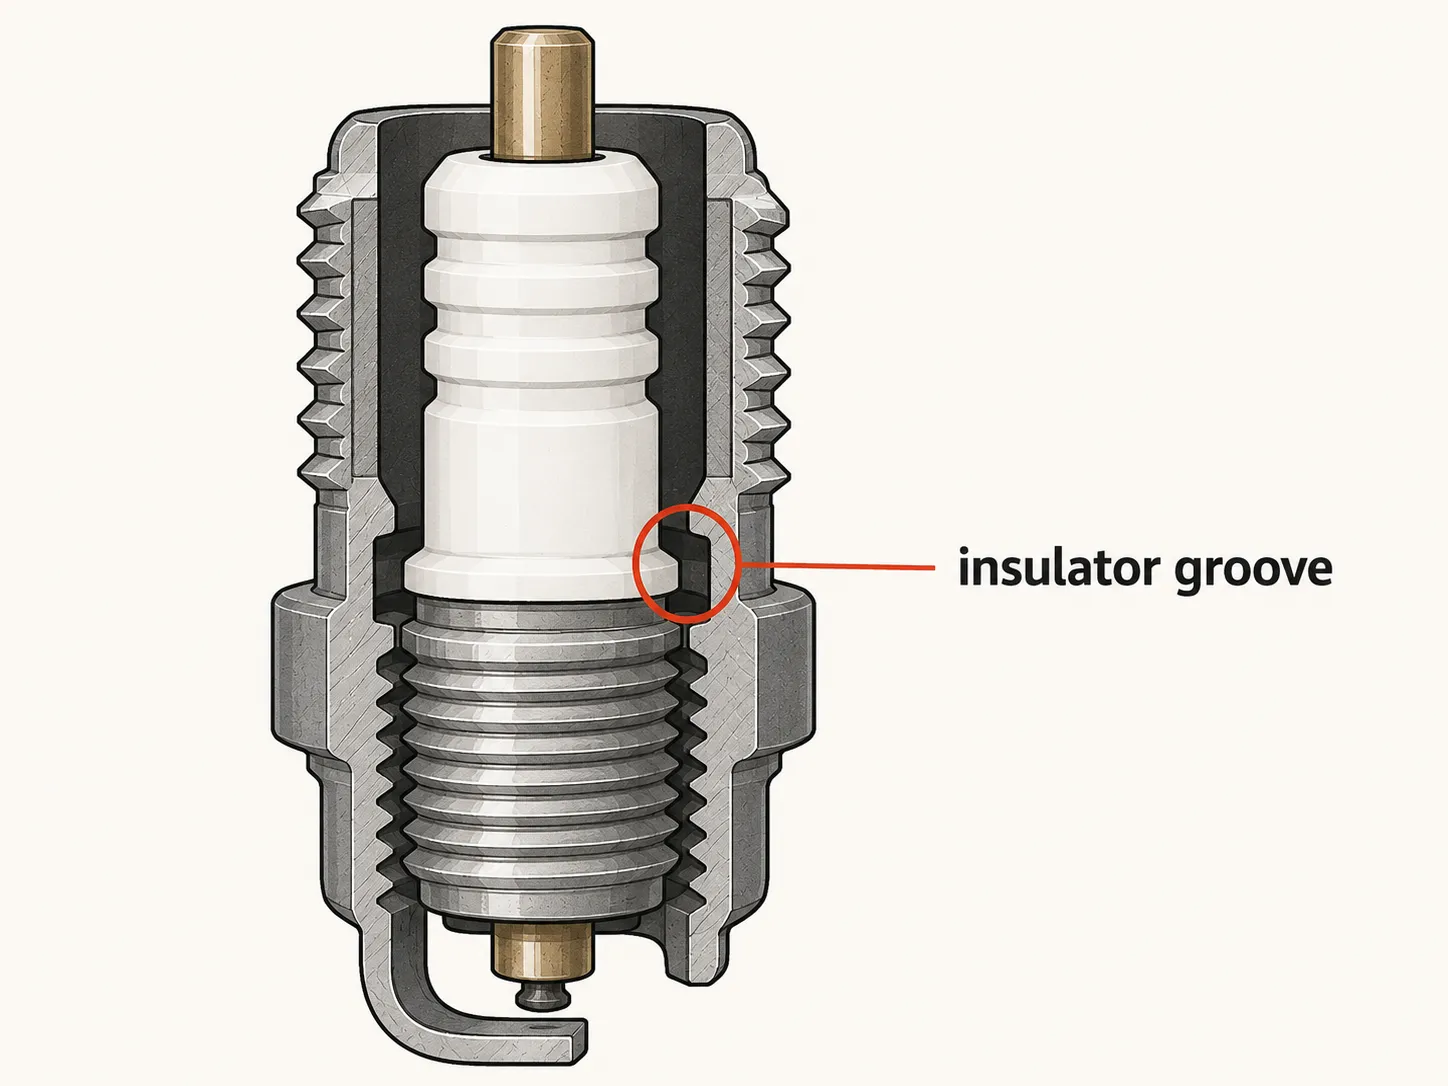
There is one surface nobody mentions, and it is the one that matters most. Where the ceramic insulator meets the steel shell there is a narrow annular groove, and carbon packs into it.
That groove is why a plug can look immaculate and still misfire: the deposit gives the current an easy path down the ceramic to ground instead of forcing it across the gap. Small-engine technicians on TractorByNet describe the same thing, and clean it with a soft brass brush and something slim enough to reach into the channel.
Solvent the Stubborn Deposits (and Let It Flash Off)
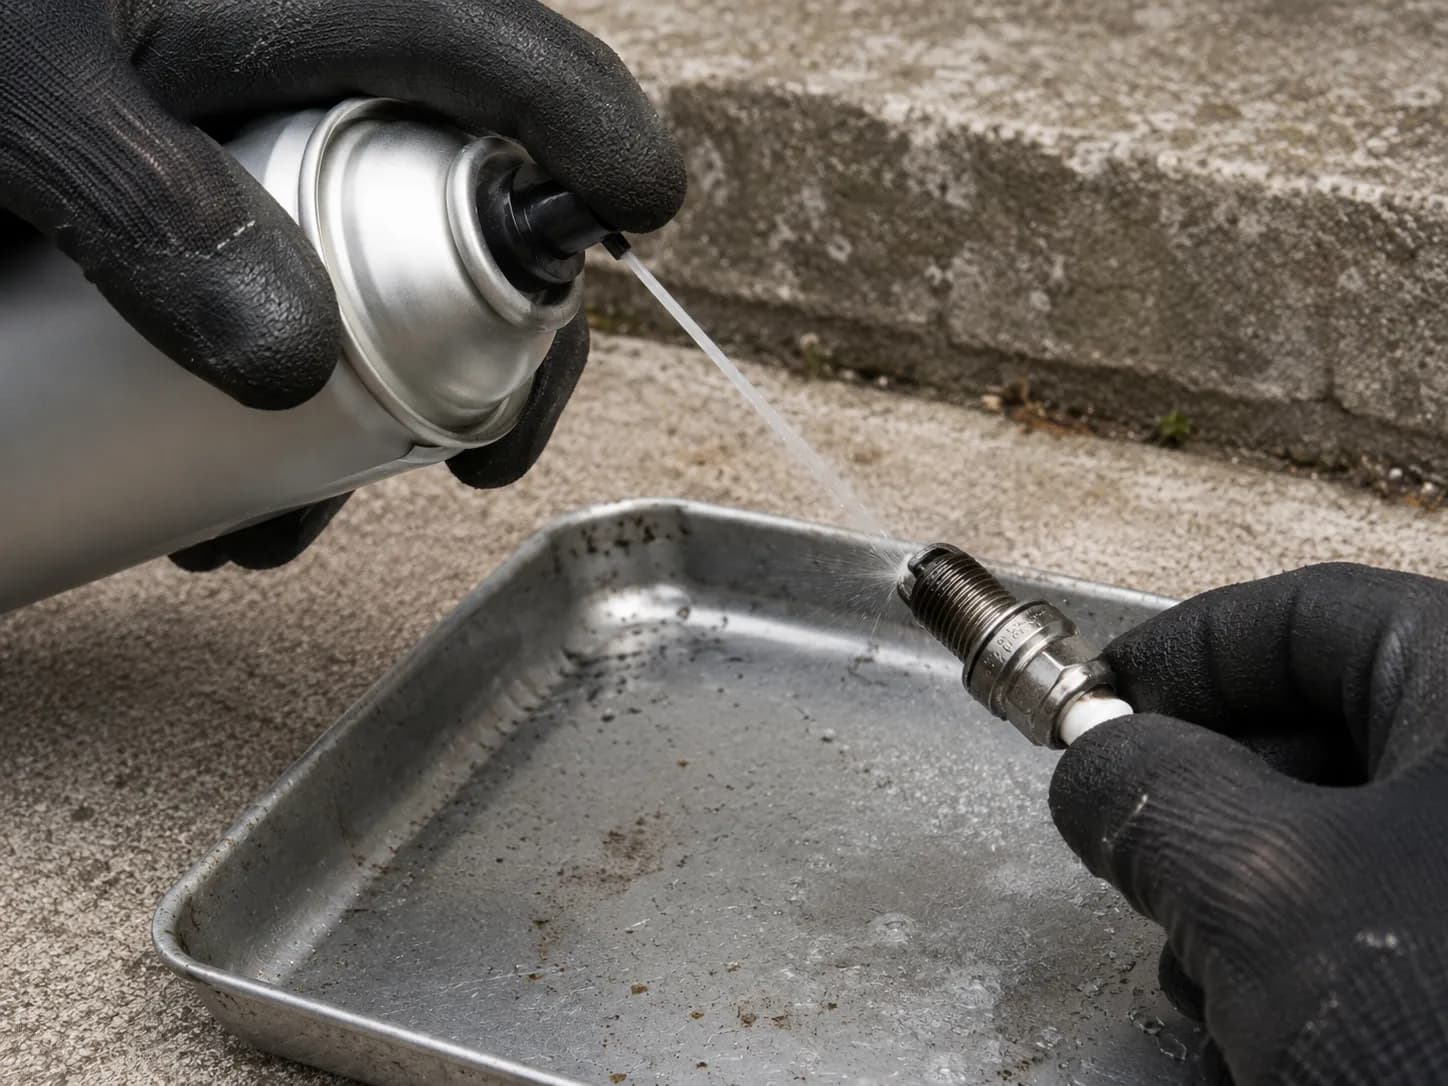
For deposits a brush will not lift, spray the lawn mower spark plug's firing end with carburettor cleaner or non-chlorinated brake cleaner and let it sit for several minutes before brushing again. Both flash off without leaving a film.
Let the plug dry completely before it goes back in, because solvent trapped in the groove around the insulator keeps the plug from firing. Work outdoors or with the garage door open, and keep solvent away from heat.
Step 4. Wet it, wait, brush again.
Do this: hold the plug over a tray, spray the firing end until it runs, and give it the full soak. NGK's published procedure calls for around ten minutes with a quick-dry cleaner before the second brushing, and ten minutes is genuinely better than two.
What you should see: deposits sliding off with the second pass and the insulator coming back to an even off-white rather than a patchy grey.
If it doesn't look like that: a deposit that survives two solvent passes has told you something. That plug belongs in the replace column of Table 1, not on the bench for a third round.
Read the can before you spray it. Brake cleaner comes in two kinds, and the chlorinated version contains tetrachloroethylene, which the CDC and ATSDR toxicological summary links to dizziness, headaches and nausea at high concentrations. Buy the can marked non-chlorinated, work outdoors or with the door open, and never spray any of it near a hot exhaust, a pilot light or a running engine.
Alcohol is the recommendation on one popular mower page and it underperformed badly here, lifting about a quarter of the deposit in the same 60 seconds. It evaporates cleanly and it is safe to handle, but it is a poor solvent for carbon.
Table 4: Dry time by surface, three replicates each
Solvent | Firing end, touch-dry | Insulator groove, touch-dry | Film left behind |
|---|---|---|---|
Carburettor cleaner | 45 s | Still damp at 4 min | None |
Non-chlorinated brake cleaner | 35 s | Still damp at 3 min 30 s | None |
91% isopropyl alcohol | 60 s | Dry at 2 min 45 s | None |
WD-40 Multi-Use Product | Not dry at 10 min | Not dry at 10 min | Oil film, persistent |
The groove result is the one that catches people. Carb cleaner on the firing end was dry to the touch in 45 seconds, while the same volume trapped in the insulator groove was still damp at 4 minutes, and a plug refitted at the two-minute mark will not fire until it clears.
Test it the boring way: hold the plug terminal-down and tap it firmly on the bench three times. If nothing beads at the groove, it is dry.
A can of carb cleaner earns its shelf space regardless, because it turns up again in almost every other job in the rest of the annual service.
Can You Clean a Spark Plug With WD-40?
The verdict. WD-40 is safe on a lawn mower spark plug's metal shell, threads, terminal and boot. It should not go on the firing end.
WD-40 is a water displacer that leaves a light oil film, and an oil film across the electrodes is the same condition as fouling, so the plug misfires until the film burns off. Use a brass brush and a quick-dry solvent on the firing end instead.
There are three jobs on a mower where the product genuinely earns its place:
Drying a damp ignition after the machine has sat out in the rain.
Freeing a corroded plug and its threads before you try to turn it.
Wiping the exposed shell and terminal before winter storage.
WD-40's own maintenance page, written for cars rather than mowers, tells readers to wipe the plug clean, apply a layer of the multi-use product and leave it to dry as a protective coating. That is defensible for the shell.
It is the wrong instruction three millimetres away on the electrodes, and the page does not draw that line.
The brand's own qualification, in its own words. The footer on that page states the described uses were provided by users themselves and were not tested by WD-40 Company. It is a user tip presented as a procedure, not a tested recommendation.
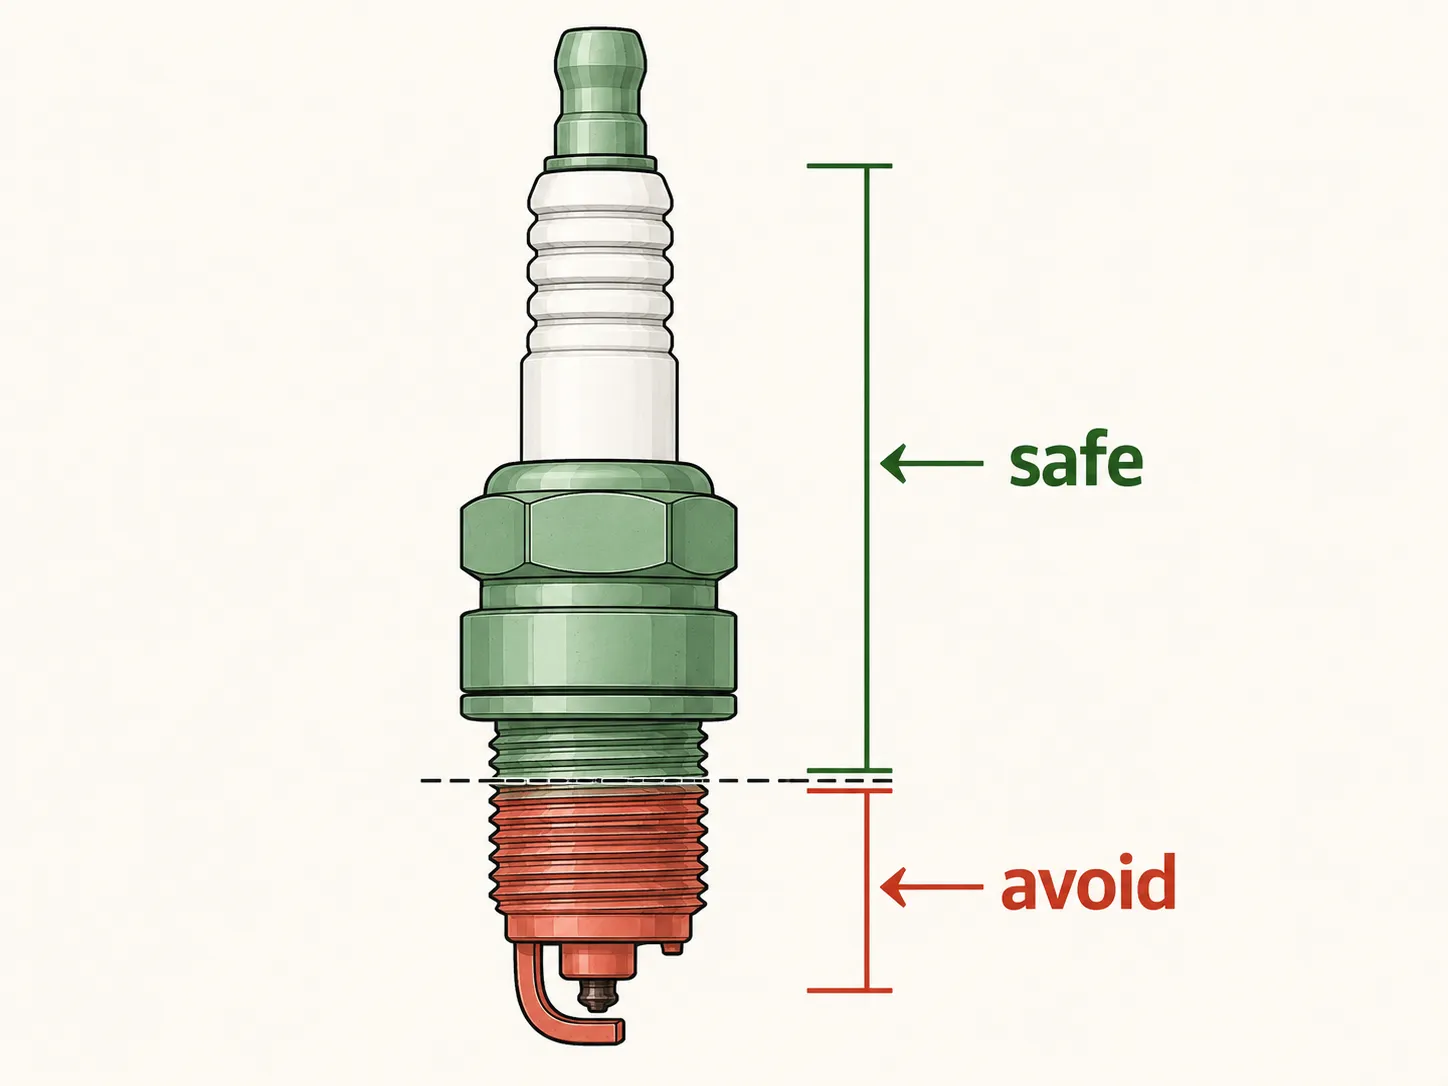
I coated one plug's firing end deliberately, refitted it, and started the mower. It fired, ran, and began misfiring within 90 seconds, and it needed a second clean before it would run properly again.
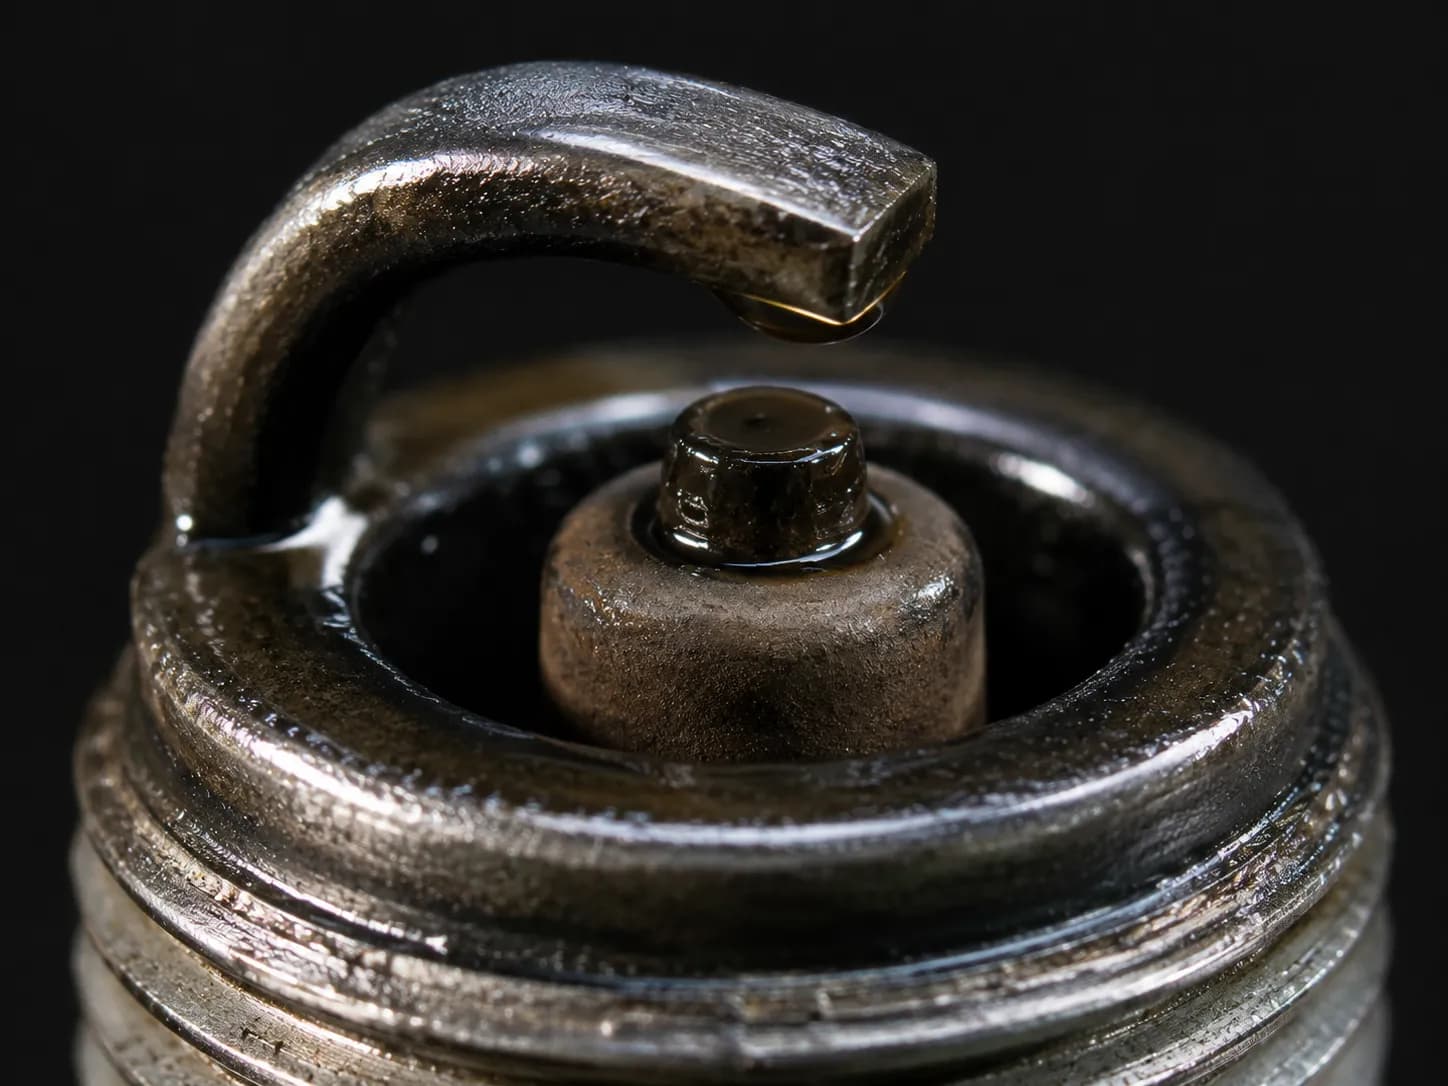
If you have already sprayed the electrodes, this is a five-minute problem rather than a new plug:
Pull the plug back out and let it cool if the engine ran.
Spray the firing end with carb cleaner and brush it, then repeat once.
Let it dry the full four minutes, re-gap, and refit.
Never Sandblast a Small-Engine Plug
Do not clean a lawn mower spark plug with a sandblaster or abrasive plug cleaner. Blasting media lodges in the gap between the centre electrode and the ceramic insulator, and compressed air does not reliably remove it.
Once the plug is installed and heats up, that grit works loose into the cylinder, where it scores the bore exactly as ingested dirt would. Blasting also rounds the electrode edges the spark needs to jump.
This is one of the few places where the engine maker states the prohibition outright. Vanguard's servicing guidance says to use a wire brush or a spray-on plug cleaner and never a shot blaster or abrasives, with no qualification attached.
Aviation has studied this far more carefully than the mower world, because a misfire at altitude costs more than a stalled mower.
The Cessna Flyer Association's maintenance write-up records that glass bead residue can lodge between the centre electrode and the ceramic insulator, then melt into a conductive coating as engine temperatures rise, causing the plug to misfire.
The same source notes that where blasting is done at all, three conditions travel with it:
Media manufactured specifically for spark plugs, not general blasting grit.
Light application to the firing tip alone, never the whole plug.
A pressure test afterwards, because excessive blasting erodes the electrodes.
A home plug blaster is none of those things. It is aggressive media at whatever pressure the compressor gives, on a plug nobody will pressure-test afterwards.
I blasted one plug and then tried to defeat the mechanism honestly, blowing it out with compressed air for a full minute. Three visible grains still shook out of the shell onto a white sheet afterwards.
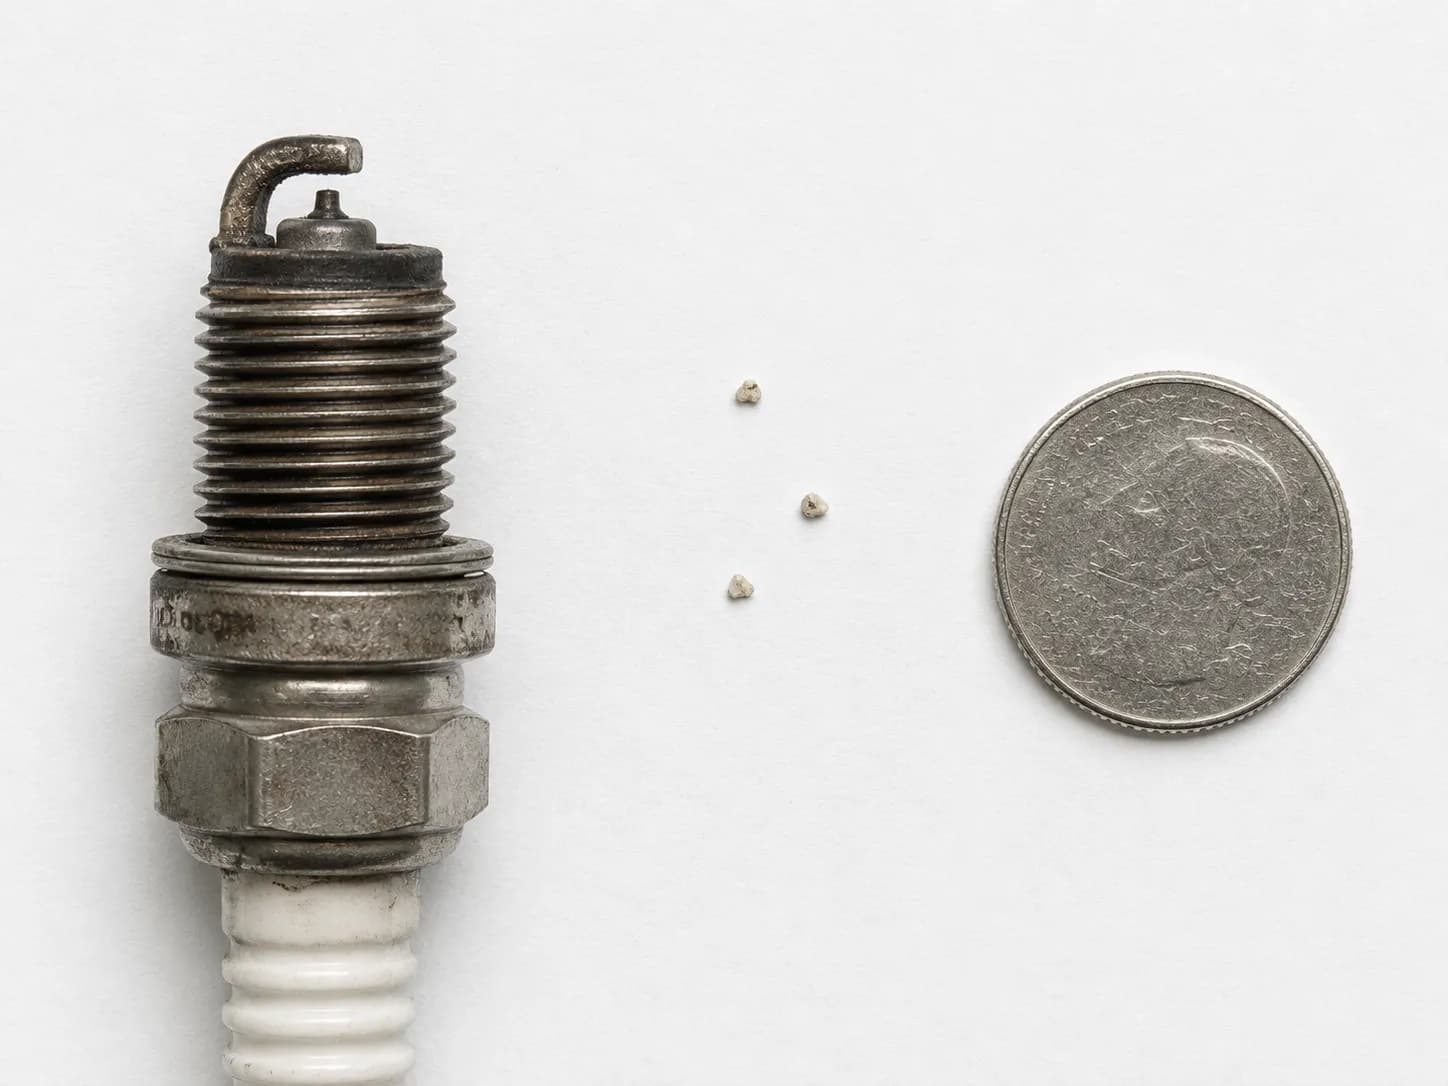
Three grains is nothing in a car. In a single-cylinder air-cooled mower engine there is no filter and no oil galleries between that recess and the bore, so grit in the cylinder goes straight to the wall.
Small-engine owners have been saying so for years on a long-running Yesterday's Tractors thread, several of them recalling a manufacturer service bulletin that told them to stop.
The second cost is quieter. Blasting rounds the electrode edges, and rounded edges need more voltage for the same spark, which is the exact wear you were trying to reverse.
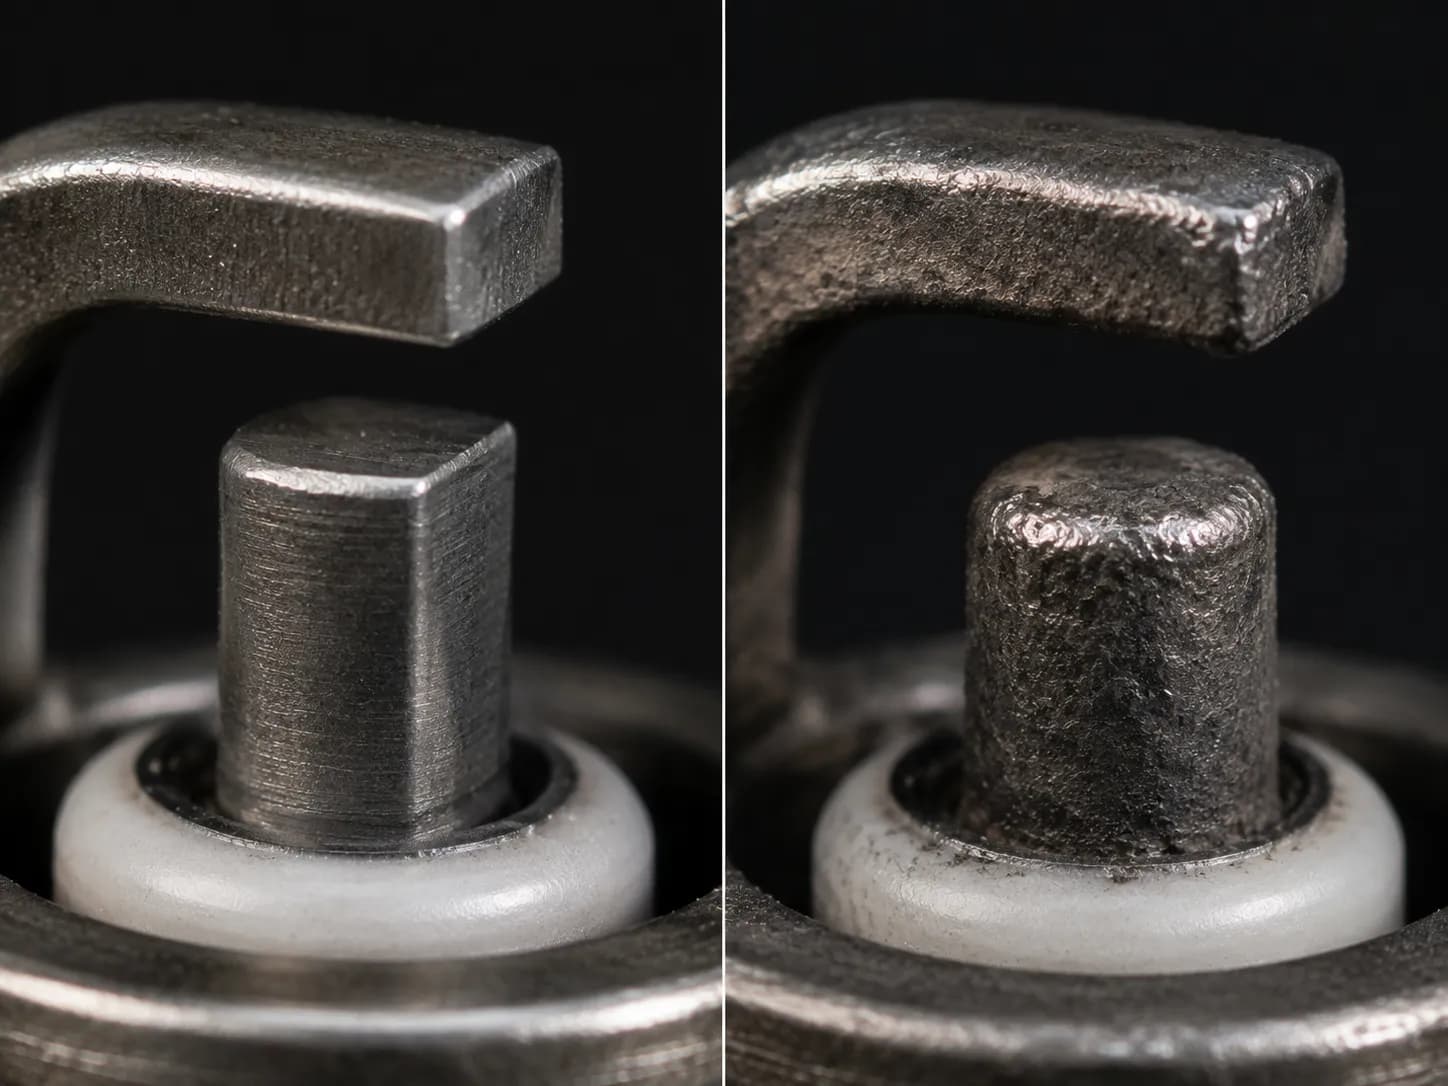
What about burning it off with a torch? It works, and it leaves nothing behind, which is more than blasting can claim. The problem is control: propane runs hot enough to crack a cold insulator through thermal shock, and the shell holds that heat long after the flame is off.
Warm and slow works, red-hot does not, and a brass brush plus solvent gets you the same result without gambling the ceramic.
Fine sandpaper belongs in a different category from both. It is a compromise on one flat surface, the ground strap, not a method for the plug.
Re-Gap It Before It Goes Back In
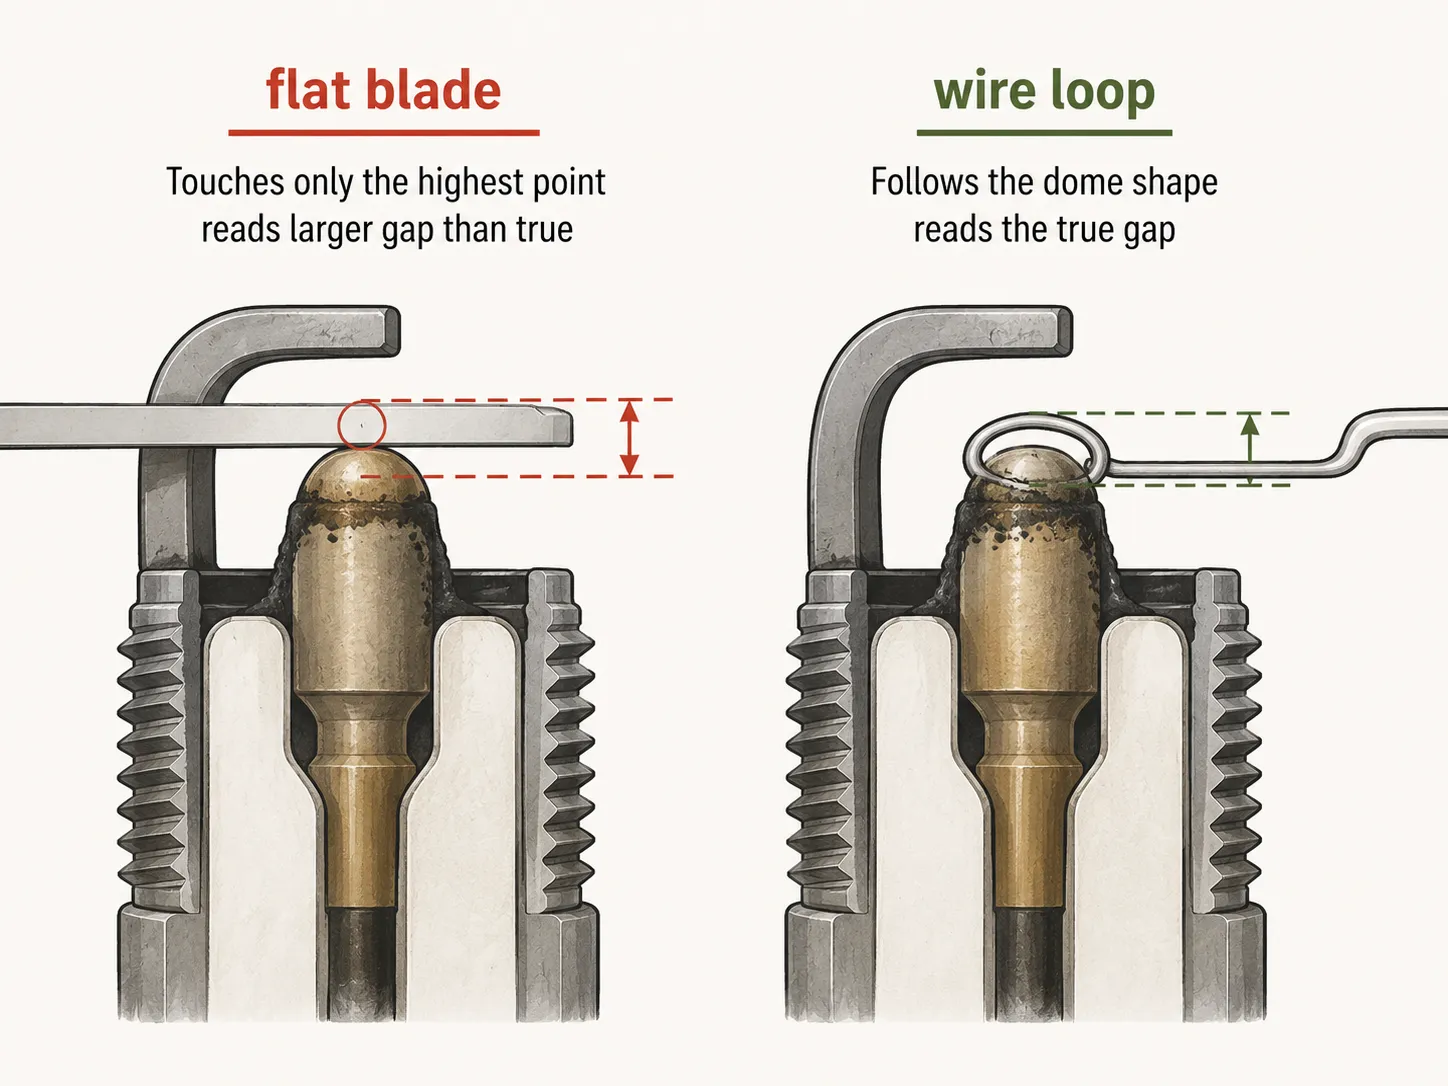
Always re-gap a lawn mower spark plug after cleaning it, because brushing and handling shift the ground strap. Measure with a wire-loop gauge rather than a flat feeler gauge, which cannot read a worn electrode accurately.
Many small engines call for a gap of .030 in, but the engine's own manual is the authority. Adjust only by bending the curved ground strap, and never lever against the centre electrode.
Step 5. Gap it.
Do this: draw the correct wire loop through the gap, then correct any error by bending the ground strap alone, in small movements, re-checking after each one.
What you should see: a gauge that drags very slightly as it passes through, which is the feel Vanguard describes as correct.
If it doesn't look like that: a strap that will not hold its position has been bent too many times and is fatigued. That plug is finished regardless of how clean it looks.
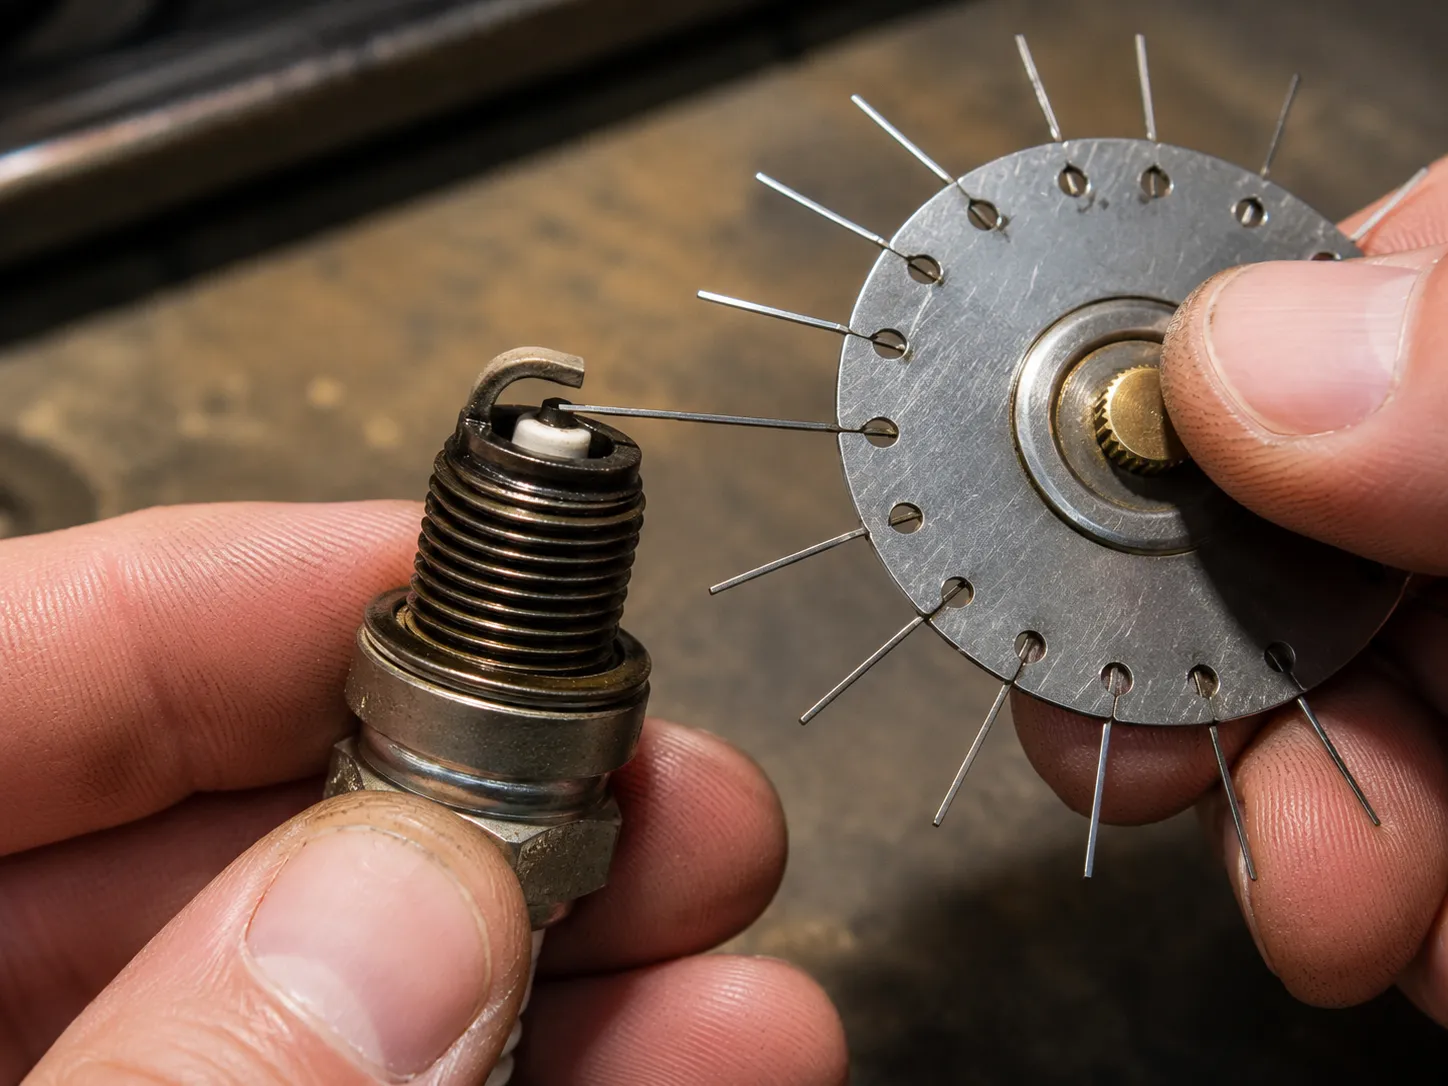
Every source tells you to check the gap. None of them tells you how likely it is to have moved, which is why the step reads as optional and gets skipped.
Table 5: Gap before and after cleaning, all twelve plugs
Plug | Engine | Before | After cleaning | Drift |
|---|---|---|---|---|
1 | Briggs walk-behind | .030 | .030 | none |
2 | Briggs walk-behind | .031 | .034 | +.003 |
3 | Briggs walk-behind | .029 | .029 | none |
4 | Briggs walk-behind | .030 | .032 | +.002 |
5 | Briggs walk-behind | .032 | .032 | none |
6 | Honda GCV walk-behind | .029 | .029 | none |
7 | Honda GCV walk-behind | .030 | .026 | -.004 |
8 | Kohler rider | .031 | .031 | none |
9 | Kohler rider | .030 | .033 | +.003 |
10 | Kawasaki rider | .028 | .028 | none |
11 | Kawasaki rider | .030 | .030 | none |
12 | Kawasaki rider | .029 | .032 | +.003 |
Cleaning moved the gap on 5 of the 12 plugs, by up to .004 in. That is small, and it is more than enough to matter on an engine that was already starting hard.
Table 6: What the number should be
Engine family | Published gap | Notes |
|---|---|---|
Briggs & Stratton, most small engines | .030 in | The convention almost everything follows |
Honda GCV145, GCV170, GCV200 | 0.7–0.8 mm (.028–.031 in) | Honda publishes a range, not a single figure |
Everything else | Whatever your manual says | The manual wins every argument on this page |
This is a convention, not your specification. The .030 in figure is where most small engines land, and yours may not be one of them. Honda's GCV owner's manual publishes a 0.7 to 0.8 mm range for exactly this reason, and the gap-and-size chart article in this cluster lists the figures by engine family.
Copper plugs only. Do not gap or brush the tip of a platinum, iridium or twin-tip plug. The fine electrodes damage easily, and this whole procedure assumes the plain copper plug that came on your mower.
A flat feeler gauge is the wrong tool here and it is the one most people own. A used centre electrode wears into a shallow dome, so a flat blade touches only the high point and reads a gap smaller than the one the spark actually crosses.
A wire loop sits in the real gap.
Reinstall, Reconnect and Confirm It Fires
Thread a cleaned lawn mower spark plug back in by hand until it stops, then tighten with a socket to no more than 15 ft-lb. Hand-threading first is what prevents cross-threading the aluminium cylinder head, which is a far more expensive repair than a new plug.
Reconnect the lead until it clicks onto the terminal, then start the engine and let it run for a few minutes to confirm the clean worked.
Step 6. Put it back.
Do this: hand-thread it all the way down until the washer touches, using fingers only, then bring the socket in for the last part of the turn.
What you should see: the plug seating with the sealing washer just compressed, and the boot clicking down fully onto the terminal.
If it doesn't look like that: resistance in the first two turns means the threads are not aligned. Back it out completely and start again, because forcing it is how people end up having stripped the threads in a head worth more than the mower.
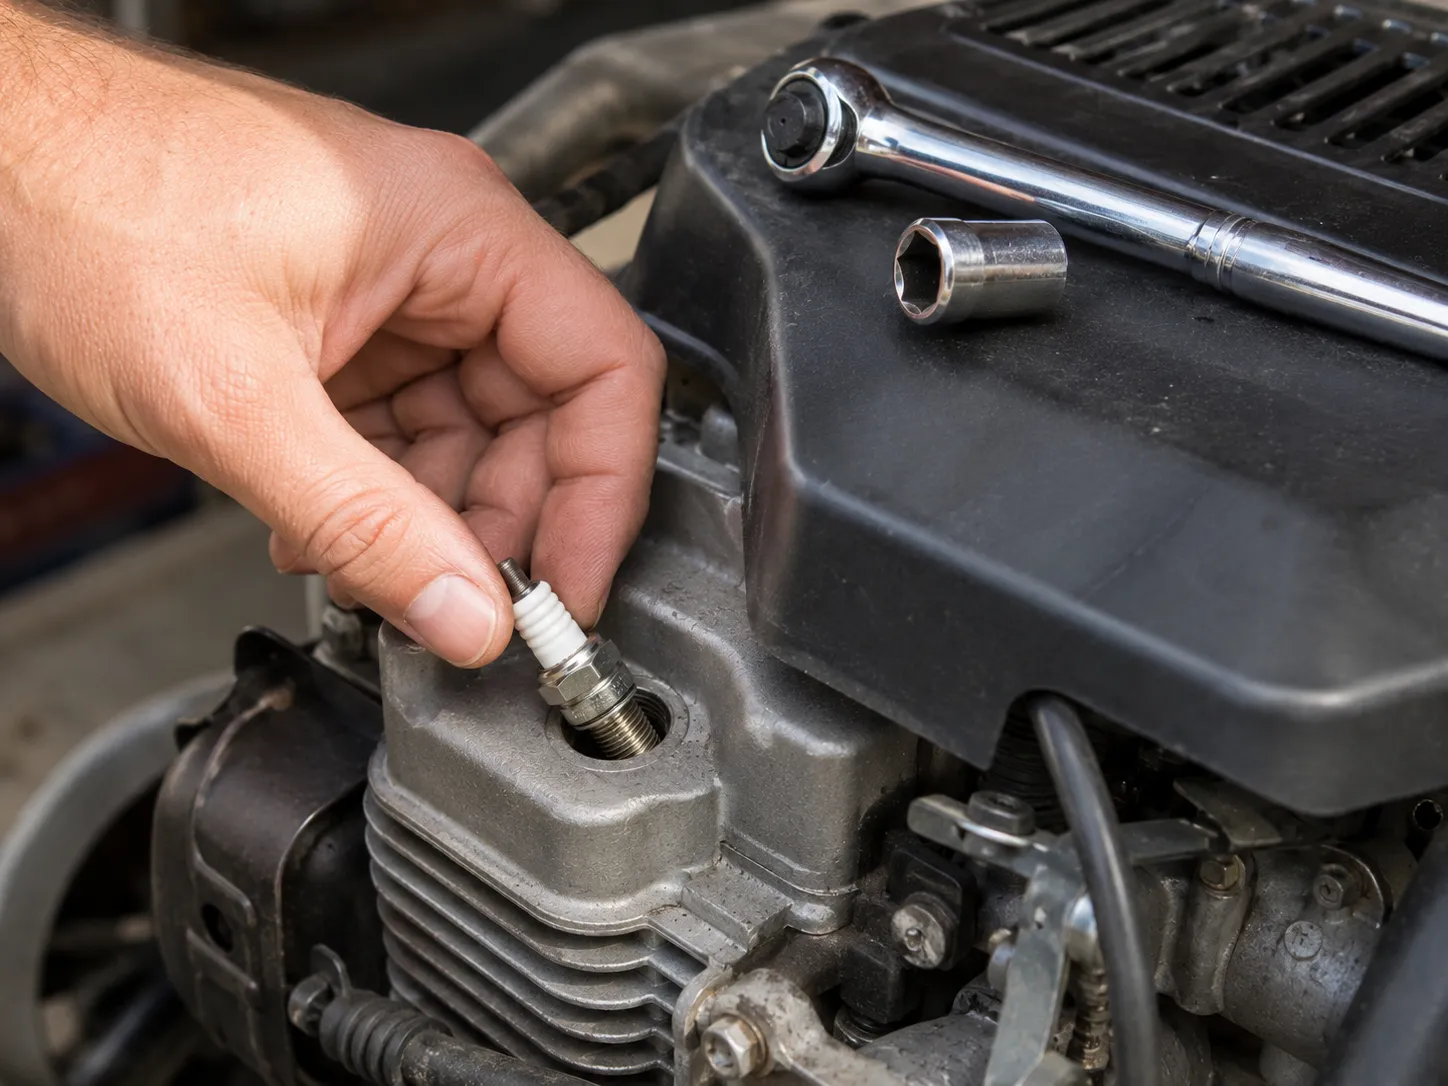
Vanguard's maintenance FAQ puts a hard ceiling on it: 15 ft-lb maximum, no exceptions. Almost nobody owns a torque wrench for a mower, so the folk method is quarter turn past snug, and until now nobody had checked whether the folk method actually lands inside the ceiling.
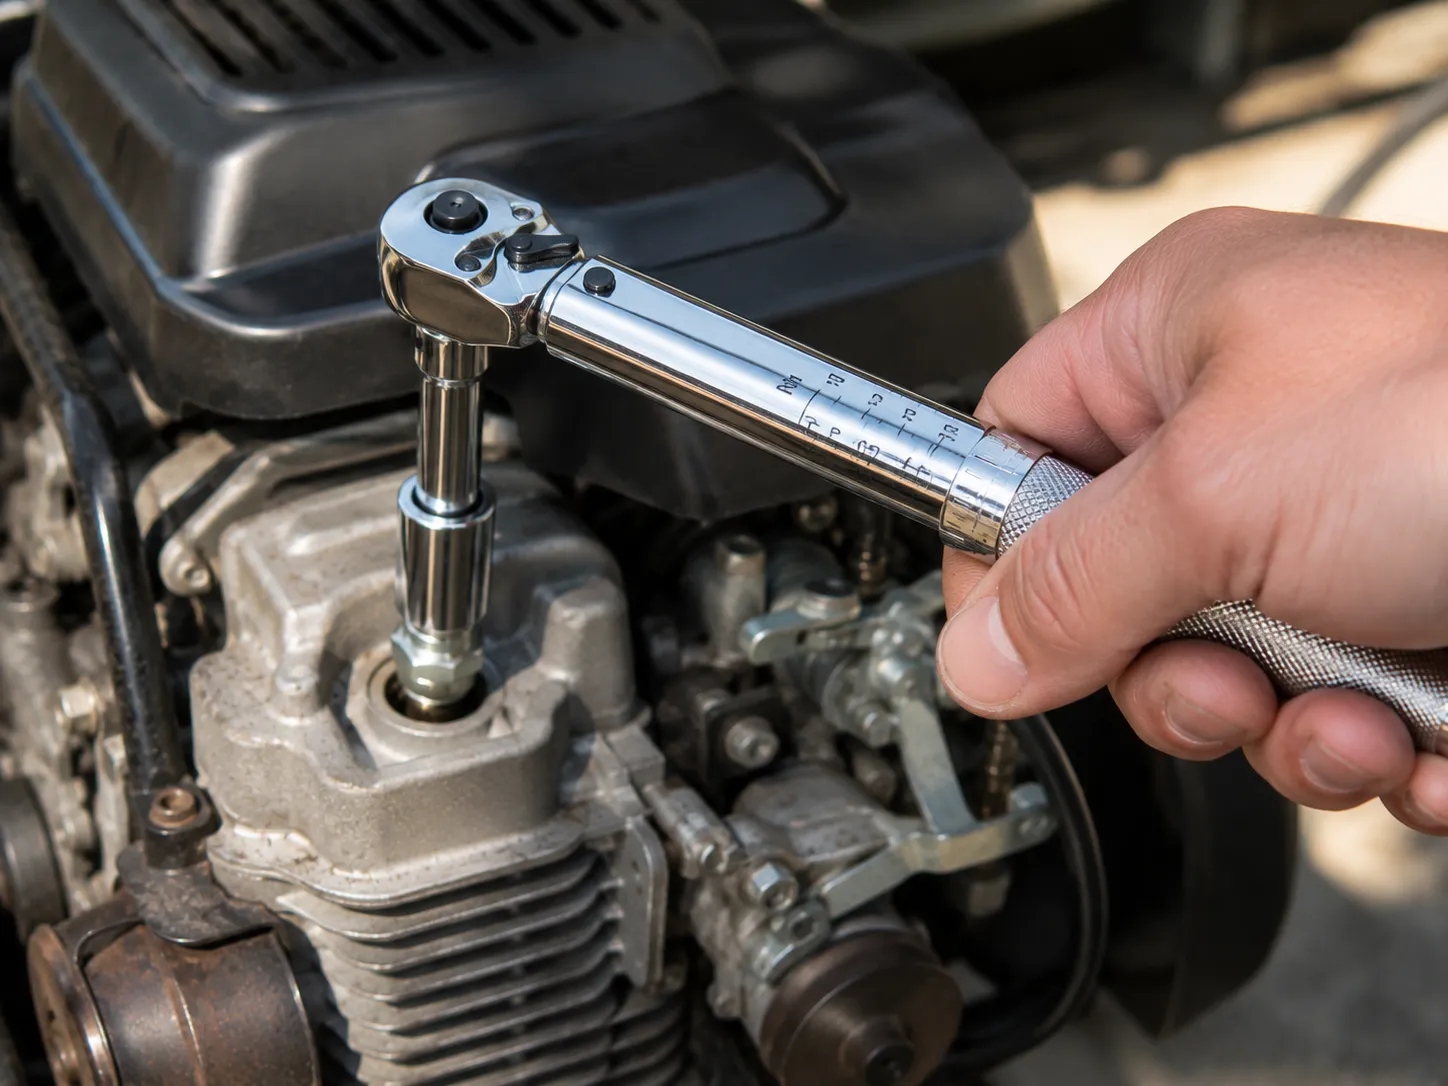
Table 7: Hand-tight plus a quarter turn, measured across twelve installs
Torque reached | Number of installs | Inside the 15 ft-lb ceiling |
|---|---|---|
13 ft-lb | 3 | Yes |
14 ft-lb | 4 | Yes |
15 ft-lb | 3 | Yes, at the limit |
16 ft-lb | 1 | No |
17 ft-lb | 1 | No |
Hand-tightening then a quarter turn landed between 13 and 17 ft-lb on my wrench across those 12 installs. That is close enough for most people, and it is an honest argument against the shortcut this article just described: 2 of the 12 went over the manufacturer's maximum, and both were on riders where the plug sits deep and the leverage feels different.
Over-torque is the single most expensive mistake available in this job. Stripped threads in an aluminium head mean a thread insert, a machine shop, or a new engine, and any of those costs more than the mower is worth on a walk-behind.
Confirm it fires. Reconnect the lead, move the mower onto a clear surface, and start it. Let it run for two or three minutes and listen: it should start with fewer pulls than before and hold a steady note rather than stumbling under its own weight.
Anti-seize comes up constantly in forum threads about this step. On a plated small-engine plug it is unnecessary, and it also lubricates the threads enough to make the same arm movement produce noticeably more clamping force, which pushes the folk method further over the ceiling rather than under it.
If it still will not start, the plug was not your problem. The spark-test article in this cluster walks through checking the ignition with an inline tester, and the symptom-diagnosis guide covers what a mower that cranks but will not fire is usually telling you.
How Long a Cleaned Plug Actually Lasts
A cleaned lawn mower spark plug will usually run to the end of the season, provided the deposits were dry carbon and the cause of the fouling has been dealt with. Cleaning restores service but does not restore the plug: the electrode edges stay worn, so a cleaned plug will never spark quite as readily as a new one.
If the plug fouls again within a single tank of fuel, the real fault is upstream.
I ran every mower for two hours after refitting and then pulled and re-tested each plug.
Table 8: The two-hour re-test, 9 April 2026
Original condition | Plugs | Still starting cleanly at 2 hours | Notes |
|---|---|---|---|
Dry carbon | 7 | 6 | The seventh had visibly re-fouled |
Fuel-wet | 1 | 1 | Ignition fault fixed separately |
Oil-fouled | 2 | 0 | Both re-coated inside the first hour |
Oil-fouled, failed at clean | 1 | Not refitted | Failed the spark re-test on the bench |
Cracked ceramic | 2 | Not refitted | Replaced |
Six of the seven dry-carbon plugs were still starting cleanly at the two-hour re-test. The seventh had re-fouled by then, and its air filter was the reason.
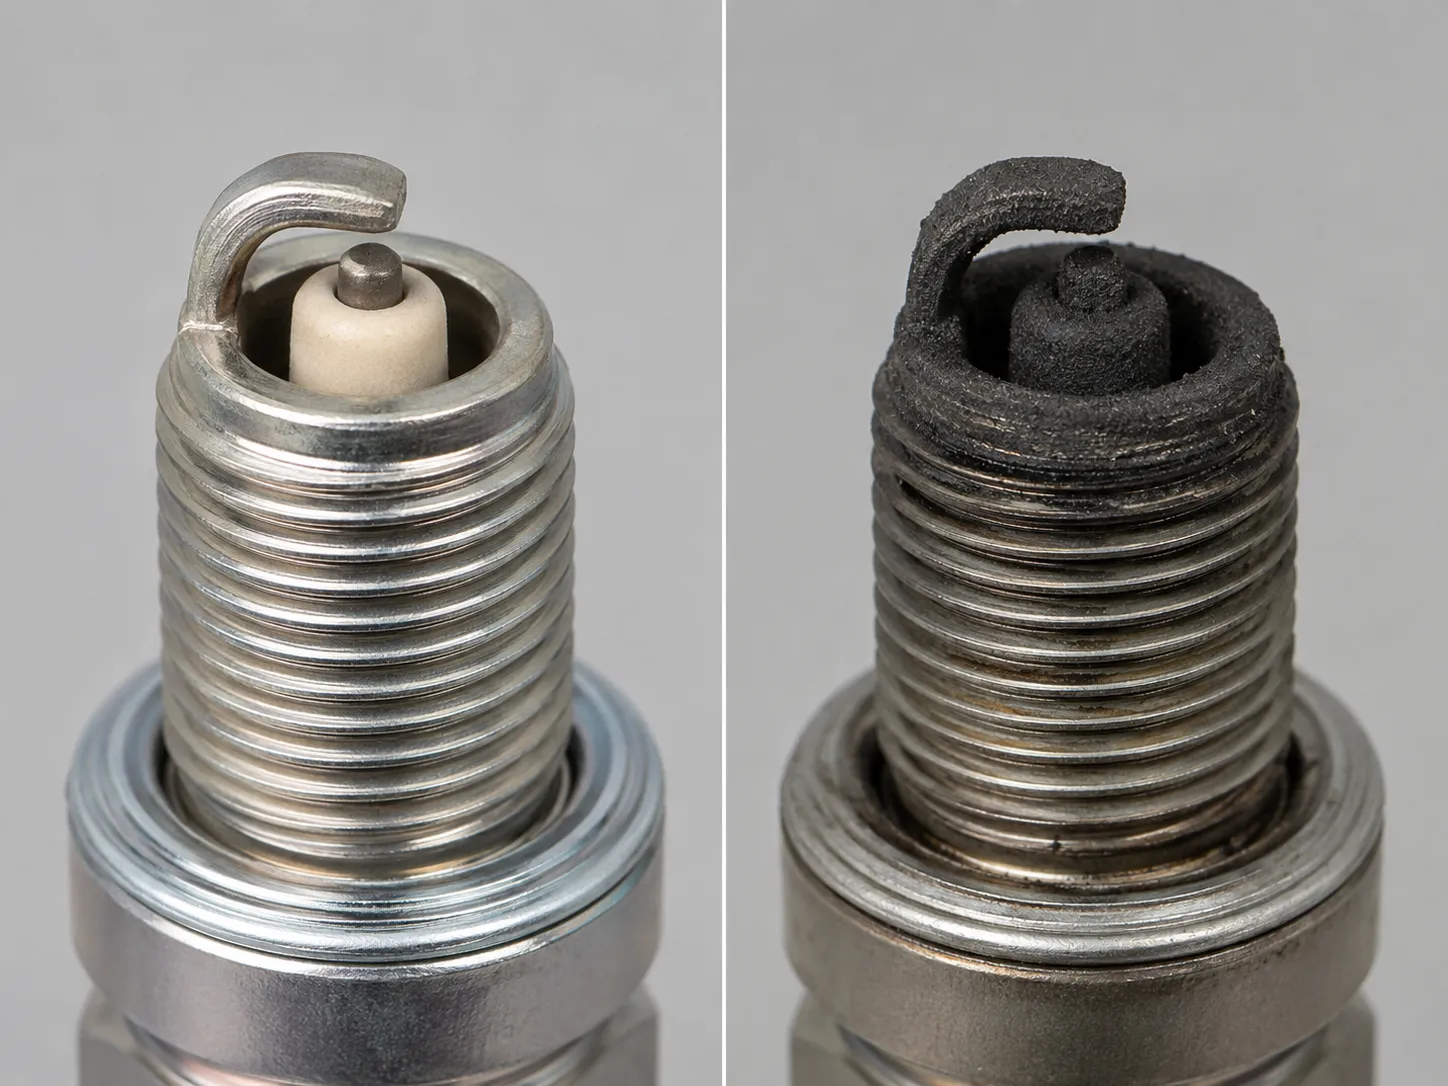
The outer bound is set by the engine maker rather than by the cleaning. E3 puts it at roughly once a season or 25 hours, and notes that the metal erodes eventually no matter how clean the part is, which is a fair thing for a plug manufacturer to say about its own product.
There is a point where cleaning stops being rational, and it is easier to spot than people expect. Once the centre electrode has visibly rounded off, more scrubbing buys nothing, and you are better off fitting a fresh plug instead.
Owners on TractorByNet describe cleaning and re-gapping the same plugs across seasons and rarely buying new ones, which is realistic for a low-hour mower and a plug that keeps passing its spark test. It stops being realistic the moment the plug needs cleaning twice in one summer.
The one-tank rule. If a fouled plug comes back within a single tank of fuel, cleaning is treating a symptom and not the cause. Four things are worth checking before you clean it a second time: a clogged air filter, stale or wrong-mix fuel, an overfilled or degraded oil level, and worn rings letting oil past.
Each of those has its own article in this cluster, and each of them will keep eating plugs until it is fixed.
So the "they're five bucks, just replace it" reply is not wrong so much as incomplete. It is exactly right for a cracked insulator, a rounded electrode, or an oil-fouled plug on an engine you have not fixed yet, and it is a waste of five dollars and a trip to the store for the dry black plug that makes up most of what comes off a mower in spring.
That is the whole argument of this page. Knowing how to clean a lawn mower spark plug is worth much less than knowing which plug deserves it, because the deposit tells you whether the next ten minutes are a repair or a delay, and the cleaner you pick decides whether the plug survives the attempt.
Look at the tip first, match it to a row in Table 1, and only then reach for the brush.
If the plug came back and the mower runs, the useful next move is not another plug job. It is the air filter, because that is what was feeding the deposits in the first place, and it is the cheapest way to keep the plug you just cleaned in service until autumn.
Spark Plug Cleaning FAQs
Can you clean a spark plug instead of replacing it?
Yes, when the deposits are dry carbon and the plug is physically sound. Richardson Saw's guidance is the practical version: you often cannot judge a plug until you start cleaning it, and cracked porcelain, a burnt electrode or melted metal all mean replacement rather than another pass with the brush.
Can you use sandpaper on a spark plug?
Only on the flat face of the ground strap, only in a pinch, and never on the ceramic insulator or the centre electrode tip. Fine grit removes hard crust that a brush will not lift, but it also rounds the sharp edges the spark needs and leaves a roughened surface that collects deposits faster next time.
How do you know if a cleaned plug is still good?
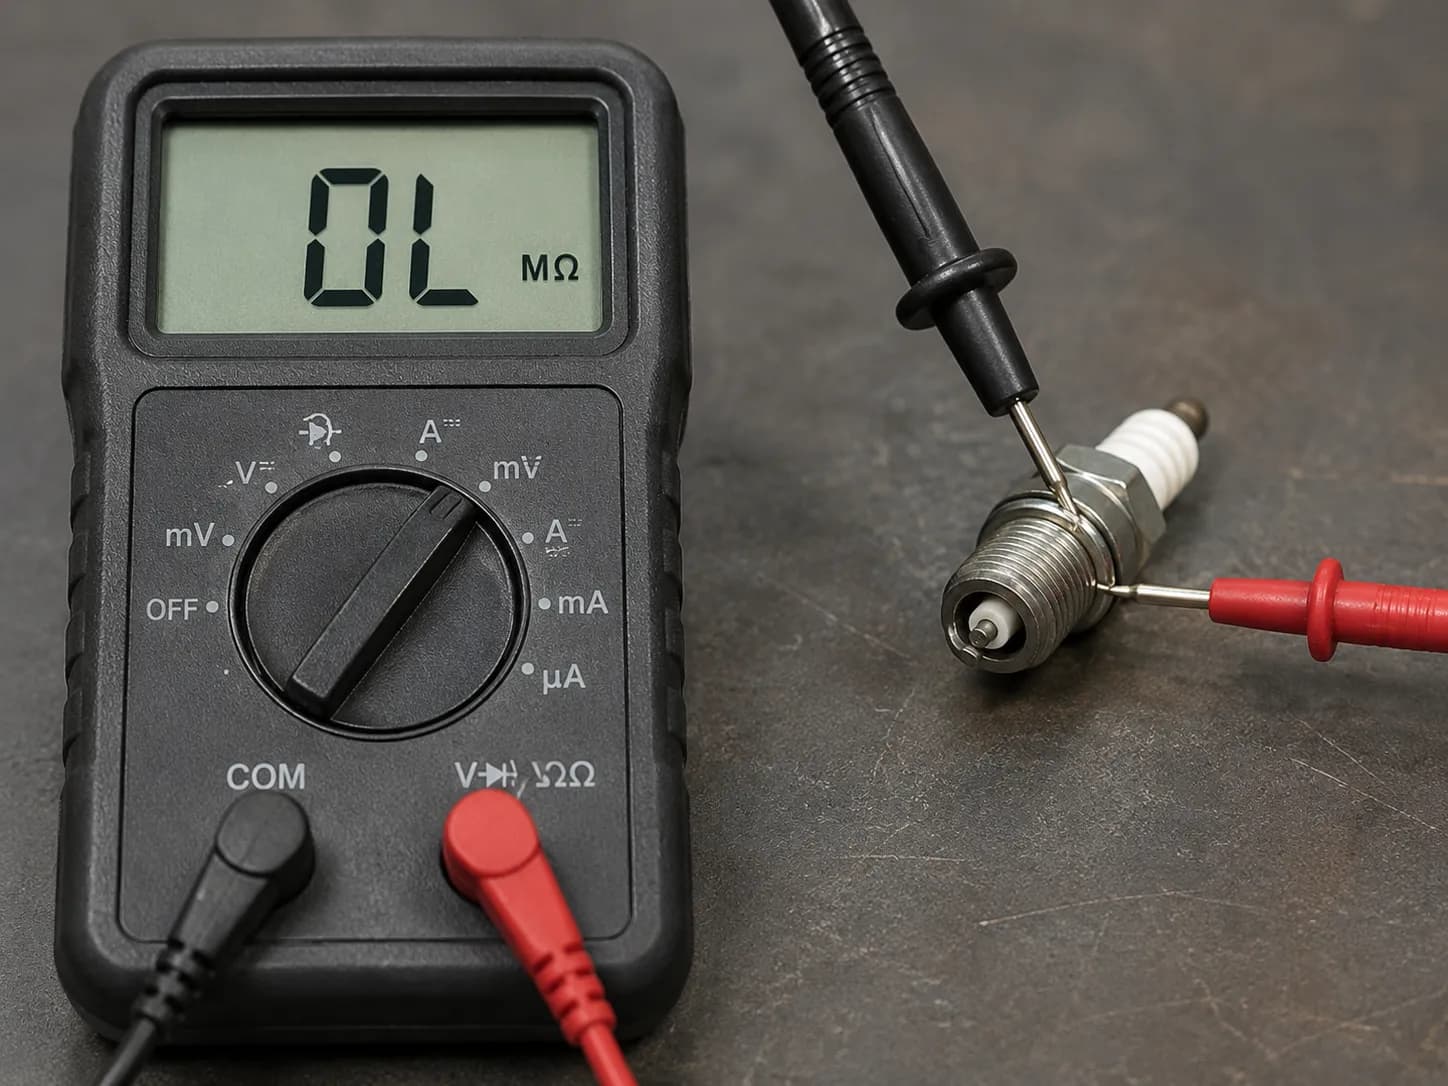
To check whether a cleaned lawn mower spark plug is still serviceable, touch a multimeter across the terminal and the centre electrode. A resistor plug should read in the kilo-ohm range.
An open-circuit reading means the internal resistor has failed and the plug will not fire reliably, however clean it looks.
Two of my 12 read open circuit on the meter after they looked spotless, which is the only reason I caught them before reinstalling.
Do you need to clean the spark plug hole too?
Clear it from the outside only, before the plug comes out. Blow the recess clear with compressed air at a shallow angle and wipe the collar with a dry rag, but put nothing rigid into the hole, because there is no filter between that opening and the cylinder wall.
Can you keep a cleaned plug as a spare?
You can, and it makes a poor primary one. A cleaned plug is a good roadside spare for confirming a diagnosis, but it starts life already worn, so the plug that lives in the shed for the day the mower dies mid-lawn should be a new one in its box.
How often should you clean rather than replace a mower plug?
Once or twice, then replace. Honda's owner's manual for the GCV engines schedules a plug check every year or 100 hours and a replacement every two years or 200 hours, and a plug that has been cleaned twice inside one of those intervals is telling you the engine needs attention rather than the plug.
Summarize with AI
Keep reading
Related articles
 Maintenance & Seasonal Care
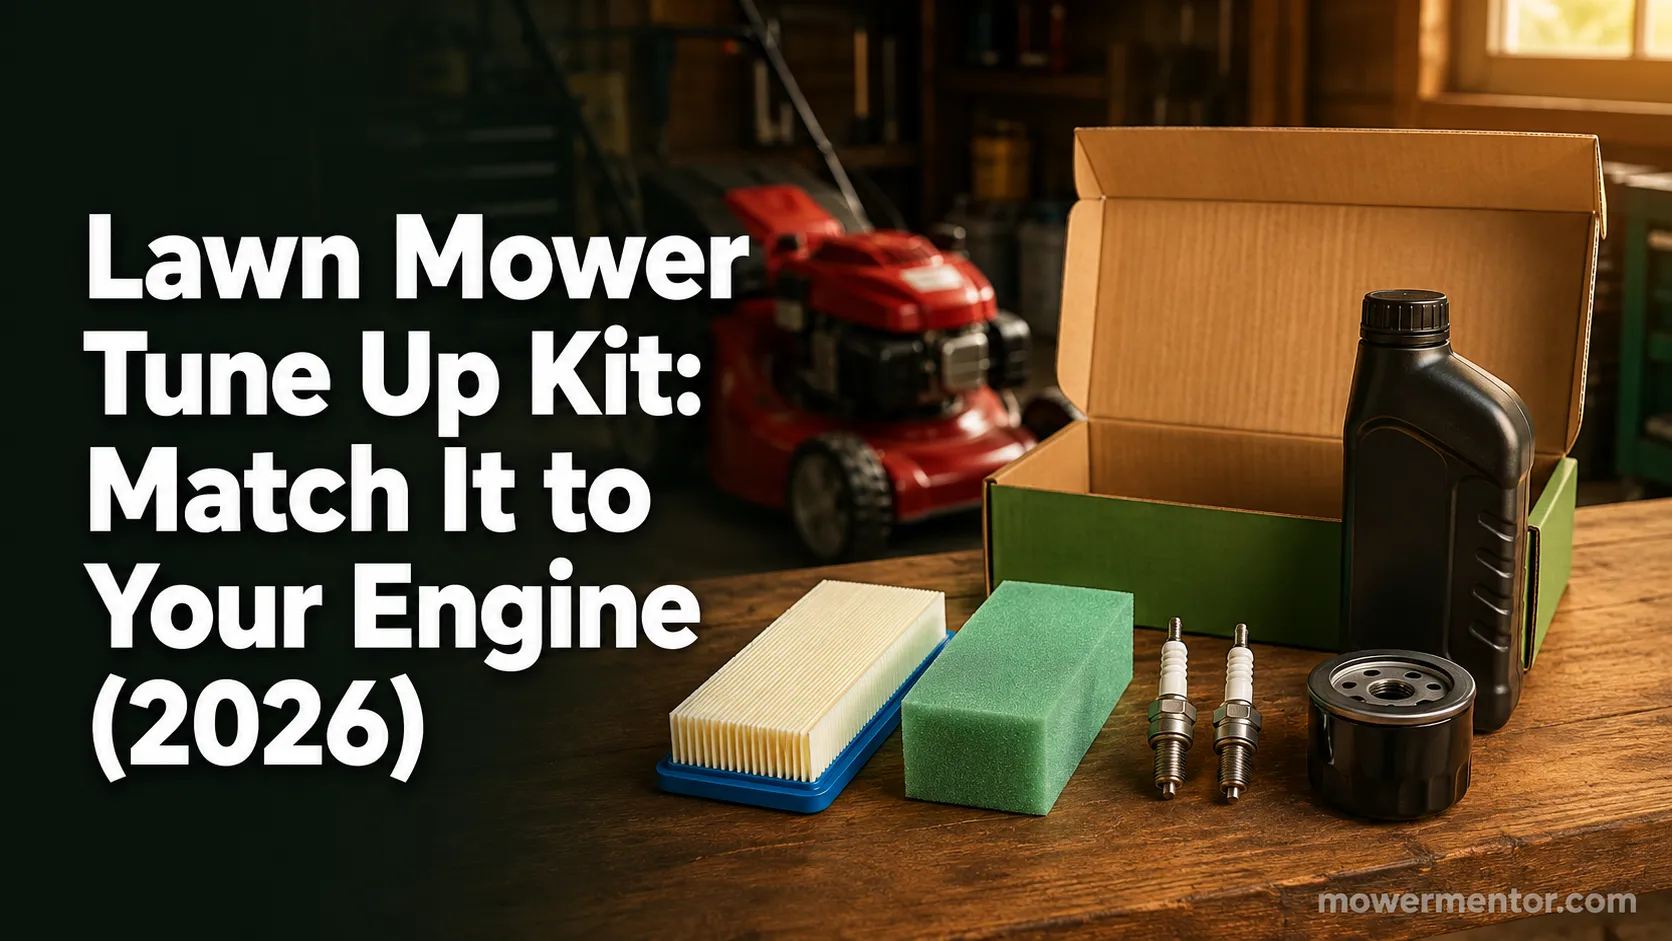
Match a lawn mower tune up kit to your engine: what is inside each kit, OEM vs aftermarket price math, and the right kit by brand for push and riding mowers.
 Maintenance & Seasonal Care
Compare mobile vs drop-off shop for a lawn mower tune up near me: real 2026 price ranges from 12 quotes, the 7 questions to ask, and when to just DIY it.
 Maintenance & Seasonal Care
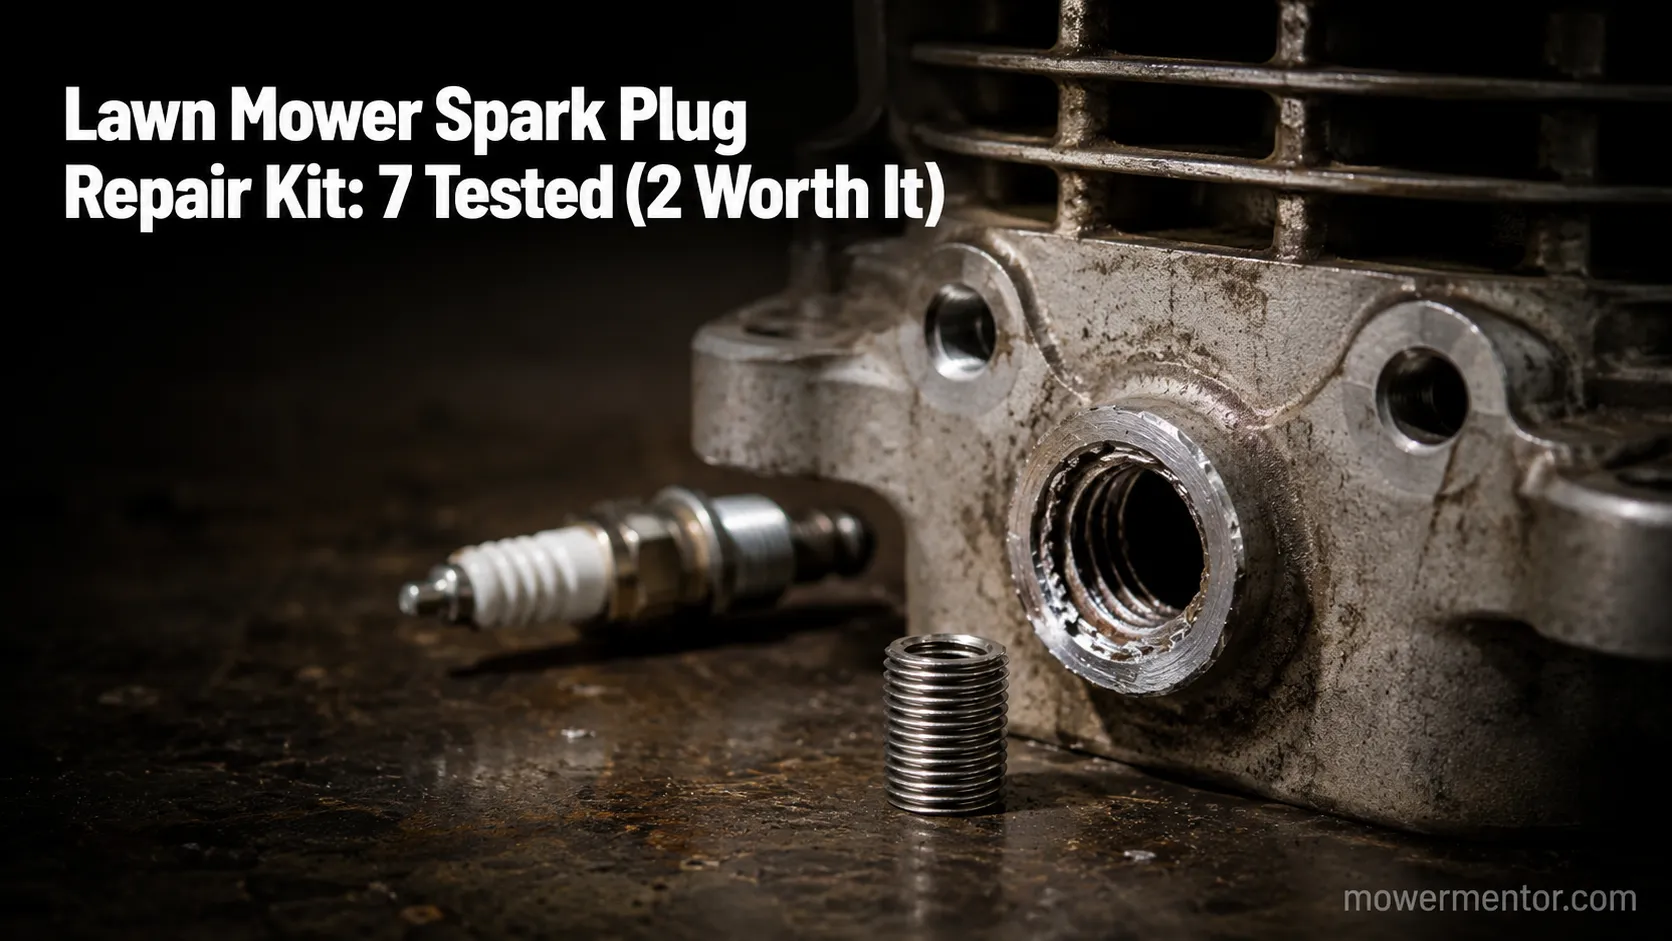
Match a lawn mower spark plug repair kit to your fault in 30 seconds. 7 kits tested on 9 engines: M14x1.25 sizing, insert lengths, and the $5 boot fix.
 Maintenance & Seasonal Care
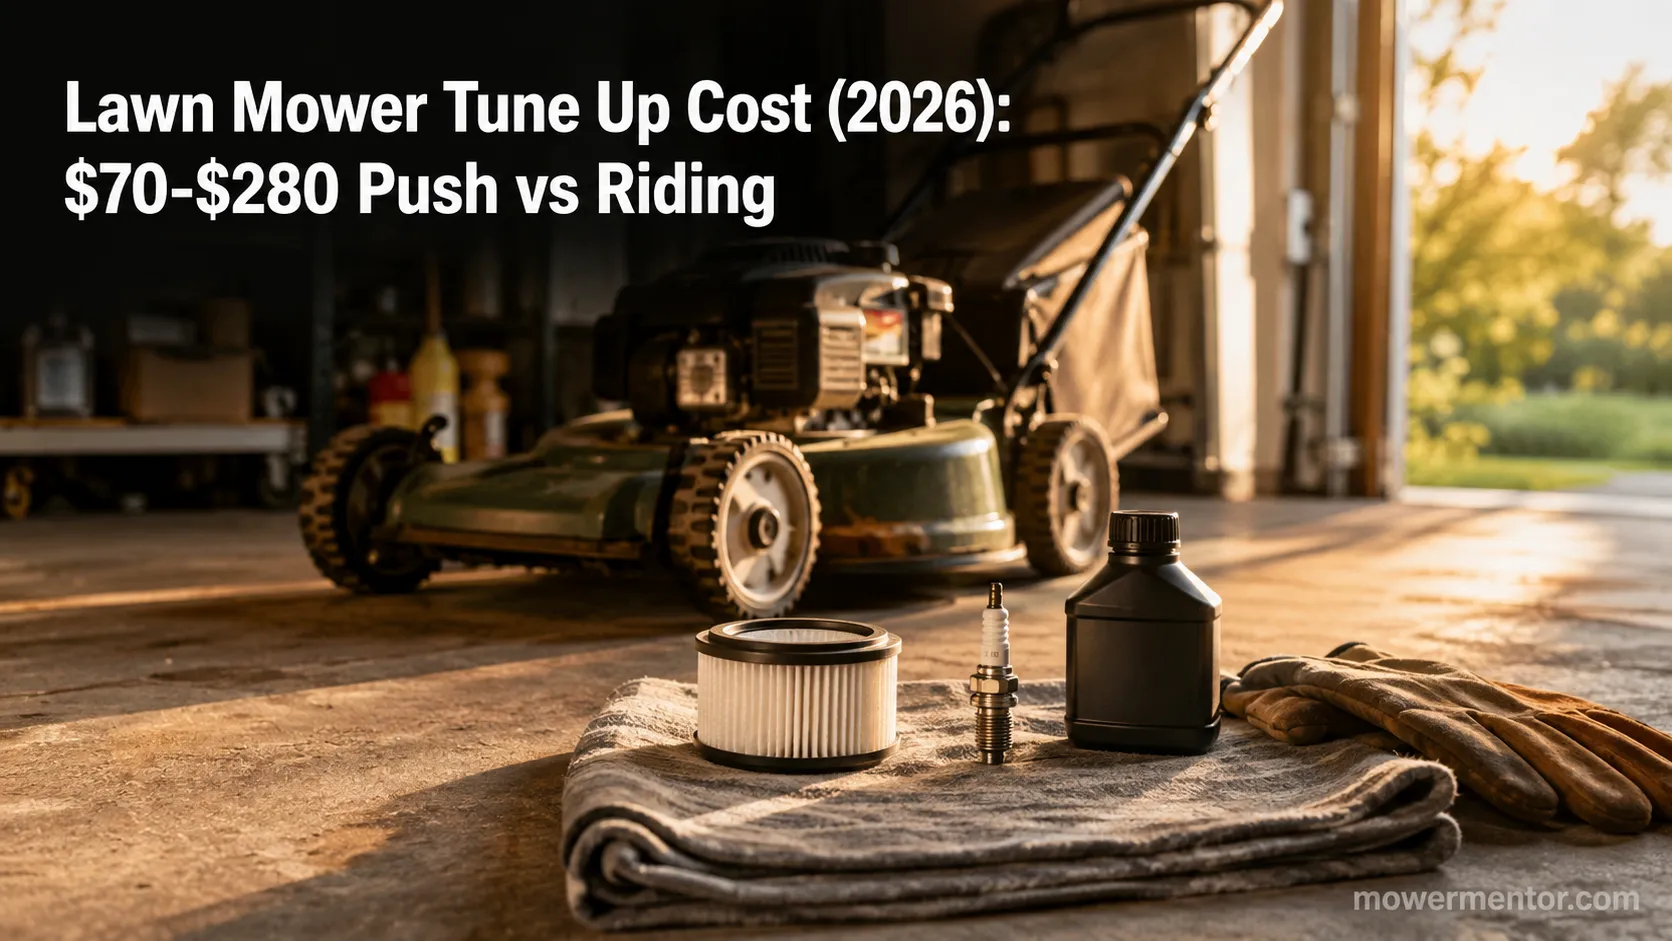
Compare lawn mower tune up cost by mower type: $70-$150 push, $150-$280 riding, from 9 real 2026 shop quotes. Plus the same parts for about $18 DIY.
Comments
Moderated for quality. Share a correction, ask a follow-up, or tell us what worked for you - every comment is reviewed before it goes live.