Lawn Mower Ignition Switch Replacement (Steps + Cost)
Do your own lawn mower ignition switch replacement: photo steps, wire-by-terminal transfer, fitment help, and a DIY-vs-shop cost table to save $100+.
Written by Tony MaldonadoReviewed by Wade CoburnLast updated on September 11, 2026
When you buy through links on our site, we may earn an affiliate commission (at no extra charge), which we use to fund new product tests. Learn more.
Read it your way
Short on time? Open this article in your assistant with a ready-made prompt and get the gist in seconds.
Found this useful? Make us a preferred source so we show up in your Google results.
Your key turns and nothing happens, or the engine keeps running after you shut it off, and a shop wants three figures to look at it.
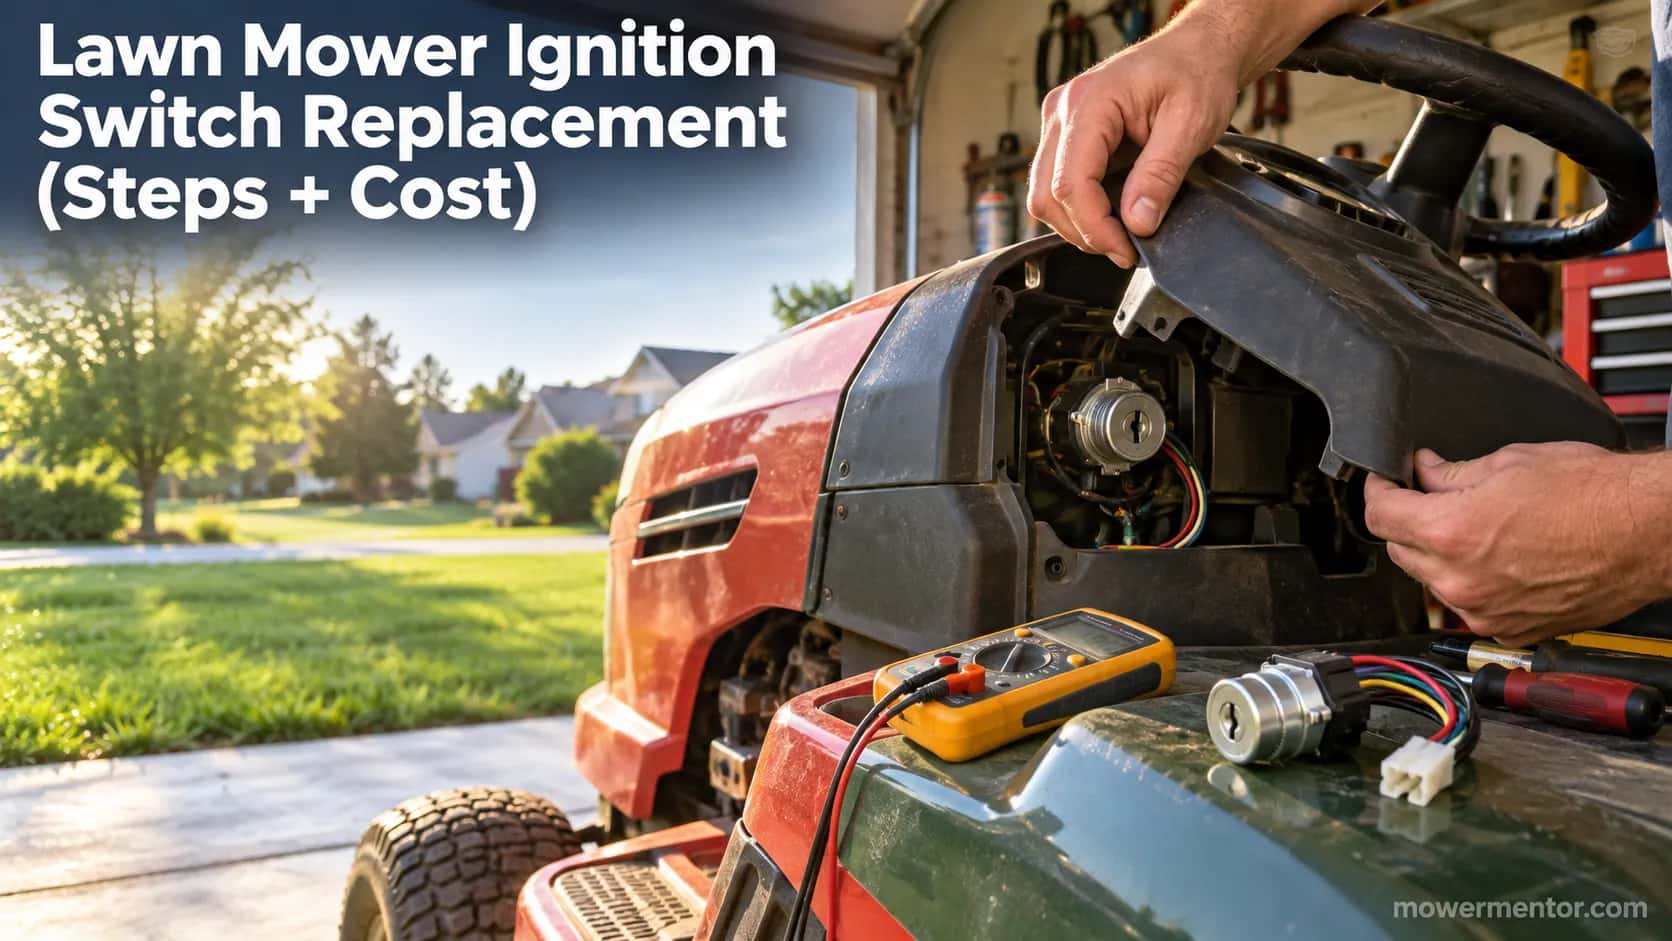
A lawn mower ignition switch replacement is one of the cheapest, most doable fixes on a riding mower, and the part usually costs less than a tank of gas.
The only step that trips people up is moving the wires over to the new switch. This guide photographs each one, so you match every terminal the first time instead of guessing.
TL;DR
Time: About 30 to 40 minutes for most keyed riding mowers.
Cost: Roughly $15 to $40 for the part if you do it yourself, versus $150 to $250 at a shop.
Hard part: Transferring the wires one terminal at a time (photograph the old switch first).
Before you buy: Confirm the switch is actually the fault, then count your terminals so you order the right one.
Safety: Disconnect the negative battery cable first, and never mow until the engine shuts off on the key.
Lawn Mower Ignition Switch Replacement at a Glance (Time, Cost and Difficulty)
A lawn mower ignition switch replacement takes most homeowners 30 to 40 minutes and costs about $15 to $40 for the part, compared with $150 to $250 at a shop once labor and a diagnosis fee are added, according to a 2026 cost breakdown.
The job rates as easy because the switch is a plug-in module behind the dash, not something wired into the frame.
You need basic hand tools, a multimeter to confirm the fault, and the correct replacement switch for your mower.
Start to finish, this took me 34 minutes on a Craftsman T-series, and most of that was me going slow on the wires on purpose.
The switch itself popped out in under a minute once the panel was off.
At a glance | What to expect |
|---|---|
Time | 30 to 40 minutes |
Difficulty | Easy, basic hand tools |
DIY cost | About $15 to $40 (part only) |
Shop cost | About $150 to $250 (part, labor, diagnosis) |
Tools | Nut driver or socket set, flat screwdriver, multimeter, work gloves |
Part needed | A 3 to 7 terminal key switch that matches your mower |
One honest caveat before you order anything: a small number of machines use a security key or an integrated ignition module that costs much more and can need a dealer.
This guide covers the standard keyed switch found on the vast majority of riding mowers and lawn tractors.
If you have not confirmed the switch is the problem yet, do that first in the next section so you do not buy a part you did not need.
Is It Really the Ignition Switch? Confirm Before You Buy
Before any lawn mower ignition switch replacement, confirm the switch is the actual fault, because a blown fuse, a bad starter solenoid, or an open safety interlock can produce the exact same no-start.
The fastest confirmation is a continuity test: with the key OFF a healthy switch grounds the magneto, in RUN it connects the battery terminal to the ignition circuit, and in START it connects the battery terminal to the starter terminal.
Sears PartsDirect's repair guide confirms the switch is often the culprit behind intermittent power and no-crank symptoms.
A failing switch usually shows one of these signs:
No response at all when you turn the key, no click and no crank.
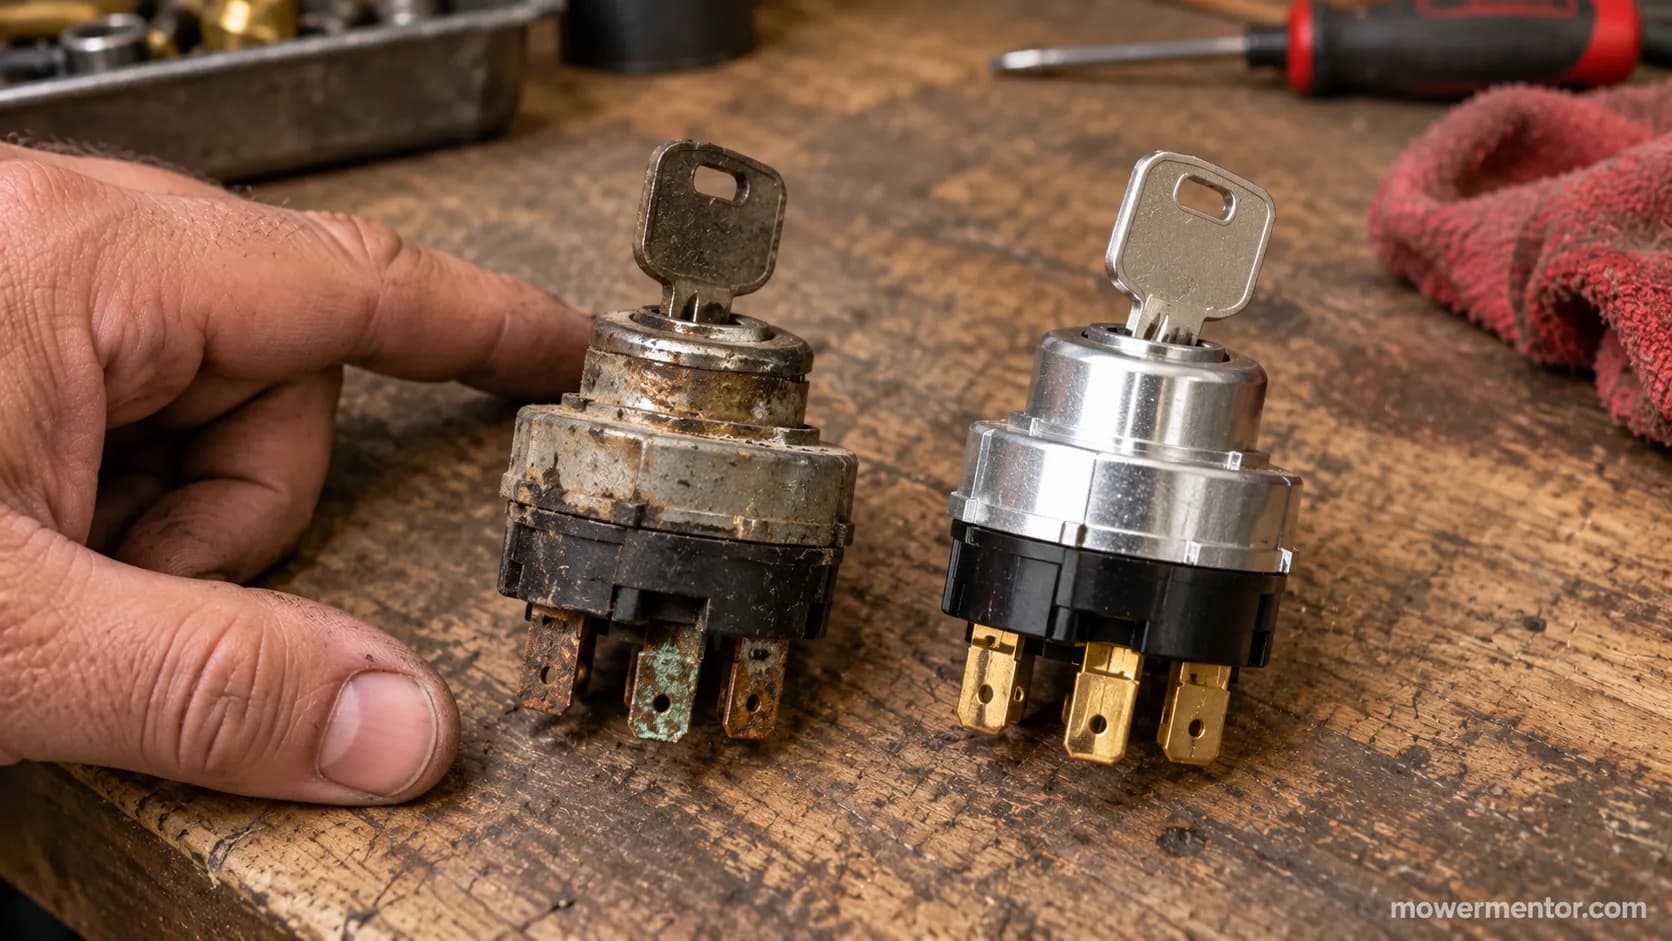
Intermittent starting, fine one day and dead the next (often corroded contacts).
The engine keeps running after you turn the key to OFF.
The key spins loosely in the barrel or feels sloppy.
It only starts if you jiggle the key or the switch requires a screwdriver to start.
That last symptom, where the barrel is so worn you can trip it with a screwdriver, is a dead giveaway the switch is done.
If you need to keep mowing before the part arrives, there are safer ways of starting it with a failing switch than forcing the key.
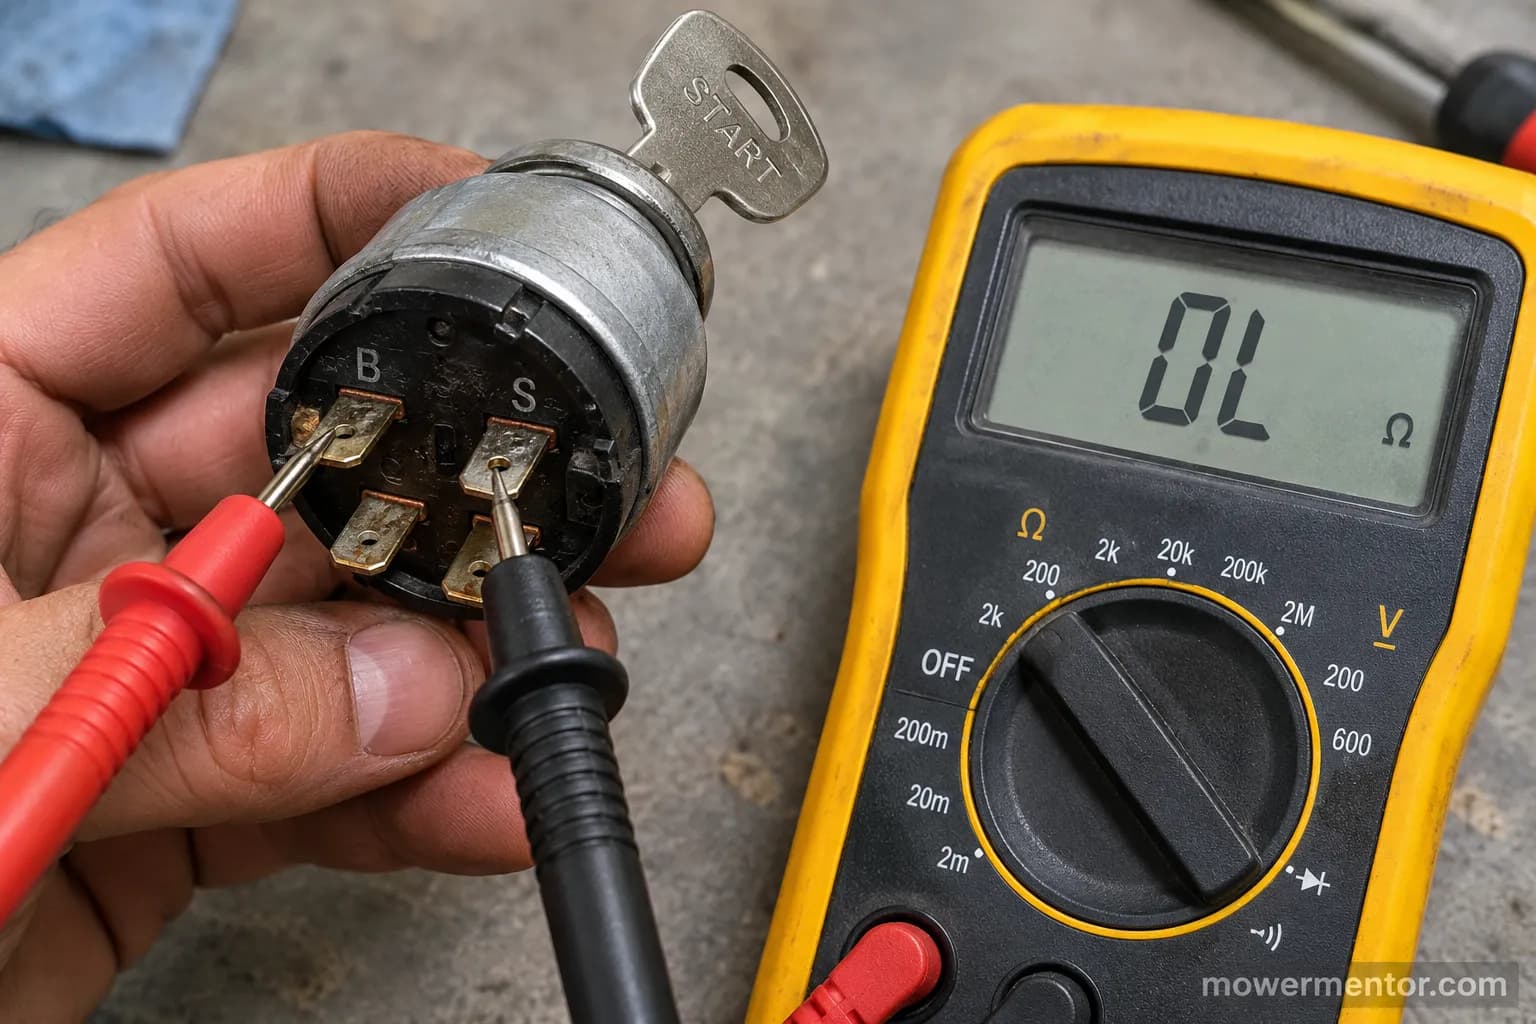
To confirm with a meter, pull the switch, set the multimeter to continuity, and check the terminal pairs in each key position.
On mine, RUN gave clean continuity, but START read open between the B and S terminals, and that open circuit in the start position was the switch failing internally.
The expected pattern (RUN connects B to the run terminal, START connects B to S) is documented in Madison Tractor's wiring guide, and you can see the full meter procedure in our walkthrough on how to check it with a meter.
If you want a quick bench check without a meter, some owners briefly bridge the B, S, and L wires together to see if the mower cranks, which confirms the fault sits in the switch rather than downstream.
Treat that as a diagnostic touch only, keep your hands clear of the blades and belts, and never leave wires jumped.
Not every no-start is the switch, so rule out the neighbors before spending money. A single loud click when you turn the key usually points at swapping the starter solenoid instead.
If nothing has been confirmed yet and you are guessing, start with the complete no-start walkthrough and work down the list.
Symptom | Most likely cause | Where to look |
|---|---|---|
No click, no crank on the key | Ignition switch or an open safety interlock | Test the switch, then the interlocks |
One loud click, no crank | Starter solenoid | Solenoid, not the switch |
Cranks but will not fire | Switch run circuit, coil, or fuel | Test B to the run terminal |
Runs but will not shut off on the key | Magneto ground wire or switch | See the post-replacement section |
Key spins loose or needs a screwdriver | Worn switch barrel | Replace the switch |
Which Switch to Buy: Prong Count, OEM vs Universal and Fitment
Choosing the right lawn mower ignition switch comes down to matching the terminal count and the terminal labels, not just the brand, because the number one install failure is buying the wrong pinout.
Riding mowers commonly use a 5-pole or 7-wire switch, and the terminals are usually stamped with letters near each spade.
Count your prongs and read those stamps before you order, because a switch with the right number of terminals can still be wired for a different job.
An OEM switch is plug and play: it matches your harness exactly and drops straight in. A universal switch costs less and fits many machines, but only works cleanly if its terminal configuration and labels line up with yours, a point EngineerFix's teardown makes when it walks through the B, S, L, M, and G functions.
If you would rather see the full buying rundown before ordering, our guide to choosing the right key switch compares OEM and aftermarket in more depth.
The safest move is to confirm your OEM part number from the owner's manual or the model plate, then cross-reference it.
Craftsman and AYP-built decks share a common switch family, and you can check the Craftsman switch specifics for part numbers like 532193350.
Murray uses its own key and cross-reference, covered in Murray's switch and key guide.
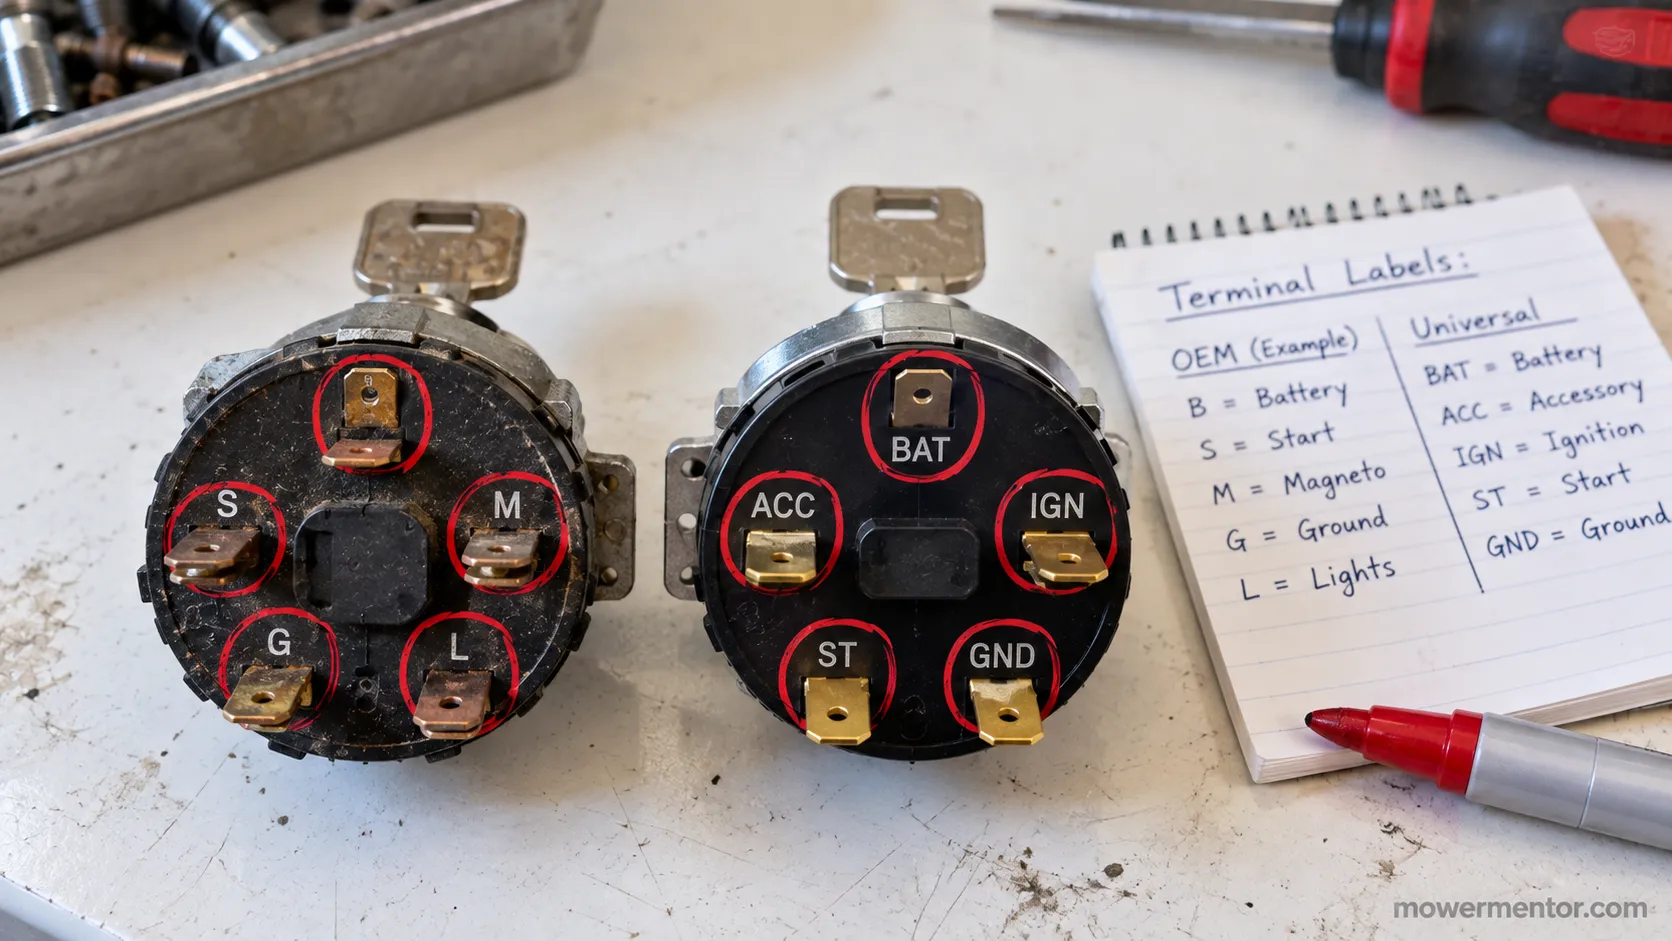
Here is where people get burned. The universal 5-terminal I bought was labeled G, S, M, L, B, while my OEM switch read BAT, E, Lo, IG, ST, same job, completely different names.
I mapped them on paper before I touched a wire, and the universal worked fine, but only because I matched the labels and not just the prong count.
Configuration | Terminals | Positions | Commonly found on |
|---|---|---|---|
Delta 3-position | 5 terminal (B, S, I or L, M, G) | OFF, RUN, START | Many Briggs-powered tractors |
4-position | 7 terminal | OFF, RUN, START, LIGHTS | Craftsman and AYP decks (532193350) |
Universal multi-fit | 5 terminal (G, S, M, L, B) | OFF, RUN, START | Aftermarket, many brands |
Brand OEM | Varies by model | Varies | Husqvarna 532176138, MTD 925-04228 |
If your labels do not match, do not force it. Match the terminal positions and functions, not just the letters, and if you are unsure which wire does what, the next section and the wiring diagram will sort it out.
How to Replace the Switch: Step-by-Step, Transferring Wires One Terminal at a Time
The core of any lawn mower ignition switch replacement is moving the wires to the new switch correctly, and the rule is simple: transfer one wire at a time, so you can never mis-seat a terminal.
Work in order, disconnect the battery first, and photograph the old switch before anything comes off. Each step below has a quick check so you know it went right before moving on.
Park and kill the power. Set the parking brake, remove the key, put on gloves, and disconnect the negative battery cable so a stray touch cannot spark or crank the starter. You should see the negative cable tucked away from the post.
Get to the switch. Lift the hood and remove the dash or steering-housing panel. Craftsman and MTD decks usually drop from the front, while the Troy-Bilt teardown notes show a slightly different panel order. The back of the switch should now be visible.
Photograph the wiring. Take a clear photo of the old switch with every wire attached before you disconnect anything, so you have a reference if a label is unclear. You should have a sharp shot showing each terminal and its wire.
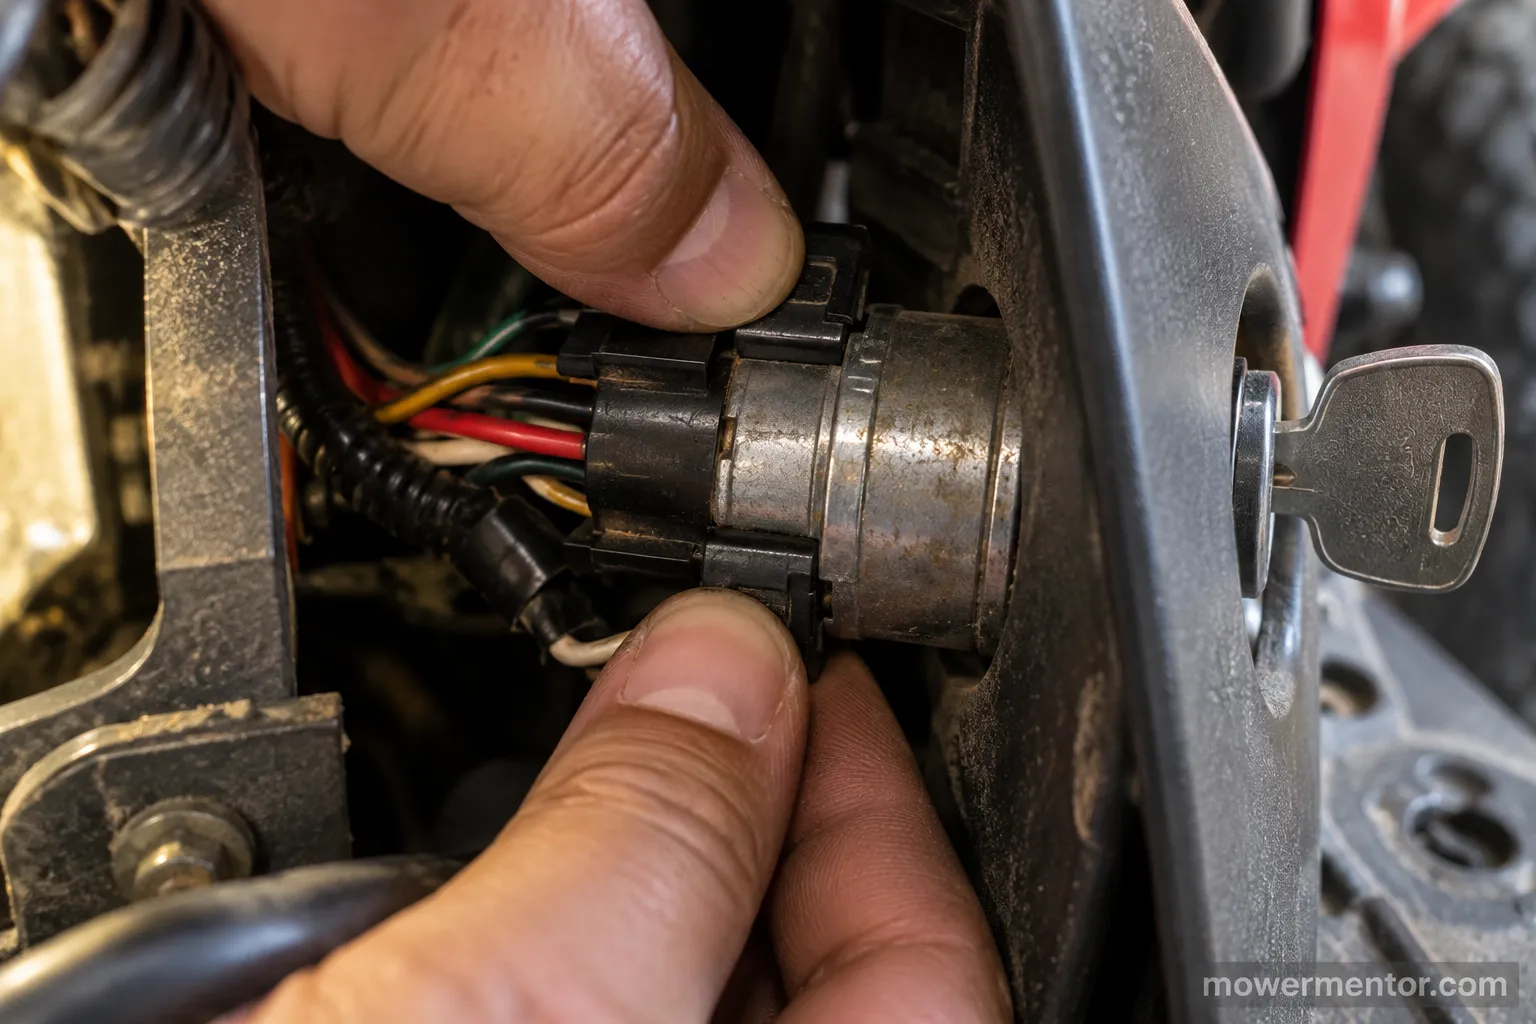
Release the switch. Depress the locking tabs and push the switch out through the front of the dash, then unplug the harness or free the individual spades. RepairClinic's replacement guide notes the tabs release toward the front. The old switch should come free in your hand.
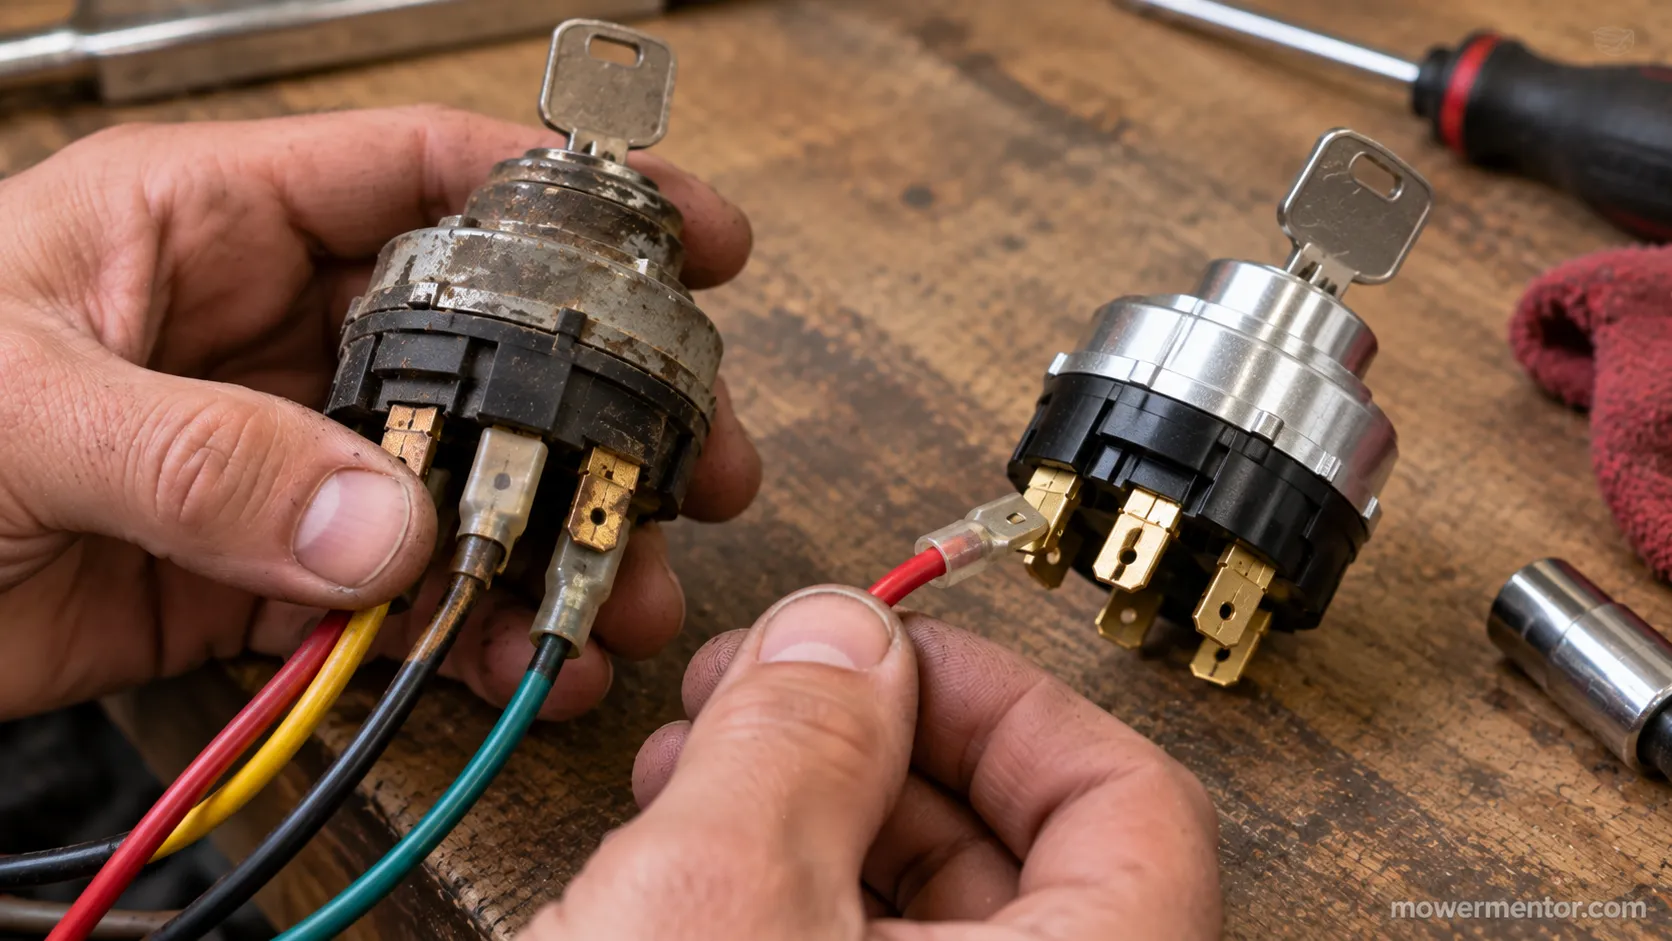
Transfer the wires one terminal at a time. Move a single wire from the old switch to the matching terminal on the new one, then repeat, so you never have more than one wire loose at once. If your labels do not line up, pull the prong-by-prong terminal map for your count and match by function. Each wire should click firmly onto its new spade.
Seat the new switch. Push it into the dash until the tabs lock and the key faces the right way up. It should sit flush and not rock.
Reconnect and verify. Reattach the negative battery cable, then turn the key to RUN, then START. The engine should crank and start, and turning the key to OFF should shut it down immediately.
The wire transfer is the whole ballgame, so here is the map I used. On my swap the L wire's spade was slightly loose when I moved it over, so I crimped a fresh connector rather than trust a wobbly fit, which is a two-minute fix that prevents an intermittent fault later.
Old terminal | Function | Typical wire color | New terminal to match |
|---|---|---|---|
B | Battery positive (via fuse) | Red | B or BAT |
S | Starter solenoid trigger | Yellow or white | S or ST |
I or L | Ignition or run and lights | Varies | I, L, or IG |
M | Magneto kill wire | Varies | M |
G | Ground | Black | G or E |
One honest note: if your harness is a single keyed plug rather than separate spade wires, there is nothing to transfer.
You just unplug the old switch and plug the connector into the new one, so skip the terminal-by-terminal work entirely.
Why Does My Mower Keep Running After I Turn the Key Off?
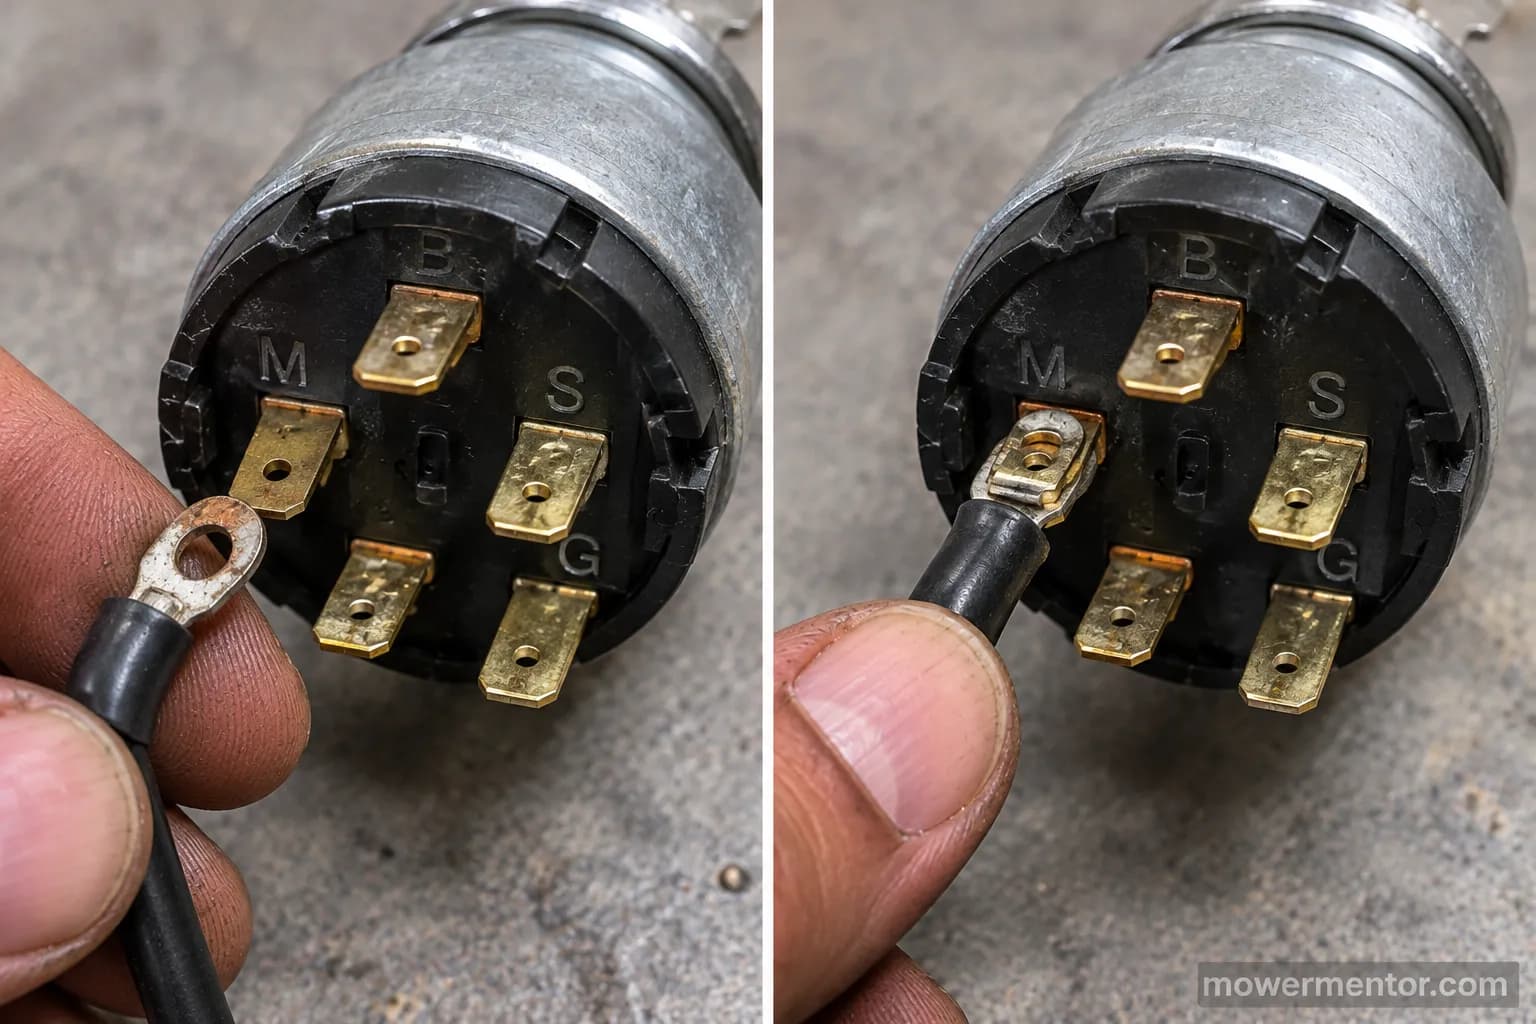
If your mower keeps running when you cut the key off after a switch swap, the magneto ground wire, the one on the M terminal, is almost always not landed or its lug has broken, so the switch cannot ground the coil to stop the engine.
In the OFF position that M terminal grounds the ignition coil and kills the spark, a function EngineerFix describes as the kill circuit.
First start after my swap, it would not shut off on the key at all, and the reason was simple: I had left the M wire off. Landing it killed the engine instantly.
A mower that will not shut off on the key is a safety issue. Do not mow with it until the key-off kill works, because you have lost your fastest way to stop the engine.
The other common complaint is the opposite: it will not crank after the swap. Nine times out of ten a safety interlock is open, so start with the seat interlock check and sit on the seat while testing.
A power take-off switch that is not fully pushed in will also block the start, and testing the PTO switch rules that out fast.
The brake interlock is the other usual suspect, so check the brake safety switch is closing when you press the pedal.
John Deere routes PTO and safety switches their own way, and Deere's PTO and safety switches guide maps the differences if that is your machine.
Finally, if the new switch does the same thing the old one did, suspect a wrong pinout or a bad-out-of-box part, and re-verify it against your terminal map before blaming the wiring.
If it still will not turn over after that, work through the no-crank diagnosis from the top.
DIY vs Shop: What Ignition Switch Replacement Really Costs
A DIY lawn mower ignition switch replacement runs about $15 to $40 for the part, while a shop typically charges $150 to $250 once you add labor of $75 to $150 and a diagnosis fee of roughly $90 to $110, a spread confirmed by RepairPal's estimator and mower-specific cost pages.
My part was $23 shipped. The two local shops I called quoted $110 and $135 plus a $90 diagnosis, so doing it myself saved close to $180 once the diagnosis was in the mix.
For comparison, replacing the starter motor costs more and takes longer, which is why confirming the cheap switch first is worth the ten minutes.
Option | Part | Labor and fees | Total |
|---|---|---|---|
DIY, universal switch | $10 to $30 | $0 | $10 to $30 |
DIY, OEM switch | $20 to $50 | $0 | $20 to $50 |
Independent shop | Included | $75 to $150 labor plus $90 to $110 diagnosis | $150 to $250 |
Mobile mechanic | Included | About $100 to $150 | $120 to $200 |
Dealer | Included | Higher labor rate | $200 and up |
While the panels are off, it is a good time for a broader once-over, so a full seasonal tune-up pairs nicely with this job. An easy Craftsman spark plug swap takes only a few minutes with the dash already open.
Or a quick Honda air filter clean if that is your engine, since you are already out in the shed with tools in hand.
If you own a multimeter and basic tools, DIY is a clear win, but if you have neither and would need to buy them for one repair, a shop visit can be the reasonable call.
Frequently Asked Questions
Can I replace a lawn mower ignition switch myself?
Yes. On a standard keyed riding mower the switch is a plug-in module behind the dash, and most people finish in 30 to 40 minutes with a nut driver, a screwdriver, and a multimeter. The only tricky part is transferring the wires, which you solve by moving one at a time.
Do I need an OEM switch or will a universal one work?
Either can work. An OEM switch is plug and play and matches your harness exactly, while a universal switch is cheaper and fits many machines only if its terminal count and labels line up with yours. Match the functions, not just the letters.
How long does the replacement take?
Budget 30 to 40 minutes for a first attempt on a keyed switch. Removing the dash panel and popping the switch takes just a few minutes, and the rest is careful wire transfer and a verification start.
Why won't my mower shut off after I replaced the switch?
The magneto ground wire on the M terminal is not landed or its lug is broken, so the switch cannot ground the coil in the OFF position. Reseat that wire and the engine will kill on the key again. Do not mow until it does.
How do I find the right replacement part number?
Read the letters stamped on your old switch, then confirm your model number from the machine's plate and cross-reference the OEM part. Sizing a switch is the same matching skill as matching the right air filter to your engine.
If the housing around the switch is cracked, note that too, the same way you would when replacing the filter housing.
Do I have to disconnect the battery first?
Yes, always disconnect the negative cable before you start. I skipped it once in a hurry and sparked a terminal against the frame.
It cost me nothing that time, but it is exactly how people damage wiring or the starter, so take the extra 30 seconds.
Once the new switch is in and the key-off kill works, your lawn mower ignition switch replacement is done and you can get back to mowing.
The part was cheap, the job was short, and the only thing that ever earns its reputation is the wiring, which is why moving one wire at a time and matching every terminal is the habit worth keeping.
Confirm the fault, buy the right switch, transfer carefully, and verify before you cut a single blade of grass.
Read it your way
Short on time? Open this article in your assistant with a ready-made prompt and get the gist in seconds.
Found this useful? Make us a preferred source so we show up in your Google results.
Keep reading
Related articles
Troubleshooting & Repair
Which Lawn Mower Ignition Switch Fits? (Prong Guide)
hoose the right lawn mower ignition switch by prong count (4/5/6/7), universal vs OEM fit, and key compatibility, plus which one fits your mower.
Troubleshooting & Repair
How to Start a Lawn Mower With a Bad Ignition Switch
Confirm it's the switch, then learn how to start a lawn mower with a bad ignition switch: a safe solenoid bypass to get moving, plus how to fix it for good.
Troubleshooting & Repair
How to Test a Lawn Mower Ignition Switch (5/6/7-Pin)
Learn how to test a lawn mower ignition switch with a multimeter: get continuity tables for 5, 6 & 7-pin switches plus a no-multimeter test-light method.
Troubleshooting & Repair
5 Prong Lawn Mower Ignition Switch Wiring Diagram (B/S/M/G)
Match your 5 prong lawn mower ignition switch wiring diagram by terminal letter: B/S/M/L/G, the magneto-vs-battery trap, plus a free PDF.
The discussion
Comments
Every comment is reviewed before it goes live.