
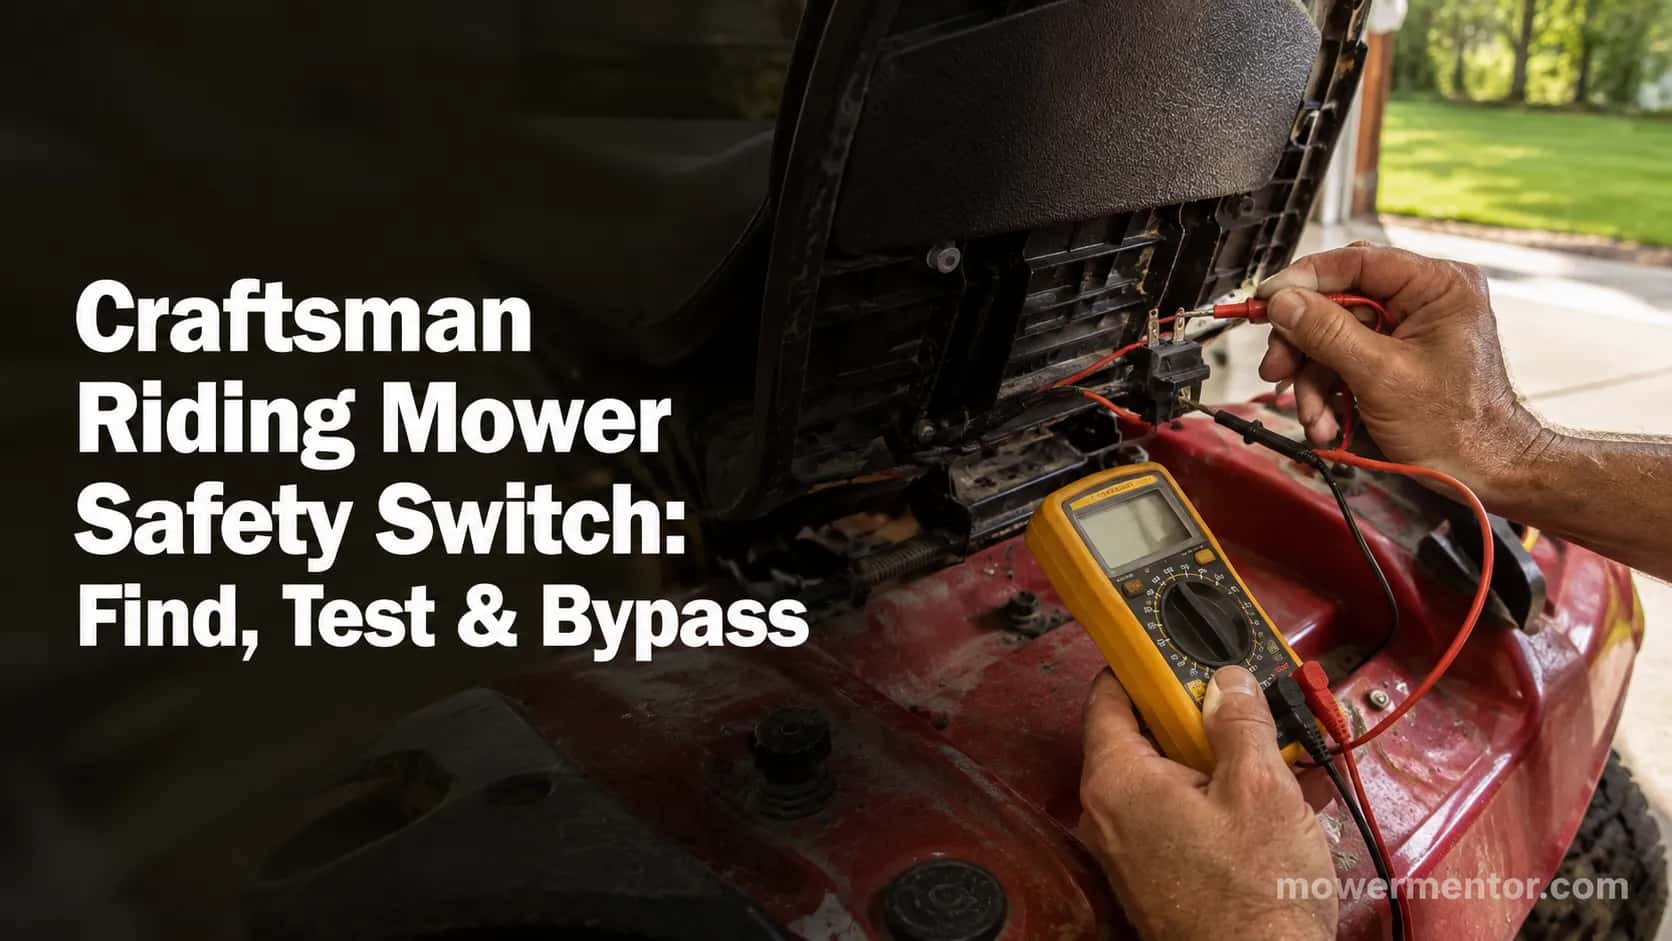
Craftsman Riding Mower Safety Switch: Find, Test & Bypass
Find, test, and safely bypass the Craftsman riding mower safety switch: seat, brake, and PTO interlocks, with multimeter values and a re-enable step.
Written by Tony MaldonadoReviewed by Wade Coburn
Last updated on August 22, 2026
When you buy through links on our site, we may earn an affiliate commission (at no extra charge), which we use to fund new product tests. Learn more.
Summarize with AI
A Craftsman riding mower safety switch is one of three interlocks (seat, brake, and PTO) wired in series to cut the engine or block the starter when it senses you are not in a safe position.
If your mower dies when you stand up, stalls when you release the brake, or will not start with the blades on, one of these switches or its connector is usually the reason.
This guide shows you where each one lives on a 917-series Craftsman, how to test it with a multimeter, and how to bypass one safely for a single diagnostic start.
If your Craftsman riding mower dies the moment you shift your weight off the seat, you are not looking at a blown engine. You are almost certainly looking at a Craftsman riding mower safety switch doing exactly what it was designed to do.
These interlocks frustrate owners because they fail quietly and hide in awkward spots. The good news: they are cheap, testable in minutes, and follow the same logic across nearly every Craftsman lawn tractor built in the last two decades.
I pulled a 42-inch 917-series Craftsman into the shop, mapped all four of its interlocks, and tested each one with a meter. Below is what I found, what a healthy switch should read, and how to get one start out of the machine without turning your mower into a hazard.
The 3 Craftsman Safety Switches, in 30 Seconds
A Craftsman riding mower safety switch system uses three core interlocks plus one optional reverse switch, all wired to interrupt the starting or ignition circuit.
The seat switch senses your weight, the brake or clutch switch confirms the pedal is down, and the PTO switch confirms the blades are off.
According to the U.S. Consumer Product Safety Commission, blade contact and loss of stability are the two hazards these interlocks exist to prevent, and the agency estimates roughly 35,000 riding-mower injuries reach emergency rooms each year.
On my shop's 917-series unit, I confirmed every switch in under two minutes each with a meter. Here is the quick map before we go deeper.
Switch | What it confirms | Typical location | How it usually fails |
|---|---|---|---|
Seat (operator presence) | You are sitting down | Under the seat pan | Dies when you stand or lean |
Brake / clutch | Brake pedal is pressed | Above the brake pedal pivot | Will not start, or stalls on release |
PTO / blade engagement | Blades are disengaged | Behind the PTO knob or under the dash | Will not start with blades on |
Reverse (RIO) | Optional, governs mowing in reverse | Near the shifter or fender | Blades cut out when backing up |
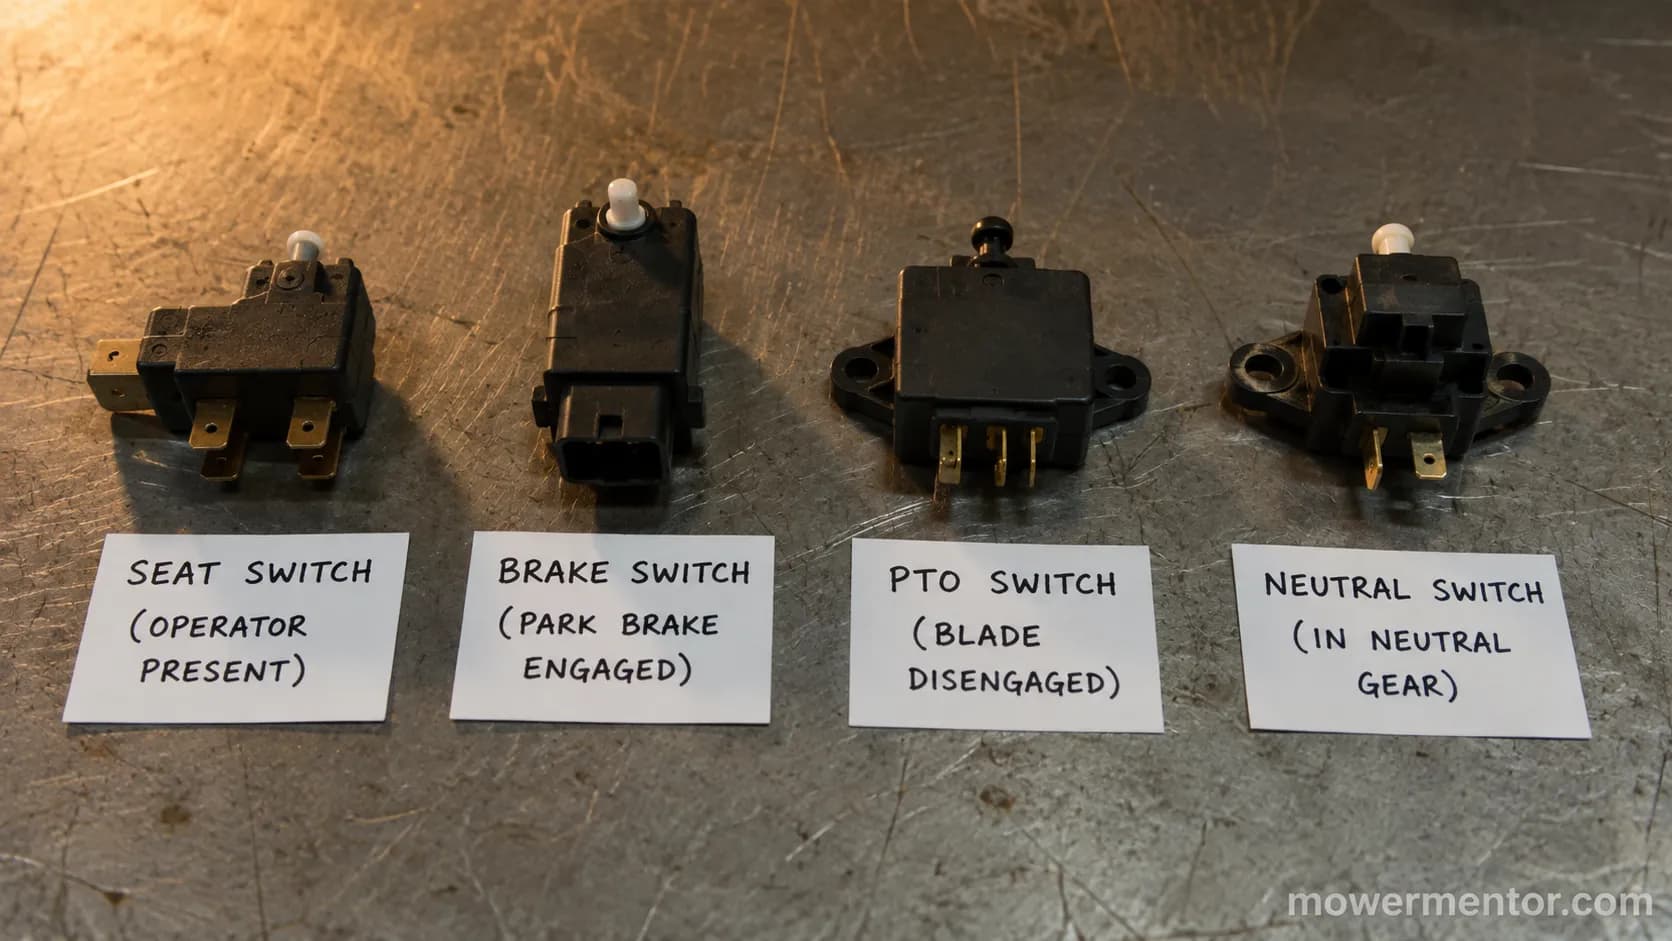
The reverse switch, often called the RIO or reverse implement option, is the one many owners forget exists. The B71.1 standard from ANSI and OPEI is why your blades stop when you shift into reverse unless you deliberately override it.
How Craftsman Safety Switches Kill the Engine (the Series Circuit)
Every Craftsman riding mower safety switch works by completing or breaking a low-current circuit, not by carrying the heavy starter load itself. The seat, brake, and PTO switches sit in series, so a single open switch anywhere in the chain stops the mower from starting or running.
On most Craftsman tractors, the seat and PTO circuits route through a module that grounds the ignition, while the brake and neutral circuits feed the starter relay. The Craftsman 917 owner's manual documents this interlock wiring in its schematic, and it is worth pulling before you probe anything.
I traced the harness on my test tractor to confirm which path did what. What surprised me was how short the chain actually is once you strip away the fuse and solenoid wiring, which I cover when I trace your model's starting-circuit wiring.
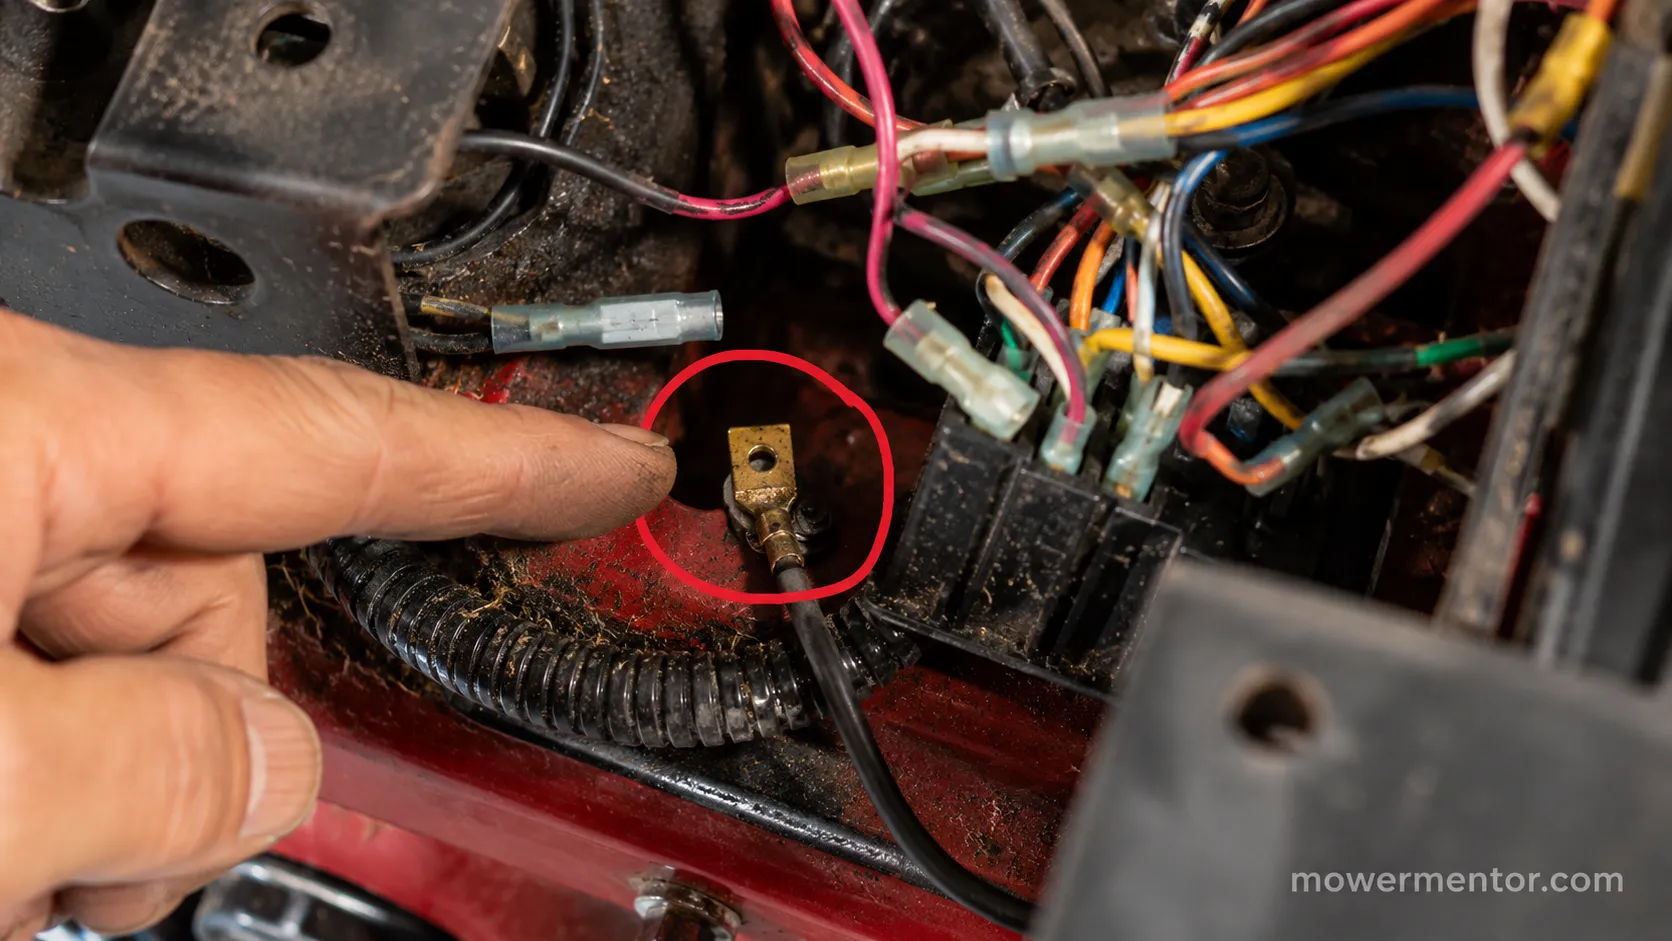
Forum mechanics describe the seat circuit as the one that grounds the M terminal and kills spark, which is a fair shorthand for what the module does. When the seat opens, it pulls the ignition to ground and the engine dies almost instantly.
That series design is also why a no-start can have nothing to do with the switches at all. If you want the wider picture first, start with the full no-start diagnostic flowchart and come back here once you have narrowed it to the interlocks.
Where Every Craftsman Riding Mower Safety Switch Is Located
Locating a Craftsman riding mower safety switch is the step most owners get stuck on, because the three switches hide in three very different places.
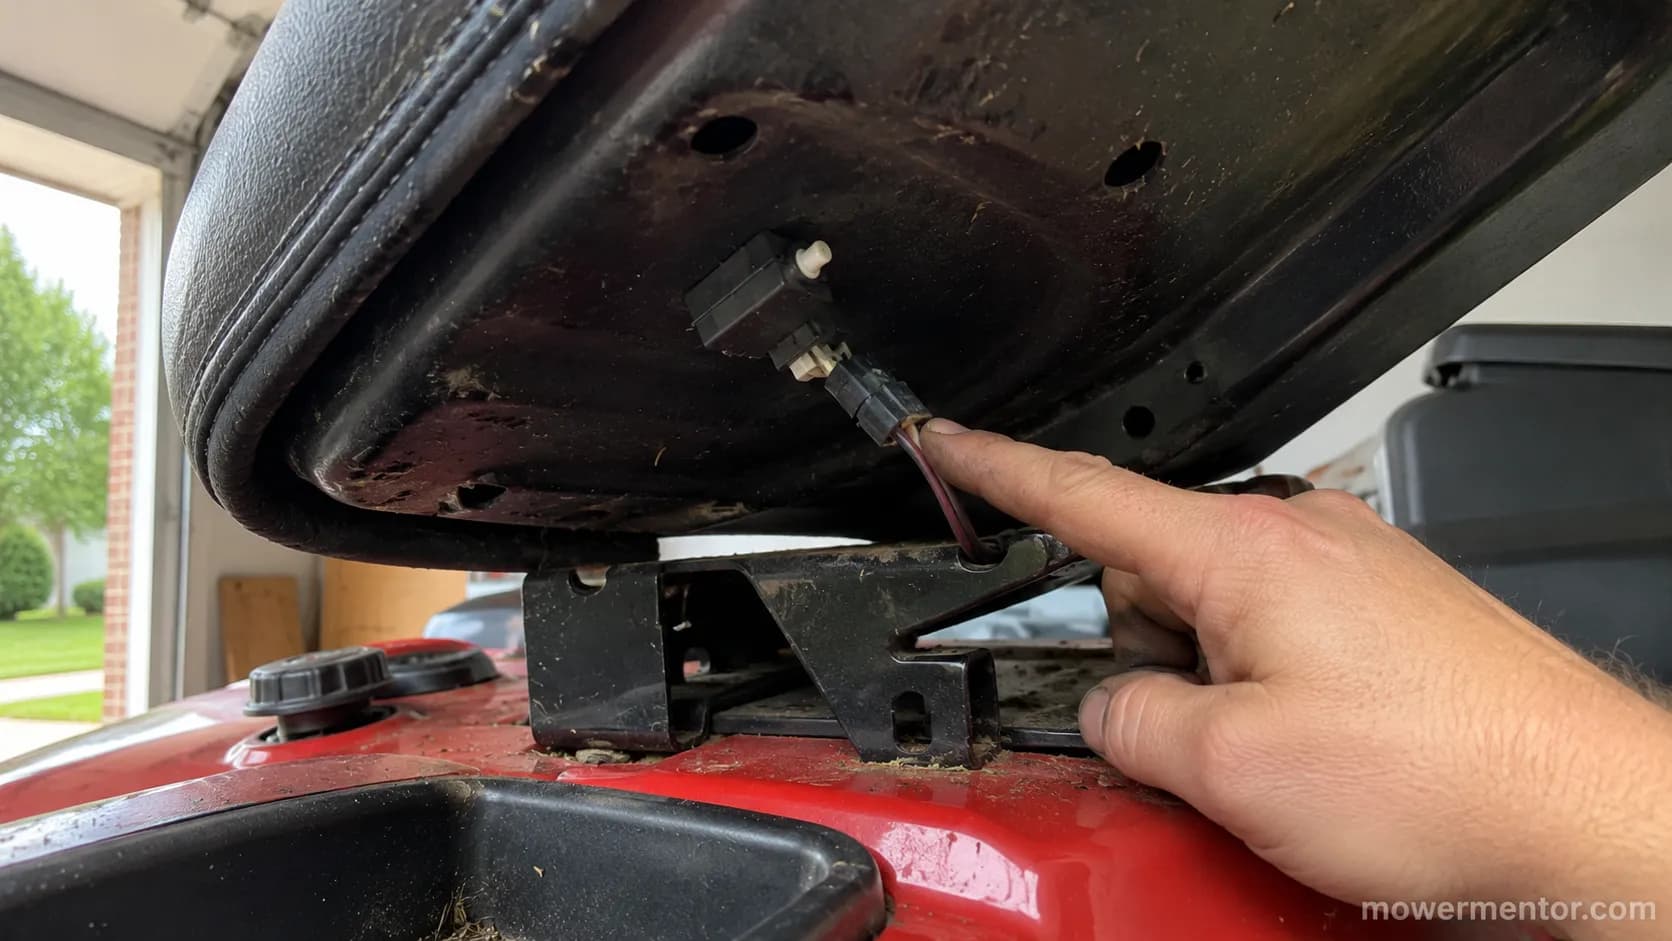
The seat switch clips into the underside of the seat pan, the brake switch mounts on a bracket above the brake pedal pivot, and the PTO switch sits behind the blade-engagement knob or under the dash panel.
Model matters here: your 917 model tag, printed under the seat or on the frame, is what a parts diagram uses to show the exact switch positions. Sears PartsDirect hosts those diagrams by model number for free.
On my test unit, the brake switch was the hardest to reach. It hid above the pedal pivot, and I had to loosen the fuel tank and swing it aside before I could get a hand and a light on it cleanly.
The seat switch was the opposite, a two-minute job. Lift the seat, and it is right there on the pan with its connector exposed.
The concept behind these interlocks is the same on any brand, so if you own more than one machine it helps to understand how interlocks work on any brand before you memorize Craftsman specifics. The seat unit itself has enough quirks that I break down the seat switch in more depth separately.
The PTO switch, sometimes called the blade engagement or electric PTO switch, is usually a pull knob on the dash with a multi-pin plug behind it. The brake circuit, which some owners call the clutch or neutral switch, is where brake-switch symptoms and replacement get their own detailed treatment.
How to Test Each Craftsman Safety Switch With a Multimeter
Testing a Craftsman riding mower safety switch takes one tool and one setting: a multimeter on continuity or ohms. A healthy normally-open switch reads open (OL) when it is not pressed and near zero ohms when it is pressed, while a normally-closed switch does the reverse.
The distinction owners trip over is NO versus NC, or as the forums put it, short equals closed. Madison Tractor's seat-switch guide walks through the continuity behavior that tells a good switch from a dead one.
I put my Klein MM400 on each switch and logged the readings. Here is the actual data from the 917-series bench test.
Switch | Meter setting | Reading unweighted / released | Reading pressed / engaged | Verdict |
|---|---|---|---|---|
Seat (NO) | Continuity / ohms | OL (open) | 0.3 Ω (closed) | Healthy |
Brake (NO) | Continuity / ohms | OL (open) | Stuck open, no change | Failed |
PTO (disengage circuit) | Continuity / ohms | 0.4 Ω (closed) | OL when engaged | Healthy |
Reverse / RIO (NO) | Continuity / ohms | OL (open) | 0.3 Ω (closed) | Healthy |
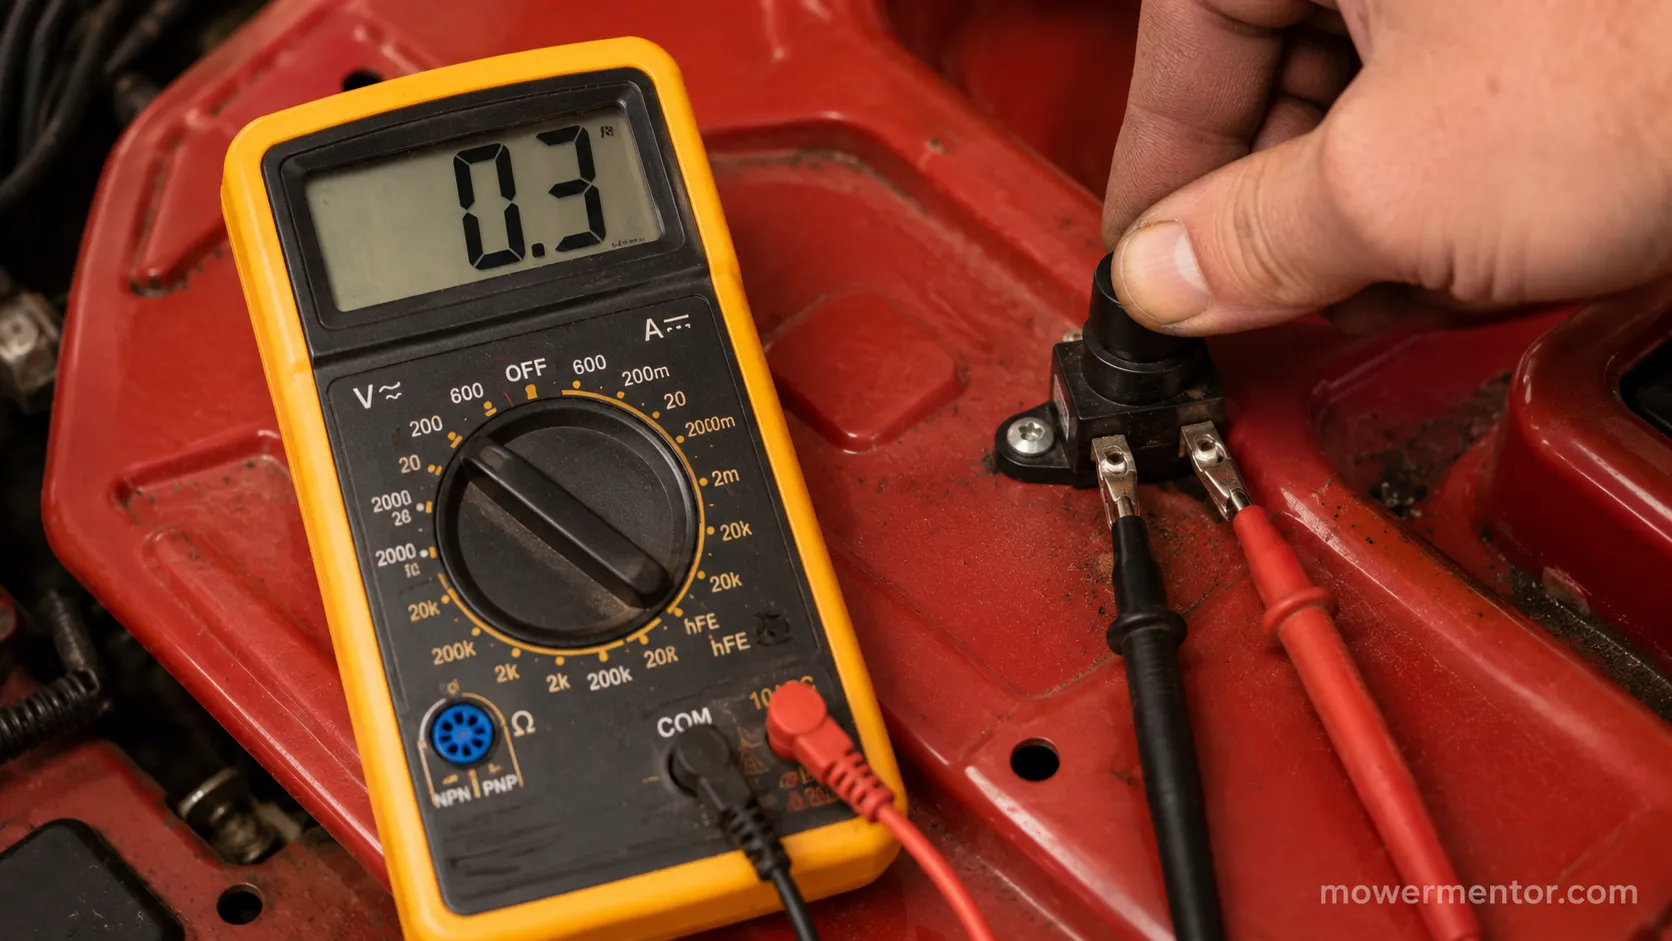
The brake switch on my unit was the culprit. It stayed open even when the pedal was fully down, which is exactly the fault that blocks the starter and leaves you turning the key to silence.
Some Craftsman switches are 4-wire rather than 2-wire, combining two circuits in one housing. On those, test each pair separately, because one half can fail while the other still works.
If the meter says every interlock is fine, the fault is upstream. That is when I move to test the key switch by terminal instead.
A starter that only clicks once is telling you something different. In that case, a single click points to the solenoid far more often than to a switch.
For a dead-quiet key with no crank at all, the trail leads elsewhere again. Walk back through the no-crank electrical path and rule out the fuse and battery first.
Which Safety Switch Is Bad? Match the Symptom
The fastest way to identify a failing Craftsman riding mower safety switch is to match the exact moment the engine cuts out to the switch that governs that moment.
A stall when you rise points to the seat switch, a no-start with the pedal down points to the brake switch, and a no-start with blades engaged points to the PTO switch. I reproduced each of these faults on the bench so the pattern is not guesswork.
The symptom-to-switch mapping below comes straight from those runs.
Symptom | Most likely switch | Quick confirmation |
|---|---|---|
Engine dies when you stand up | Seat | Meter reads open while seated |
Will not start, pedal not helping | Brake / clutch | No continuity with pedal down |
Will not start with blades on | PTO | No continuity when disengaged |
Blades quit only in reverse | Reverse / RIO | Working as designed, not a fault |
Nothing at all at the key | Often upstream, not a switch | Fuse, battery, solenoid suspect |
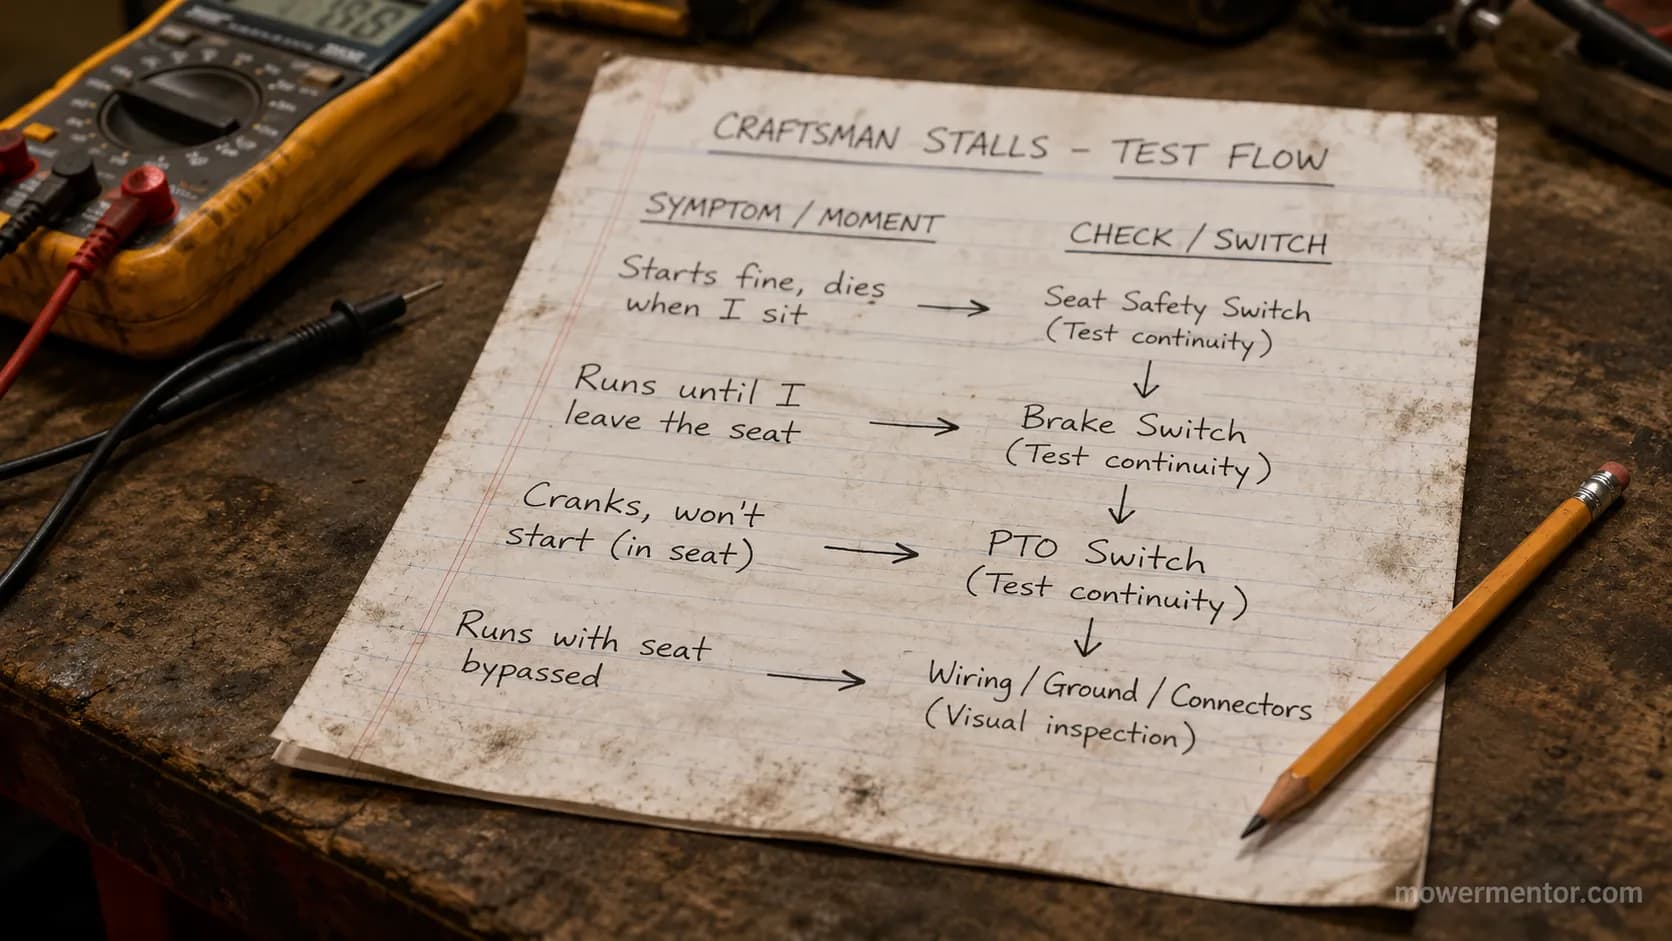
Why does my Craftsman die when I stand up or let off the brake?
That specific complaint, dies when you stand up or let off the brake, is the seat switch or brake switch opening the circuit under real conditions. A switch can pass a static bench test and still fail under vibration or partial contact, so recreate the movement while the meter is attached.
If the key does nothing rather than the engine dying, the switches may be innocent. Compare your symptom against when nothing happens at the key to rule the interlocks in or out.
A start that ends in a rapid-clicking start usually means battery or solenoid, not an interlock. A completely dead circuit lines up better with a totally dead circuit than with any single switch.
How to Replace a Craftsman Safety Switch
Replacing a Craftsman riding mower safety switch is a bolt-out, plug-out job once you can reach it, and most switches cross-reference to a small family of part numbers.
The common seat and interlock switch on many 917-series tractors is part 532197802, and RepairClinic's replacement guide documents the fit and the removal steps.
Match the connector shape and pin count, not just the part number, because Craftsman used both 2-wire and 4-wire versions.
On my unit, reaching the seat switch took a 3/8-inch and a 1/4-inch socket and about ten minutes. The new switch read 0.3 ohms pressed on the first test, which matched the healthy value from earlier.
Follow these steps for the seat switch, the most common replacement:
Disconnect the negative battery cable before touching any wiring.
Lift the seat and unclip the old switch from the pan.
Unplug the connector and note the wire orientation.
Clip the new switch in and reconnect the plug.
Reconnect the battery and confirm continuity with the meter.
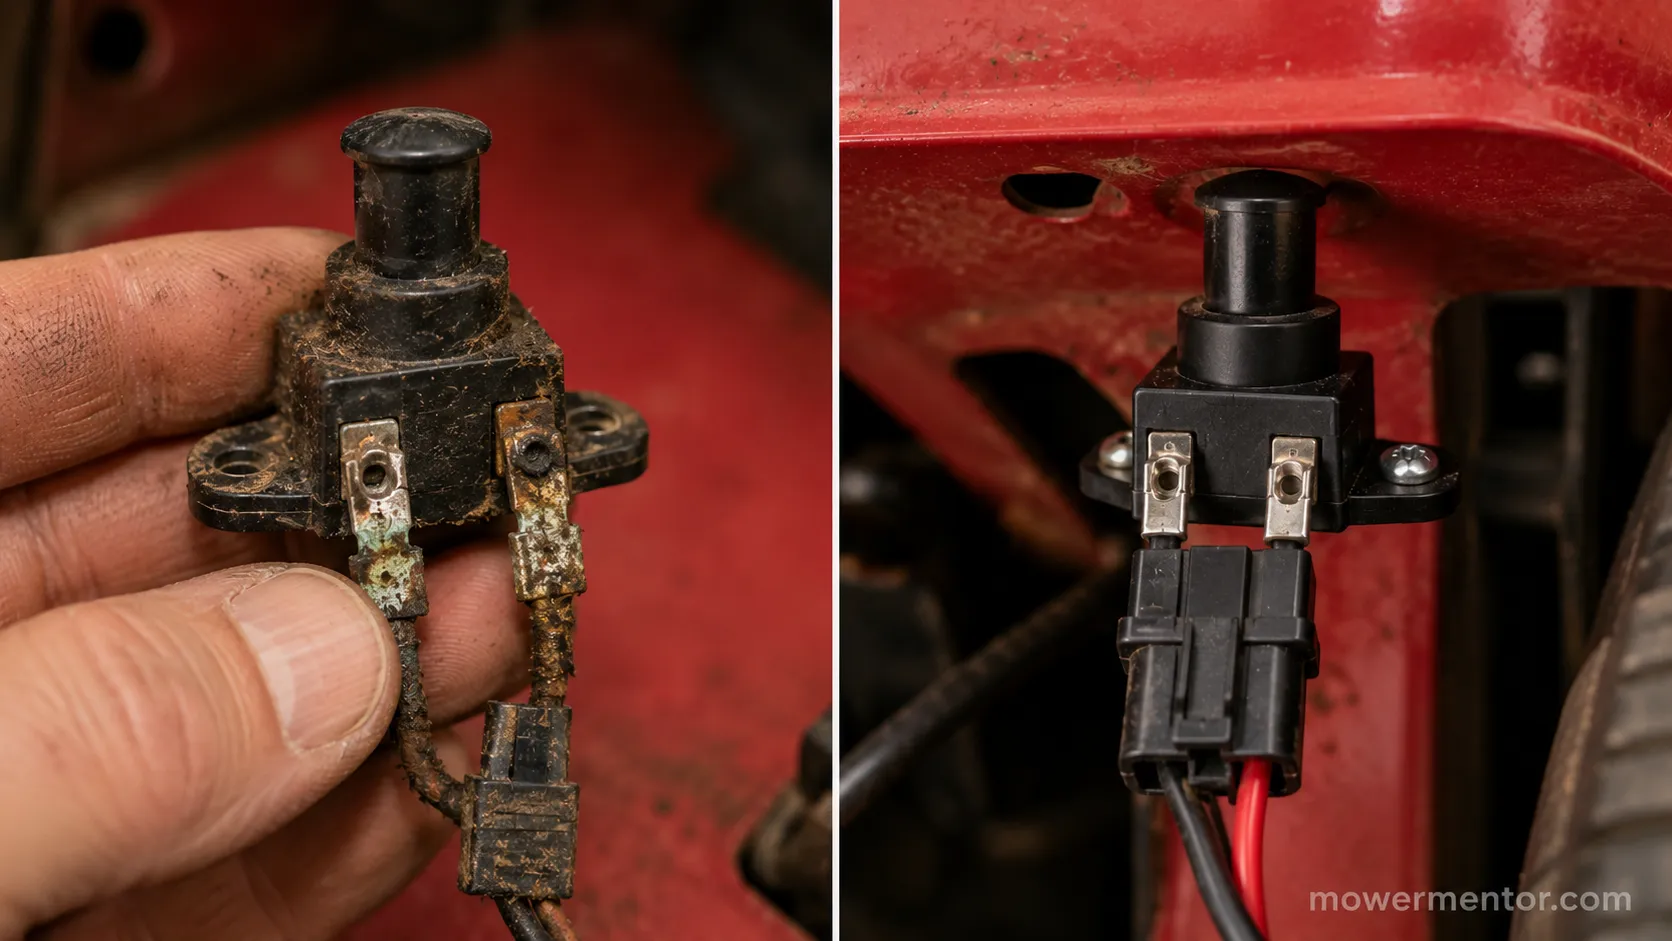
If a new switch does not fix the no-start, the problem was never the switch. That is the moment to check the starter motor next, since a dead starter mimics a dead interlock.
A tired battery can fake the same symptoms too, and a weak battery can mimic this more often than people expect. While the seat is up and the tools are out, it is also a fine time to swap the spark plug and rule out a weak-spark red herring.
Responsible Temporary Bypass (for Diagnosis Only)
Bypassing a Craftsman riding mower safety switch is legitimate for one thing only: proving a suspect switch is the fault, for a single controlled start.
To jump the safety switches, you unplug the connector and bridge the two terminals with a short jumper wire, which tells the circuit the switch is closed.
The LSU AgCenter and every safety authority agree the interlocks exist because these machines amputate limbs, so a bypass left in place is the actual danger, not the switch.
I jumped the seat connector on the bench, confirmed the engine would then run, and reconnected the original plug before the deck ever spun. The whole point is a diagnostic yes-or-no, not a permanent defeat.
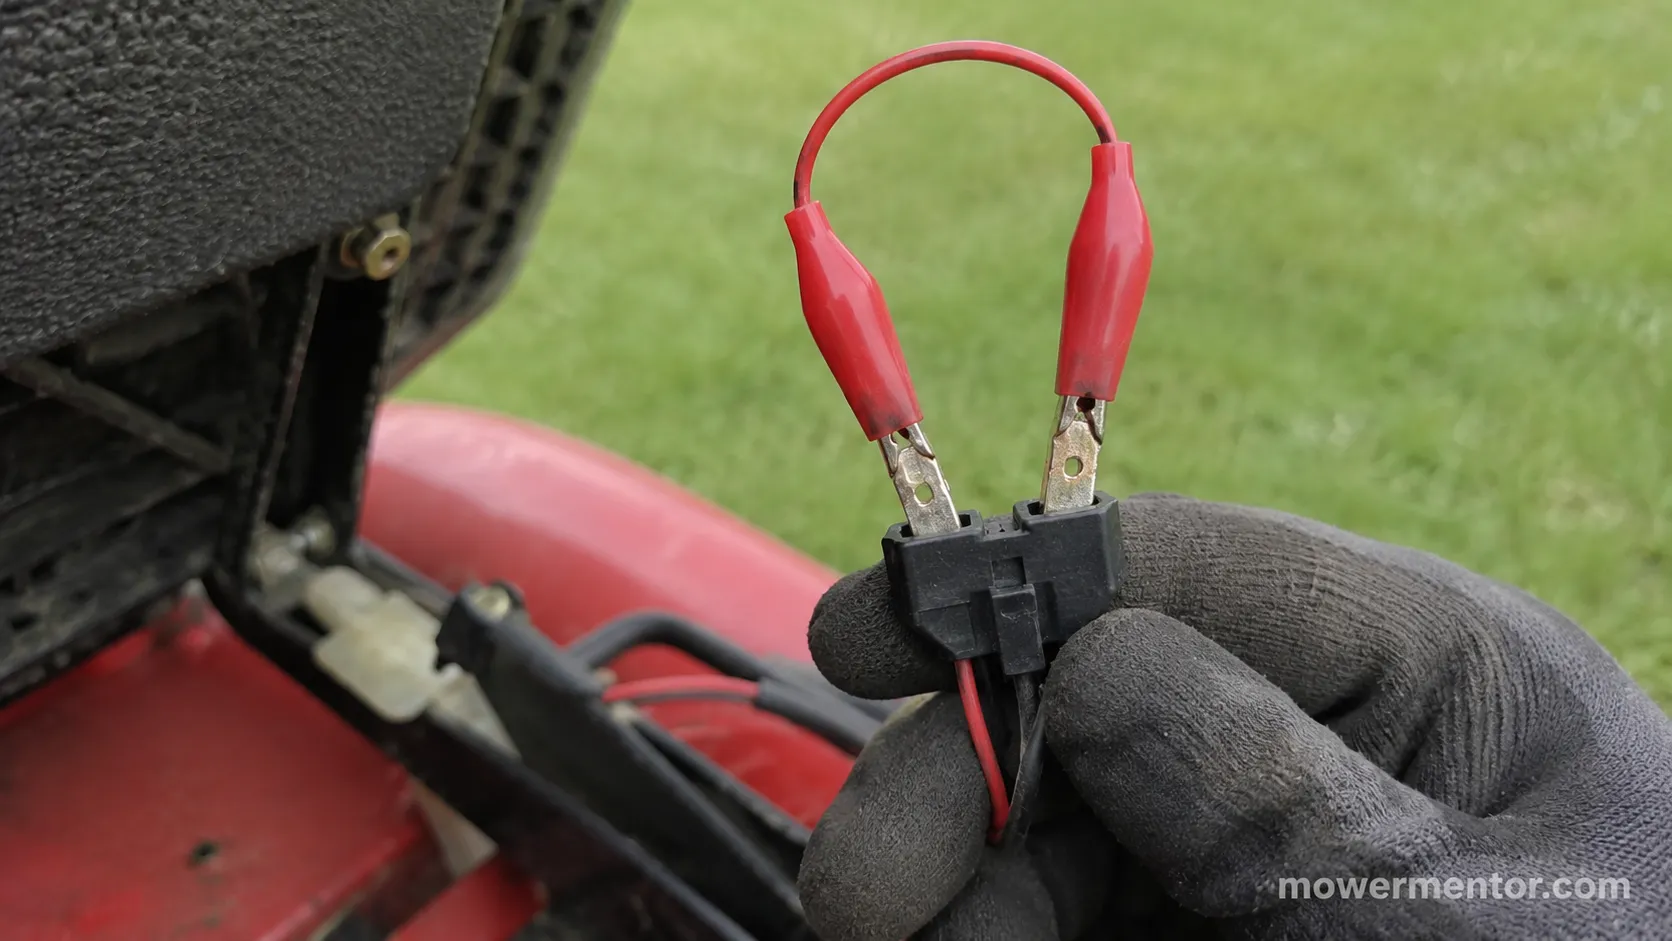
Never mow with a seat, brake, or PTO interlock bypassed. Reconnect the switch or install a new one before the blades turn, every time.
For the full method with the safety cautions spelled out, follow the full bypass walkthrough. If you are still not sure the interlocks are even your problem, back up to the complete electrical diagnosis hub and work down from the top.
Common Mistakes & When to Call a Pro
The most common Craftsman riding mower safety switch mistake is condemning a switch that tests fine, when the real fault is a loose or corroded connector feeding it.
On my bench, my first suspected bad switch turned out to be a green-crusted connector, and cleaning the terminals restored continuity instantly.
Safety authorities like the LSU AgCenter stress that a mower that runs unpredictably is a mower to stop using until it is fixed.
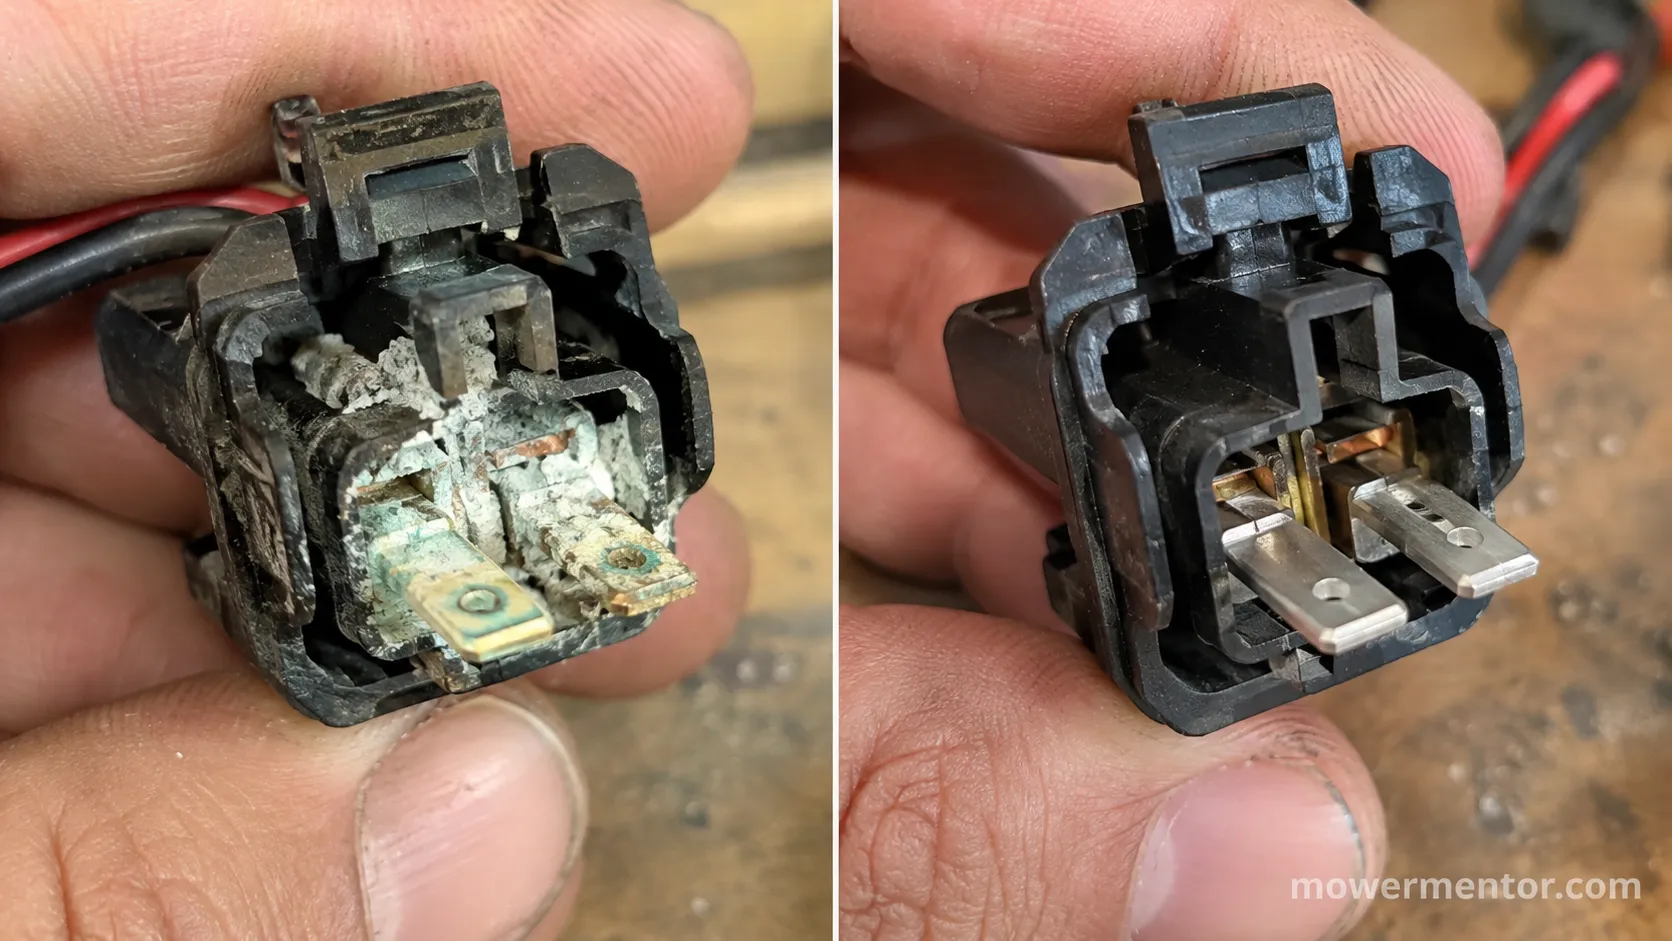
Call a professional when the fault survives a good switch, clean connectors, and a verified fuse and battery. Wiring damage inside the harness is hard to chase without a diagram and patience.
A few habits prevent most repeat visits. Keeping the machine tuned helps, and a full seasonal tune-up catches small electrical gremlins early.
Airflow problems can masquerade as electrical ones when a starved engine stalls oddly. It is worth learning to find the right air filter for your model so you can rule that out fast.
Frequently Asked Questions
The questions below cover the Craftsman riding mower safety switch problems owners raise most, with short answers drawn from the tests above. Each pulls from the same 917-series bench work and the CPSC safety guidance that explains why these interlocks matter in the first place.
How do I know which safety switch is bad on my Craftsman?
Match the moment the engine cuts to the switch that governs it: standing up points to the seat switch, the pedal points to the brake switch, and the blades point to the PTO switch. Confirm with a meter on continuity, recreating the movement while the probes are attached.
What part number is the Craftsman seat safety switch?
Many 917-series Craftsman tractors use part 532197802 or a close cross-reference for the seat and interlock switch. Match the connector shape and pin count before you buy, since 2-wire and 4-wire versions both exist.
Can I permanently bypass the safety switches on my Craftsman?
No. A bypass is for a single diagnostic start only, because these interlocks prevent blade-contact injuries and rollovers, and mowing with one defeated is genuinely dangerous. Reconnect or replace the switch before the blades turn.
Why does my Craftsman start but die when I sit up or shift?
That pattern is the seat switch opening under real movement, even if it passes a static test. Recreate the motion with the meter attached, and replace the switch if it drops continuity.
While you have the toolbox open, two quick maintenance wins pair well with this repair. Reliable starts also depend on the right ignition part, so pick the correct spark plug for your engine while you are in there.
A clogged filter can also make an engine stall in ways that look electrical. Take a minute to clean or replace the air filter so a starved engine never gets blamed on your interlocks.
The Bottom Line
A Craftsman riding mower safety switch is not a mystery once you know the three places it hides and the two numbers a healthy one should read. Match your symptom to the seat, brake, or PTO circuit, confirm it with a meter on continuity, and replace the switch that fails instead of defeating the whole system.
Bypass one only to prove a diagnosis, and only for a single start. Reconnect it before the blades ever move, and your Craftsman keeps the protection it was built with while you get back to actually cutting grass.
Summarize with AI
Keep reading
Related articles
 Troubleshooting & Repair
Test your Craftsman riding mower starter solenoid in about 15 minutes with a screwdriver and multimeter, then fix the click-no-crank for around $18.
 Troubleshooting & Repair
Fix a Craftsman riding lawn mower won't start no clicking: test battery voltage, inline fuse, safety switches, ignition and solenoid with a multimeter.
 Troubleshooting & Repair
Find the right Craftsman riding mower battery: 12V U1/U1R size chart by model, 5 tested picks, and why yours keeps dying.
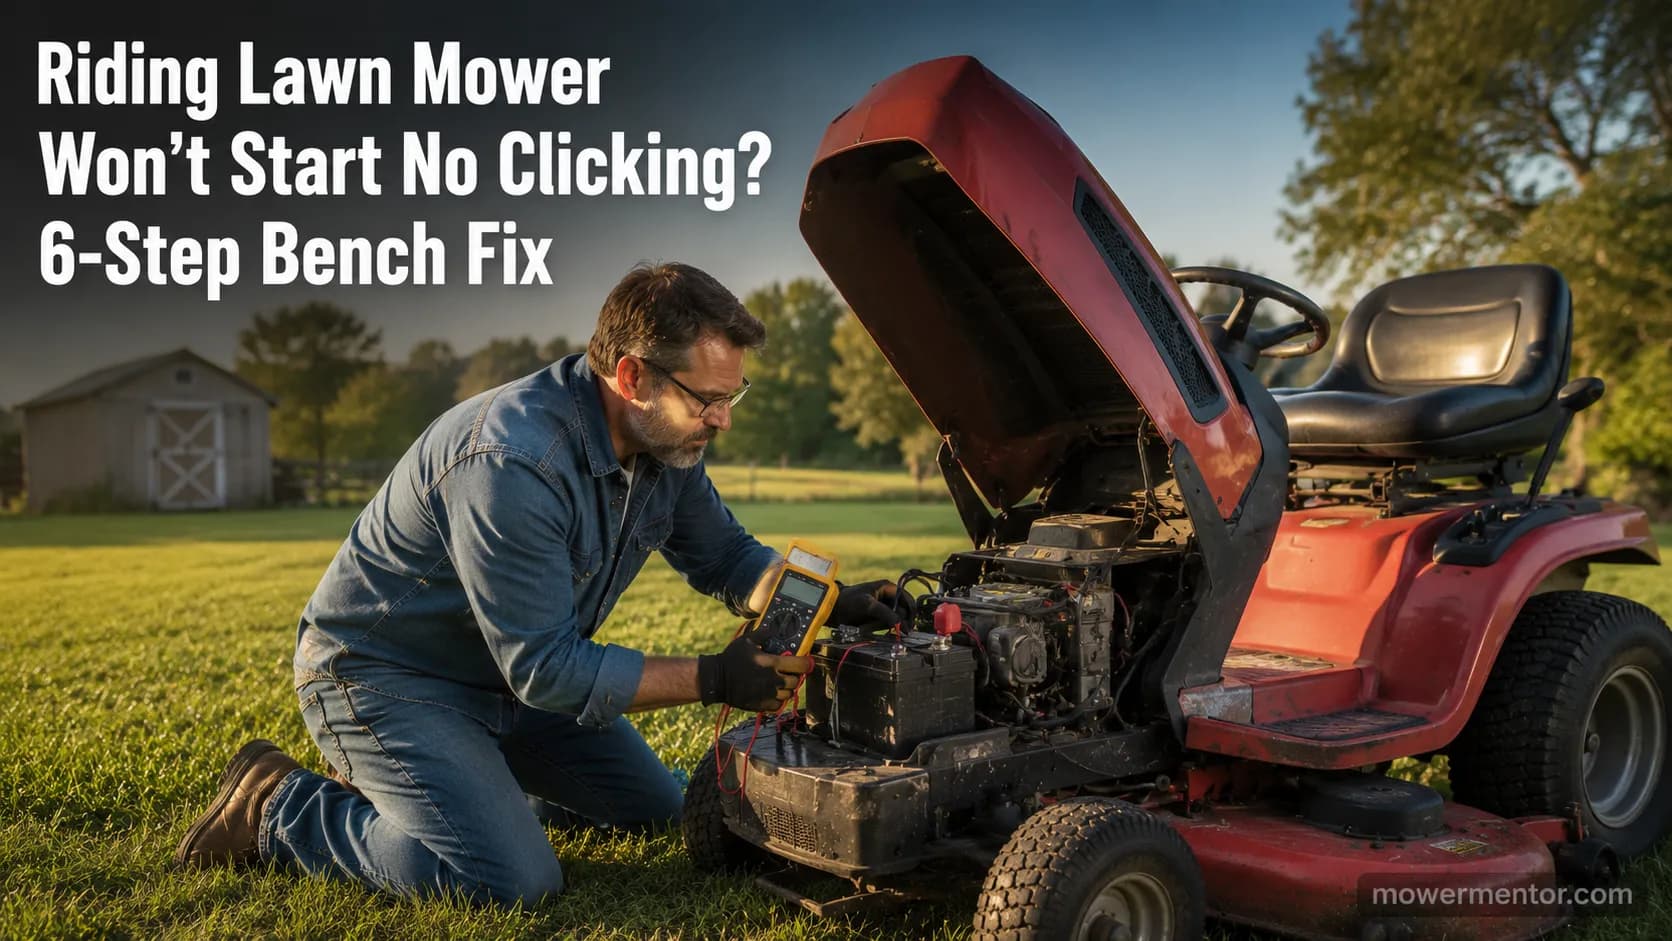 Troubleshooting & Repair
Fix a riding lawn mower won't start no clicking fast: test the battery, ground, fuse, safety switches and ignition in 6 bench-verified steps.
Comments
Moderated for quality. Share a correction, ask a follow-up, or tell us what worked for you - every comment is reviewed before it goes live.