Won't Engage? Lawn Mower PTO Switch, Tested & Fixed
Test a lawn mower PTO switch with a multimeter in minutes: bad-switch symptoms, terminal pinout, wiring diagram, and how to replace the right one.
Written by Tony MaldonadoReviewed by Wade CoburnLast updated on September 8, 2026
When you buy through links on our site, we may earn an affiliate commission (at no extra charge), which we use to fund new product tests. Learn more.
Read it your way
Short on time? Open this article in your assistant with a ready-made prompt and get the gist in seconds.
Found this useful? Make us a preferred source so we show up in your Google results.
You flip the switch, the engine keeps running, and the blades just sit there. Before you spend money on parts, the lawn mower PTO switch is worth two minutes of testing.
A bad switch has a specific electrical signature you can confirm. About half the "bad switch" jobs I see turn out to be the clutch, the interlock chain, or a short instead.
This guide walks the whole path in order. You get the fast triage, the symptoms, the switch-versus-clutch call, the multimeter test with a real pinout table, the wiring diagram, the blown-fuse case, and the replacement, so you can fix it once with the right part.
The 30-Second Answer: Is Your PTO Switch Bad?
A bad blade-engagement switch usually shows up in one of three ways.
The blades will not engage at all, the blades cut out or will not stay engaged, or the mower blows its PTO fuse the moment you switch on.
The fastest tool-free check is the click test.
Turn the key to run with the engine off, engage the PTO, and listen under the deck for the clutch to clunk.
A clunk means the switch is passing its signal. No clunk points you toward the switch, the fuse, or a safety interlock.
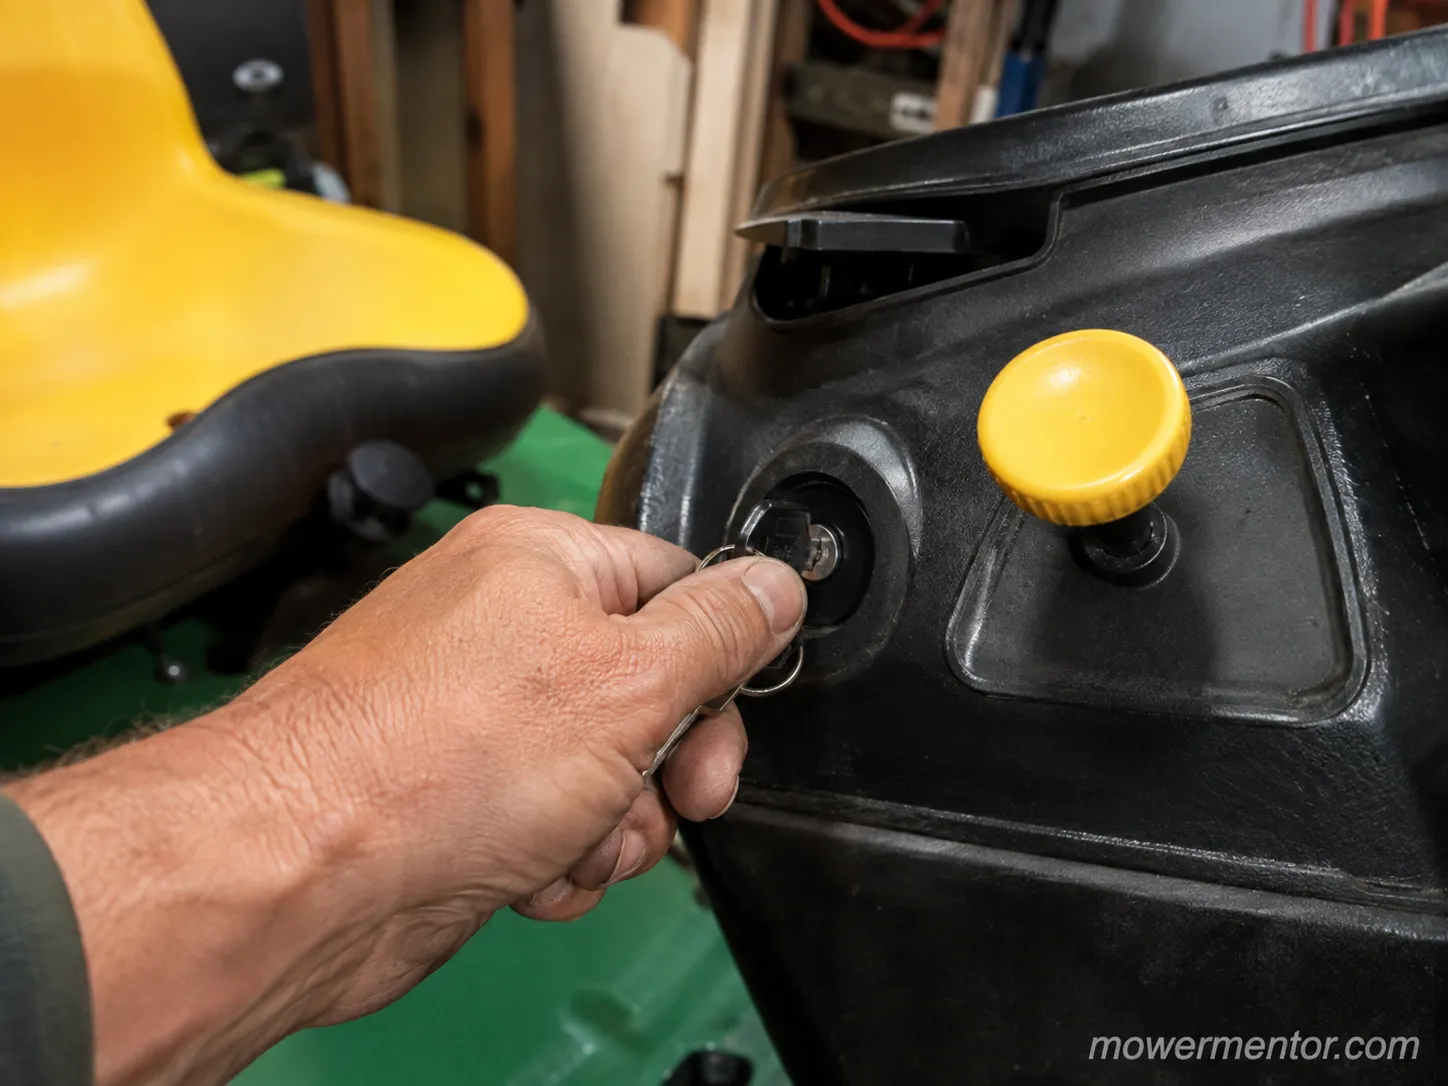
One caveat, because it matters. The click test confirms signal, not health, so a switch can pass it and still fail under load or once it warms up.
That is why the multimeter test further down is the one that actually condemns a switch.
What a Lawn Mower PTO Switch Does and Where to Find It
A lawn mower PTO switch is the dashboard switch that sends 12 volts to the PTO clutch to engage the mower blades.
It also sits inside the safety-interlock chain, so the engine will not crank unless the PTO is switched off.
That dual job is the part most guides skip.
According to Briggs & Stratton's operator manual, the engine should only start with the PTO disengaged, the brake set, and the operator seated, and the drive belt should stop within about five seconds once the PTO is switched off.
You will find the switch on the dashboard or control panel, usually as a pull knob or a rocker.
Pull or press it and it changes state, driving both the blade circuit and the interlock circuit at once.
On that pulled switch, the mower would not crank until the knob was fully seated down, which is the interlock doing its job.
If your mower also refuses to crank rather than simply refusing to mow, start with the full no-start diagnosis instead.
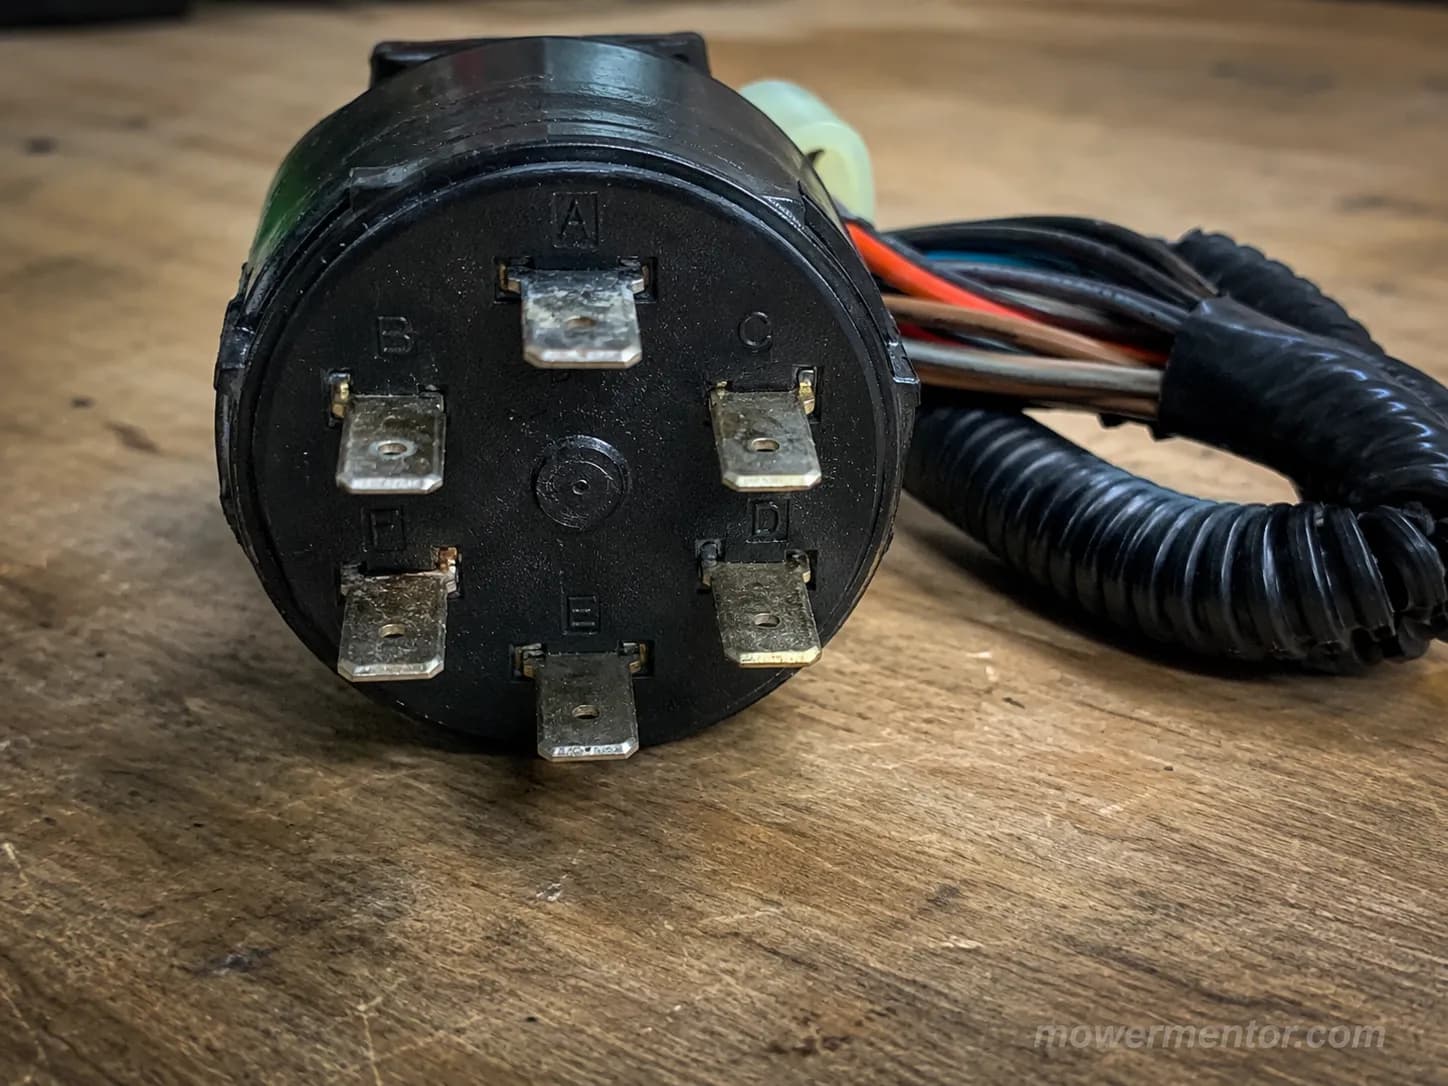
The terminals matter more than the wire colors.
Most of these switches carry six or eight terminals lettered A through H, split into a power bank that feeds the clutch and an interlock bank that feeds the start circuit, and you can see those legs mapped in how to read the starting circuit.
Colors vary by model. Trust the letters and the continuity test over the color of any wire.
Bad PTO Switch Symptoms: The Checklist
The symptoms of a bad blade-engagement switch overlap with several look-alikes. The trick is separating the switch from the fuse, the interlock chain, the belt, and the clutch.
A failed safety switch and a blown fuse can produce the identical "nothing happens" response.
Backyard Engine Pro flags that overlap as the most common reason people replace the wrong part.
Owners describe these in their own words on the forums, and the phrasing is a useful diagnostic in itself.
"Won't stay engaged" and "works cold, quits hot" are two of the most common, and they point in very different directions.
Symptom as owners phrase it | What I found on the bench | Actual culprit |
|---|---|---|
Blades won't engage, no click | Power bank open in both positions | Bad PTO switch |
PTO won't stay engaged when I let go | Knob spring not latching | Switch latch or knob, not the contacts |
Works cold, quits after it gets hot | Continuity dropped out after roughly 10 minutes of heat | Heat-intermittent switch contacts |
Blows the fuse when the PTO engages | Clutch coil read about 0.6 ohm | Shorted clutch coil, not the switch |
No response at all, won't crank either | Interlock leg open | Seat or brake interlock, not the switch |
The most misleading one I have chased worked perfectly cold and quit about ten minutes into mowing.
That was a heat-sensitive contact inside the switch, and it looked exactly like a failing clutch until the readings gave it away.
Two of those rows are not the switch at all.
If the mower will not crank rather than will not mow, the culprit is often a bad seat switch breaking the start circuit.
The same is true of the parking-brake switch, which sits in the same interlock chain.
This checklist narrows the field, but the multimeter test two sections down is what turns a suspicion into a verdict.
PTO Switch vs PTO Clutch: Don't Replace the Wrong Part
The PTO switch and the PTO clutch are different parts with different tests, and confusing them is the single most expensive mistake in this repair.
The switch is the signal, the clutch is the actuator that grabs the blades, and the interlock chain is the gate that can block either one.
One jumper test separates them cleanly. iFixit's repair threads show why owners keep swapping the switch when the clutch was fine all along.
Here is the exoneration test, and it takes about a minute.
Disconnect the clutch connector, run two jumper leads straight from the battery to the clutch leads with nothing else in the circuit, and touch them briefly.
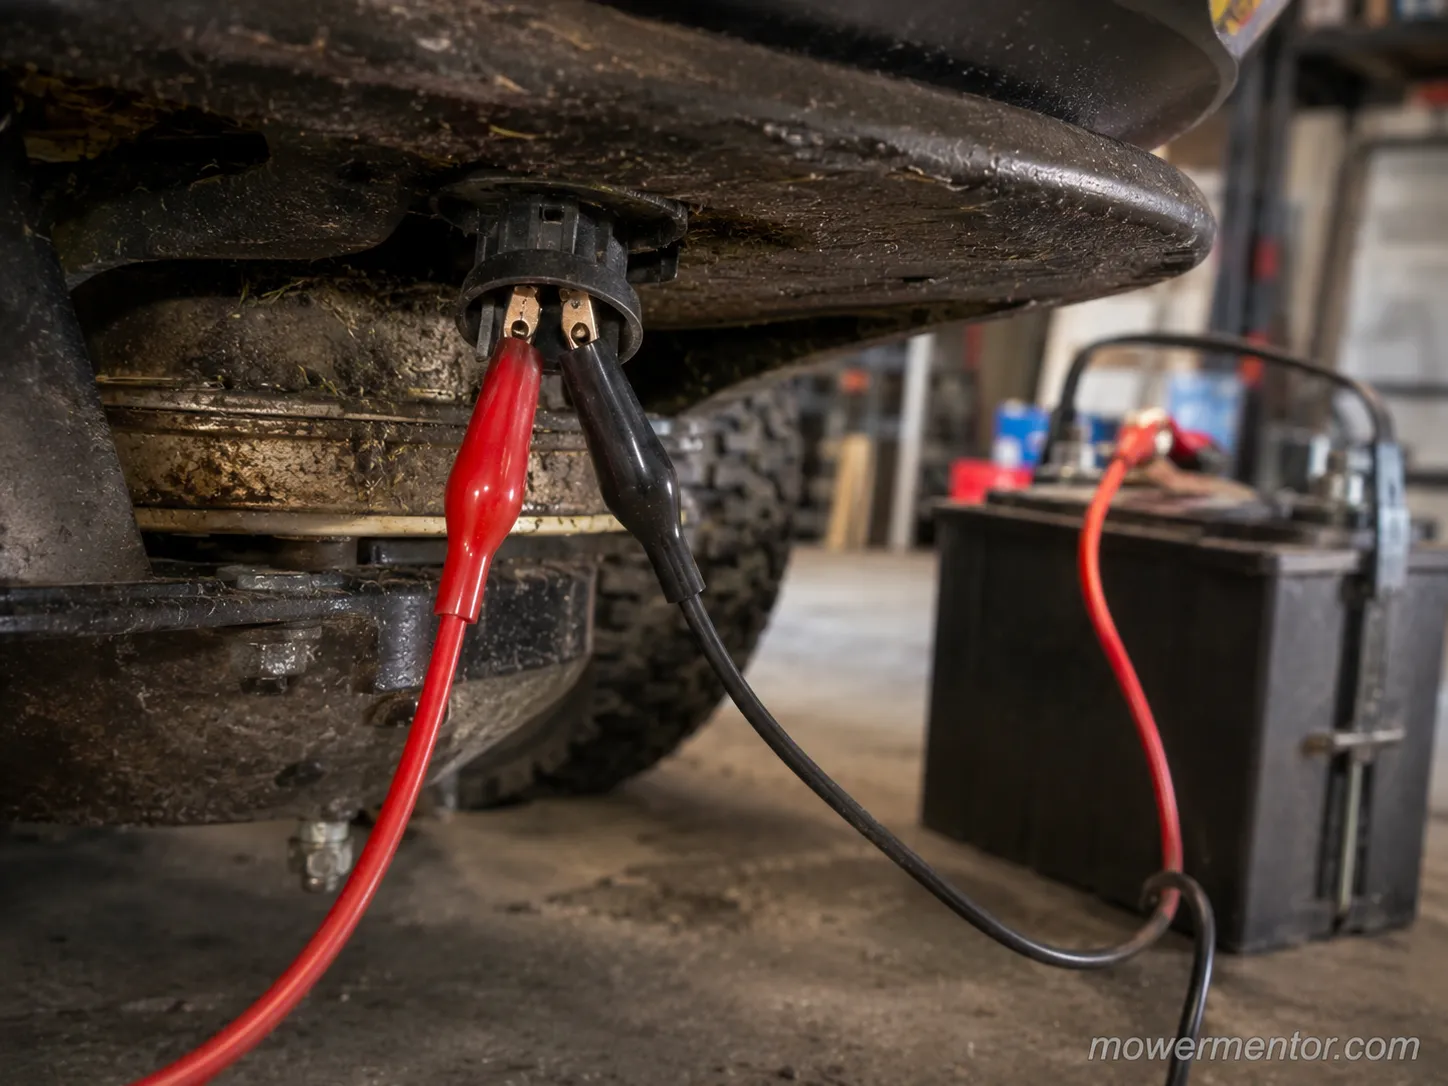
A solid click means the clutch coil is good and the fault is upstream in the switch, the wiring, or the interlock.
On one job that single test cleared a clutch I had nearly bought, and it put the blame back on the switch and its harness where it belonged.
If the click test points upstream, the next parts in the crank path are worth a look. Work through test the starter solenoid if the mower cranks weakly too.
Brand layouts differ as well, and John Deere's PTO setup routes the interlock legs its own way. Keep clear of the blade path during this test, since the clutch can grab.
Know the limit of the test.
It proves the clutch coil, not the belt or the pulleys, so a good click with dead blades still leaves the belt to check.
If instead the engine bogs down rather than the blades staying still, that is often a weak or fouled spark plug, not the PTO at all.
How to Test the Switch With a Multimeter (Pinout Table)
Testing the blade-engagement switch with a multimeter is the step that actually condemns or clears it.
It comes down to continuity in two states plus a live voltage check, where the power bank reads open with the knob down and closed when you switch on, and the interlock bank does the opposite.
According to Ox Clutch's bench data, a healthy clutch coil reads roughly 2 to 4 ohms and draws about 4 amps.
A shorted coil near 0.5 ohm can pull 27 amps, which is exactly what pops fuses.
Set up first, then probe by terminal. Pull the key, disconnect the battery for the continuity work, and reconnect it only for the live 12-volt check.
Set the meter to continuity or the lowest ohms range.
Probe the power-bank terminals with the knob down; you want an open circuit.
Switch the knob on and probe again; you want continuity, near zero ohms.
Probe the interlock bank; it should read the opposite of the power bank in each position.
Reconnect the battery, key to run, engage the PTO, and check for about 12 volts at the clutch output terminal.
No volts at the output means the fault is upstream in the fuse or interlock, not the switch.
Here is the pinout from my own bench readings on a six-terminal switch. The good switch and the condemned one sat side by side, and the difference is stark.
Terminal | Wire role | Knob down, PTO off | Knob up, PTO on |
|---|---|---|---|
A | Power in, from fuse | Open | Continuity, about 0.2 ohm |
B | Clutch output | Open | Continuity, about 0.3 ohm |
C | Ground | Continuity to ground | Continuity to ground |
D | Interlock, to start circuit | Continuity, about 0.2 ohm | Open |
E | Interlock return | Continuity | Open |
F | PTO indicator light | Open | Continuity |
The switch I condemned read open between A and B in both positions, so no power ever reached the clutch. That is the reading that ends the guessing.
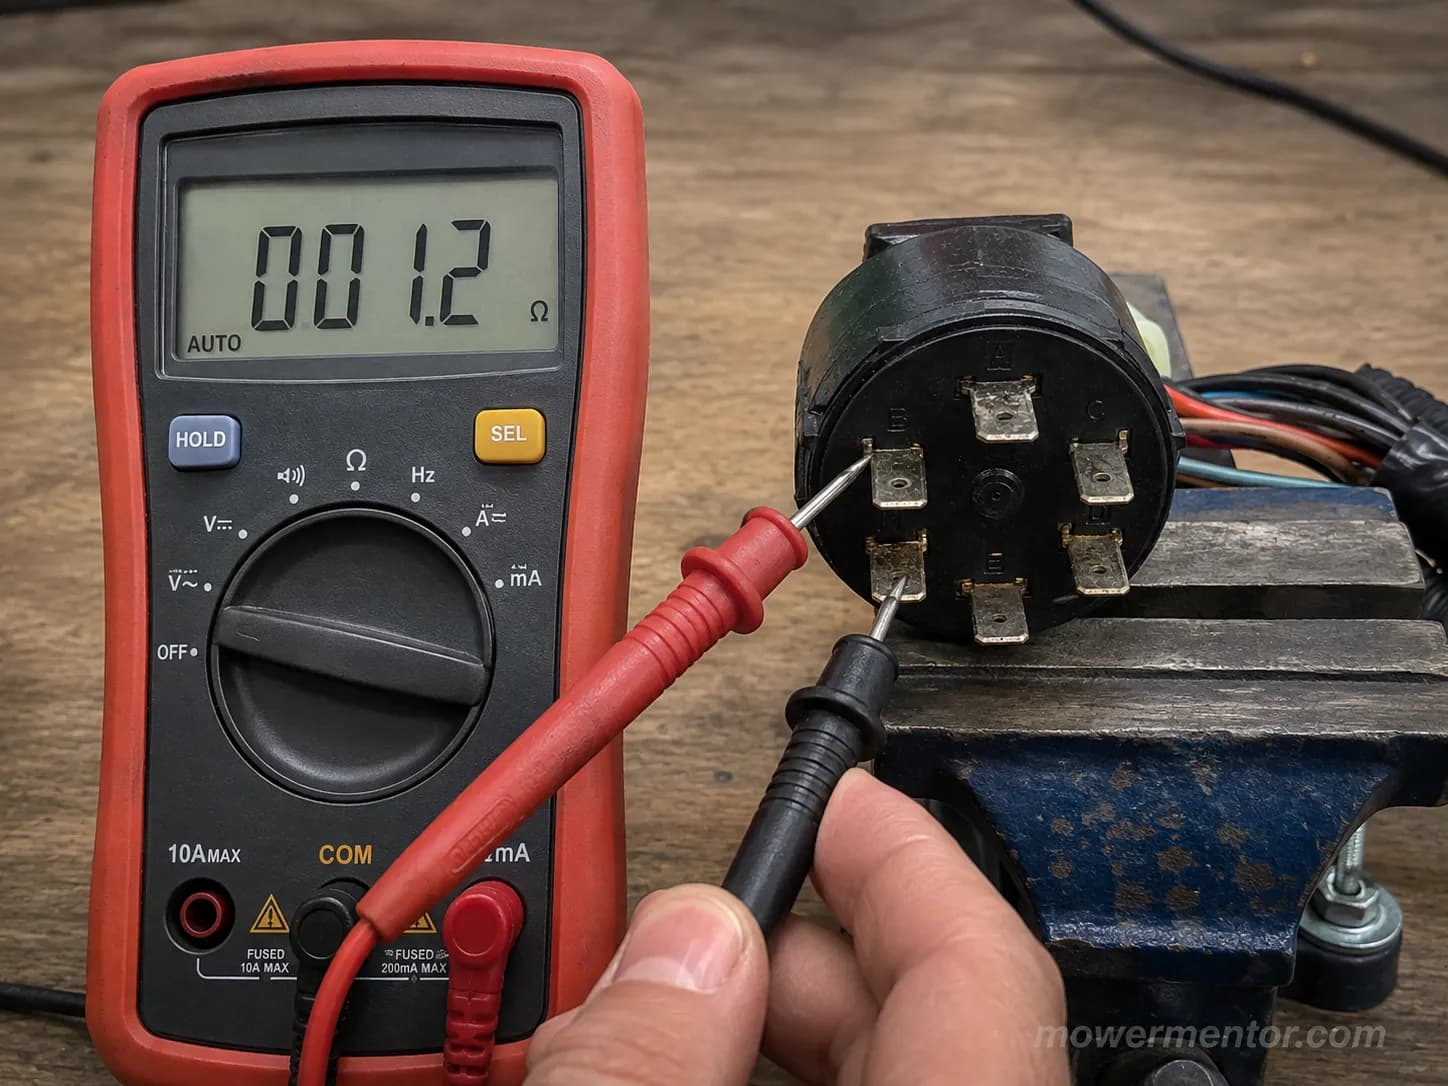
One honest limit is worth stating. A cold bench test can pass while a heat-intermittent switch fails once it is warm in service, which is the failure the symptom table flagged.
The same meter method carries over to the key side.
If the start circuit is also suspect you can test the ignition switch the same way, and the ignition switch terminal maps lay out the prong layouts clearly.
On a Craftsman, the same probe-by-letter approach in Craftsman's switch by terminal applies.
Reading a PTO Switch Wiring Diagram (6- and 8-Terminal)
A lawn mower PTO switch wiring diagram shows two circuits running through one switch: a power bank that engages the clutch and an interlock bank that gates the crank circuit.
Read it by terminal letter, not by wire color, because the colors change from model to model while the letters and their roles stay consistent.
When a keyed plug has been cut off and replaced with crimp connectors, contact gets unreliable.
A small-engine tech on JustAnswer recommends restoring the original layout with OEM-style plugs and confirming continuity between the switch terminals and the clutch or solenoid.
The generic map below covers the common six- and eight-terminal switches. It pairs each lettered terminal with its role so you can rebuild a butchered harness from the switch outward.
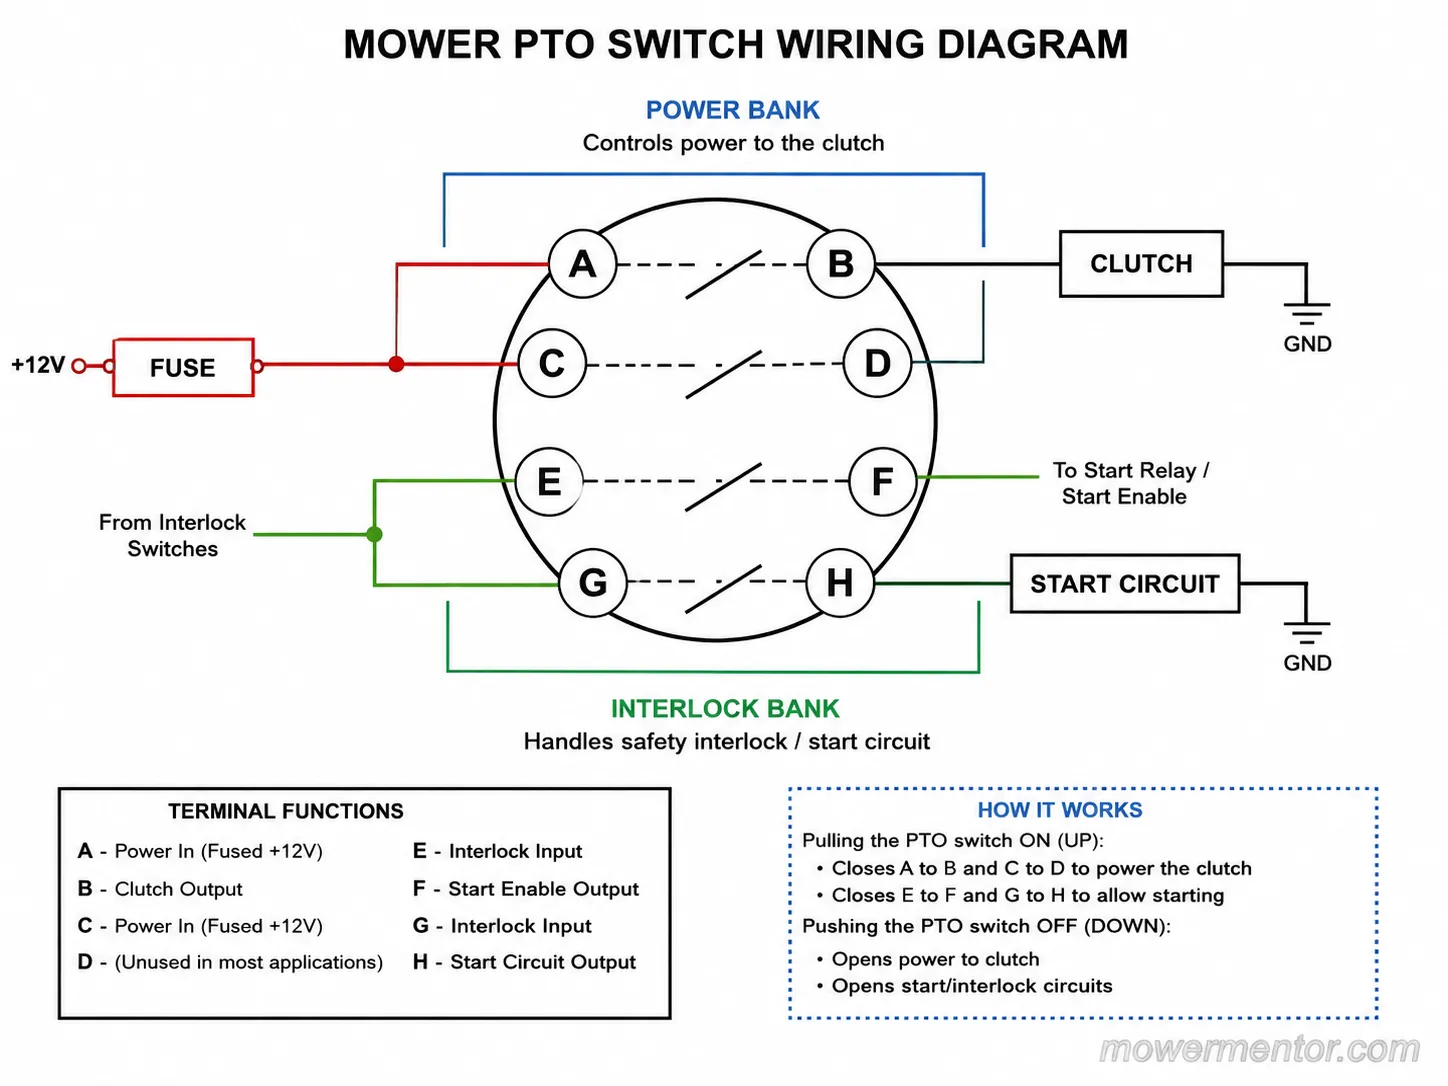
On a switch whose keyed plug had been hacked off, I traced continuity by letter to rebuild the map.
The yellow and black leg turned out to be the clutch-ground path, not power, which is where the previous owner had wired it wrong.
If the fault sits upstream of the switch, follow the harness back and inspect the wiring harness for chafe and melted insulation.
Brand harnesses route these legs differently, and Troy-Bilt's no-crank switches show one common variation.
Why Does My Mower Blow a Fuse When I Engage the PTO?
A mower blows a fuse when you engage the PTO because the clutch circuit has a dead short pulling high current the instant it closes.
The usual culprits are a shorted clutch coil, a pinched harness, or a failed switch bridging its banks.
The electric clutch normally draws only a few amps on engagement, so a fuse popping on engage means current is running away somewhere.
In one BobIsTheOilGuy thread, owners trace this to the way many mowers fuse the charging circuit around 20 amps and the PTO clutch separately, where a weak battery under charging load adds to the problem.
Work the suspects in order, simplest first, and do not skip to parts:
Pull the clutch and re-run the battery jumper test from the switch-versus-clutch section; a shorted coil is the most common cause.
Inspect the harness for a pinched or chafed spot rubbing the frame near the deck.
Re-check the switch banks for a short bridging power to ground.
Confirm the battery and charging system are healthy, since a weak battery loads the circuit.
On one rider that kept popping its fuse the instant the PTO engaged, the clutch coil ohmed low at about 0.6 ohm, a shorted winding, so the fuse was doing exactly its job.
Swapping the coil ended it, and up-sizing the fuse would have hidden the short until it melted the harness.
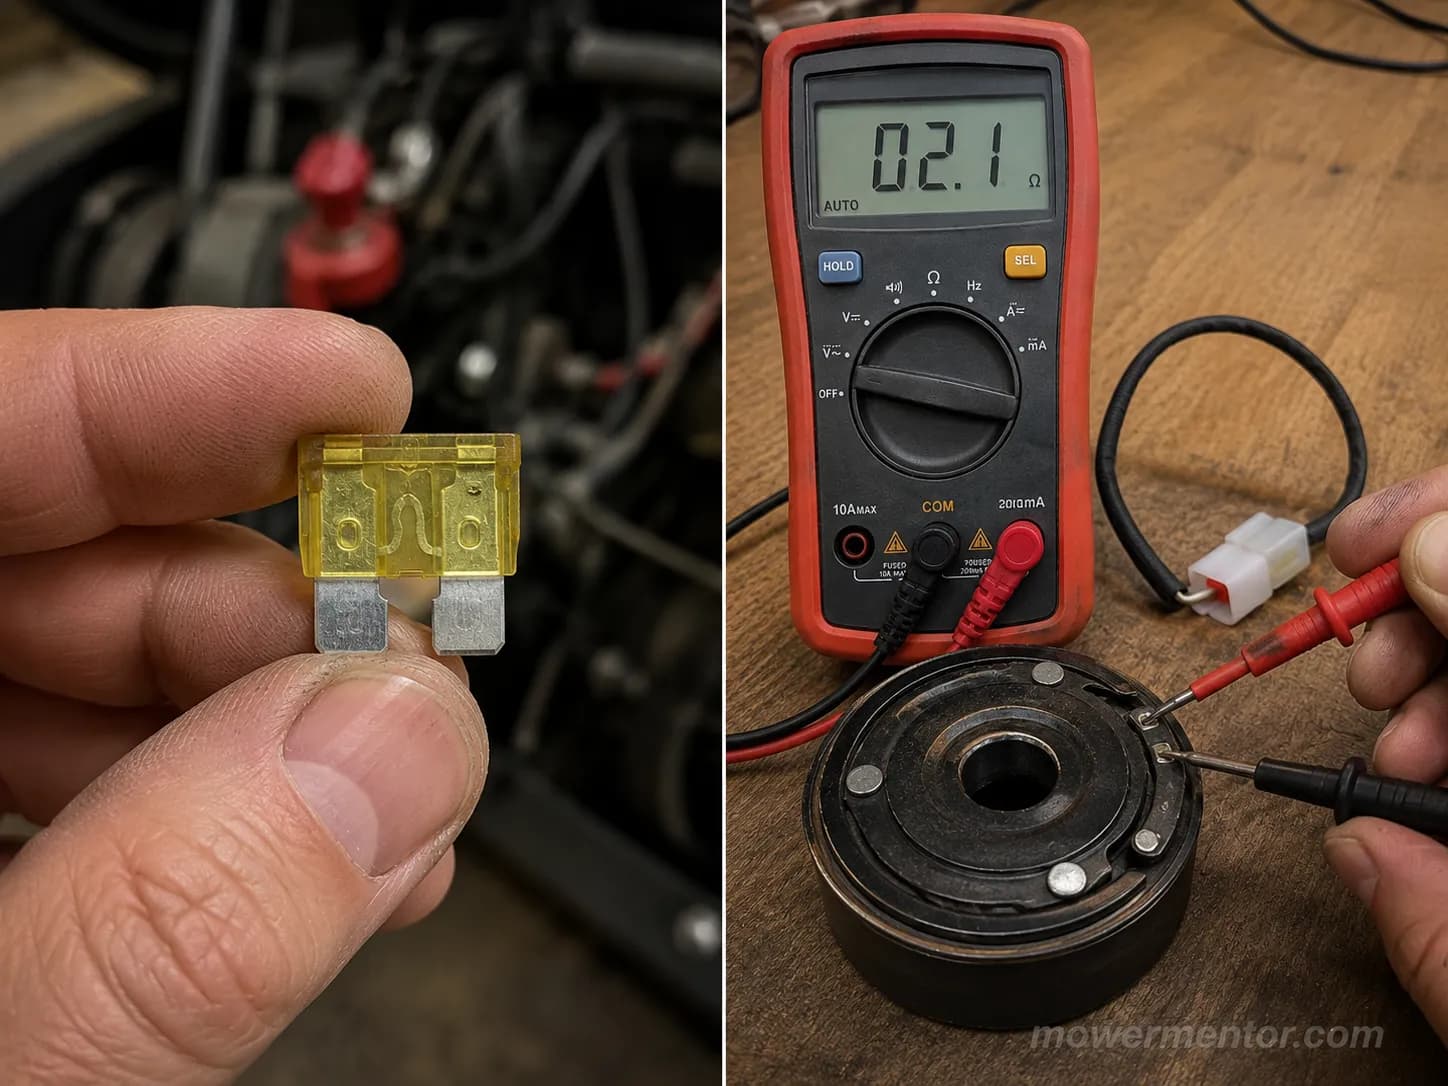
Never fit a higher-amp fuse to stop the blowing, because the rating protects the harness from exactly this kind of overcurrent. A repeatedly blowing fuse is a signal to fix the short.
If the blow also kills the engine, you may be starting it with a bad ignition in the same circuit.
If the charging side keeps loading the fuse, roll the battery check into a full seasonal tune-up.
Replacing a Bad PTO Switch (Step by Step)
Replacing a confirmed-bad blade-engagement switch is a 20 to 30 minute job. The one step that saves you is transferring the wires by terminal letter rather than by memory.
Photograph the old switch before you touch a wire, release the retaining ring behind the dash, and rebuild to the pinout if a previous owner ever cut the plug.
Match the fuse amperage on reinstall, since ElectricalFlux's clutch data notes these clutches draw roughly 3.5 to 5.5 amps on engagement and sit behind a 20 or 30 amp inline fuse you should not oversize.
Follow the sequence in order:
Disconnect the battery, remove the key, and photograph the old switch and its wiring.
Release the retaining ring or nut and withdraw the switch from the panel.
Unclip the harness and transfer each wire to the matching terminal letter on the new switch.
Seat the new switch, reconnect, and re-run the continuity test from the multimeter section.
Do a live blade test with the deck clear before you call it done.
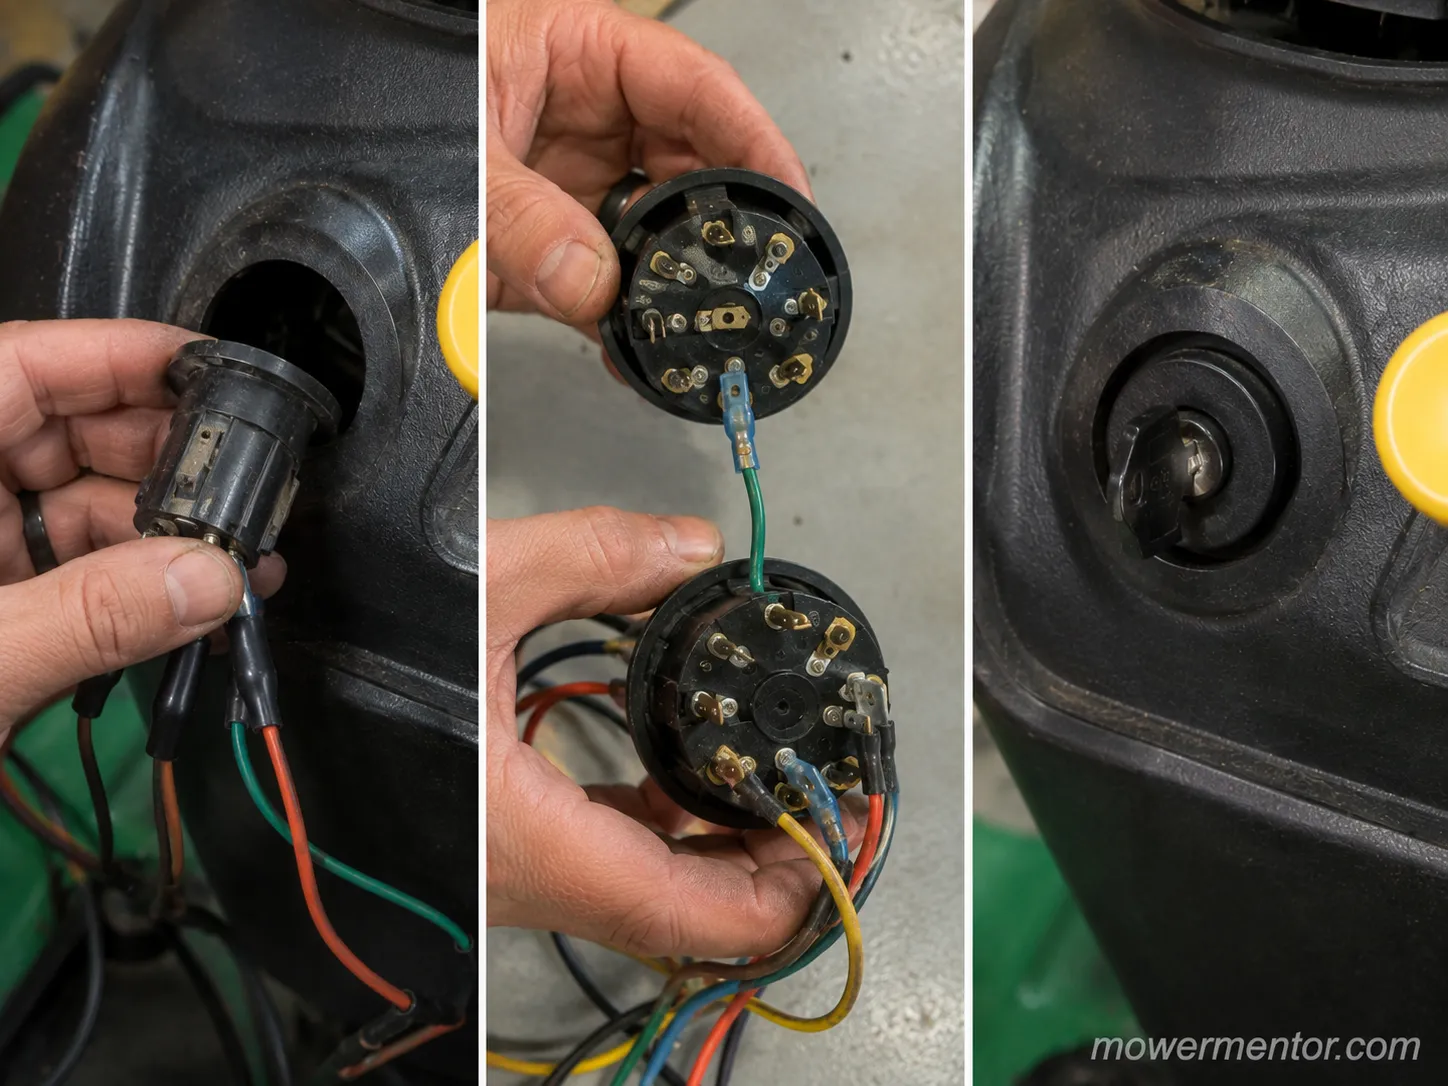
My last swap ran about 25 minutes, and the only snag was the retaining ring hidden behind the dash. Photographing the old switch first is what kept me from guessing the interlock pair.
The dash comes apart the same way when you are swapping an ignition switch, so the access is familiar.
Choosing universal against OEM is the same call laid out in the ignition switch buyer's guide.
Choosing the Right Replacement (Connector Count & Fitment)
Choosing the right replacement PTO switch comes down to three things you can read off the old switch: the terminal count, the knob action, and the bank layout.
Match those and a universal switch will usually fit.
Terminal count alone is not enough, which is the trap most model-number lookups fall into. Miss the bank layout and even a same-count switch can wire up wrong.
Here is the fitment check I run before buying anything.
Fitment factor | What to check | Why it decides the fit |
|---|---|---|
Terminal count | 6 or 8 terminals on the base | Sets the switch family |
Knob action | Pull-to-engage or rocker | Wrong action will not mount or operate right |
Bank layout | Which letters carry power vs interlock | Same count can still route differently |
Connector style | Keyed plug or individual spades | Decides whether you need a pigtail adapter |
Lining up three replacement switches against a bad one on the bench made the point for me.
Two were six-terminal, but one had the interlock pair on the opposite bank, so it would have back-fed the start circuit if I had trusted the terminal count alone.
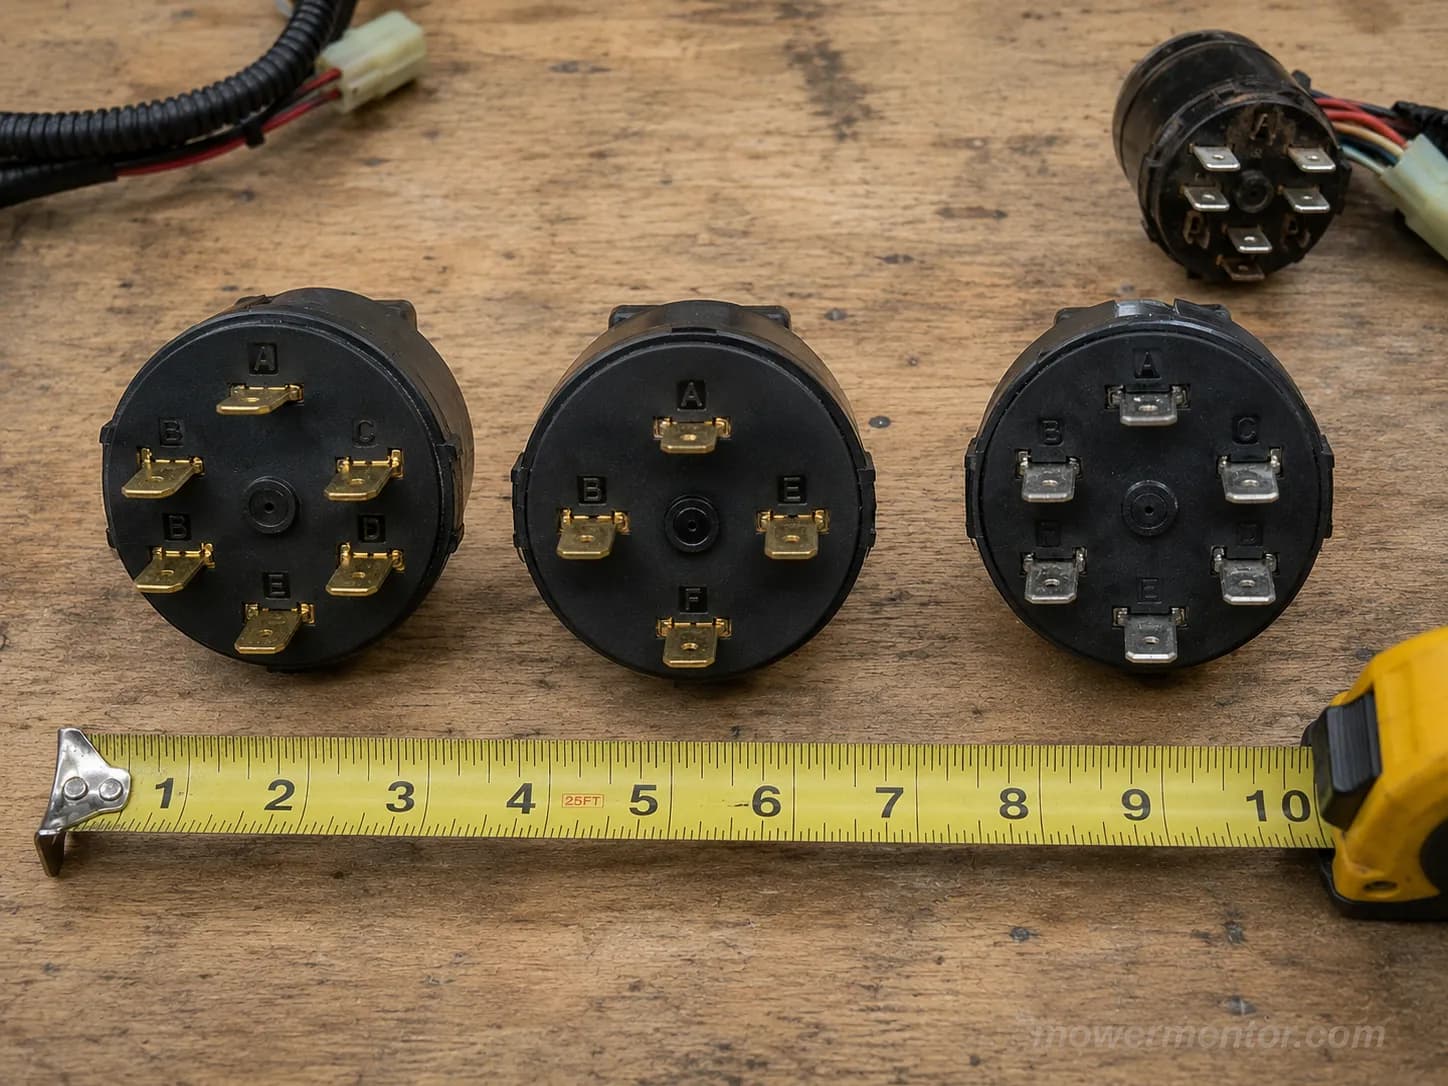
Find your model number on the frame plate, under the seat, or on the engine to confirm the match.
If yours is a Murray, use the Murray part cross-reference to pin the number down.
A cheap universal switch can be false economy if it needs rewiring, so verify the layout before you buy.
While the panel is open, glance at a clogged air filter if the engine has also been struggling.
Frequently Asked Questions
Why won't my PTO stay engaged?
Nine times out of ten in my repair log, a PTO that only stays on while you hold the knob is a latch or knob issue, not failed contacts. The knob is not seating in its detent, so the circuit opens the moment you let go.
If the knob latches firmly and it still drops out, test the switch contacts and check for a heat-intermittent fault.
Can I start my mower with a bad PTO switch, or bypass it?
You can sometimes start the engine if the interlock leg still closes, but a truly failed switch can block the crank circuit entirely. Bypassing the interlock is a diagnostic step, not a permanent fix, because the switch keeps the blades from engaging unexpectedly.
Is a PTO switch the same as a PTO clutch?
No. The switch is the dashboard control that sends the signal, and the clutch is the electromagnetic unit under the deck that actually grabs the blades.
They fail differently and test differently, which is why the switch-versus-clutch section walks through the jumper test that separates them.
Where can I get a PTO switch near me?
Your fastest options are an OEM dealer for an exact-fit part, a major home-improvement retailer for common switches, or an online parts seller if you can match terminal count and layout. Bring your model number and a photo of the old switch's terminals so you match fitment, not just the brand.
What size fuse does the PTO circuit use?
Most riding mowers protect the PTO or charging circuit with a 20 amp blade fuse, though some split it into a smaller PTO fuse, so verify against your model. Never up-size the fuse to stop it blowing, because that removes the protection and risks the harness.
How can I tell the switch from an engine problem?
If the blades will not spin but the engine runs fine, the fault is in the switch, clutch, fuse, or interlock. If the engine itself bogs or dies, start by checking for spark before touching the PTO parts.
On a battery mower the equivalent care is battery-mower upkeep, where the electrical checks differ. The clutch symptoms that mimic a switch, such as slipping and weak engagement, are laid out in Ox Clutch's failure guide.
The Bottom Line
A lawn mower PTO switch is one of the cheapest parts in the blade circuit, but the money is lost when you replace it without testing and the real fault was the clutch, the interlock, or a short.
The two-minute continuity test and the pinout table are what turn a guess into a verdict.
Confirm the switch first, match the replacement by terminal count and bank layout rather than by model number alone, and reinstall the correct fuse.
Do that, and you fix the blades that will not engage once, with the right part, instead of chasing the wrong one across a whole mowing season.
Read it your way
Short on time? Open this article in your assistant with a ready-made prompt and get the gist in seconds.
Found this useful? Make us a preferred source so we show up in your Google results.
Keep reading
Related articles
Troubleshooting & Repair
Lawn Mower Ignition Switch Replacement (Steps + Cost)
Do your own lawn mower ignition switch replacement: photo steps, wire-by-terminal transfer, fitment help, and a DIY-vs-shop cost table to save $100+.
Troubleshooting & Repair
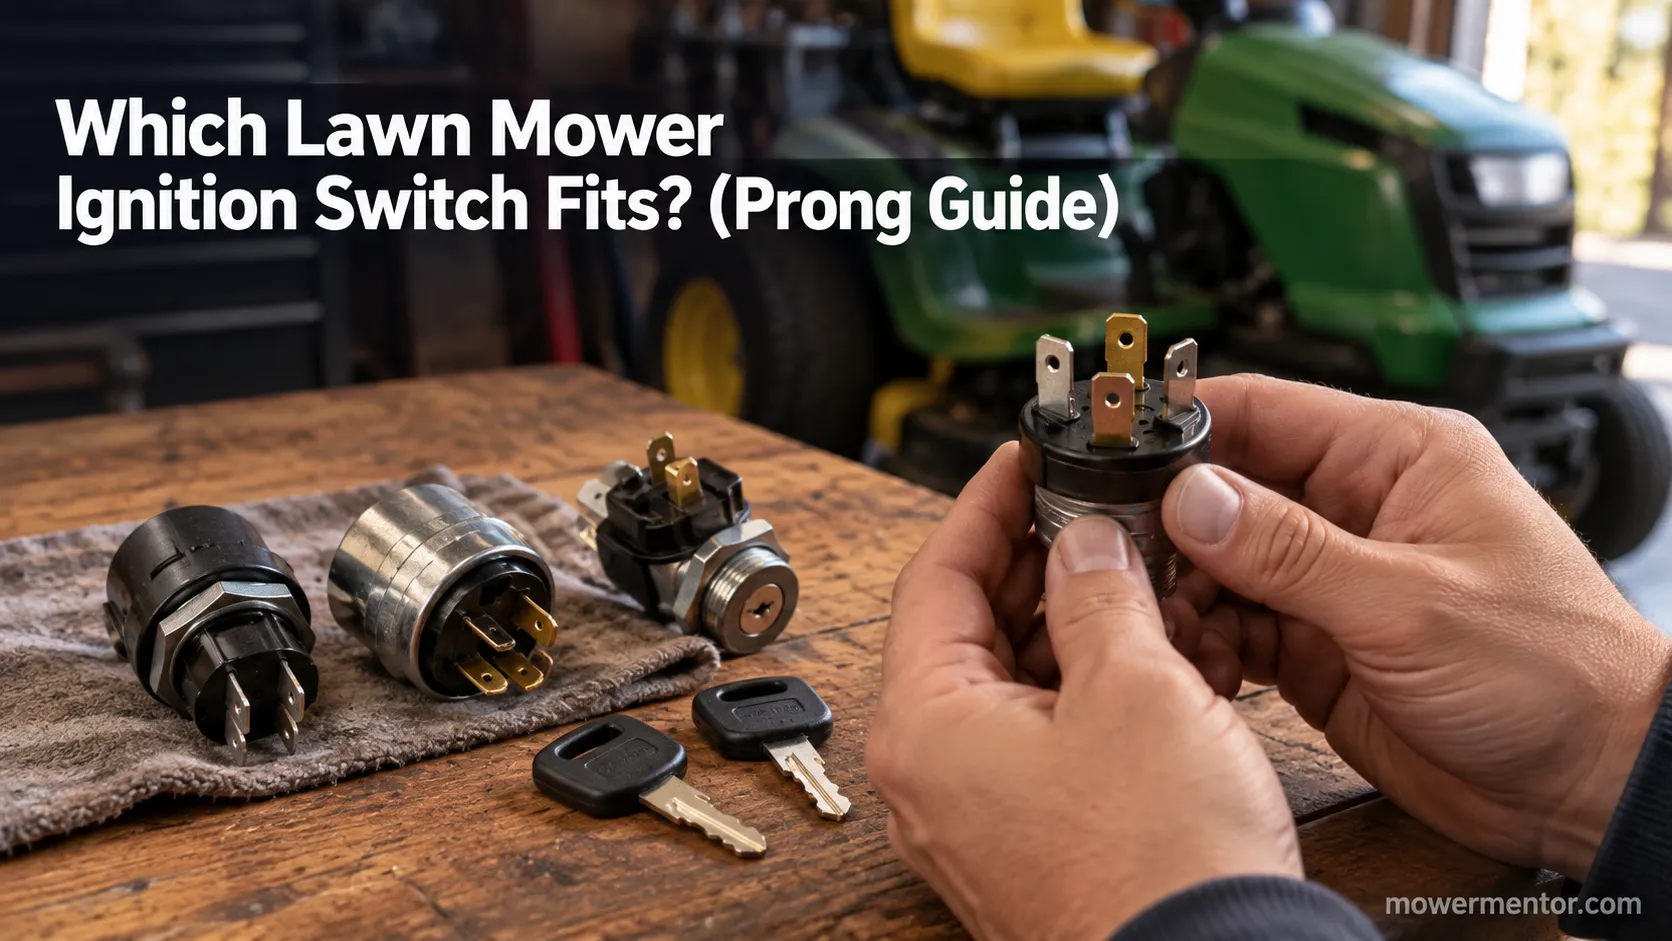
Which Lawn Mower Ignition Switch Fits? (Prong Guide)
hoose the right lawn mower ignition switch by prong count (4/5/6/7), universal vs OEM fit, and key compatibility, plus which one fits your mower.
Troubleshooting & Repair
How to Start a Lawn Mower With a Bad Ignition Switch
Confirm it's the switch, then learn how to start a lawn mower with a bad ignition switch: a safe solenoid bypass to get moving, plus how to fix it for good.
Troubleshooting & Repair
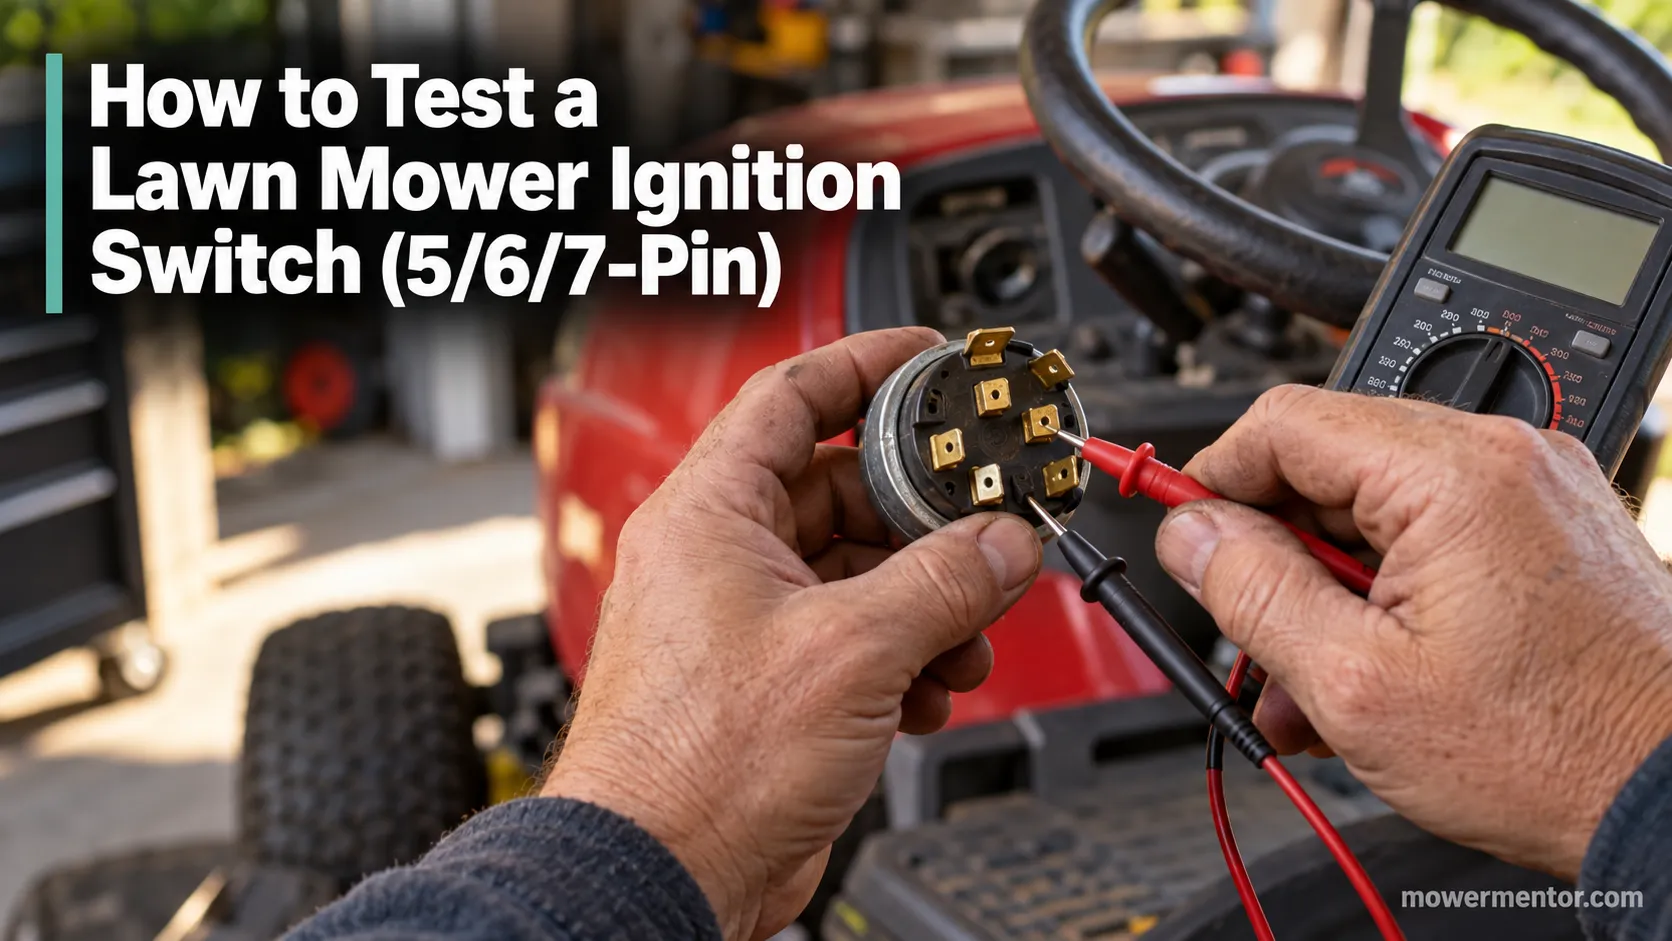
How to Test a Lawn Mower Ignition Switch (5/6/7-Pin)
Learn how to test a lawn mower ignition switch with a multimeter: get continuity tables for 5, 6 & 7-pin switches plus a no-multimeter test-light method.
The discussion
Comments
Every comment is reviewed before it goes live.