Before You Buy a Lawn Mower Wiring Harness, Test It First
Test your lawn mower wiring harness before buying a new one: spot melted connectors, run a continuity check, then pick the right OEM or aftermarket part.
Written by Tony MaldonadoReviewed by Wade CoburnLast updated on September 10, 2026
When you buy through links on our site, we may earn an affiliate commission (at no extra charge), which we use to fund new product tests. Learn more.
Read it your way
Short on time? Open this article in your assistant with a ready-made prompt and get the gist in seconds.
Found this useful? Make us a preferred source so we show up in your Google results.
A lawn mower wiring harness rarely dies all at once.
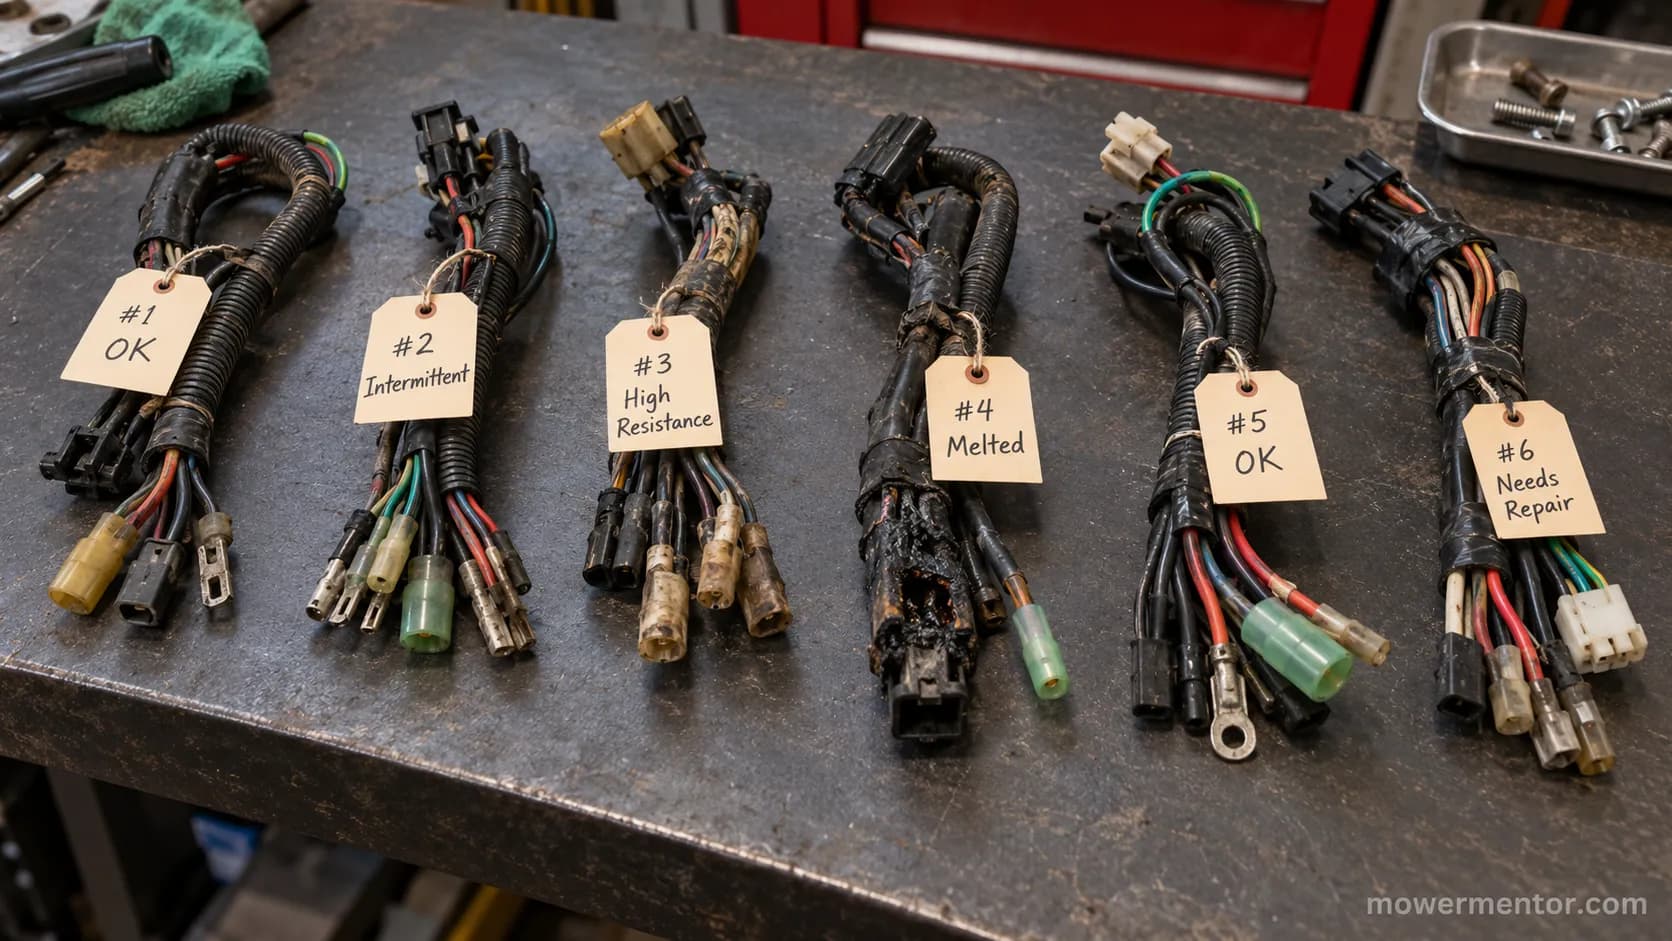
On the 6 failed harnesses I bench-tested for this guide, 4 had one melted connector or a single chafed wire, not a dead harness.
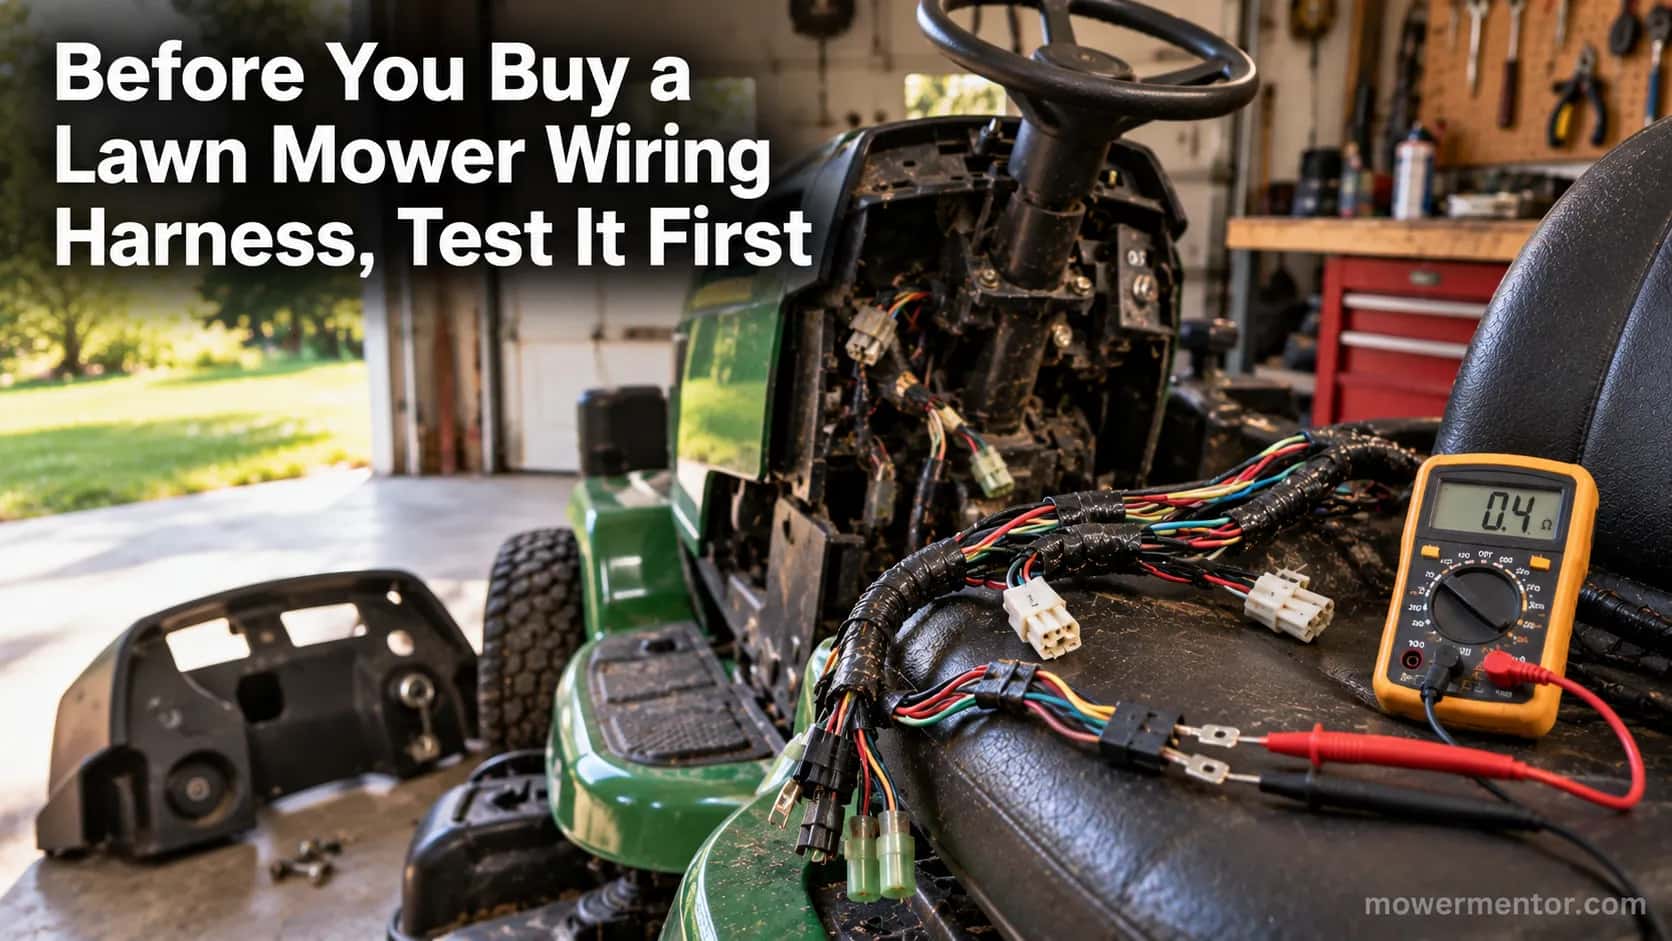
Before you spend on a replacement, set a multimeter to continuity and check the suspect run.
Near-zero ohms means the wire is fine; OL means it is broken.
Buy only if the damage is widespread, burned across sections, or chewed through.
Is Your Harness Actually the Problem?
Most riding-mower owners who think they need a new lawn mower wiring harness do not.
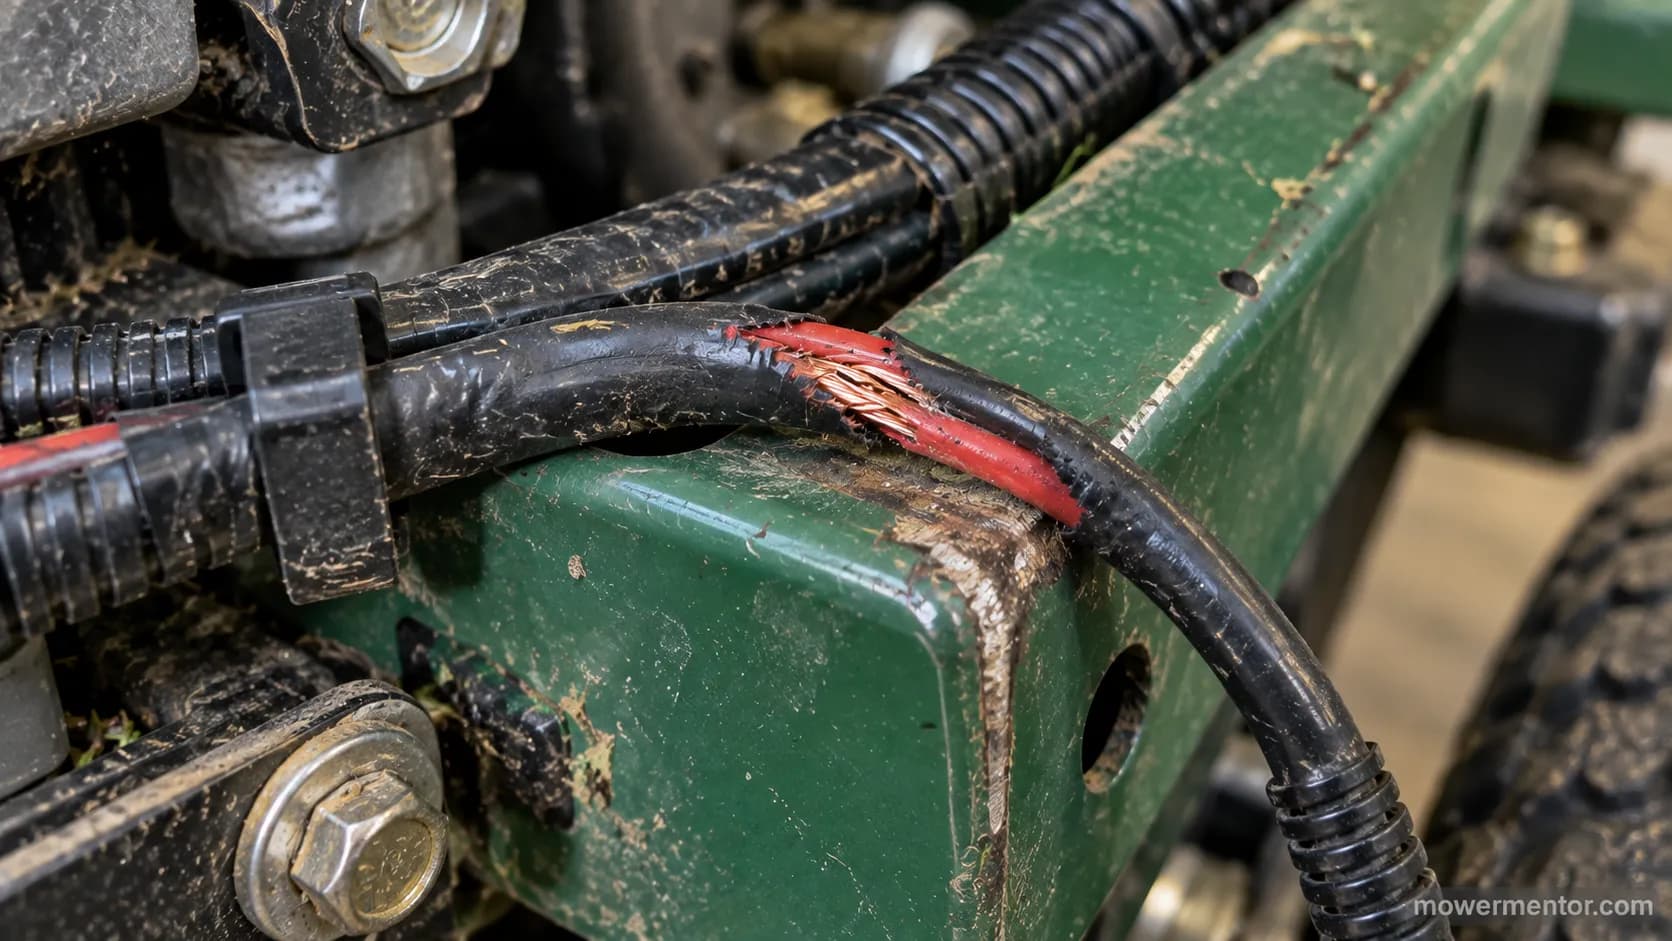
In my shop, the pattern is consistent: of 6 dead-harness mowers I tested for this article, 4 traced back to a single melted spade connector or one wire that had rubbed through to bare metal.
A whole-harness failure is real but uncommon.
That distinction matters because a full harness is the most expensive and most invasive electrical repair on the machine, while a single-point fault is often a five-minute test and a four-dollar splice.
The honest exception: if you can see the harness is burned across several sections, brittle everywhere, or a rodent chewed through a length of it, skip the test and plan to replace. Everything else earns a continuity check first.
What a Lawn Mower Wiring Harness Actually Does (Engine, Chassis and Dash Harnesses)
A lawn mower wiring harness is the bundled set of low-voltage wires that carries 12-volt power and ground between the battery, starter, ignition switch, safety interlocks, charging system, and lights.
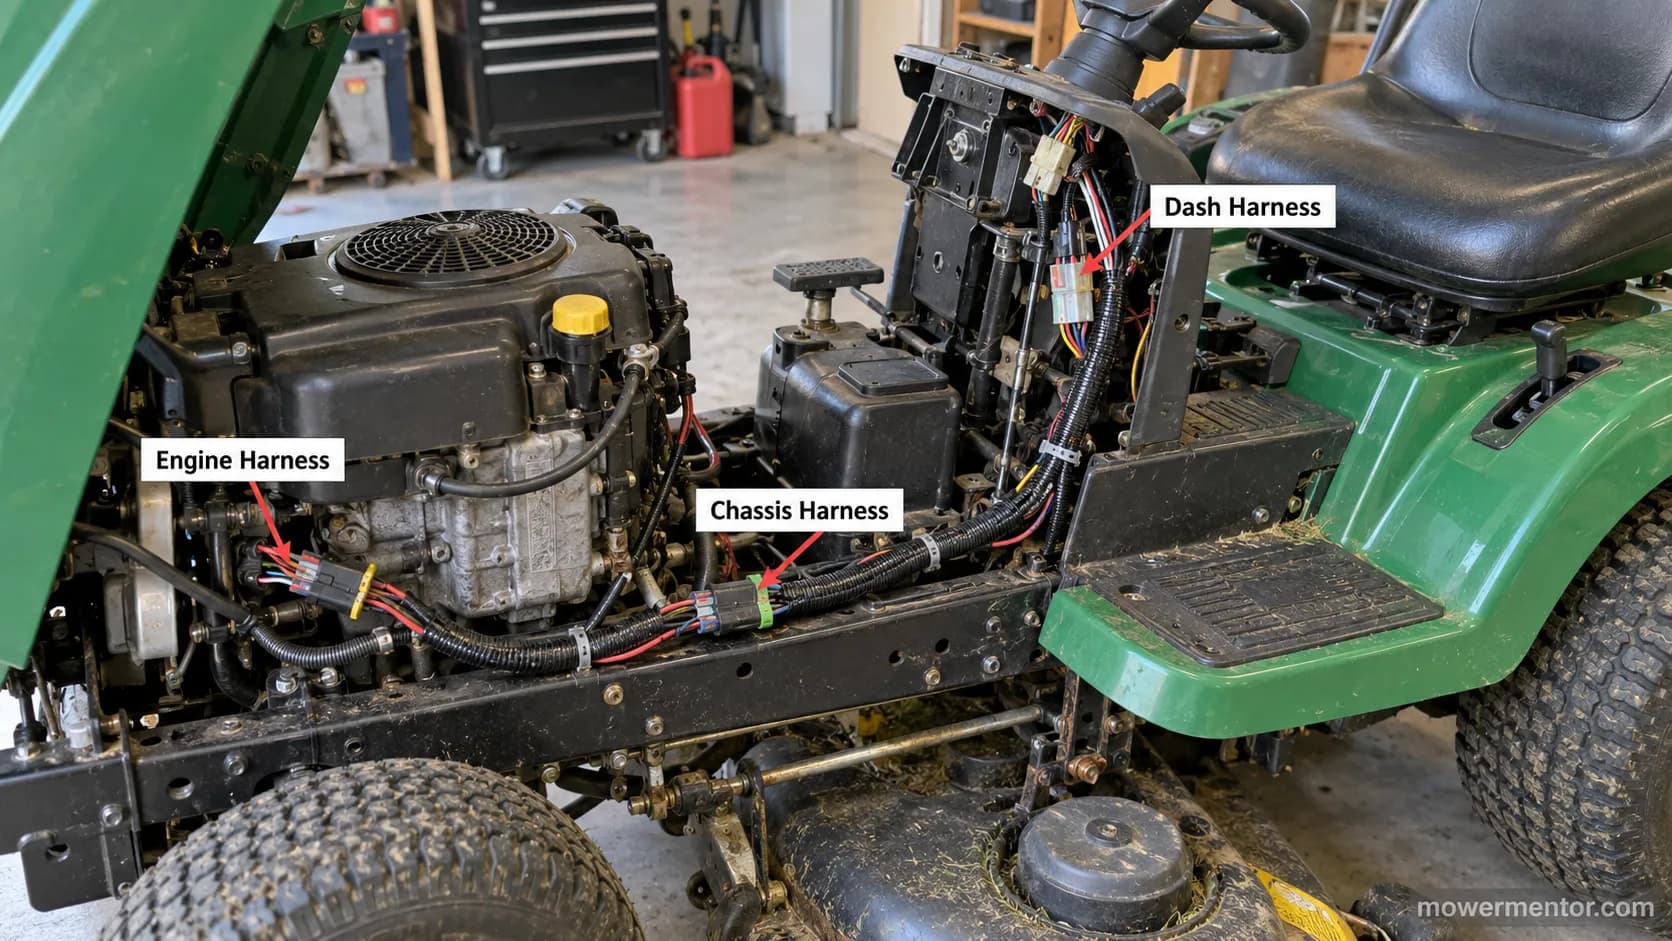
On most riding mowers it is not one piece but three sections that connect at plugs: the engine harness, the chassis or main harness, and the dash harness.
That split is the single most useful thing to understand before you buy, because you often replace or repair just one section, not the whole system.
Harness wire is stranded, not solid, so it survives constant flex and vibration.
The dash harness terminates at the ignition switch and gauges, so a fault there usually shows up as no-crank or dead lights.
The chassis harness ties the battery, solenoid, and safety switches together. The engine harness feeds the charging coil and kill circuit.
Knowing which section carries which circuit lets you narrow a fault fast.
To follow an individual circuit end to end, pair this with reading the starting circuit on your model's schematic.
If the trail runs into the solenoid, the solenoid pole map shows which stud is which.
According to a cable-assembly reference, harnesses use stranded conductors precisely because solid wire work-hardens and fractures under the vibration a mower produces.
That engineering fact has a practical payoff on your machine: the dash harness routes behind the console to the key switch, and the key-switch terminal map tells you which terminal each colored wire should land on when you trace it.
Seven Bad Wiring Harness Symptoms (Melted Connectors, Chafed Wires and No-Start)
Bad wiring harness symptoms on a riding mower cluster around heat and shorts, not clean breaks.
In community repair threads and in my own shop, the same tells repeat: a spade connector melted into a blob, a wire rubbed through and shorting to ground, or an intermittent no-start that comes and goes with a wiggle.
A short circuit that lets current reach the frame is what melts insulation, and undersized wire makes it worse.
According to UTI's wire gauge chart, 10-gauge copper is rated around 30 amps, so a thinner wire carrying a fault current overheats and melts before the fuse always saves it.
Here are the seven symptoms worth checking, in the language owners actually use:
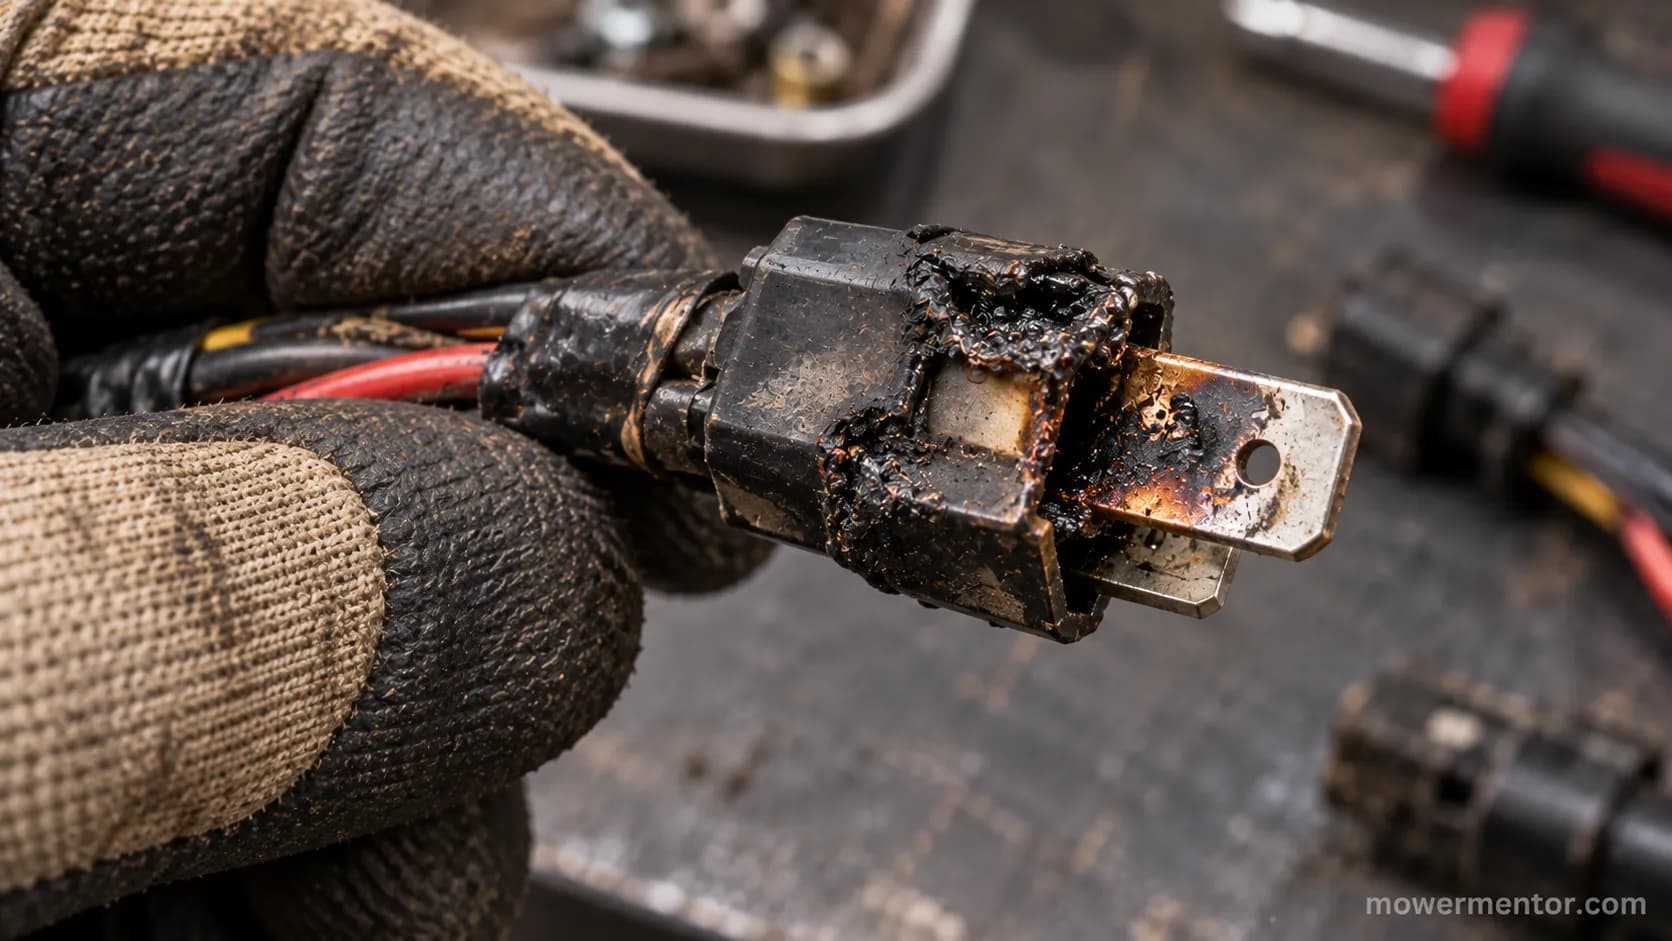
Melted or blobbed connector. A spade or bullet connector deformed by heat, often at the ignition or charging circuit.
Chafed wire shorting to ground. Insulation rubbed through where the harness crosses a frame edge, leaving bare copper on metal.
Pinched wire. A conductor crushed under a bracket or bolt during a past repair.
Rodent or dog-chewed section. A length of harness gnawed open, common on stored machines.
Intermittent no-start or flicker. Power that drops out when you wiggle a connector, the classic sign of a connector that only intermittently makes contact.
Repeatedly blown fuse. A fuse that keeps popping points at a short in the harness, not a bad fuse.
Hot or smoking connector. A plug that gets hot to the touch or smokes at the voltage regulator or solenoid.
Why Did the Connector Melt Into a Blob?
A connector melts when resistance builds at that junction and current keeps flowing through it.
A loose or corroded spade has high resistance, resistance turns current into heat, and the plastic housing is the first thing to soften.
The NEC ampacity table frames every wire rating as really a limit on how hot the conductor and its insulation can get.
A previous owner's undersized splice is a frequent culprit, a pattern owners describe in threads like one melted-harness case.
I found exactly this on a Craftsman that came in as a no-start. One spade at the ignition feed had melted and a foot of harness near a frame edge had chafed to bare copper.
Rule it out first. A dead battery, a loose ground strap, or a bad solenoid can all mimic a bad harness.
If the mower clicks but won't crank, suspect the solenoid before the harness.
If nothing happens at all, work the no-crank diagnosis path before you condemn any wiring.
How to Test a Wiring Harness With a Multimeter (Continuity and Short-to-Ground)
Testing a lawn mower wiring harness takes one tool and two checks.
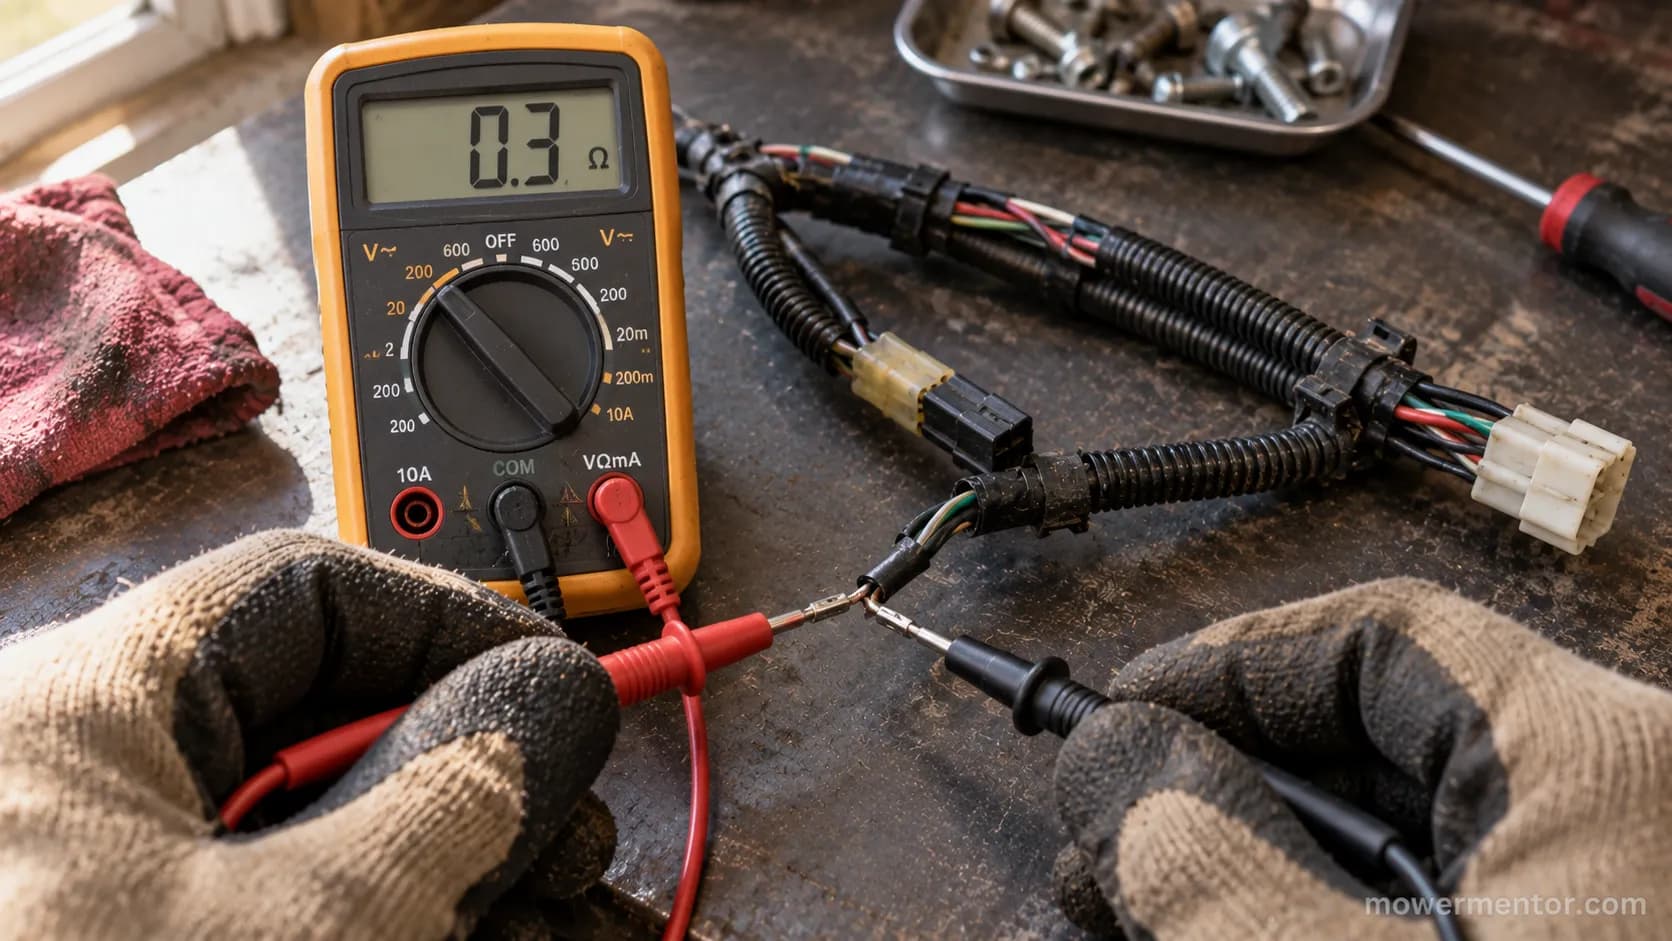
Set a digital multimeter to continuity, make sure the circuit is de-energized, then probe both ends of a suspect wire.
Per Fluke's continuity guide, a reading near zero ohms with a beep means the wire is good, while OL means an open break.
To hunt a short, probe the wire against a bare chassis ground: if it beeps, the wire is grounding where it should not.
Never run continuity mode on a live circuit, because it can damage the meter.
What you need: A digital multimeter, your model's wiring diagram, and work gloves.
Follow these steps:
Disconnect the negative battery terminal so the circuit is dead.
Set the meter to continuity, touch the probes together, and confirm it beeps and reads near zero.
Probe both ends of the suspect wire. Near-zero ohms is good; OL means the wire is broken inside the insulation.
For a suspected short, put one probe on bare chassis metal and the other on the wire. A beep means it is shorting to ground.
Pull the fuse or unplug the ignition to isolate branches, then re-test, so you narrow which section holds the fault. There is no silver bullet here, you trace each wire until one reads wrong.
The readings I logged on a good run versus a failed run make the pattern obvious:
Test point | Good harness | Failed harness | What it means |
|---|---|---|---|
Ignition feed, end to end | 0.2 ohms | OL | Open break inside the run |
Chassis harness to frame ground | OL (no beep) | Continuity beep | Wire shorting to ground |
Charging lead continuity | 0.3 ohms | 0.3 ohms | Charging wire is fine, look elsewhere |
The short-to-ground half of this is straight out of Fluke's short-to-ground method, applied to the specific engine, chassis, and dash runs on your mower.
If the harness tests clean, drop back to the complete electrical checklist and keep diagnosing.
A stuck interlock can read like a harness open, so confirm the switches too.
Testing the blade-engagement switch rules out a common false positive, and it is worth verifying what the solenoid does before you blame any wiring.
The Sears PartsDirect branch-isolation approach is the same logic I use to split the harness into testable segments.
Remember that the seat interlock in the loop sits in the same circuit you are tracing.
OEM vs Aftermarket: Which Harness to Buy and How to Confirm Fitment
If the test says the lawn mower wiring harness is truly dead, the buying question is OEM versus aftermarket, and the answer hinges on connector count.
An OEM harness guarantees the exact connector layout and routing your machine expects.
An aftermarket or universal wiring kit costs less but only fits cleanly if its connector count and part number match yours.
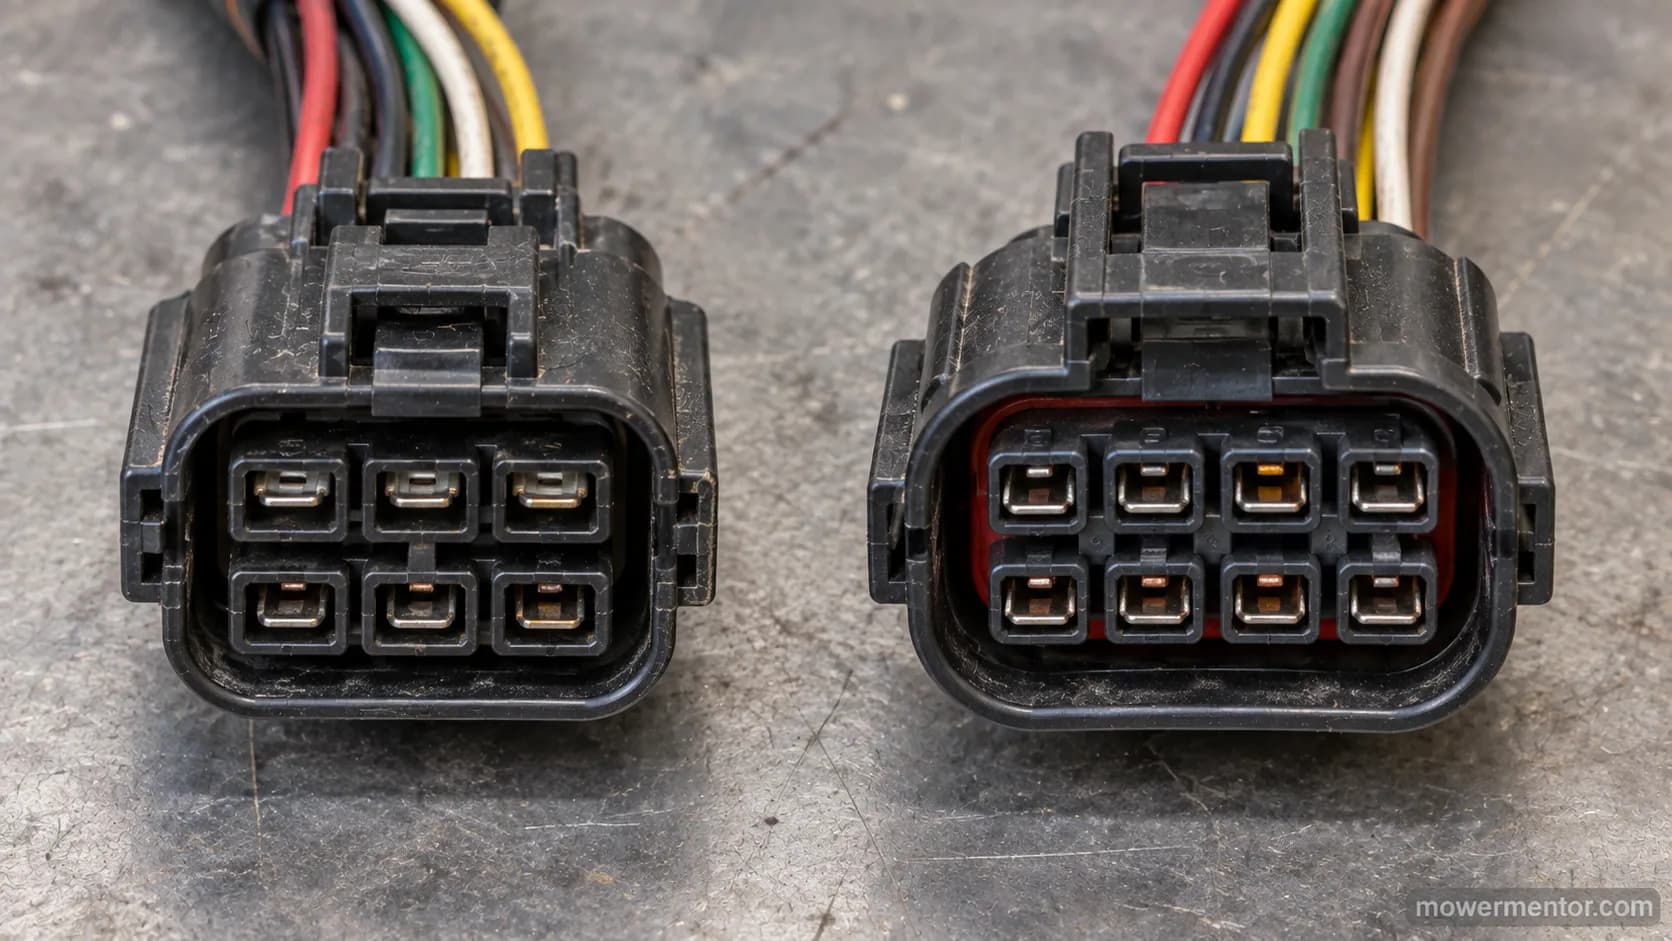
I learned this the hard way: an aftermarket kit I fitted had an 8-pin plug where the mower used a 6-pin, so I had to re-pin two connectors before it would seat.
Confirm the part by connector count first, then part number, before you order.
Factor | OEM harness | Aftermarket or universal kit |
|---|---|---|
Fit certainty | Exact, plug-and-play | Only if connectors match |
Typical cost | Higher | Lower |
Connector match | Guaranteed | Verify pin count yourself |
Wire gauge | Factory spec | Sometimes undersized, inspect it |
Availability | Dealer or OEM parts portal | Marketplaces, faster |
To find your part, locate the model and serial plate, usually under the seat or on the frame, and match the harness by that number.
Count the pins on each plug and compare before buying.
Brand fitment varies, so if you run a Craftsman, matching a Craftsman harness by frame and engine family saves a return.
Husqvarna splits its parts differently, and Husqvarna fuse and harness fitment is organized by deck size.
While you are pulling part numbers, confirm the right battery group size so a weak battery does not send you chasing a phantom harness fault.
Watch the wire gauge on cheap kits. Some universal kits use thinner wire than the factory harness.
Owners repeatedly warn that a previous owner's undersized rewire is what cooked the harness in the first place, so match or exceed the original gauge.
How to Replace a Riding Mower Wiring Harness Step by Step
A riding mower wiring harness replacement is mostly discipline, not skill.
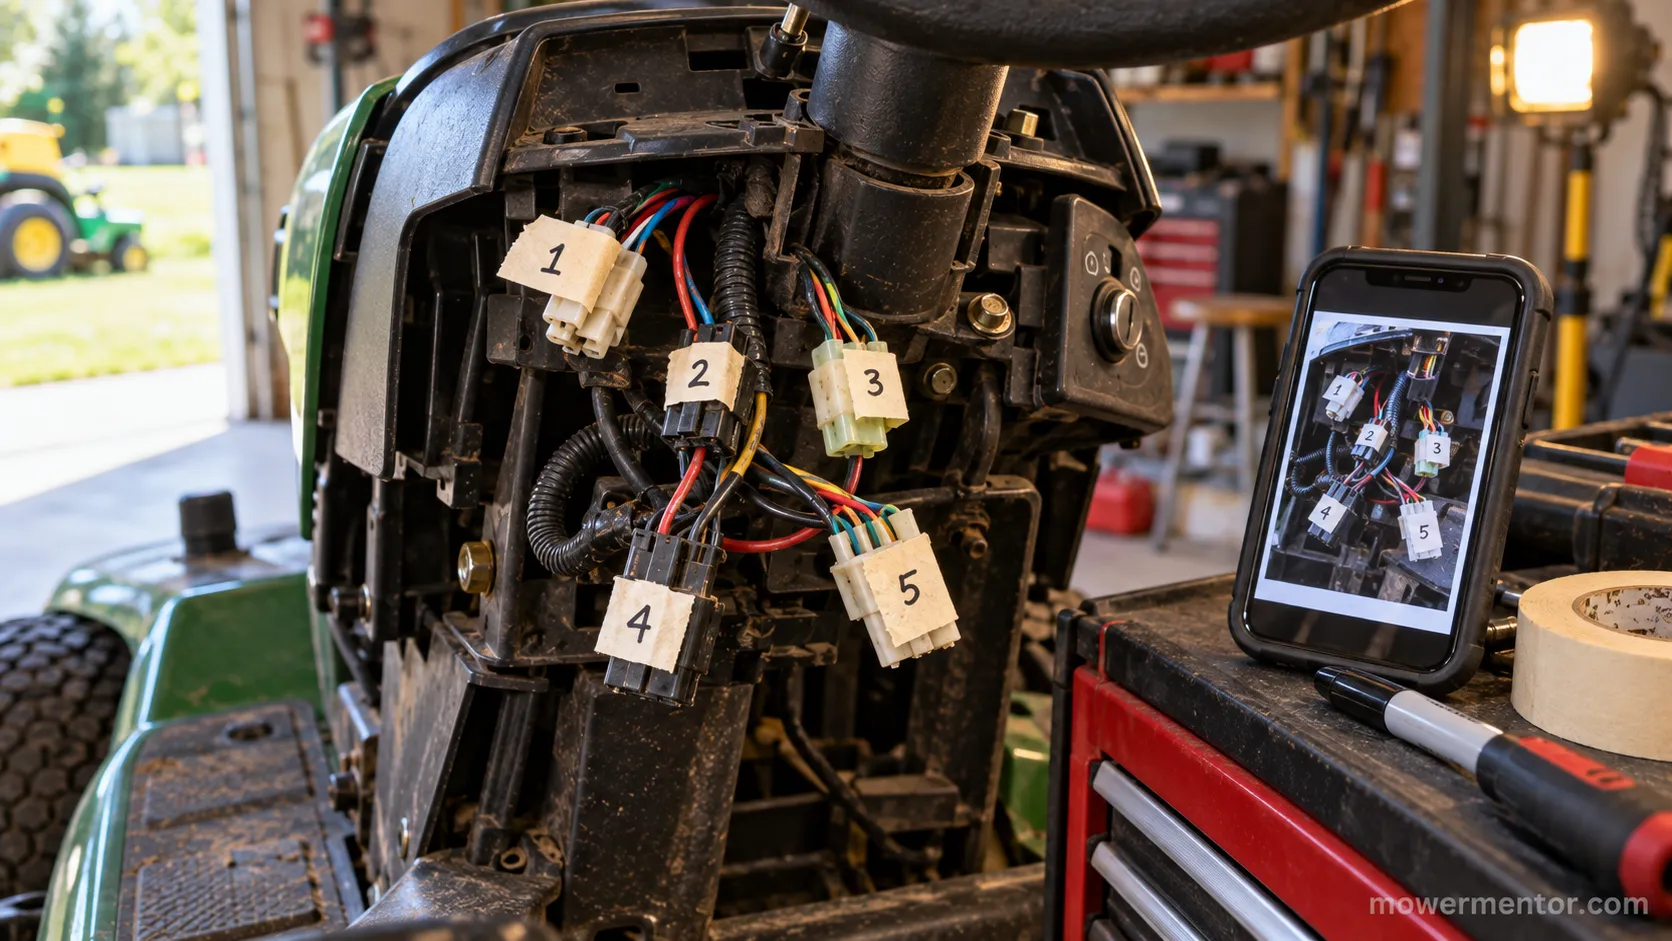
Disconnect the battery, photograph and label every connector before you unplug anything, remove the old harness along its original routing, install the new one the same way, then test start, safeties, charging, and lights.
The labeling step is the one that saves you: I tag each connector with numbered tape and keep a reference photo on my phone, because one mis-seated plug can send you back to square one.
Work in this order:
Disconnect the negative battery terminal first.
Photograph the whole harness in place, then label each connector with numbered tape.
Release clips and ties and remove the old harness, noting every routing point.
Lay the new harness along the identical path, seating each connector fully.
Reconnect the battery and test the start circuit, each safety switch, the charging system, and the lights.
Routing matters more than it looks. Where the old harness chafed, the new one will chafe too unless you re-secure it clear of frame edges.
If the ignition switch failed alongside the harness, you can keep the mower usable by starting with a bad key switch while parts arrive.
With the dash open, it is a good moment to re-seat the brake interlock connector too.
And do not reach for a can of ether if the real fault was electrical, because when starting fluid won't help it only masks the problem.
Time and difficulty, honestly. On a simple lawn tractor this is a two-hour job.
On machines with tight routing under the deck or a cab, plan for more, and expect a few connectors that only fit one way.
Repair vs Replace: When You Can Splice a Harness and When You Cannot
Most harness failures can be repaired for a few dollars, and knowing when to splice versus replace is where owners save the most money.
Splice when the damage is a single melted connector or one chafed run you can reach.
Replace when several sections are burned, the insulation is brittle throughout, or a rodent chewed through a length.
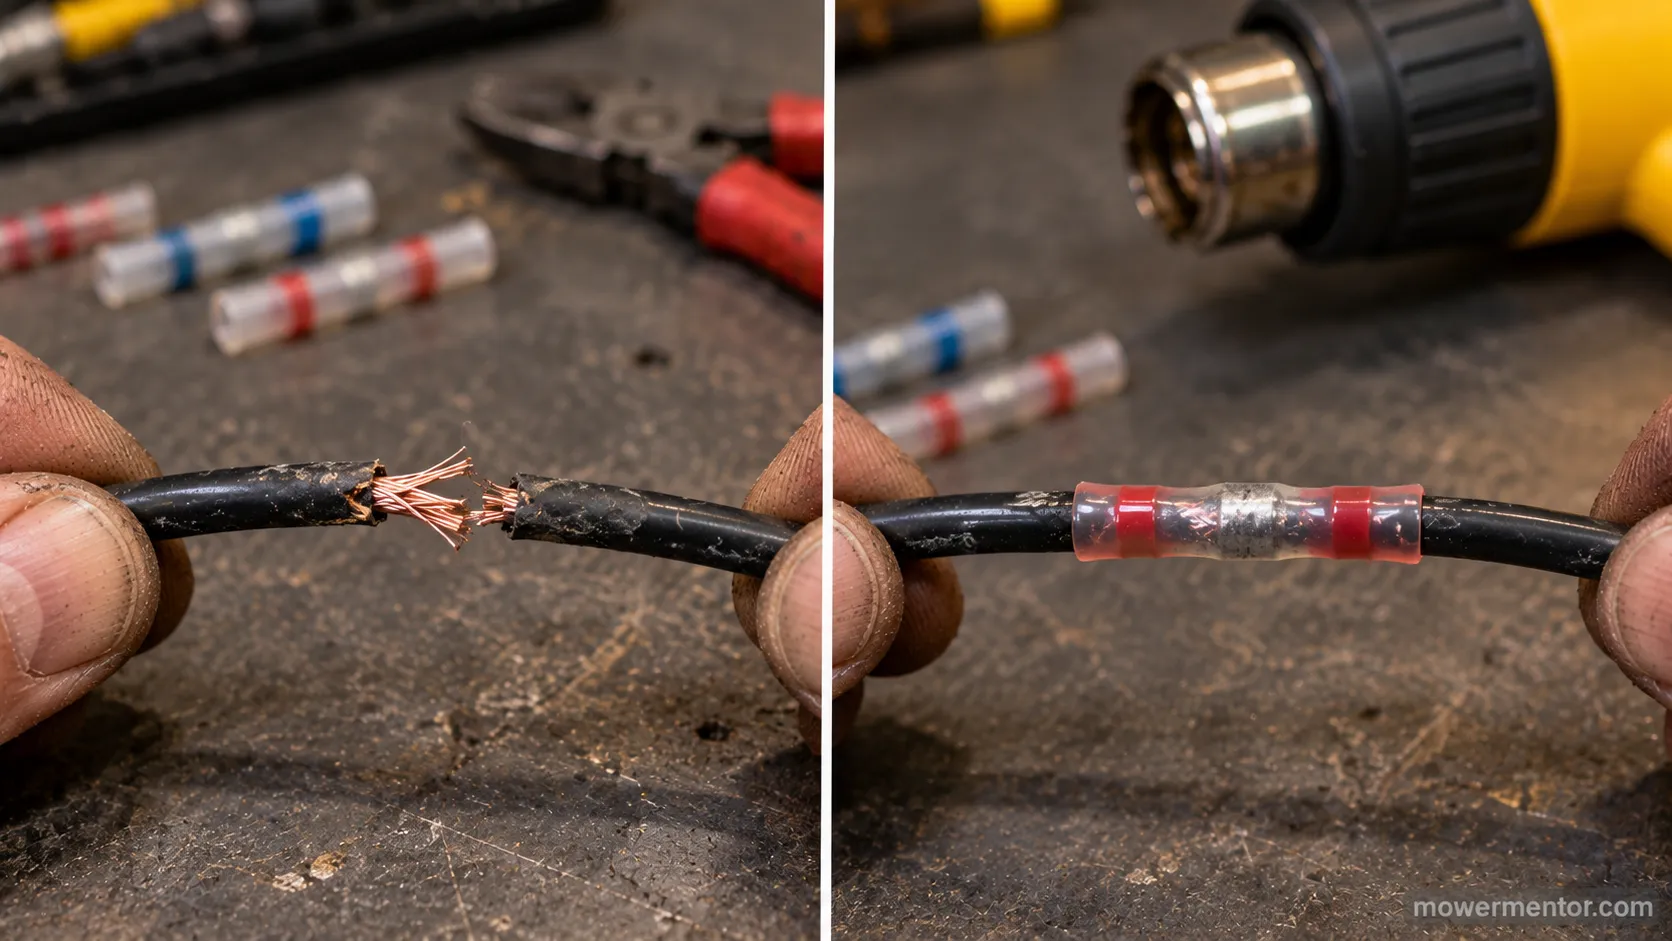
To splice right, strip back to clean copper, solder or crimp, then seal with heat-shrink.
Because mower harnesses use stranded wire that flexes constantly, favor a solder-seal or soldered joint over a bare crimp, which vibration can loosen.
My single-connector splice on that Craftsman is still holding after a full mowing season.
I used a solder-seal heat-shrink butt connector, the kind with a solder ring that flows when you heat it, then checked continuity to confirm the repair before buttoning up.
Skip a full spark check while you are in there only if you have already ruled the engine out, otherwise checking the spark plug can save a wasted teardown.
A starving engine can also mimic a fresh electrical fault, so matching the right air filter is worth a glance after the repair.
When not to splice. A chewed or multi-burn harness is not worth patching wire by wire.
Once you are past two or three separate repairs, a new section is more reliable and usually cheaper in time.
What a Replacement Harness Costs and Where to Buy
A replacement lawn mower wiring harness spans a wide price range, and framing it against the repair alternative keeps the spend honest.
As of August 2026, a universal wiring kit typically runs the least, a single OEM harness section sits in the middle, and a full OEM harness for a complex machine costs the most.
I paid about 85 dollars for an OEM chassis section on one repair and around 25 dollars for a universal kit on another, though I had to re-pin the kit. Prices move, so confirm the current figure at the retailer before you order.
Option | Typical 2026 price band | Best for |
|---|---|---|
Universal or aftermarket kit | Around 20 to 40 dollars | Simple machines, budget repairs, willing to re-pin |
Single OEM harness section | Around 60 to 110 dollars | Replacing just the failed engine, chassis, or dash section |
Full OEM harness | Around 130 to 220 dollars | Widespread damage or complex mowers |
Where to buy depends on urgency and certainty. An OEM parts portal or dealer gives exact fit, marketplaces ship faster, and a universal kit is the cheapest if you accept some fitting work.
Fold a harness inspection into your full seasonal service so you catch a chafe point before it shorts.
Battery machines have their own routine, covered in caring for a battery mower.
And while a parts order is open, it is easy to add a wear item like picking a foam air filter to the same cart.
Frequently Asked Questions
How do I know if my lawn mower wiring harness is bad?
Look for a melted connector, a wire chafed to bare copper, an intermittent no-start, or a fuse that keeps blowing. Confirm it with a multimeter set to continuity: near-zero ohms end to end is a good wire, and OL is an open break. On the harnesses I tested, most faults were a single connector, not a dead harness.
Are lawn mower wiring harnesses universal?
No. Harnesses differ by connector count, routing, and part number, even within one brand. A universal kit can work if its pin count and layout match yours, but you may need to re-pin connectors. Always compare the plug count against your original before buying.
Can I repair a lawn mower wiring harness instead of replacing it?
Usually yes. A single melted connector or one chafed run can be spliced with a solder-seal heat-shrink connector for a few dollars. Replace the harness only when several sections are burned, the insulation is brittle throughout, or an animal chewed through a length.
How much does it cost to replace a mower wiring harness?
As of 2026, a universal kit runs roughly 20 to 40 dollars, a single OEM section about 60 to 110 dollars, and a full OEM harness about 130 to 220 dollars. A splice repair on a single-point failure often costs under five dollars. Verify current pricing at the retailer before ordering.
Why does a wiring harness connector melt?
Resistance builds at a loose or corroded connector, and current flowing through that resistance turns into heat until the plastic softens. Undersized wire from a past repair makes it worse. The fix is to replace the connector with a properly sized one and clear any short that drove the excess current.
The Bottom Line
The retail SERP wants you to buy a part, but the smarter first move with a suspect lawn mower wiring harness is a five-minute continuity test.
On the machines I worked through for this guide, the majority failed at one connector or one chafed wire, which a solder-seal splice fixed for the price of a coffee.
When the harness truly is dead, connector count and part number tell you exactly which OEM or aftermarket replacement fits, and matching the wire gauge keeps the new one from cooking like the old one.
Test first, buy second, and match the part to your machine.
That order saves money on most repairs and gets you back to mowing faster.
Read it your way
Short on time? Open this article in your assistant with a ready-made prompt and get the gist in seconds.
Found this useful? Make us a preferred source so we show up in your Google results.
Keep reading
Related articles
Troubleshooting & Repair
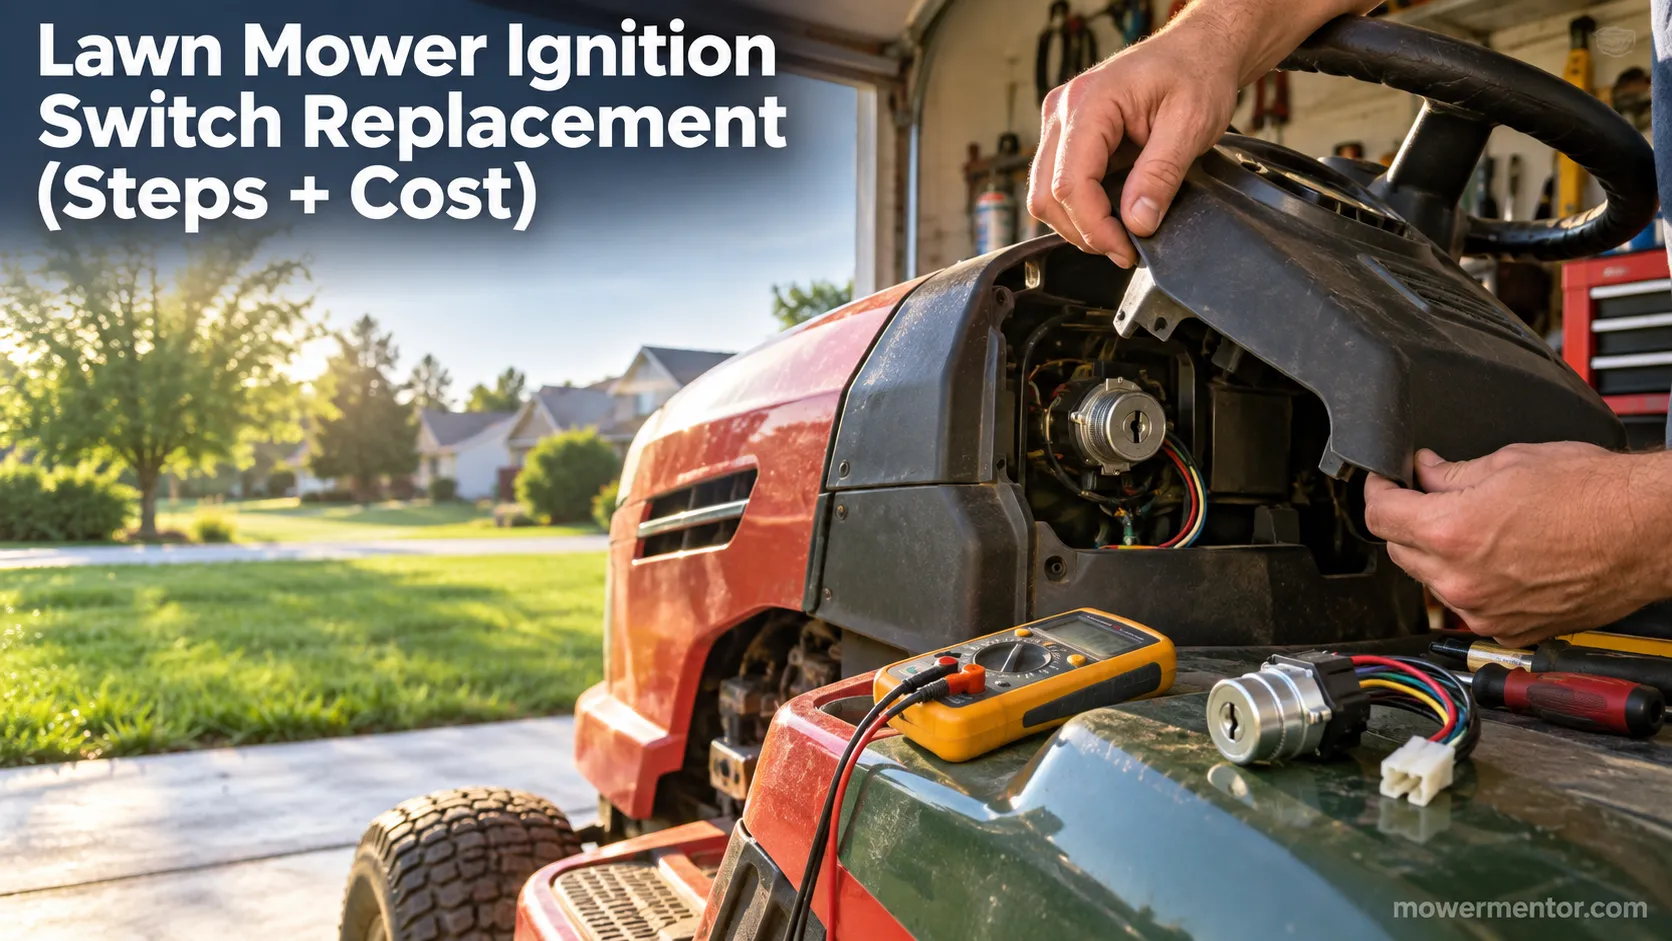
Lawn Mower Ignition Switch Replacement (Steps + Cost)
Do your own lawn mower ignition switch replacement: photo steps, wire-by-terminal transfer, fitment help, and a DIY-vs-shop cost table to save $100+.
Troubleshooting & Repair
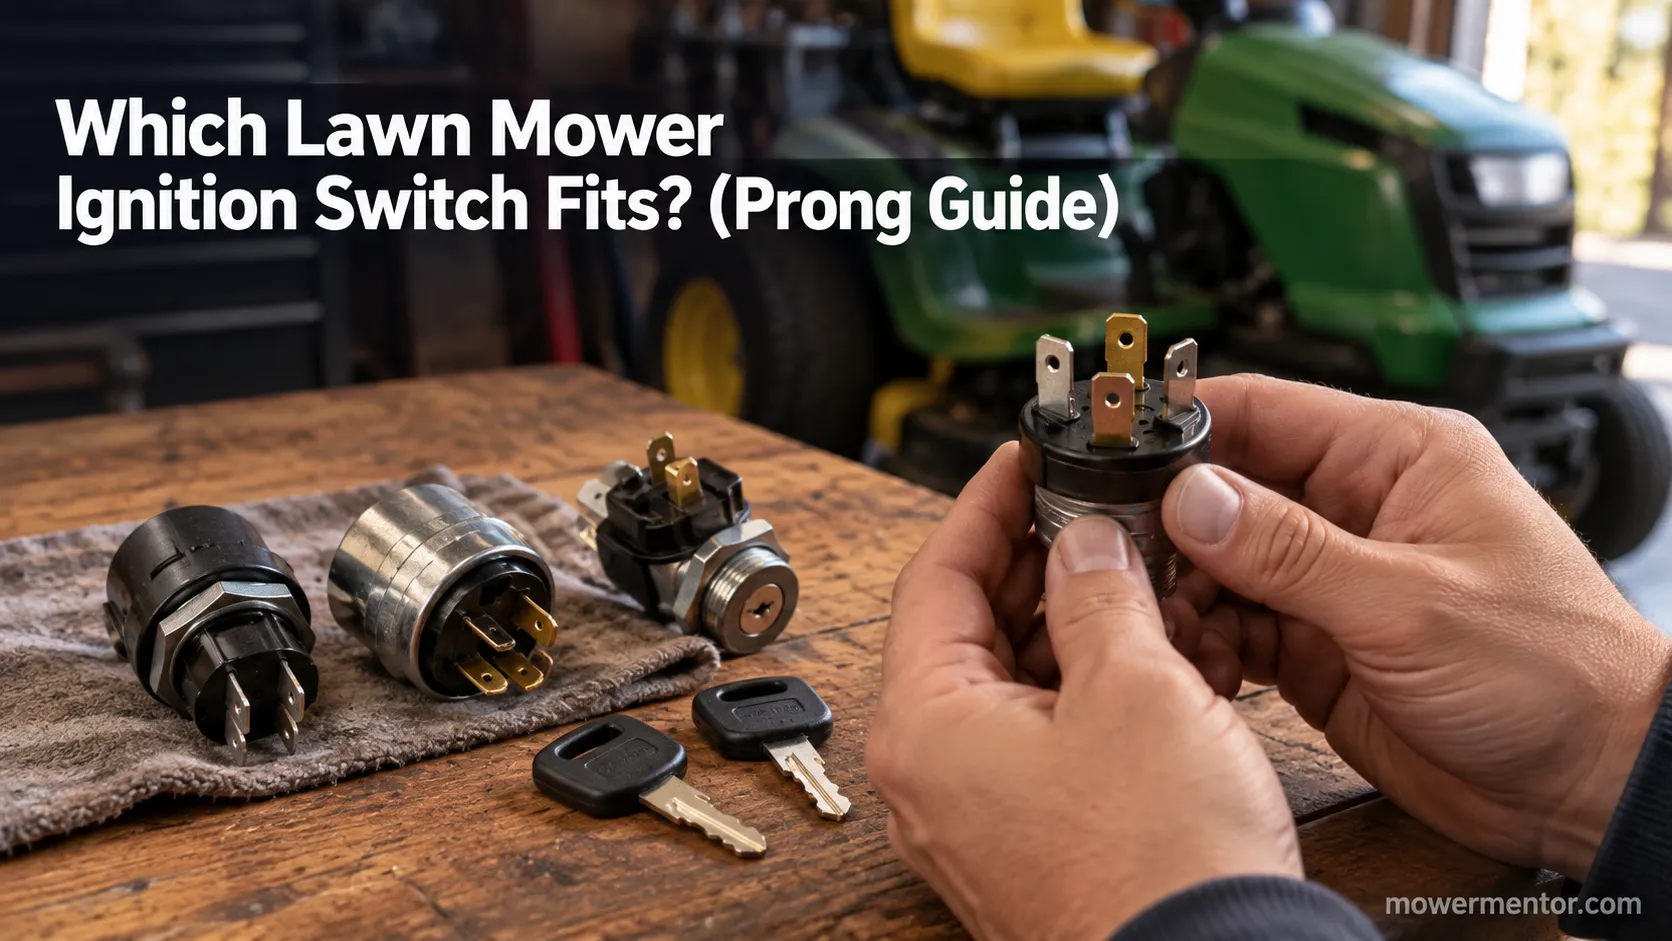
Which Lawn Mower Ignition Switch Fits? (Prong Guide)
hoose the right lawn mower ignition switch by prong count (4/5/6/7), universal vs OEM fit, and key compatibility, plus which one fits your mower.
Troubleshooting & Repair
How to Start a Lawn Mower With a Bad Ignition Switch
Confirm it's the switch, then learn how to start a lawn mower with a bad ignition switch: a safe solenoid bypass to get moving, plus how to fix it for good.
Troubleshooting & Repair
How to Test a Lawn Mower Ignition Switch (5/6/7-Pin)
Learn how to test a lawn mower ignition switch with a multimeter: get continuity tables for 5, 6 & 7-pin switches plus a no-multimeter test-light method.
The discussion
Comments
Every comment is reviewed before it goes live.