
John Deere Lawn Mower Starter Solenoid: 2 Tests, 1 Diagram
Test your John Deere lawn mower starter solenoid with a screwdriver or multimeter, decode the 3-vs-4-pole wiring, and pick the right AUC15346/MIU12537 part.
Written by Tony MaldonadoReviewed by Wade CoburnLast updated on September 24, 2026
When you buy parts or tools through links on our site, we may earn a commission at no extra cost to you. It never changes what we recommend. Learn more.
A John Deere lawn mower starter solenoid is a 12-volt relay that uses a small ignition signal to switch the battery's full current to the starter.
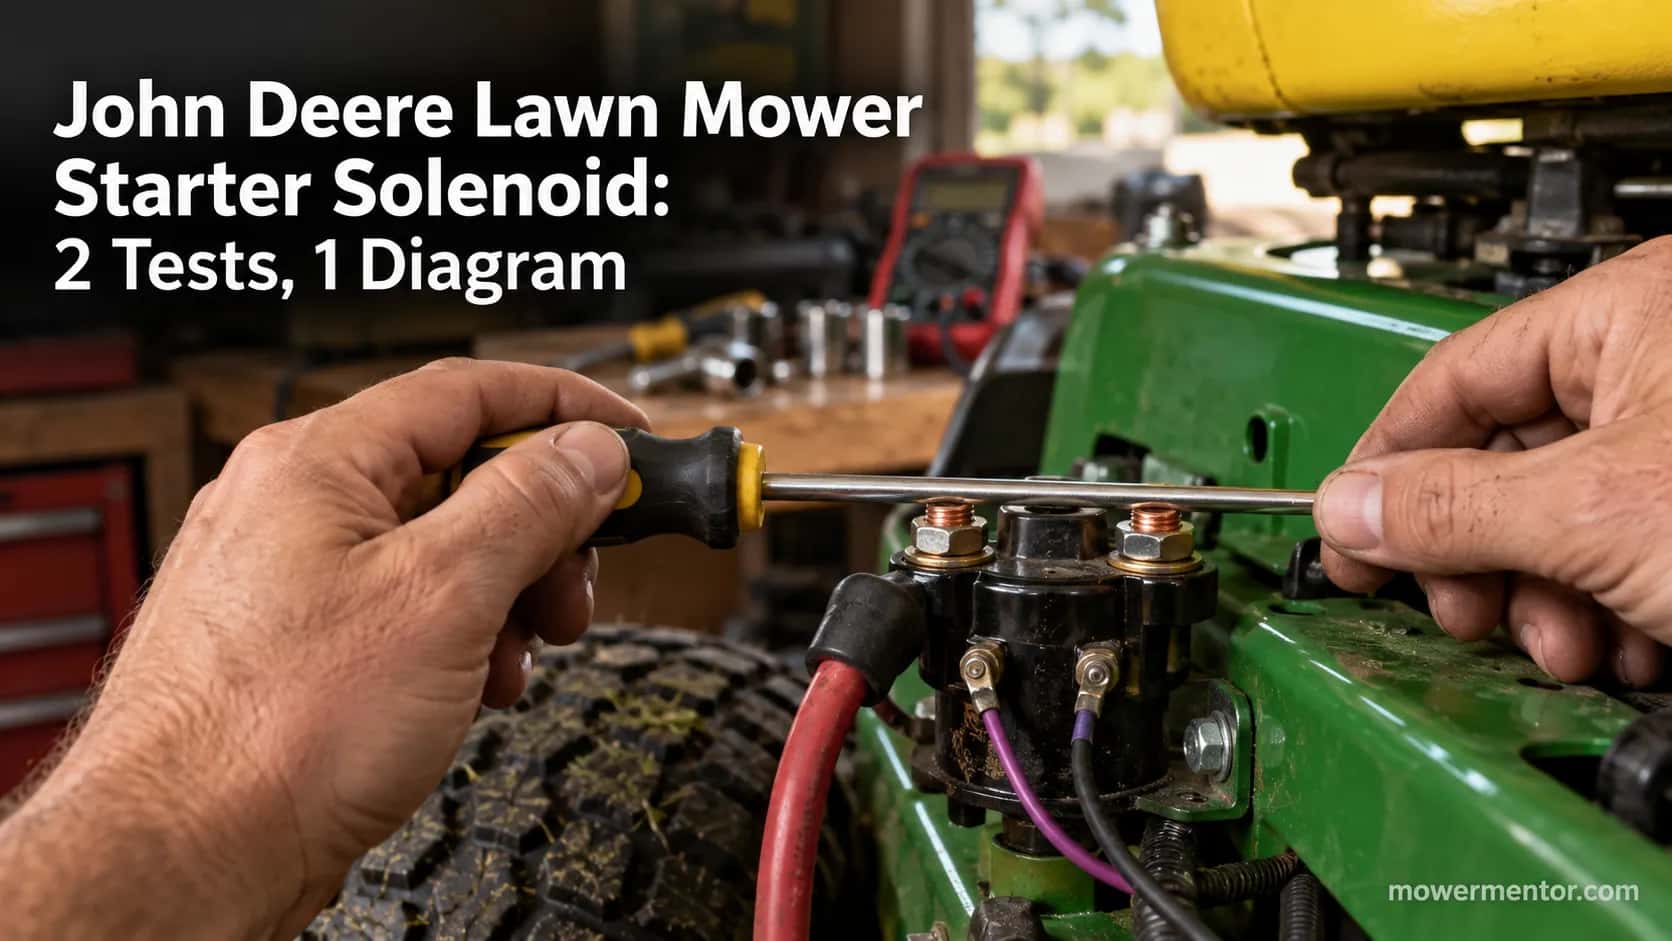
If the engine cranks when you bridge the two large posts with a screwdriver, the solenoid or its trigger circuit is at fault; if nothing happens, the problem is elsewhere.
The two OEM parts you will most likely need are AUC15346 (100, D, E, L, LA, X100, and Z series) and MIU12537 (S240 and the X300 to X394 Select Series).
The 30-Second Check: Is the Solenoid Your Problem?
A dead John Deere lawn mower starter solenoid produces one classic signature. You turn the key, hear a single sharp click or nothing at all, and the engine will not spin.
Before buying any part, you can confirm the culprit in about half a minute.
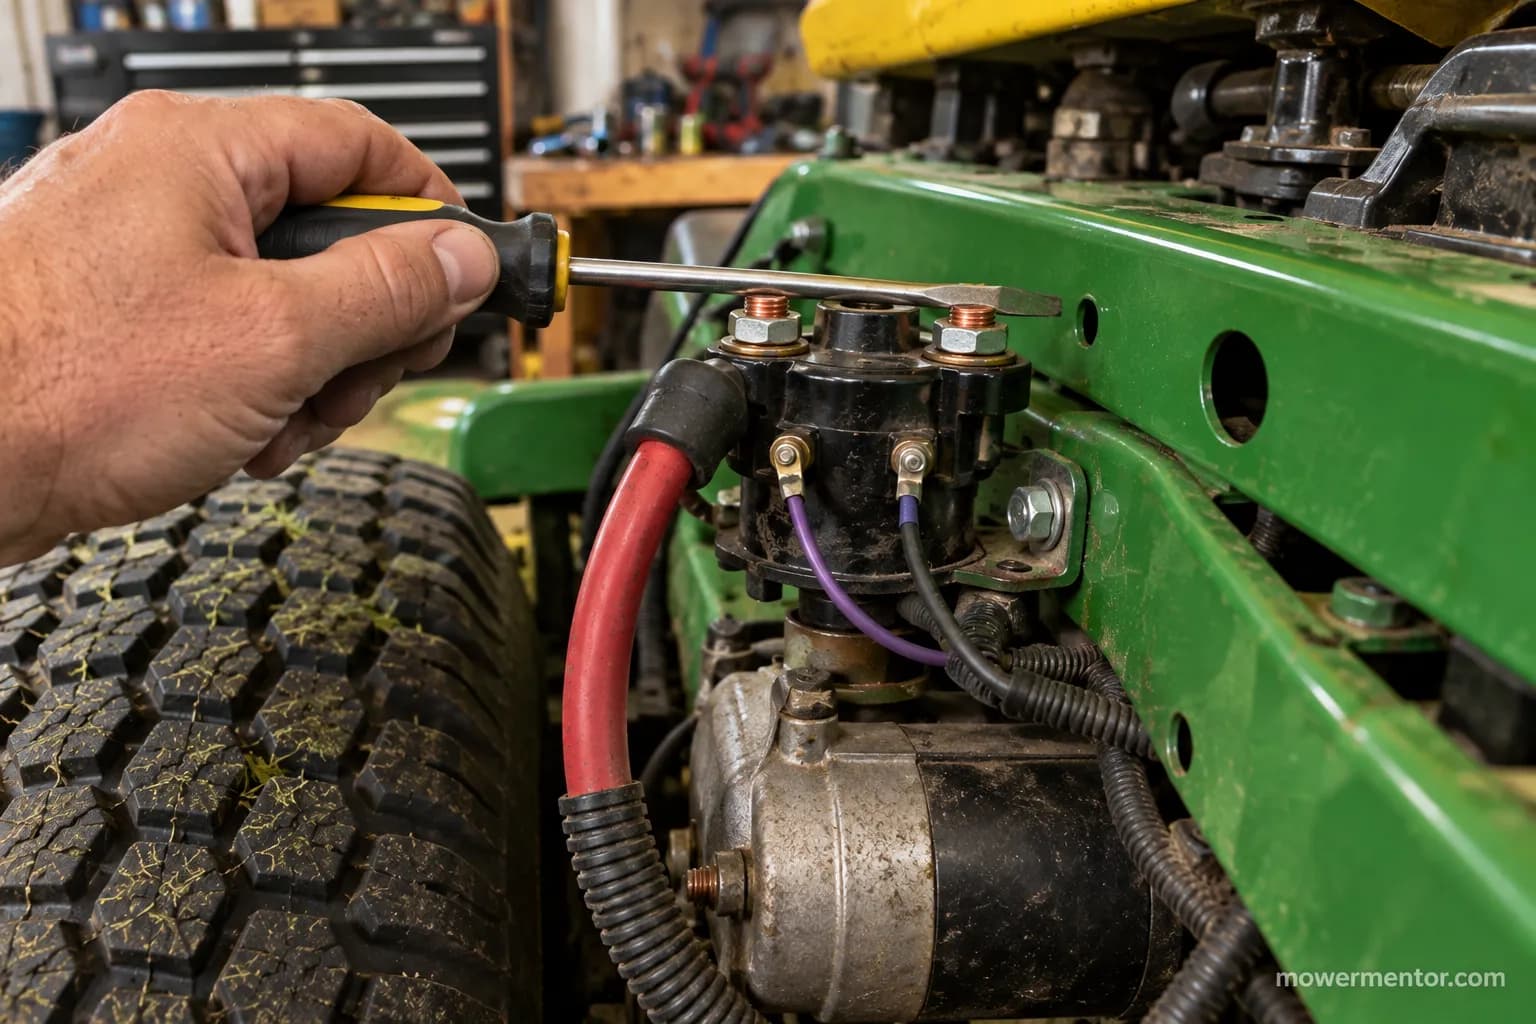
Bridging the two large terminals with a flat screwdriver bypasses the solenoid's trigger circuit and sends battery current straight to the starter.
If the engine cranks, the solenoid or its trigger side is the fault. If it stays silent, the solenoid is probably innocent.
Here is the fast field test, in order.
Put the mower in neutral or park, set the parking brake, and disengage the blades.
Find the solenoid (a small cylinder with two large studs and one or two small wires) near the battery or starter.
Lay a clean flat-blade screwdriver so its metal shaft touches both large studs at once.
Watch the starter: an instant crank means the trigger side failed, while a dead response points away from the solenoid.
Safety note: Bridging the posts bypasses the seat, brake, and PTO interlocks.
The machine must be in neutral with the brake set and blades off before you touch the solenoid.
On our test John Deere X300, laying a flat screwdriver across the two large posts cranked the engine instantly.
That told us the solenoid's trigger side had failed rather than the starter motor.
A successful jump does not tell you why the trigger side failed, so the next two sections narrow it down.
Still not sure what you heard? The click pattern itself is a clue.
What the John Deere Lawn Mower Starter Solenoid Does and Where It Is
The John Deere lawn mower starter solenoid is a 12-volt relay. It takes the small current from your ignition switch and uses it to close a heavy internal contact, passing the battery's full amperage to the starter motor.
John Deere lists the common OEM unit, AUC15346, as a 12-volt solenoid, which confirms the part is a switching relay rather than a fuse or a sensor.
Without it, your key would have to carry starter-level current, which no ignition switch is built to survive.
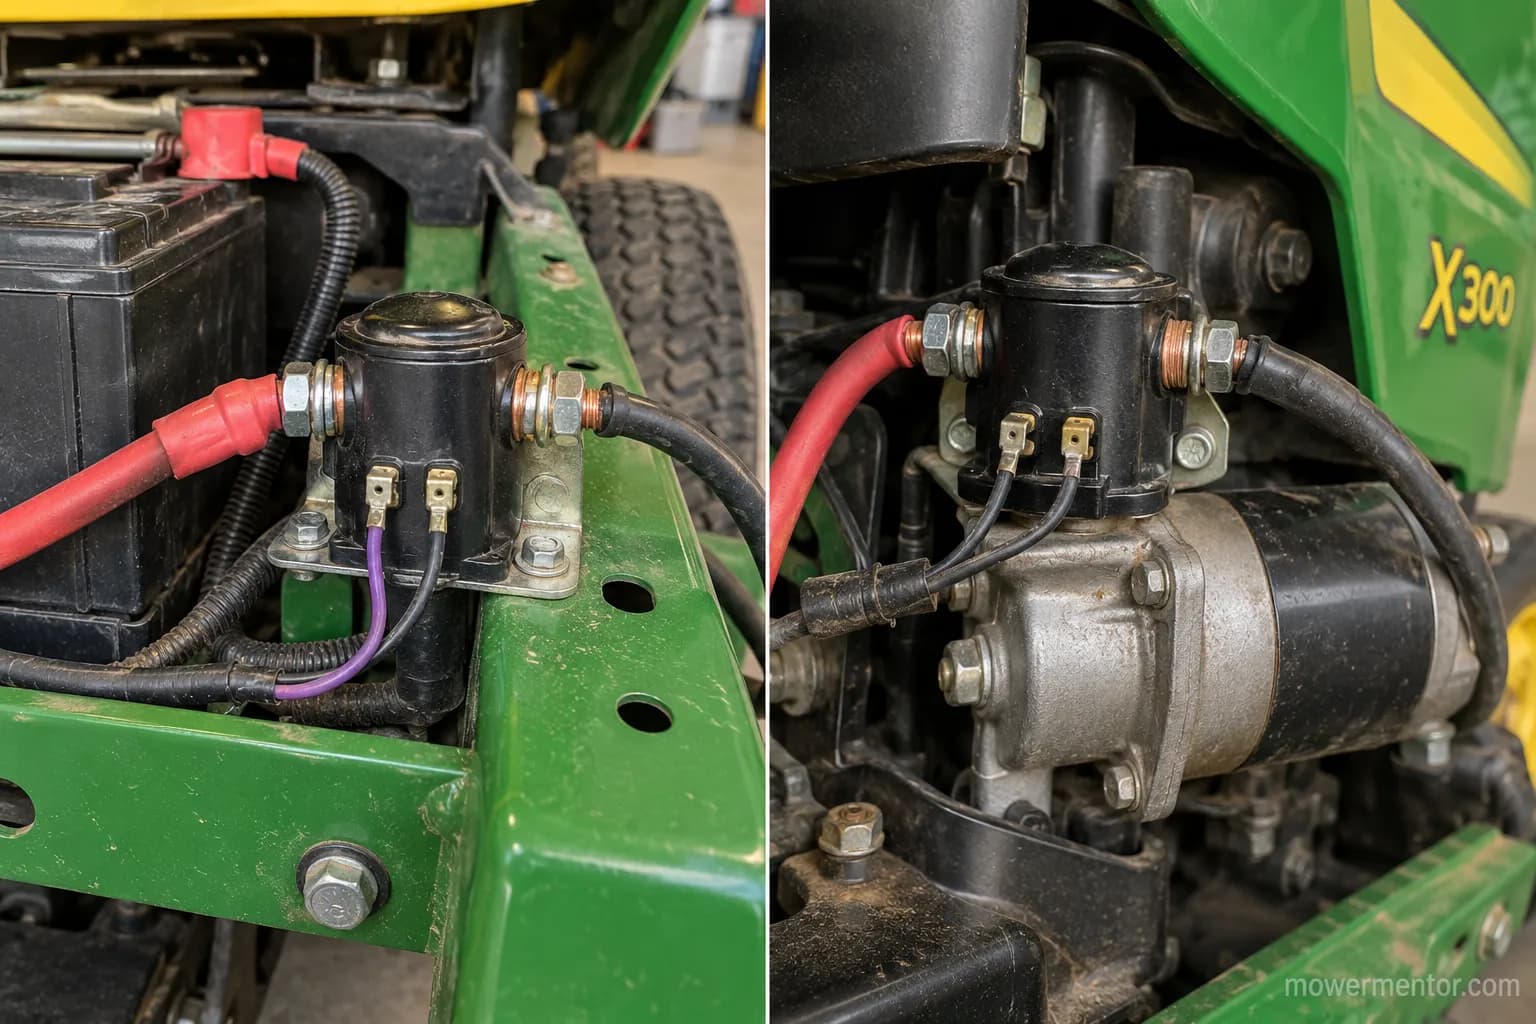
Location varies by series, and that trips up a lot of owners. On 100, D, E, L, and LA series riders, the solenoid usually sits on the frame rail beside the battery, while on X300 and similar Select Series machines it is tucked closer to the starter.
The part itself is a general-purpose relay used across many brands. Our overview of what a starter solenoid is covers the fundamentals if you are new to it.
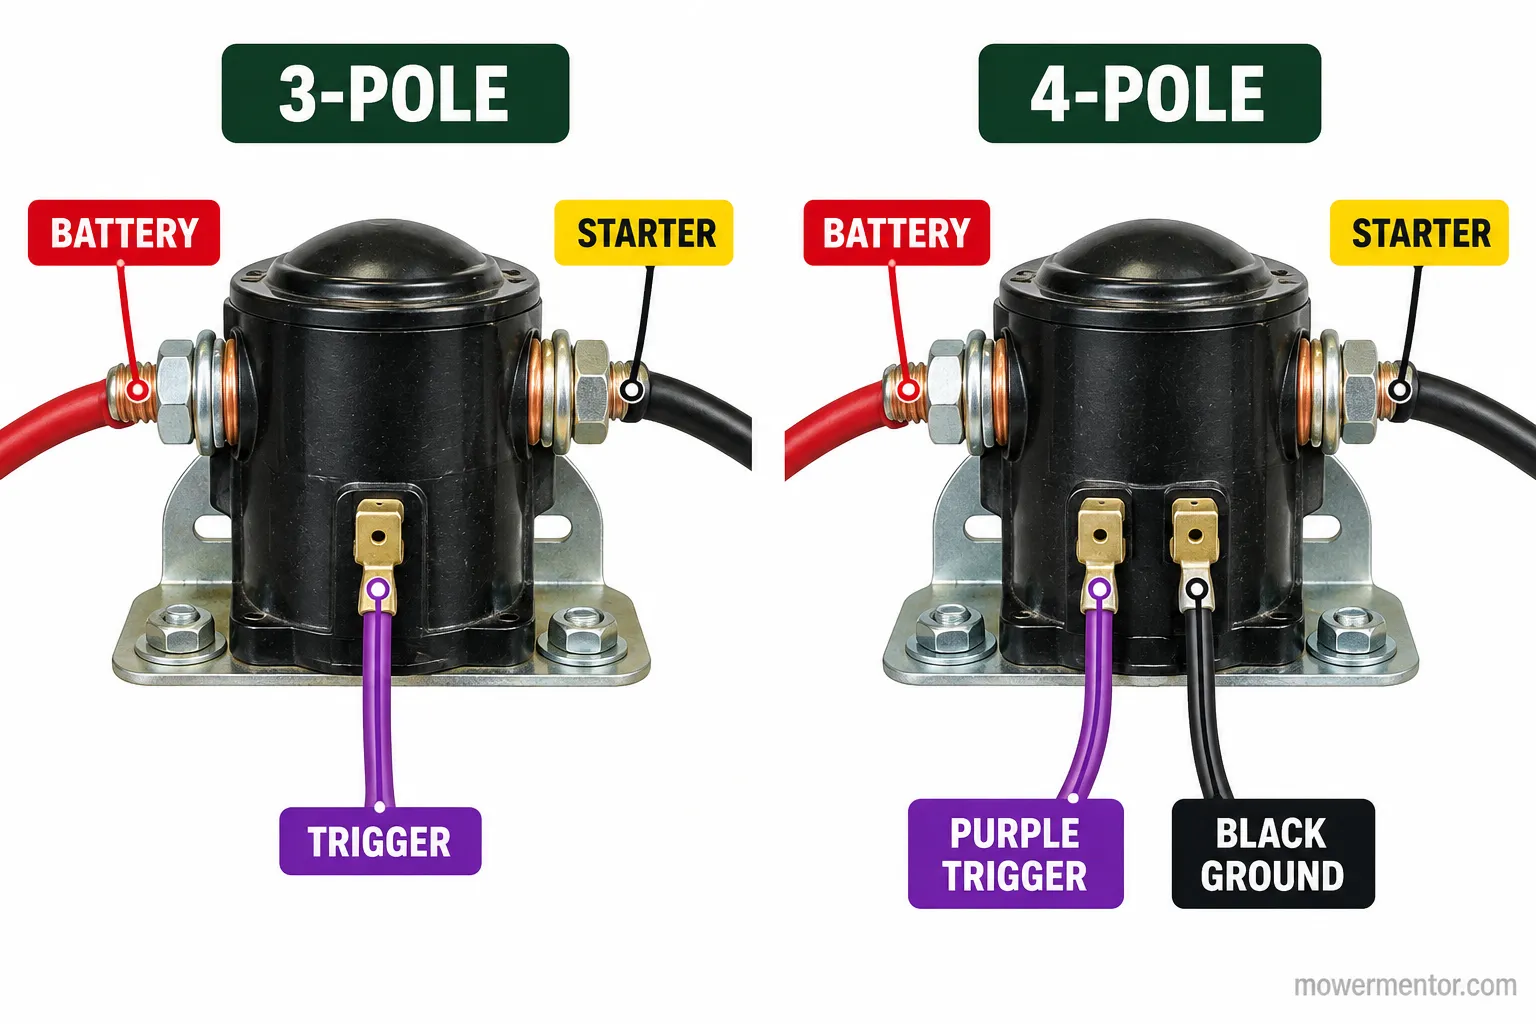
Most John Deere fender and frame solenoids are the 4-wire type. That means two large studs (battery in, starter out) plus two small terminals, a purple trigger wire and a black ground wire.
Some setups use a 3-post style instead, with two large studs and a single small trigger, grounding through the mounting bracket to the frame.
Count your small terminals before you buy, because the type decides how you wire and test it.
On our D130, the solenoid sat on the frame beside the battery with the classic two small wires, purple and black.
On the X300 it was closer to the starter, so treat ours as representative and verify against your own machine.
Bad Solenoid Symptoms: Single, Rapid, or Continuous Clicking
The sound your John Deere makes when you turn the key narrows the fault before you touch a tool.
A single sharp click usually means the solenoid pulled in but could not pass current, often from burned contacts, a weak battery, or a bad ground.
Rapid clicking points to low voltage or a loose connection rather than the solenoid itself.
Continuous clicking, or a click that seems to come from a separate relay, suggests the trigger circuit or ground rather than the main contacts.
Here are the patterns and what each one most often means.
Single click, no crank: Solenoid contacts, starter, or a weak battery.
Rapid clicking: Low battery voltage or a loose or corroded connection.
Continuous or relay-style clicking: Trigger circuit, ground, or a separate starter relay.
No click at all: Ignition switch, a tripped safety switch, or an open trigger wire.
Rapid clicking especially points at the battery rather than the solenoid. Before condemning the part, confirm you are running the right John Deere battery and that it holds voltage under load.
Is It the Relay or the Solenoid Clicking?
Some John Deere circuits include a small starter relay that clicks near the solenoid, which fools people into replacing the wrong part.
If the click comes from a plastic relay in the harness rather than the metal solenoid body, the solenoid may be fine.
A single crisp click with no crank has its own diagnosis path, and we walk through what a single click really means in detail.
If you hear nothing at all when you turn the key, a silent no-click no-start follows a different branch.
Our own two machines showed how the pattern can mislead. The table below is the data we captured.
Machine | Click pattern | Battery at rest | What it turned out to be |
|---|---|---|---|
John Deere X300 | Single sharp click | 12.7 V | Arced solenoid contacts, dead solenoid |
John Deere D130 | Rapid clicking | 12.7 V | 0.4 V drop on a corroded frame ground |
Reality check: Clicking is not proof.
One of our two clicking mowers had a perfectly good solenoid, so a weak battery or a bad ground can fake the same symptom.
How to Test It: Screwdriver Jump Plus Multimeter
Confirming a John Deere lawn mower starter solenoid takes one of two tools. With the key in START you should read battery voltage, roughly 12.6 to 12.7 volts, at the solenoid's large input stud and about 12 volts at the small purple trigger wire.
If those are present but there is no continuity across the two large terminals when triggered, the solenoid is dead.
The screwdriver jump gives you the same verdict without a meter: bridge the large posts and watch for a crank.
How Do You Test It With a Screwdriver?
The screwdriver jump is the fastest confirmation. Field guides such as Powered Outdoors treat bridging the large posts as a valid test.
Set neutral, brake, and blades off, then turn the key to ON.
Lay a clean flat-blade screwdriver across both large studs so it shorts the two big posts.
A crank means the solenoid's trigger side failed, while silence means look past the solenoid.
Bridging the big posts is the same move as the screwdriver-bypass trick, used here as a diagnostic.
How Do You Test It With a Multimeter?
The multimeter gives you the definitive answer. The same continuity check works across brands if you want the generic test-any-mower-solenoid walk-through.
Set the meter to DC volts and read the battery at rest. About 12.6 to 12.7 volts is a full charge, per a standard battery voltage chart.
With a helper holding the key in START, check the small purple wire reads about 12 volts.
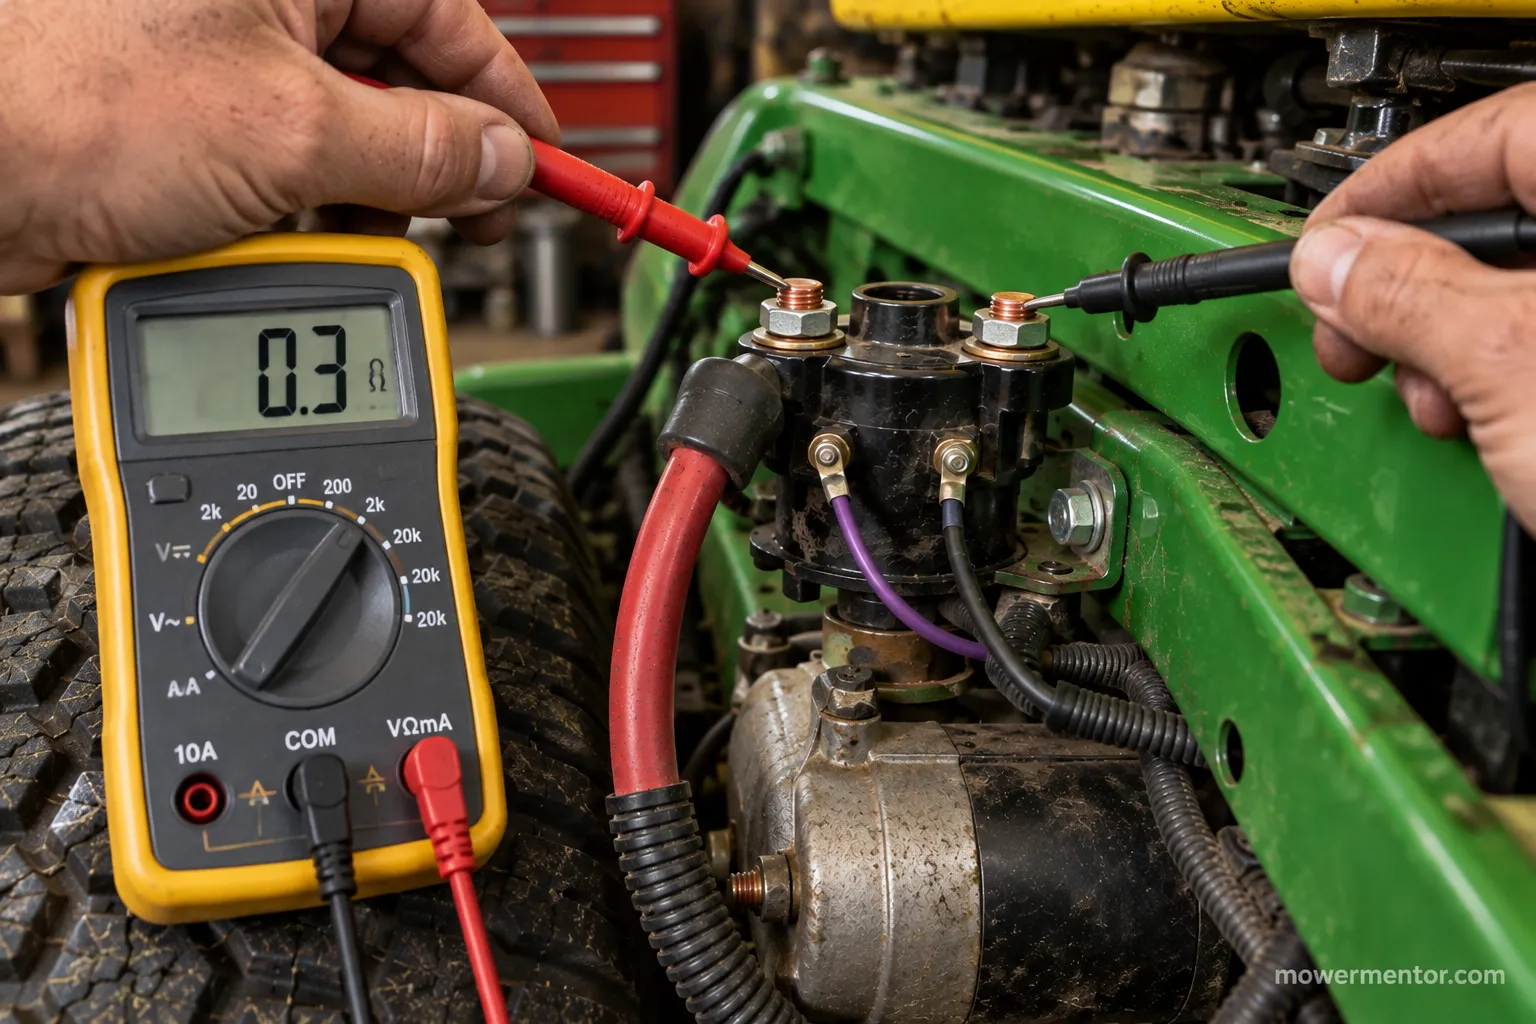
Switch to continuity, back-probe the two large terminals, and have the helper hold START again.
Continuity present means the contacts close; no continuity with 12 volts at the trigger means the solenoid is bad.
You can also bench test a removed unit. Clamp the meter's negative to the case and the positive to a big post, then apply 12 volts to the trigger to hear and read it close.
Step | What you should see | Our X300 reading |
|---|---|---|
Battery at rest | About 12.6 to 12.7 V | 12.7 V |
Purple trigger wire in START | About 12 V | 12.1 V |
Continuity across large posts, triggered | Near 0 ohms (closes) | No continuity |
Verdict | Closes and cranks | Dead solenoid, replaced |
On our X300 the meter read 12.7 volts at the input stud and 12.1 volts at the purple wire, yet showed no continuity across the large terminals when triggered.
That confirmed a dead solenoid rather than a starter fault.
A surface-charged battery can read 12.6 volts at rest but sag under load, so retest under a crank if your numbers are borderline.
If the solenoid tests good, the next suspect is the starter motor itself. On a John Deere specifically, the John Deere starter guide covers that check.
The 4-Pole and 3-Pole Wiring Diagram, Labeled
A John Deere starter solenoid comes in two wiring layouts, and mixing them up is the most common rewiring mistake.
A 3-post solenoid has a battery-in large post, a starter-out large post, and one small ignition trigger, grounding through its metal bracket.
A 4-pole solenoid adds a second small terminal, so you get a purple trigger wire and a separate black ground wire.
Most John Deere fender and frame units, including AUC15346 and MIU12537, are this 4-terminal type.
The table below maps each terminal to what it connects to.
Terminal | 3-pole role | 4-pole role |
|---|---|---|
Large post A | Battery positive cable in | Battery positive cable in |
Large post B | Starter cable out | Starter cable out |
Small terminal 1 | Ignition trigger (purple) | Ignition trigger (purple) |
Small terminal 2 | None (grounds through bracket) | Dedicated ground wire (black) |
The 4-wire type needs that dedicated black ground because it is not relying on the mounting bracket to reach the frame.
If you are unsure which you have, count the small terminals as described earlier, since that is the whole distinction.
For printable 3-pole and 4-pole schematics with a downloadable PDF, see the full wiring reference.
We traced the purple trigger and the black ground on our 4-wire X300 unit and drew the diagram below directly from the actual harness.
Verify first: Wire colors can vary by year and model.
Confirm the purple-trigger and black-ground convention against your own machine before trusting any diagram.
How to Replace the Starter Solenoid, Step by Step
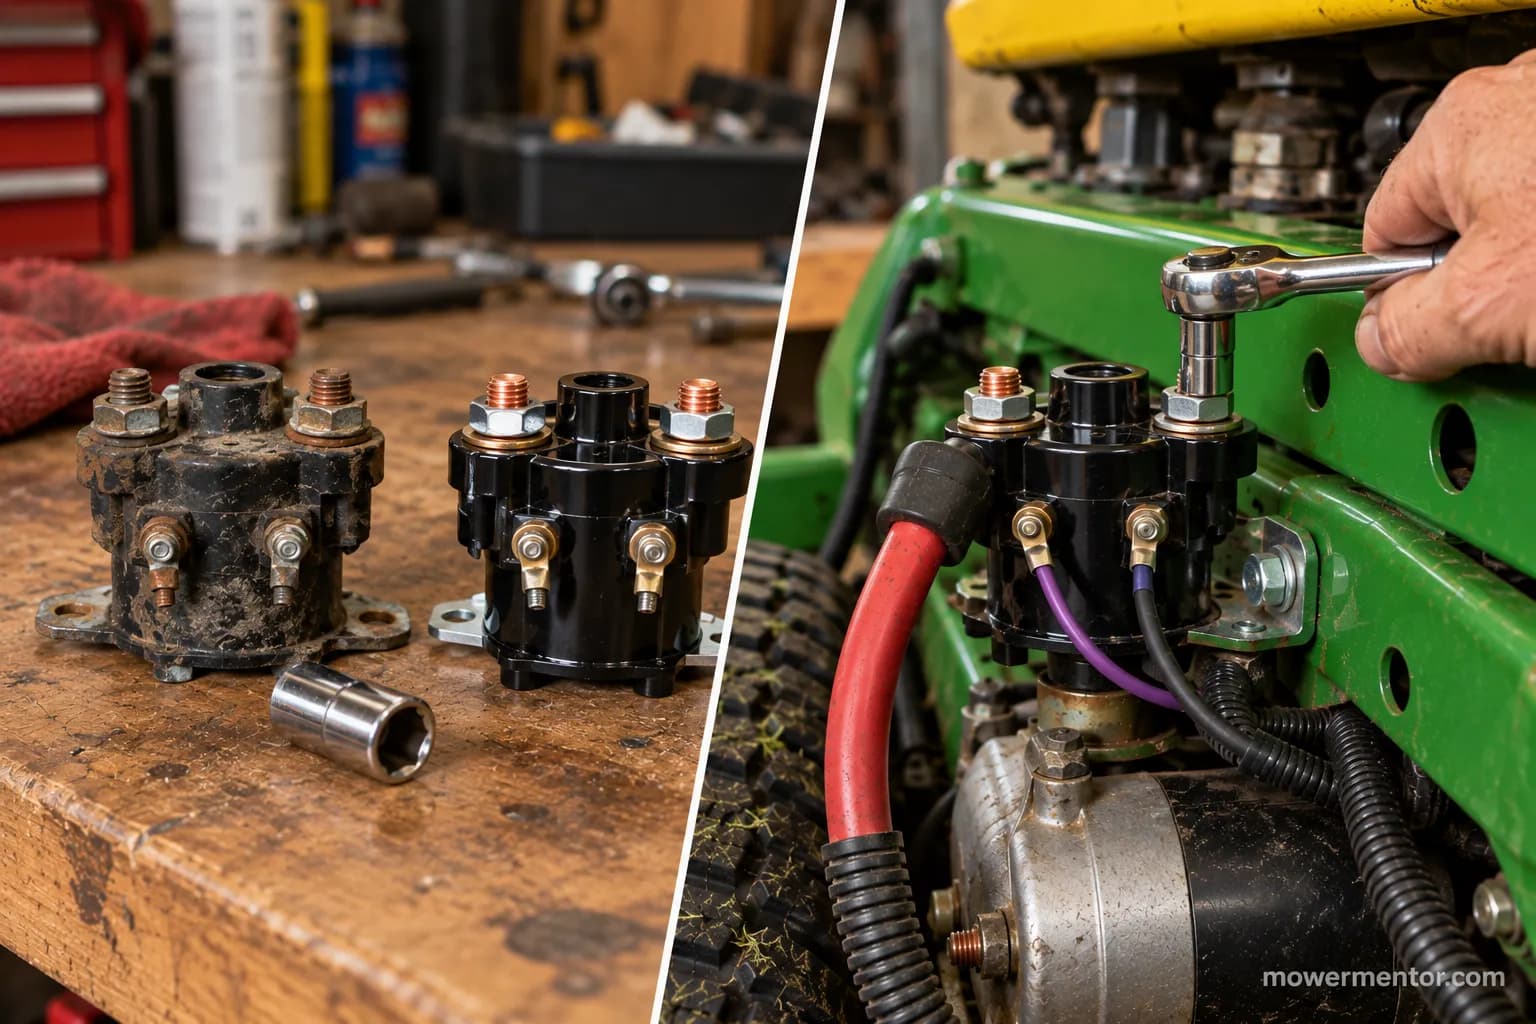
Replacing a John Deere starter solenoid is a basic hand-tool job once you have confirmed the part is bad.
Disconnect the negative battery cable first, photograph the wiring, remove the two 10-millimeter nuts that hold the solenoid, and transfer each wire to the matching terminal on the new unit.
A published John Deere teardown from Practical Mechanic confirms the two 10-millimeter solenoid nuts, a 14-millimeter battery cable, and the negative-first order.
Plan on about fifteen minutes.
Tools and safety first.
A 10-millimeter and a 14-millimeter socket or wrench.
A phone camera to photograph the wiring before you touch it.
Disconnect the negative battery cable before anything else.
Removal, in order.
Disconnect the negative battery cable, then the positive.
Photograph the solenoid wiring, noting which small wire is on which terminal.
Label and disconnect the two large cables and the small trigger and ground wires.
Remove the two 10-millimeter nuts and lift the solenoid off its bracket.
Installation, in order.
Mount the new solenoid with the same two 10-millimeter nuts.
Reconnect the large battery-in and starter-out cables to their original studs.
Reconnect the purple trigger and black ground to the matching small terminals, using your photo.
Reconnect the battery positive, then negative, turn the key to START, and confirm a crank.
Two 10-millimeter nuts held our X300 solenoid and the battery cable was a 14-millimeter. Photographing the wiring first is what kept the purple and black wires from getting swapped.
The battery must be disconnected first, because a live large post will arc against a wrench.
For a brand-neutral replacement walk-through with a cost breakdown, see the full guide.
If the starter itself is the fault, replacing the starter motor follows the same access path.
While the electrical is apart is also the natural moment for a full John Deere tune-up.
That is the easiest time to handle changing the spark plugs too.
With the panels already off, cleaning the air filter takes another minute.
Which Part Fits Yours: AUC15346 vs MIU12537
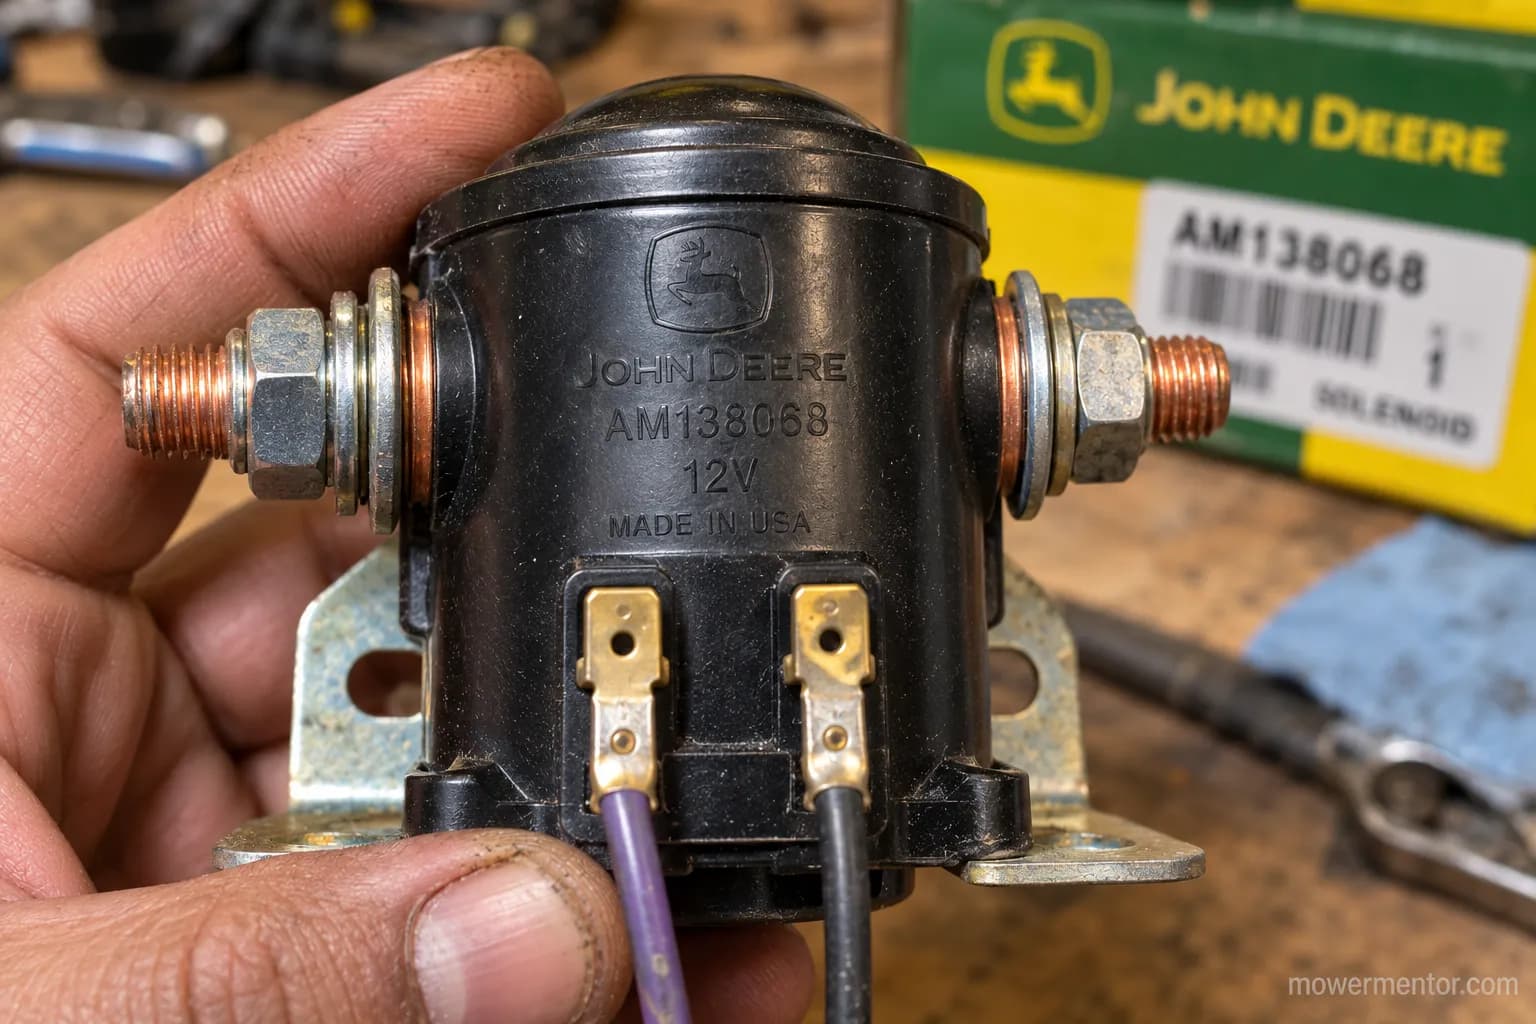
Two OEM part numbers cover most John Deere riders. Most 100, D, E, L, LA, X100, and Z series machines use AUC15346, which John Deere sells as a genuine part that replaces GY22476 and AM138068.
The S240 and the X300 through X394 Select Series machines, with FS600V or FS651V Kawasaki engines, use MIU12537 instead.
Match the number stamped on your old solenoid, not just the model name.
Your John Deere series | OEM part | Also replaces or notes | Typical price band |
|---|---|---|---|
100, D100 to D170, E100 to E180 | AUC15346 | Subs GY22476, AM138068 | About $10 to $20 aftermarket, $25 to $45 OEM |
L, LA, LT, X105 to X166R | AUC15346 | 4-terminal type | About $10 to $20 aftermarket, $25 to $45 OEM |
Z225 to Z665 (EZTrak, ZTrak) | AUC15346 | Subs GY22476 | About $10 to $20 aftermarket, $25 to $45 OEM |
S240, X300 to X394 Select Series | MIU12537 | FS600V or FS651V engines | About $12 to $22 aftermarket, $30 to $50 OEM |
A few buying notes are worth keeping in mind. Aftermarket solenoids vary in contact quality, so the terminal layout matters more than the model name: confirm you are matching a 4-wire unit to a 4-wire unit.
OEM parts cost more but arrive with the correct studs and spade terminals already in the right place.
Our X300 took the MIU12537 and our D130 took the AUC15346 (the GY22476 substitution), both confirmed by the numbers stamped on the old units.
Fitment lists shift by year and serial number, so verify your exact model and serial before ordering.
If you are already sourcing parts, it is a good time to check the right spark plug for your engine.
The same goes for finding your air filter by model while you have the parts catalog open.
When It Is Not the Solenoid: Ground, Battery, Starter, Safety Switch
If a John Deere lawn mower starter solenoid tests good but the mower still will not crank, the fault is usually a bad ground, a battery that sags under load, a worn starter, or a tripped safety switch.
The solenoid gets blamed far more often than it deserves, and swapping it changes nothing when the real problem is a grounding wire to the frame.
Work through the electrical path in order rather than throwing parts at it. Check these next, in rough order of likelihood.
Battery under load: A battery reading 12.6 volts at rest can still collapse when the starter draws current.
Frame ground: Measure voltage from the battery negative to the frame; more than about 0.2 volts of drop means a dirty or loose ground.
Safety switches: A tripped seat, brake, or PTO switch stops the crank exactly like a dead solenoid, so start by testing the safety switches.
Starter: If it whirs without engaging or makes a SPROING noise as the gear will not release, the starter drive is worn.
The PTO switch in particular is a common no-start culprit across brands. A bad ground produces the same click-with-no-crank you would blame on the solenoid, a pattern owners document often on community forums.
One known John Deere fix for a marginal circuit is a starter-assist or relay kit that adds a dedicated relay to carry trigger current. It is worth considering when a fresh solenoid keeps failing.
Case study, June 2026: Our rapid-clicking D130 tested a good solenoid, so we measured the frame ground and found a 0.4-volt drop on a corroded connection.
Cleaning and re-torquing that ground brought the reading near zero and the mower cranked normally.
Some no-crank faults need a service manual and a meter you trust. If the ground, battery, starter, and switches all check out, that is the point to stop guessing.
If you are still stuck, the full no-start flowchart walks every branch for John Deere riders.
For any riding mower, the master starting-circuit guide covers the whole electrical decision tree.
Frequently Asked Questions
How do I know if it is the solenoid or the starter?
Jump the two large posts with a screwdriver, and if the engine cranks, the solenoid or its trigger side is the fault. If the starter still does nothing with battery voltage bridged straight to it, the starter motor or its ground is the problem, and the multimeter continuity test confirms which.
Can I run the mower by jumping the solenoid?
Only to test, and only with the machine in neutral, the brake set, and the blades off, because bridging the posts bypasses the safety switches that normally block starting.
It is a diagnostic move rather than a way to operate a mower with a bad interlock, so fix the underlying fault before you mow.
Why did my new solenoid fail again?
A repeat failure usually means the solenoid was never the real problem: in our own case a rapid-clicking John Deere had a 0.4-volt frame-ground drop, not a bad solenoid, and cleaning the ground fixed it.
A marginal trigger circuit can also cook a solenoid, which is why John Deere offers a starter-assist relay kit for some models.
Does it matter whether I buy a 3-post or 4-pole solenoid?
Yes, so match the terminal count and layout rather than just the model name. A 4-wire John Deere solenoid needs both a purple trigger and a black ground terminal, so a 3-post replacement leaves the ground wire nowhere to go, which is why you should count your small terminals before ordering.
How long does a John Deere starter solenoid last?
There is no fixed number, since many last the life of the mower while others fail in a few seasons when the contacts arc from a weak battery or a poor ground.
Heat, moisture, and vibration shorten that life, so a solenoid that keeps failing is usually a symptom of an underlying electrical fault.
How much does the part cost?
A John Deere lawn mower starter solenoid is an inexpensive repair, with aftermarket units running roughly $10 to $22 and genuine OEM AUC15346 or MIU12537 parts running roughly $25 to $50 depending on the series.
Prices shift, so confirm the current figure with a John Deere dealer or parts retailer before ordering.
Diagnosing a John Deere lawn mower starter solenoid comes down to proving it before you buy it.
Bridge the two large posts or run the continuity test, decode whether you have a 3-post or 4-wire unit, and match your series to AUC15346 or MIU12537.
Do those three things and you will fix the no-crank the first time instead of guessing. You will also know when the solenoid was innocent all along.
Found this useful? Make us a preferred source so we show up in your Google results.
Keep reading
Related articles
Troubleshooting & Repair
Dead Dash? Riding Mower No Power Fixed Fuse-First (2026)
Fix riding mower no power fast: clean terminals, find the hidden fuse, test the battery, reset the BMS. A fuse-first checklist for gas & electric mowers.
Troubleshooting & Repair
How to Bypass Safety Switch on Riding Mower (Bench-Tested)
Jump a seat, brake or PTO interlock safely: how to bypass safety switch on riding mower for bench testing, with 2-wire/4-wire diagrams and a restore checklist.
Troubleshooting & Repair
Riding Lawn Mower Won't Turn Over: 5-Stage Voltage Test
Fix it fast: a riding lawn mower won't turn over usually means battery, ground, solenoid or starter. Test each in 5 ordered stages.
Troubleshooting & Repair
Just Clicks? Solenoid Troy-Bilt Riding Mower, Fixed (Pony)
Diagnose a solenoid Troy-Bilt riding mower fault fast: the single-click test, safe screwdriver bypass, 725-1426 fitment and step-by-step Pony/Bronco replacement
The discussion
Comments
Every comment is reviewed before it goes live.