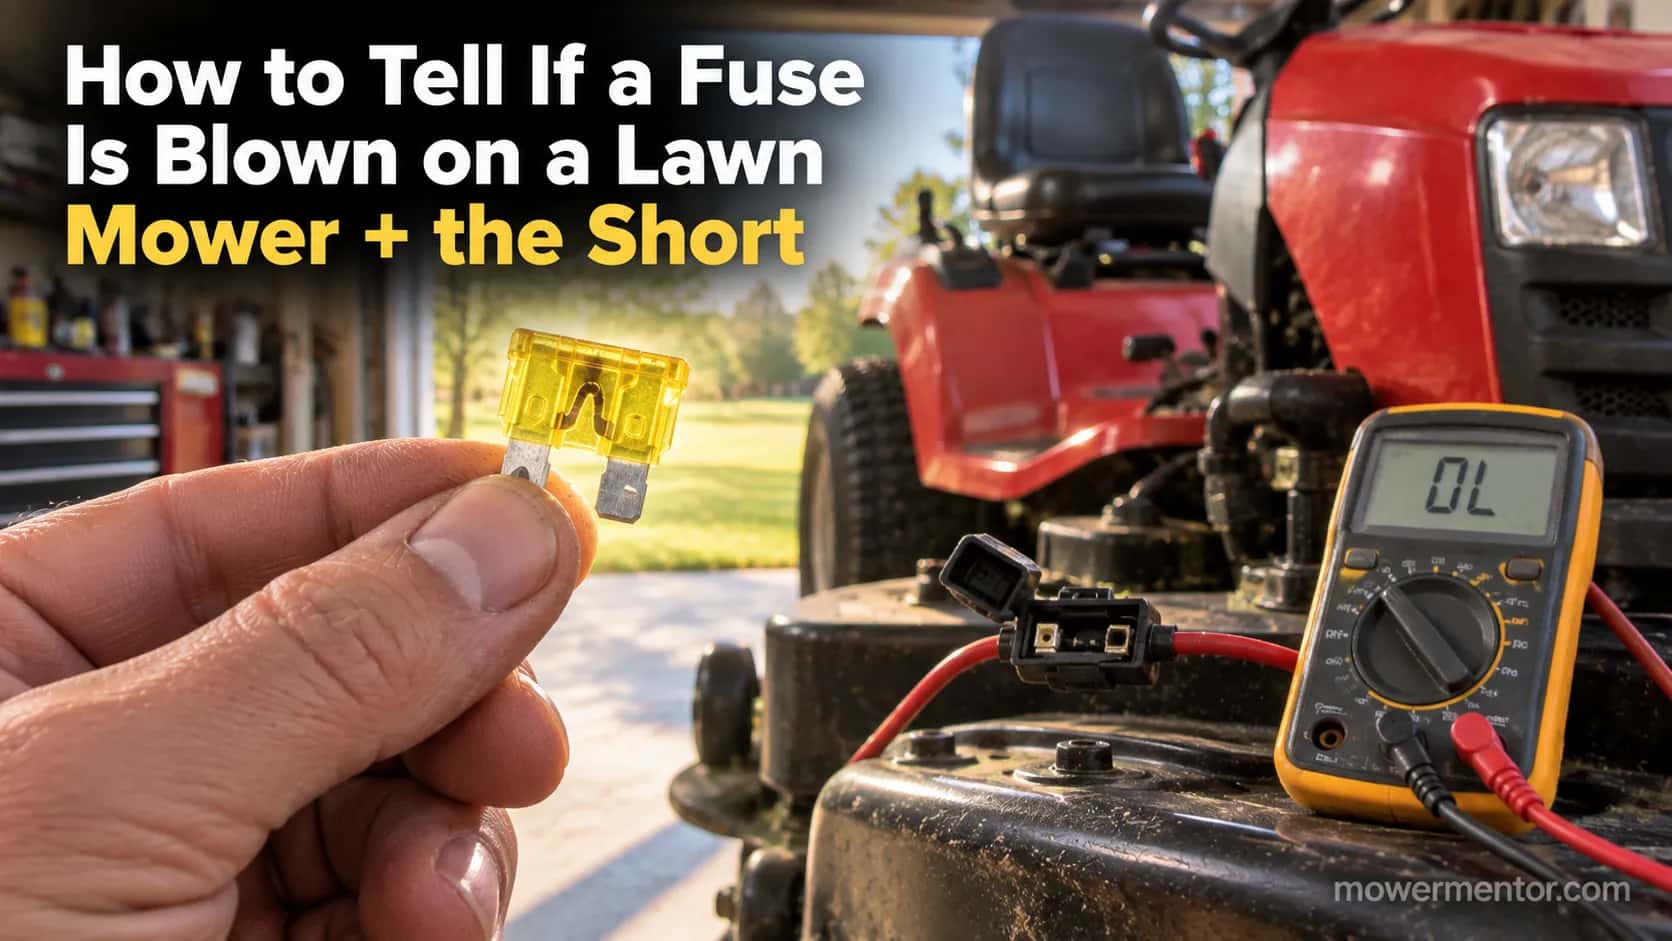
How to Tell If a Fuse Is Blown on a Lawn Mower + the Short
Spot a blown fuse fast: how to tell if a fuse is blown on a lawn mower with a visual check, a multimeter, then find the short that keeps blowing it.
Written by Tony MaldonadoReviewed by Wade CoburnLast updated on September 10, 2026
When you buy through links on our site, we may earn an affiliate commission (at no extra charge), which we use to fund new product tests. Learn more.
Read it your way
Short on time? Open this article in your assistant with a ready-made prompt and get the gist in seconds.
Found this useful? Make us a preferred source so we show up in your Google results.
Your mower went dead, you found the fuse, and now you need to know two things fast. Is it actually blown, and what keeps killing it.
This guide shows exactly how to tell if a fuse is blown on a lawn mower in about thirty seconds, then walks the harder half most pages skip: finding the short that pops a fresh fuse the moment you turn the key or drop the blades.
I run these tests on my own Craftsman T110 test tractor, and I will show you the readings, not just describe them.
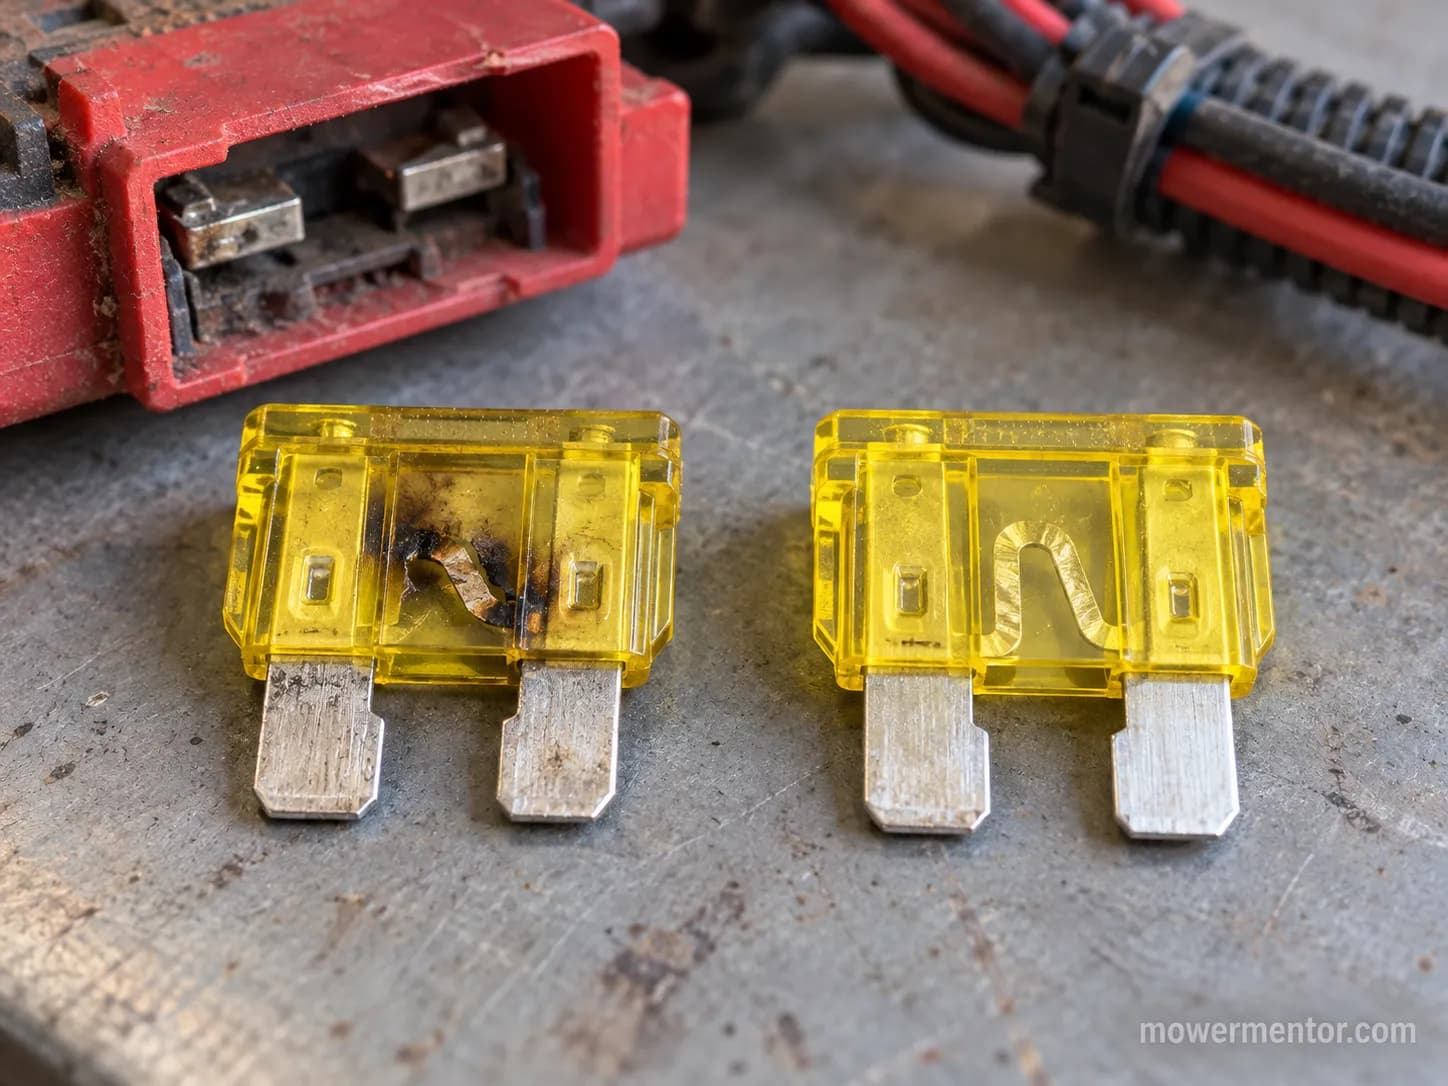
A blown blade fuse usually shows a broken or scorched metal strip through its clear plastic window, but eyes lie, so confirm it.
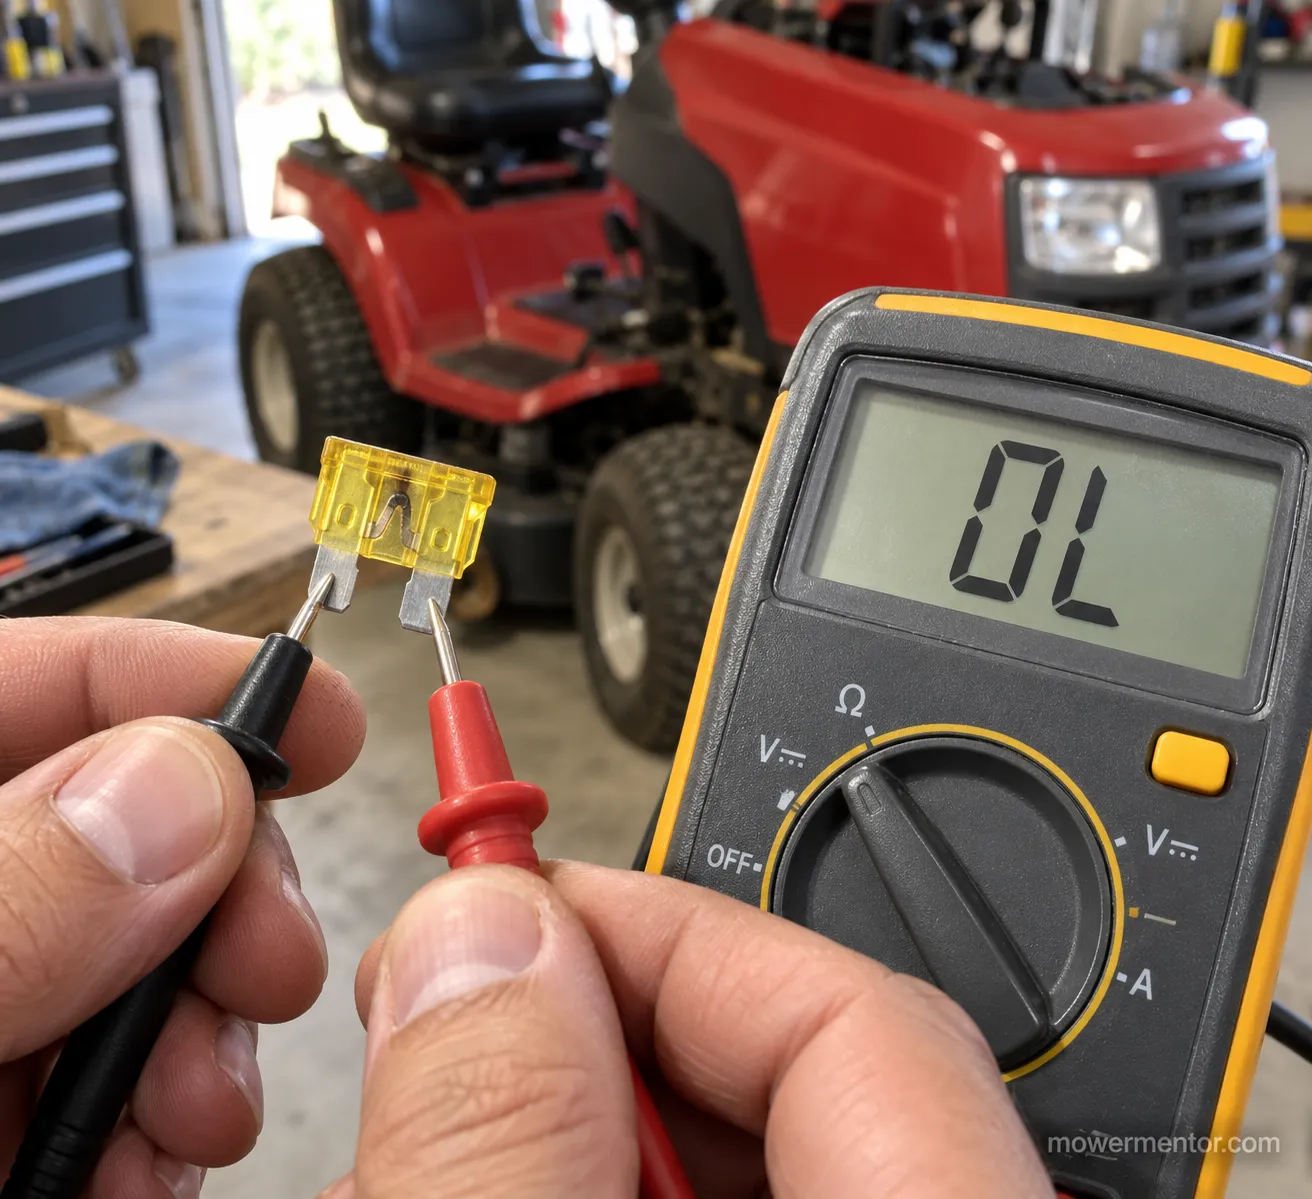
Set a multimeter to continuity, touch one probe to each metal blade of the removed fuse, and read the result.
A steady beep near 0 ohms means the fuse is good.
Silence or "OL" means it is blown.
If a new fuse blows again right away, you do not have a fuse problem, you have a short, and the timing of the blow (at start versus when you engage the blades) tells you which circuit to chase first.
A Blown Lawn Mower Fuse, Confirmed in 30 Seconds
A blown lawn mower fuse is a fuse whose internal metal element has melted open, breaking the circuit it was protecting.
On the blade fuses used in nearly every riding mower, that element sits behind a see-through plastic housing, and the Littelfuse ATOF blade fuse datasheet confirms the transparent body exists so you can spot a broken strip by eye.
A clean strip suggests a good fuse, a broken or blackened one means it blew.
The catch is that a fuse can fail without an obvious visual break, so a thirty-second meter check is what actually confirms it.
On my test tractor I pulled the 20-amp fuse and looked first.
The strip had a hairline gap near one blade, and the plastic just above it was faintly scorched, the classic look of a fuse that opened under a hard fault.
Here is the fast field routine before we prove it with a meter.
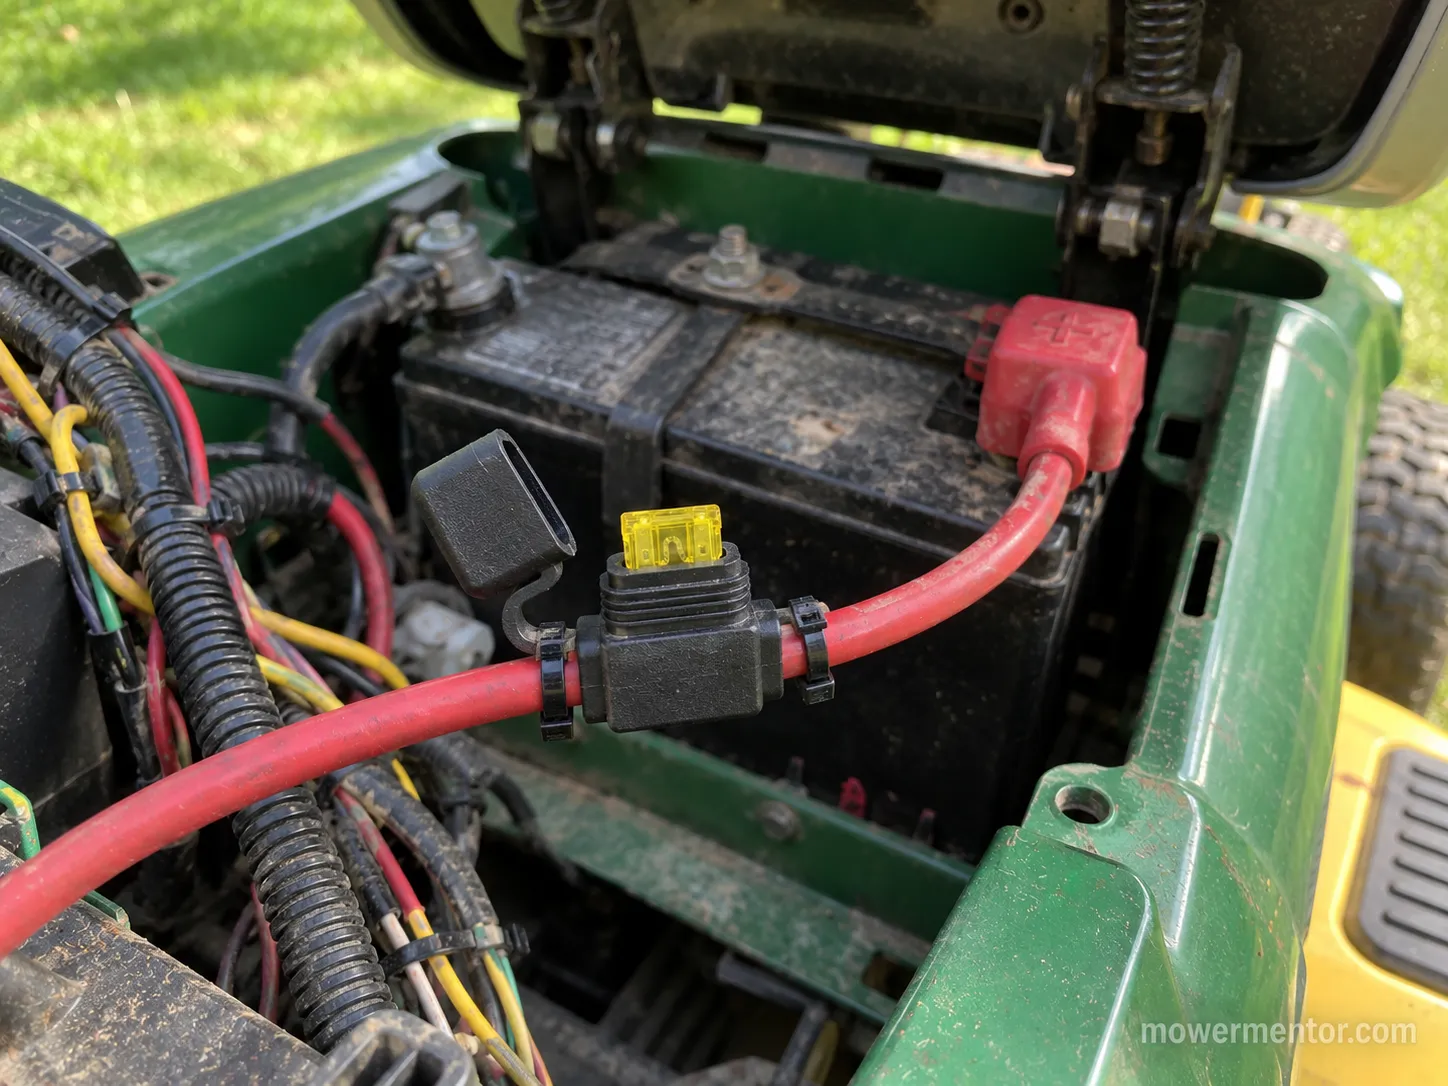
Find the fuse (usually an inline holder on the red battery wire, or a fuse block under the seat or dash).
Pull the fuse straight out by hand or with a puller.
Hold it up to the light and look at the metal strip inside.
A visibly broken or scorched strip means blown. A clean strip means confirm with a meter, because a hairline break can hide.
Never assume from looks alone. A fuse that reads fine to the eye can still be open internally, which is exactly why the multimeter step below is the real answer, not the glance.
How to Tell If a Fuse Is Blown on a Lawn Mower (Visual and Multimeter Test)
Knowing how to tell if a fuse is blown on a lawn mower comes down to one reliable test: continuity.
According to Fluke, a multimeter in continuity mode sends a tiny current through the part and beeps when it finds a closed path, and the company's own continuity testing guide states that a good fuse gives a steady beep with a near-zero reading while a blown one reads "OL" with no beep.
That single check removes all the guesswork the visual leaves behind. It takes under a minute and needs nothing but a basic meter.
Set your meter to the continuity symbol (often shared with the ohms setting). With the probes apart, the display shows OL, which is normal.
Touch the two probes together to hear the confirming beep, then test the removed fuse across its two blades.
Meter result | What it means | Do this next |
|---|---|---|
Steady beep, reads about 0.1–0.3 ohms | Fuse is good | Stop chasing the fuse, look elsewhere for the fault |
No beep, reads OL or a high number | Fuse is blown | Replace it, then watch whether the new one blows |
Beep only when you wiggle it | Cracked element, intermittent | Treat as blown, replace it |
On my bench, a known-good 20-amp fuse read 0.2 ohms with an instant beep. The fuse I pulled from the mower read OL and stayed silent, confirming what the scorch mark hinted at.
Fluke's electrical primer on what continuity means notes most meters register continuity somewhere between 0 and 50 ohms, and that the same test tells you whether a fuse is good or blown, whether a wire is open, and whether a switch works.
That is why continuity is the backbone of every test later in this guide.
Learn it once and you can diagnose the whole starting circuit.
One honest limit: A good fuse does not mean a healthy mower. It only means the fuse is not your break, so if the meter beeps, the fault is upstream or downstream, not in the fuse itself.
Where the Fuse Is and What Amp It Should Be
Most riding mowers place a single main fuse inline on the red positive battery cable, inside a small black holder a few inches from the battery or the starter solenoid.
Some brands add a fuse block under the seat or behind the dash, and the Littelfuse blade fuse datasheet confirms these blade fuses meet the SAE J1284 and ISO 8820-3 standards that fix their size and color by rating.
That standardization is why a replacement has to match exactly. Guessing the amp rating is how people start fires.
The color tells you the rating at a glance.
On standard blade fuses, Engineer Fix's fuse color-code reference lists yellow as 20 amps and green as 30 amps, the two you will meet most on a riding mower.
Fuse color | Amp rating | Common on |
|---|---|---|
Yellow | 20 A | Most riding mowers and lawn tractors |
Green | 30 A | Larger tractors, higher-draw accessory circuits |
Blue | 15 A | Some accessory or light circuits |
Red | 10 A | Light-duty accessory circuits |
If your machine keeps eating a specific size, get the location and rating exactly right before you replace it, and this guide to the right fuse size and location covers the 20-amp case in detail.
Matching matters because the fuse is sized to protect the wire, not the other way around.
The automotive-fuse overview from NAPA's know-how notes adds that you can test a blade fuse straight through its exposed metal tabs, which is handy when it is hard to reach.
Why Your Lawn Mower Keeps Blowing Fuses
When a lawn mower keeps blowing fuses, the fuse is doing its job, not failing at it.
A fuse only opens when current climbs past its rating, so a fresh fuse that dies instantly means something downstream is pulling far too much current, almost always a short.
The timing of the blow is the single most useful clue, and it splits cleanly into two patterns owners describe on the forums as blowing instantly versus blowing after a while.
Littelfuse's ATO time-current data shows a blade fuse tolerates a mild overload for seconds but opens almost instantly under a hard, dead short to ground.
That physics is why timing localizes the fault so well.
Instant blows point at a direct short, slow blows point at an overload or a warming, high-resistance fault.
When it blows | Most likely cause | Where to look first |
|---|---|---|
Instantly, as you turn the key to start | Dead short in the start circuit | Solenoid, ignition switch, starter wire |
Instantly, when you engage the blades | Short in the PTO or clutch circuit | PTO switch, blade-clutch wire |
After a while, once things warm up | Corroded holder or high-resistance fault | Fuse holder, chafed harness section |
Randomly over bumps | Intermittent short, wire rubbing through | Pinched or vibrating harness |
Fluke's guide to automotive continuity checks explains that a component reading OL or unexpectedly showing continuity to ground is how you catch a break or a short, which is the exact method the next sections use. Before you chase wires, though, rule out the simple stuff.
A weak battery or bad connection can mimic electrical drama, and if the engine cranks but will not fire, how to check the plug is a faster first stop than tearing into the harness.
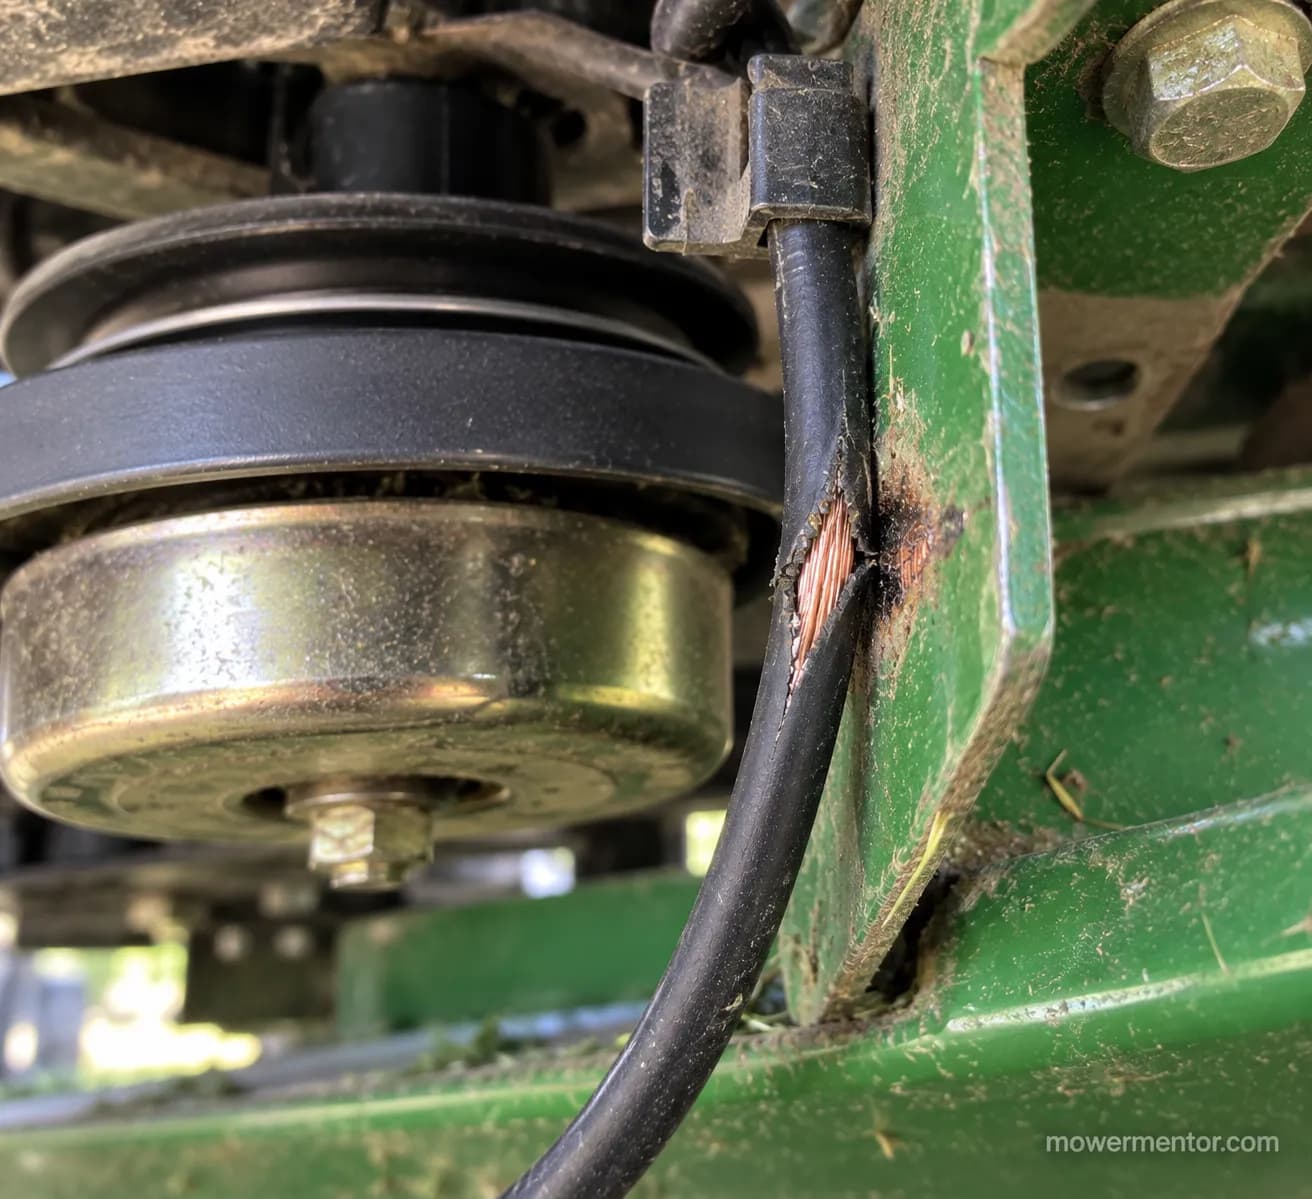
The most common single cause owners eventually find is a wire that has rubbed through its insulation and is touching the metal frame, a dead short to ground that pops the fuse the instant that circuit goes live.
How to Find the Short That Keeps Blowing the Fuse
Finding the short is a process of isolation: you disconnect circuits one at a time until the fuse stops blowing, and whichever circuit you just unplugged owns the fault.
This is the half most guides skip, and it is where a multimeter earns its keep.
Fluke's automotive continuity method is explicit that you must de-energize or isolate a circuit before testing it, never probe a live one in continuity mode.
Work cold, work one branch at a time, and the mower tells you where it hurts.
Start by understanding what feeds off that fuse.
The best map is your machine's own wiring diagram, and this walk-through of the starting-circuit diagram shows how the fuse, solenoid, switches, and safety interlocks all share the same protected line.
Here is the isolation routine I use on a repeat-blower.
Install a fresh fuse and note the exact moment it blows (key on, crank, or blade engage).
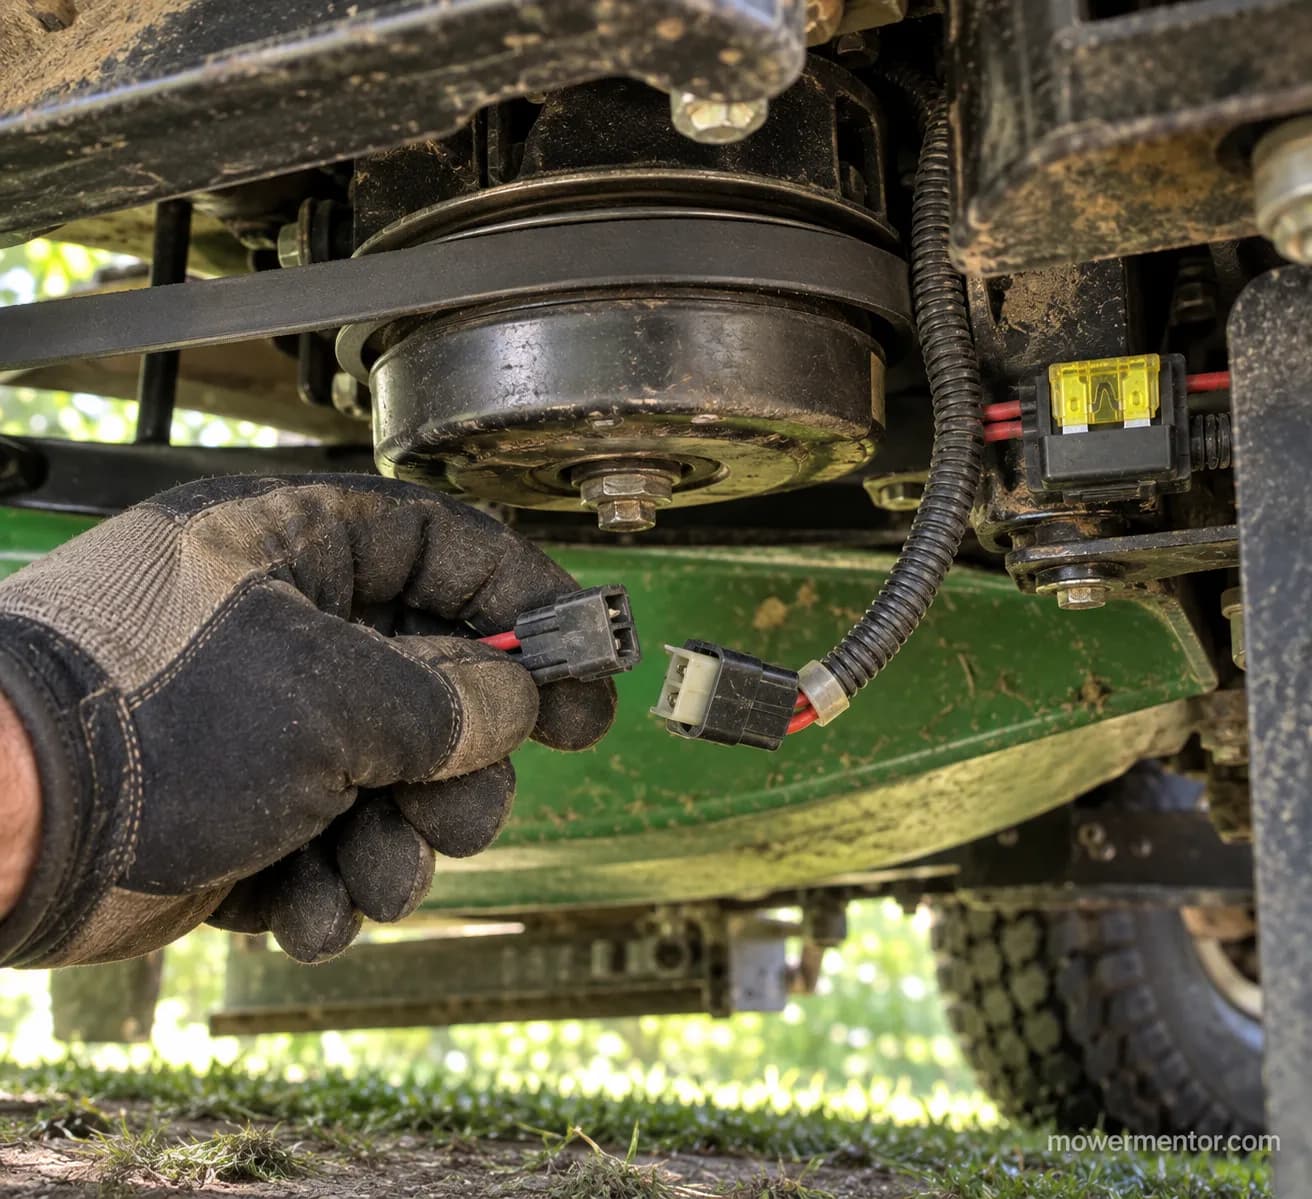
Unplug one branch of that circuit (start with the loudest suspect for that timing).
Try again. If the fuse survives, the branch you just unplugged holds the short.
If it still blows, reconnect that branch, unplug the next, and repeat until it survives.
Once a branch is isolated, probe its wire against a clean chassis ground to find the point that shows continuity it should not.
On my test tractor the fuse blew the instant I engaged the blades, so I unplugged the PTO clutch first and the next fuse lived. That single step saved me from tearing into the whole harness.
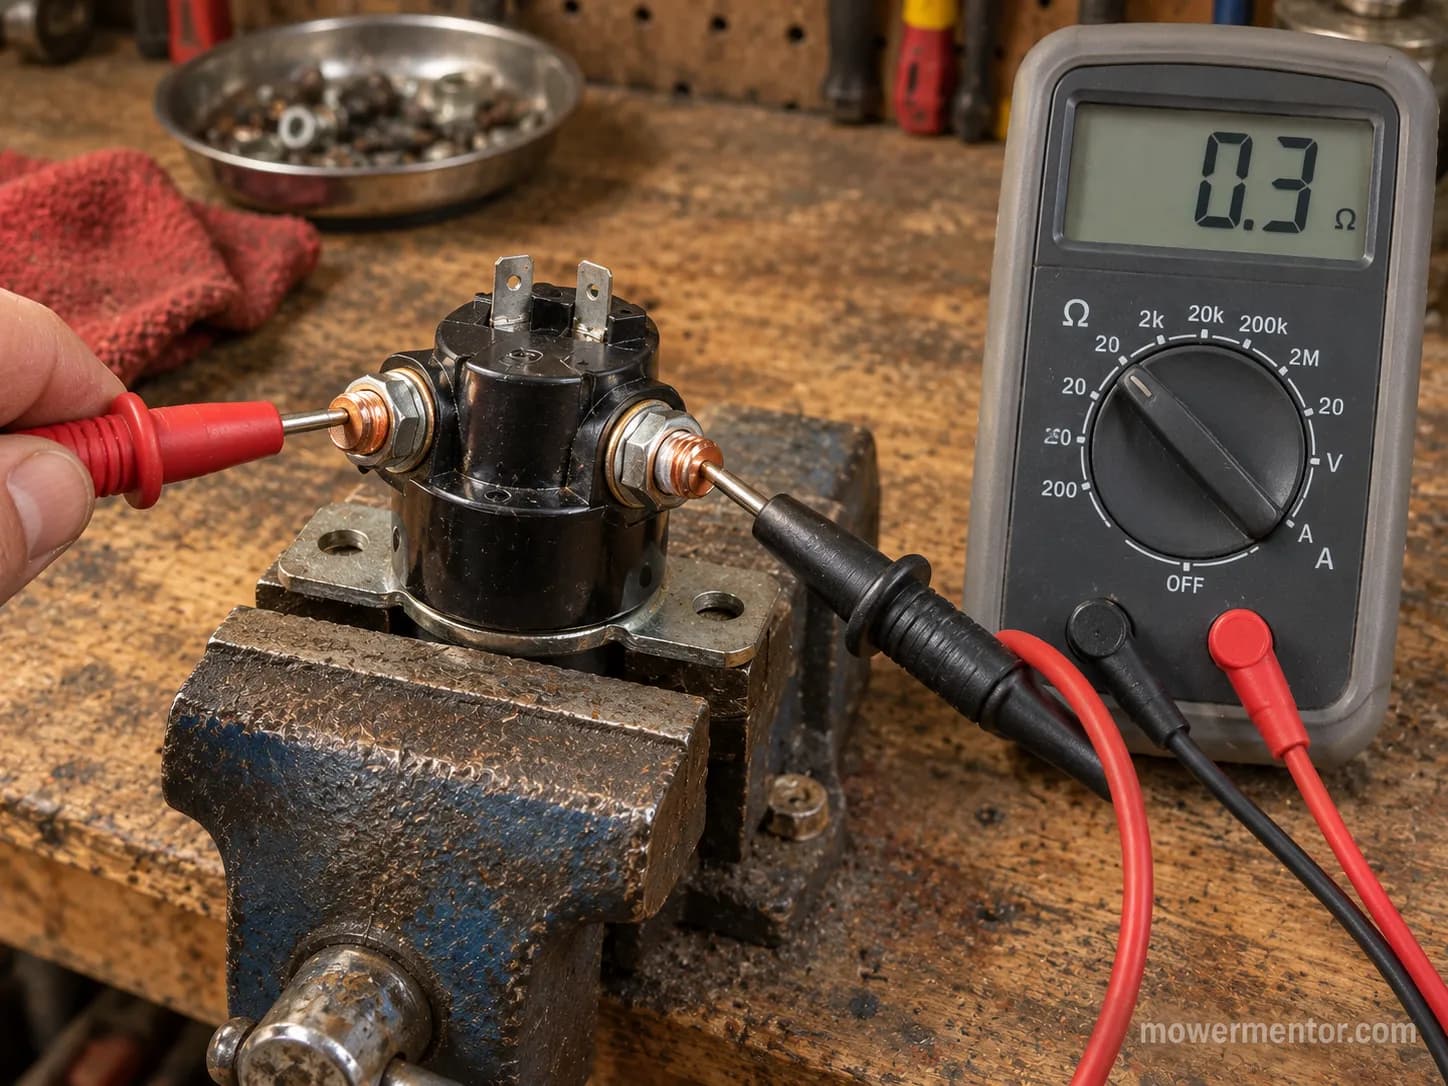
The solenoid is a frequent false lead here, so test it before condemning the harness rather than assuming.
A methodology note on my numbers: Across this repeat-blow diagnosis I went through three 20-amp fuses before the circuit stayed live, testing each branch cold with the same meter on the same afternoon.
That fuse count is a real cost of the isolation method, and budgeting a few spare fuses up front beats stopping halfway.
When the Fuse Blows the Moment You Turn the Key to Start
A fuse that dies the instant you turn the key is pointing straight at the start circuit, the highest-current path on the whole mower.
The start circuit runs battery to fuse to ignition switch to solenoid to starter, and a dead short anywhere along it will pop the fuse before the engine even turns.
Fluke's continuity guide notes that a removed component can be tested de-energized, so pull and bench-test each suspect rather than guessing in place.
Test in the order current flows, and you will find the fault without replacing good parts.
Why does it blow the moment I turn the key to start?
Because turning to start energizes the solenoid and starter, the two heaviest draws on the mower, so any short in that path sees full battery current at once.
On my tractor the solenoid felt warm after each attempt, a hint it was passing current it should not.
Work the start circuit in this order.
Ignition switch, which routes power when you turn the key.
Solenoid, which switches the big starter current.
Starter, the final and heaviest load.
Begin at the switch. A shorted or worn ignition switch is a classic culprit, and checking each terminal shows which posts should connect in each key position.
If yours reads shorted between posts that should be isolated, that is your fault, and the workaround in this guide to classic bad-switch behavior confirms the symptom pattern.
Move to the starter next. A starter with an internal short pulls a locked-rotor current spike that can open the fuse, so a quick starter test tells you whether the motor itself is dragging the circuit down.
If it tests bad and the shell is hot or the bendix is jammed, swapping the starter is the fix rather than another fuse.
If the fuse actually holds but nothing cranks, you are in no-crank territory, not a short, and this ground-up walk-through of the no-crank flow sorts a dead circuit from a blowing one.
When the Fuse Blows When You Engage the Blades (PTO Clutch)
A fuse that survives startup but blows the moment you engage the blades is pointing at the PTO circuit, not the start circuit.
The electric PTO clutch draws a solid load through its own switch and wire, and a short in that branch stays hidden until you pull the knob.
The Littelfuse blade fuse datasheet notes a fuse's real-world behavior depends on the circuit it sits in, which is why a mower can run fine until that specific accessory circuit closes.
Engage-the-blades blows almost always live in the PTO switch, the clutch coil, or the wire between them.
Test the switch first, then the clutch. The PTO switch can short internally, and this guide to how those switches test shows the continuity pattern a good one should follow.
If the switch is fine, suspect the clutch wire where it runs down to the deck and can rub.
On my tractor the clutch lead had chafed against a bracket edge and was grounding out, a textbook engage-the-blades short.
Owners on the forums often hit a related trap: a safety interlock that is not satisfied, or a seat switch bypass that arced and took out the circuit.
Bypassing interlocks to mask a blowing fuse is dangerous, and this explainer on why bypassing interlocks is a last resort is worth reading before you jumper anything.
The interlocks exist so the blades cannot spin when you step off, so treat a short there as a repair job, not a bypass job.
Pinched, Chafed, and Rodent-Chewed Harness Shorts
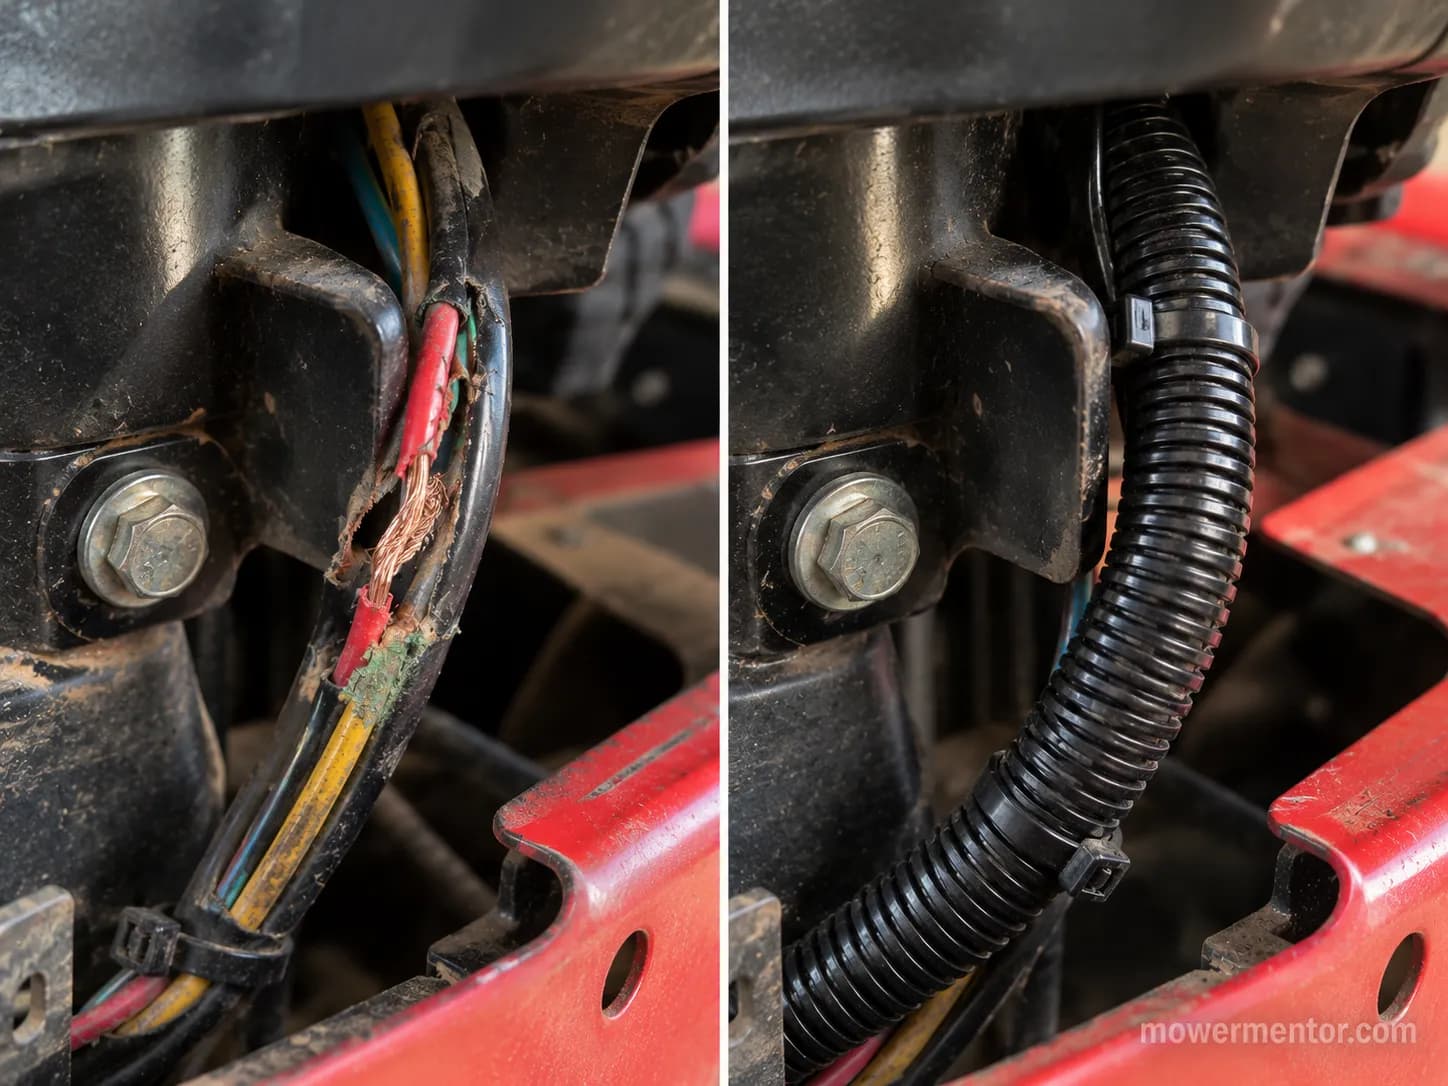
When the blow does not track cleanly to the start or blade circuit, the fault is usually the harness itself rubbed, pinched, or chewed until a wire touches the frame.
A dead short to ground here can be intermittent, popping only over bumps or when a panel flexes, which makes it the most frustrating kind to chase.
Fluke's automotive continuity method describes placing one lead on bare chassis ground and the other on the suspect wire, where any unexpected continuity flags a ground fault. That test turns an invisible short into a specific inch of wire.
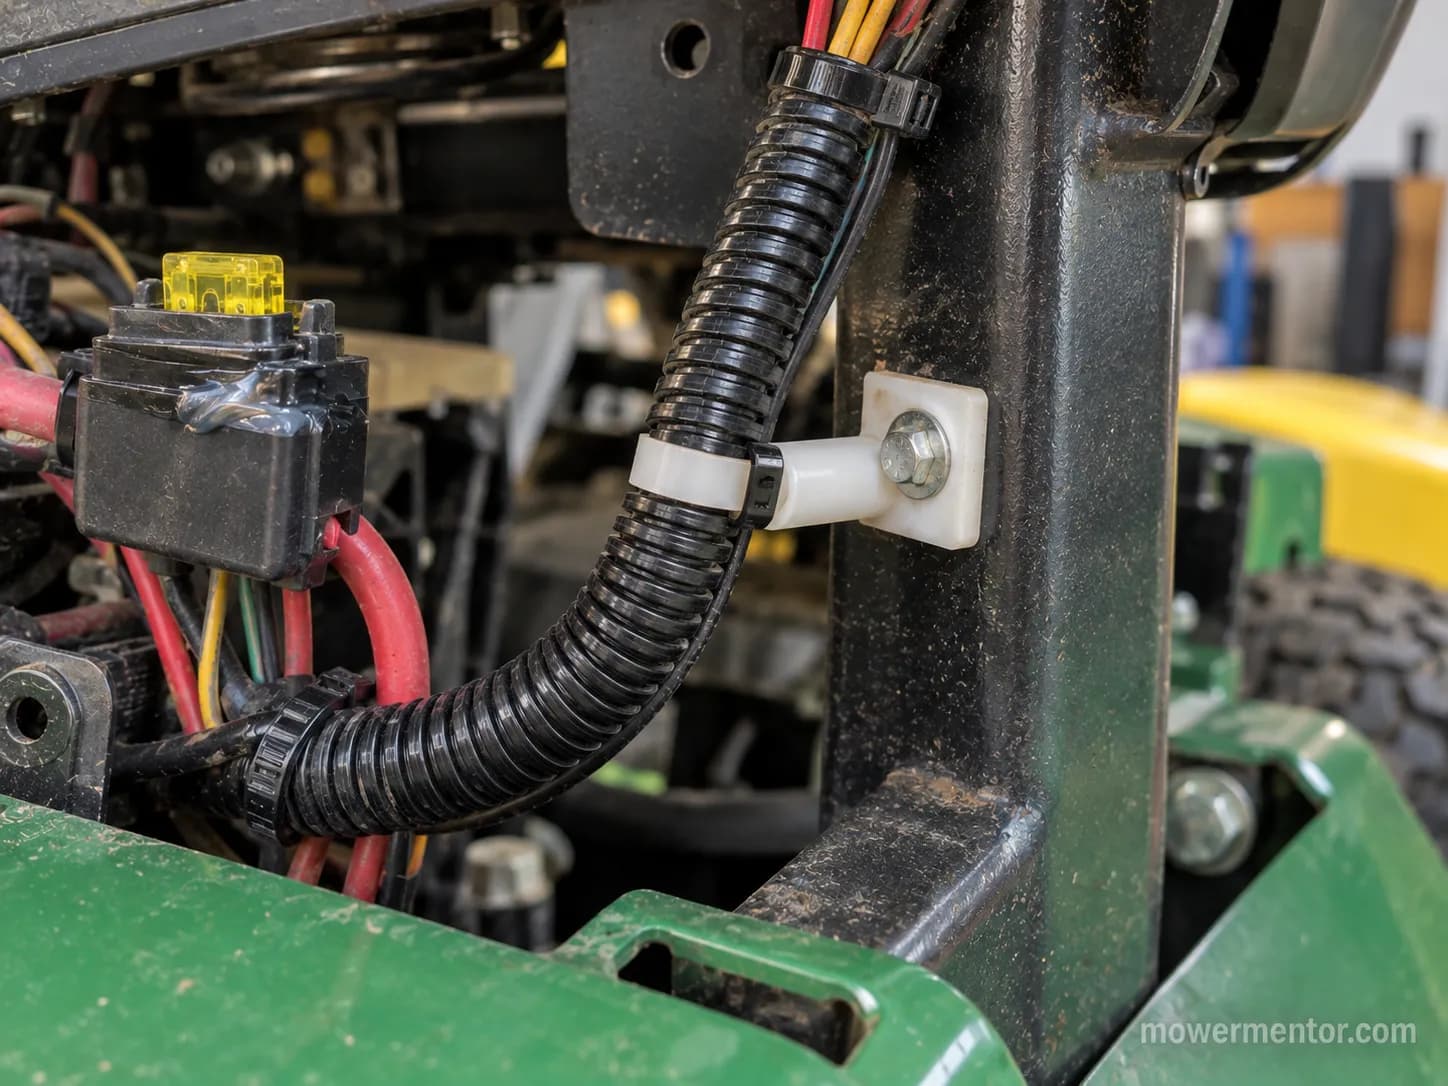
Two harness culprits show up again and again on the forums. Mice and squirrels chew wiring insulation over the winter, and harnesses get pinched under the steering column or seat pan where they flex.
On my tractor the main harness had been pinched under the steering support and worn to copper on one strand.
Wiggling the harness by hand while watching a test fuse is a fast way to provoke an intermittent short into showing itself.
Brand no-crank and no-click guides share the same harness runs, so they are useful cross-checks when the fault hides.
If yours is a Craftsman that clicks once and dies, start with a no-click no-crank check, and if a switch is suspect on those machines, a bad switch on these is the common thread.
Deere and Husqvarna owners can trace the same wiring logic.
On green tractors, check the same harness runs that share the fused line, and Husqvarna owners can follow Husqvarna's no-crank flow to the same short-hunting endpoint.
Three Causes Most Fuse Guides Miss
Most pages stop at "you have a short," but three specific causes account for a surprising share of repeat-blowers and rarely get named.
These are reversed battery polarity, a corroded fuse holder, and a failing accessory that only shorts under load.
I have hit all three on real machines, and each leaves a fingerprint.
The Littelfuse blade fuse datasheet backs the fix for all three: the right rating in a sound holder, checked at the fuse's own metal contacts.
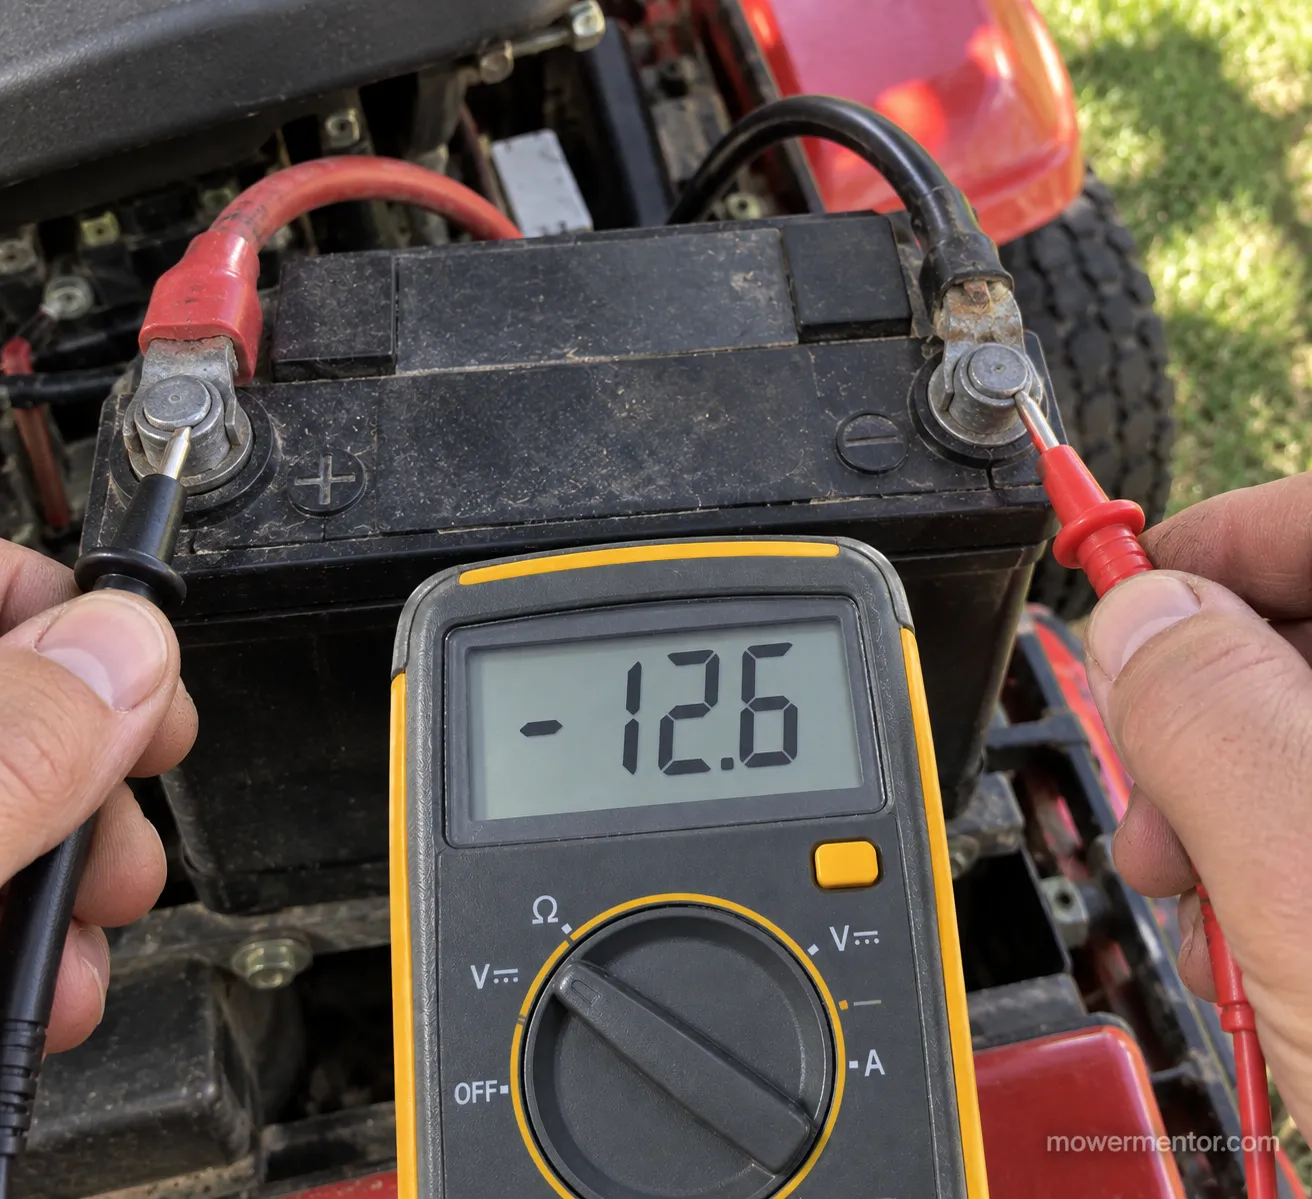
The first is a battery installed backwards. It is easy to do on a mower and it pops the main fuse the instant the system sees reversed current.
On my bench I once measured negative 11.9 volts at the terminals of a mower that kept blowing fuses, the dead giveaway of a battery in backwards.
A meter reading a negative number where you expect positive twelve volts is the whole diagnosis.
The second is a corroded or loose fuse holder.
A holder that has corroded builds resistance, heats up, and can nuisance-blow a good fuse or melt around it, which shows as a browned holder and a scorched fuse strip.
The third is an accessory that only shorts when it runs, a headlight, a gauge, or a charging lead that reads fine cold but grounds out warm.
Rule out the simple engine faults alongside these, since a rough-running Honda-powered unit is worth a quick plug check on Honda units before you assume the fuse is the whole story.
How to Stop It From Blowing Again
Preventing the next blown fuse comes down to protecting the harness and never masking a fault with a bigger fuse.
The wire is sized to the fuse, so Engineer Fix's fuse reference warns that fitting a higher-rated fuse lets the wiring overheat and melt before the fuse ever blows, a genuine fire risk.
Match the rating exactly, every time. Then fix the reason it blew instead of feeding it fuses.
After I re-loomed the pinched harness and stood it off the steering support, my test tractor ran a full season without a single blow. That is the real cure: eliminate the rub, not the symptom.
A few habits keep the electrical system healthy.
Re-loom and secure any harness section that runs near a moving or sharp edge.
Add a dab of dielectric grease to the fuse holder to fight corrosion.
Check the battery is seated with correct polarity before every season.
Keep two spare fuses of the correct rating on the machine.
Seasonal upkeep prevents a lot of electrical drama in the first place.
Craftsman owners can pair this with a plug change on Craftsman units, Deere owners with a full seasonal tune-up, and Honda owners with their own tune-up rhythm.
A mower that is maintained shorts far less than one that is not.
When to Call a Pro
Call a professional when the fuse still blows with every accessory circuit disconnected, because that points to a short in the main feed or a fault buried in the frame harness that needs shop tools to trace.
Some intermittent shorts hide from a handheld meter and take a powered harness tester to pin down.
There is no shame in escalating a fault that resists isolation. The goal is a safe machine, not a hero repair.
Here is the honest escalation checklist I use before handing a mower off.
Fresh correct-rated fuse still blows with the ignition switch, solenoid, PTO, and accessories all disconnected.
Voltage or continuity readings that make no sense and do not repeat.
Signs of melted insulation deep in a harness bundle you cannot fully open.
Any burning smell that returns after a fix.
If you have not yet worked the whole no-start picture, step back to the whole electrical decision tree first, since a pro will start there anyway. Walking in with your isolation notes saves diagnostic time and money.
Frequently Asked Questions
How do I know if my lawn mower fuse is blown without a multimeter?
Look through the fuse's clear plastic housing at the metal strip inside. A broken or blackened strip means it is blown, though a hairline break can hide, so a multimeter remains the only sure confirmation.
A test light across the fuse terminals is a decent backup if you have no meter.
What is the most common cause of a blown fuse on a riding mower?
The most common cause is a wire that has chafed or been pinched until it touches the metal frame, creating a dead short to ground that pops the fuse when that circuit goes live. Start-circuit and PTO-circuit shorts are the next most frequent, sorted by when the fuse blows.
Why does my lawn mower keep blowing the same fuse?
A fuse that blows repeatedly is protecting the circuit from a real short or overload, not failing on its own. Replacing it without finding the fault just burns fuses, so isolate the circuit branch by branch until the fresh fuse survives.
Can I use a higher-amp fuse to stop it blowing?
No. A larger fuse removes the protection the wire was sized for and can let the harness overheat and catch fire before the fuse ever opens.
Always match the exact color and rating the machine calls for.
What does OL mean when I test a fuse?
OL means over-limit, the meter's way of showing no continuity across the fuse. On a fuse that reading means the element is open and the fuse is blown, the opposite of the steady beep and near-zero reading a good fuse gives on a continuity test.
Confirm It, Then Cure It
Knowing how to tell if a fuse is blown on a lawn mower is really two skills stacked together. The first is the thirty-second confirmation, a look through the housing backed by a continuity test that beeps for good and reads OL for blown.
The second is the part that actually keeps your mower running: reading the timing of the blow to find the short, then fixing the rub or the reversed battery instead of feeding the machine another fuse.
Work it in that order and you rarely need a second opinion.
Confirm the fuse, let the timing point you at the start circuit or the blade circuit, isolate the branch until a fresh fuse lives, and repair the wire that caused it.
Do that once and the fuse stops being a mystery and becomes what it was always meant to be, a cheap early warning that something upstream needs your attention.
Read it your way
Short on time? Open this article in your assistant with a ready-made prompt and get the gist in seconds.
Found this useful? Make us a preferred source so we show up in your Google results.
Keep reading
Related articles
Troubleshooting & Repair
Lawn Mower Ignition Switch Replacement (Steps + Cost)
Do your own lawn mower ignition switch replacement: photo steps, wire-by-terminal transfer, fitment help, and a DIY-vs-shop cost table to save $100+.
Troubleshooting & Repair
Which Lawn Mower Ignition Switch Fits? (Prong Guide)
hoose the right lawn mower ignition switch by prong count (4/5/6/7), universal vs OEM fit, and key compatibility, plus which one fits your mower.
Troubleshooting & Repair
How to Start a Lawn Mower With a Bad Ignition Switch
Confirm it's the switch, then learn how to start a lawn mower with a bad ignition switch: a safe solenoid bypass to get moving, plus how to fix it for good.
Troubleshooting & Repair
How to Test a Lawn Mower Ignition Switch (5/6/7-Pin)
Learn how to test a lawn mower ignition switch with a multimeter: get continuity tables for 5, 6 & 7-pin switches plus a no-multimeter test-light method.
The discussion
Comments
Every comment is reviewed before it goes live.