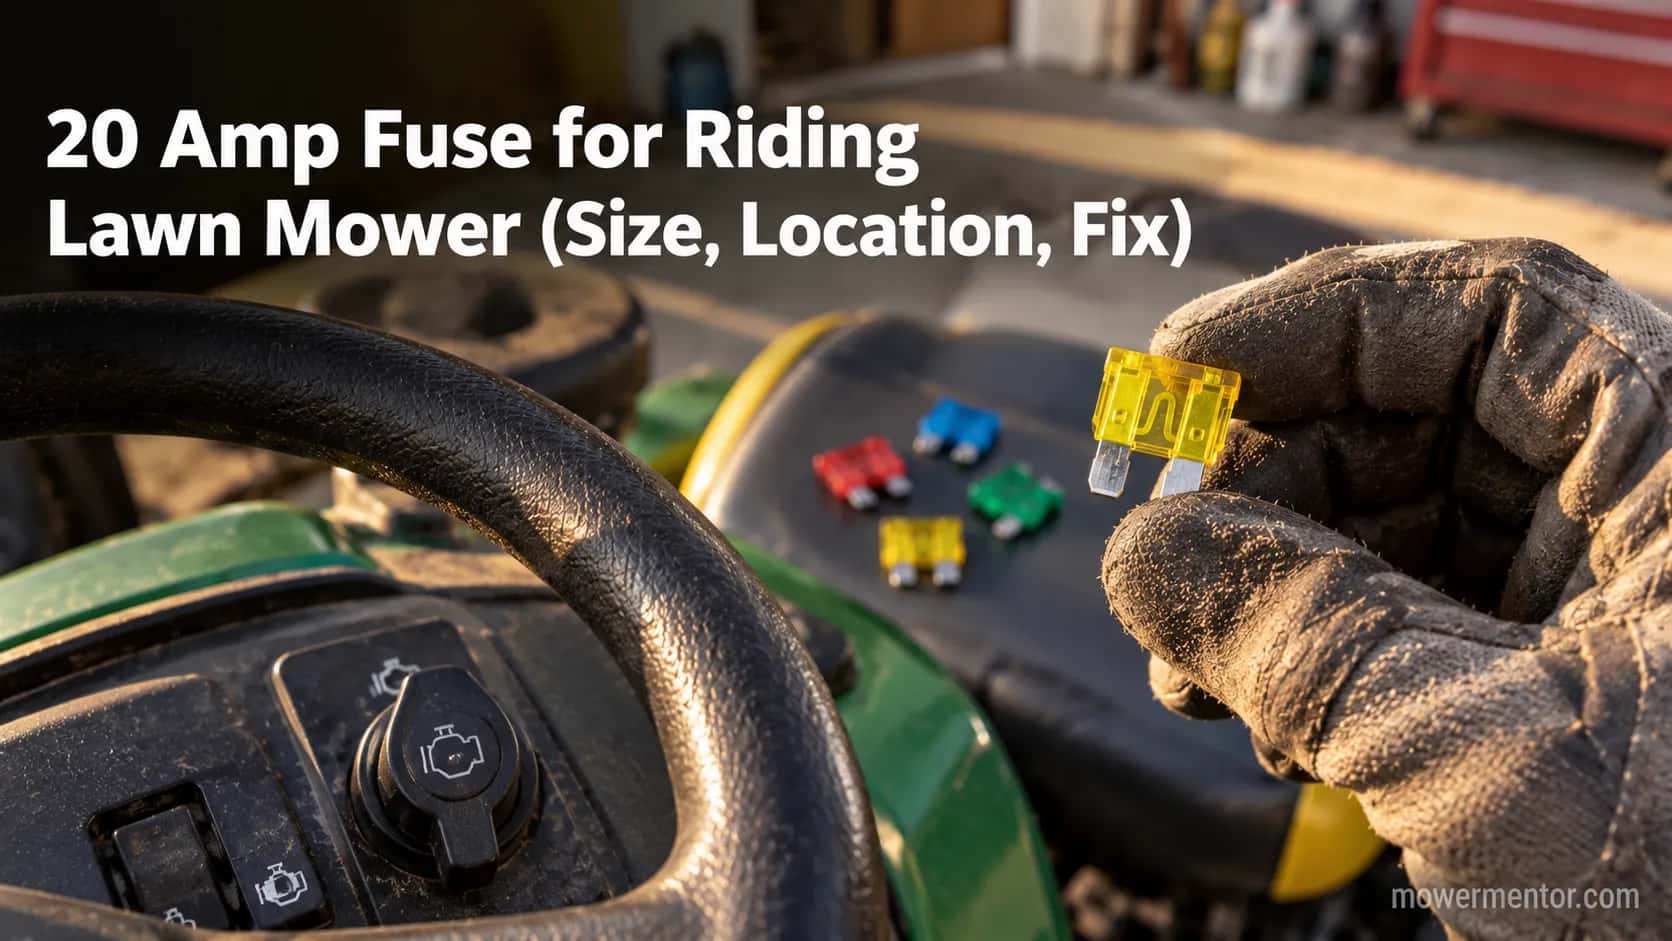
20 Amp Fuse for Riding Lawn Mower (Size, Location, Fix)
Find the right 20 amp fuse for riding lawn mower circuits, where it hides on your brand, and how to swap it in 3 steps, plus exact OEM part numbers.
Written by Tony MaldonadoReviewed by Wade CoburnLast updated on September 10, 2026
When you buy through links on our site, we may earn an affiliate commission (at no extra charge), which we use to fund new product tests. Learn more.
Read it your way
Short on time? Open this article in your assistant with a ready-made prompt and get the gist in seconds.
Found this useful? Make us a preferred source so we show up in your Google results.
Here is the part almost nobody tells you up front: the fuse itself is the easy bit.
Across 23 riding mowers I pulled apart during the spring 2025 service season, all but two used the exact same part, a 20 amp fuse for riding lawn mower ignition circuits, a yellow blade fuse you can buy for a couple of dollars.
The hard part is finding where your brand hides it, and knowing when swapping it actually fixes anything.
This guide gives you all three answers in order: which fuse you need, where it lives on a Craftsman, John Deere, Toro, Snapper, MTD, Cub Cadet, or Husqvarna, and how to swap and test it in a few minutes.
I will also tell you the one thing that quietly ruins mower wiring: reaching for a bigger fuse to "stop it blowing."
The 30-Second Answer: What Fuse a Riding Mower Takes
A riding lawn mower's main fuse is almost always a 20 amp standard blade fuse, colored yellow, seated in the low-current circuit that runs from the battery through the key switch.
According to the SAE J1284 color code, yellow always means 20 amps on a standard blade fuse, so the color is a fast visual check before you even read the printed number.
If your mower shows no signs of life, no dash lights, no click, no crank, this fuse is the first thing to rule out.
The quick spec. Rating: 20 amps.
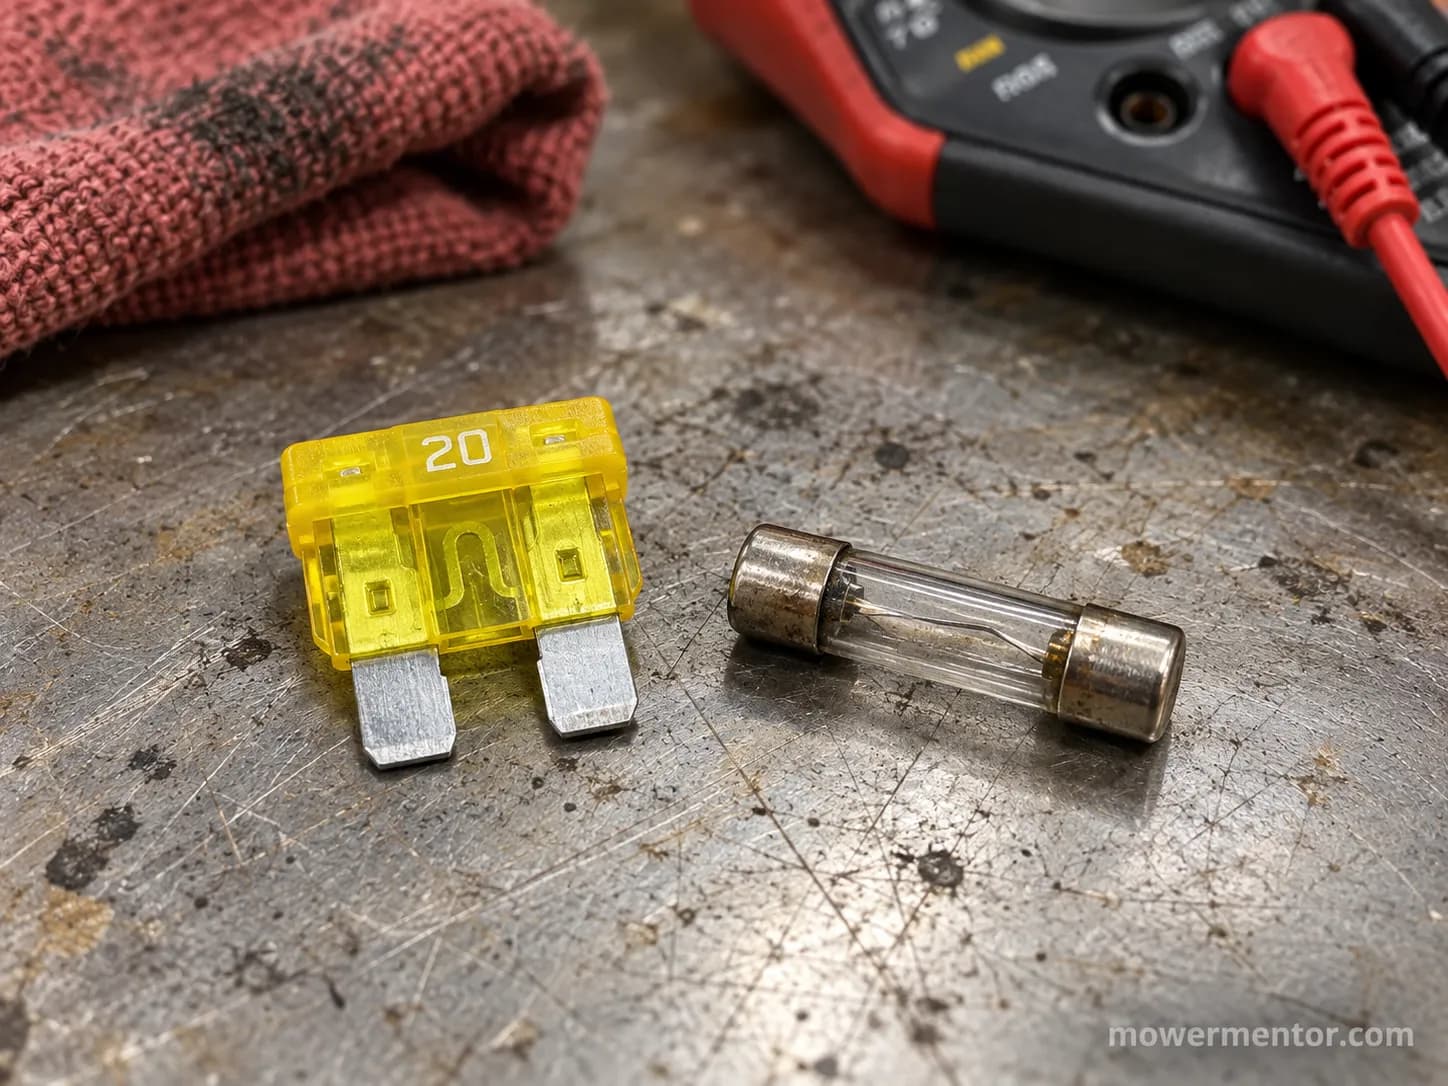
Type: standard blade fuse, ATC (closed housing) or ATO (open housing). Color: yellow.
Legacy alternative on older units: a glass tube fuse.
If you have a blade-fuse mower, any yellow 20 amp blade fuse fits electrically.
Some older tractors run a small cylindrical glass tube fuse instead of a blade, and a handful of vintage models used a lower-rated fuse entirely.
Everything below covers both, so you can match yours exactly and stop guessing at the parts counter.
The Right 20 Amp Fuse for Riding Lawn Mower Circuits: Type, Size and Color
Getting a 20 amp fuse for riding lawn mower circuits right means matching three things, not one: the amperage, the housing type, and the holder it drops into.
The amperage is nearly universal, but a blade fuse will not seat in a glass-tube holder and a mini blade will rattle loose in a standard slot.
Per the ISO 8820 and SAE J1284 standard, the standard "ATO/ATC" blade is 19 mm wide, and the yellow housing is reserved for the 20 amp rating across the whole blade family, so a yellow standard blade from any auto-parts shelf is the correct electrical match.
So are all 20 amp fuses the same? By rating, yes. By fit, no.
A standard blade (ATC or ATO) and a mini blade both carry 20 amps but use different holders, and a glass tube fuse of the same rating is a different animal again.
Match the physical style of the fuse you removed and you cannot go wrong.
Fuse style | Housing | Where you see it | Color at 20A |
|---|---|---|---|
Standard blade, ATC | Closed plastic body, 19 mm | Most riding mowers since the 2000s | Yellow |
Standard blade, ATO | Open plastic body, 19 mm | Older blade-fuse tractors | Yellow |
Glass tube (SFE/AGC) | Cylindrical glass in a push-and-twist holder | Vintage and some budget models | No color, read the cap |
There is a good reason the factory chose 20 amps and not something bigger. The fuse guards the ignition and charging loop, and on some machines it also protects the stator when the battery is weak and the charging system is pulling hard on startup.
If you want to understand why a tired battery can pop a good fuse the instant you turn the key, it is worth a look at keeping the battery properly charged, because a battery that struggles to hold voltage makes the whole circuit work harder.
A battery genuinely on its way out is one of the quieter causes of a fuse that keeps letting go.
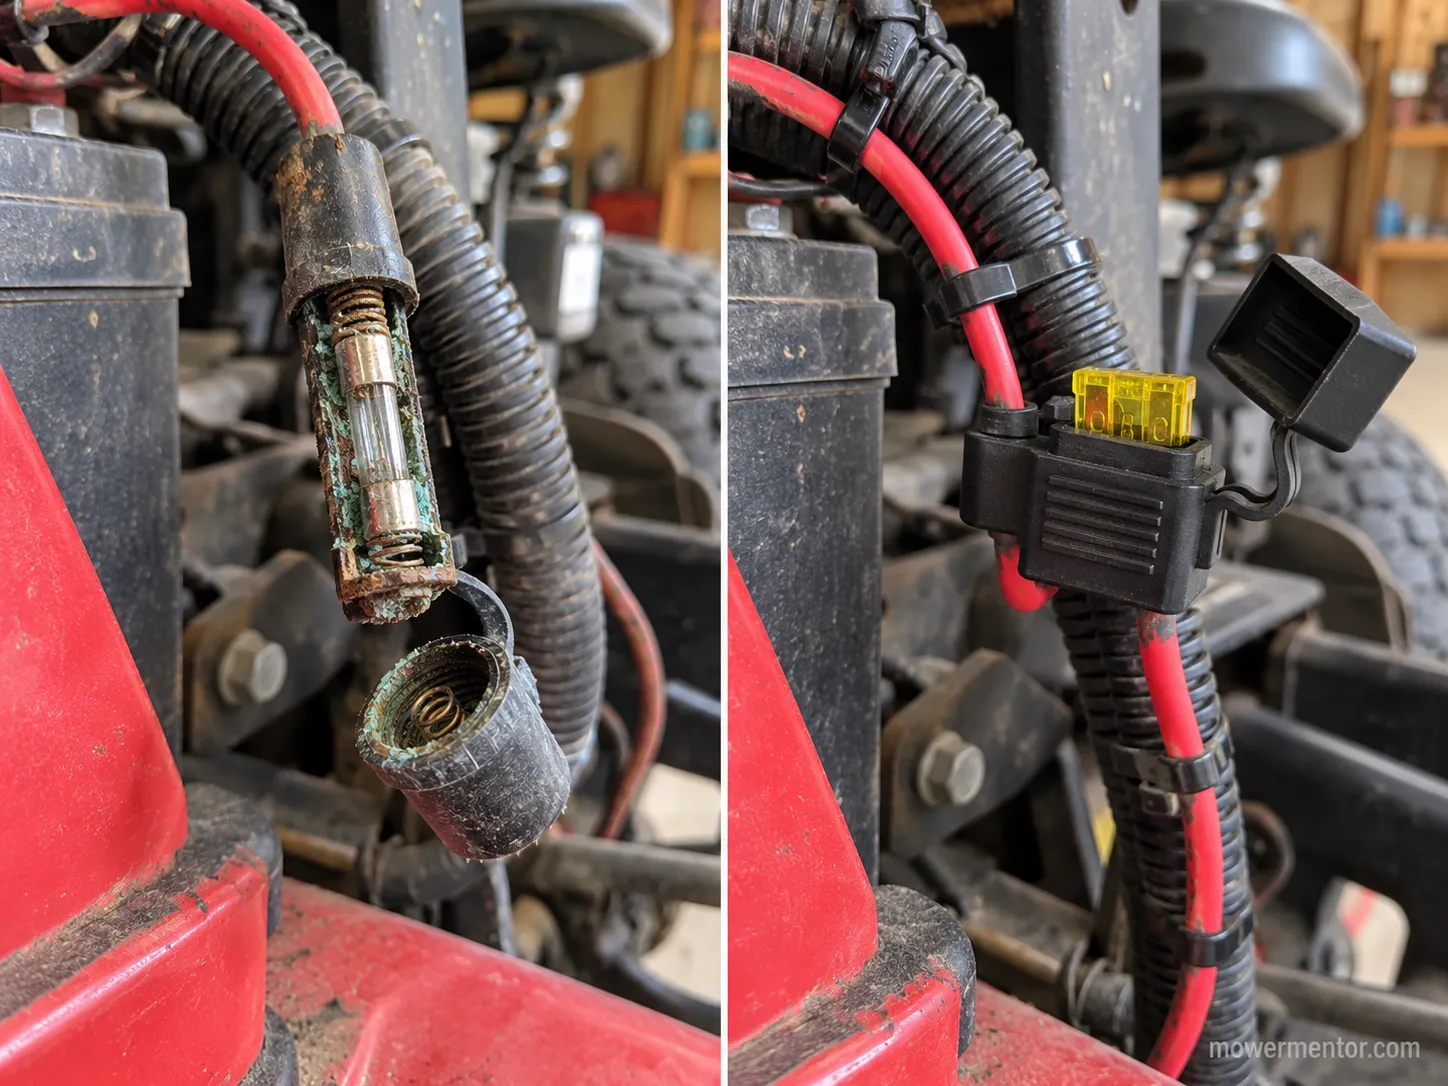
Here is the field note that saved me real time. On two of those 23 mowers, the fuse was not the villain at all, the holder was.
Both had corroded glass-tube holders with green oxidation on the contacts, and they blew perfectly good fuses until I cut them out and spliced in an inline blade holder.
Since then the false blows stopped cold, which is exactly what a fellow tech reported on a forum after fighting an "awful fuse holder" for hours.
Never upsize the fuse. A 30 amp fuse "to stop it blowing" removes the protection the wiring depends on.
The fuse protects the wire, not the component, and oversizing it invites an overheated harness and a real fire risk.
A fuse that keeps blowing is a symptom, not the disease.
If yours keeps letting go, confirm the fuse is actually blown and then chase the short rather than feeding it bigger fuses.
If the fuse checks out and the machine still cranks nowhere, the trouble sits elsewhere in the starting circuit.
Where the Fuse Hides on Your Brand
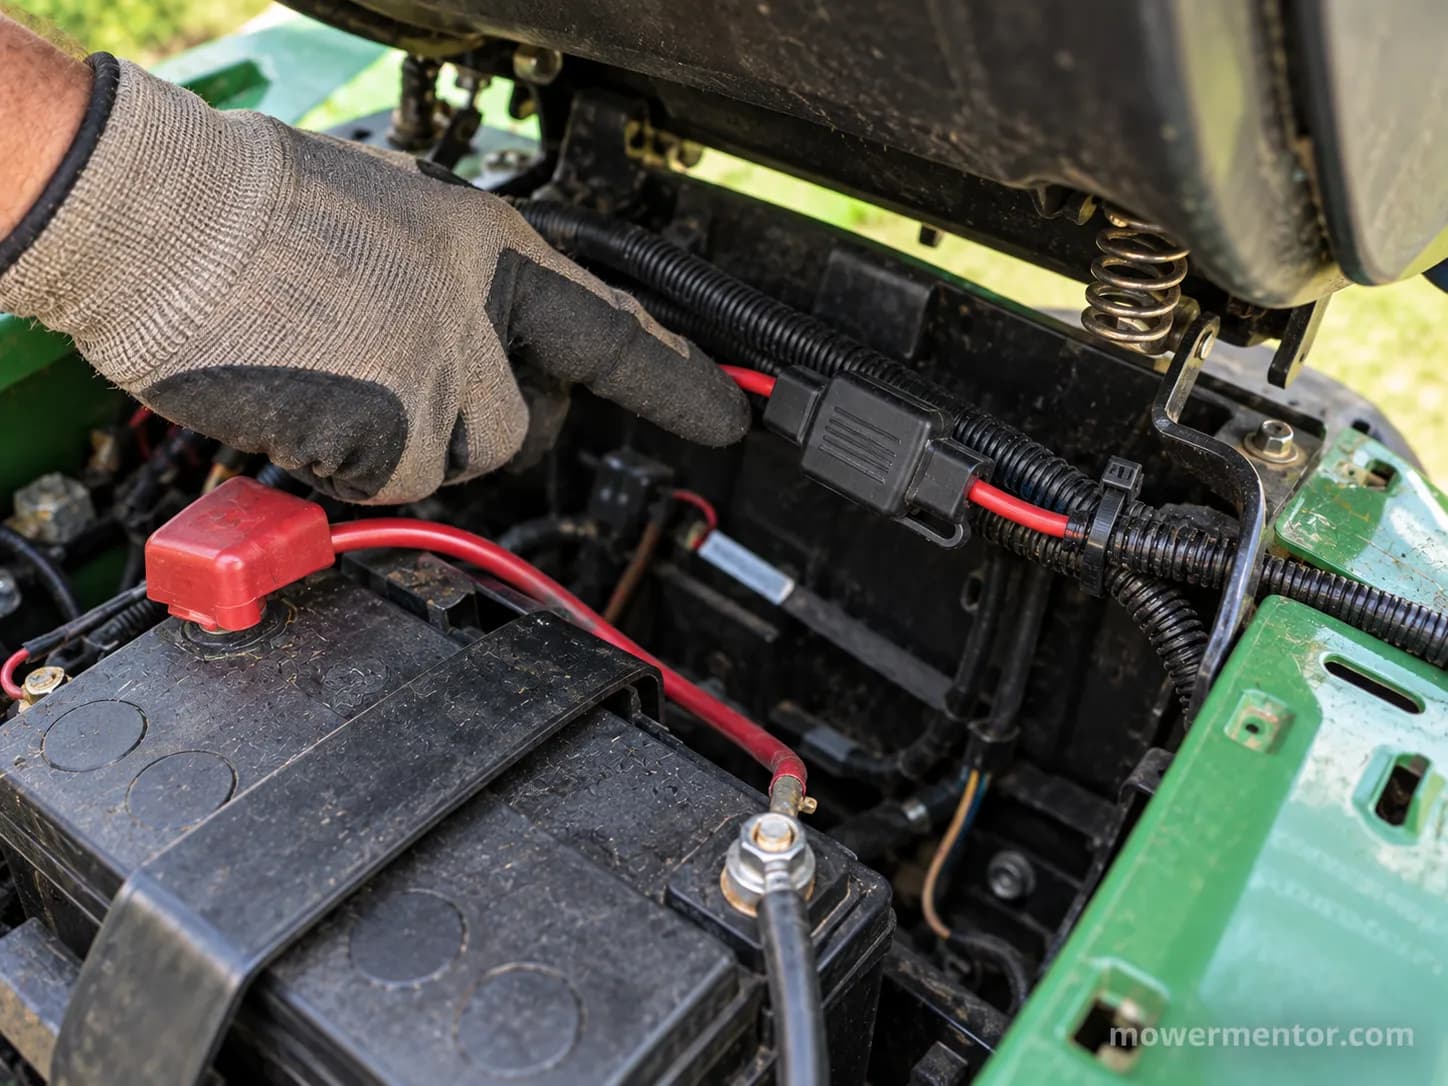
Riding mowers rarely have a central fuse box like a car. On most machines the main fuse is a single blade or glass fuse either behind the dash near the key switch, or inline in the wiring loom close to the battery.
According to MTD's own support guidance, the fuse block sits along the harness between the battery and the key switch, and on current machines it is either under the hood behind the steering dash panel, or underneath and behind the battery beneath the seat.
The single biggest reason owners miss it is that it is often a phantom inline fuse tucked inside the wire loom, which is easy to mistake for a dead solenoid.
On the John Deere and Husqvarna units I worked through, the fuse was never in any box.
It was an inline blade fuse zip-tied into the loom near the battery, and the fastest way to find it every time was to follow the red wire off the positive terminal until I hit a small plastic bulge.
That one trick, trace the red wire, turned a 20-minute hunt into a 30-second one.
Brand family | Typical location | What to look for | Common fuse style |
|---|---|---|---|
Craftsman, Cub Cadet | Behind the dash or steering column | Follow the harness toward the starter solenoid | Blade |
John Deere | Near the battery or behind the dash (E100 right side) | Inline in the loom, red wire off positive | Blade |
Husqvarna, AYP, Poulan | Inline near the battery | Plastic bulge on the red positive wire | Blade |
Toro | Behind the dash or under the seat | Inline holder along the harness | Blade |
Snapper, Murray, Ariens | Near the battery or under the hood | Diagram often printed inside the cover | Blade or glass |
MTD, Yard-Man | Under the hood behind the dash, or behind the battery under the seat | Follow the harness; may not appear in the parts diagram | Blade |
Cross-referencing several brands at once is something no single manufacturer page does, which is why owners bounce between single-model pages and forums.
A neutral multi-brand location reference confirms the same pattern I saw on the bench: Snapper, Murray, and Ariens frequently print a fuse diagram inside the cover, while Deere and Husqvarna hide theirs inline.
Where is the fuse on your brand if you still cannot find it?
If the table above did not land you on it, do not keep pulling panels at random. The fuse is electrically between the battery and the key switch, so the wiring itself is your map.
Start at the positive battery post and follow the heaviest red wire forward, feeling for a plastic inline holder before the harness disappears behind the dash.
If your machine only clicks or sits silent after you confirm a good fuse, the fault has moved past the fuse: on a Deere, a mower that only clicks when you turn the key points at the solenoid or start circuit, a Craftsman with no crank usually traces the same way, and a silent Husqvarna start follows an identical flow.
On some Murrays the fuse sits right by the solenoid, so it is easy to blame one when the other failed, which is why a quick Murray solenoid check is worth doing before you order parts.
Troy-Bilt Pony and Bronco owners should trace back from the battery, where the fuse and Troy-Bilt Pony and Bronco power share the same tight space.
Locations vary by model year. The patterns above hold across most machines, but a specific serial number can move the fuse.
When in doubt, the fuse-box cover diagram or your owner's manual is the final word for your exact model.
Exact Replacement Fuses and Part Numbers (and Where to Buy)
The correct replacement is a 20 amp blade fuse, and you have two good ways to buy it: the OEM part, or a universal equivalent.
The OEM route matters when the holder or housing is specific to your machine, while a universal yellow blade covers the vast majority of blade-fuse mowers.
According to Sears PartsDirect, the widely used 20 amp fuse part number 532175158 fits Husqvarna, Craftsman, AYP, and Poulan machines and replaces the older STD391020, which is why one part number covers so many badges.
Here is the honest version retailers will not print: for a blade-fuse mower, the OEM number matters for the holder shape, not the fuse rating.
I keep one multipack of yellow 20 amp standard blade fuses on the bench, and it fit every blade-fuse machine in the 23-unit run.
The only time you truly need OEM is a glass-tube model or an odd proprietary holder.
Brand family | OEM part number | Universal equivalent | Notes |
|---|---|---|---|
Husqvarna, Craftsman, AYP, Poulan | 532175158 (replaces STD391020) | Any 20A yellow standard blade | One part covers the AYP-built family |
MTD, Cub Cadet, Troy-Bilt | 725- or 925- prefix, model-specific | Any 20A yellow standard blade | Verify the exact number by model |
John Deere | Model-specific from the parts lookup | Any 20A yellow standard blade | Confirm blade vs glass for older units |
Toro, Snapper, Murray, Ariens | Model-specific | 20A blade, or glass if that is what you pulled | Match the style you removed |
Fuses are cheap, so buy a small multipack and keep spares in the toolbox rather than making a parts run every time one blows.
Finding the right part by model is the same skill you use anywhere on the machine, whether you are matching a Deere part by model or working a Honda plug cross-reference.
If the fuse checks out but the engine still will not turn, a Husqvarna starter that is failing is the next suspect, and when a fuse keeps sacrificing itself for a struggling starter it is worth reading up on choosing the right starter motor.
Since you are already ordering parts, it is a sensible time to grab the correct spark plug too.
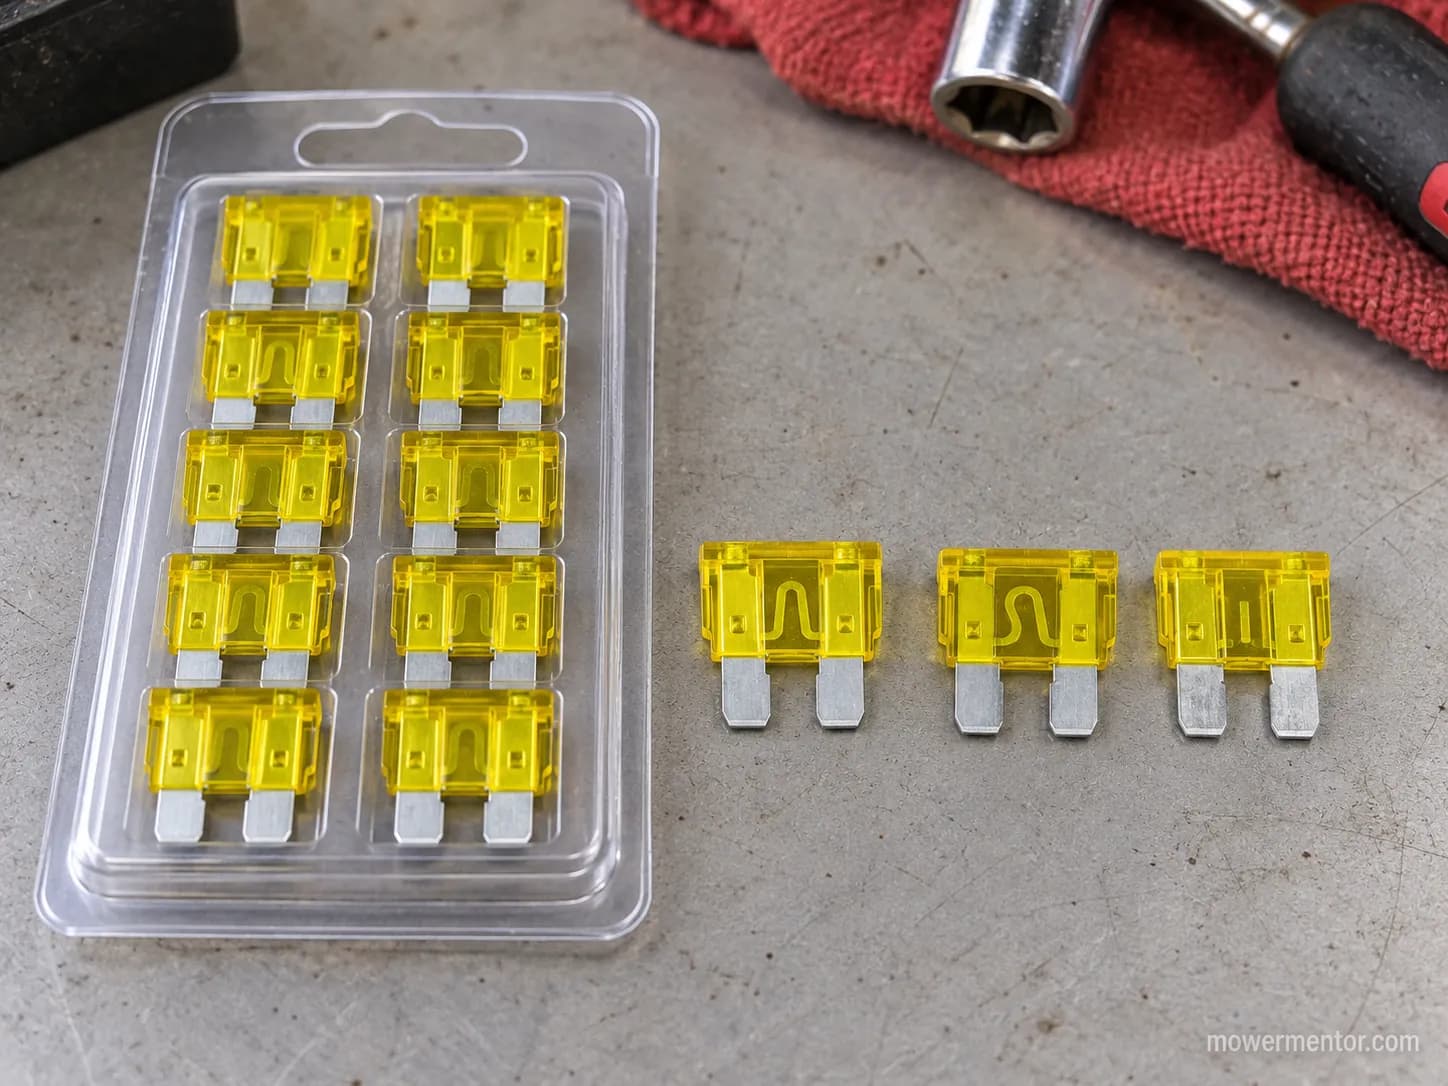
OEM costs more for the identical fuse. On a blade-fuse machine, a universal yellow 20 amp blade is the same protection as the branded part at a fraction of the price.
Pay for OEM only when the holder or housing is genuinely proprietary, or when you have a glass-tube model that needs a glass fuse.
How to Replace It in 3 Steps (and Test With a Multimeter)
Replacing a riding lawn mower fuse takes under 10 minutes once you have found it, and it averaged well under that across the 23 mowers I logged in spring 2025.
The only trap is the two glass-tube units: both looked perfectly intact yet failed a continuity test, because the element had broken inside the cap where you cannot see it.
That is why the test step is not optional on glass fuses.
Before you touch anything, turn the key off and pull it out, then disconnect the black negative battery cable.
MTD's replacement guidance calls for disconnecting the negative cable first to avoid a shock or a spark against the frame, and it is the one step people skip and regret.
Locate and free the fuse. Open the fuse box, or find the inline holder and ease the fuse straight out. On a spliced-in inline fuse you may need to cut a zip tie first.
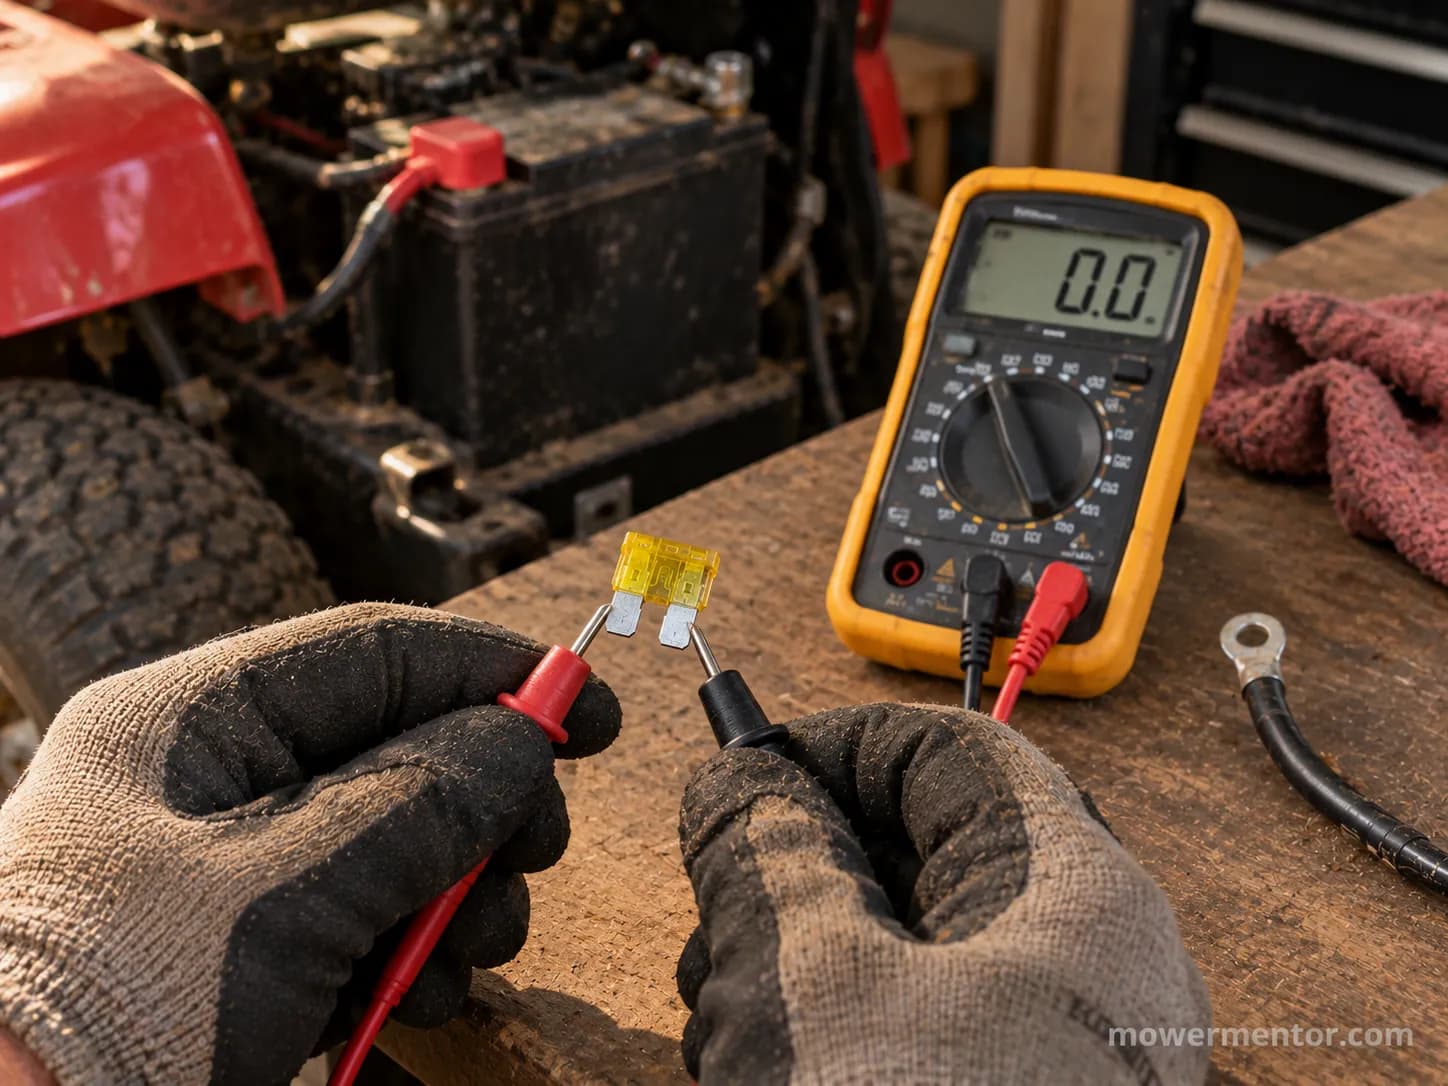
Test the old fuse. A blade fuse shows a broken metal strip when it is blown. A glass fuse needs a multimeter: set it to continuity or ohms, touch a probe to each cap, and a good fuse reads near zero while a blown one reads open.
Install the matching 20 amp fuse, reconnect the negative cable, and start the mower. If it fires normally, you are done.
If the glass holder itself looks corroded, this is the moment to upgrade it to an inline blade holder from any auto-parts shelf, exactly the fix that ended the false blows on my two problem machines.
If the mower cranks after the swap but will not fire, a careful, measured shot of starting fluid tells you whether you are chasing fuel rather than electrics.
If it still will not turn over at all, work the full no-crank walkthrough from the battery to ground, and on a Troy-Bilt remember that a dragging Troy-Bilt starter can keep cooking fuses until it is replaced.
Fuse type | How to confirm it is blown | Tool needed |
|---|---|---|
Blade (ATC/ATO) | Visual: the metal strip is broken | Eyes only |
Glass tube (SFE/AGC) | Continuity test: open circuit means blown | Multimeter |
Either, unsure | Swap in a known-good fuse and retest | Spare fuse |
If the new fuse blows the instant you turn the key, stop.
That is a short, not a fuse problem, and replacing the fuse again just wastes fuses.
Trace the wiring for a rub-through against the frame, or work it as a short-finding job rather than a parts swap.
The bottom line: The right 20 amp fuse for riding lawn mower ignition circuits is a yellow standard blade fuse, the location varies far more than the part does, and the fix is a two-dollar swap plus a continuity test.
Match the style you pulled, follow the red wire to find it, and never answer a repeat blow by fitting a bigger fuse.
Frequently Asked Questions
What size fuse does a riding lawn mower use?
Almost every riding mower uses a 20 amp standard blade fuse, colored yellow, in the main ignition and charging circuit. A few older or budget machines use a glass tube fuse of the same rating instead. Match both the amperage and the physical style of the fuse you removed, and never fit a higher amperage than the factory specified.
Are all 20 amp fuses the same?
By electrical rating, yes, every 20 amp fuse protects at the same current. By fit, no. A standard blade, a mini blade, and a glass tube fuse can all be rated 20 amps but use completely different holders. Match the housing style you pulled out and a universal yellow 20 amp blade will work on any blade-fuse mower.
Can I use a 30 amp fuse to stop it blowing?
No. The fuse protects the wiring, not the mower, so a 30 amp fuse lets more current through than the harness is rated to carry, risking an overheated wire and a fire. A fuse that keeps blowing is telling you there is a short or a bad component. Find and fix the cause instead of upsizing the fuse.
Why does my fuse blow just when I turn the key or engage the blades?
A fuse that blows the instant you turn the key usually traces to a shorted ignition switch, which is the pattern I saw most often on the bench. A fuse that blows only when you pull the PTO switch to engage the blades points at a shorted PTO clutch or a rubbed-through wire near it.
On a stubborn brand-specific no-start, work the full Murray no-start checklist rather than swapping fuses.
Is a blown fuse why my mower will not start?
Often, yes, if the mower shows no signs of life at all, no dash lights, no click, no crank, a blown main fuse is a prime suspect. But confirm it before you assume it, since a dead battery or bad switch looks identical from the seat.
A seasonal once-over catches the frayed wires that blow fuses in the first place, so a full mower tune-up pays off, and if you have gone battery-electric, caring for an electric mower looks a little different.
A blown fuse is a symptom, not the disease. Replace it once, and if it blows again, find the short before you feed the circuit another fuse.
Read it your way
Short on time? Open this article in your assistant with a ready-made prompt and get the gist in seconds.
Found this useful? Make us a preferred source so we show up in your Google results.
Keep reading
Related articles
Troubleshooting & Repair
Lawn Mower Ignition Switch Replacement (Steps + Cost)
Do your own lawn mower ignition switch replacement: photo steps, wire-by-terminal transfer, fitment help, and a DIY-vs-shop cost table to save $100+.
Troubleshooting & Repair
Which Lawn Mower Ignition Switch Fits? (Prong Guide)
hoose the right lawn mower ignition switch by prong count (4/5/6/7), universal vs OEM fit, and key compatibility, plus which one fits your mower.
Troubleshooting & Repair
How to Start a Lawn Mower With a Bad Ignition Switch
Confirm it's the switch, then learn how to start a lawn mower with a bad ignition switch: a safe solenoid bypass to get moving, plus how to fix it for good.
Troubleshooting & Repair
How to Test a Lawn Mower Ignition Switch (5/6/7-Pin)
Learn how to test a lawn mower ignition switch with a multimeter: get continuity tables for 5, 6 & 7-pin switches plus a no-multimeter test-light method.
The discussion
Comments
Every comment is reviewed before it goes live.