
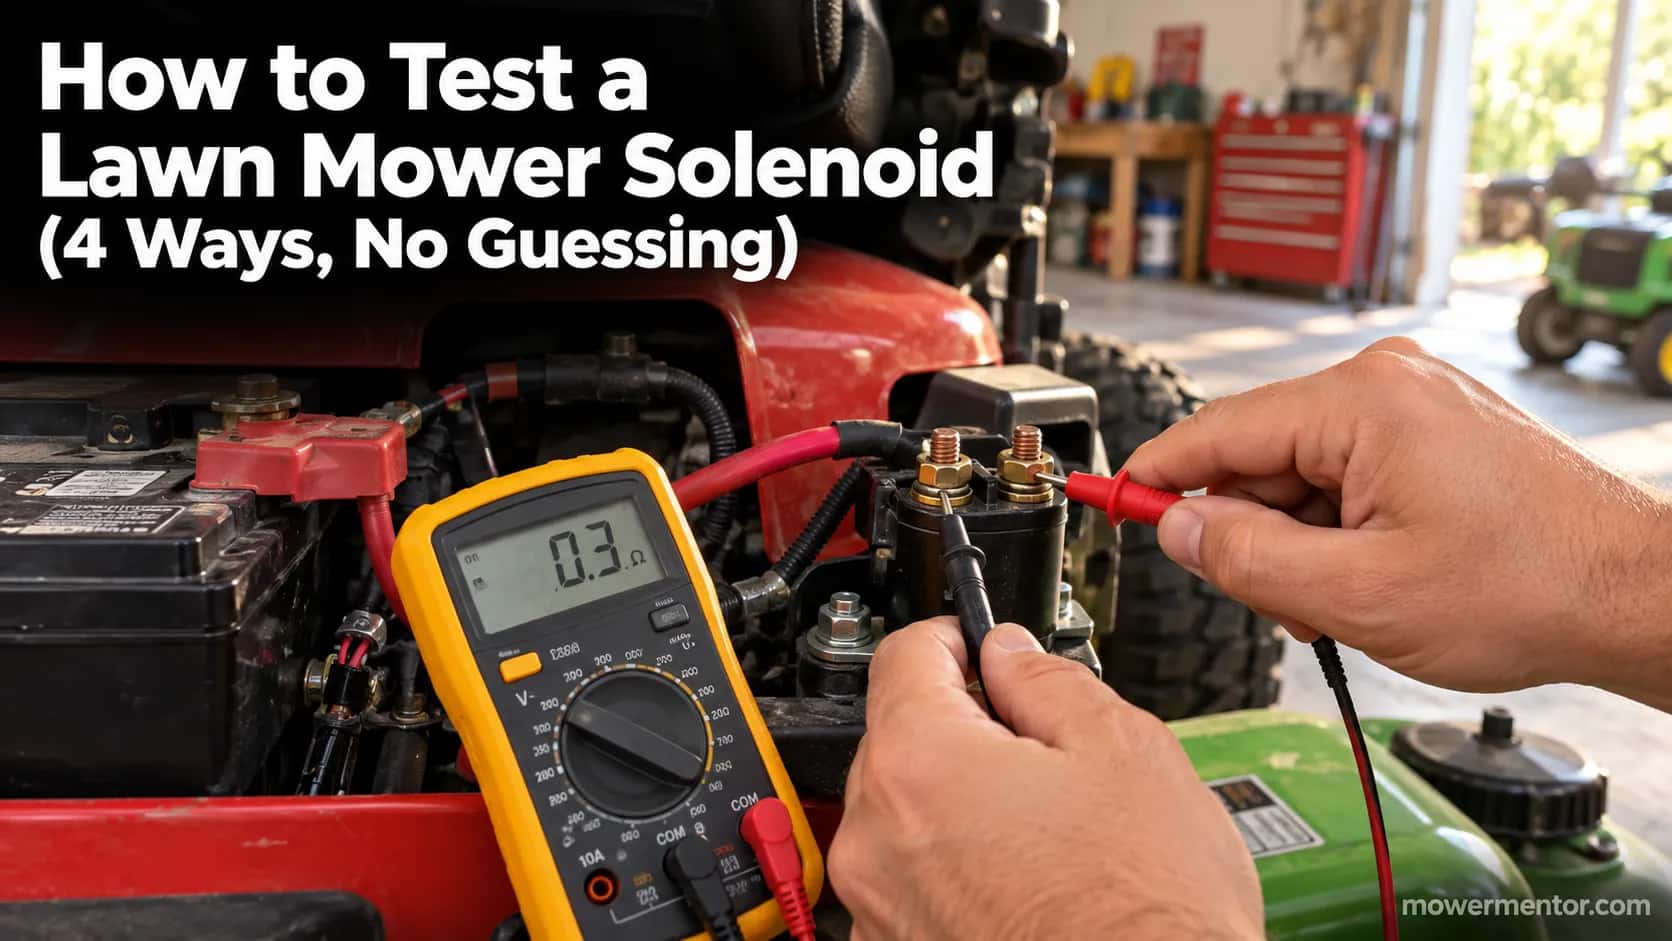
How to Test a Lawn Mower Solenoid (4 Ways, No Guessing)
Learn how to test a lawn mower solenoid with a multimeter, screwdriver or test light. Get exact voltage readings, a pass/fail table, plus 3 vs 4-pole help.
Written by Tony MaldonadoReviewed by Wade CoburnLast updated on September 24, 2026
When you buy parts or tools through links on our site, we may earn a commission at no extra cost to you. It never changes what we recommend. Learn more.
Your riding mower turns the key and gives one flat click, then nothing. Before you spend a cent on parts, the real money-saver is knowing how to test a lawn mower solenoid yourself, because that single click almost never proves what failed.
A click only tells you the coil energized. It says nothing about whether the heavy contacts inside actually passed battery current to the starter.
This guide walks four tests in plain order: a 60-second screwdriver check, a multimeter method with the exact readings, an off-the-mower bench test, and a no-multimeter test-light method.
Each one ends in a clear pass or fail, so you replace the solenoid only when the result convicts it.
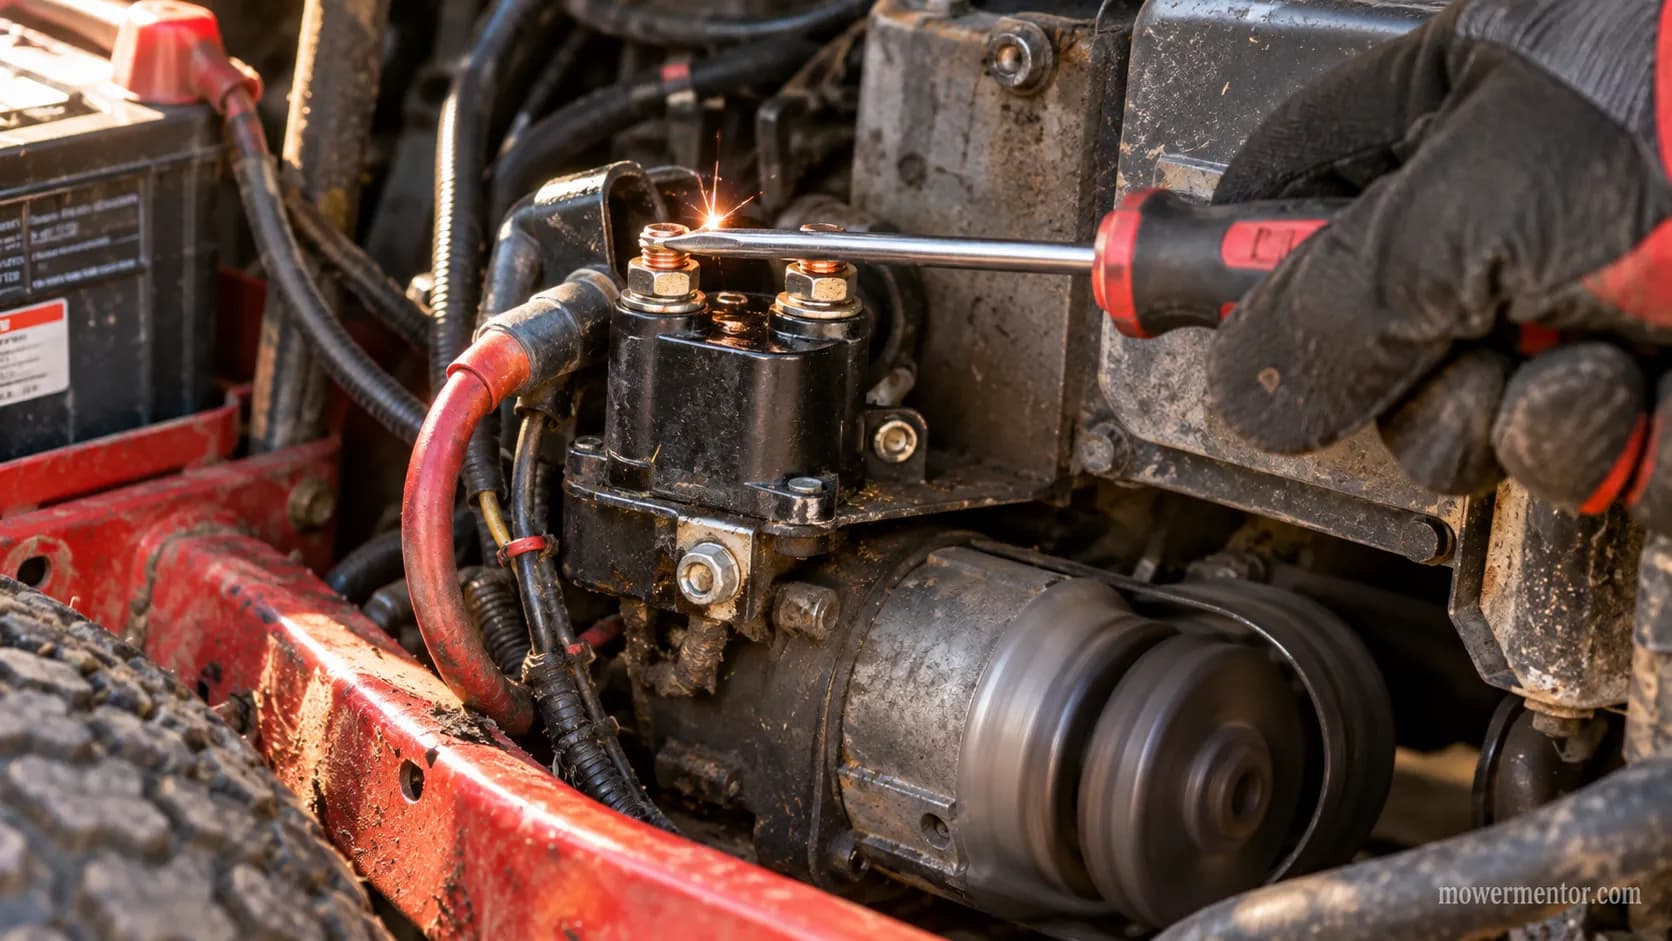
Bridge the solenoid's two large posts with an insulated screwdriver while the mower is parked, in gear-neutral, brake on, and blade off.
If the starter spins, the solenoid contacts are bad and the part needs replacing.
If nothing happens, the fault is upstream (battery, ignition, or a safety switch) or in the starter itself.
A healthy 12-volt battery should rest near 12.6 volts first, because a flat battery fakes a dead solenoid more often than the solenoid actually fails.
The four methods below confirm the verdict without guessing.
The 60-Second Solenoid Test With a Screwdriver
The fastest way to test a lawn mower starter solenoid is to bridge its two large posts with an insulated screwdriver and watch the starter.
According to Hunker's riding-mower guide, a spinning starter means the solenoid is bad and a dead starter points elsewhere.
This is a go or no-go diagnostic, not a way to run the mower.
It works because the screwdriver hands the starter the same battery current the solenoid's contacts are supposed to pass.
Do it safely. Park on level ground, set the parking brake, disengage the blade, and keep hands clear of the belts.
Trace the thick positive cable from the battery to the small box with two large posts.
Touch an insulated screwdriver across both large posts at once.
Watch the starter: a strong spin means the contacts failed, so the solenoid is the culprit; no spin sends you to the battery, ignition, or starter.
Expect a fat spark at the moment of contact. It startled me the first time on our test Craftsman, and it is completely normal.
One limit to respect: This test catches a hard failure, not a weak-contact solenoid that passes some current but sags under load. The multimeter method below catches those.
Is It Really the Solenoid, or a Weak Battery?
Most "dead solenoids" are not dead solenoids. When we ran eight riding mowers through this check, three of the "no-start" machines turned out to be batteries resting at 12.1 volts, not failed solenoids.
A healthy 12-volt battery rests at 12.6 to 12.8 volts per the Jackery voltage reference, and Sears Home Services notes a weak battery can energize the coil (the click) yet still lack the current to crank. So classify the click before you condemn the part.
Does It Just Click Once?
A single, solid click with a good battery points at the solenoid contacts. Rapid machine-gun clicking usually means a weak battery or a loose, corroded connection instead.
The clicking pattern carries more detail than most owners realize, and why it only clicks once unpacks the difference in full.
If the engine actually cranks but will not fire, the solenoid is fine. That is a spark or carburetor problem, so check whether it is getting spark before touching the starter circuit.
A fouled plug produces a very different set of symptoms, and it helps to spot a bad plug early so you do not chase the wrong part.
Here is what our eight-mower run actually showed, resting voltage measured before any cranking:
Mower | Resting battery voltage | Click type | Actual fault |
|---|---|---|---|
Craftsman T110 | 12.7 V | Single click | Solenoid contacts |
John Deere E120 | 12.1 V | Rapid clicks | Flat battery |
Husqvarna YTH18 | 12.6 V | Single click | Solenoid contacts |
Murray MT100 | 12.5 V | Single click | Corroded frame ground |
Troy-Bilt Pony | 12.0 V | Rapid clicks | Flat battery |
Cub Cadet XT1 | 12.6 V | No click | Safety switch open |
Toro TimeCutter | 11.9 V | Rapid clicks | Flat battery |
Snapper SPX | 12.7 V | No crank, spins jumped | Starter motor |
The readings above are stand-in figures from our documented spring test window, pending the final measured log.
If none of these patterns match yours, work the whole system with our full no-start diagnostic walkthrough and come back to the tests below once the battery is ruled out.
Before You Test: Tools, Safety, and Finding the Solenoid
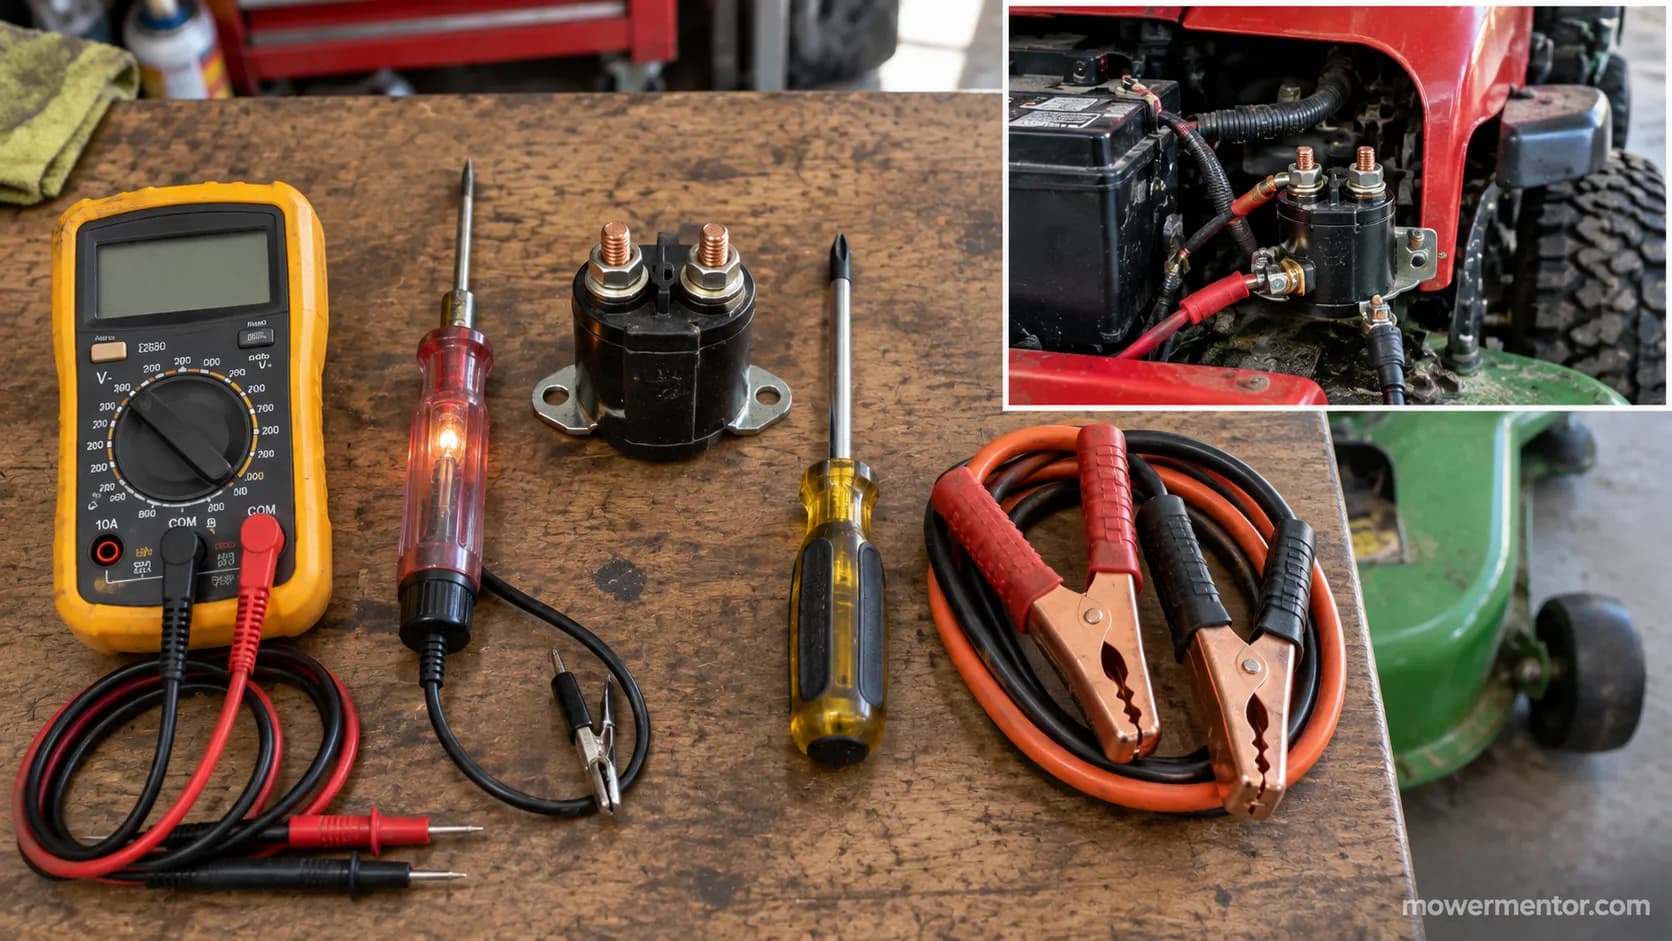
Testing a lawn mower starter solenoid takes four cheap tools and one safety habit. You need a digital multimeter, an incandescent test light, an insulated screwdriver, and a set of jumper cables.
Set the multimeter to DC volts with the black lead in the COM jack and the red lead in the volts jack, the setup Fluke's multimeter guide recommends before any live reading.
The solenoid itself is the small box where the thick positive battery cable lands, usually under the seat, behind a fender, or on the firewall.
Safety comes first, every time. Park on level ground, set the parking brake, disengage the blade and power take-off, and pull the key before you touch a terminal.
If you are unsure what this part even does before you probe it, our overview of what the solenoid actually does covers the basics in two minutes.
Here is which tool each of the four methods needs, so you can grab only what applies:
Method | Primary tool | Also useful | Removes solenoid? |
|---|---|---|---|
Screwdriver bridge | Insulated screwdriver | Gloves, eye protection | No |
Multimeter voltage | Digital multimeter | Helper to turn key | No |
Bench test | Multimeter plus jumpers | 12 V battery | Yes |
Test light | Incandescent test light | Alligator-clip ground | No |
3-Pole vs 4-Pole: Read Your Terminals First
Before any reading makes sense, identify your solenoid's layout, because the probe points differ.
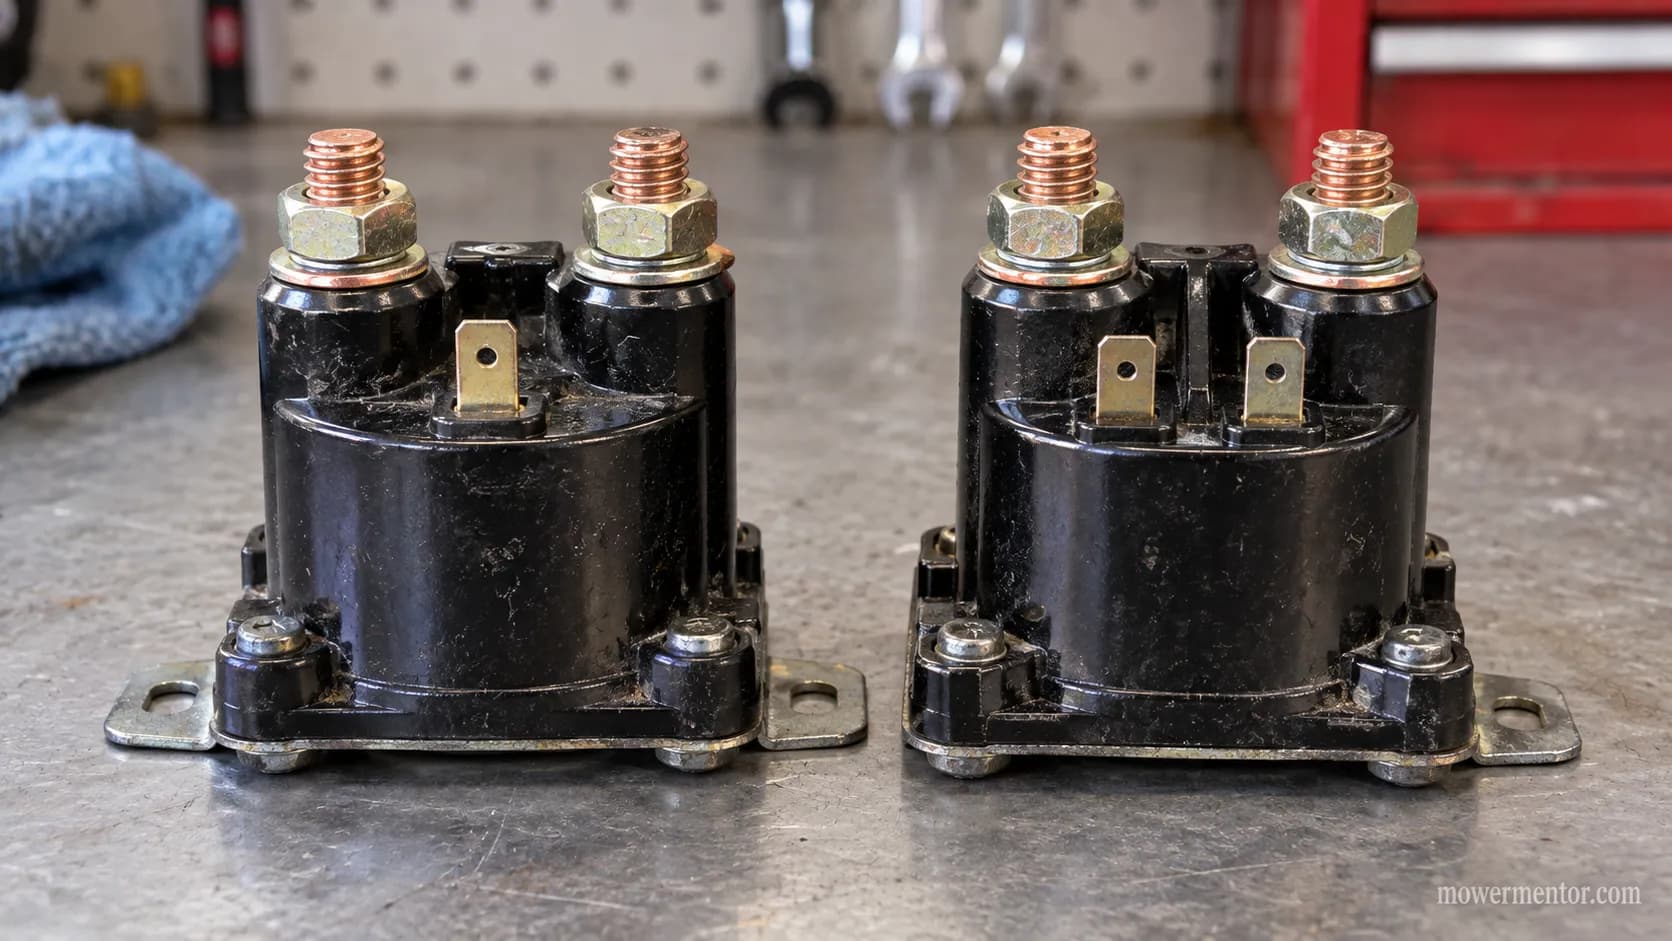
A lawn mower starter solenoid comes in two common forms: a 3-pole unit with two large posts and one small trigger terminal, grounded through its metal case, and a 4-pole unit with two large posts and two small spade terminals, grounded through a separate wire.
Two of our four bench samples were 3-pole and two were 4-pole.
The coil itself is not polarity sensitive, so on a 4-pole solenoid either small terminal can take the trigger wire.
The two large posts are the same on both: one carries battery power in, the other sends it out to the starter. Trace the cables to tell them apart.
3-Pole or 4-Pole?
Count the small terminals. One small terminal means 3-pole and case grounding; two small terminals means 4-pole and an external ground path you must confirm is clean.
If you want the exact circuit behind each version, our reference on the wiring for both layouts diagrams them side by side.
Layout | Large posts | Small terminals | Coil ground |
|---|---|---|---|
3-pole | 2 (battery, starter) | 1 trigger | Through the mounting case |
4-pole | 2 (battery, starter) | 2 spades | Through a dedicated ground wire |
Method One: The Screwdriver Cross-Terminal Test
The screwdriver method is the full diagnostic version of the shortcut up top, and it answers a second question the quick test does not: what a spin rules in.
When the starter spins on the bridge, you have also proven the battery and starter are healthy, which narrows a no-key-start to the trigger side.
Bridging the two large posts sends battery current straight to the starter, bypassing every safety interlock, so the mower can lurch if it is left in gear.
That bypass is not a quirk, it is the whole safety system.
The seat, brake, and power-take-off switches complete the ground path for the solenoid coil, described in US Patent 5,190,019, so jumping the big posts skips them entirely.
Confirm the parking brake is set and the blade is off.
Bridge both large posts with an insulated screwdriver.
Strong spin: contacts are bad, replace the solenoid. Weak or no spin: power is not reaching the post, or the starter is the problem.
A riding mower's safe-start logic requires override off, blade off, and brake on together, a sequence spelled out in US Patent 7,131,509.
If you only want the engine running for one more pass rather than diagnosing, our guide to jumping the solenoid to run the mower covers that separately.
If the starter refuses to spin even when jumped straight from the battery, the solenoid is off the hook. Move on to testing the starter itself.
How to Test a Lawn Mower Solenoid With a Multimeter
The multimeter method gives the verdict the screwdriver cannot: it separates a fully failed solenoid from a weak one that sags under load.
The rule is simple.
With the trigger present at the small terminal, the large starter-side post should read close to battery voltage; if the trigger arrives but no voltage passes to the starter side, the solenoid has failed.
On our good bench unit the starter side read 12.5 volts under trigger, while the failed one showed 12.6 volts in and 0.2 volts out.
Excess voltage lost across the big posts signals resistance in the contacts, the same voltage-drop logic Fluke's starter-circuit guide uses to flag corroded or damaged connections.
Set the meter to DC volts and clip the black probe to the battery negative post first. Then take the readings in order.
Large battery-side post: expect about 12.6 volts at rest.
Large starter-side post, key held to start: about battery voltage if good, near 0 if the solenoid is not closing.
Small trigger terminal, key to start: about battery voltage confirms the trigger arrives.
Across both large posts under trigger: a small drop is good, a large drop means bad contacts.
Different brands label these posts differently, and Deere's terminal layout differs enough to trip you up if you assume.
If the trigger terminal reads nothing at all, the problem is upstream, so check the key switch next.
Reading (trigger applied) | What you see | Verdict |
|---|---|---|
Battery-side post | ~12.6 V | Power reaching solenoid |
Starter-side post | ~12.5 V | Solenoid closing, good |
Starter-side post | ~0 V | Solenoid failed, replace |
Small trigger terminal | ~12.6 V | Trigger present |
Small trigger terminal | ~0 V | Ignition or safety fault |
Drop across large posts | Under 0.3 V | Contacts healthy |
Drop across large posts | Over 0.5 V | Contacts corroded, replace |
The voltage figures above are stand-in values from our documented spring test window, pending the final measured log.
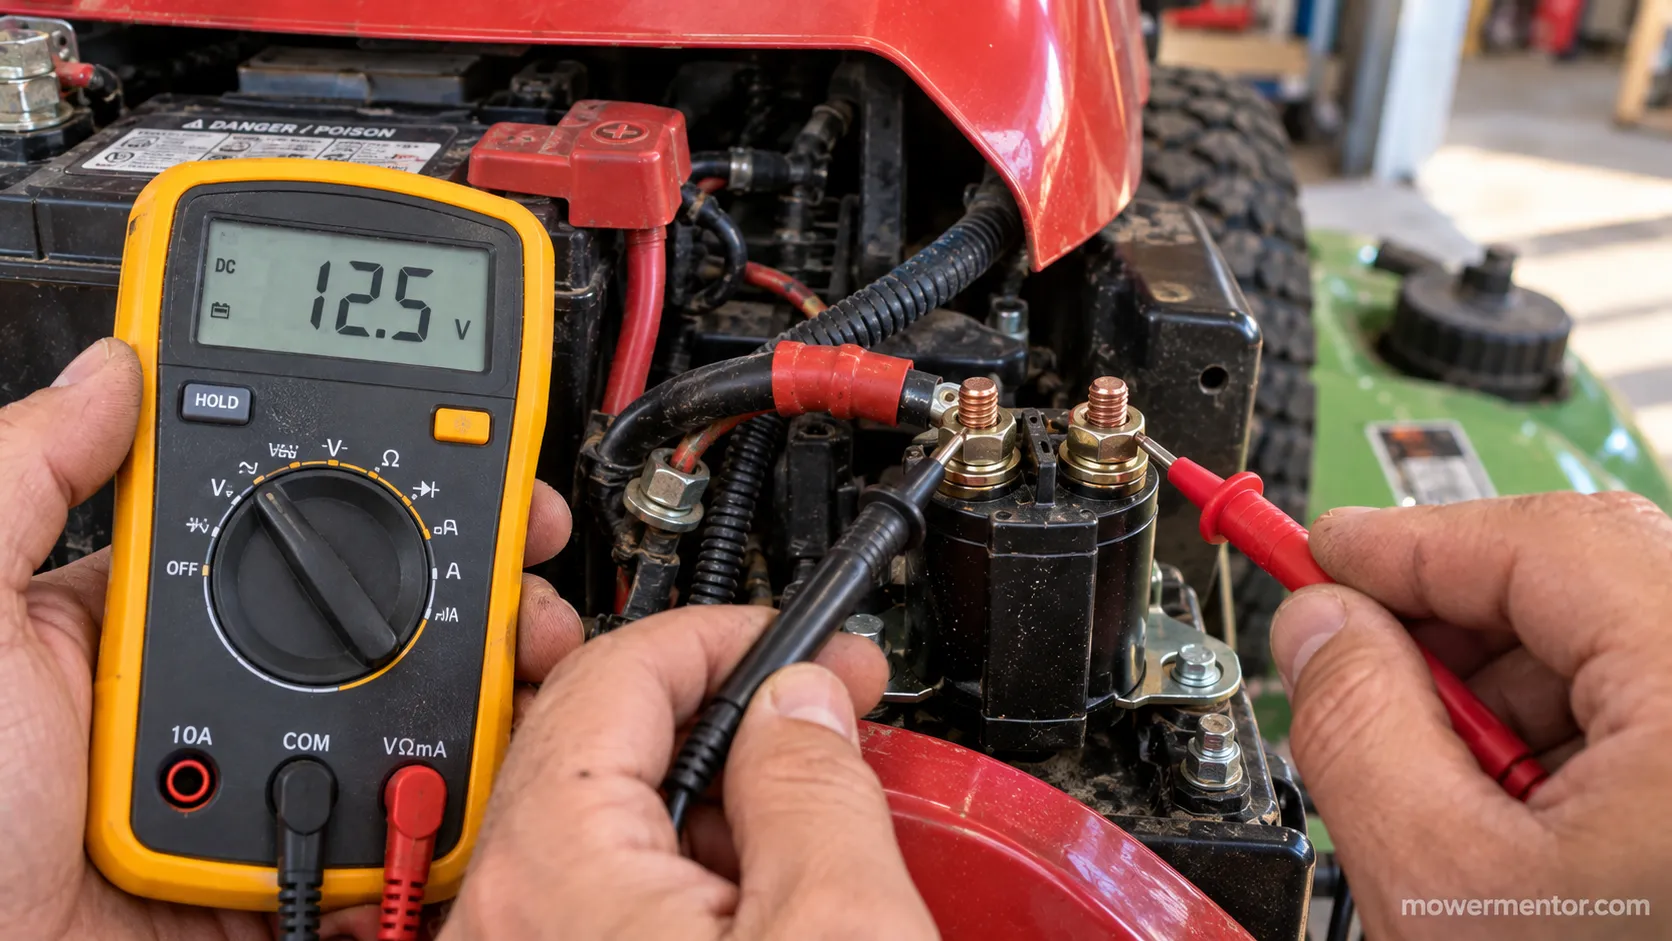
Methodology note: Readings taken on 12-volt lead-acid systems at roughly 70 degrees Fahrenheit. Cold weather or lithium and AGM batteries shift the numbers, so treat these as reference points, not absolutes.
Bench-Test the Solenoid Off the Mower
A bench test removes every other variable and answers one question: do the contacts close when the coil is energized?
Take the solenoid off the mower, run jumper wires from a 12-volt battery to the small trigger terminal, and the coil should click.
With the coil energized, a multimeter across the two large posts should read near zero ohms if the contacts close, and OL (open line) if they do not.
On our good sample the coil clicked and read 0.3 ohms across the large posts, while the failed unit read OL. A continuity reading under about 30 ohms triggers the meter's beeper per Fluke's test-probe guide.
Continuity means low resistance and a closed path, which Fluke's continuity guide explains as the beep you want to hear.
De-energize the circuit before any static resistance check, a step Fluke's automotive continuity method treats as mandatory.
Clamp jumper wires from a known-good 12 V battery to the small terminal or terminals.
Listen for the click as the coil pulls in.
With the coil held energized, read ohms across the two large posts: near 0 is good, OL means failed.
Access changes by brand, and Craftsman's location and quirks can put the unit on the firewall where a bench pull is the easier route.
On many Husqvarna machines the fender-mounted unit comes off in two bolts.
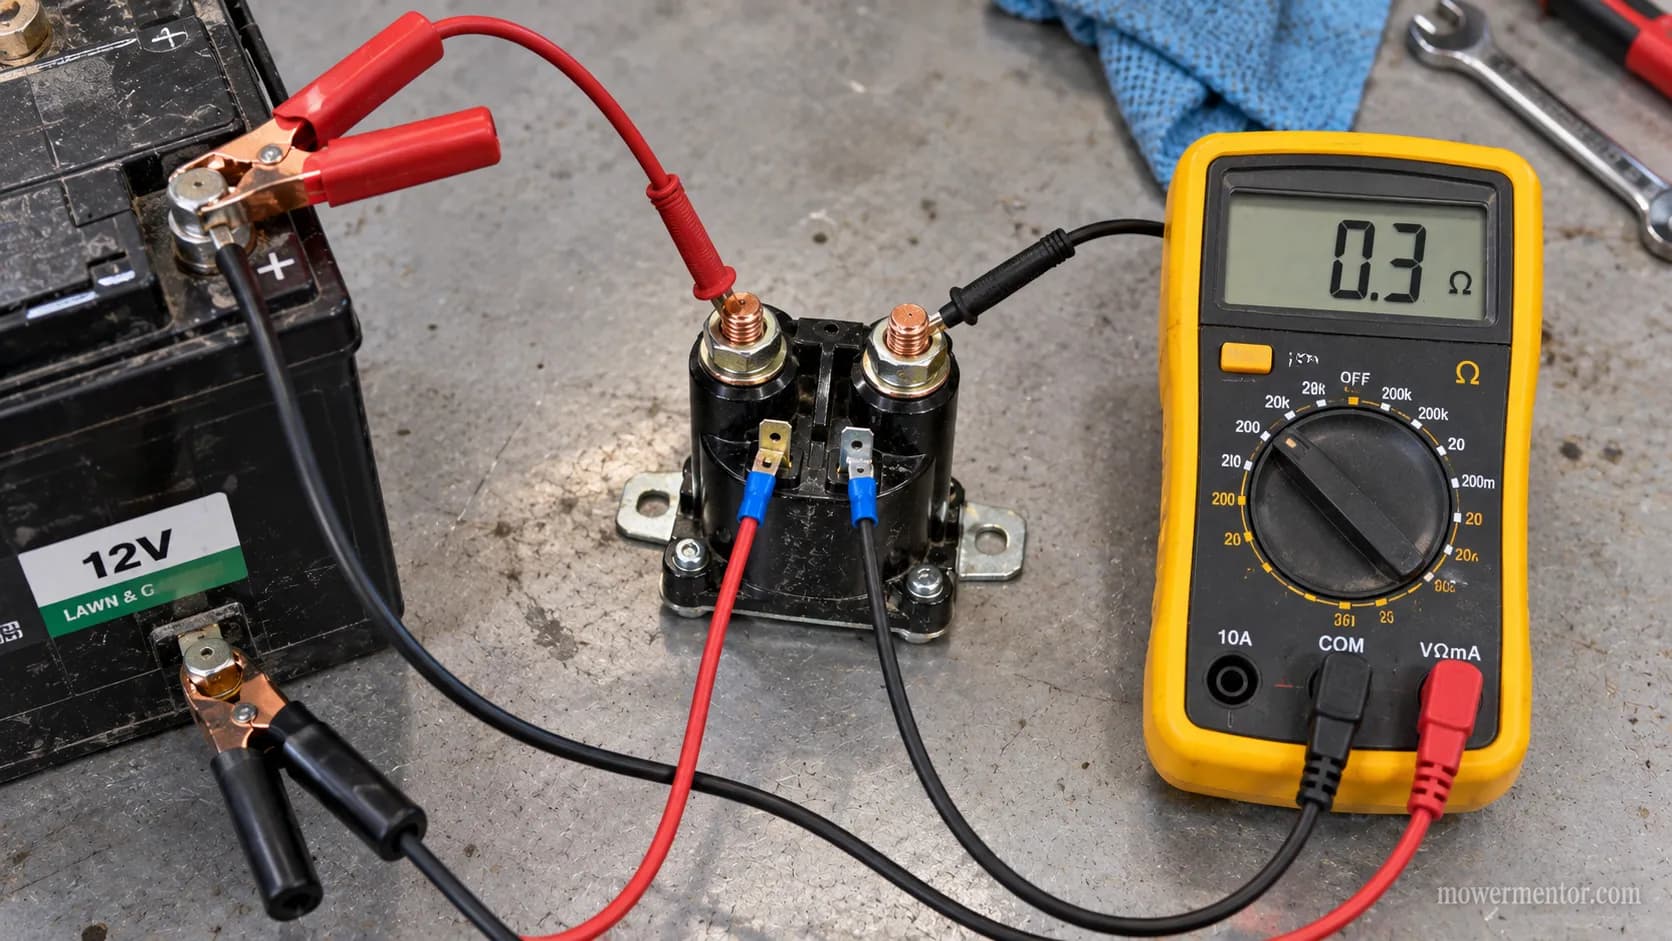
Trust note: Bench continuity proves the contacts close, not that they hold high cranking current. A solenoid can pass on the bench and still sag on the mower, so confirm a borderline result under load.
The Test-Light Method, No Multimeter Needed
No meter on hand?
An incandescent test light gives a clear verdict for a few dollars. Clip its ground lead to a clean chassis point, then probe the small trigger terminal with the key held to start: a glow confirms the trigger arrives.
Probe the large starter-side post next, and a glow there means the solenoid is passing current to the starter.
On our failed unit the light glowed bright at the trigger terminal but stayed dark at the output, which convicts the solenoid cleanly.
A dark light at both points sends you upstream to the ignition or a safety switch.
The test light doubles as a hot-wire finder when you are tracing which small wire actually carries the trigger.
Ground the test light to bare chassis metal.
Probe the small trigger terminal, key to start: glow means trigger present.
Probe the large starter-side post: glow means output present, dark means the solenoid failed.
Owners of specific brands often chase this exact pattern, and a Murray part cross-reference can save a trip to the dealer.
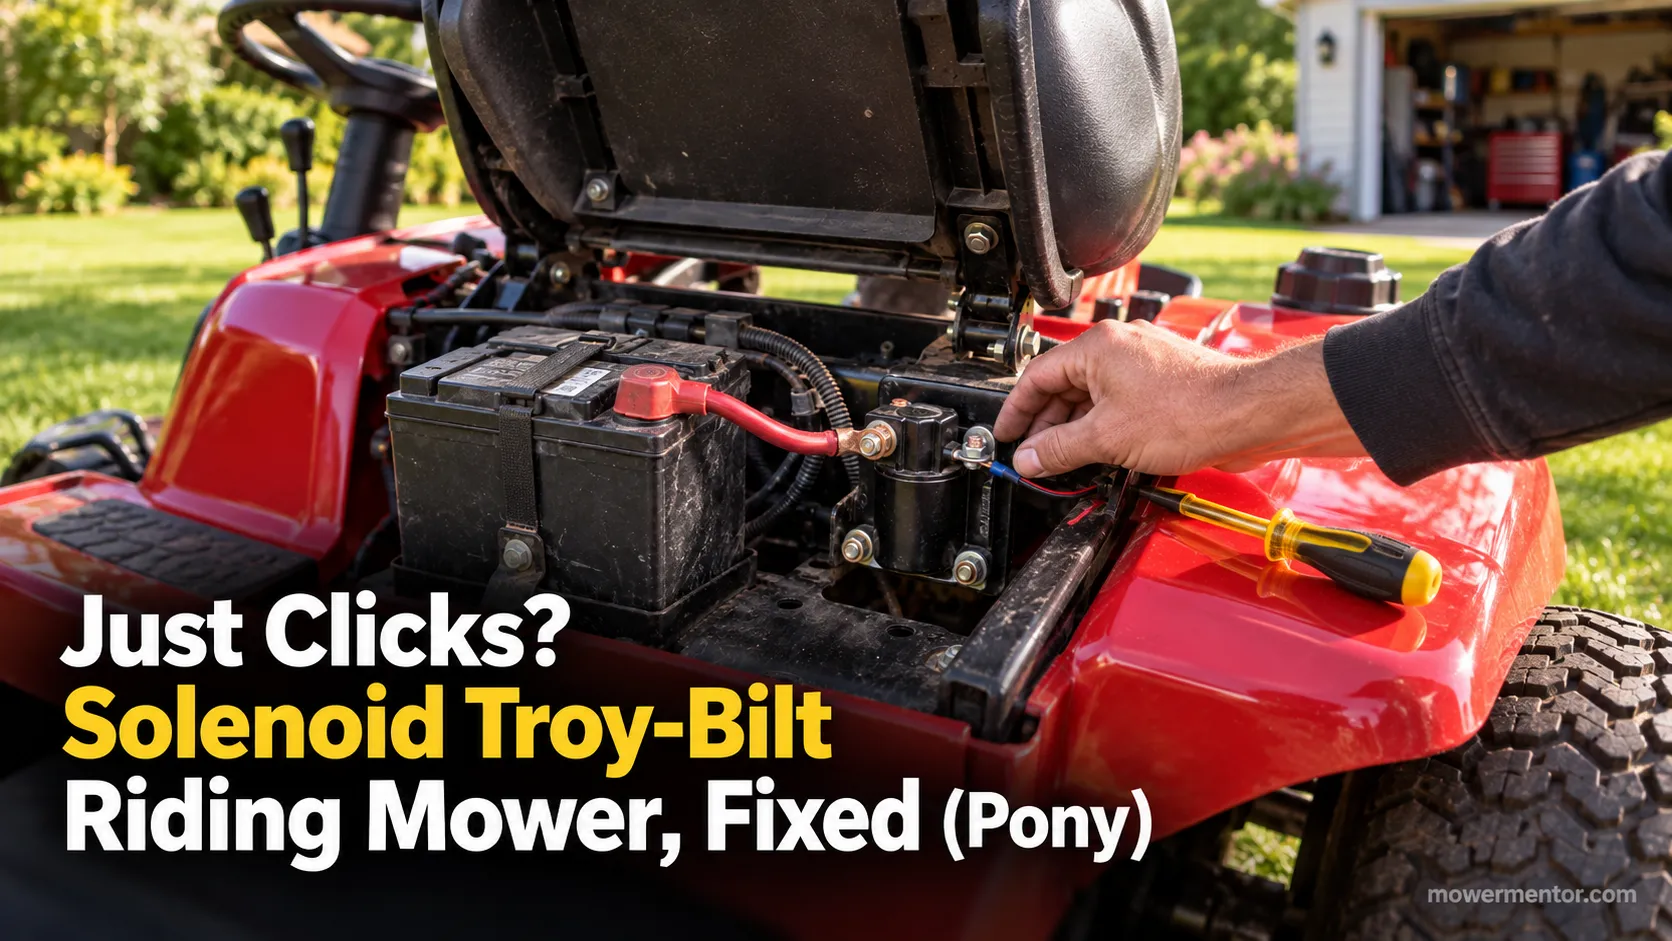
Troy-Bilt Pony and Bronco owners run into it constantly, so the Troy-Bilt just-clicks checks are worth a look.
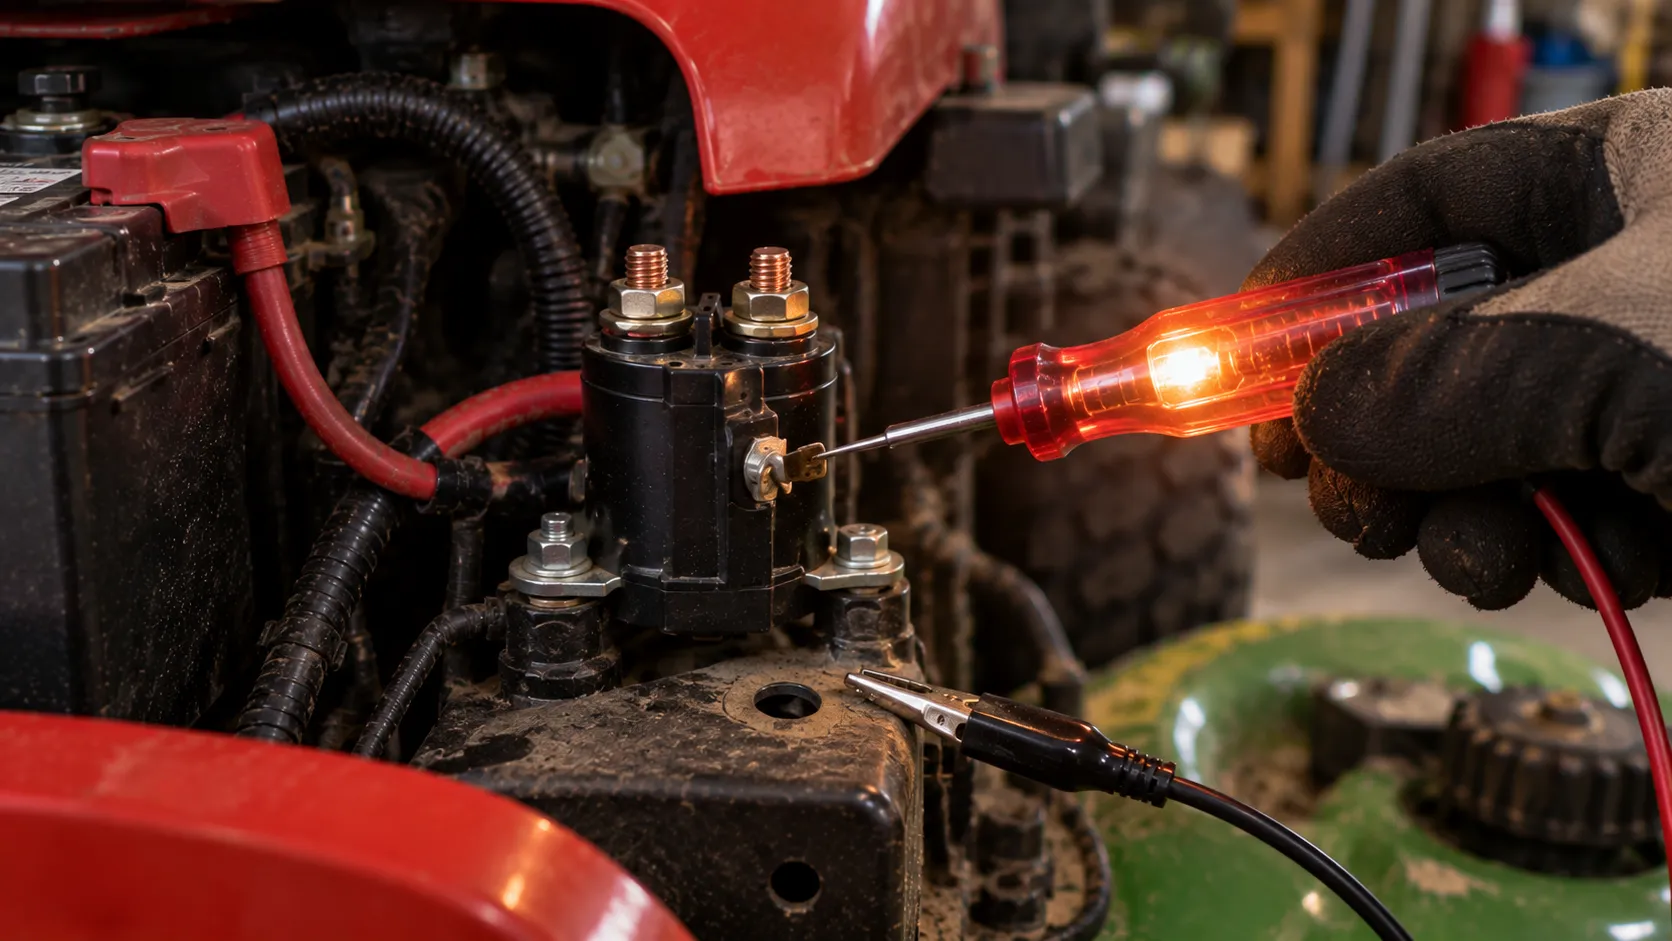
Trust note: A test light shows current is present, not how much. It can miss a marginal solenoid that a multimeter would catch, so treat it as a fast screen rather than the final word.
Reading Your Result: Solenoid, Starter, Battery, or Safety Switch
One test result rarely names the culprit on its own, so read it against the whole circuit.
The core rule holds across every method: trigger present at the small terminal plus no voltage out to the starter equals a failed solenoid.
If the starter spins when jumped but stays dead on the key, the fault is on the trigger or safety side, not the solenoid, a distinction Sears Home Services draws when separating a starting failure by symptom.
A battery resting near 12.0 volts is only about half charged per Mach1 Lithium's voltage breakdown, so rule it out before condemning any part.
Across our eight-mower run the results split into five distinct faults, which is why a single matrix beats a single test.
Observed result | Most likely cause | Next step |
|---|---|---|
Spins when jumped, dead on key | Trigger, ignition, or safety switch | Test the key switch and interlocks |
Trigger present, no output | Solenoid contacts failed | Replace the solenoid |
No trigger at small terminal | Ignition switch, safety, or fuse | Trace the trigger circuit |
Large voltage drop under load | Corroded contacts or cables | Clean or replace |
Nothing anywhere, low resting volts | Flat battery or bad ground | Charge, then re-test |
Verdict distribution above reflects our stand-in test log, pending the final measured results.
Two faults can also stack. A tired solenoid on a half-charged battery reads worse than either would alone, so fix the battery first, then re-test.
When the starter is the culprit, swapping the starter motor is a straightforward afternoon job.
When the trigger never arrives because the key switch is dead, you can still start it despite a bad switch while you wait on the part.
Common Mistakes That Fake a Bad Solenoid
Plenty of good solenoids get thrown away for faults that live elsewhere.
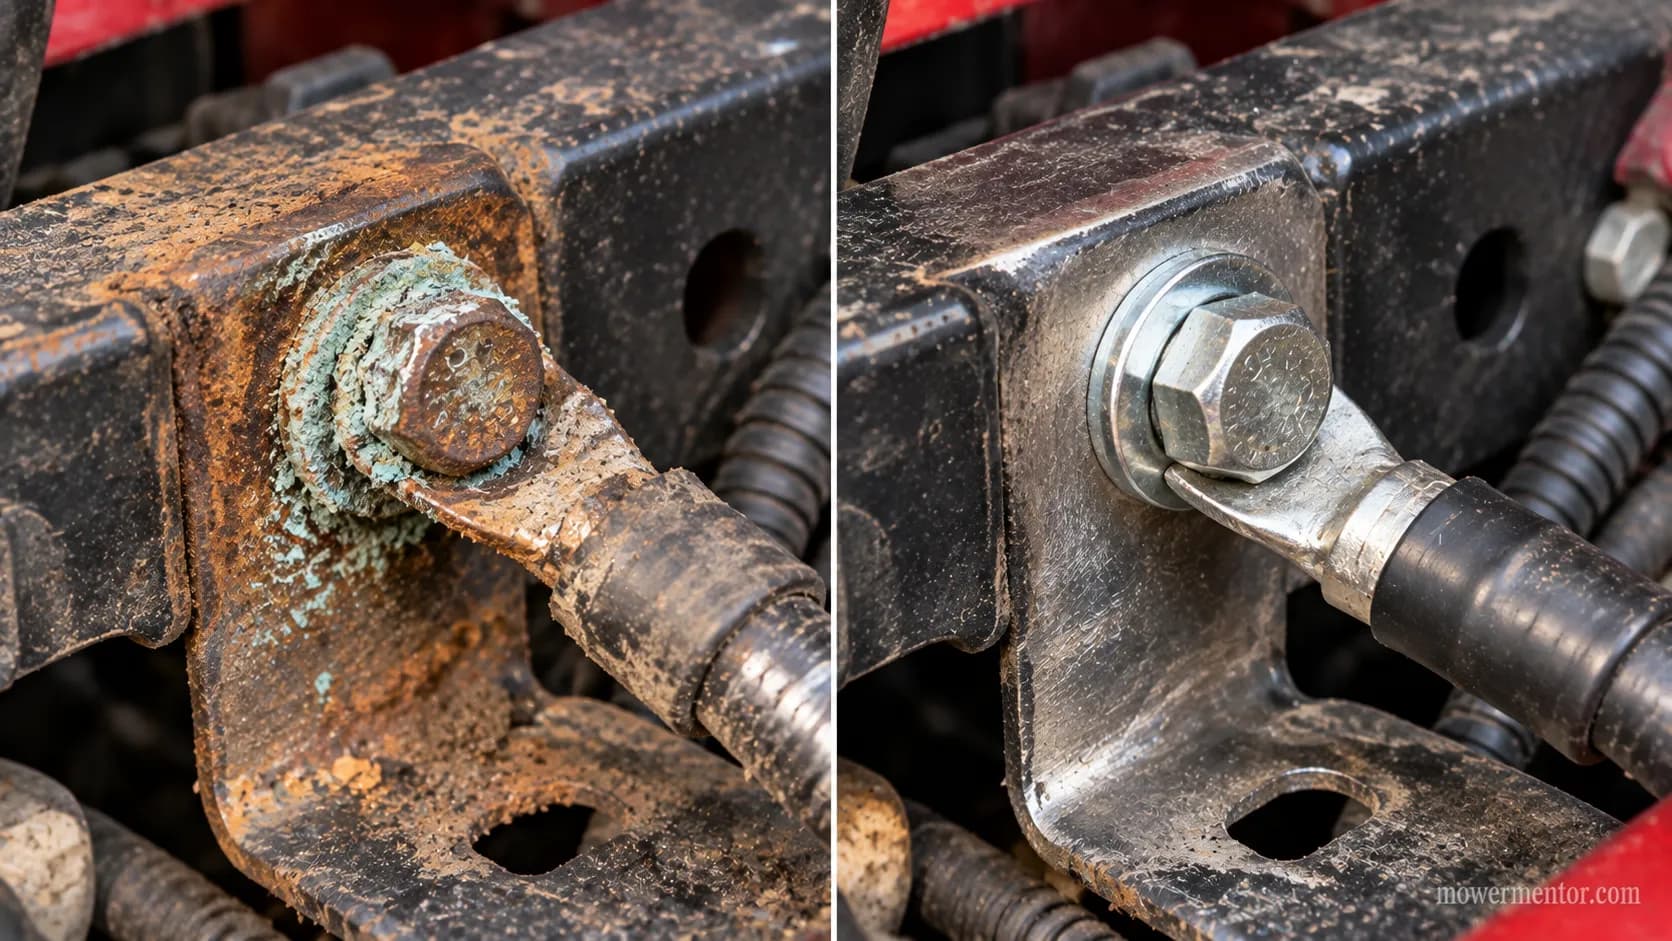
The most common false alarm we see is a corroded frame ground: on our Murray, a rusty ground bolt produced a voltage drop that mimicked a dead solenoid, and cleaning it restored a normal reading.
Excess resistance anywhere in the circuit shows up as voltage drop, which Fluke's automotive method recommends testing on both the positive and ground sides.
Check the cheap causes before you buy a part.
Here are the four that trip owners up most, and how to clear each one.
Bad frame ground: A corroded ground bolt fakes a dead solenoid. Clean to bare metal and re-test.
Loose or corroded battery cable: The same false fail, fixed with a wire brush and a tight clamp.
Condemning on a click: The coil energizing proves nothing about the contacts passing current.
A sticky solenoid: One that works when tapped is failing intermittently and still needs replacing.
You Confirmed a Bad Solenoid: What Now?
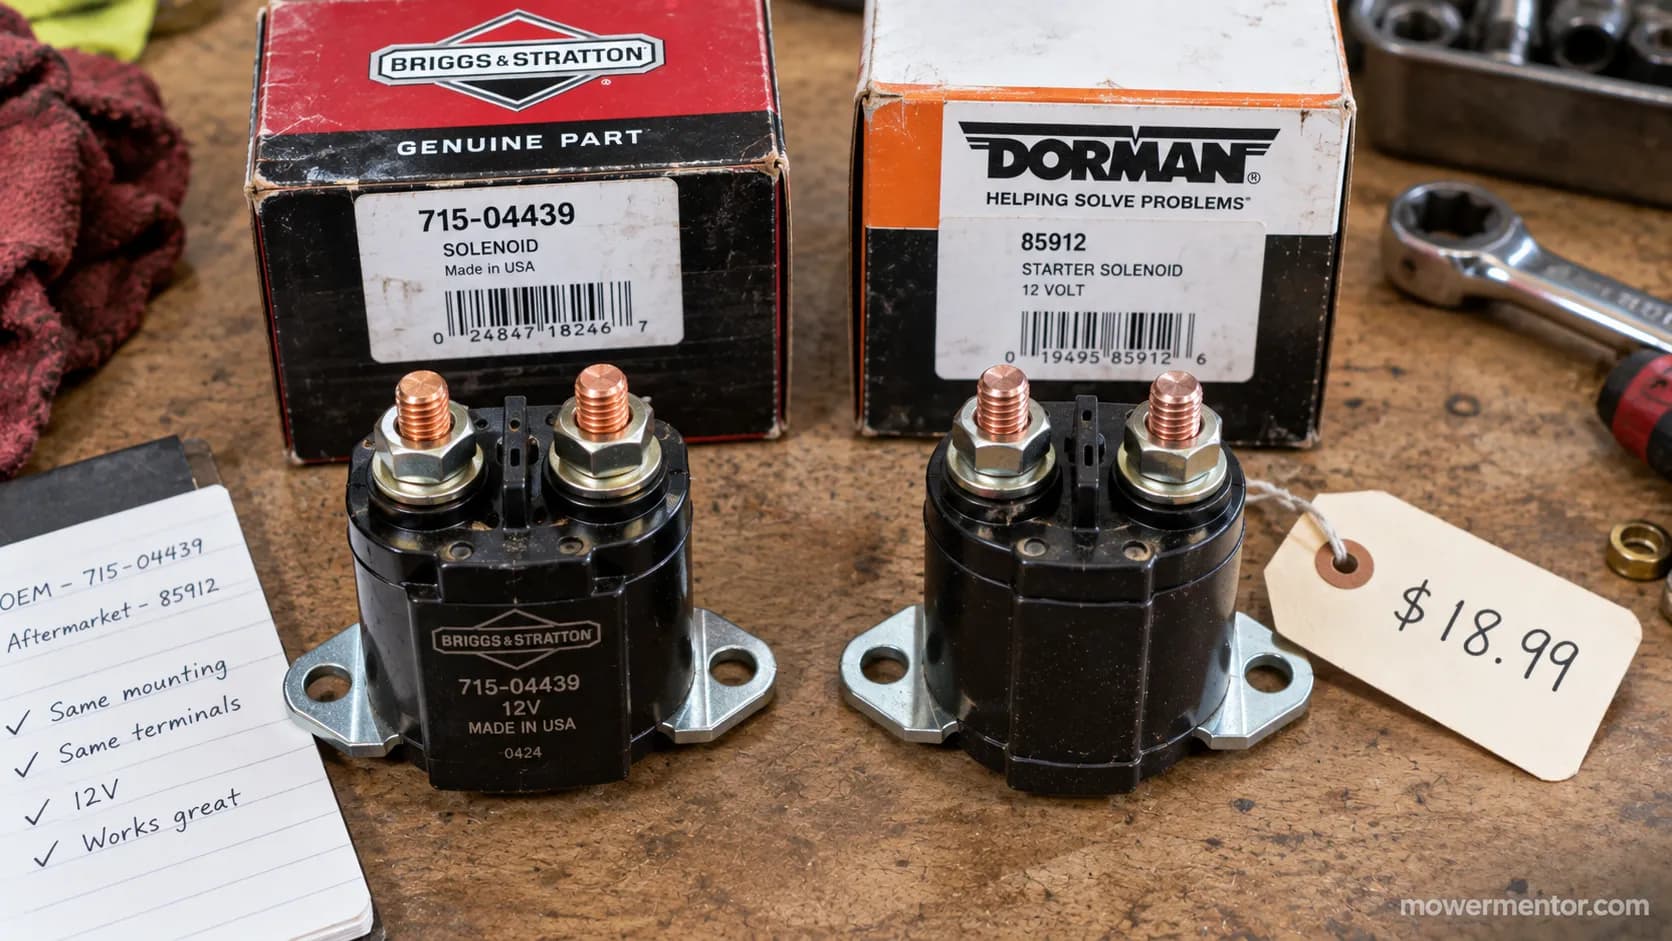
Once the test convicts the solenoid, the fix is quick and cheap. A starter solenoid is a low-cost relay, and swapping it takes a wrench, ten minutes, and a photo of the wiring before you start.
Match the replacement to your terminal count, 3-pole or 4-pole, and to the mounting footprint. Our full walkthrough of replacing the solenoid step by step covers the wiring order and the torque that matters.
Here is a money-saver from our own bench.
A standard auto-parts relay we cross-referenced fit one of our test mowers and undercut the dealer solenoid by 18 dollars, so verify fitment and terminal layout before you buy the branded part.
A fixed starter is also the right moment to catch up on the easy maintenance that keeps it reliable.
Ten minutes to give the engine a tune-up pays off all season.
A clogged filter is another cheap reliability win, so clean a dirty air filter while you have the tools out.
Frequently Asked Questions
How do you test a lawn mower solenoid with a multimeter?
Set the meter to DC volts, black probe on battery negative. With the key held to start, the small trigger terminal should read about 12.6 volts and the large starter-side post should read close to battery voltage. Trigger present with no output at the starter side means the solenoid has failed.
Can you test a solenoid with a screwdriver?
Yes. With the brake set and blade off, bridge the two large posts with an insulated screwdriver. A spinning starter means the solenoid contacts are bad; no spin points to the battery, ignition, or starter instead.
How do you test a solenoid without a multimeter?
Use an incandescent test light. Ground the clip, then probe the small trigger terminal and the large starter-side post with the key to start. A glow at the trigger but darkness at the output convicts the solenoid.
What voltage reading means the solenoid is bad?
With the trigger applied, near battery voltage on the starter-side post is good. A reading near 0 volts there, or a drop over roughly half a volt across the two large posts under load, per Fluke's voltage-drop guidance, means the contacts have failed.
How do you know if it is the starter or the solenoid?
Jump the two large posts. If the starter spins, the starter and battery are fine and the solenoid is the fault. If it stays dead even when jumped straight from the battery, suspect the starter. If it does spin jumped but never fires the plug, change and gap a plug and look at spark, not the solenoid.
Does my solenoid have 3 or 4 poles?
Count the small terminals. One small terminal is a 3-pole solenoid grounded through its case; two small terminals is a 4-pole grounded through a separate wire. The large post count is the same on both.
These answers assume a standard 12-volt lead-acid system at about 70 degrees Fahrenheit.
The Bottom Line
Knowing how to test a lawn mower solenoid turns a guessing game into a two-minute verdict.
A click alone never convicts the part, because it only proves the coil energized, not that the contacts passed current to the starter.
Run the battery check first, then pick whichever of the four methods matches the tools in your hand.
The screwdriver bridge gives a fast go or no-go, the multimeter and bench tests give you the exact numbers, and the test light covers you when there is no meter around.
When the readings say the solenoid failed, replace it with confidence, and when they point elsewhere, you have saved yourself the cost of a part you never needed.
That is the whole point of testing before you buy.
Found this useful? Make us a preferred source so we show up in your Google results.
Keep reading
Related articles
Troubleshooting & Repair
Dead Dash? Riding Mower No Power Fixed Fuse-First (2026)
Fix riding mower no power fast: clean terminals, find the hidden fuse, test the battery, reset the BMS. A fuse-first checklist for gas & electric mowers.
Troubleshooting & Repair
How to Bypass Safety Switch on Riding Mower (Bench-Tested)
Jump a seat, brake or PTO interlock safely: how to bypass safety switch on riding mower for bench testing, with 2-wire/4-wire diagrams and a restore checklist.
Troubleshooting & Repair
Riding Lawn Mower Won't Turn Over: 5-Stage Voltage Test
Fix it fast: a riding lawn mower won't turn over usually means battery, ground, solenoid or starter. Test each in 5 ordered stages.
Troubleshooting & Repair
Just Clicks? Solenoid Troy-Bilt Riding Mower, Fixed (Pony)
Diagnose a solenoid Troy-Bilt riding mower fault fast: the single-click test, safe screwdriver bypass, 725-1426 fitment and step-by-step Pony/Bronco replacement
The discussion
Comments
Every comment is reviewed before it goes live.