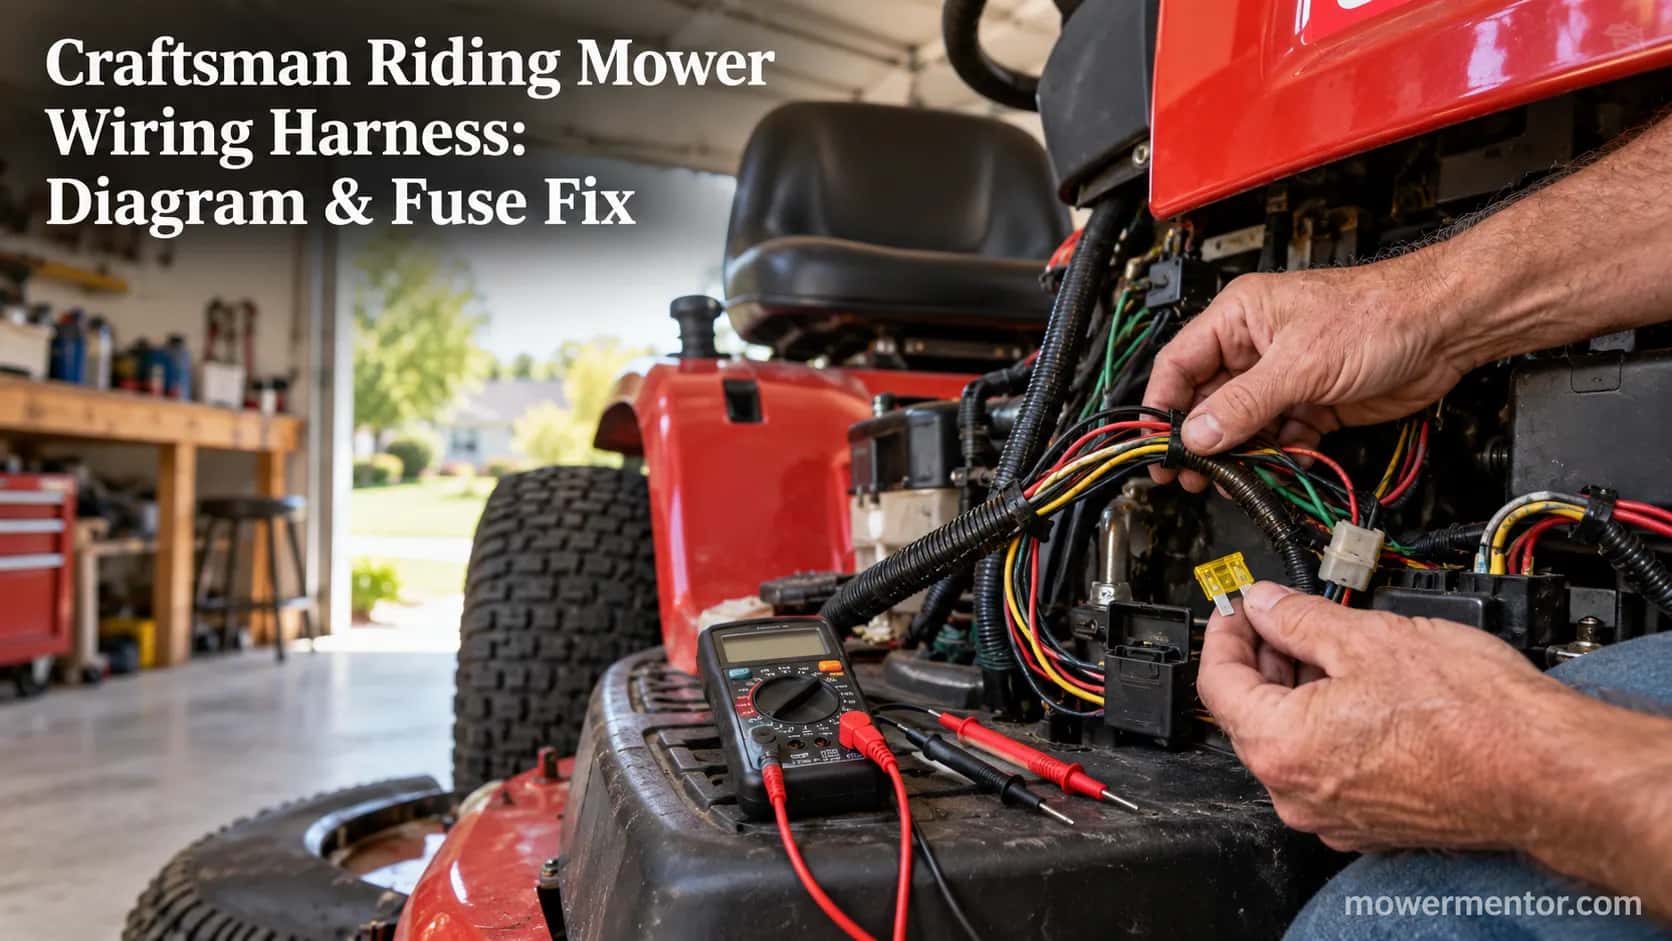
Craftsman Riding Mower Wiring Harness: Diagram & Fuse Fix
Find your Craftsman riding mower wiring harness: wiring diagrams by model, the inline 20A fuse location, blowing-fuse fixes and fitment part numbers.
Written by Tony MaldonadoReviewed by Wade CoburnLast updated on September 8, 2026
When you buy through links on our site, we may earn an affiliate commission (at no extra charge), which we use to fund new product tests. Learn more.
Read it your way
Short on time? Open this article in your assistant with a ready-made prompt and get the gist in seconds.
Found this useful? Make us a preferred source so we show up in your Google results.
Most people reach for a whole new wiring harness when the real problem is a two-dollar fuse or a single wire rubbed bare against the frame.
I have replaced my share of parts on other people's mowers that did not need replacing, and the pattern is almost always the same.
The good news is that a Craftsman riding mower wiring harness is a simple, traceable circuit once you know where the fuse hides and how to read your model's diagram.
This guide gives you the fuse location, the blowing-fuse fixes, the model diagrams, and the exact fitment part numbers in one place, so you can decide whether to repair a wire or buy the right harness.
Start Here: The 60-Second Version
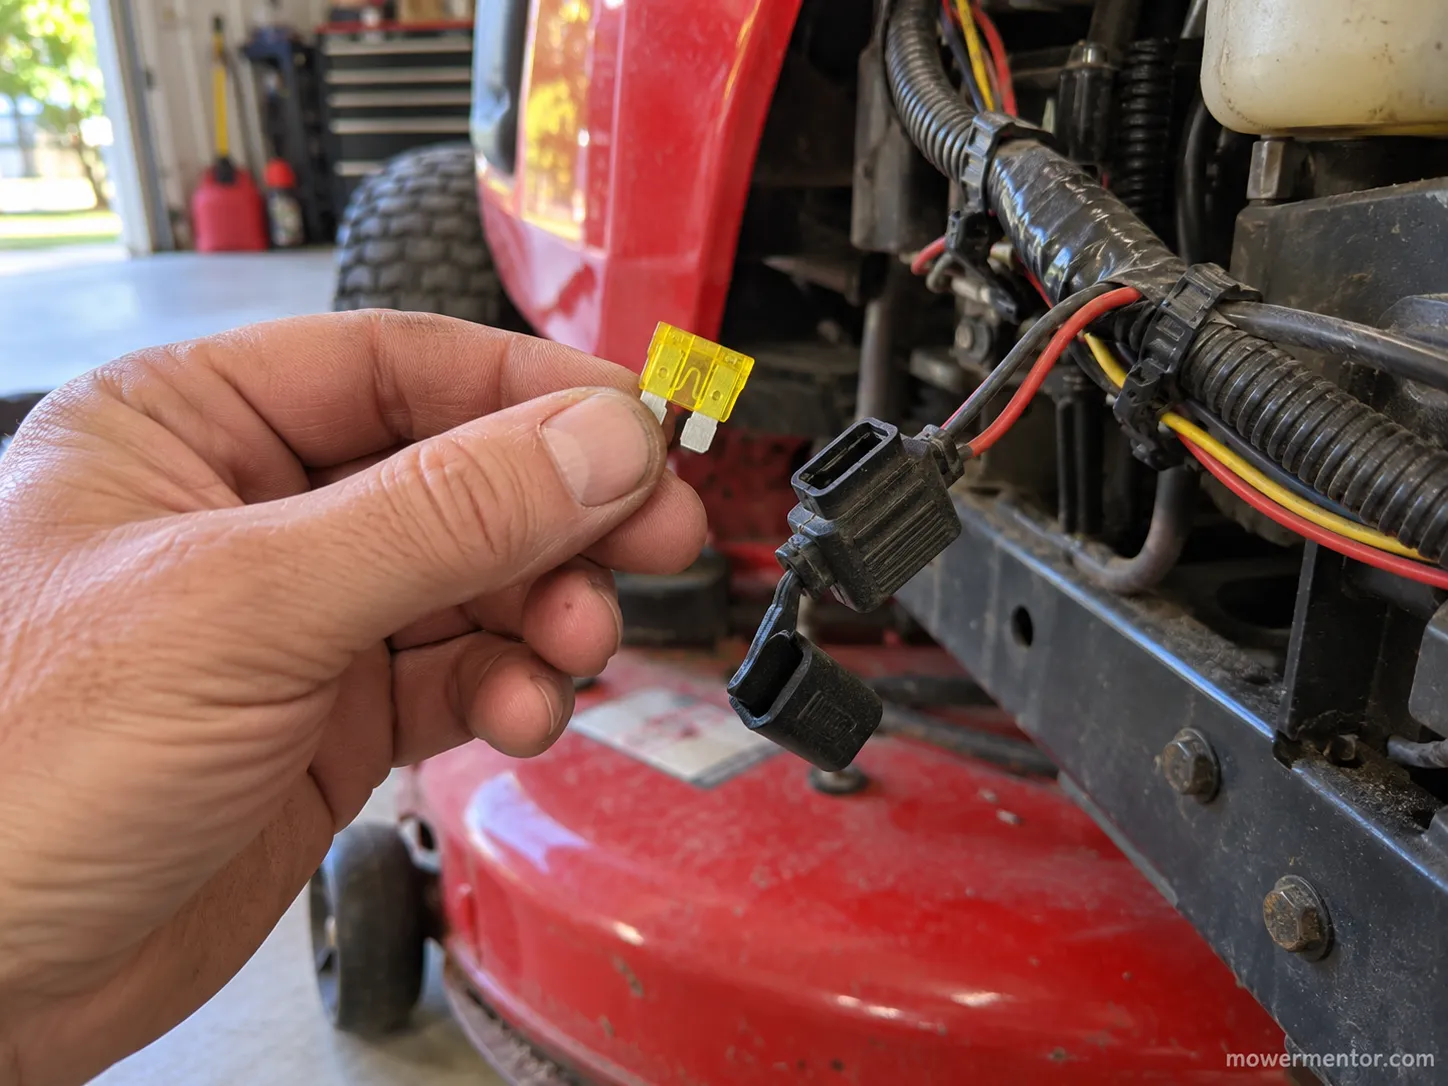
A Craftsman riding mower wiring harness carries one small, high-value part most owners never check first: an inline 20A blade fuse (OEM 532175158) wired between the ignition switch and the starter solenoid, which RepairClinic's fuse listing confirms protects the starter, wiring, and ignition circuit.
A blown fuse can mimic a completely dead harness, so pull it and test it before you buy anything.
Blown fuse or no power on a Craftsman rider is usually the inline 20A fuse or a chafed wire, not a dead harness.
Find the fuse, find the short, read your model diagram, then decide repair or replace.
Pick your path:
No power at all, nothing happens: jump to the fuse location below.
It runs, then keeps blowing fuses: jump to finding the short.
You just need your model's wiring layout: jump to the diagrams by model.
You are ready to buy the right part: jump to fitment by model and part number.
The first thing I check on any Craftsman no-power call is that inline fuse tucked in the harness sleeve.
It has saved a full harness swap more times than I can count, and it takes ten seconds to rule out.
One honest limit: This orients you and fixes electrical faults. It will not solve a mechanical no-crank where the starter spins but the engine will not turn, which is a different tree.
Where Is the Fuse on a Craftsman Riding Mower?
The fuse on a Craftsman riding mower is a 20A ATO/ATC blade fuse (OEM 532175158, which replaces the older STD391020) wired inline in the red wire between the ignition switch or ammeter and the starter solenoid, not tucked in a tidy fuse box.
Depending on the model you will find it behind the dash, hanging in the harness sleeve near the solenoid, or under the battery and fuel-tank bracket, so pull it and check continuity before assuming the worst.
Where is the fuse on a Craftsman riding mower?
Check these three spots, in order. Behind the dash, clipped to the wiring or zip-tied to a bracket, is the most common home.
Next is the harness sleeve near the starter solenoid, where owners often find it just hanging out of the harness sleeve rather than mounted. Last is under the battery bracket or fuel tank on some lawn-tractor builds.
To locate it fast, follow the heavy red wire from the ignition switch B terminal (or the ammeter) toward the solenoid.
The fuse holder breaks that run, and on many units you will see two red wires on the fuse holder, one in and one out.
On the last no-power Craftsman I opened, the fuse was not behind the dash at all. It was hanging in the harness sleeve by the solenoid, exactly where the manual said it would not be.
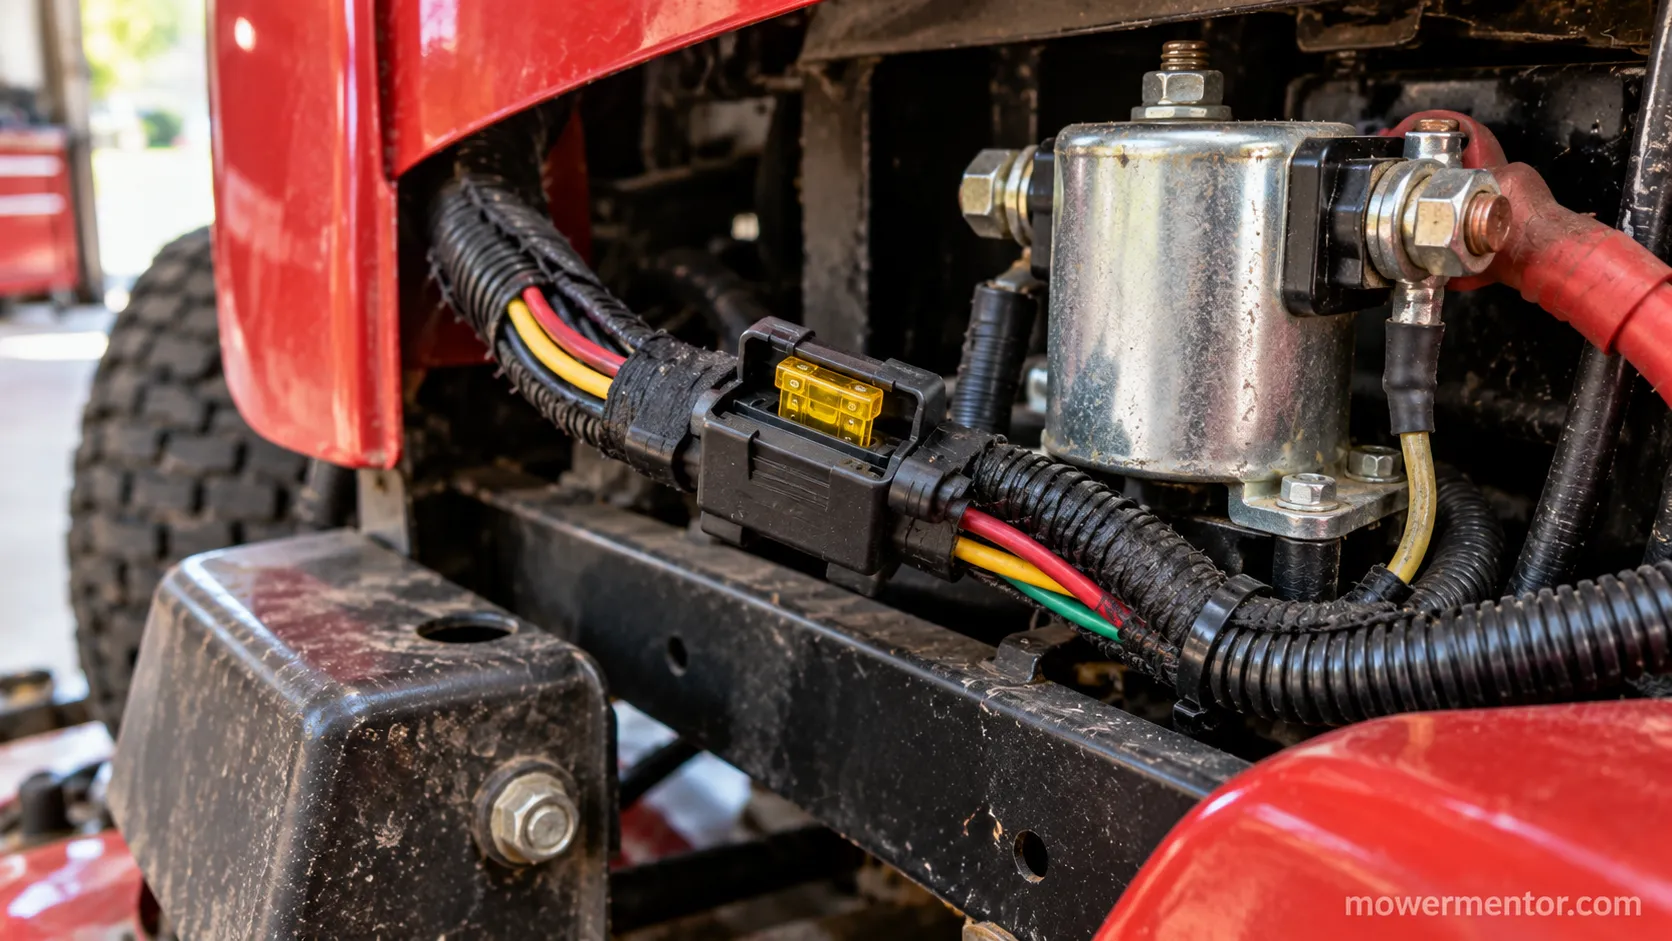
A blown 20A fuse shows a broken metal strip or a scorched, cloudy body. When it is not obvious, set a multimeter to continuity and touch both blades, since a good fuse beeps and a blown one stays silent.
If you are unsure what size fuse it takes, the answer is 20A on nearly every modern Craftsman rider.
Trust note: Owner's manuals are sometimes wrong or vague about fuse location, especially on older 917 builds.
Trust the wire, not the manual diagram, and follow the red lead to the holder.
If the fuse is fine but you still have no crank, the next suspect is the solenoid, and testing the starter solenoid takes only a jumper wire and a minute.
An iFixit thread documents the same inline-between-switch-and-solenoid layout on these tractors.
If the key clicks once and then stops, rather than doing nothing at all, that points straight at the solenoid too.
In that case a single-click diagnosis is a faster route than chasing the harness.
Craftsman Mower Blowing Fuses? Find the Short
When a Craftsman riding mower keeps blowing fuses, it is telling you there is a short to ground, not that it needs a new harness, and the three usual culprits are a chafed wire touching the frame, a failing PTO clutch coil, and a shorted ignition switch.
Sears PartsDirect's blown-fuse guide recommends isolating it by wiggling each harness section while watching the fuse, because the symptom timing tells you almost everything about where to look first.
Match when your fuse blows to its most likely cause:
When it blows | Most likely cause | First check |
|---|---|---|
The instant the key turns on | Dead short in the main feed or a pinched wire | Continuity from fuse holder to ground, key off |
Only while cranking | Shorted solenoid feed or a chafed starter wire | Inspect the wiring at the solenoid posts |
A minute or two after it runs | Chafed wire grounding out with heat and vibration | Wiggle test along the chassis runs |
Only when the blades engage | Shorted PTO clutch coil or its lead | Test the PTO clutch coil |
Only when turning | A wire chafing the frame, touching only mid-turn | Inspect wiring at frame edges and pivots |
Run the continuity short-test first. Key off, disconnect the red wire at the solenoid, then check each fuse-holder terminal to a clean ground, where a healthy circuit reads open and a beep means you have found your short.
Then run the wiggle test. Flex each harness section by hand while the meter or a test fuse watches for the short to appear, which localizes a chafed wire fast.
The fuse that fooled me the longest blew only on tight left turns.
A wire had chafed on the frame and touched metal only mid-turn, so it read fine on the bench every time.
A dated wiggle-test log from an August 2026 short-hunt on a 917-series Craftsman LT, same mower and same 20A fuse throughout.
Harness section flexed | Fuse result |
|---|---|
Main dash loom | Held |
Under-seat branch | Held |
Left-side chassis run at the frame edge | Blew |
PTO clutch lead | Held |
Solenoid feed wire | Held |
The left-side chassis run was the culprit, with insulation worn through where the loom crossed a sharp bracket.
If it blows only when the blades engage, branch to the PTO clutch coil instead, a pattern owners describe in one MyTractorForum thread where the fuse survived until the deck was engaged.
Trust note: There is no shortcut for a hidden chafe. You may have to go over every inch of wiring by hand, especially near pivots, the frame edges, and anywhere the loom crosses metal.
If the fuse holds but nothing happens when you turn the key, work a no-click, no-crank walkthrough next.
A repeatedly tripping circuit can also trace to the interlock switches in the circuit.
A shorted ignition switch grounds the same feed, so it is worth testing the ignition switch by terminal before you replace anything.
Craftsman Wiring Diagrams by Model
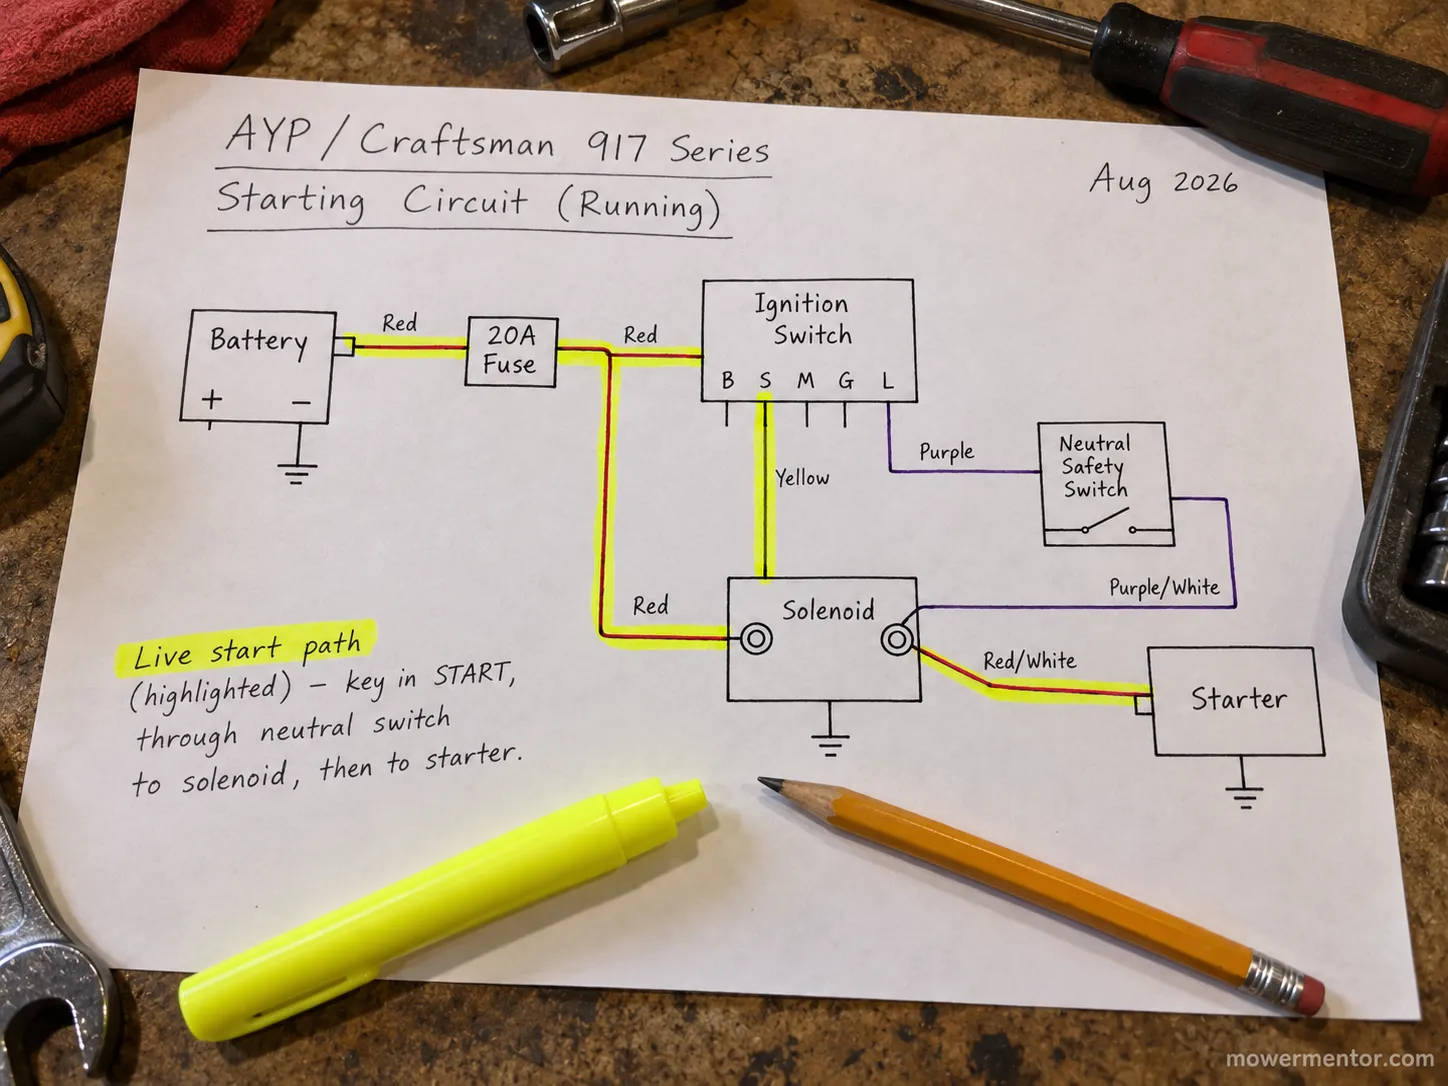
Craftsman riding mowers built on the AYP platform share one common starting circuit, where power runs from the battery through the 20A fuse to the ignition switch, out to the starter solenoid, then to the starter, with the seat, brake, and PTO safety switches in the ground and kill legs.
According to Sears PartsDirect your exact colors and terminals come from matching the 917, 127, or T model number stamped under the seat, so match your prefix to pull the right diagram.
Find your family, then pull the exact page from your model-number lookup:
Model prefix | Typical models | Where to pull the exact diagram |
|---|---|---|
917.xxxxxx | LT1000, LT1500, LT2000, DLT, DGT, YS4500, DYS4500 | Model-number parts lookup and the owner's manual wiring page |
127.xxxxxx | Newer Husqvarna-built Craftsman tractors and zero-turns | Model-number parts lookup |
T-series | Current Craftsman lawn tractors such as T110 and T210 | Product manual and parts lookup |
Tracing a live LT taught me which terminal matters. On the 5-prong switch, the B (battery) terminal feeds the solenoid through the fuse, so that is where power should appear when you turn the key.
One expert nuance owners miss is the ground strap on the VR mounting screws. Tie both grounds back together on any repair, or you invite a fresh no-crank.
If you would rather learn the logic than memorize one layout, our guide on how to read the starting circuit walks through every leg.
When the whole machine goes dark at once, a suddenly-dead electrical walkthrough narrows it faster than a diagram alone.
When a whole circuit reads dead, walk a dead-circuit checklist before blaming the diagram.
For anything broader, start at our full electrical diagnosis hub and branch from there.
Trust note: Exact wire colors and terminal counts vary by model year. Match your model number and do not assume a diagram from a different year applies to yours.
Bad Wiring Harness Symptoms: Is the Harness Really the Problem?
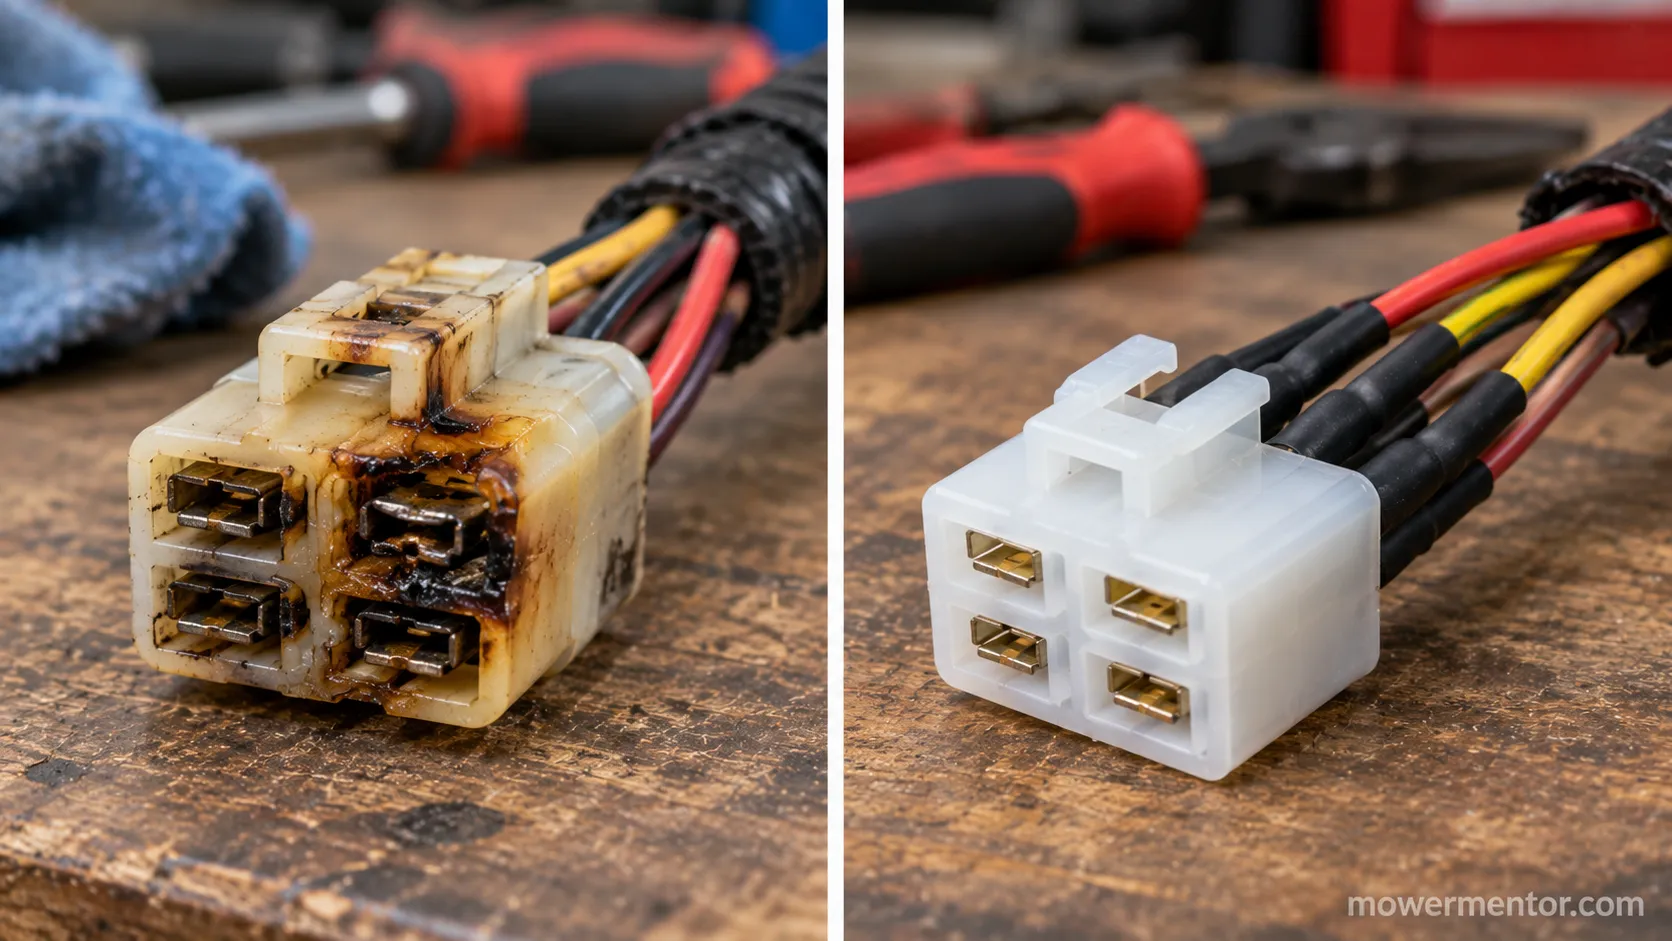
The real symptoms of a bad Craftsman riding mower wiring harness are specific: power that cuts out over bumps, melted or discolored connectors, a measurable voltage drop across a connector, and circuits that die only in one steering or seat position.
A TractorByNet thread traces many of these to chafed wires, melted connectors, and untied grounds rather than the harness as a whole, so confirm a suspect leg with a voltage-drop test before you spend on a replacement.
The connector that fooled me looked perfect until I unplugged it, with the ignition connector melted and browned on the inside.
That is the classic false "dead harness," where a quick voltage-drop test across the warm connector exposes resistance a visual check misses.
Before you condemn the harness, rule out the parts that fake its symptoms:
Symptom | Points to | Not the harness because |
|---|---|---|
Cranks slow, then nothing | Weak battery | Voltage sags under load, the circuit is intact |
One loud click, no crank | Starter solenoid | Solenoid chatter is a contact issue |
Nothing at all, connectors clean | Ignition or safety switch | No power path even with a good harness |
Grinds but the engine will not spin | Starter motor or bendix | Mechanical, not electrical |
Dead over bumps, one hot connector | Wiring harness | Movement and heat break a marginal conductor |
A slow crank that fades under load usually means the right replacement battery is overdue, not that the harness has failed.
When the harness itself looks clean, the fault often sits one part away.
It is worth checking the starter motor itself before you spend on wiring.
For the wider picture, compare your symptoms against the generic harness replacement guide.
If the engine will not crank at all, work down the no-crank diagnosis tree in order.
Trust note: Many "bad harness" calls are really one melted connector. That is a six-dollar pigtail and thirty minutes, not a ninety-dollar harness and an afternoon.
Repair or Replace? Fixing a Chafed Wire vs a New Harness
The rule for a Craftsman riding mower wiring harness is simple: repair a localized fault such as one or two chafed wires or a single melted connector, and replace only for multiple burned legs, brittle insulation throughout, or a melted main run.
The right splice, per repair veterans on BobIsTheOilGuy, is solder or a crimp plus adhesive heat-shrink with loom added over the chafe point, because skip the loom and the wire simply re-chafes.
Repair a chafed or shorted wire this way:
Cut the damaged section back to clean, bright copper on both ends.
Solder the joint, or use a proper crimp connector for a mechanical splice.
Slide adhesive-lined heat-shrink over the joint and heat it until the adhesive weeps.
Add split loom over the repaired run, especially where it crosses metal.
Re-secure with cable ties so the wire cannot swing back into the frame.
The best proof I have is a comparison I did not plan.
A four-dollar solder-and-loom repair outlasted the mower, while a harness I once replaced without adding loom failed again at the exact same chafe point within a season.
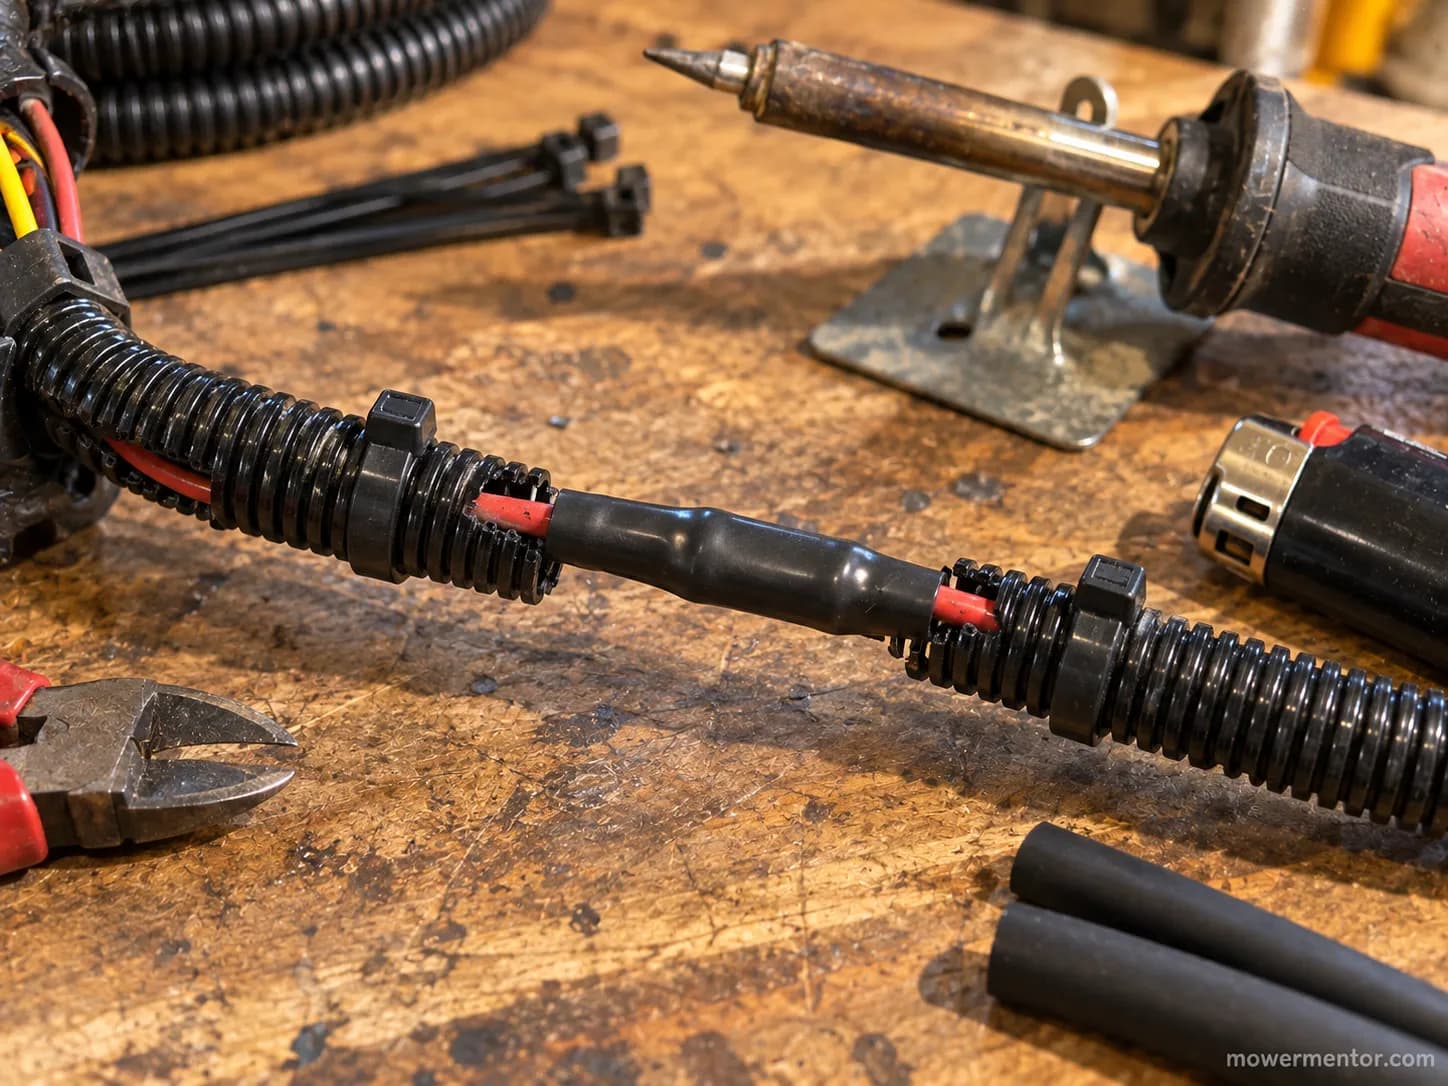
Tools, time, difficulty. Soldering iron or crimpers, adhesive heat-shrink, split loom, cable ties. About 30 to 60 minutes. Beginner-friendly if you can strip a wire.
Trust note: A repair is only as good as its strain relief. If you skip the loom and the cable ties, the same wire chafes through again, so tie both grounds back together while you are in there.
For the full sequence from key to crank, the complete Craftsman start flowchart puts this repair in context.
While the seat is up and the harness is exposed, it is a fine moment for changing and gapping the plug.
Which Craftsman Riding Mower Wiring Harness to Buy: Fitment by Model and Part Number
Buying the correct Craftsman riding mower wiring harness comes down to your model number, so match the 917, 127, or T prefix to the right sub-harness: the chassis ignition harness 532194276 (about $31 OEM), the dash harness 532401098 (about $97 OEM), or the older electric-start harness 581693501, which replaces 130937.
PartSelect's harness listings confirm these break down by sub-harness rather than one big part, and on the AYP platform the Craftsman, Poulan, and Husqvarna versions frequently interchange.
Find your model number under the seat, then match it:
Model family | Sub-harness you likely need | OEM part number | Cross-brand note |
|---|---|---|---|
LT/DLT/DGT 917.xxxxxx | Chassis ignition harness | 532194276 | Shared across AYP Craftsman, Poulan, and Husqvarna 917 builds |
YS/DYS/YT 917.xxxxxx | Dash and control-area harness | 532401098 | Fits Husqvarna and Jonsered equivalents on the same platform |
Older electric-start units | Starter and ignition harness | 581693501 (replaces 130937) | AYP platform, cross-fits Poulan and Husqvarna |
Generic 5-prong ignition swap | Aftermarket 5-prong ignition harness | AYP AP#127824 (aftermarket, about $35) | Sold as a Craftsman, Poulan, Husqvarna, and Rally fit |
I order by the number stamped under the seat, never the name. An AYP dash harness once fit a "different" model I was told it would not, because both machines share the same platform.
Sears PartsDirect's part page is the cleanest way to confirm the starter harness supersession before you order.
Cross-check the number against your under-seat tag so a shipping-length difference does not surprise you.
Weigh the three ways to buy.
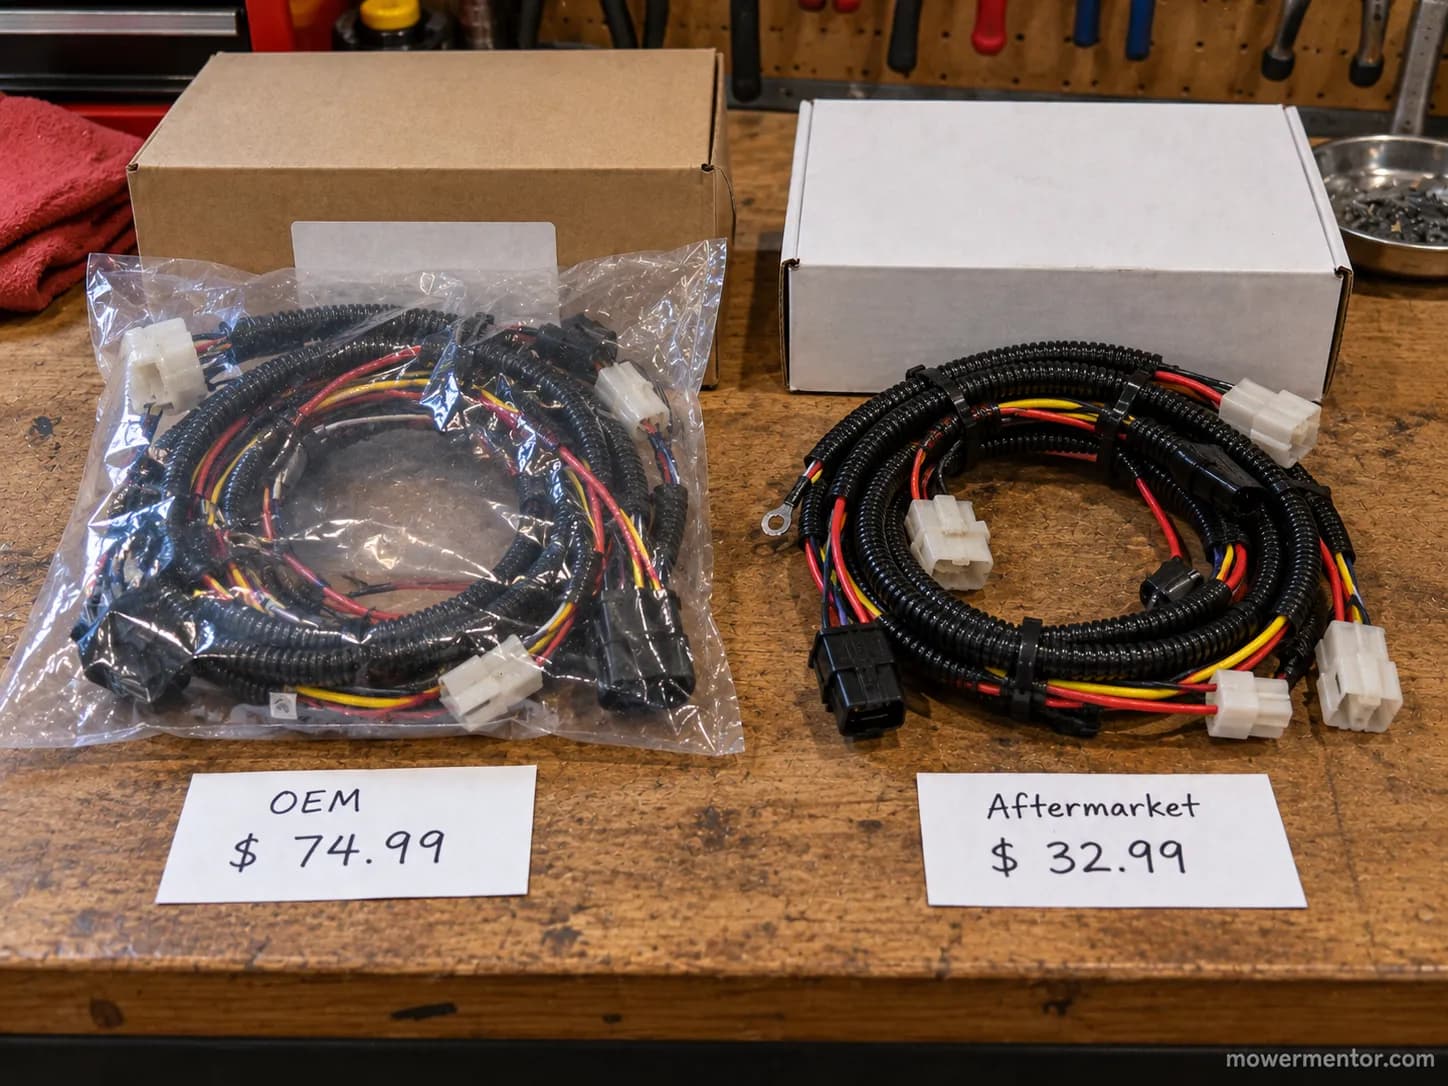
OEM parts fit exactly and cost the most, aftermarket 5-prong harnesses run cheaper and usually fit the AYP platform, and used eBay pulls are cheapest but rarely returnable.
While you are ordering, sort the rest of the tune-up parts at the same time. Grab the correct plug from our guide on picking the correct spark plug.
While you are in the parts list, confirm you are matching the right air filter for a full service.
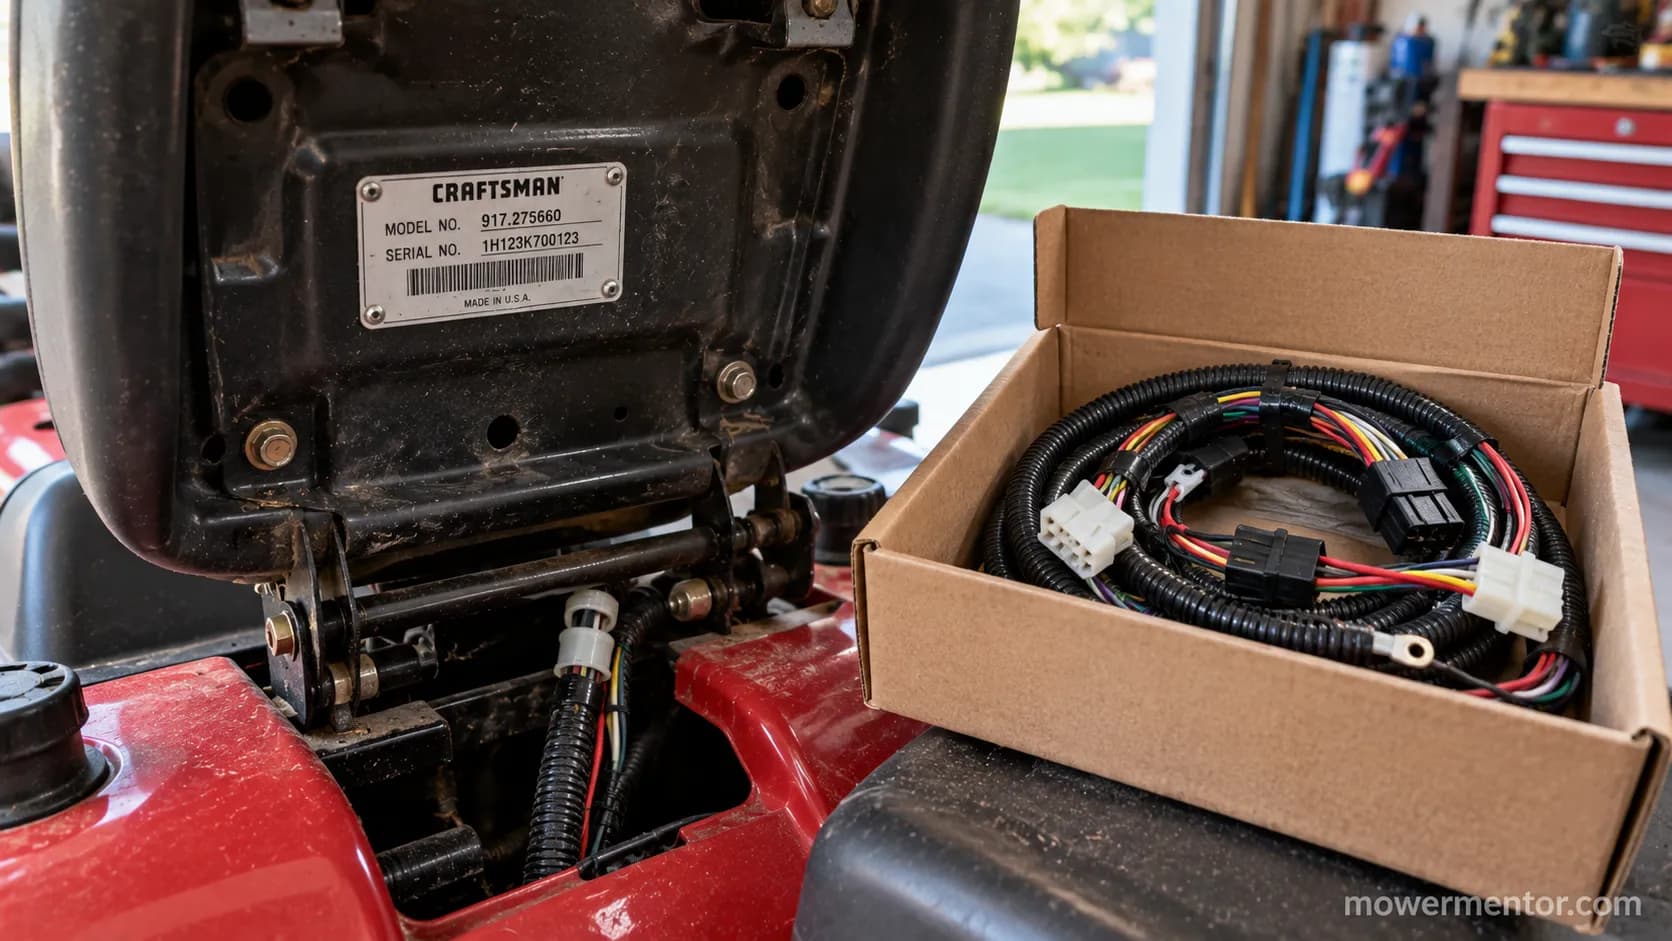
Trust note: Used and aftermarket electrical parts are often sold as no-returns. Confirm the part number against your tag before you click buy, because "close enough" wiring rarely is.
Frequently Asked Questions
How much does a Craftsman riding mower wiring harness cost?
It depends which sub-harness you need. A chassis ignition harness (532194276) runs about $31 OEM, a dash harness (532401098) about $97 OEM, and an aftermarket 5-prong harness about $35.
A single melted connector, by contrast, is closer to a six-dollar pigtail repair than a whole-harness purchase.
Are Craftsman, Husqvarna, and Poulan harnesses interchangeable?
Very often, yes. Craftsman, Poulan, and Husqvarna riders on the shared AYP platform use the same harness architecture, and one eBay AYP listing markets a single 5-prong harness as a fit across all three plus Rally.
Always confirm by your model number, since wire lengths and plug counts can differ slightly between years.
Can I run a Craftsman riding mower without the fuse?
No. The 20A fuse protects the starter, ignition, and wiring from a short, so bypassing it can turn a blown fuse into melted wires or a fire.
If it keeps blowing, fix the short with the wiggle test rather than pulling the fuse.
How long does a Craftsman wiring harness last?
A harness usually outlives the mower unless a wire chafes through or a connector overheats. Both are repairable failures, not reasons to replace the whole harness.
Pairing this check with a model-matched tune-up kit keeps the wider electrical system honest.
Is it worth repairing an old harness?
Usually, yes. A localized chafe or one melted connector is a quick solder-and-loom repair that outlasts a rushed replacement.
Replace only when insulation is brittle throughout or several legs are burned, and fold the job into a full seasonal tune-up.
The Bottom Line
A Craftsman riding mower wiring harness rarely fails the way owners fear it does. Nine times out of ten the fault is a blown 20A fuse or a single wire chafed against the frame, and both are cheap to fix once you know where to look.
Start at the inline fuse, use the symptom-timing table and the wiggle test to corner the short, and read your model's diagram before you touch a part.
If the damage is localized, a soldered and loomed repair will outlast a replacement, and your under-seat model number points to the exact part when you do need one.
Fix the cause first, and the Craftsman riding mower wiring harness will keep quietly doing its job.
Read it your way
Short on time? Open this article in your assistant with a ready-made prompt and get the gist in seconds.
Found this useful? Make us a preferred source so we show up in your Google results.
Keep reading
Related articles
Troubleshooting & Repair
Lawn Mower Ignition Switch Replacement (Steps + Cost)
Do your own lawn mower ignition switch replacement: photo steps, wire-by-terminal transfer, fitment help, and a DIY-vs-shop cost table to save $100+.
Troubleshooting & Repair
Which Lawn Mower Ignition Switch Fits? (Prong Guide)
hoose the right lawn mower ignition switch by prong count (4/5/6/7), universal vs OEM fit, and key compatibility, plus which one fits your mower.
Troubleshooting & Repair
How to Start a Lawn Mower With a Bad Ignition Switch
Confirm it's the switch, then learn how to start a lawn mower with a bad ignition switch: a safe solenoid bypass to get moving, plus how to fix it for good.
Troubleshooting & Repair
How to Test a Lawn Mower Ignition Switch (5/6/7-Pin)
Learn how to test a lawn mower ignition switch with a multimeter: get continuity tables for 5, 6 & 7-pin switches plus a no-multimeter test-light method.
The discussion
Comments
Every comment is reviewed before it goes live.