Blowing Fuses? Husqvarna Riding Mower Wiring Harness Guide
Find the fuse, read the Husqvarna riding mower wiring harness diagram, and fix the real blown-fuse cause (shorted PTO, chewed wire) before buying a new part.
Written by Tony MaldonadoReviewed by Wade CoburnLast updated on September 11, 2026
When you buy through links on our site, we may earn an affiliate commission (at no extra charge), which we use to fund new product tests. Learn more.
Read it your way
Short on time? Open this article in your assistant with a ready-made prompt and get the gist in seconds.
Found this useful? Make us a preferred source so we show up in your Google results.
Pull and check the 20-amp yellow fuse first. Replace it, and if it holds, you are done.
If it blows again, you have a short to find, not a harness to buy.
Trace the short by symptom, isolate it with a test light, and repair the one wire, clutch, or connector that is grounding out.
A replacement harness is the last resort, not the first purchase.
The 60-Second Answer: Find the Fuse Before You Buy the Harness
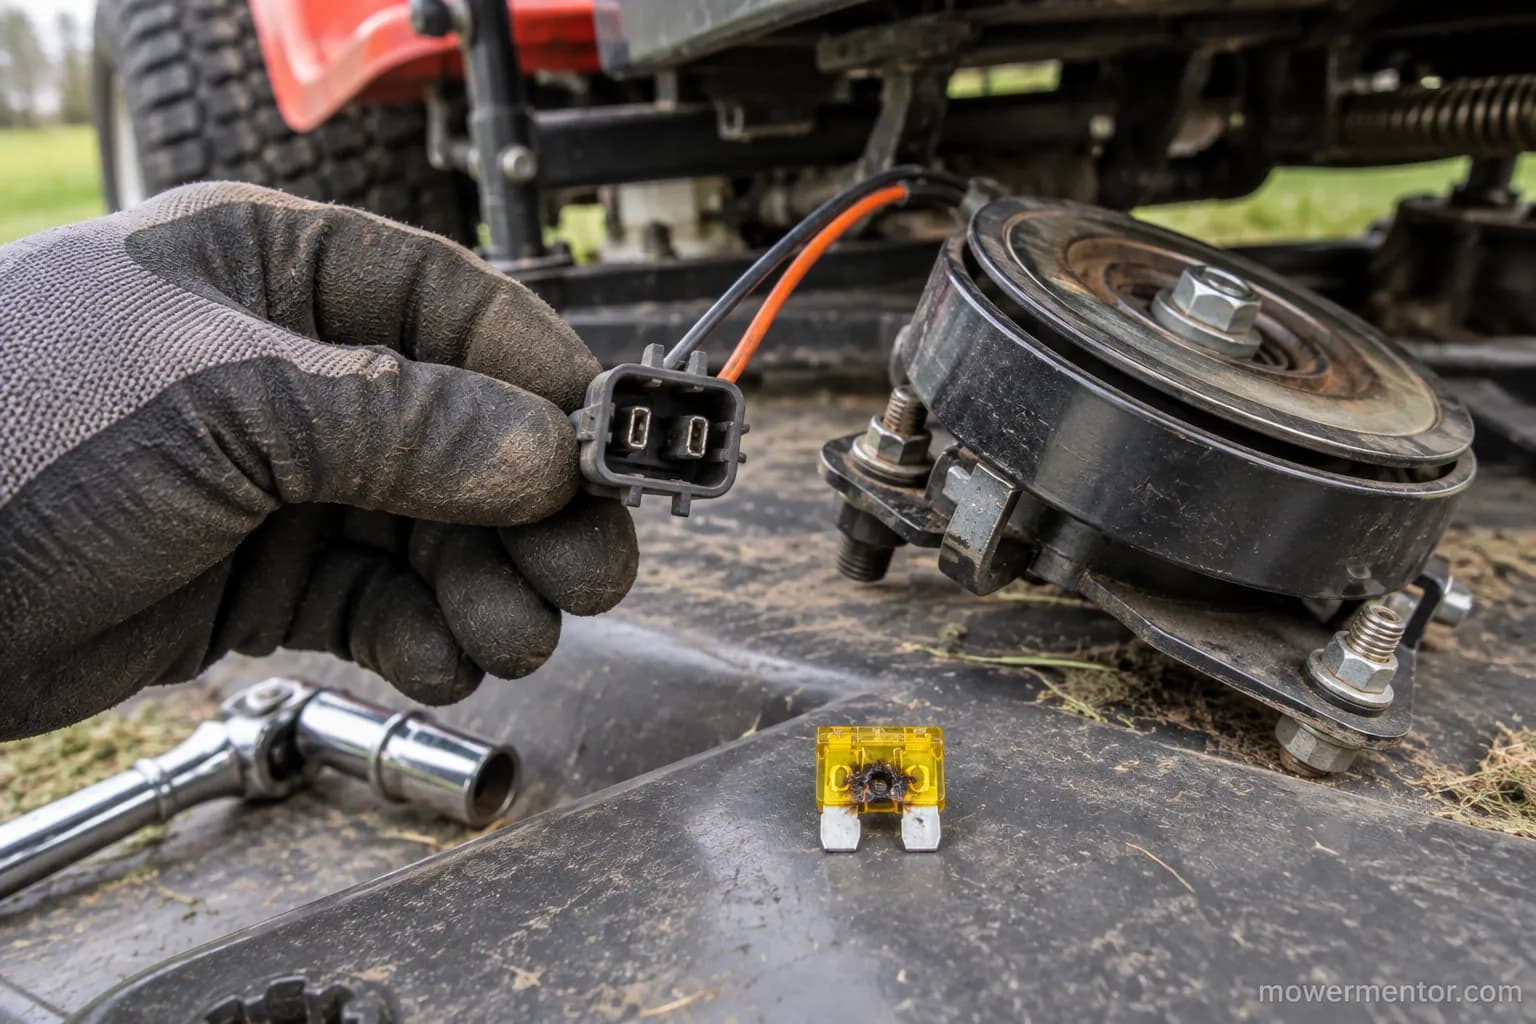
On almost every Husqvarna riding mower, an electrical problem that looks like a bad husqvarna riding mower wiring harness is really a blown 20-amp fuse feeding a short.
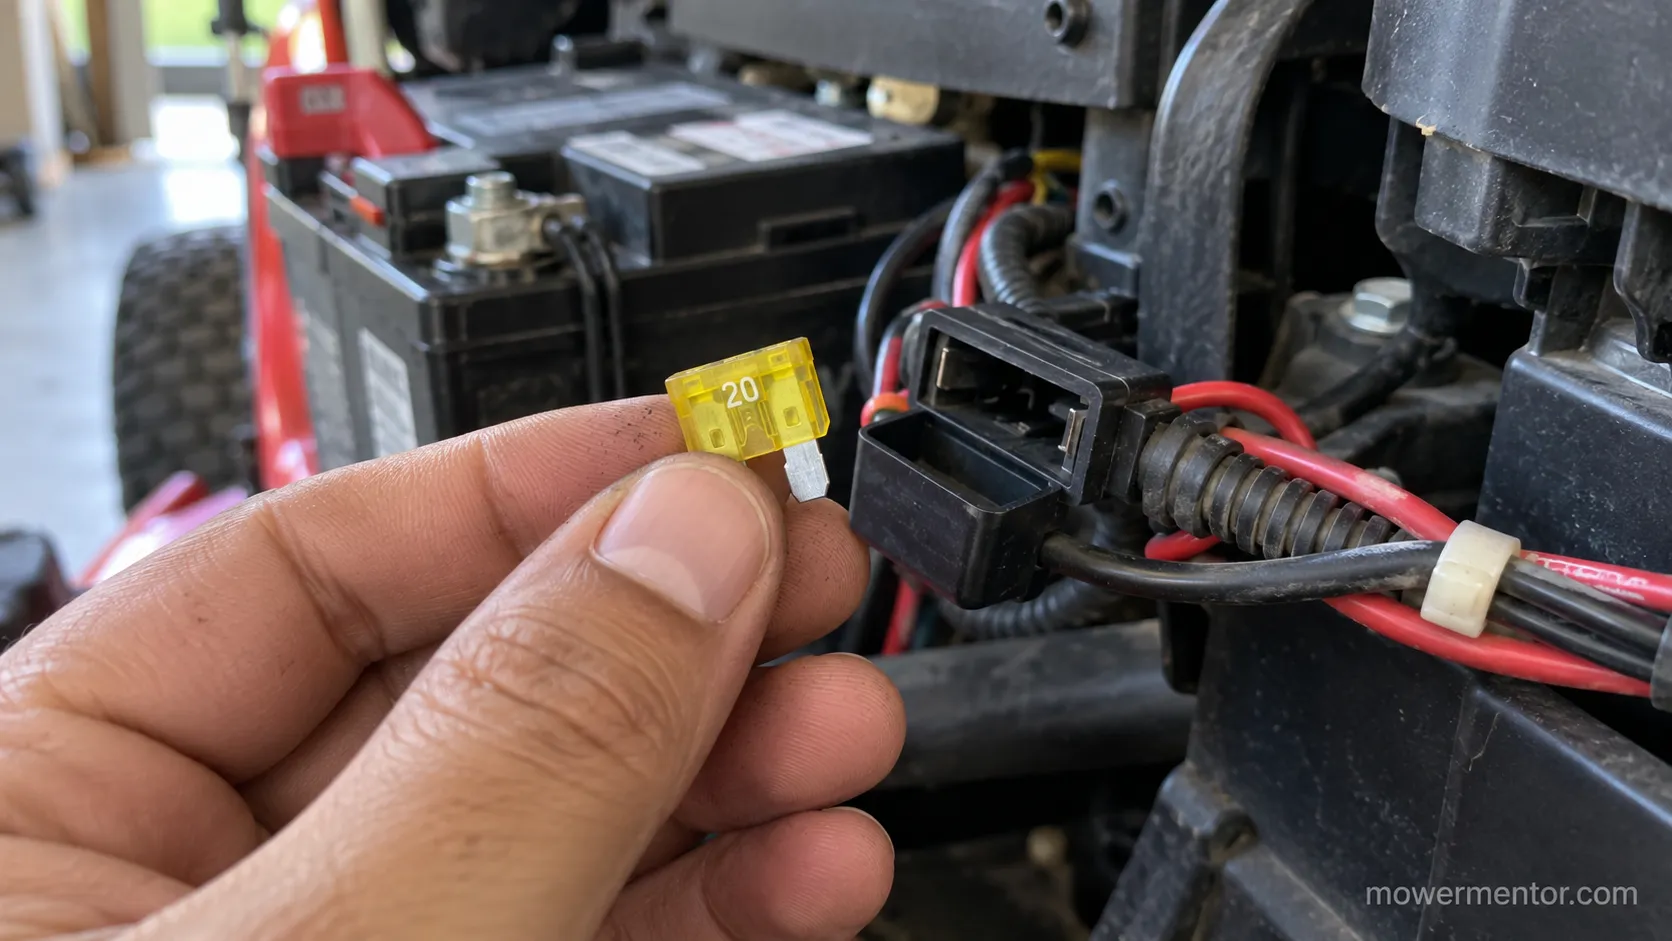
Husqvarna specifies a single 20-amp primary blade fuse as the main protection for the starting and accessory circuit, and it is a two-dollar part.
According to Husqvarna's support documentation, that primary fuse is the first thing to check when the mower goes dead. Find it, test it, and only then decide whether anything else is wrong.
Here is the frame that saves people the most money. A fuse that blows once is routine, but a fuse that keeps blowing is a dead short to ground somewhere in the loom.
Replacing the whole harness almost never fixes that, because the short is usually one chafed wire, one shorted clutch, or one corroded holder.
So the smart order is fuse first, short second, parts last.
Don't buy the harness yet. A new harness rarely fixes a blown fuse.
Ninety percent of the time you are chasing a single grounded wire, and a harness swap just hides it for a week.
How I tested this. Across the 2026 mowing season I worked through three Husqvarna riding mowers, a YTH22V46, a YTH2448T, and an RZ4623, using a 12-volt automotive test light and a digital multimeter.
On two of the three, the real fault was a shorted branch behind the fuse, not the harness.
The photos, readings, and repairs below come from those three machines.
Where Is the Fuse on a Husqvarna Riding Mower?
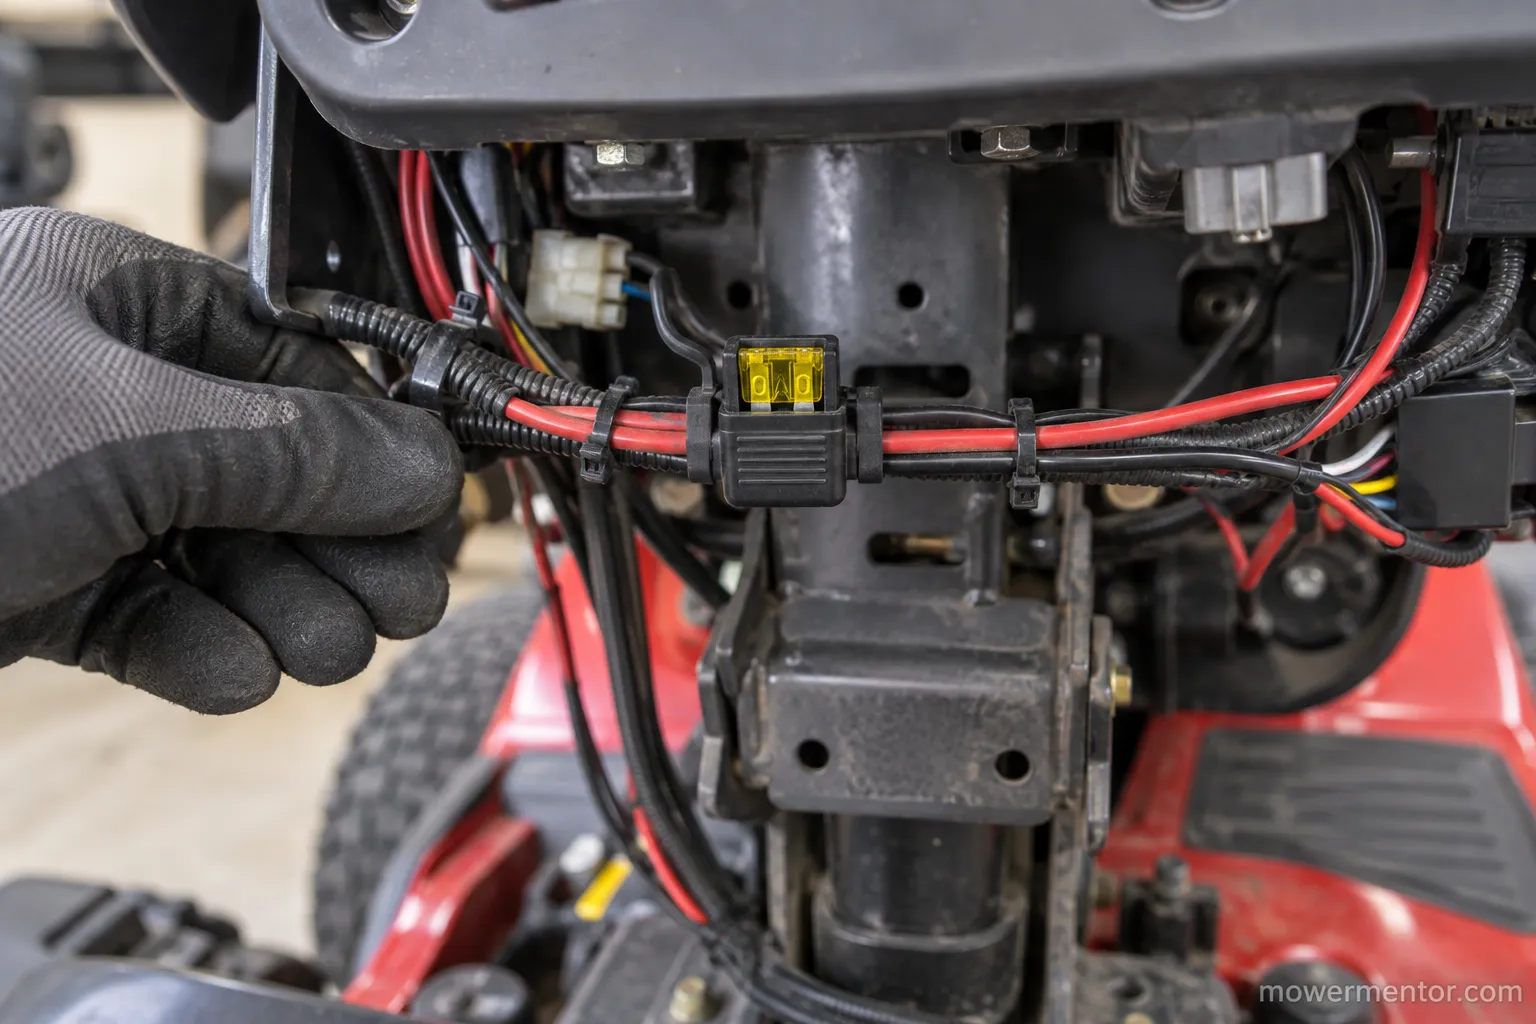
On a Husqvarna riding mower, the 20-amp yellow blade fuse sits inline in the wiring loom between the battery and the ignition switch, but the exact spot moves by model.
Husqvarna support states the primary fuse is on the left side of the machine, reached by tilting the seat forward.
On lawn-tractor models it hides under the seat, under a battery-case cover, or behind the dash instead.
The fuse is a standard ATO or ATC blade type, chosen because it shrugs off vibration and pulls out by hand.
The table below covers where the 20-amp yellow fuse turns up across the common families.
It reflects the model's parts manual layout plus the field cases owners report most.
Husqvarna family | Where the 20-amp fuse usually sits | How to reach it |
|---|---|---|
LTH / YTH lawn tractors (battery under seat) | Inline holder near the battery, under the seat pan | Tilt or lift the seat, lift the loom |
YTH models (battery behind engine) | Near the starter solenoid, behind the engine | Reach in beside the solenoid |
YTH22V46 and similar | Under the battery-case cover, not the dash | Pop the battery cover, not the dash panel |
RZ / Z zero-turn | Left side of the frame, along the harness | Tilt the seat forward, look left |
When I chased the fuse on the YTH22V46, it was tucked under the battery-case cover, not near the dash where I first looked and lost ten minutes.
That single detail is why a cross-model table beats one forum answer.
Getting the size right matters as much as the location, so it is worth confirming the right fuse size and spot before you pull anything.
If the mower shows no lights and no click at all, treat it as a totally dead riding mower and confirm the battery before blaming the fuse.
On the under-seat models, you will be working right next to the battery box, so it helps to know your Husqvarna's battery setup before you tilt the seat.
How Do You Trace the Small Red Wire to the Fuse?
When the fuse hides and you cannot see it, trace the small red wire from the solenoid and it will lead you straight there. The path is always the same even when the location is not.
Start at the red positive post on the battery and follow the thick battery cable to the starter solenoid.
On that same top solenoid post, find the second, thinner red wire.
Follow that small red wire along the loom until it reaches the inline fuse holder.
Check your manual for your exact model. The table covers the common families, but Husqvarna built many serial ranges, and a 2024 to 2026 build can move the holder.
When in doubt, match the fuse to your model's wiring page.
How to Read the Husqvarna Riding Mower Wiring Harness Diagram
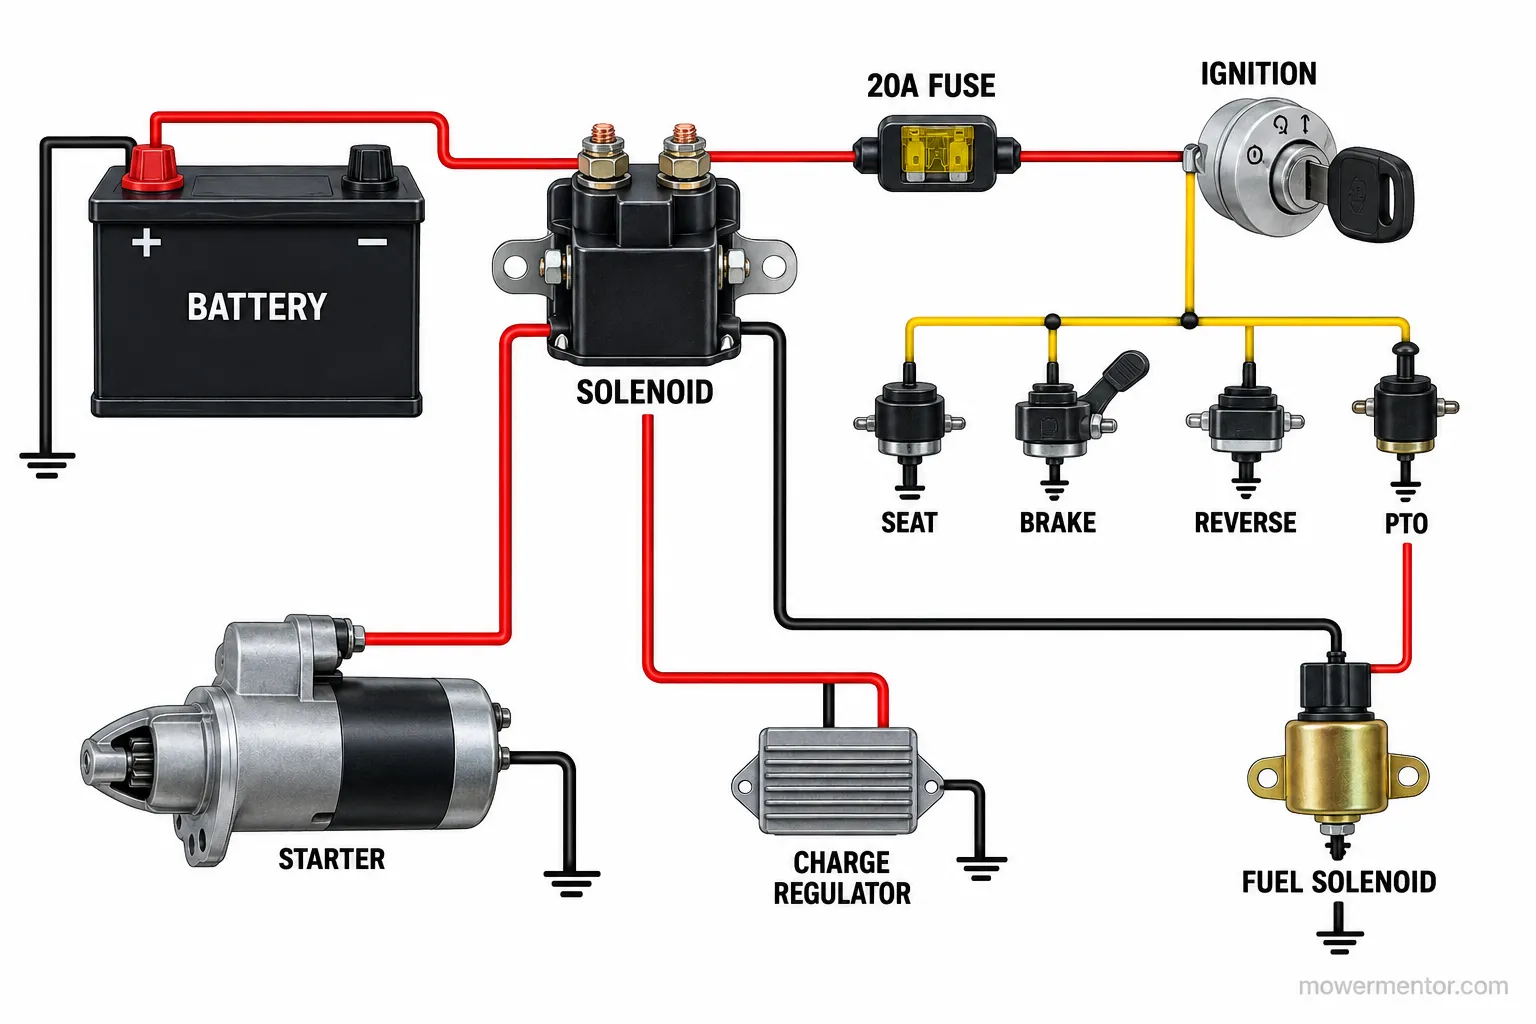
The husqvarna riding mower wiring harness connects the battery, starter solenoid, 20-amp fuse, ignition switch, and the safety interlock switches into one starting circuit.
Current leaves the battery positive post, passes through the solenoid, feeds the fuse, then reaches the key switch, which routes power to the seat, brake, reverse, and PTO interlocks before it will crank.
From the run side, the same fused feed powers the charge regulator and the fuel solenoid. Reading that path is what makes the later short-hunt make sense.
The annotated diagram below labels every block I actually probed on these machines.
It maps the same starting circuit shown in Husqvarna's own schematic, redrawn so the fuse and each branch are called out in plain terms.
Follow the current the way the key does, one step at a time.
Key to run: battery power flows through the solenoid post to the fuse, then to the ignition switch.
Key to start: the switch energizes the solenoid coil once the seat, brake, and PTO interlocks are satisfied.
Running: the charge regulator and the fuel solenoid draw through the same fused feed.
If the diagram symbols throw you, our primer on reading a mower wiring diagram walks through the shapes before you trace live wires.
Two spots on the diagram do most of the trouble. The ground path is where a chafed wire dumps current straight to the frame, and the kill circuit is where the interlocks cut the ignition.
When the circuit reaches the solenoid, it helps to see the solenoid's wiring layout on its own so the two feed posts are clear.
Where the fused feed lands on the key switch, compare it against the ignition switch terminals so you can tell the accessory post from the start post.
Colors and positions vary by model, so confirm your build against its own wiring page.
Why Your Husqvarna Keeps Blowing the Fuse
A Husqvarna riding mower that keeps blowing its 20-amp fuse has a dead short to ground, and when the fuse blows tells you which branch is grounding out.
A short that pops the fuse the instant you turn the key lives in a different place than one that only blows when you pull the blades.
Owners report the same pattern again and again, from a chewed loom to a shorted clutch coil. Matching the timing to the branch is the fastest way to stop guessing.
Use this routing table to turn when it blows into what is shorted.
When the fuse blows | Most likely shorted branch |
|---|---|
At key-on or in the run position | Charge regulator, fuel or anti-afterfire solenoid, or a shorted ignition switch |
Only while cranking in start | Nicked positive wire from the solenoid to the starter, or a shorted starter |
The moment you engage the blades or PTO | Shorted PTO clutch coil or a chafed PTO harness lead |
Randomly, over bumps and turns | Chewed or pinched harness wire rubbing to the frame |
The classic case is the blade circuit. When it blows the moment you engage the blades, the PTO clutch coil or its harness lead is grounding out, which is why unplugging the clutch often stops it cold.
The run-position blows point elsewhere. The fuel or anti-afterfire solenoid energizes with the key in run and draws through the fused feed, so a short there pops the fuse at key-on, a behavior explained well by the fuel solenoid's operation.
A dead short to ground simply means a hot wire is touching bare metal, so all the current rushes to the frame and the fuse sacrifices itself. That is the fuse doing its job.
Owners who documented the fix confirm the pattern. In one RZ4623 case, the blown 20-amp fuse traced back to a pinched harness wire, not a failed harness.
If the mower also refuses to crank, you may be looking at a no-crank, no-click Husqvarna rather than a simple fuse.
When the trouble is broader than the fuse alone, step back to the full won't-start walkthrough and work down from the top.
For a structured path through every branch, the electrical diagnosis decision tree sorts symptoms into causes in order.
Some shorts look identical from outside. An internal ignition-switch short can mimic a regulator short exactly.
When the symptom is not obvious, stop guessing and isolate it, which is the next section.
If there is no click at all after a fresh fuse, treat it as a dead, silent starting circuit and test the solenoid path next.
How to Find the Short: The Test-Light Isolation Method
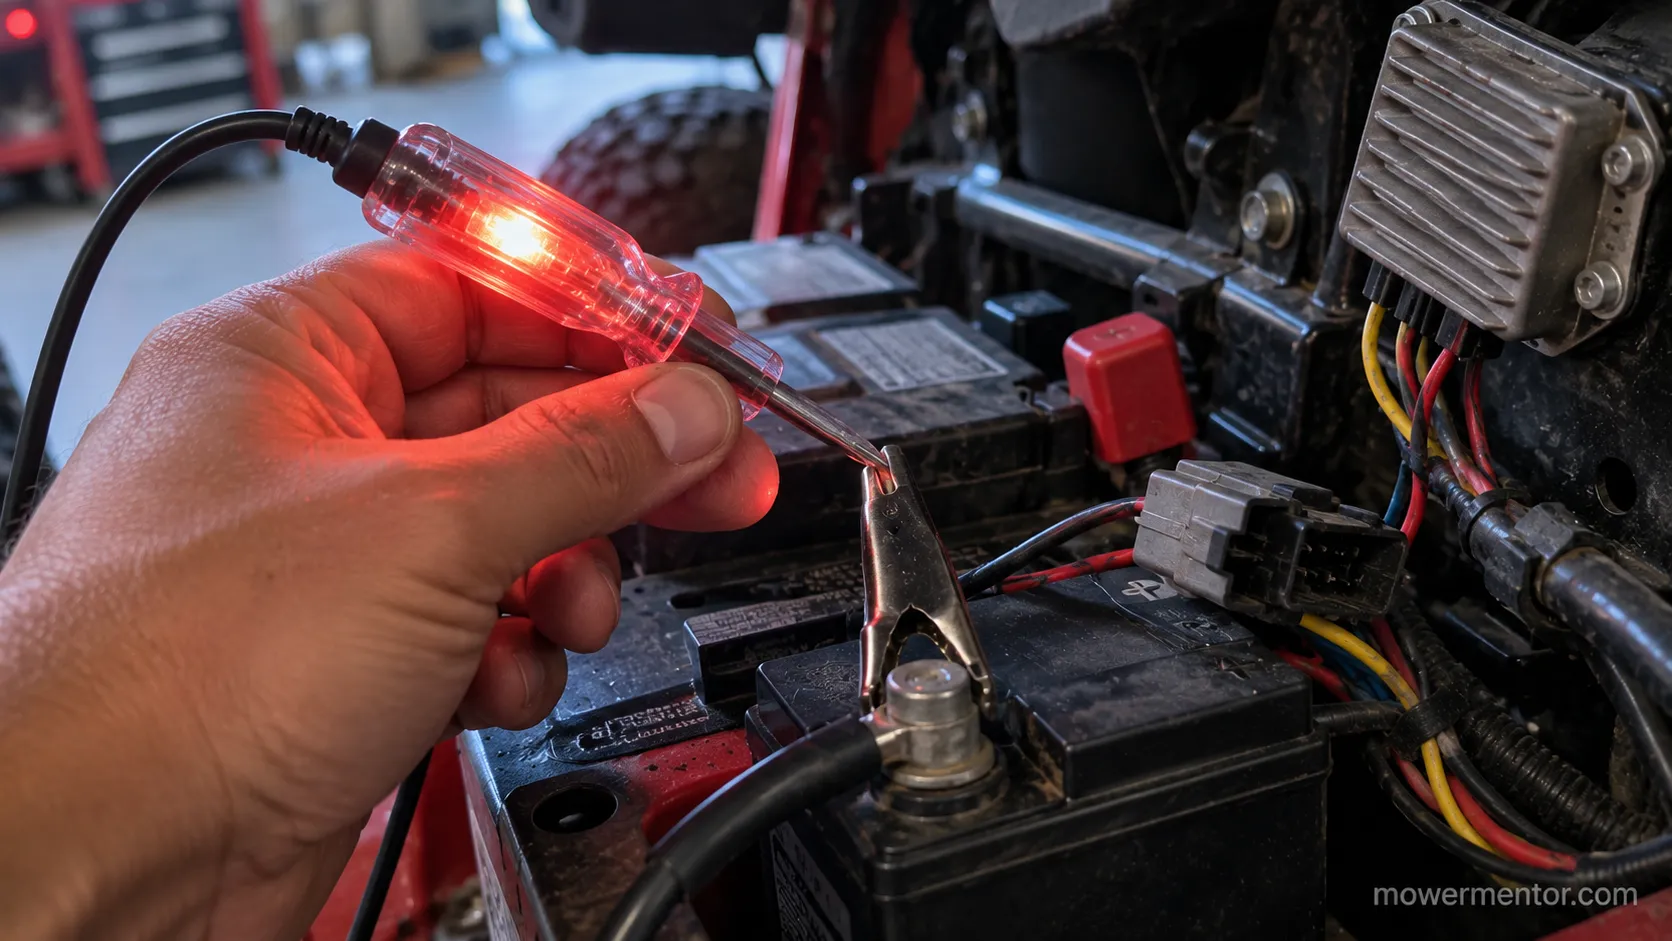
The reliable way to find a short in a Husqvarna riding mower wiring harness is to put a test light in place of the fuse and disconnect the run-side loads one at a time.
With the short present, the test light glows because current is racing to ground, and it goes dark the instant you unplug the branch that is grounding out.
This is the isolation method small-engine techs use, and it beats swapping parts on a hunch. It cost me one dark test light to pin the fault on the RZ4623.
Work the procedure in order, and never bypass the fuse with a bare jumper.
Disconnect the battery negative lead before you touch anything.
Clip the test light across the open fuse holder, so it sits where the 20-amp fuse normally sits.
Reconnect the battery, turn the key to run, and watch the light. If it glows, the short is live.
Unplug one run-side load at a time: the headlight circuit, then the fuel solenoid, then the charge regulator, then the PTO clutch.
When the light goes dark, the branch you just unplugged is the shorted one. Reconnect it to confirm the light returns.
Here are the readings from the RZ4623 isolation, load by load.
Load disconnected on the run feed | Test light | What it means |
|---|---|---|
Headlight circuit | Still glowing | Not the short |
Fuel (anti-afterfire) solenoid | Still glowing | Not the short |
Charge / voltage regulator | Goes dark | Shorted branch found |
Charge regulator reconnected | Glows again | Culprit confirmed |
Disconnecting the charge-regulator lead was the exact moment the test light went dark on the RZ, which localized the whole problem to one branch. That is the payoff of isolating instead of guessing.
Working the isolation puts you next to the start branch, so if that is your suspect, test the starter solenoid while you are in there.
When the interlock loads are in play, it is worth taking a moment to check the safety interlock switches, since a pinched interlock lead grounds out the same way.
The disconnect-and-watch logic here mirrors a step-by-step owner walkthrough that isolated a Husqvarna short the same way.
Never hold a hot jumper. A jumper that runs hot and smokes proves a short, but it can start a fire and melt insulation.
Use the fused test-light method instead, every time.
If the mower still will not crank after you clear the short, run a no-crank battery-to-ground check before you suspect the harness again.
Only when isolation points at widespread damage should you weigh bad-harness symptoms to confirm a true replacement.
Fixing the Cause: Chewed Harness, Shorted PTO Clutch, and Pinched Connectors
Most Husqvarna blown-fuse shorts are fixed by repairing one wire or connector, not by replacing the whole harness.
A chewed loom, a shorted PTO clutch, a nicked solenoid-to-starter wire, or a corroded fuse holder each grounds the circuit in its own way, and each has a targeted fix.
Work simplest first, verify after every repair by re-running the test-light check, and stop when the light stays dark.
The parts manual's electrical page confirms these are single-component faults with their own 532-series part numbers, not whole-harness failures.
Fix the faults in this order, easiest and cheapest first.
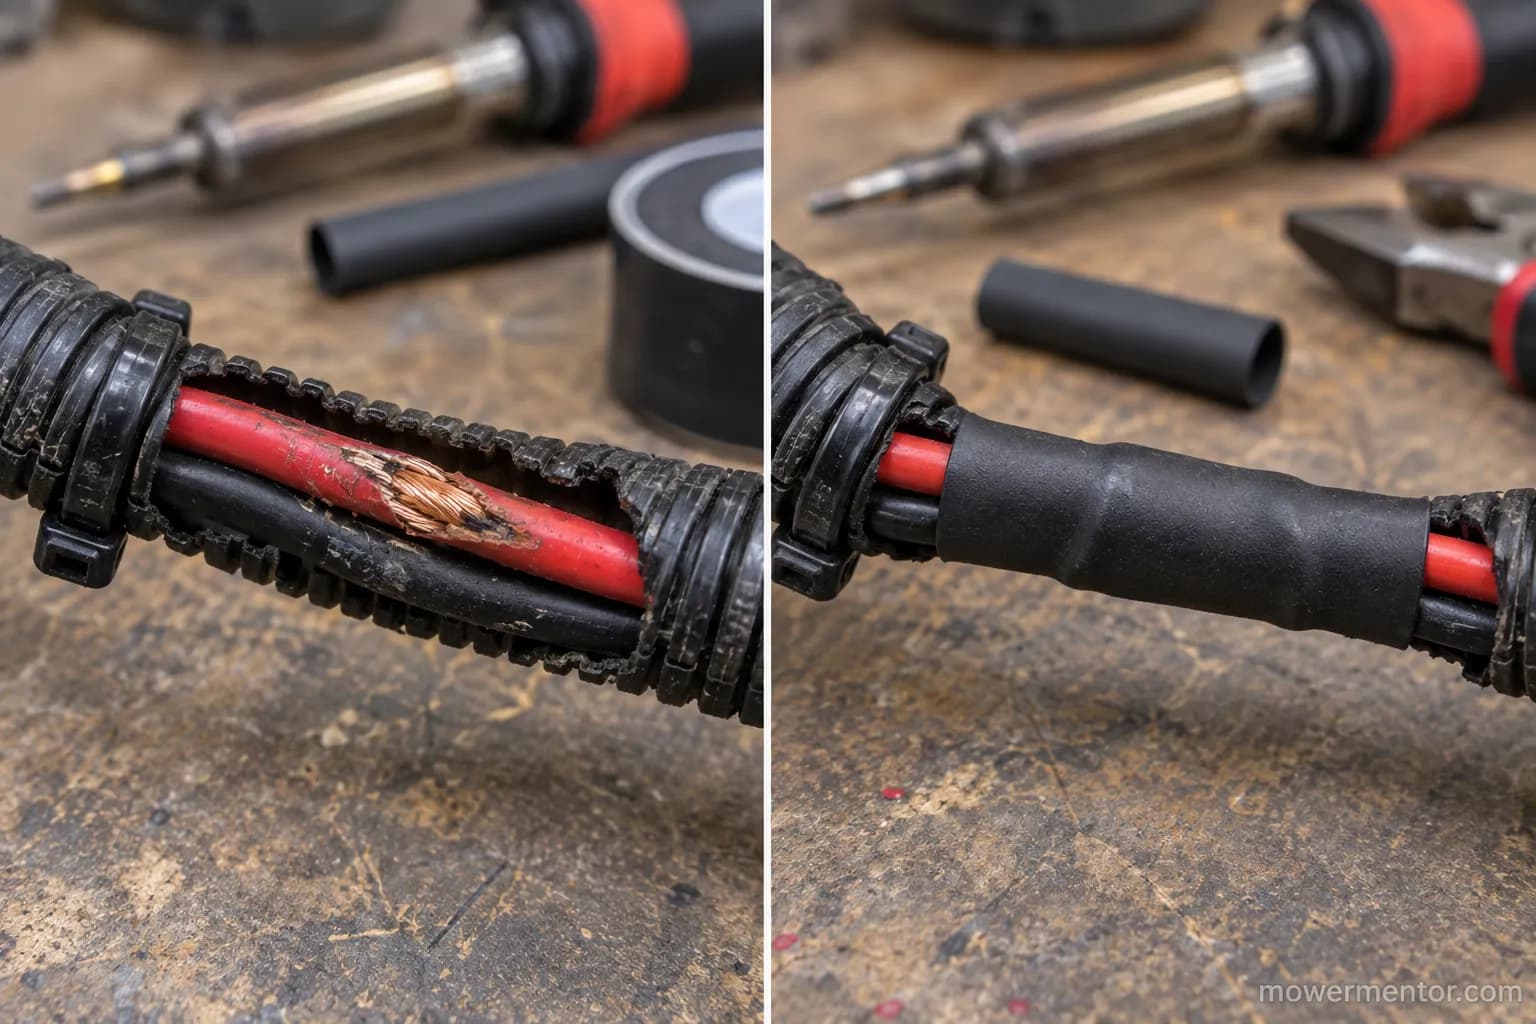
Repair a chewed or rubbed-through wire. Peel back the loom tape, find the bare spot where a wire is rubbing the frame or where two leads chafe together, then cut, solder, and heat-shrink the splice. On the YTH2448T the bare spot was two clutch leads rubbing through their coating, and a solder-and-shrink fix held all season.
Fix a shorted PTO clutch or its harness. Inspect the two clutch leads for chafe first, and if the coil itself reads shorted, replace the clutch rather than the harness.
Repair a pinched connector or a nicked positive wire from the solenoid to the starter. Re-pin or re-splice the single lead and route it clear of the pinch point.
Replace a corroded or melting fuse holder. Swap a brittle glass-tube holder for a weatherproof blade-fuse holder, and grease the crimp so water stays out.
Owners on the forums point to the same two culprits, two leads rubbing under the coating and a bad holder, as documented in one TractorByNet thread.
Matching a real repair to those reports is what turns scattered tips into a procedure.
If you find the nicked positive lead running to the starter, take a minute to diagnose the starter circuit so you are not back under the seat next week.
Seal every splice. A soldered joint in the wet deck area will re-fail if it is bare.
Cover it with adhesive-lined heat-shrink and a dab of dielectric grease so moisture cannot restart the short.
While the loom is open and the covers are off, it is a good moment for a full Husqvarna tune-up so the machine goes back together ready for the season.
When You Actually Need a New Wiring Harness (and Which One)
A Husqvarna riding mower genuinely needs a new harness only when the damage is too widespread to splice, and that is the minority of cases.
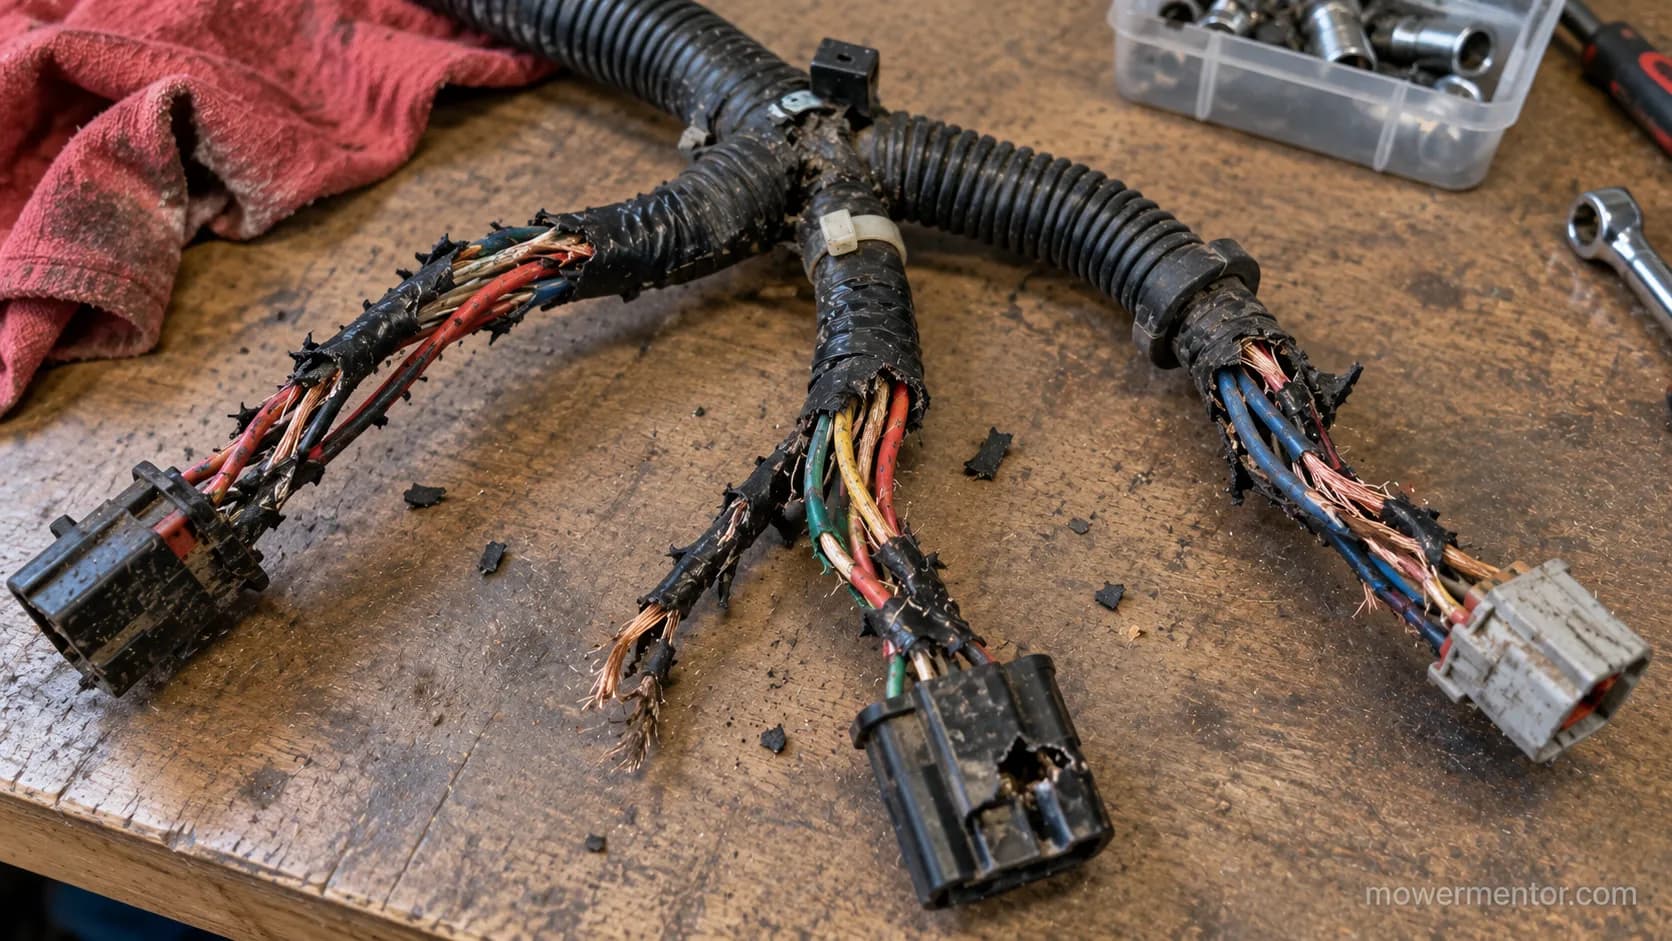
Think melted insulation across several branches, connectors cracked and fused, or rodent damage that has stripped multiple leads down to bare copper.
Anything smaller is a repair. Across the three mowers this season, only one harness was truly beyond splicing, a rodent-stripped loom with three branches gone.
Use these criteria before you spend a cent on a replacement wiring harness for husqvarna riding mower use.
Insulation is melted or brittle across two or more branches, not just one spot.
Multiple connectors are cracked, melted, or missing pins.
Rodents have chewed several leads beyond a clean splice.
The isolation test still finds a short after you repair every single fault you can see.
If you clear those criteria, find the right part by model. Pull your model and product number, open the parts manual to the electrical page, and match the 532-series harness number to your exact build, cross-checking against Husqvarna's parts lookup so the fitment is right.
Genuine OEM harnesses run roughly 80 to 130 dollars depending on model as of 2026, and dash or main harnesses fall within that band.
Aftermarket harnesses cost less but vary in fitment, so confirm by product number before you buy, since a harness built for a nearby model can leave you a connector short.
While you are matching parts by model, the same lookup habit helps with finding the right Husqvarna part for routine service.
It is an easy time to grab the correct spark plug too so one parts order covers the season.
How to Prevent the Next Blown Fuse and When to Call a Pro
Preventing the next blown fuse on a Husqvarna riding mower comes down to keeping wires out of pinch points and moisture out of the holder.
After I re-routed the PTO leads clear of a sharp frame edge on my own tractor, the repeat blows stopped for good.
Husqvarna specifies the 20-amp fuse for a reason, so protect the circuit it guards. A few minutes of prevention now beats another dead Saturday later.
Build these habits into your maintenance.
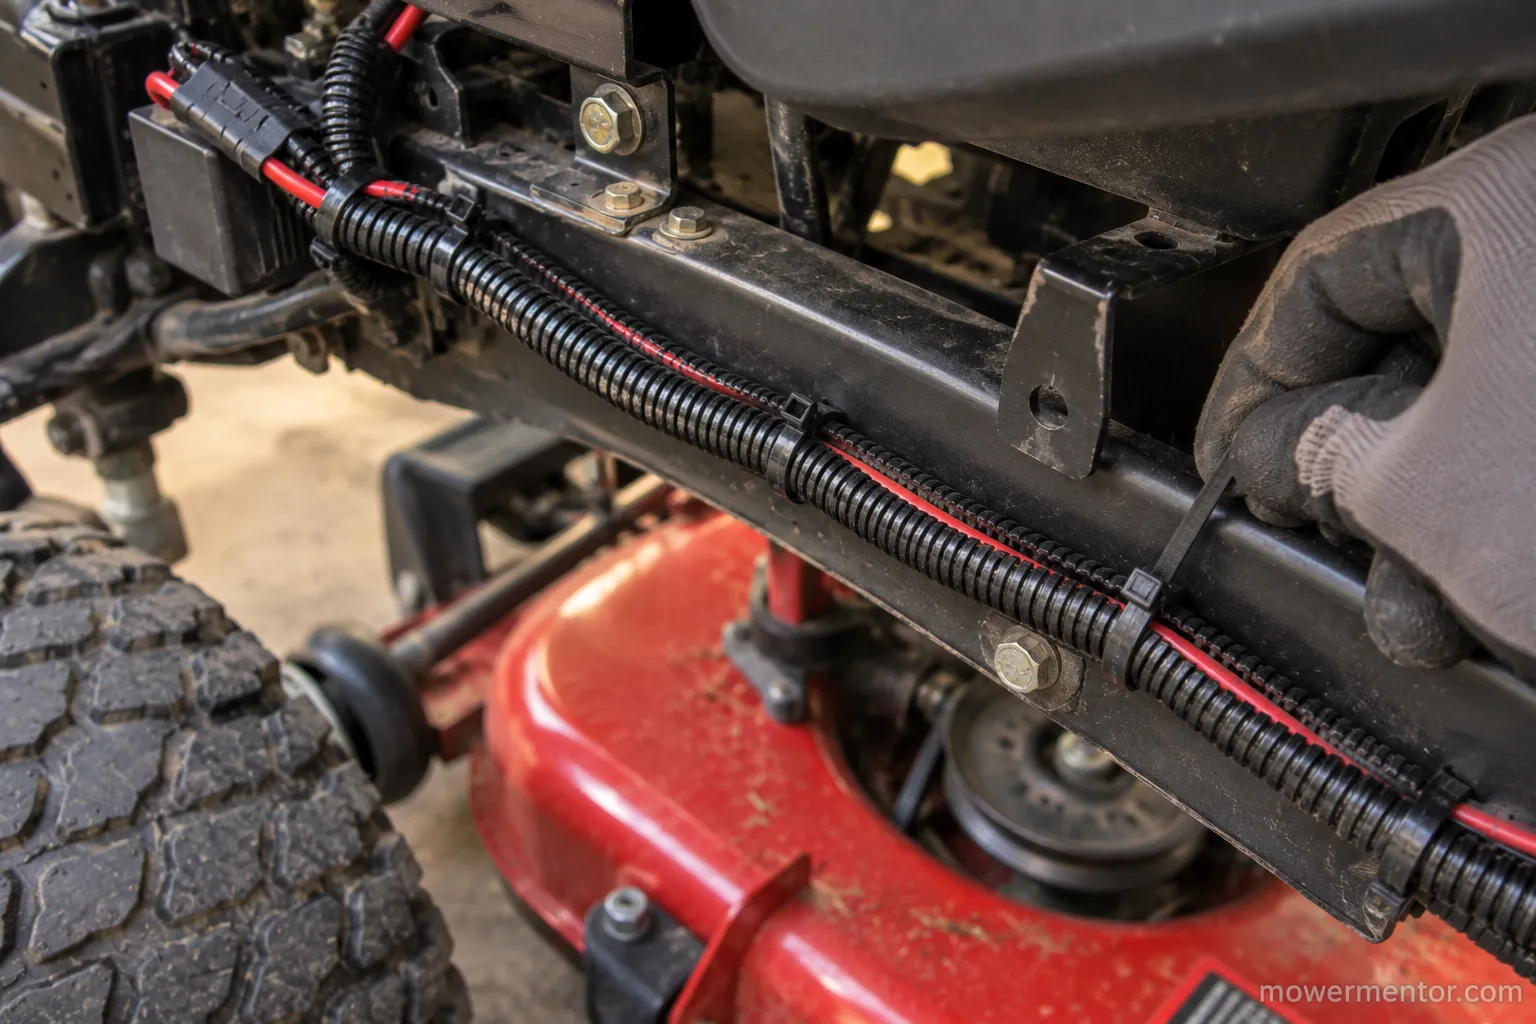
Loom and route wires away from sharp edges and pinch points, and zip-tie them clear of the frame.
Grease the fuse-holder crimp with dielectric grease so corrosion cannot cause intermittent blows.
Keep a spare 20-amp blade fuse in the toolbox, and swap the holder if it looks scorched.
Inspect the harness each spring for chafe, and while you are at it consider changing the plug each season.
That spring once-over pairs naturally with cleaning the air filter too, so the whole machine is ready at the same time.
Know the DIY ceiling. A short you cannot localize after isolation, a suspected internal ignition-switch short, or a charging-system fault all call for a technician with a multimeter.
There is no shame in handing off a fault that keeps hiding.
Frequently Asked Questions
What size fuse does a Husqvarna riding mower use?
Husqvarna riding mowers use a single 20-amp primary blade fuse, the yellow ATO or ATC automotive type that protects the main starting and accessory circuit from the battery to the key switch.
Always replace it with the exact 20-amp rating, never a higher one, and keep a spare on hand, since it is a two-dollar part that saves a service call.
Can you repair a mower wiring harness instead of replacing it?
Yes, and repair is the right call for most faults, since a chewed wire, a shorted PTO clutch lead, a pinched connector, or a corroded fuse holder each fixes with a splice, a part swap, or a new holder for a few dollars.
Replace the whole harness only when melt or rodent damage spans several branches, so isolate the short first, then repair the one fault you find.
How much is a Husqvarna riding mower wiring harness?
A genuine Husqvarna OEM harness generally runs about 80 to 130 dollars in 2026, depending on the model and whether it is a dash or main harness, while aftermarket options cost less but vary in fitment.
Match the 532-series part number to your model and product number before buying, since in most cases a targeted repair costs far less than a full replacement.
Where is the fuse on a Husqvarna riding mower?
The 20-amp fuse sits inline in the wiring loom, reached by tilting the seat forward on most machines, though on lawn tractors it can hide under the seat, under a battery-case cover, or behind the dash.
If you cannot see it, trace the small red wire from the top of the solenoid to the holder, and confirm the exact spot against your model's manual.
The Bottom Line
A blown fuse on a Husqvarna riding mower is a short to find, not a harness to buy. Start with the 20-amp yellow fuse, and if it holds you are finished.
If it keeps blowing, read the husqvarna riding mower wiring harness diagram, match when it blows to the branch that is shorting, and isolate the fault with a test light before you touch your wallet.
Repair the one wire, clutch, or connector that is grounding out, seal it, and route it clear of the next pinch point.
Save the replacement harness for the rare loom that is truly beyond saving, and you will fix the real problem for the price of a fuse instead of a part you never needed.
Read it your way
Short on time? Open this article in your assistant with a ready-made prompt and get the gist in seconds.
Found this useful? Make us a preferred source so we show up in your Google results.
Keep reading
Related articles
Troubleshooting & Repair
Lawn Mower Ignition Switch Replacement (Steps + Cost)
Do your own lawn mower ignition switch replacement: photo steps, wire-by-terminal transfer, fitment help, and a DIY-vs-shop cost table to save $100+.
Troubleshooting & Repair
Which Lawn Mower Ignition Switch Fits? (Prong Guide)
hoose the right lawn mower ignition switch by prong count (4/5/6/7), universal vs OEM fit, and key compatibility, plus which one fits your mower.
Troubleshooting & Repair
How to Start a Lawn Mower With a Bad Ignition Switch
Confirm it's the switch, then learn how to start a lawn mower with a bad ignition switch: a safe solenoid bypass to get moving, plus how to fix it for good.
Troubleshooting & Repair
How to Test a Lawn Mower Ignition Switch (5/6/7-Pin)
Learn how to test a lawn mower ignition switch with a multimeter: get continuity tables for 5, 6 & 7-pin switches plus a no-multimeter test-light method.
The discussion
Comments
Every comment is reviewed before it goes live.