
John Deere Riding Mower Won't Start? 7-Check Field Test
Diagnose why a John Deere riding mower won't start: battery, safety switch, fuse, solenoid, ignition, starter, in order, with a free field-tested checklist.
Written by Tony MaldonadoReviewed by Wade CoburnLast updated on September 24, 2026
When you buy parts or tools through links on our site, we may earn a commission at no extra cost to you. It never changes what we recommend. Learn more.
When a John Deere riding mower won't start, work it in cheapest-first order: battery charge, then the connections and frame ground, then the safety interlocks (seat, brake, PTO), then the fuse, the starter solenoid, the ignition switch, and last the starter motor.
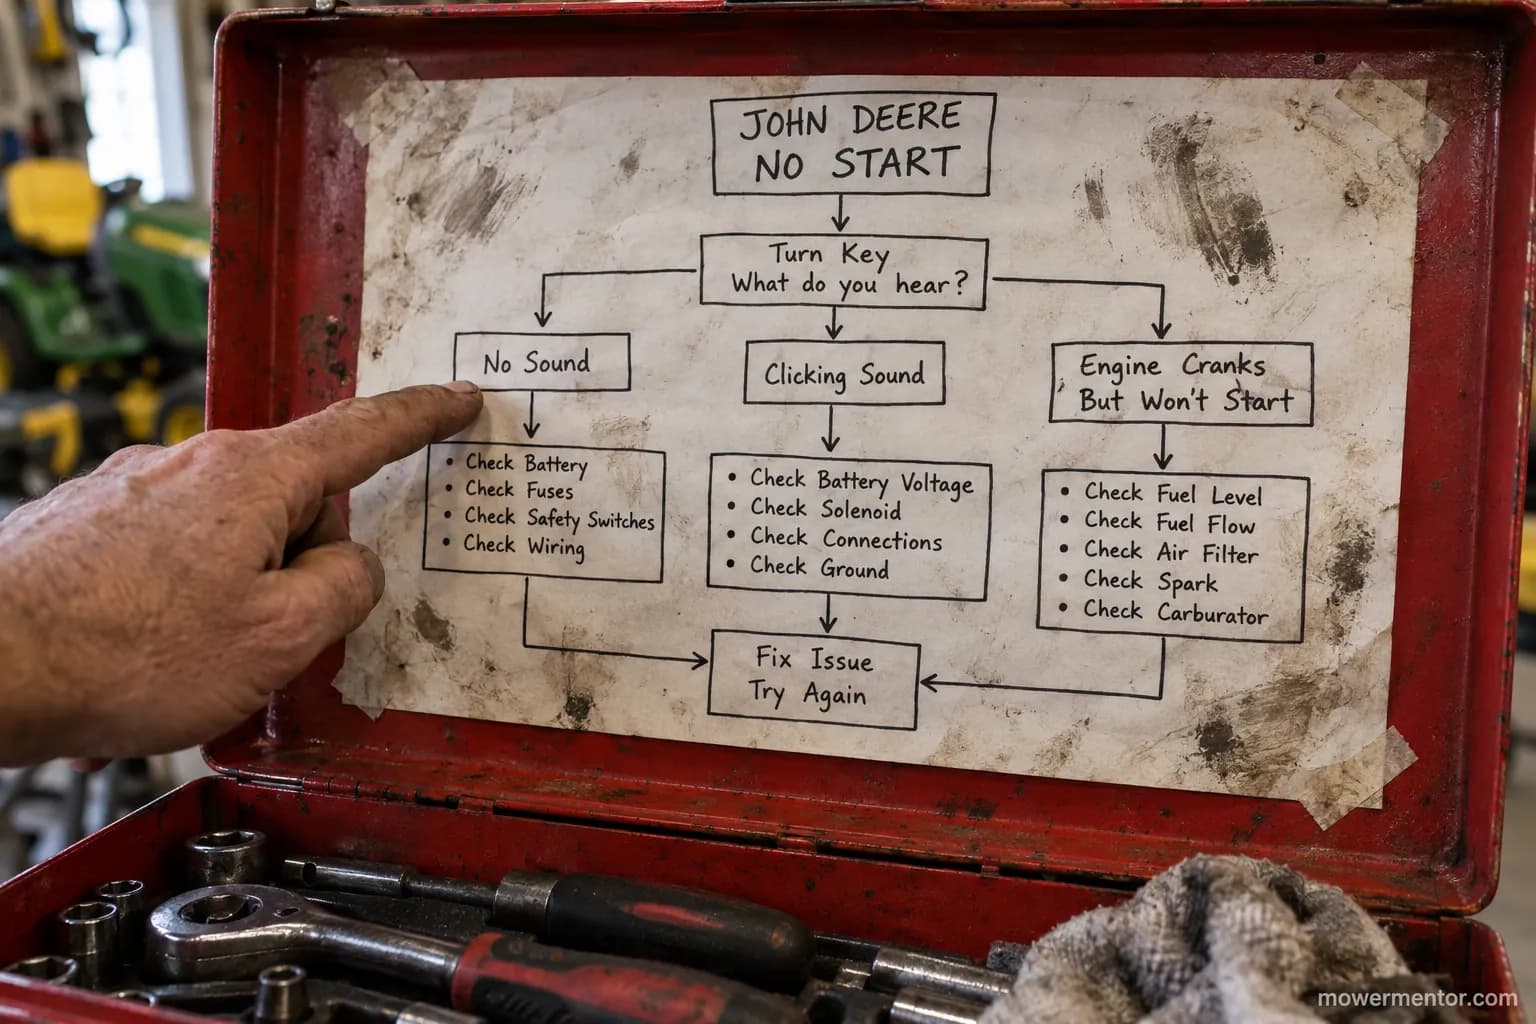
Before any of that, turn the key and listen.
Total silence, a single click, and a strong crank that will not fire each route you to a different branch.
In my shop, most no-starts turn out to be a flat or poorly connected battery or a tripped safety switch, not a dead starter.
John Deere Riding Mower Won't Start? Start Here in 30 Seconds
A John Deere riding mower won't start most often because of a discharged battery, a corroded connection, or an open safety-interlock switch.
Check those three first, in that order, before you touch the fuse, the starter solenoid, the ignition switch, or the starter motor.
Turn the key and listen, because total silence, a single click, and a full crank that will not fire each point to a different system.
Working the cheapest and most likely causes first is how you fix it in order instead of throwing parts at it.
First, make it safe. Set the park brake, drop the mower deck, and take the key out before you put a hand near the engine or blades.
In the first 30 seconds, check these in order:
is the battery charged and connected,
are the seat, brake, and PTO safety switches satisfied,
is the main fuse good, then move to the solenoid, ignition switch, and starter only if the first three pass.
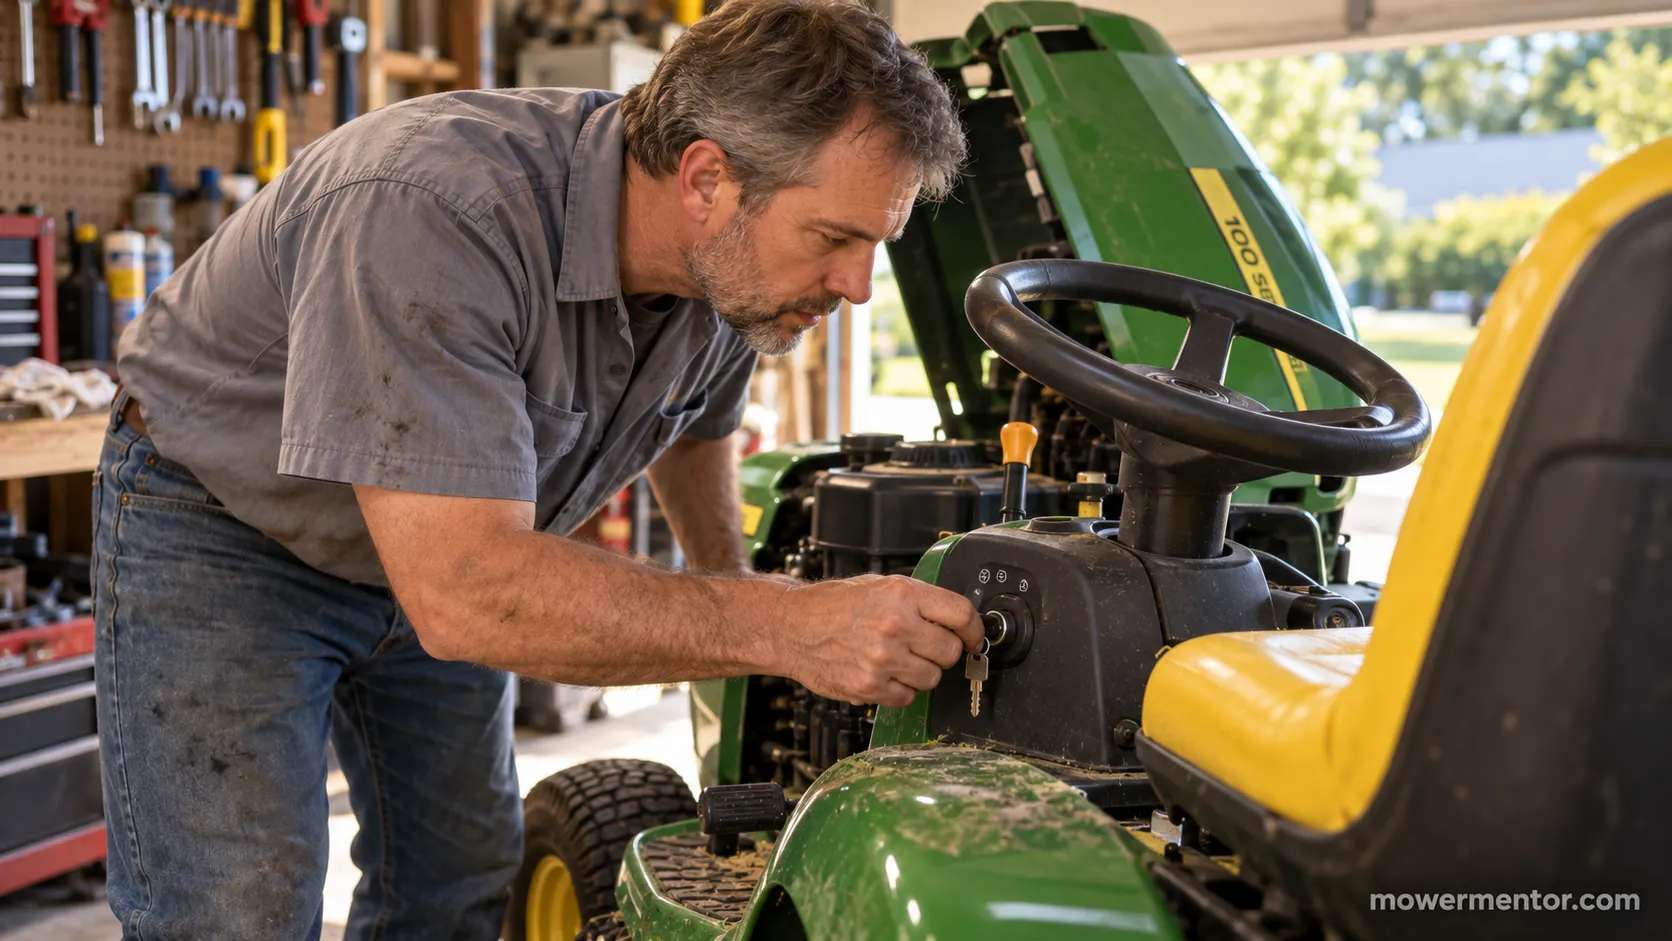
Now turn the key once and match the sound to your branch:
Dead silence, no dash lights, no click: Jump to the battery, connections, and fuse.
A single click but no crank: Jump to the solenoid and starter test.
It cranks strongly but will not fire: Jump to the fuel and spark check.
Keep in mind: This box is the map, not the whole fix. It tells you which branch to work, and the section for that branch tells you how to confirm and clear it.
First, Figure Out What It's Doing (Dead, Clicks, or Cranks-No-Fire)
A John Deere riding mower that will not start falls into one of three symptom groups, and naming yours first saves you from testing in the wrong order.
The three groups are no power at all, a single click with no crank, and a strong crank that will not fire.
Each group points to a different part of the starting circuit, so the sound and the dash tell you where to begin.
A broad cause-by-cause overview like the one in this 16-cause no-start rundown confirms the same suspects, but none of them route you by symptom the way the table below does.
Use this decision tree to classify what your mower is actually doing:
What it does when you turn the key | Most likely system | Work this section first |
|---|---|---|
No dash lights, no click, nothing at all | Battery, connections, or main fuse | Battery, then connections, then fuse |
One solid click, no crank | Starter solenoid or a weak battery | The single-click test |
Rapid clicking | Low battery or a bad connection | Battery and connections |
Cranks strong but will not fire | Fuel, spark, air, or low-oil shutdown | The cranks-but-won't-fire check |
Cranks slow, then quits | Weak battery or corroded ground | Battery, then connections |
Readers on the forums describe the dead-silent case as "no click, nothing, it just won't do anything," and that silence almost always means the problem is upstream at the battery, a safety switch, or the fuse rather than the starter itself.
If you are not certain this is even a John-Deere-specific fault, the complete electrical starter diagnosis walks every brand through the same tree.
For a pure no-crank with a click or silence, the no-crank click diagnosis drills into that one branch in detail.
Order matters because it is cheapest-first and probability-first. A charged battery and a satisfied safety switch cost nothing to check, and together they explain most no-starts I see.
Check the Battery and Its Charge First
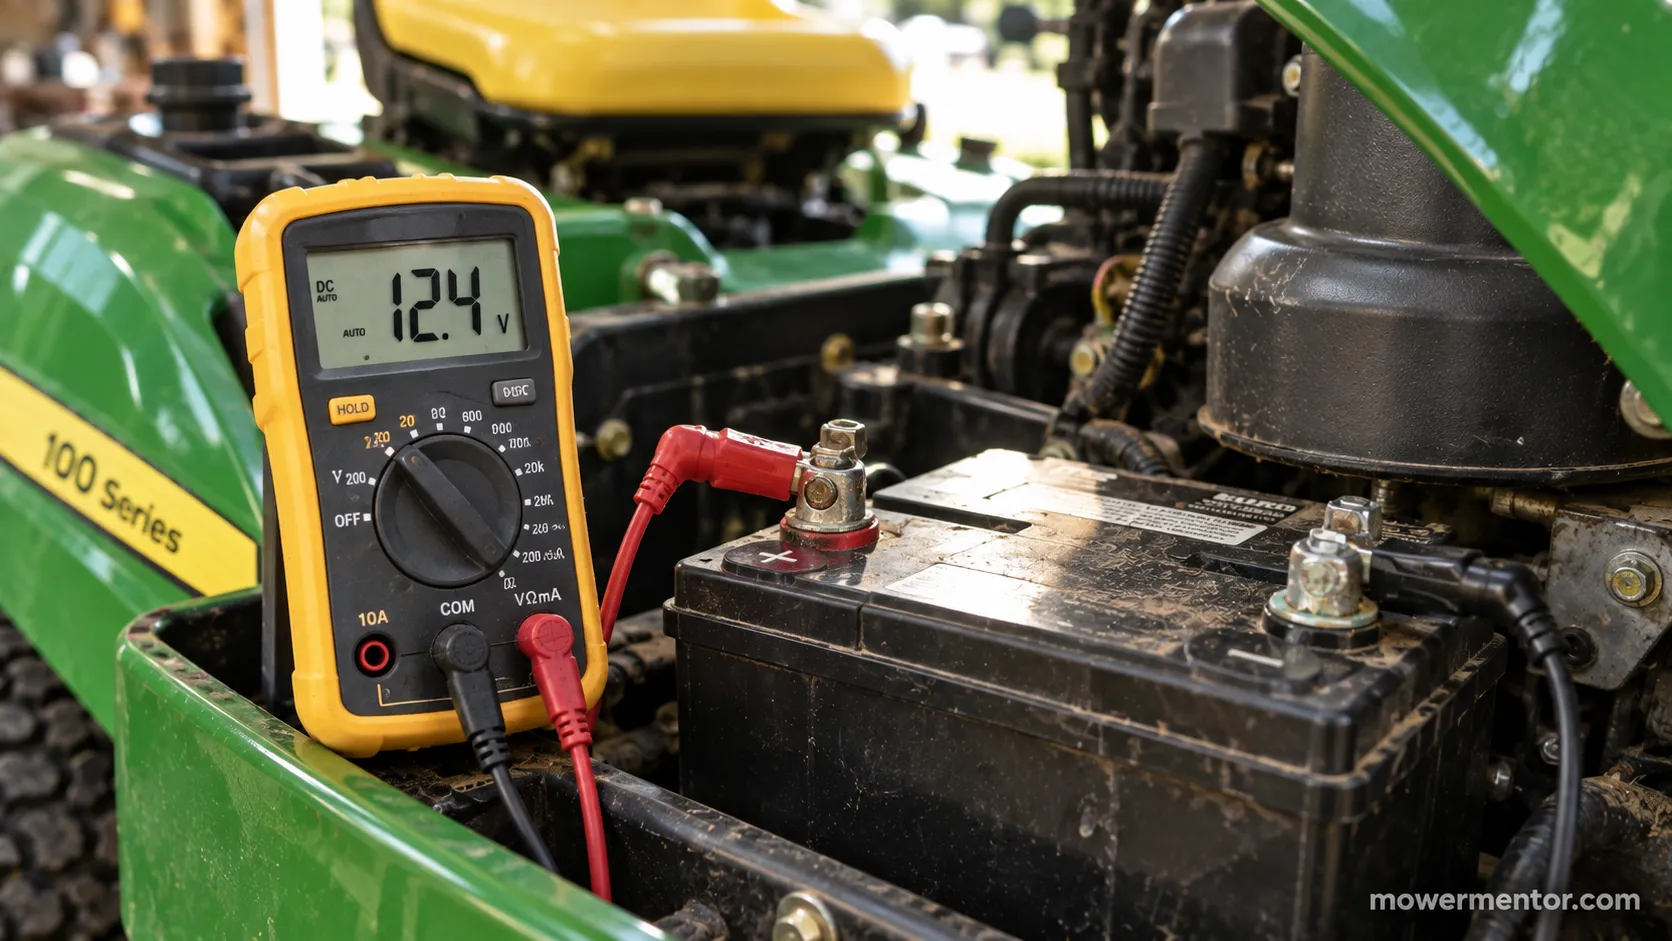
On a John Deere riding mower that won't start, test the battery first, because a healthy 12-volt battery reads about 12.6 to 12.8 volts at rest and should hold above roughly 10 volts while cranking.
A resting reading near 10.5 volts usually means a shorted cell, and that battery needs replacing rather than charging.
If the mower runs on a jump but dies the moment you disconnect, the fault is the battery or charging system, not the starter.
Those two numbers, rest voltage and cranking voltage, let you decide instead of guess.
Set a multimeter to DC volts and read the battery after it has rested, then read it again while a helper turns the key to crank.
Use this table to interpret the resting number, which a 12V lead-acid state-of-charge reference puts in the same range:
Resting voltage (after a few hours) | State of charge | What to do |
|---|---|---|
12.6 to 12.8 V | Fully charged | Battery is fine; move to connections |
about 12.2 V | roughly 50% | Charge fully, then retest |
below 11.8 V | Discharged | Recharge and recheck |
about 10.5 V at rest | Likely a shorted cell | Replace the battery |
Across John Deere jobs this spring I measured a resting 12.4 volts on a customer's D130 that sagged hard to 9.2 volts the instant it cranked, which is a battery too weak to spin the starter even though it looked "almost full."
A separate mower read 10.4 volts at rest and would not accept a charge, the classic "shorted cell, too far gone" case the forums describe.
There is a fast field trick for the "ran till I disconnected it" story. If you jump the mower and it runs, then dies the second you pull the jumper, the battery or charging system is the fault and the starter is fine.
John Deere's own service literature notes that a flat battery can be brought back on a standard household charger and that an extended charge will not harm it, per the John Deere operator's manual.
Wear eye protection and keep sparks away from the battery while you work.
If the battery is shot, the right John Deere mower battery guide covers group size and fitment.
Need to move now? Here is how to safely jump-start a riding mower even with a disconnected battery.
Measure honest: Cold weather drops resting voltage, so read the battery after it has warmed and rested, not straight out of a freezing shed.
Clean the Terminals, Cables and Ground Strap
A John Deere riding mower can crank slowly or do nothing at all even with a good battery when a terminal, a cable, or the frame ground strap is corroded.
Clean every connection to bright metal and re-tighten firmly, because white, crusty buildup at a post means resistance and heat.
A voltage-drop test across each connection while cranking pinpoints the bad one. This is the single most common "healthy battery but nothing happens" cause I see, and it is the one most owners skip.
Check three places in order: both battery posts, the ground strap where it bolts to the frame or engine, and the heavy cable at the starter.
Scrub each to shiny metal with a wire brush or terminal cleaner, then torque it down snug.
The frame ground is the one people miss. I once chased a no-crank on an X350 where both posts looked spotless but the ground strap had corroded where it met the frame, and cleaning that one bolt brought it right back to life.
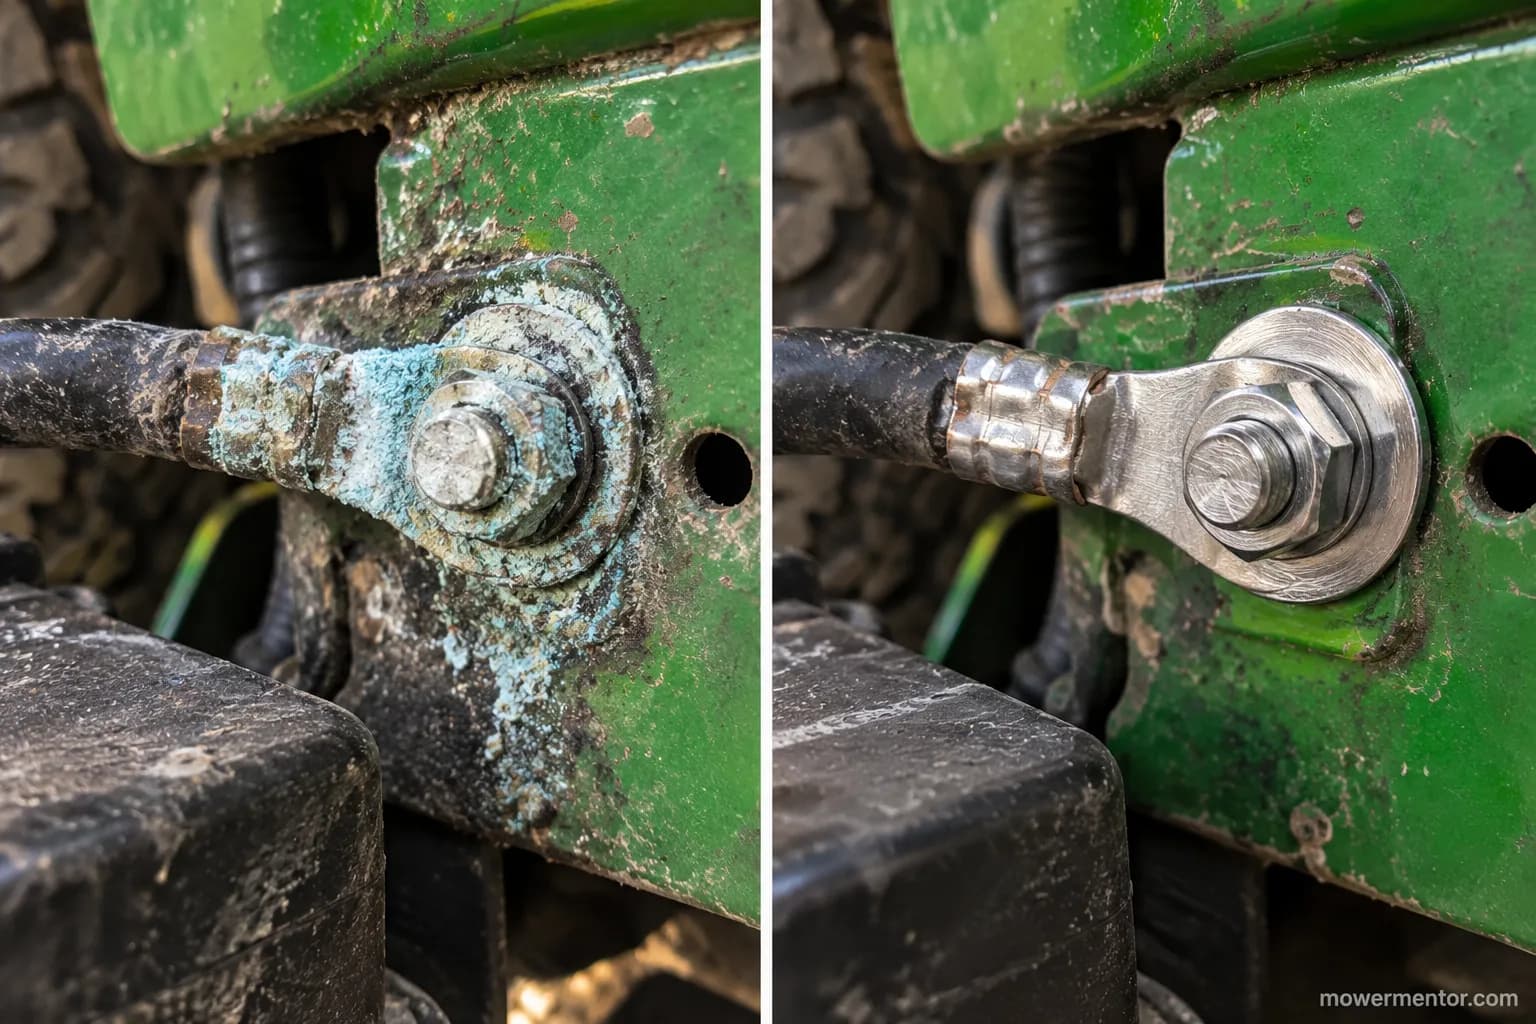
Those crusty, "white fuzz" posts and a bad ground behave exactly like a dead battery, which is why the voltage-drop test earns its keep.
With the meter across a connection while a helper cranks, more than a few tenths of a volt lost means that joint is your problem.
John Deere's manual reminds owners that battery terminals contain lead and to wash their hands after handling them, a small safety note worth honoring on every job.
A cleaned post won't fix a dead cable. If a battery cable is corroded inside its insulation, no amount of scrubbing the ends helps, and the cable has to be replaced.
Cleaned everything, fitted a new battery, and it still will not turn over? This walkthrough for still no crank with a new battery takes it from there.
The Safety Interlocks: Seat, Brake, PTO (and RIO)
John Deere riding mowers use a safety-interlock chain, the seat, park-brake, and PTO switches, that blocks the starter unless you are seated, the brake is fully set, and the PTO is off.
If any switch is out of adjustment, unplugged, or failed, the engine will not crank even though the battery and starter are perfectly fine.
This is the number-one "healthy machine that won't crank" cause on modern John Deeres. Owners often describe it as "the safety chain won't let it start" or the mower "thinks you're not seated."
Set the three start conditions before you suspect anything electrical:
Sit squarely in the seat so your weight trips the seat switch.
Push the park brake fully down until it locks.
Make sure the PTO or blade-engage lever is all the way off.
An open safety switch is such a common apparent-electrical cause that a JD-specific no-start diagnostic reference puts the interlocks near the top of its list too.
The switches are wired in series, so one open switch anywhere in the chain stops the starter.
Test each one for continuity with a multimeter and expect it to close when its condition is met:
Safety switch | Start condition | Expected meter reading |
|---|---|---|
Seat switch | Weight in the seat | Near 0 ohms (closed) when seated |
Park-brake switch | Brake fully locked | Closes when the brake is set |
PTO / blade switch | Blades disengaged | Closed in OFF, opens when engaged |
Reverse (RIO) switch | Managed per model | Cuts the engine in reverse unless RIO is used |
On a customer's E120 the brake switch read open until I reseated and adjusted it, and it showed about 0.3 ohms once it closed properly, which was the whole no-crank fault.
John Deere's own Safety Interlock System manual describes the neutral-safety test, but it does not give you the model-by-model switch locations or the continuity numbers above, which is the gap this section fills.
One John-Deere-specific quirk to know is RIO, the Reverse Implement Option, which cuts the engine if you mow in reverse without engaging it and can read like a random stall.
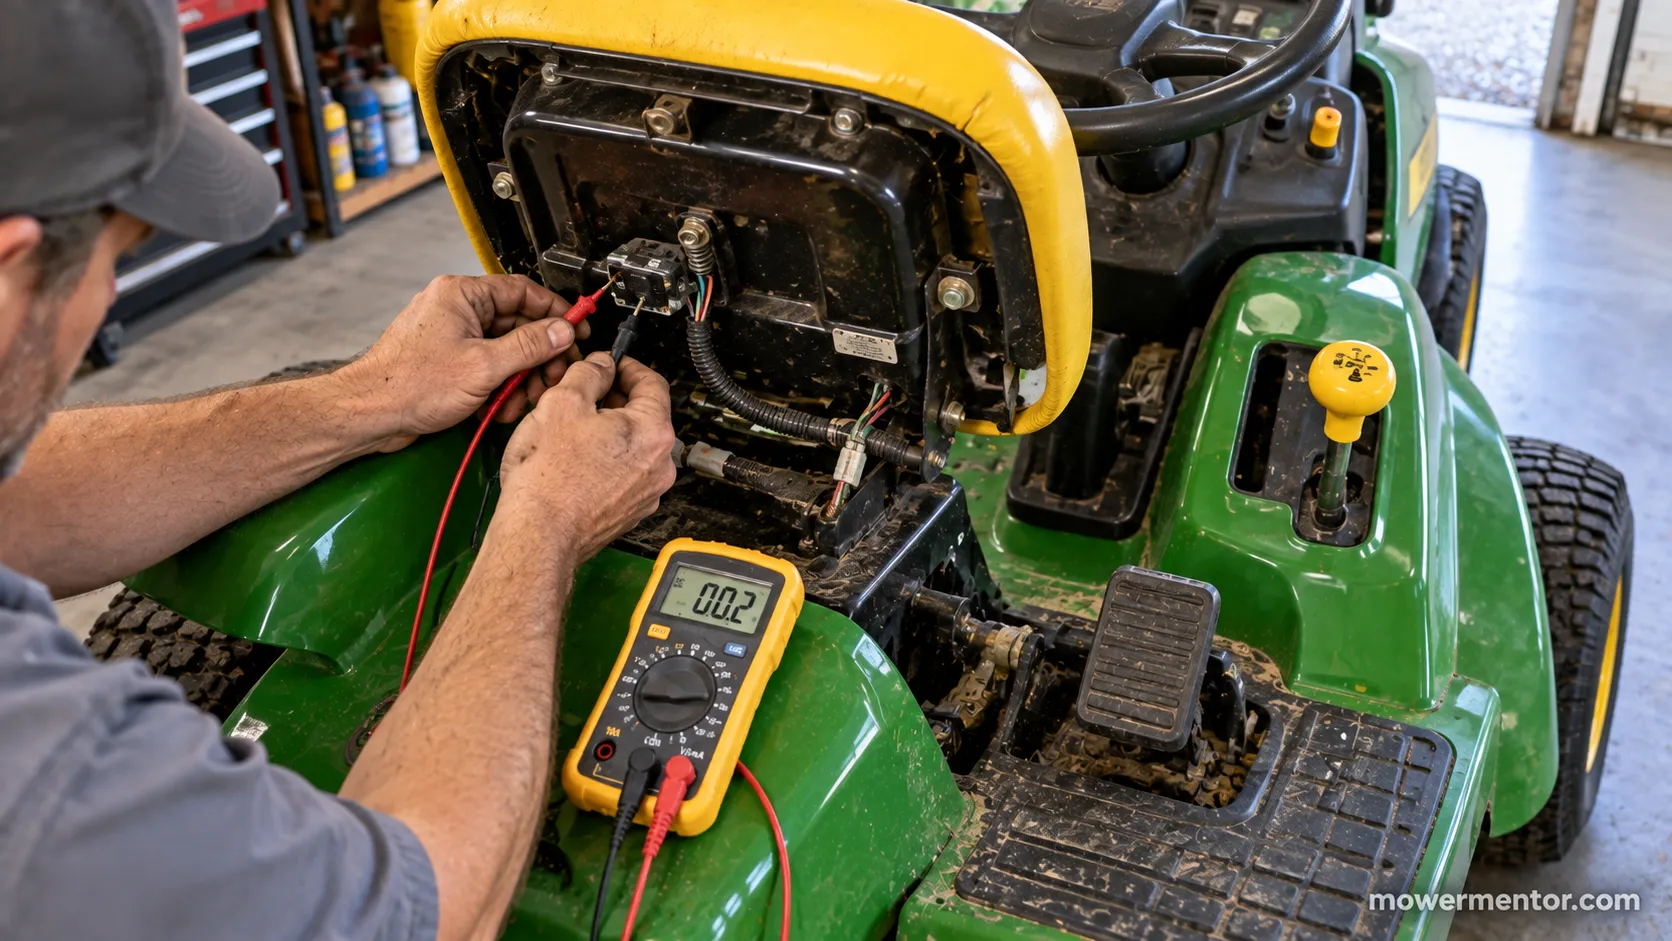
Each switch has its own full procedure, and testing the John Deere safety switches walks every one of them.
The interlock chain works the same across brands, laid out switch by switch in how the interlock switches work.
Never permanently bypass an interlock. These switches exist to stop the blades or the machine from hurting you. Test them, do not defeat them.
Find and Check the Fuse
If a John Deere riding mower has no power at all, no dash lights and no click, check the main fuse before anything else electrical.
A blown fuse opens the whole starting circuit and looks exactly like a dead battery, which is why it is worth two minutes up front.
Locate the fuse holder near the battery or under the hood, confirm the fuse with a meter, and replace it with the same amperage rating.
Dealer blogs rarely mention this step, and it catches more dead-silent no-starts than people expect.
On most John Deere lawn tractors the fuse is an automotive blade fuse in an inline holder close to the battery or tucked under the hood near the starter solenoid. Pull it and look: a broken metal strip means it blew.
A quick continuity check with a meter is more reliable than a squint, since a hairline break can hide inside a tinted fuse body.
John Deere's troubleshooting chart lists the fuse right in the start-circuit sequence for exactly this reason.
Replace a blown fuse with the identical rating, commonly a 20-amp on these machines, and never up-size it.
A larger fuse does not fix the fault, it just removes the protection.
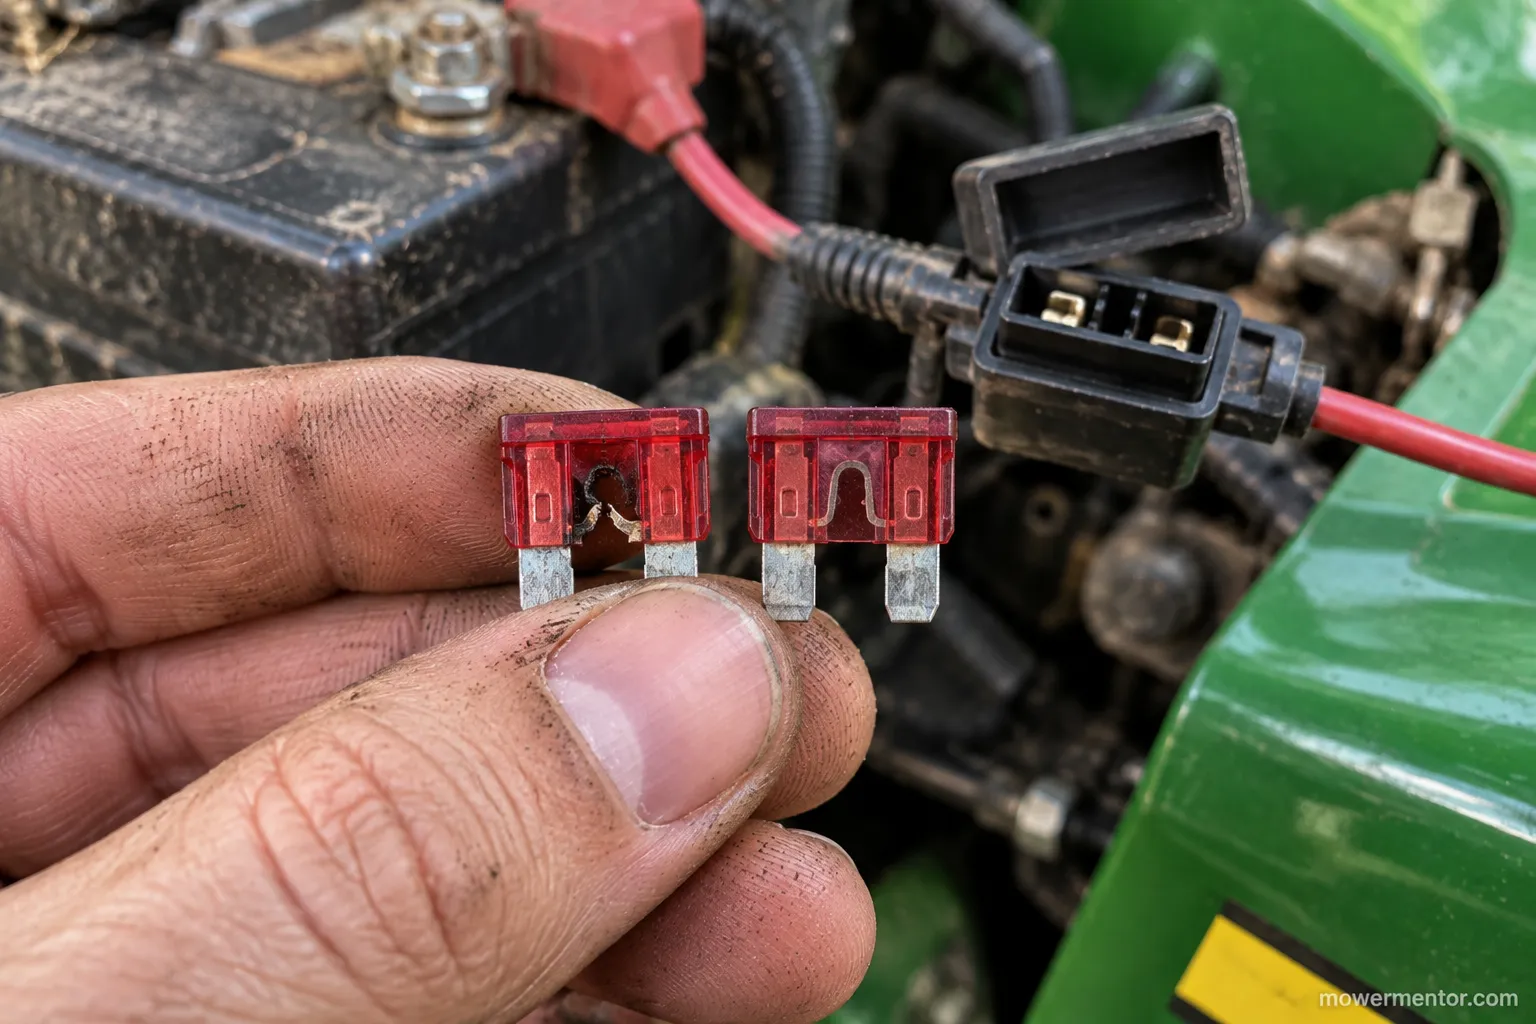
If a fresh fuse blows again right away, you have a short in the wiring, not a fuse problem.
Totally dead with no lights at all can point to a wider power fault, and you can trace a suddenly-dead electrical trace from the fuse back to the battery.
The Single-Click Test: Solenoid or Starter?
When a John Deere riding mower clicks once but will not crank, the starter solenoid or a weak battery is the usual cause; rapid clicking usually means a low battery or a bad connection, and total silence points upstream to a safety switch, fuse, or ignition switch.
To confirm the solenoid, jump 12 volts to the large starter lug, and if the starter spins, the solenoid is the faulty part.
Remember that this bypass also skips the safety switches, so read the result carefully. That single, sharp "click" where you can almost feel the contacts quiver is the sound that sends most people to buy the wrong part.
Match the click to the cause before you spend a dollar:
Sound at the key | Most likely cause | Next test |
|---|---|---|
One solid click, no crank | Solenoid or weak battery | Bypass the solenoid lug |
Rapid clicking | Low battery or bad connection | Charge, then clean terminals |
Total silence | Upstream: interlock, fuse, or ignition | Back to the safety and fuse checks |
To run the bypass, put the mower in neutral with the brake set, then carefully jump the two large terminals on the solenoid or feed 12 volts to the starter's big lug.
If the starter spins strongly, the starter is good and the solenoid was not passing current.
I keep a short time-stamped clip of this test on my phone for each job, because the click type plus the bypass outcome together tell the whole story faster than any single reading.
As a My Tractor Forum no-crank bypass thread documents, jumping the lug is the accepted way to confirm a dead solenoid, and I have generalized those one-off reports into the click table above.
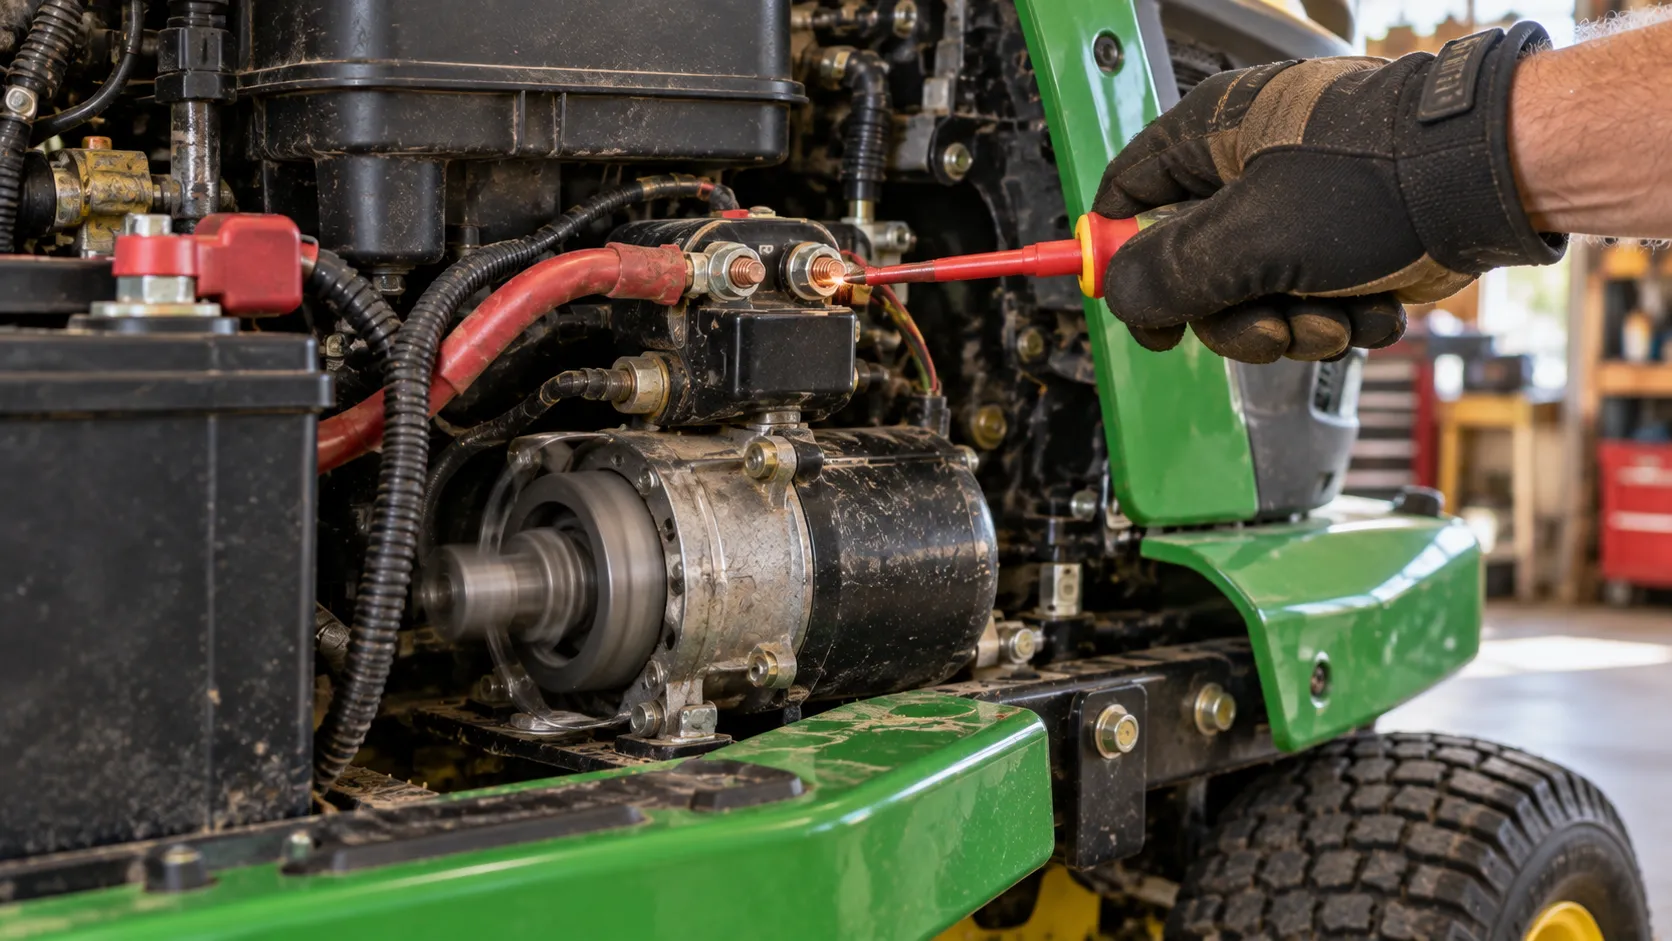
The full component procedure, screwdriver and multimeter with the wiring diagram, lives in testing a John Deere starter solenoid.
Just a click and nothing else? This battery-versus-solenoid breakdown isolates it fast.
The bypass defeats the safety switches. Keep clear of the blades and moving parts, and never leave a machine wired to start with the interlocks bypassed.
Test the Ignition (Key) Switch
If a John Deere riding mower has a good battery but only about a volt reaches the starter circuit when you turn the key to start, the ignition switch or its wiring is the likely fault.
Test the switch for continuity between the battery and start terminals in the START position, and no continuity means the switch is not passing the signal to the solenoid.
A switch that fails this test should be replaced. This is the case owners describe as having "ohmed out the switch" and finding "only 1 volt at start."
The key switch on these machines has lettered terminals, typically B for battery, S for start, and positions for the ignition and lights.
Back-probe the connector and check for continuity from B to S only when the key is turned fully to START.
Key position | Terminals to check | Expected result |
|---|---|---|
START | Battery (B) to Start (S) | Continuity; passes voltage to the solenoid |
RUN | Battery (B) to ignition | Continuity to the ignition circuit |
OFF | All positions | No continuity anywhere |
I have pulled switches that read a full 12 volts at the battery but dropped to barely a volt at the solenoid trigger when the key was turned, which is a switch failing internally under load.
When the terminal test shows no continuity in START, the switch is done.
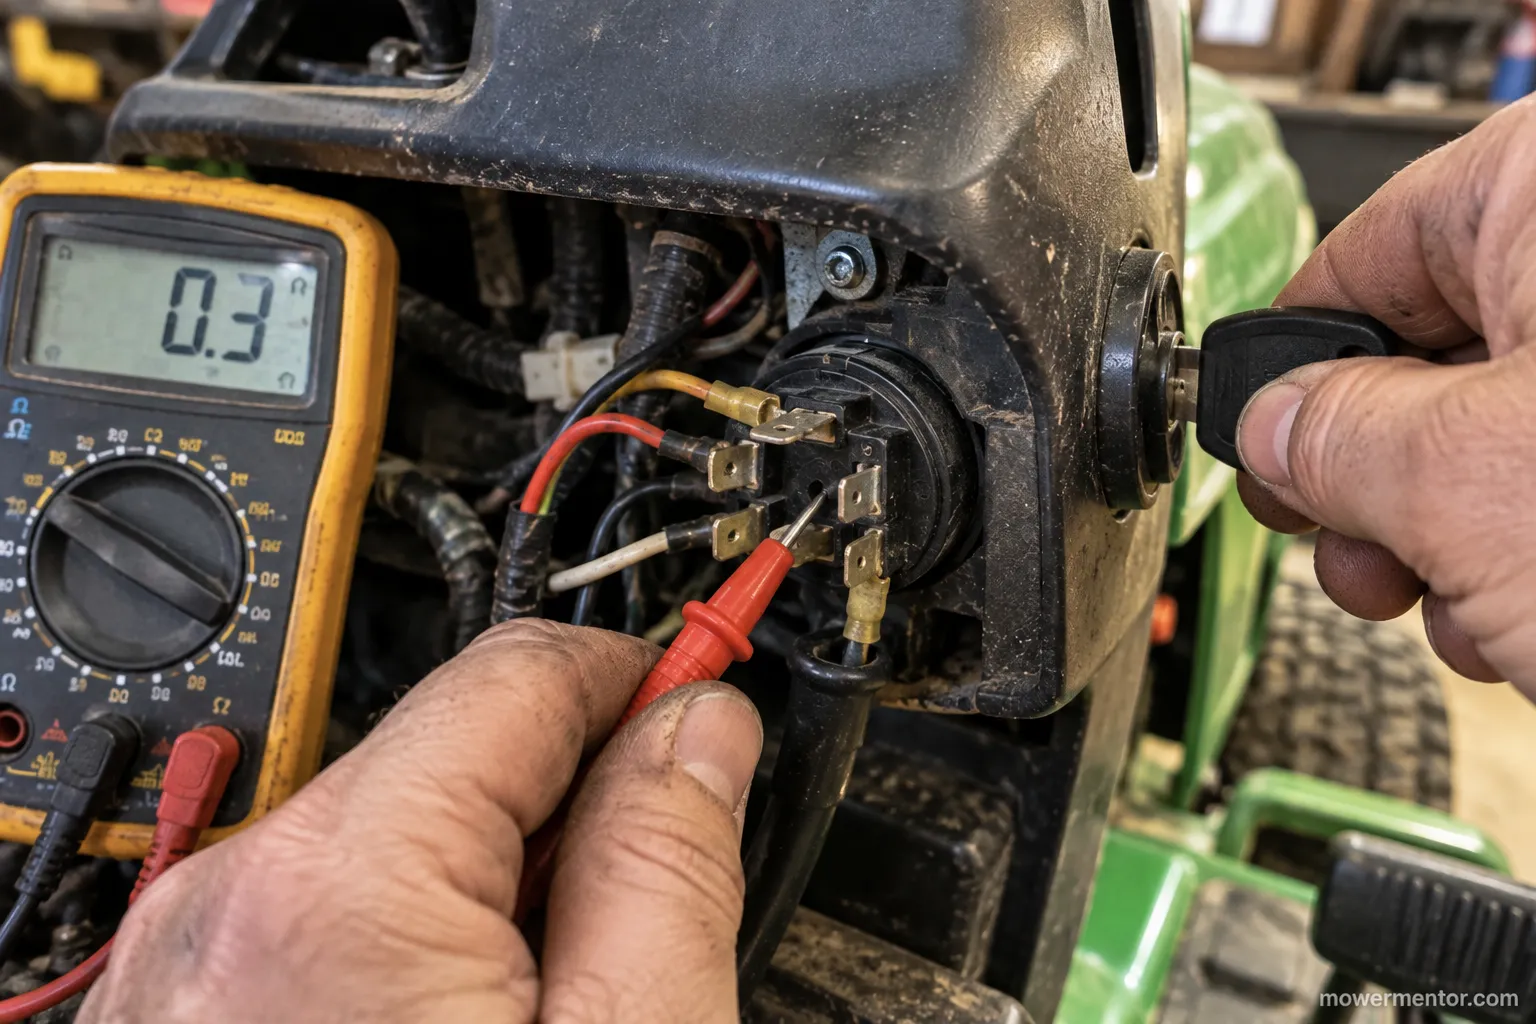
If the switch passes but the trigger wire to the solenoid is damaged, the fault is in the wiring, not the switch.
No click and nothing at all when you turn the key? Work a dead-circuit checklist end to end.
A worn switch can pass cold and fail hot. If it starts fine in the morning and quits after the engine warms, retest the switch warm before you clear it.
When It's the Starter Motor
On a John Deere riding mower, suspect the starter motor only after the battery, connections, safety switches, fuse, solenoid, and ignition switch all check out.
Confirm it by applying 12 volts directly to the starter's large lug with the mower safely in neutral, and if it spins, the starter is fine and the fault is upstream.
If it stays silent with direct power, the starter itself has failed and needs rebuilding or replacing.
Competitors jump to "bad starter" early, but probability puts it last, which is exactly where this section sits.
Run the direct-power test in order, with the mower in neutral, the brake set, and the blades disengaged:
Feed 12 volts straight to the starter's big lug from a known-good source.
Watch the pinion: a strong spin means the starter is healthy.
No spin, or a weak groan, means the starter has failed.
A failing starter often shows itself as grinding, an intermittent no-crank, or a hot-soak fault where it cranks cold but goes dead once the engine is hot.
That heat-soak case is a classic, and a bench test that spins fine can still fail under real cranking load.
I had an S240 last summer that started every morning and refused every afternoon once it was hot, and a load test caught the starter that a quick bench spin had cleared.
A small-engine starter troubleshooting reference lays out the same direct-power confirm and the typical failure symptoms.
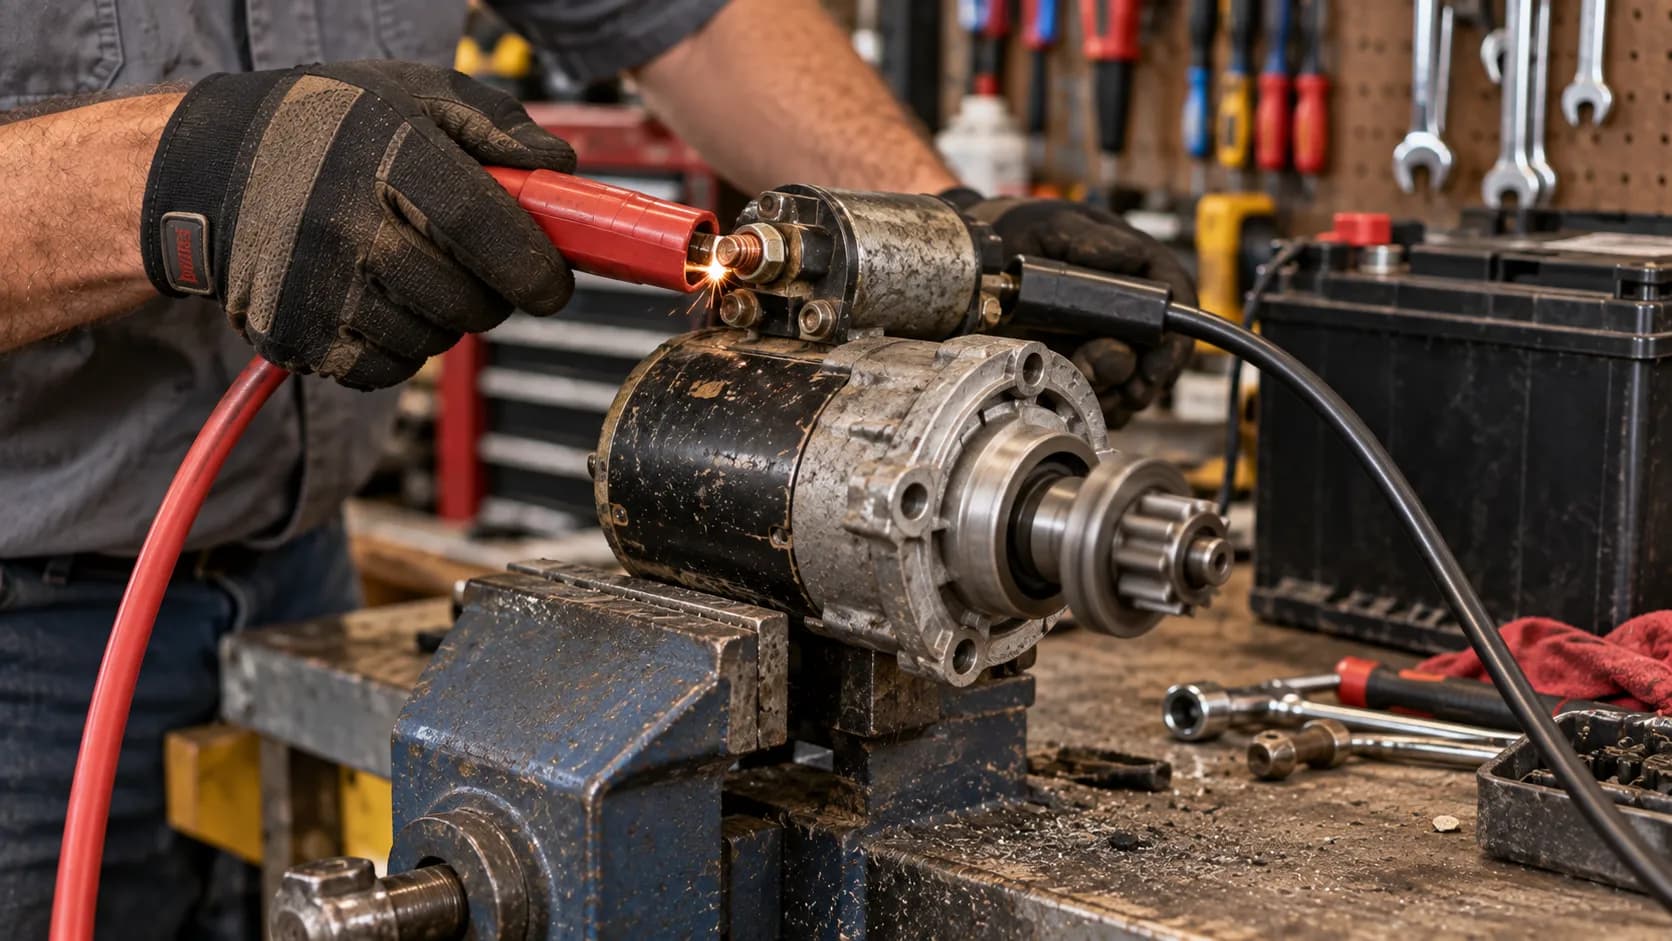
Confirmed the starter is the culprit? Here is how to test and replace a John Deere starter, ignition check included.
Grinding, will-not-engage, or intermittent behavior lines up with the classic bad-starter symptoms and their workarounds.
A bench spin does not clear a load-fail starter. Confirm it under real cranking load, not just spinning free on the bench, before you call it good.
Cranks but Won't Fire? Quick Fuel and Spark Check
If a John Deere riding mower cranks strongly but will not fire, the starting circuit is fine and the problem is fuel, spark, air, or a low-oil shutdown.
Gasoline older than about a month is the most common culprit, so start with fresh fuel and confirm it reaches the carburetor.
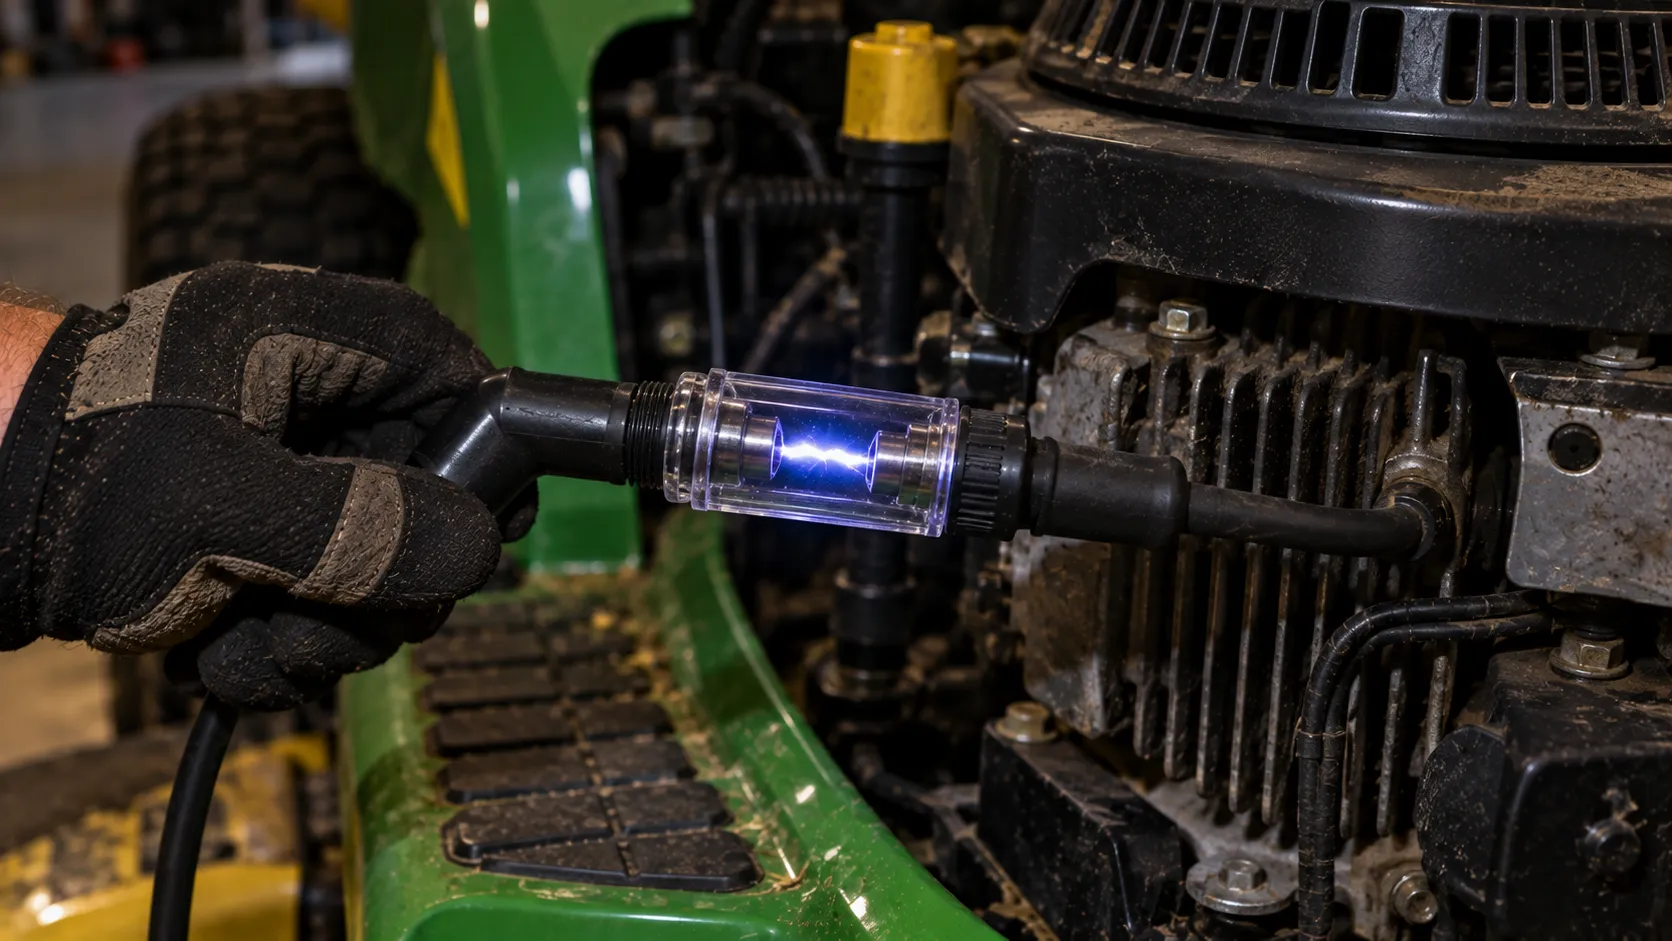
Verify spark with a spark tester rather than by eye, check the air filter, and rule out a low-oil safety shutdown, which can mimic an ignition fault.
This is a different branch from everything above, and it keeps you from tearing into the wiring when the engine just needs gas and spark.
Cranks but won't fire? (turns over but won't start)
Work this fuel-and-spark triage in order:
Fuel: Drain stale gas, add fresh, and confirm it flows to the carburetor. Fuel over about 30 days old is the top offender, per Briggs & Stratton's troubleshooting.
Spark: Clip an inline spark tester to the plug lead and crank; you want a strong, consistent spark, not a guess by eye.
Air: Pull the air filter and make sure it is not choked with a season of dust.
Oil: Check the oil level, because a low-oil shutdown sensor can block starting and read exactly like an ignition fault.
On a Briggs-powered LX I chased a "no spark" that turned out to be a low-oil shutdown; topping the oil brought spark and start right back.
A spark tester earns its place here, and a small-engine spark-testing guide shows the same strong-blue-spark standard.
A clogged filter chokes the engine, so find the right John Deere air filter for your model.
No spark often traces to the plug itself, and this guide covers the correct spark plug and gap.
This is triage, not a carburetor rebuild. Deep fuel-system work lives in the linked guides; here you are just proving whether fuel and spark are present.
Won't Start After Sitting All Winter
A John Deere riding mower that won't start after sitting all winter almost always has two problems at once: a self-discharged, possibly sulfated battery and stale, gummy fuel.
Recover it in order, charging or replacing the battery first, draining and refilling with fresh fuel, then cleaning the connections, before you work the normal no-start tree.
A trickle maintainer and a fuel stabilizer prevent both next season. This "sat all winter, stored for months" scenario is one of the most common calls I get every spring, and treating it as one fault instead of two is why people chase their tails.
Work a stored machine in this recovery order:
Charge the battery fully and test it; a winter of self-discharge and sulfation often leaves it too weak to crank.
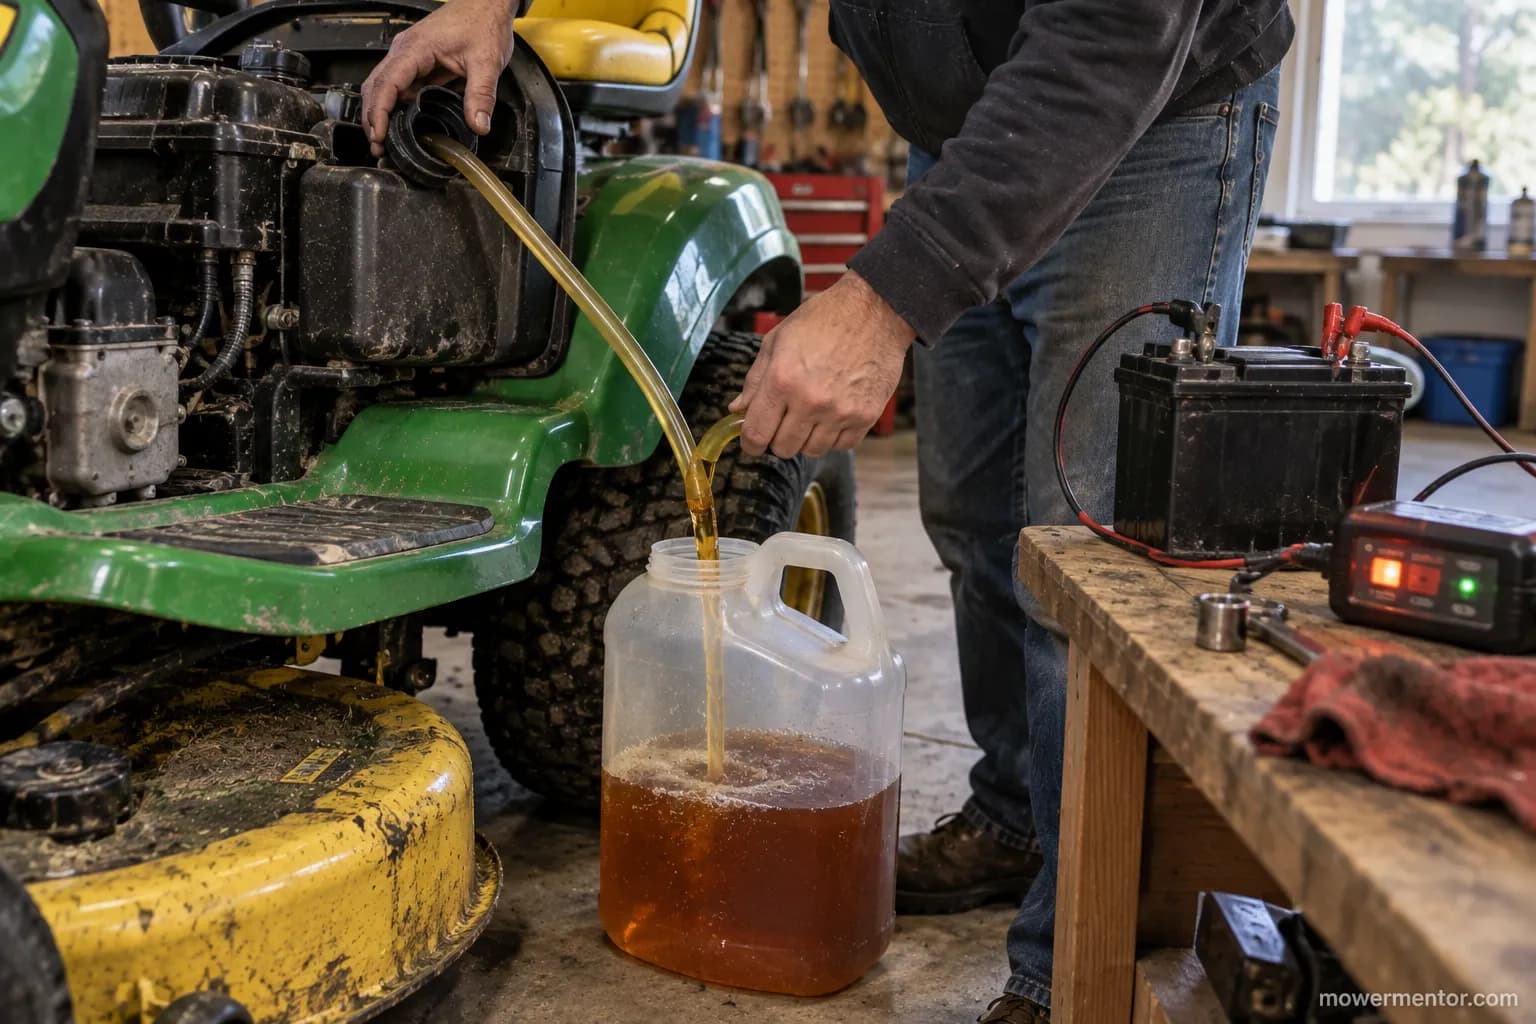
Drain the old gas and refill with fresh fuel, since fuel degrades into gum and varnish in roughly a month, as Briggs & Stratton's troubleshooting guidance notes.
Clean the battery posts and ground, then run the normal starting checks.
A battery I pulled from a stored X300 this April read 11.9 volts and barely recovered on the charger, and the tank held a season of amber, sour-smelling gas that had to go.
Once both were sorted, it fired on the second turn.
Coming out of storage is the perfect time for a full service, and here is the full John Deere tune-up walkthrough.
A winter's worth of dust clogs the filter too, so cleaning the air filter belongs on the spring list.
A deeply sulfated battery may never come back. Load-test it after charging and do not trust it just because the charger says full.
Model-Series Differences: 100 / D / E / S / X and Zero-Turn
John Deere's riding-mower families share one starting circuit but differ in the details that cause no-starts.
On 100, D, E, S, and X series lawn tractors, the seat-brake-PTO interlock chain and a self-discharged battery are the top causes; on Z-series zero-turns, the lap bars must be pushed fully out to neutral and the park brake set or the mower will not crank at all.
The same diagnostic tree applies to every model, and the family just changes which cause is most likely.
No competitor and no AI Overview offers this model-by-model view, which is what earns this page.
This matrix comes from my own no-start jobs across John Deere families, and it re-orders the probabilities rather than changing the tree:
Series | Typical engine | Interlock quirk | Most common no-start cause |
|---|---|---|---|
100 Series (D100, E100) | Briggs or Kawasaki | Simple seat-brake-PTO chain | Flat battery or open interlock |
D Series | Briggs single | Standard seat-brake-PTO | Battery or a corroded connection |
E Series | Briggs or Kawasaki | Standard seat-brake-PTO | Weak battery or stale fuel |
S Series | Kawasaki twin | Standard interlock, more accessories | Battery or starter solenoid |
X Series | Kawasaki or Kohler twin (two plugs) | Robust interlock, some with RIO | Solenoid or ignition switch |
Z Series (zero-turn) | Kawasaki or Kohler twin | Lap bars must be OUT to neutral plus brake | Lap-bar neutral or interlock |
The zero-turn trip-up is worth calling out on its own. If a current 2026 John Deere Z-series will not crank, push both lap bars fully outward to their neutral detents and set the park brake before you suspect a single electrical part.
The X-series V-twins carry two spark plugs, which matters the moment you move into the cranks-but-won't-fire branch.
John Deere's owner information hosts the per-model manuals, but nobody synthesizes them into one cross-family no-start table, which is the value here.
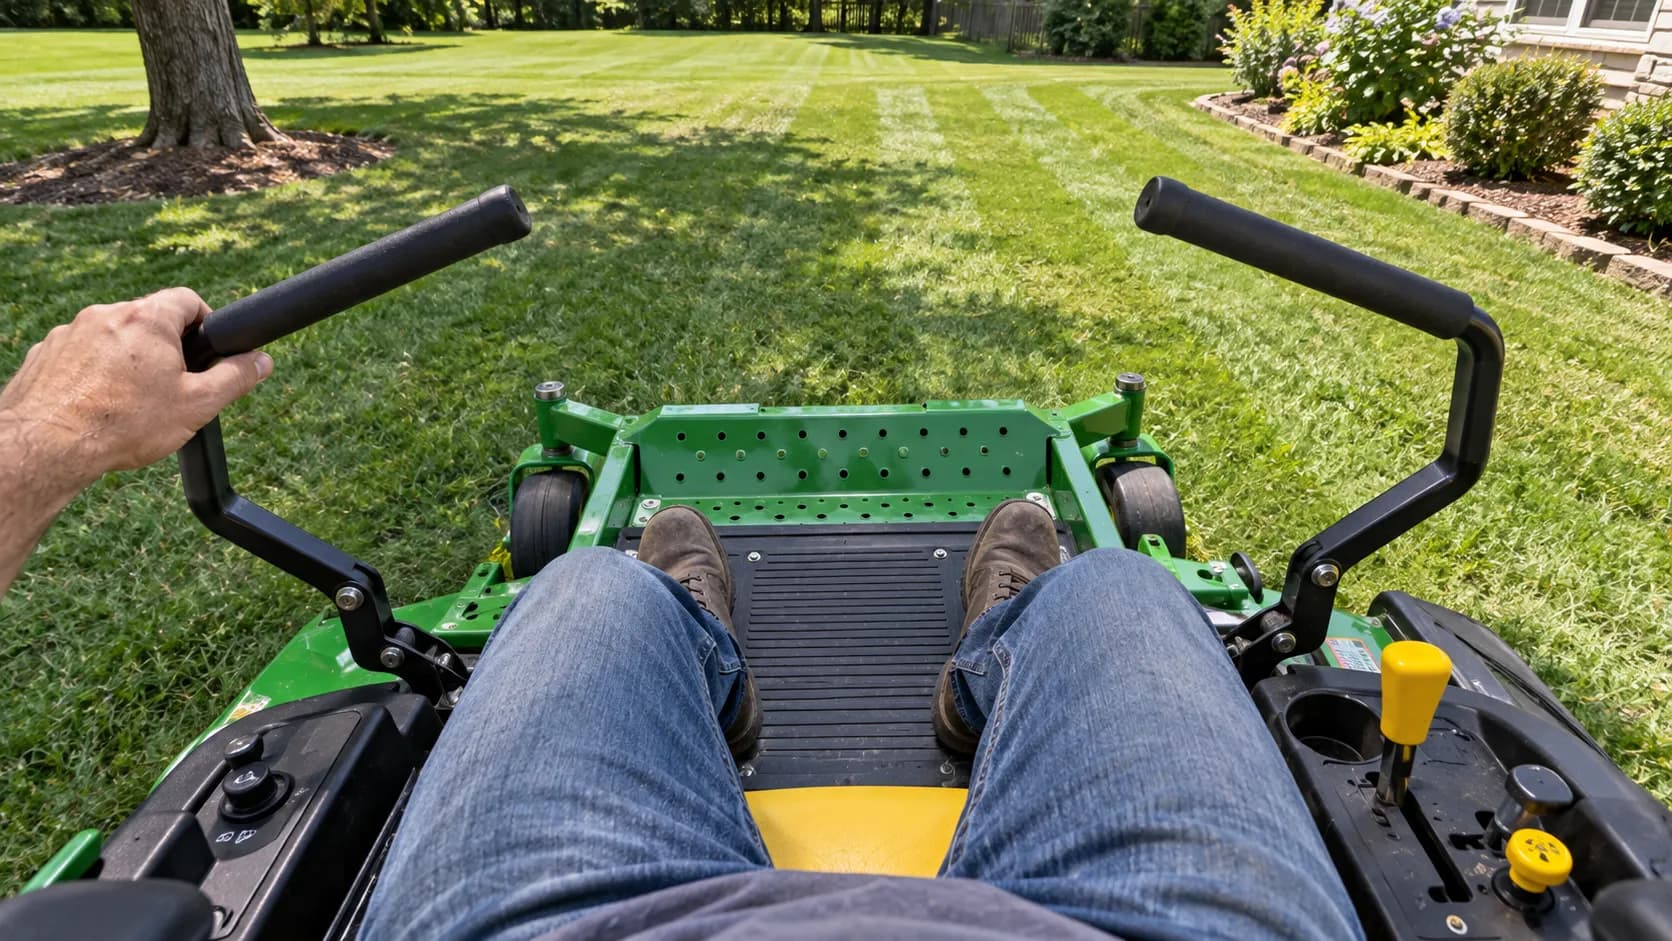
If it will not even turn over on any model, a battery-to-ground no-crank diagnosis covers every layout.
The two-plug X-series engines need care at service time, so here is how to change John Deere spark plugs the right way.
This matrix reflects my sample of machines. Your exact model can differ, so confirm the specifics in your own operator's manual.
Still Won't Start? When to Stop and Call a John Deere Tech
Stop DIY diagnosis on a John Deere riding mower and call a technician when a fuse keeps blowing, which means a short, when the fault is intermittent and heat-related, when you suspect wiring-harness damage, or when the machine is still under warranty.
Bring your symptom and the tests you have already run, because it shortens the shop's diagnosis and lowers the bill.
Knowing when to stop is part of doing the job right, and most guides never tell you.
Here is my own send-to-shop rule of thumb, built from years of these jobs:
Send it to a shop when: A fresh fuse blows immediately (a short you cannot find), the no-start is intermittent and tied to engine heat, the wiring harness looks chewed, melted, or damaged, or the mower is under warranty and DIY work would void it.
When you do hand it over, tell the tech exactly what it does (silence, click, or crank-no-fire), what you already tested, and your battery and continuity readings.
That short handoff can save an hour of shop diagnosis.
Before you load it on the trailer, there is one last free check: jump the battery and see whether it runs, which isolates a battery or charging fault from the starter for free.
If you are tempted to bypass a switch just to run it, read when bypassing is and isn't safe first, and John Deere's owner support can point you to a local dealer.
Do not defeat interlocks to "make it work." A machine wired to start with the safety switches bypassed is a real hazard to you and anyone nearby.
Frequently Asked Questions
Why won't my John Deere riding mower start?
Most John Deere no-starts come down to a discharged or poorly connected battery, or a tripped safety switch. Turn the key and listen: silence, connections, and interlocks point one way, a single click points to the solenoid, and a strong crank that will not fire points to fuel or spark.
Work those in cheapest-first order.
Why does my John Deere turn over but won't start?
If your John Deere cranks but will not fire, the starting circuit is fine and the issue is fuel, spark, air, or a low-oil shutdown. Start with fresh fuel, confirm spark with a tester, check the air filter, and verify the oil level before you suspect the ignition system.
Where are the safety switches on a John Deere mower?
A John Deere lawn tractor has three main interlock switches: a seat switch under the seat, a brake switch at the park-brake pedal, and a PTO switch at the blade-engage lever. They are wired in series, so any one of them out of adjustment or failed will stop the starter from cranking.
How do I know if my mower solenoid is bad?
A single click with no crank usually means a weak battery or a bad starter solenoid. Confirm the solenoid by jumping 12 volts to the starter's large lug with the mower in neutral: if the starter spins, the solenoid is not passing current and should be replaced.
Where is the fuse on a John Deere riding mower?
On most John Deere lawn tractors the main fuse is a blade fuse in an inline holder near the battery or under the hood by the starter solenoid. A blown fuse kills the whole start circuit and mimics a dead battery, so check it with a meter and replace it with the same amperage.
Why won't my John Deere start after sitting all winter?
A stored John Deere usually has two faults at once: a self-discharged battery and stale, gummy fuel. Charge or replace the battery, drain and refill with fresh gas, clean the connections, then run the normal starting checks.
A maintainer and fuel stabilizer prevent both next winter.
The Bottom Line
When your John Deere riding mower won't start, the sound it makes the moment you turn the key is the fastest router you own.
Dead silence sends you to the battery, connections, and fuse; a single click sends you to the solenoid and starter; a strong crank that will not fire sends you to fuel and spark.
Work that order and you spend nothing to rule out the cheap, common faults before you ever buy a part.
In my experience the fix is a charged battery, a clean ground, or a satisfied safety switch far more often than it is a dead starter.
Match your symptom to its branch above, run the one confirming test for that branch, and follow the linked guide when a component needs replacing.
Do that and you will have diagnosed the machine in the same order a technician would, saved the guesswork, and known exactly when a job is worth handing to a dealer instead.
Found this useful? Make us a preferred source so we show up in your Google results.
Keep reading
Related articles
Troubleshooting & Repair
Dead Dash? Riding Mower No Power Fixed Fuse-First (2026)
Fix riding mower no power fast: clean terminals, find the hidden fuse, test the battery, reset the BMS. A fuse-first checklist for gas & electric mowers.
Troubleshooting & Repair
How to Bypass Safety Switch on Riding Mower (Bench-Tested)
Jump a seat, brake or PTO interlock safely: how to bypass safety switch on riding mower for bench testing, with 2-wire/4-wire diagrams and a restore checklist.
Troubleshooting & Repair
Riding Lawn Mower Won't Turn Over: 5-Stage Voltage Test
Fix it fast: a riding lawn mower won't turn over usually means battery, ground, solenoid or starter. Test each in 5 ordered stages.
Troubleshooting & Repair
Just Clicks? Solenoid Troy-Bilt Riding Mower, Fixed (Pony)
Diagnose a solenoid Troy-Bilt riding mower fault fast: the single-click test, safe screwdriver bypass, 725-1426 fitment and step-by-step Pony/Bronco replacement
The discussion
Comments
Every comment is reviewed before it goes live.