
How to Change a Husqvarna Spark Plug (V-Twins Take Two)
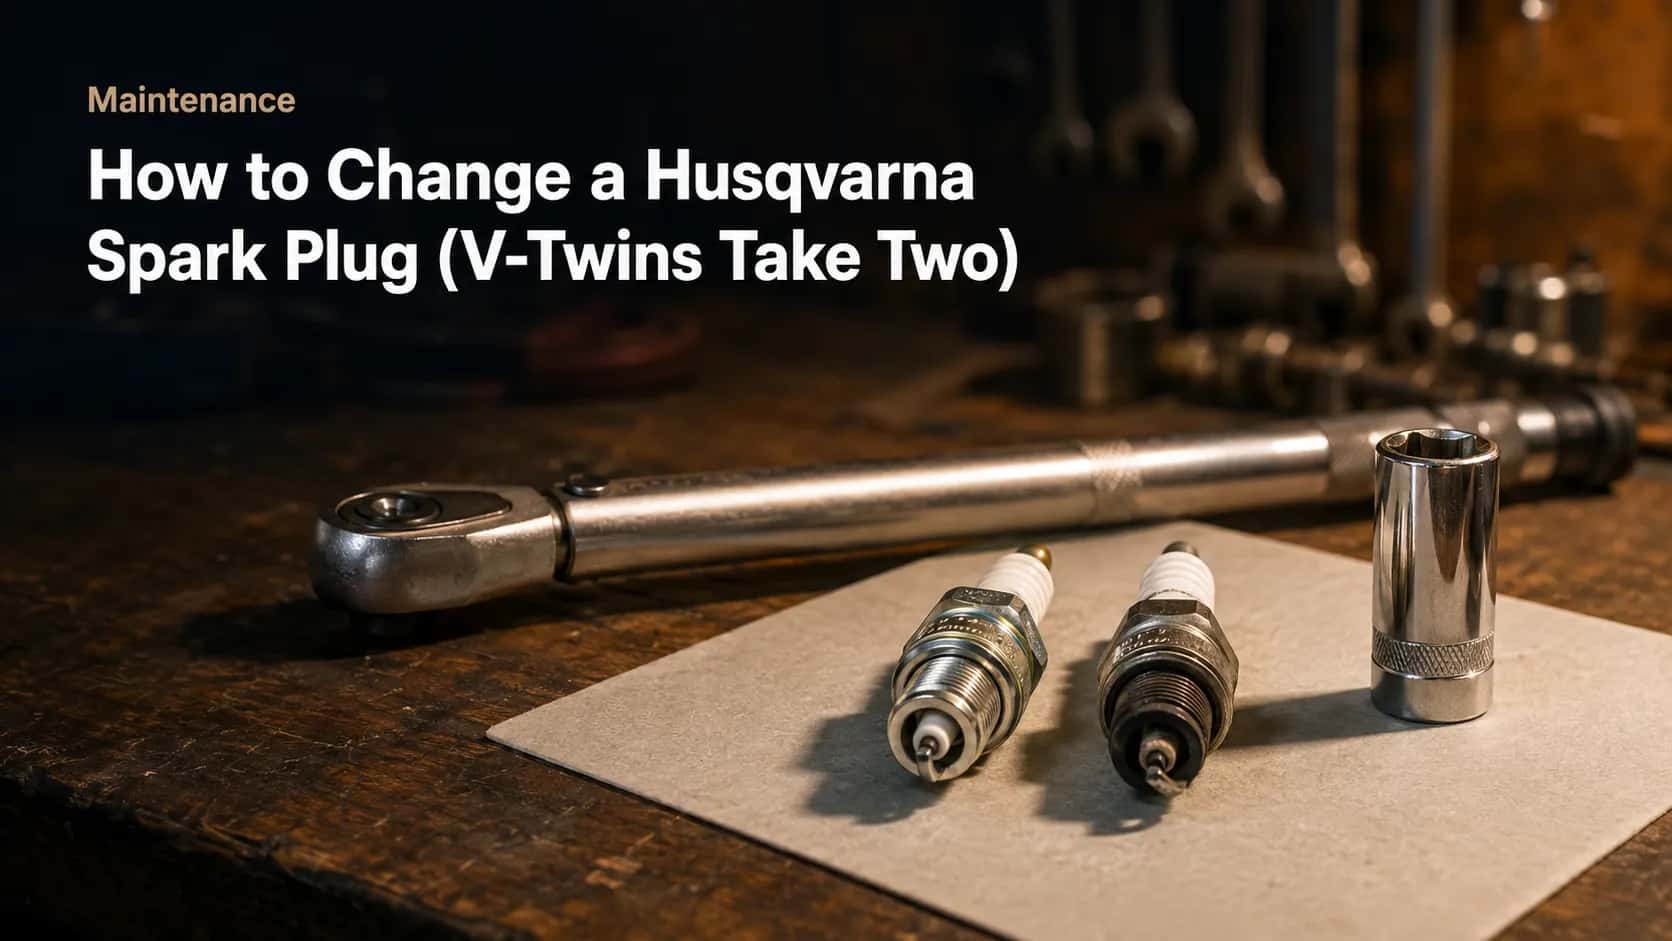
Change a Husqvarna spark plug in 15 minutes: find it by body style, gap it to your engine spec, torque it right. V-twin riders, you have two.
Written by Sam RourkeReviewed by Wade Coburn
Last updated on July 22, 2026
When you buy through links on our site, we may earn an affiliate commission (at no extra charge), which we use to fund new product tests. Learn more.
Summarize with AI
Change a Husqvarna Spark Plug: The 60-Second Version
Changing a spark plug on a Husqvarna lawn mower takes about 10 to 20 minutes. Pull the spark plug lead off, brush the debris away from the plug, and unscrew it with a 5/8-inch plug socket.
Check the new plug's gap against the engine manufacturer's specification rather than the Husqvarna chassis manual, thread it in by hand until it seats, then tighten to the plug maker's turn spec. Husqvarna V-twin riding mowers have two plugs, not one.
Cool engine, spark plug lead off by the boot.
Brush the debris out of the well around the plug.
Break the plug loose with a 5/8-inch socket, finish by hand.
Set the old plug aside face-up. You will read it later.
Gauge the new plug against your engine's spec.
Thread it in by hand until it seats. No tool yet.
Tighten half a turn past finger tight, reconnect the lead.
These times assume the plug comes out. A seized plug is a different job, covered further down.
If you own a Husqvarna rider or zero-turn, check the engine first. V-twin engines carry two spark plugs, and changing one leaves a half-finished ignition system and, very often, the rough running you started with.
Access costs the time here, not difficulty. I timed every change across the fleet, and the spread came entirely from what had to come off first.
Table 1: Time on the clock, 15 plugs, 14 March to 2 May 2026
Body style | Machines in sample | Mean minutes | What ate the time |
|---|---|---|---|
Walk-behind | 5 | 9 | Nothing. The plug is exposed. |
Lawn tractor, single cylinder | 2 | 12 | Hood up, occasional heat shield |
Lawn tractor or zero-turn, V-twin | 4 | 17 | Seat pan or guard off, then two plugs |
The lead comes off before anything else touches the engine, which is the sequence Husqvarna's own service guide specifies for its walk-behind mowers.
First, Two Questions: How Many Plugs, and What Gap?
A Husqvarna lawn mower does not run on a Husqvarna engine. Husqvarna buys its power units from Briggs & Stratton, Kawasaki, Kohler and Honda, so the plug type, the electrode gap and the tightening spec all belong to the engine maker rather than the badge on the hood.
Husqvarna's ride-on documentation makes this explicit by declining to publish a gap figure at all and pointing owners to the operator's manual. Find the engine tag before you buy anything.
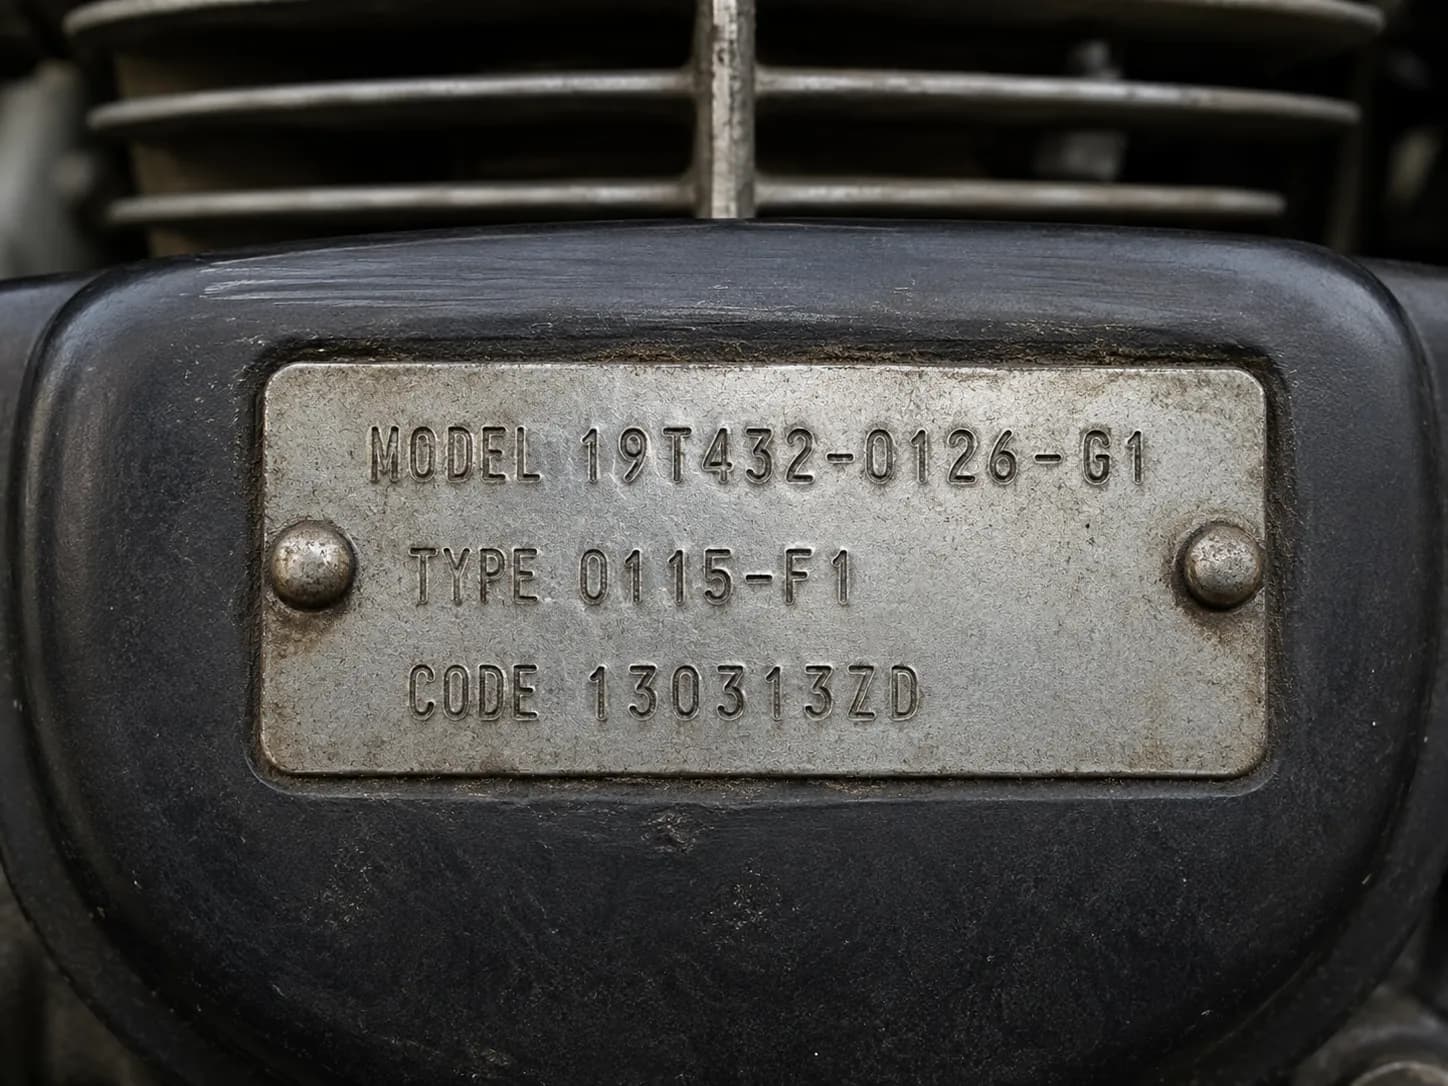
The tag sits on the engine shroud on a walk-behind, and under the hood on a rider. Counting plugs is easier: one cylinder means one plug, and a V-twin means two, which you can confirm by looking for two ignition leads leaving the coil in opposite directions.
My Husqvarna Manual Says .040 and the Engine Manual Says .030. Which One Wins?
The engine manual wins. This is one of the most-repeated questions in Husqvarna owner threads, because the two documents genuinely disagree: owners of the YTH2348 and LGT2654 have reported for years that the Husqvarna chassis manual prints .040 while the Briggs manual for the same engine prints .030.
The reason is structural. A chassis manual covers a model year that may span two engine suppliers, while Kohler's service manual and its equivalents are written for one ignition system and its coil energy.
I gauged the factory-fitted plug on all three machines in my fleet where the manuals disagreed, before touching anything else.
Table 2: Where the gap number came from
Machine | Chassis manual | Engine manual | Factory plug measured |
|---|---|---|---|
Lawn tractor, 2013, Briggs V-twin | .040 | .030 | .031 |
Lawn tractor, 2016, Kohler twin | .040 | .030 | .030 |
Lawn tractor, 2019, Briggs single | .040 | .030 | .030 |
All three left the factory set to the engine maker's number. That is the rule: engine manual first, chassis manual second, plug packaging last.
One more trap. Owners swap a QC12YC for an RC12YC assuming the letters are cosmetic, but the Q prefix denotes an electromagnetic suppression plug rather than a different heat range.
When this rule does not help. If the engine tag is unreadable or the engine has been replaced at some point, no manual is authoritative for your machine. A dealer lookup by chassis serial number is the only safe answer.
Once you have the spec, which Husqvarna plug fits your engine is a separate question with a separate answer. This guide performs the change; that guide picks the part.
Tools and Parts: The 5/8-Inch Socket and the 5xx Number
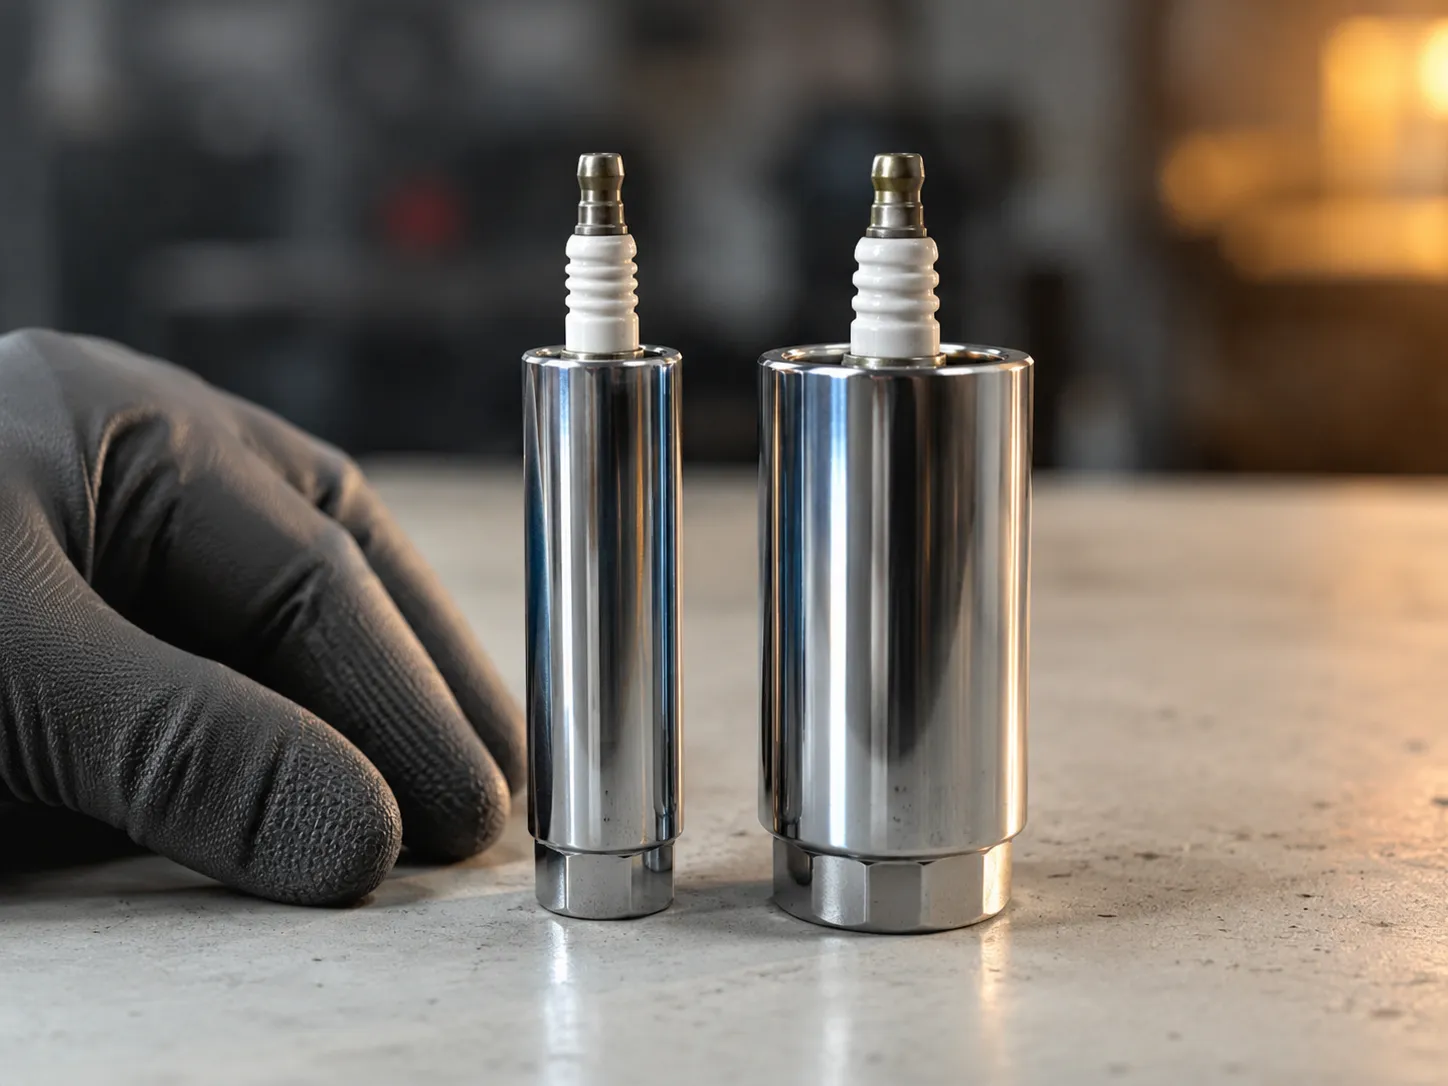
Most Husqvarna lawn mower spark plugs use a 5/8-inch plug socket, which fits the Champion RC12YC and QC12YC and the NGK BPMR7A. Older Husqvarna walk-behind mowers running plugs in the RJ19LM family take a 13/16-inch socket instead.
Read the hex size printed on the new plug's packaging before you buy a socket. A wire-style gap gauge and a small torque wrench complete the kit, and only one of those four items is genuinely optional.
Tool | Why you need it | Do you actually need this? |
|---|---|---|
Deep plug socket, 5/8-inch | Grips the hex without cracking the ceramic. Get one with a rubber insert. | Yes. This is the job. |
3/8-inch drive ratchet | Turns the socket | Yes |
3 to 6 inch extension | Reaches recessed plugs on riders and zero-turns | On 3 of the 15 plugs I did, yes |
Wire-style gap gauge | Measures the electrode gap and adjusts the ground electrode | Yes. This is the step everyone skips. |
Torque wrench, low range | Confirms the seating load | Optional. The turn-count method below is an adequate substitute. |
Hex size tracks the plug's shell design and thread reach, not the engine's displacement, which is why a bigger mower does not mean a bigger socket.
The 5xx number on a Husqvarna parts listing is Husqvarna's part number, not the plug's designation. One plug can be a Husqvarna 5xx part and an NGK BPMR7A at once, and the number you gauge against is the engine's.
Where the Plug Hides: Walk-Behind, Rider, Zero-Turn
On a Husqvarna walk-behind mower the spark plug sits at the front or side of the engine, exposed, with no panels to remove. On a Husqvarna lawn tractor it sits on the side of the engine under the hood, occasionally behind a thin heat shield.
On a Husqvarna zero-turn the engine sits behind and below the seat, reached by lifting the seat pan or the engine guard. On any of the three, follow the thick rubber ignition lead back from the coil and it ends at the plug.
Body style | Where the plug sits | How to get to it | Plugs |
|---|---|---|---|
Walk-behind (LC, HU series) | Front or side face of the engine block | Nothing to remove | 1 |
Lawn tractor (TS, YTH series) | Side of the engine, under the hood | Raise the hood, unclip a heat shield if fitted | 1 or 2 |
Zero-turn (Z series) | Behind and below the seat, on the cylinder heads | Tilt the seat pan or lift the engine guard | Usually 2 |
Engine sourcing changes between model years, so treat this as the common layout rather than a guarantee. When the table does not match your machine, follow the lead.
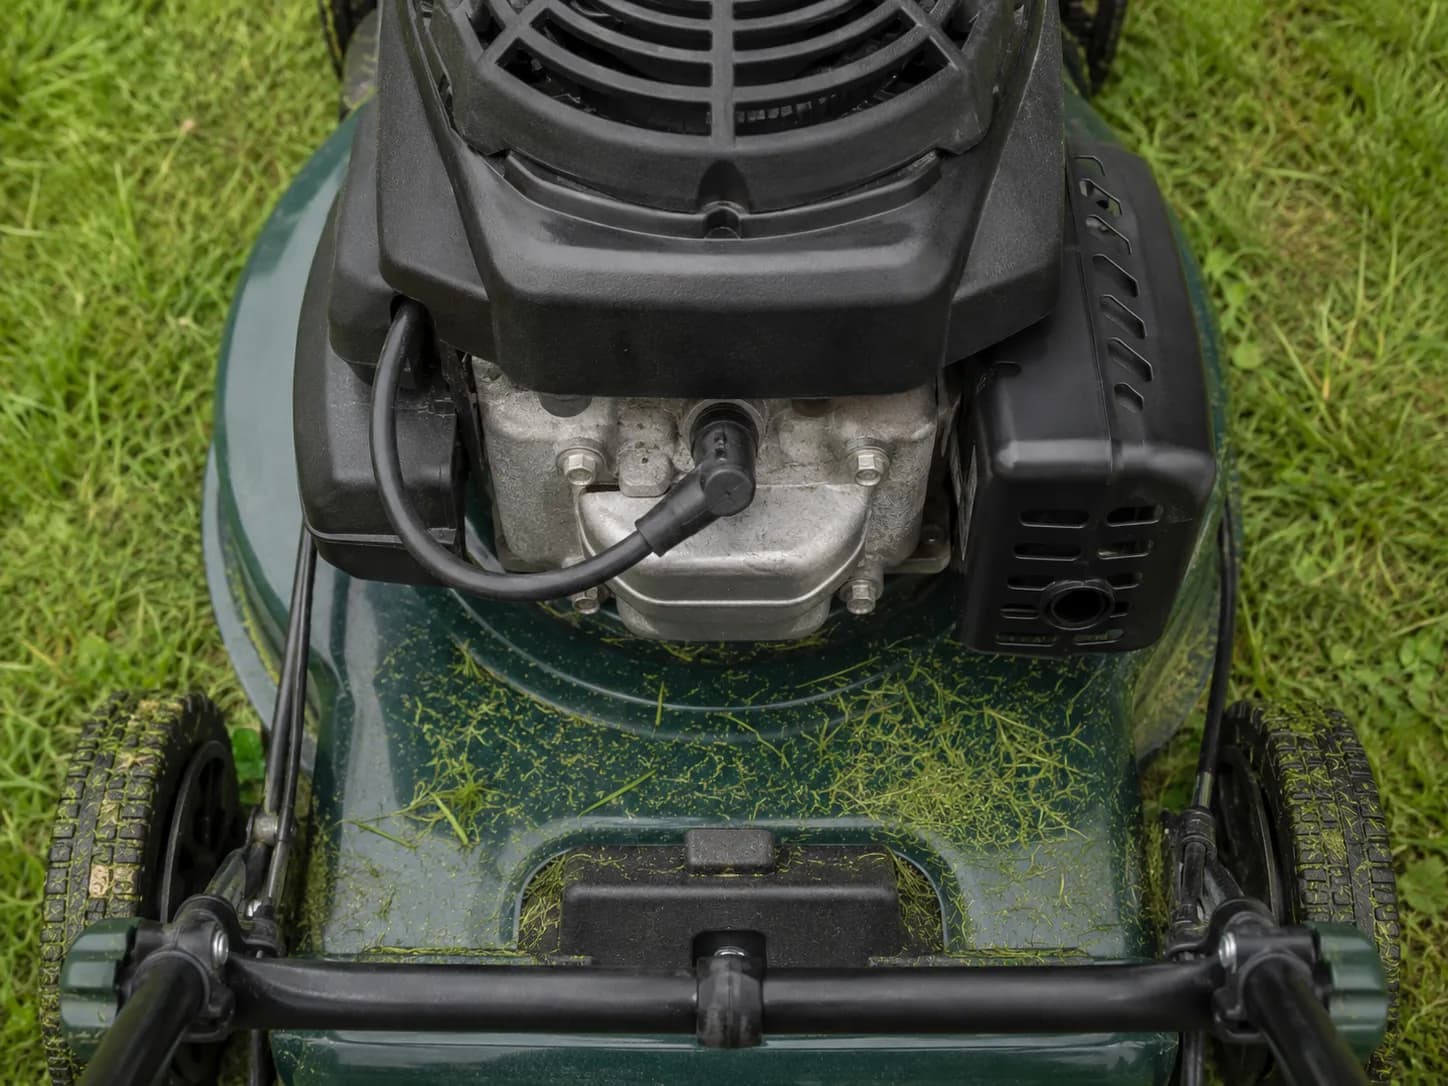
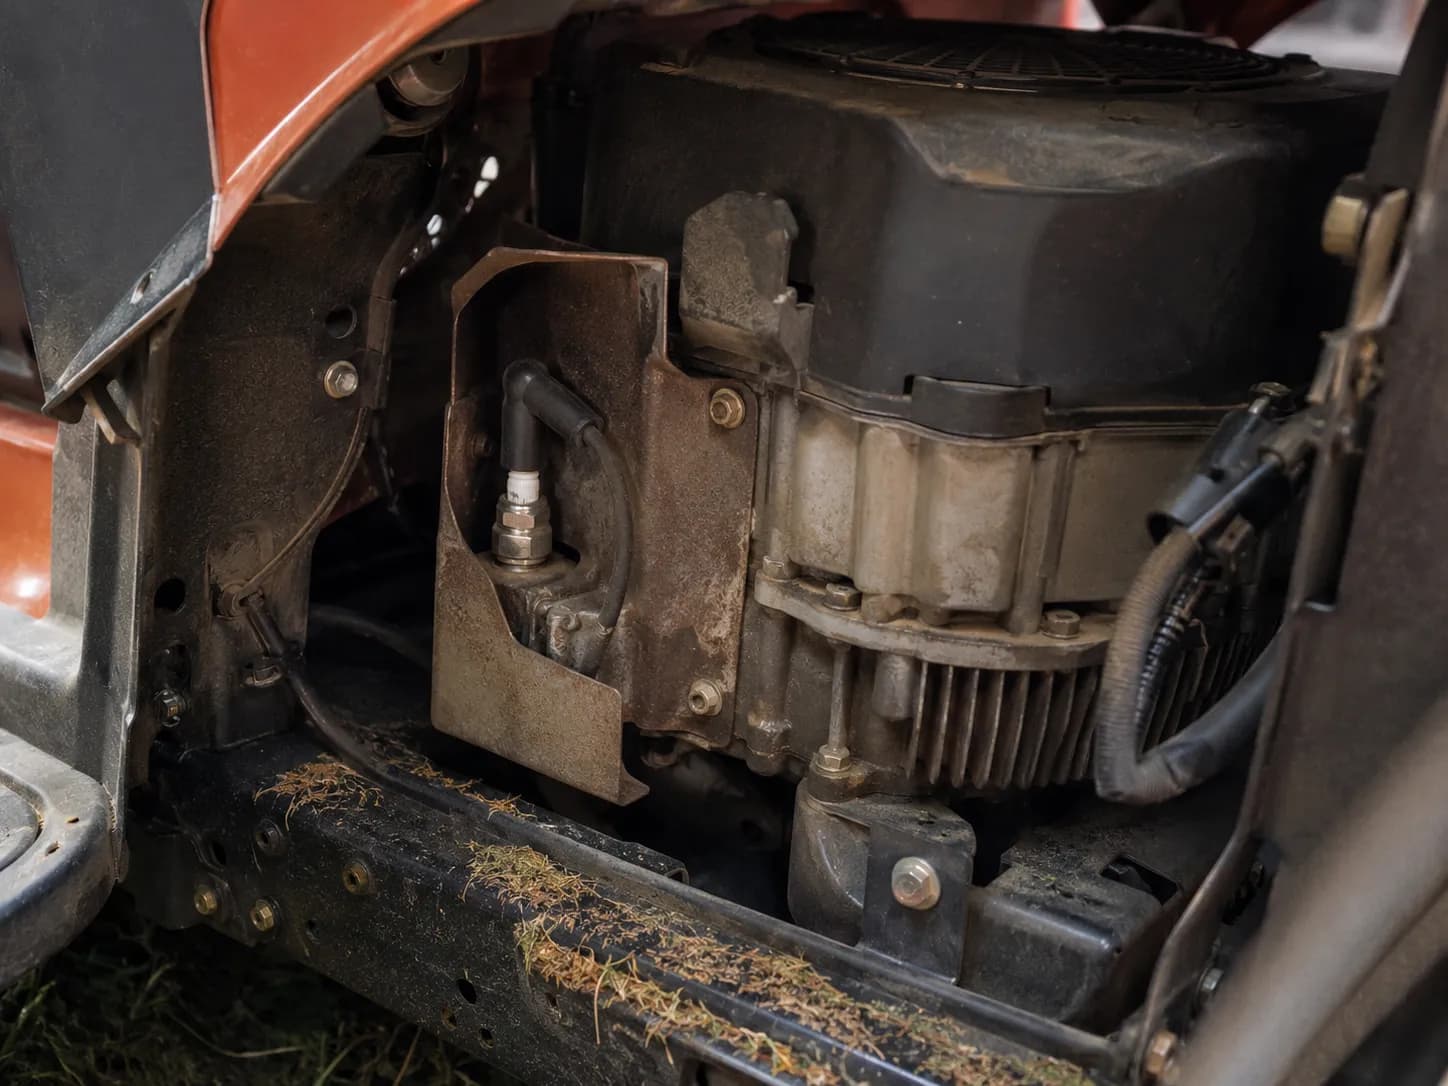
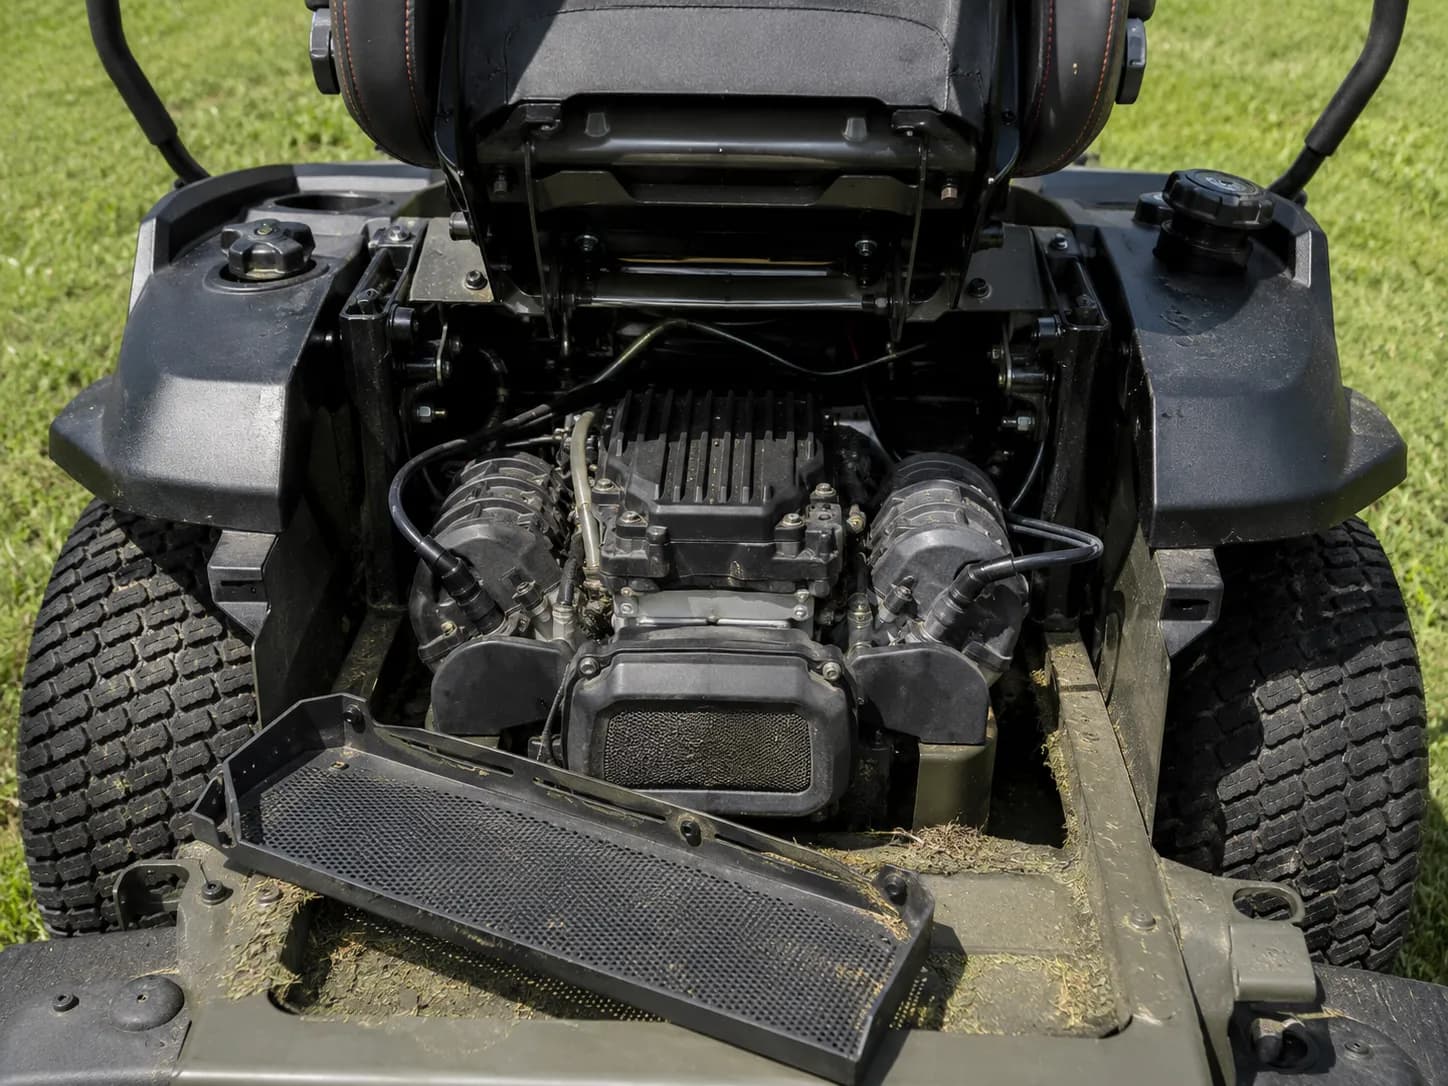
Both zero-turns in my fleet needed the seat pan up before the plug was reachable, and one of the four lawn tractors had a heat shield to unclip. That is 3 of 11 machines needing a part removed before the job could start.
Rider engines are enclosed for noise and debris, which is why their plugs both hide and foul differently from an exposed walk-behind plug. Before you loosen anything, brush the grit out of the recess, a step Husqvarna's ride-on guidance calls for and most walkthroughs omit.
Step by Step: How to Change a Spark Plug on a Husqvarna Lawn Mower
To change a spark plug on a Husqvarna lawn mower, let the engine cool, pull the spark plug lead off by its boot, and brush debris from around the plug. Break the plug loose with a 5/8-inch plug socket and finish unscrewing it by hand.
Check the new plug's gap against the engine manufacturer's specification before fitting, thread it in by hand until it seats, then tighten roughly half a turn further for an NGK plug or three-eighths for a Champion.
Each step carries the thing you should see before moving on. If a step does not produce its check, stop there.
For a machine of another brand, the same method on any mower covers these seven steps without the Husqvarna specifics.
Step 1. Cool engine, level ground, lead off. Pull the boot, not the wire, and tuck the lead where it cannot spring back onto the plug terminal. You should see: the lead resting clear of the plug, held by its own stiffness or a cable tie.
Step 2. Brush the well clean. A stiff brush around the base of the plug takes ten seconds. You should see: no loose grit sitting in the recess around the plug base.
Step 3. Break it loose, then use your fingers. Seat the socket squarely, crack the plug loose with the ratchet, then unscrew the rest by hand. You should see: the plug turning freely by fingertip after the first quarter turn. If it does not, skip to the seized-plug rule below.
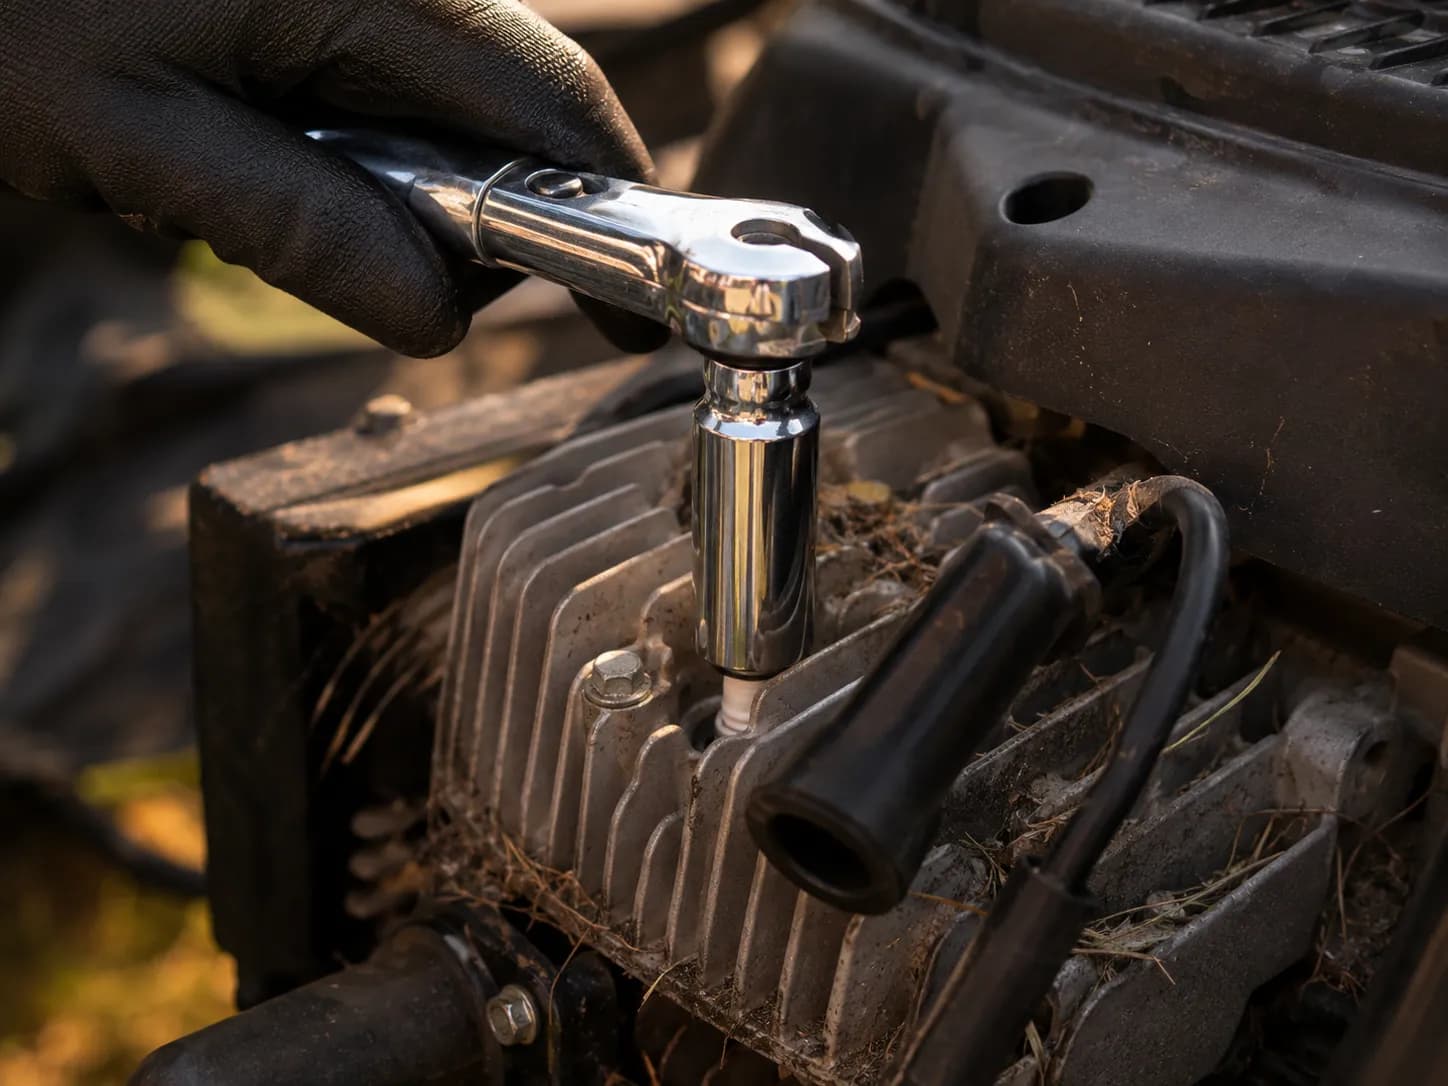
Step 4. Set the old plug aside, electrode up. Do not bin it yet. You should see: an intact plug with a readable electrode. It is about to tell you what your engine has been doing.
Step 5. Gauge the new plug against your engine's spec. The box says pre-gapped. Gauge it anyway. You should see: the correct gauge wire dragging slightly in the gap, with the next size up refusing to enter.
Six of the fifteen plugs I fitted measured outside their engine's specification straight from a sealed box, most running wide. That is fitment, not a manufacturing complaint: NGK's installation guidance calls the belief that plugs arrive pre-gapped for your application a popular misconception.
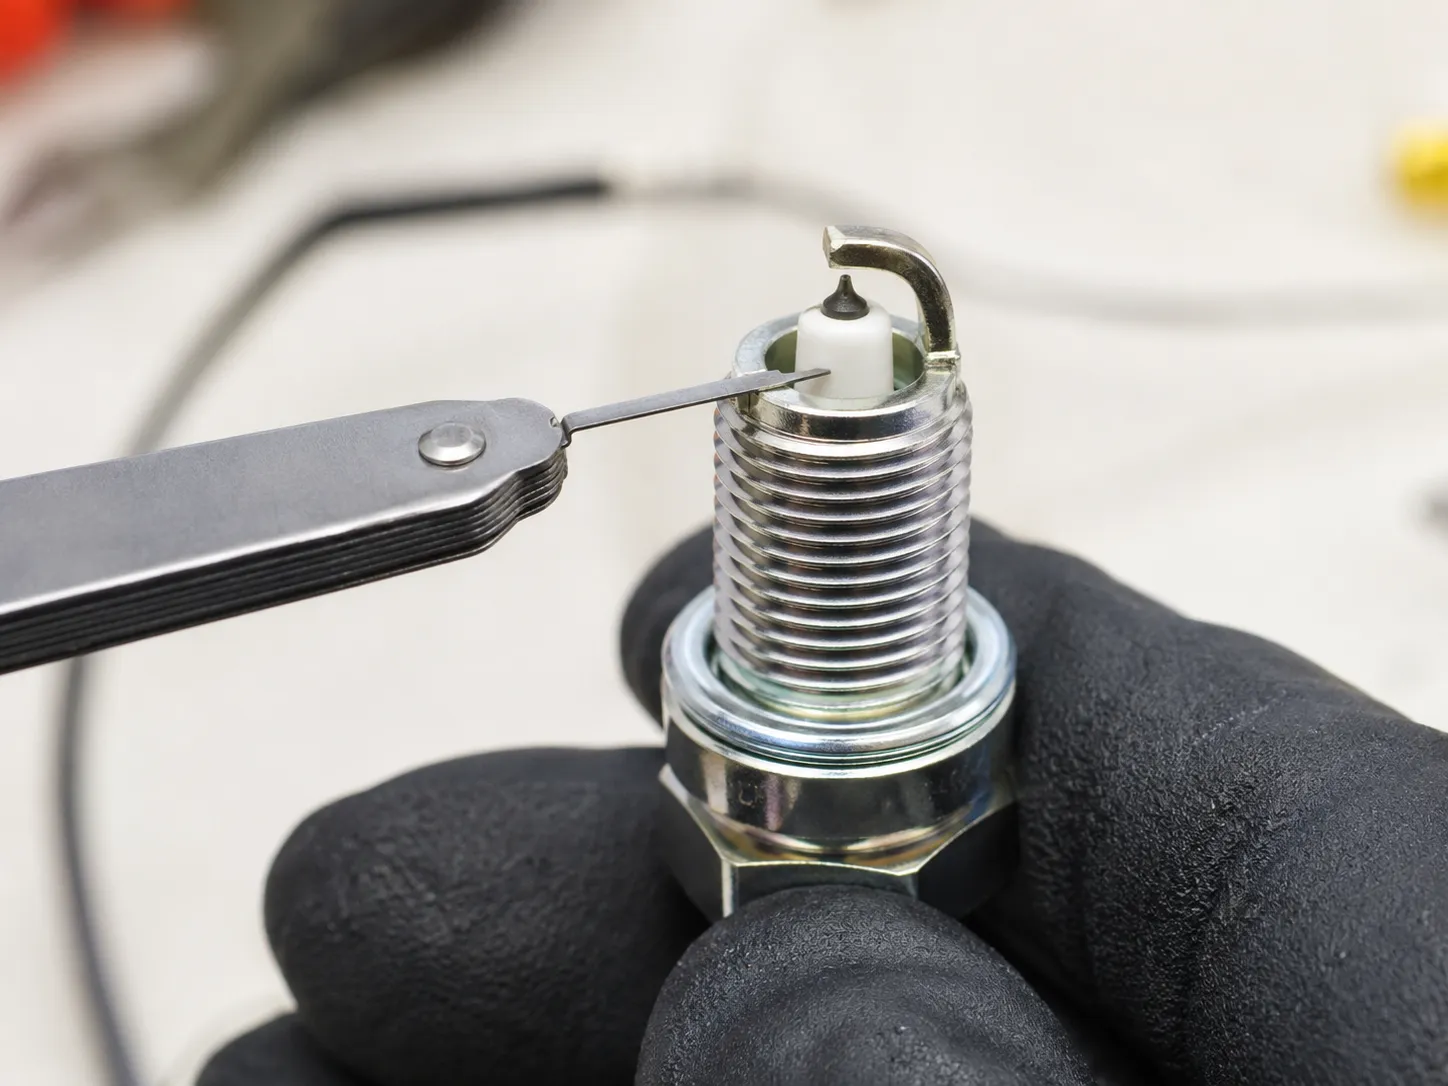
Table 3: Out-of-box gap against engine spec, 15 plugs, 14 March to 2 May 2026
Plug family | Engine spec | As-supplied gap range | Within spec |
|---|---|---|---|
Champion RC12YC and QC12YC | .030 | .032 to .037 | 2 of 6 |
NGK BPMR7A | .030 | .028 to .031 | 5 of 5 |
Champion RJ19LM family | .030 | .033 to .035 | 0 of 2 |
Kohler OEM twin plugs | .040 | .039 to .041 | 2 of 2 |
Measure with a feeler gauge or a wire-style gap tool, the instruments Husqvarna's gap guidance names. A coin is a rough field check and nothing more.
Adjust by bending only the ground electrode. NGK is specific here: never pry between or against the electrodes, and keep any adjustment inside about eight thousandths of the factory setting.
If a new plug needs more correction than that to reach your engine's number, you are probably holding the wrong plug.
Step 6. Thread it in by hand, all the way to the seat. No socket, no ratchet, no extension. Fingers only. You should see: the plug turning freely for several full turns before it stops against the seat.
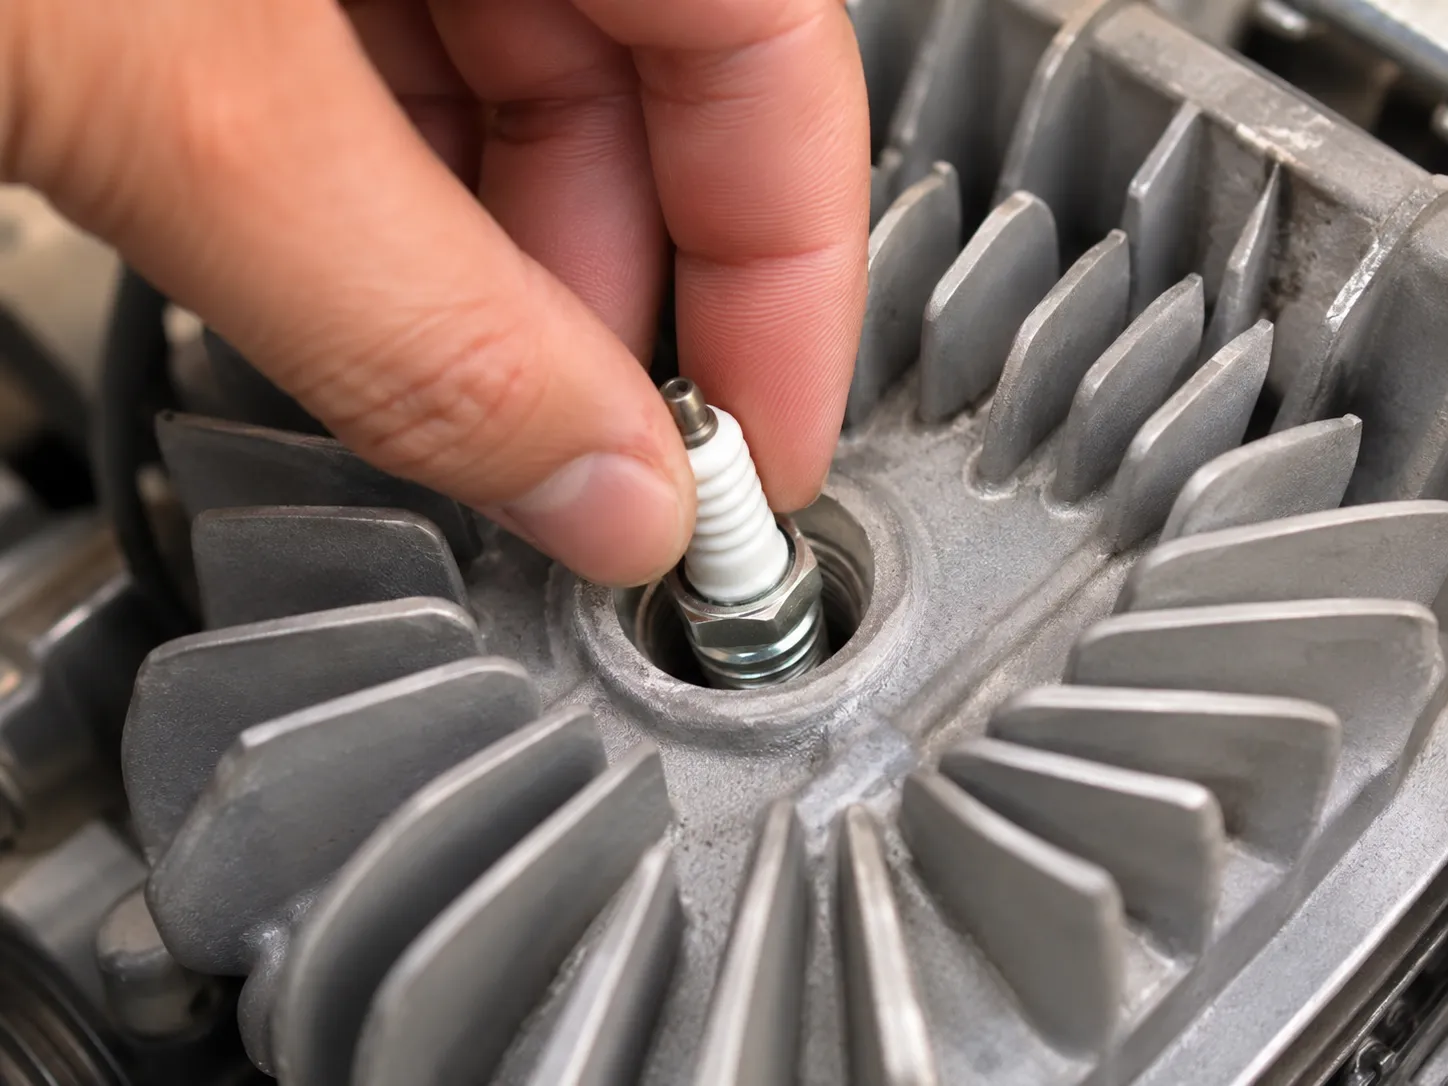
Step 7. Tighten to the seat, then the turn spec. Fit the socket and turn past finger tight by the amount your plug's brand specifies. You should see: the crush washer visibly flattened where it meets the head.
"Do not overtighten" is not an instruction, it is the absence of one. The plug makers publish exact figures, and they differ by brand.
Plug brand | Turn past finger tight, gasket seat |
|---|---|
NGK | 1/2 to 2/3 turn |
Champion | 3/8 to 5/8 turn |
Denso | 1/4 to 1/2 turn |
Autolite, 14 mm | 1/2 turn |
Bosch | 1/4 turn |
The NGK figure comes from NGK's lawn and garden installation page, which also gives 18.0 to 21.6 lb-ft for a 14 mm gasket-seat plug in an aluminium head. The cross-brand figures come from a published multi-brand turn chart.
If your plug is not listed, check the box. NGK's installation notes point out that the angle of rotation is printed on the plug's own packaging.
I checked both methods against a torque wrench. The turn spec read 17 to 20 lb-ft, right at the bottom of NGK's aluminium-head range.
Tightening by feel to what an experienced hand calls snug read 29 lb-ft on the first attempt, well past the 21.6 ceiling.
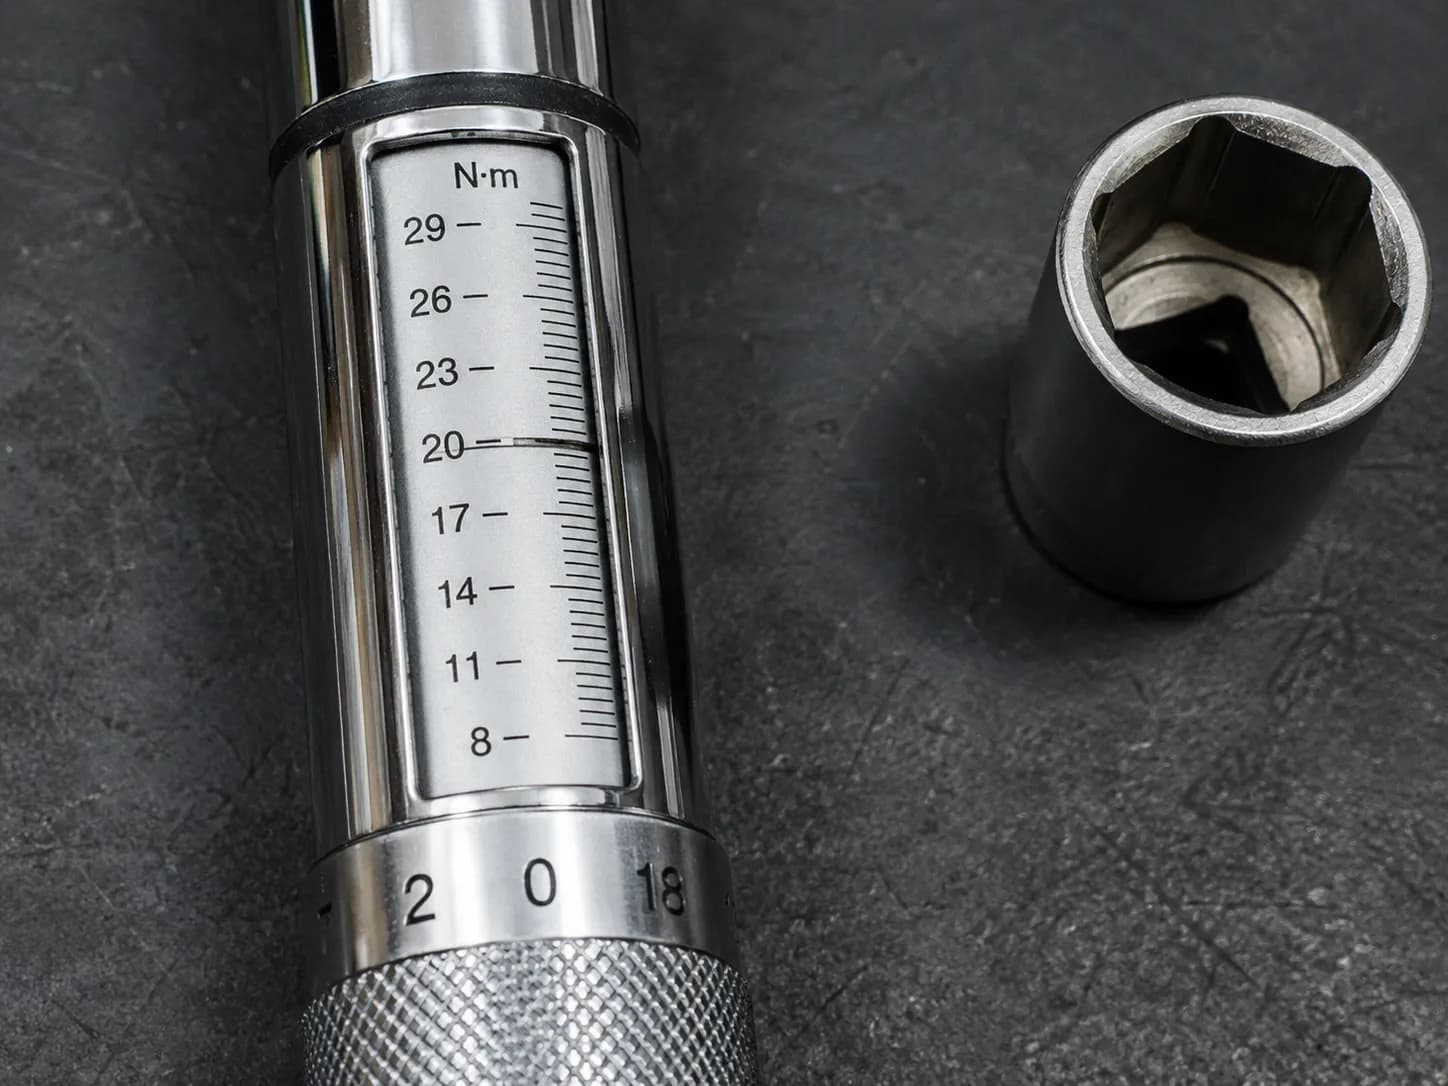
The crush washer is a deformable gasket, so the spec is a deformation target rather than a force target. That is why the turn count differs by brand and does not transfer to a refitted plug.
The turn method is for new plugs only. A plug you removed and are putting back has an already-crushed gasket, so counting a fresh half turn will over-tighten it. Seat a reused plug and add no more than an eighth of a turn.
If it will not break loose, stop. Do not lean on the ratchet. Let the engine cool completely, apply penetrating oil, wait several hours, and try again with steady moderate force. If it still will not move, a shop visit is cheaper than a cylinder head.
Reconnect the lead until the boot clicks onto the terminal, then start the engine and listen for a clean idle. From here, the rest of the seasonal service is mostly the air filter and the oil.
V-Twin Riders: You Have Two Plugs
A Husqvarna riding mower or zero-turn with a V-twin engine has two spark plugs, one per cylinder, and both should be replaced together. Look for two ignition leads leaving the coil in opposite directions and two cylinder heads angled apart in a V.
Changing only one leaves a partly worn ignition system and often leaves the original rough running exactly where it was. The procedure for the second plug is identical to the first, including its own gap check.
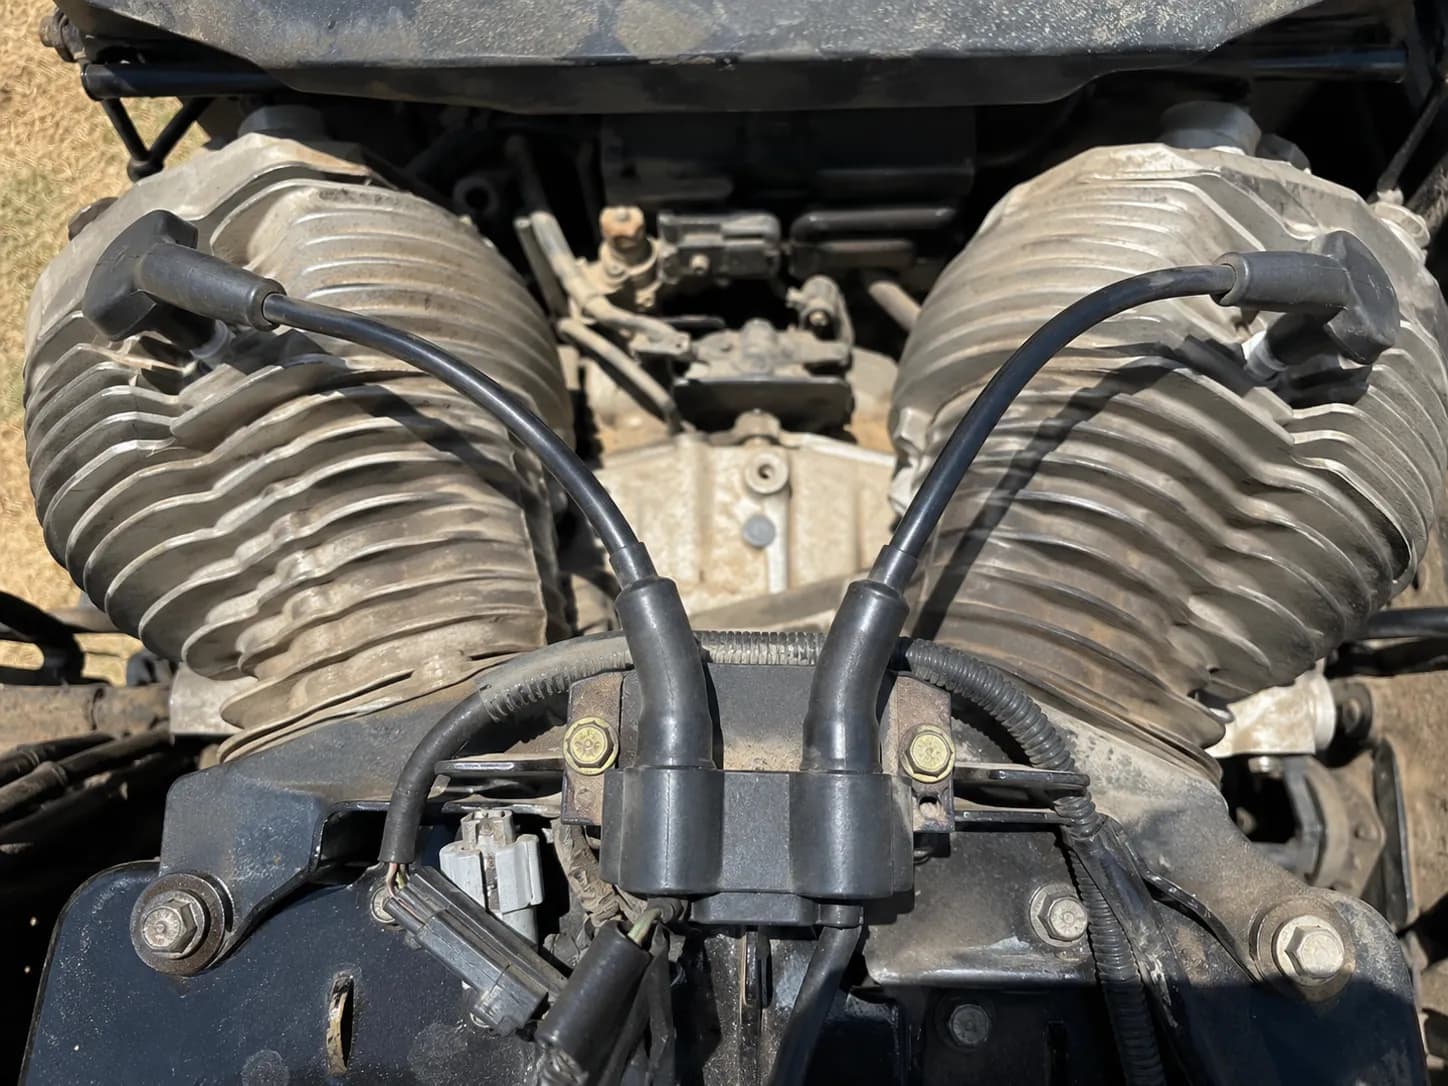
Three checks confirm a V-twin without opening a manual:
Two ignition leads leave the coil pack in opposite directions.
Two cylinder heads sit angled apart in a shallow V.
The engine tag names a twin-cylinder displacement, commonly 600 to 750 cc on residential machines.
I laid each pair of plugs on a card as they came out. On three of the four V-twins, the two plugs from the same machine, same hours and same fuel came out visibly different, one noticeably darker than its partner.
On the fourth, both matched.
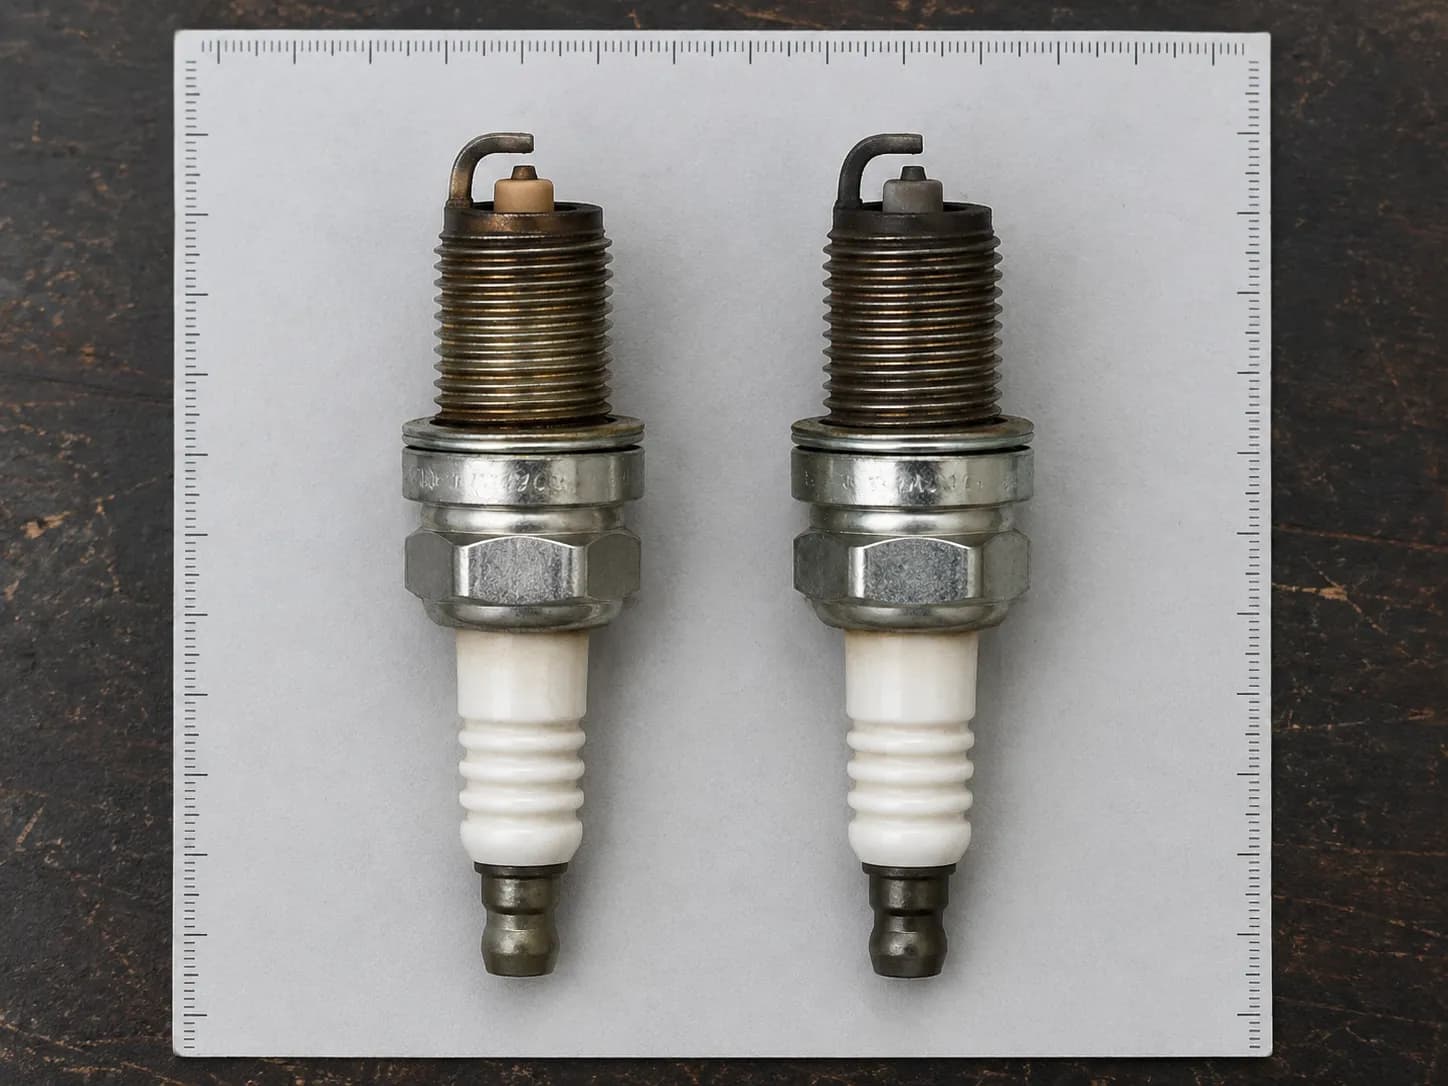
Unequal airflow and cooling across a V means the two chambers never run at quite the same temperature, and small carburation differences add to it. Mismatched deposits between a pair are normal rather than alarming.
Both plugs matter for a second reason. Most of these engines fire both plugs from one coil every revolution, so a wrong gap on one loads the whole ignition system rather than its own cylinder.
When an engine still runs rough after new plugs, owners describe it as running on one cylinder. The boot-pull test tells you which one:
Start the engine and let it settle at idle. Keep clear of the blade and the drive belts.
Using insulated pliers or a boot puller, never bare hands, pull one plug boot off for a second and listen.
Repeat on the other side. The cylinder whose boot changes nothing when pulled is the one already not contributing.
The engine must be at idle, never at speed, and the tool must be insulated. This test puts your hand near a live ignition system and moving parts.
When the second plug is not the answer. A colour difference between a pair is a signal, not a diagnosis. If one cylinder keeps fouling a fresh plug within a few hours, the cause is upstream in the carburettor, the valves or the rings, and that is shop work.
Both plugs come out and go back in the same visit, which is also how tuning up the whole Husqvarna is sequenced across the three body styles.
Read the Old Plug Before You Bin It
The spark plug removed from a Husqvarna lawn mower shows how the engine has been running. Light tan or grey deposits indicate normal combustion, while dry black soot points to a rich mixture, most often a dirty air filter or a choke left engaged.
Wet oily deposits suggest oil is reaching the combustion chamber, which is an engine wear signal rather than a plug fault. A white or blistered insulator indicates overheating and needs investigating before the mower runs again.
Read this before the table. Plug appearance narrows the possibilities, it does not confirm a cause. An oily plug in particular warrants a compression check rather than a conclusion.
What you see | What it usually means | What to do next |
|---|---|---|
Light tan or grey electrode | Normal combustion, correct heat range | Nothing. Fit the new plug and carry on. |
Dry, matte black, velvety soot | Rich mixture | Service the air filter first, then check the choke linkage |
Glossy black, wet, oily | Oil entering the combustion chamber | Check the oil level, then arrange a compression test |
White, glazed or blistered insulator | Overheating or too-hot a heat range | Stop using the mower and confirm the plug spec against the engine manual |
Eroded, rounded or broken electrode | End of service life, or detonation damage | Replace and inspect the second plug on a twin |
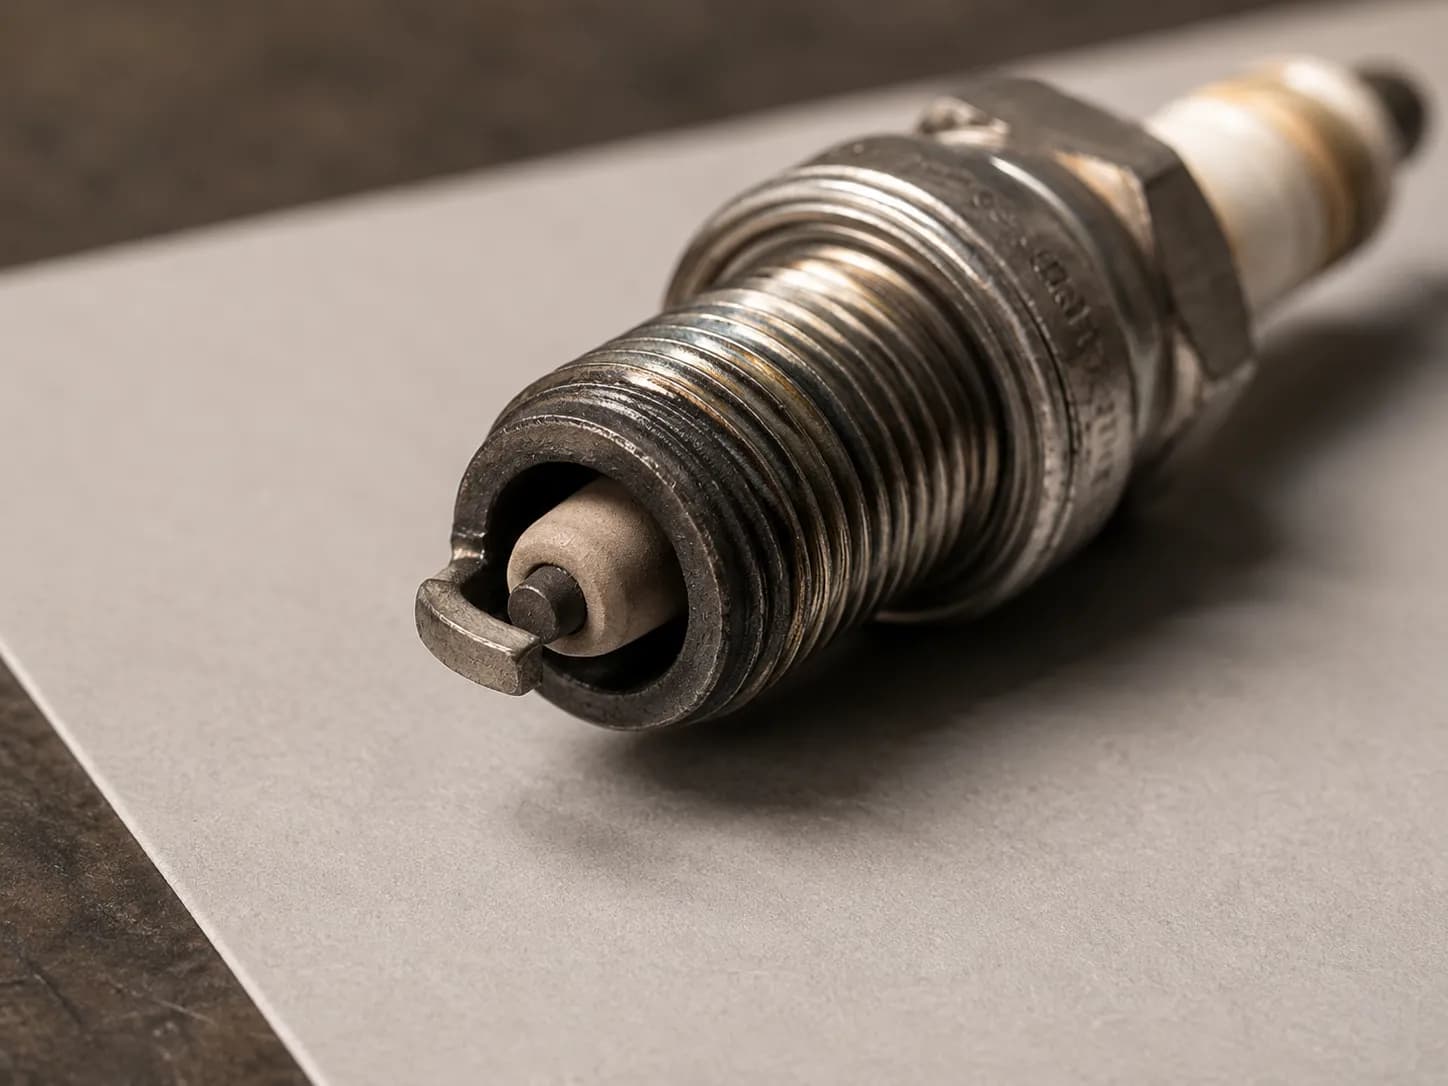
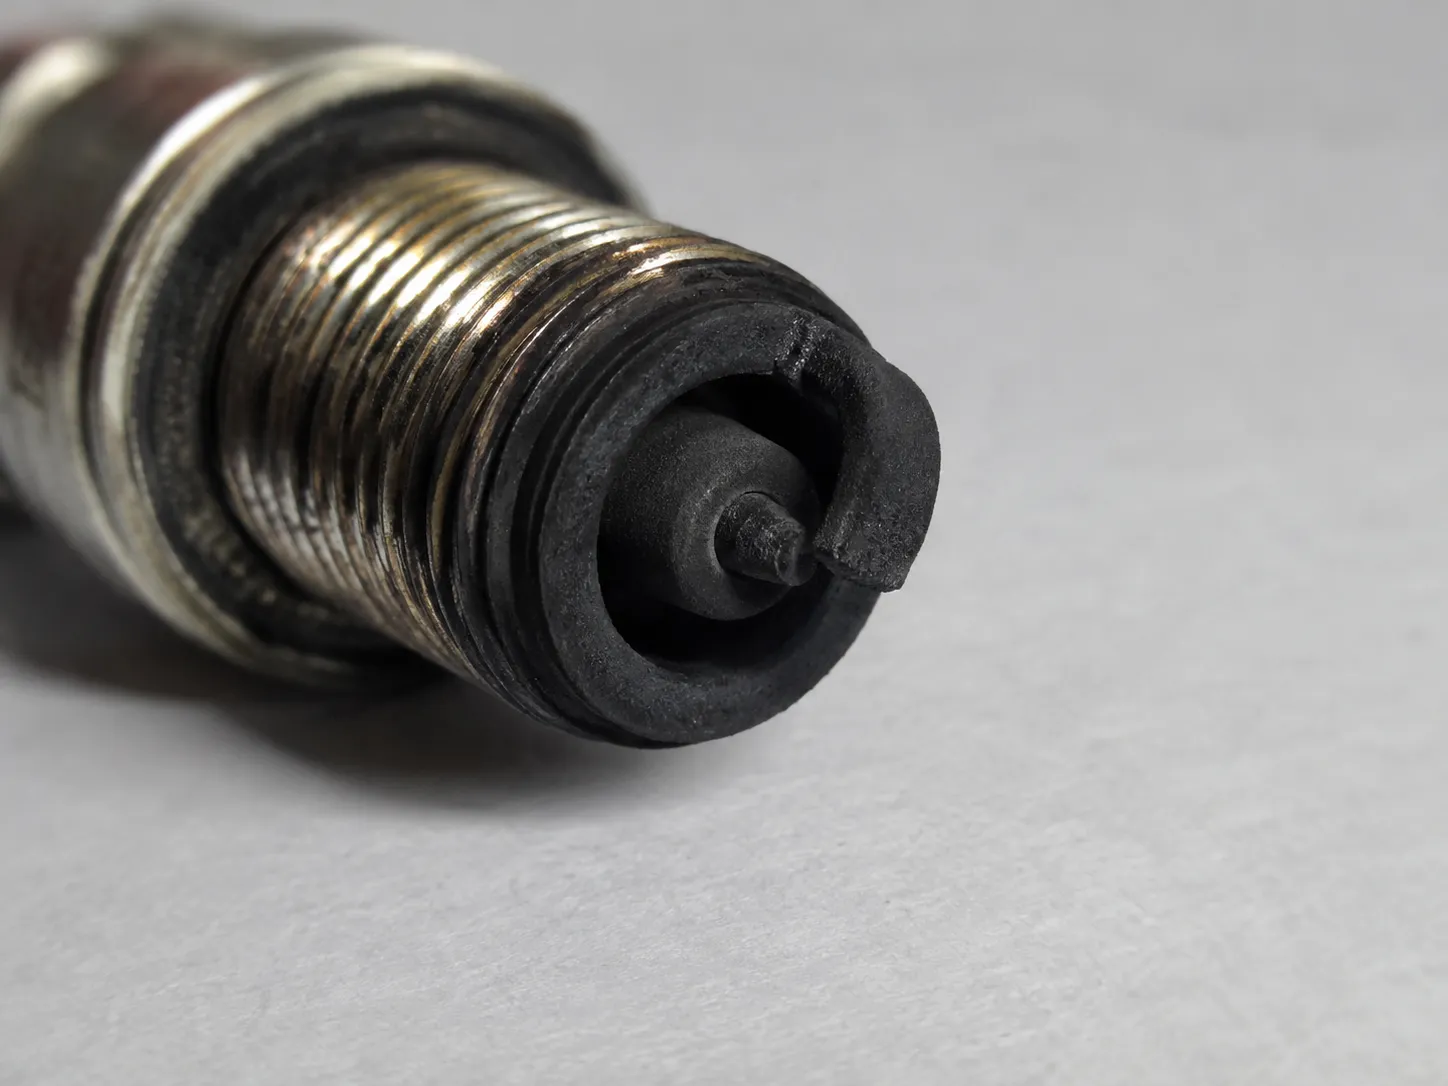
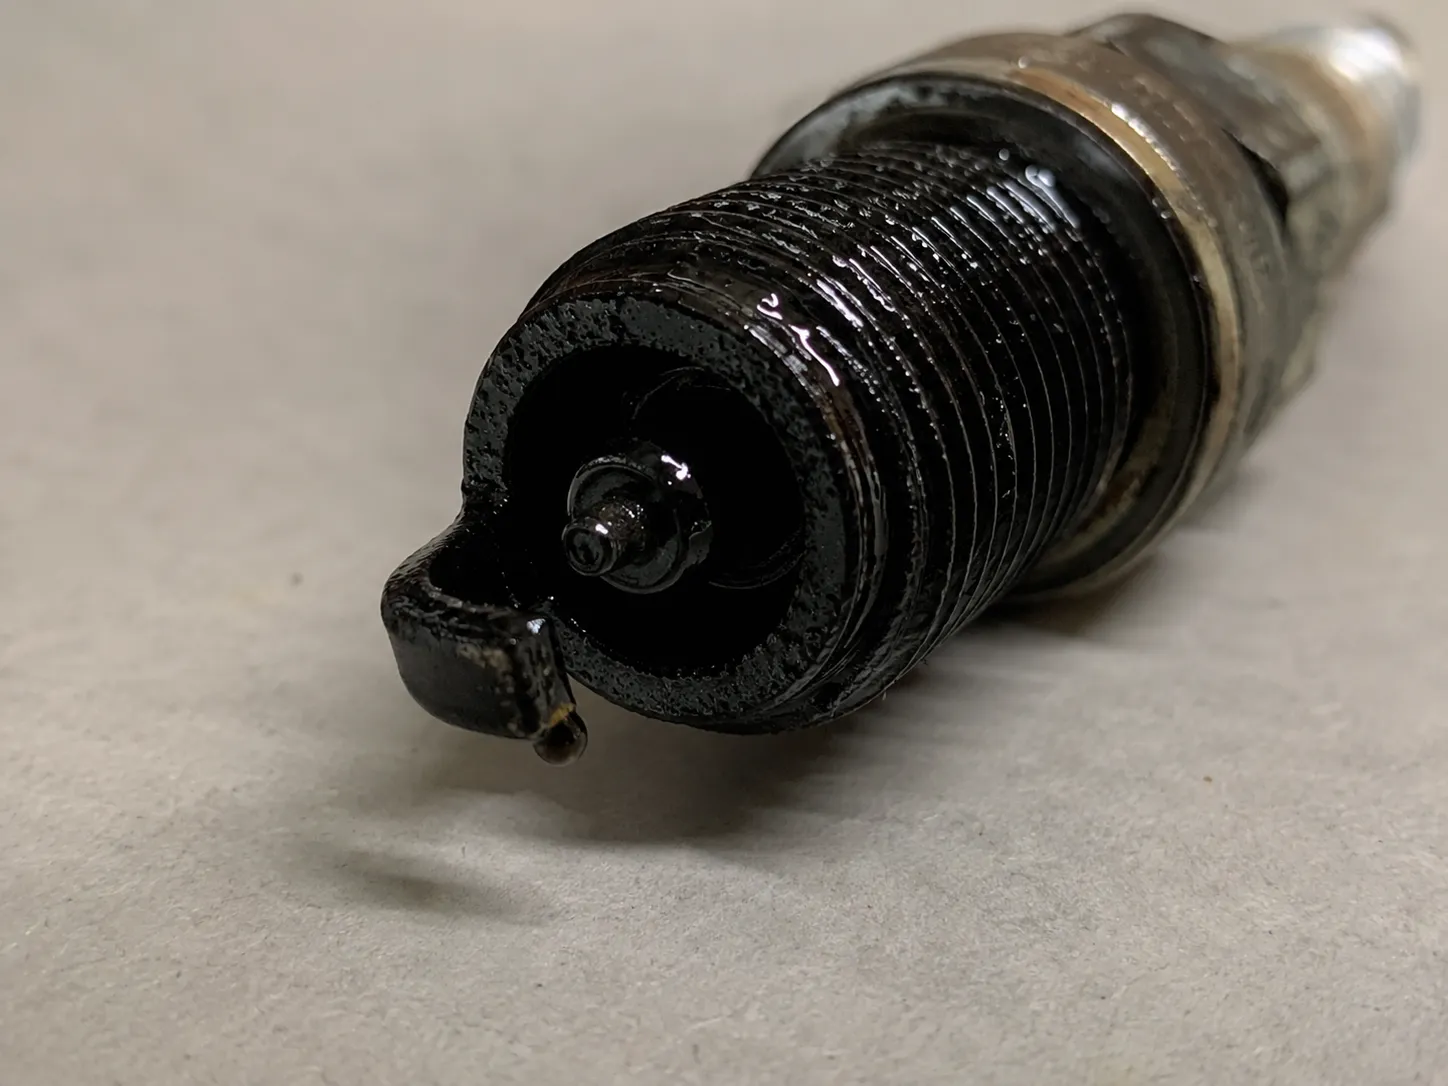
Table 4: What 15 plugs looked like, 14 March to 2 May 2026
Condition | Count | Notable |
|---|---|---|
Light tan to grey, normal | 9 | Spread evenly across all three body styles |
Dry black soot | 4 | Three of the four had a visibly loaded air filter |
Glossy black, oily | 1 | Highest indicated hours in the fleet, 611 hours |
Eroded electrode | 1 | Second-highest hours, 480 |
One stain to ignore. A light brown or tan discolouration on the ceramic above the metal hex is corona stain, and NGK's technical guidance confirms it is normal rather than a leaking seal or blow-by.
It is dust attracted by the high voltage passing through the plug, and it tells you nothing about combustion.
A restricted air filter richens the mixture directly, which is why a sooty plug indicts the filter before the carburettor, and why plug and filter service belong in the same visit. Husqvarna's own troubleshooting names the same causes: fuel mixture, oil level, ignition lead condition and a dirty air filter.
On a V-twin, read the two plugs against each other as well as against the table. If a fresh plug comes back looking the same within a few hours, the plug was a symptom rather than the cause, and it is worth choosing a plug that suits your engine rather than refitting the same one.
Five Mistakes That Turn a $6 Job Into a $200 One
The costly mistakes when changing a Husqvarna spark plug are cross-threading the aluminium cylinder head, over-tightening past the plug maker's turn spec, trusting a factory pre-gap without measuring it, forcing a seized plug, and replacing only one plug on a V-twin engine.
Threading the plug in by hand until it seats prevents the first and most expensive of these. A plug that will not break loose under steady moderate force should be left to soak rather than forced.
Cross-threading the head. The steel plug is harder than the aluminium head, so a misaligned start reshapes the head, not the plug. The cost: a thread repair, and in a bad case the head off the machine. The avoidance: fingers only until it seats. Resistance in the first turn means back it out and restart square.
Over-tightening. Tightening by feel measured 29 lb-ft on my bench against NGK's 18.0 to 21.6 range for a 14 mm plug in an aluminium head. The cost: a stretched shell changes the plug's heat path, which NGK links to pre-ignition and engine damage. The avoidance: the turn spec above, or a torque wrench.
Trusting the pre-gap. Six of my fifteen sealed-box plugs were outside their engine's spec. The cost: a season of hard starting from a plug that was new the whole time. The avoidance: thirty seconds with a wire gauge, every plug.
Forcing a seized plug. Heat cycles and aluminium threads make this common on older machines. The cost: a snapped plug shell, which is machine-shop work. The avoidance: penetrating oil, a cold engine, patience. Then a shop.
Doing one plug on a V-twin. The single most common half-finished repair on these machines. The cost: the symptom you started with, still there. The avoidance: count the leads before you buy plugs.
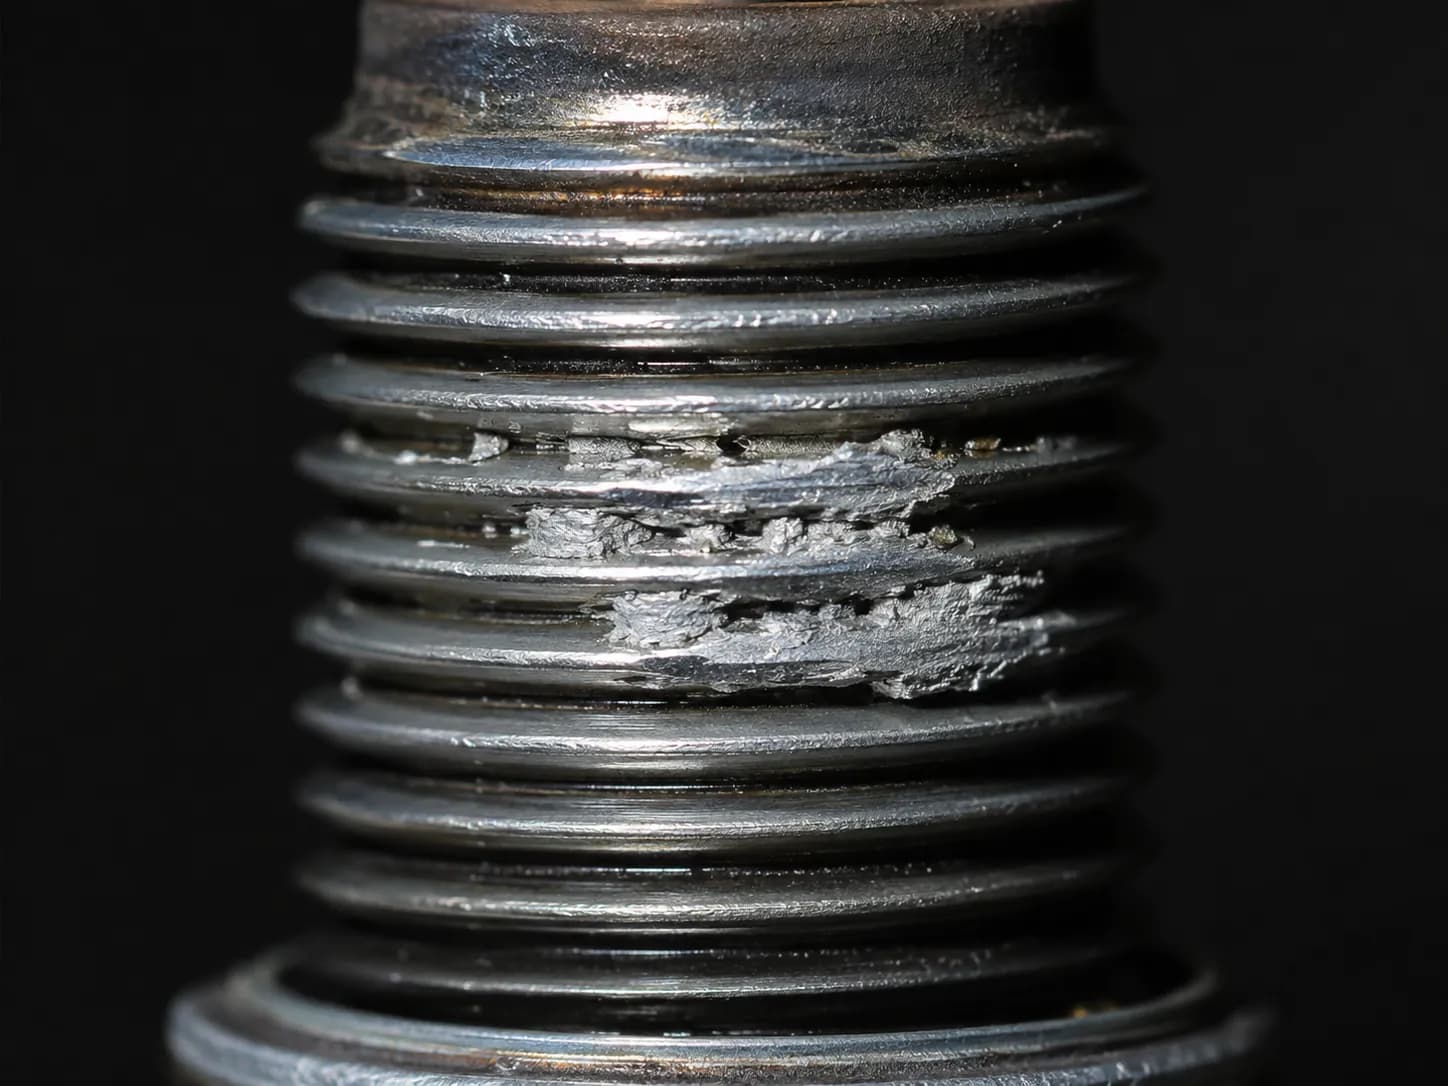
Two of the fifteen plugs I removed came out with dull grey aluminium smeared into the thread valleys, head material picked up on the way out. Both were shiny plated plugs fitted dry, which is what pushed me toward a decision rule rather than a blanket answer on the next question.
Should you use never-seize on the threads? Look at the plug. NGK says no: its plugs carry a trivalent plating that already acts as a release agent, they leave the factory dry, and anti-seize can alter the effective torque by up to 20 percent and invite over-tightening.
The repair community says yes, with fifty years of habit behind it, because aluminium heads and steel plugs do gall together. The deciding variable is visible. A shiny, silver-plated shell is already protected. A dull or blackened shell has no coating, and that is where a very light film earns its place. If you use it, reduce the tightening accordingly.
If a thread does get damaged, the repair is a greased chaser run in by hand to chase the threads clean, or a thread insert such as a Heli-Coil when the damage is worse.
Both are shop work. This audience owns a socket set, not a tap and die set, and running a chaser into an installed head drops swarf into the cylinder unless it is done properly.
The lead stays disconnected from the first step until the plug is tight, because you are working beside a live ignition system, a fuel tank and a blade.
How Often to Change a Husqvarna Spark Plug
Husqvarna advises replacing the spark plug at the beginning of each mowing season or after every 100 hours of operation, whichever comes first. Most homeowners reach the seasonal trigger long before the hourly one, since a typical residential mower runs well under 100 hours a year.
Pairing a Husqvarna lawn mower spark plug change with the air filter service at the start of spring covers both in one session, which is the pattern the manufacturer's own maintenance schedule assumes.
The interval has two triggers because it tracks two failure paths. Hours track electrode wear; the season tracks storage effects such as stale fuel and moisture in a cold engine.
Table 5: Plug condition against indicated hours
Machine | Indicated hours | Plug condition |
|---|---|---|
Lawn tractor, Briggs V-twin | 611 | Glossy black, oily |
Zero-turn, Kawasaki twin | 480 | Eroded electrode |
Lawn tractor, Kohler twin | 295 | Dry black soot |
Walk-behind, Honda single | 140 | Light tan, normal |
Walk-behind, Briggs single | 62 | Light tan, normal |
Sorting the fifteen plugs by machine age produced no pattern. Sorting the same plugs by indicated hours produced the table above on the first pass, with the two worst at the top.
The interval comes from Husqvarna's riding mower guidance, which also points owners to the product specifications section for plug type and gap.
When once a year is more than you need. A healthy plug does not stop working on a calendar. On a lightly used walk-behind, inspecting and refitting a good plug is a reasonable alternative to replacing it. On a rider the maths changes, because you pay the access cost either way, so annual replacement is cheap insurance.
Write the date on the new plug's box, or on tape inside the hood. Memories do not survive a winter.
Husqvarna Spark Plug FAQs
Can a bad spark plug stop a Husqvarna mower from starting?
Yes. A fouled, cracked or badly worn plug can fail to produce a spark strong enough to light the mixture.
A no-start also has several other common causes including stale fuel, a blocked air filter and a failed coil, so treat the plug as the cheapest and fastest one to rule out rather than the answer.
Are new spark plugs pre-gapped?
Not for your engine. NGK calls the belief that plugs arrive correctly gapped a popular misconception, and six of the fifteen plugs I fitted measured outside their engine's spec straight from a sealed box.
Gauge every plug before it goes in, and adjust by moving only the ground electrode.
Can I clean and reuse a Husqvarna spark plug instead of replacing it?
Yes, if it is undamaged. Husqvarna's own procedure allows cleaning a sound plug with a steel brush and refitting it, though a reused plug has an already-crushed gasket, so seat it and add no more than an eighth of a turn.
Do I need to change the spark plug wire too?
Usually not. The ignition lead is not a consumable in the way the plug is, because nothing is eroding on it every revolution.
Replace it if the insulation is cracked, the boot no longer grips the terminal firmly, or you can see arcing in the dark with the engine running.
Will the wrong spark plug damage a Husqvarna engine?
It can. Husqvarna states that fitting an incorrect plug type can damage the product, and the usual mechanisms are a wrong heat range or a wrong thread reach letting the plug run too hot or protrude into the chamber.
The companion Husqvarna plug selector guide covers matching a plug to your engine.
Two of the wire-brushed plugs I refitted came back sooty within the same season. Both were on machines whose air filters I left alone, which is the pattern behind the advice above.
What This Job Actually Comes Down To
Two things go wrong when people change a spark plug on a Husqvarna lawn mower, and neither is the mechanical part. The first is trusting the badge on the hood instead of the tag on the engine, which is how a reader ends up gapping a Briggs V-twin to a number printed in a chassis manual written to cover three different engine suppliers.
The second is counting to one when the answer is two. A Husqvarna rider or zero-turn with a V-twin carries a plug per cylinder, and the half that gets skipped is usually the half causing the symptom.
Everything else is fifteen minutes and a 5/8-inch socket. Find the engine tag, gauge the new plug against the engine maker's number rather than the box, thread it home with your fingers before any tool touches it, and stop at the turn spec rather than at what feels tight.
Then pick up the old plug before you bin it. It is the only free diagnostic your engine produces, and on a machine that has been running rough it will tell you whether the plug was the problem or just the part that showed it.
Summarize with AI
Keep reading
Related articles
 Maintenance & Seasonal Care
Match a lawn mower tune up kit to your engine: what is inside each kit, OEM vs aftermarket price math, and the right kit by brand for push and riding mowers.
 Maintenance & Seasonal Care
Compare mobile vs drop-off shop for a lawn mower tune up near me: real 2026 price ranges from 12 quotes, the 7 questions to ask, and when to just DIY it.
 Maintenance & Seasonal Care
Match a lawn mower spark plug repair kit to your fault in 30 seconds. 7 kits tested on 9 engines: M14x1.25 sizing, insert lengths, and the $5 boot fix.
 Maintenance & Seasonal Care
Compare lawn mower tune up cost by mower type: $70-$150 push, $150-$280 riding, from 9 real 2026 shop quotes. Plus the same parts for about $18 DIY.
Comments
Moderated for quality. Share a correction, ask a follow-up, or tell us what worked for you - every comment is reviewed before it goes live.